As some of you will be aware, as a way of keeping myself occupied during the pandemic I’ve learned how to use Adobe Illustrator to design stuff. A particularly enjoyable, if slightly odd, area of design I’ve gotten into is designing game boards for abstract strategy board games. I’ve had a good time getting to know the software and experimenting with many different designs, and now that nice neoprene game mats can be custom-printed for affordable prices, I’ve actually gone ahead and had some of my designs printed out as well. Hopefully, in some theoretical future where the pandemic is over, I can use these boards to introduce friends and colleagues to some of my favourite games.
I’ve made a lot of boards over the last year, so rather than wait until I can find the time and energy to write detailed blog posts on all of the games that go with them, I thought I’d share a few abstract strategy gems with you with just a few sentences about why they’re interesting. Each brief review includes links to full-size images of the boards I’ve made for each game, which you can print if you wish. Some of these games will get covered in detail in the future; for now, hopefully these short descriptions will entice some of you to give these games a try.
As a side note, I can output these designs in a huge number of formats — PDF, PNG, JPG, SVG, whatever — so if any of these strike your fancy but you need a different format, just let me know in the comments and I’ll upload it for you.
Catchup
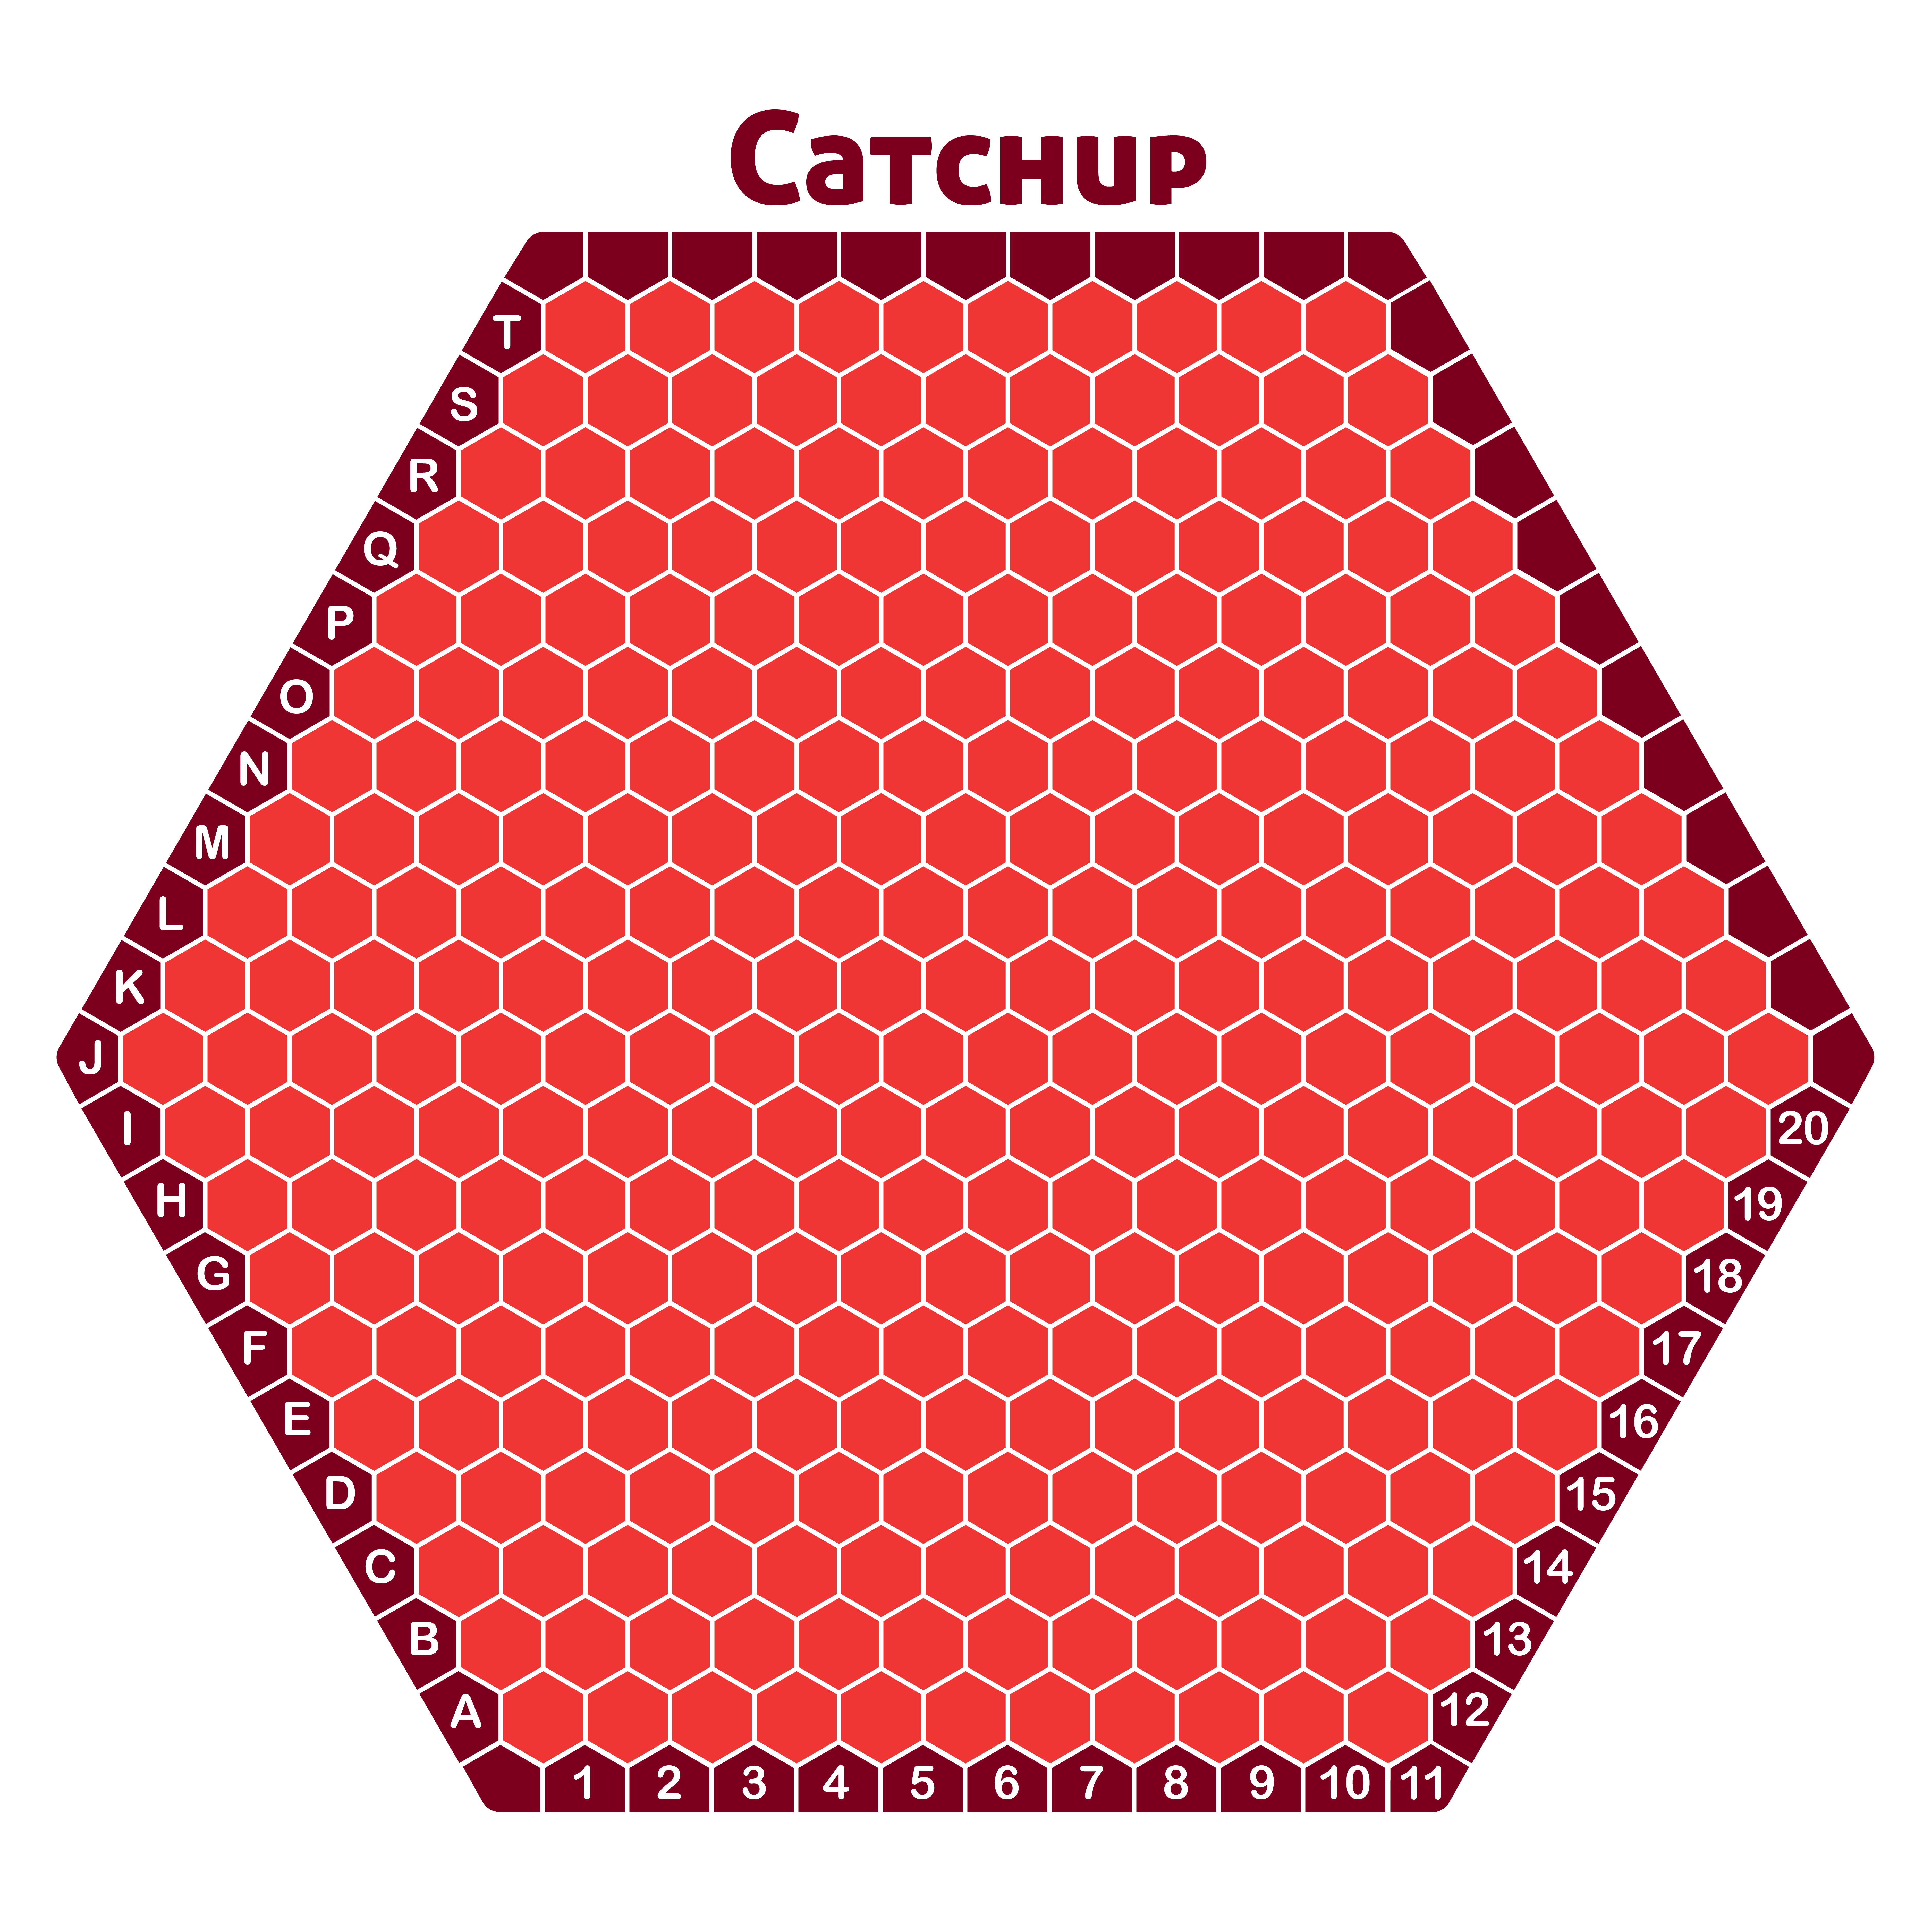
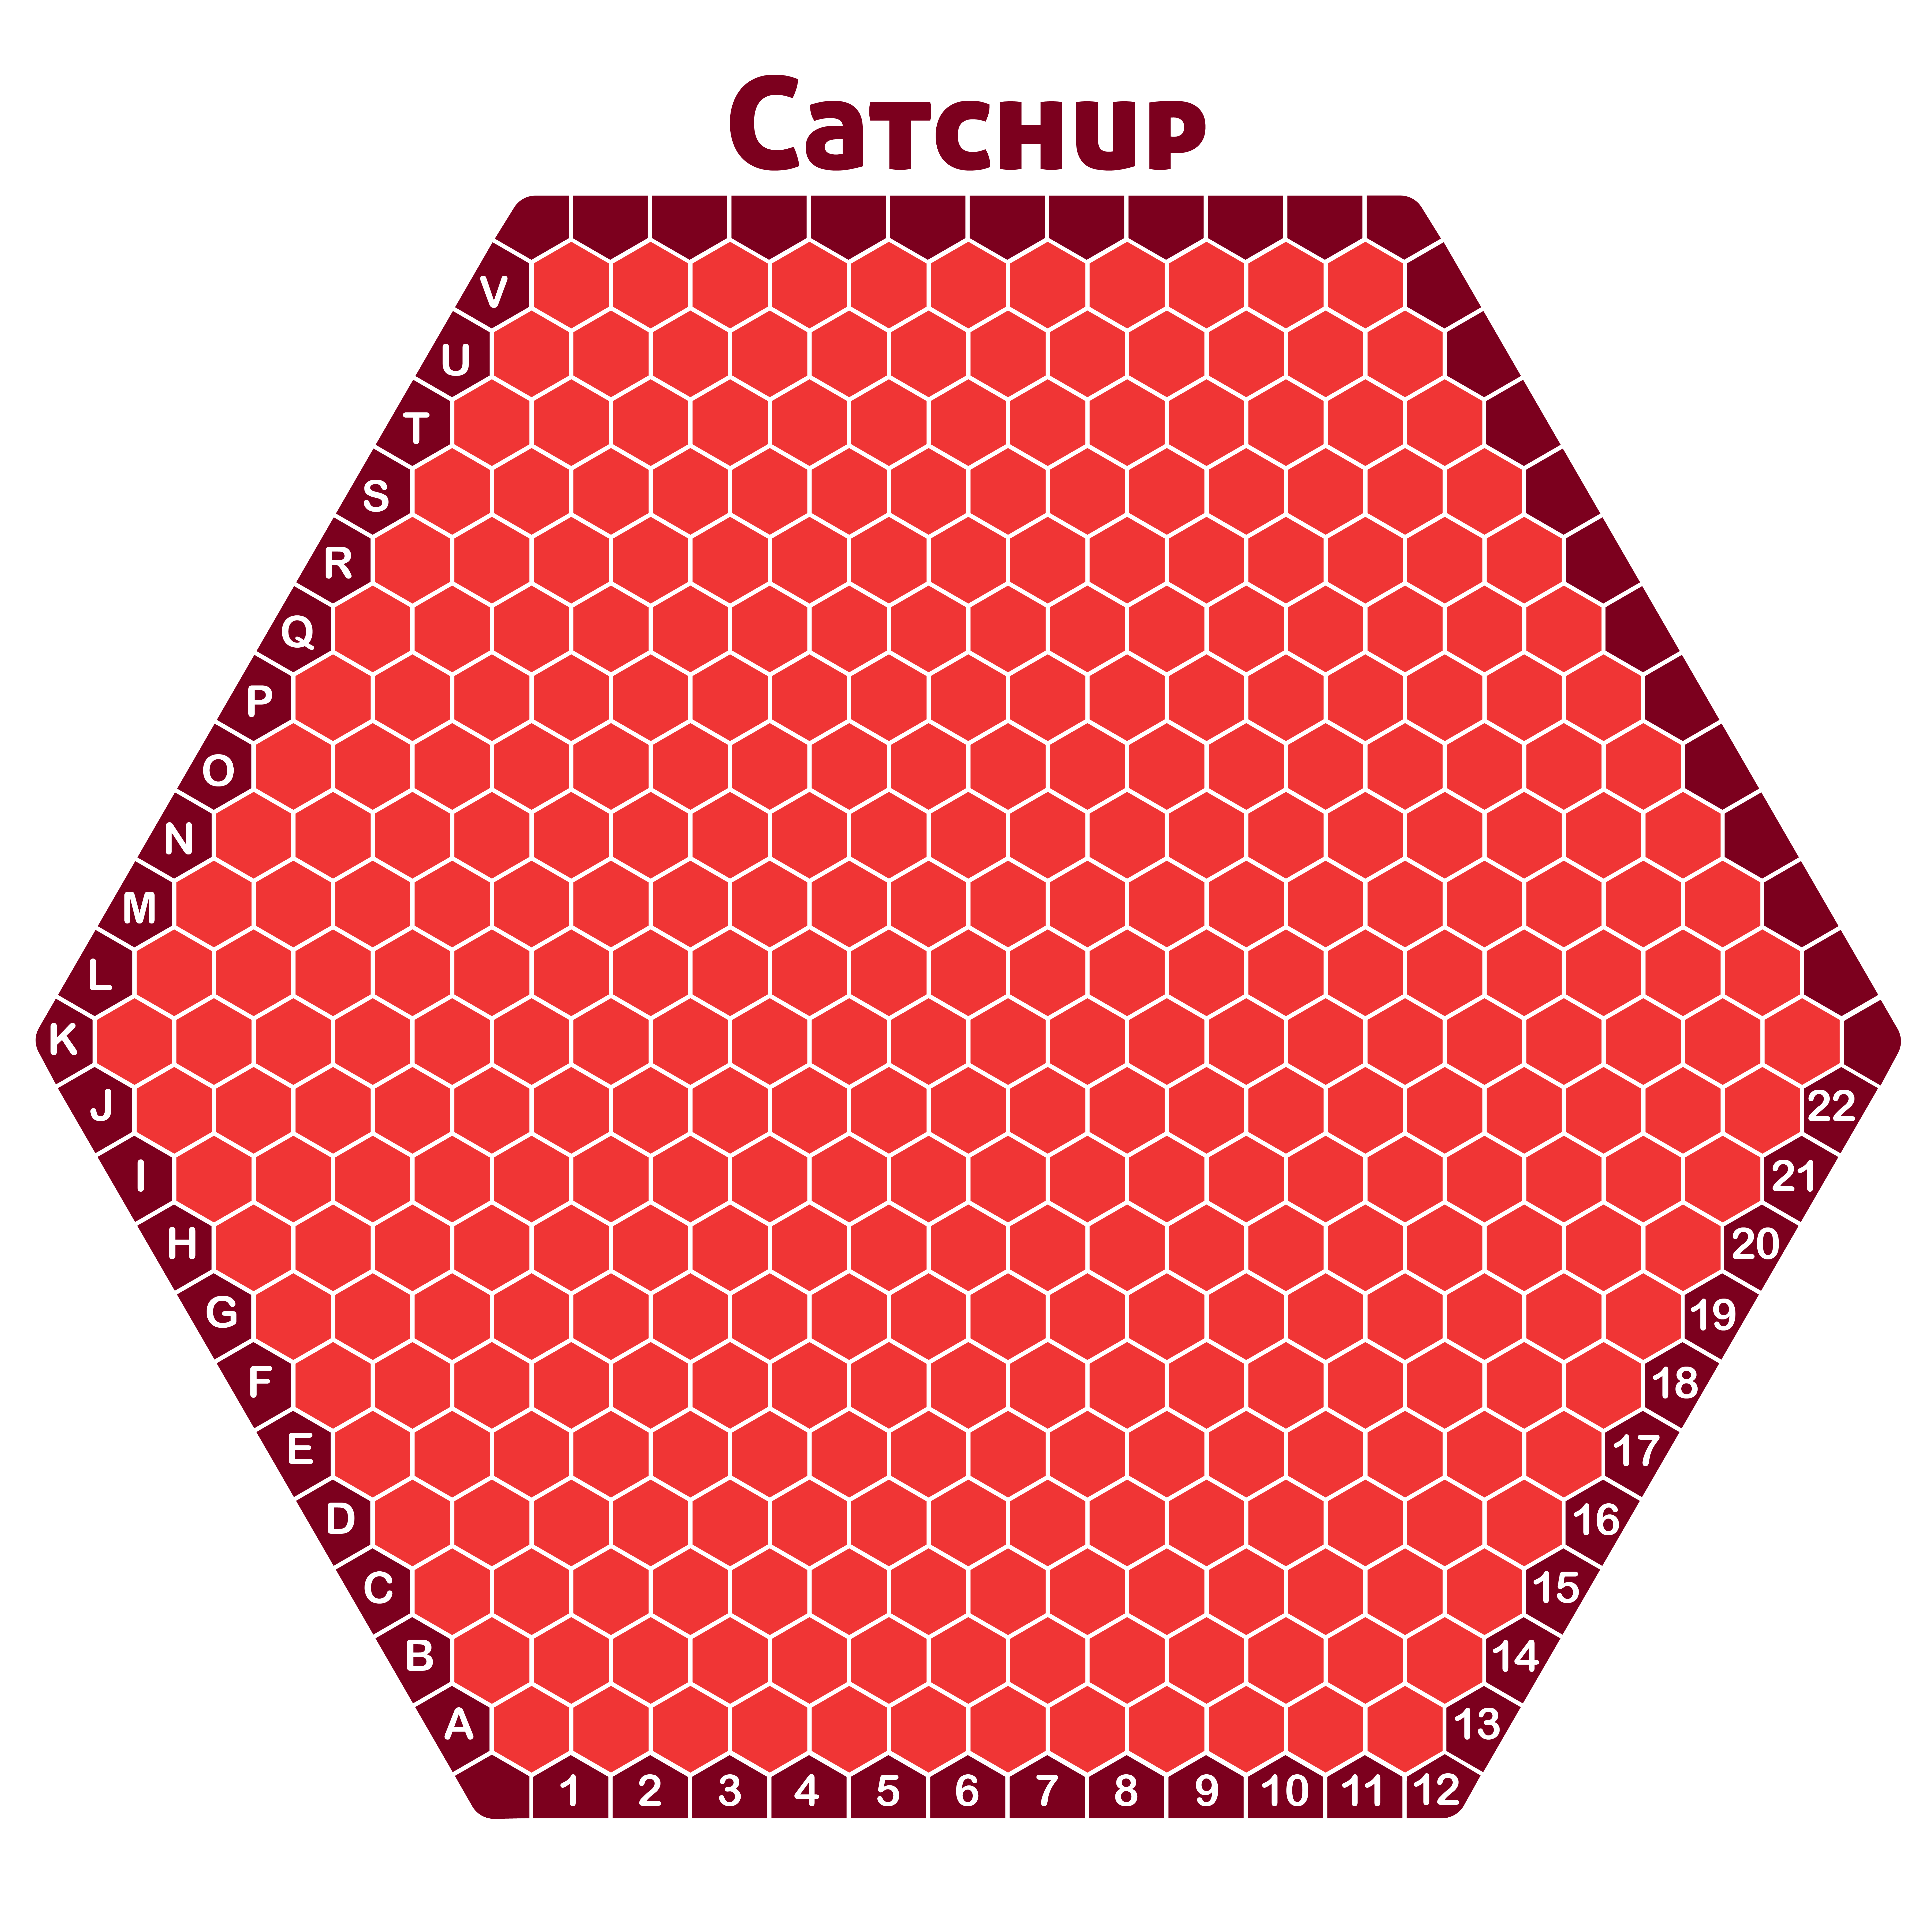
Catchup is a wonderful game by Nick Bentley that I’ve mentioned briefly before, because the scoring system inspired my choice of scoring system for Permute. This is a game I’ll definitely cover in the future, as it’s incredibly easy to learn, yet within moments of starting to play you’ll realise the core strategic dilemmas at the heart of the game. Catchup is a really dynamic and exciting game, and personally I think Catchup is Nick’s best design by far.
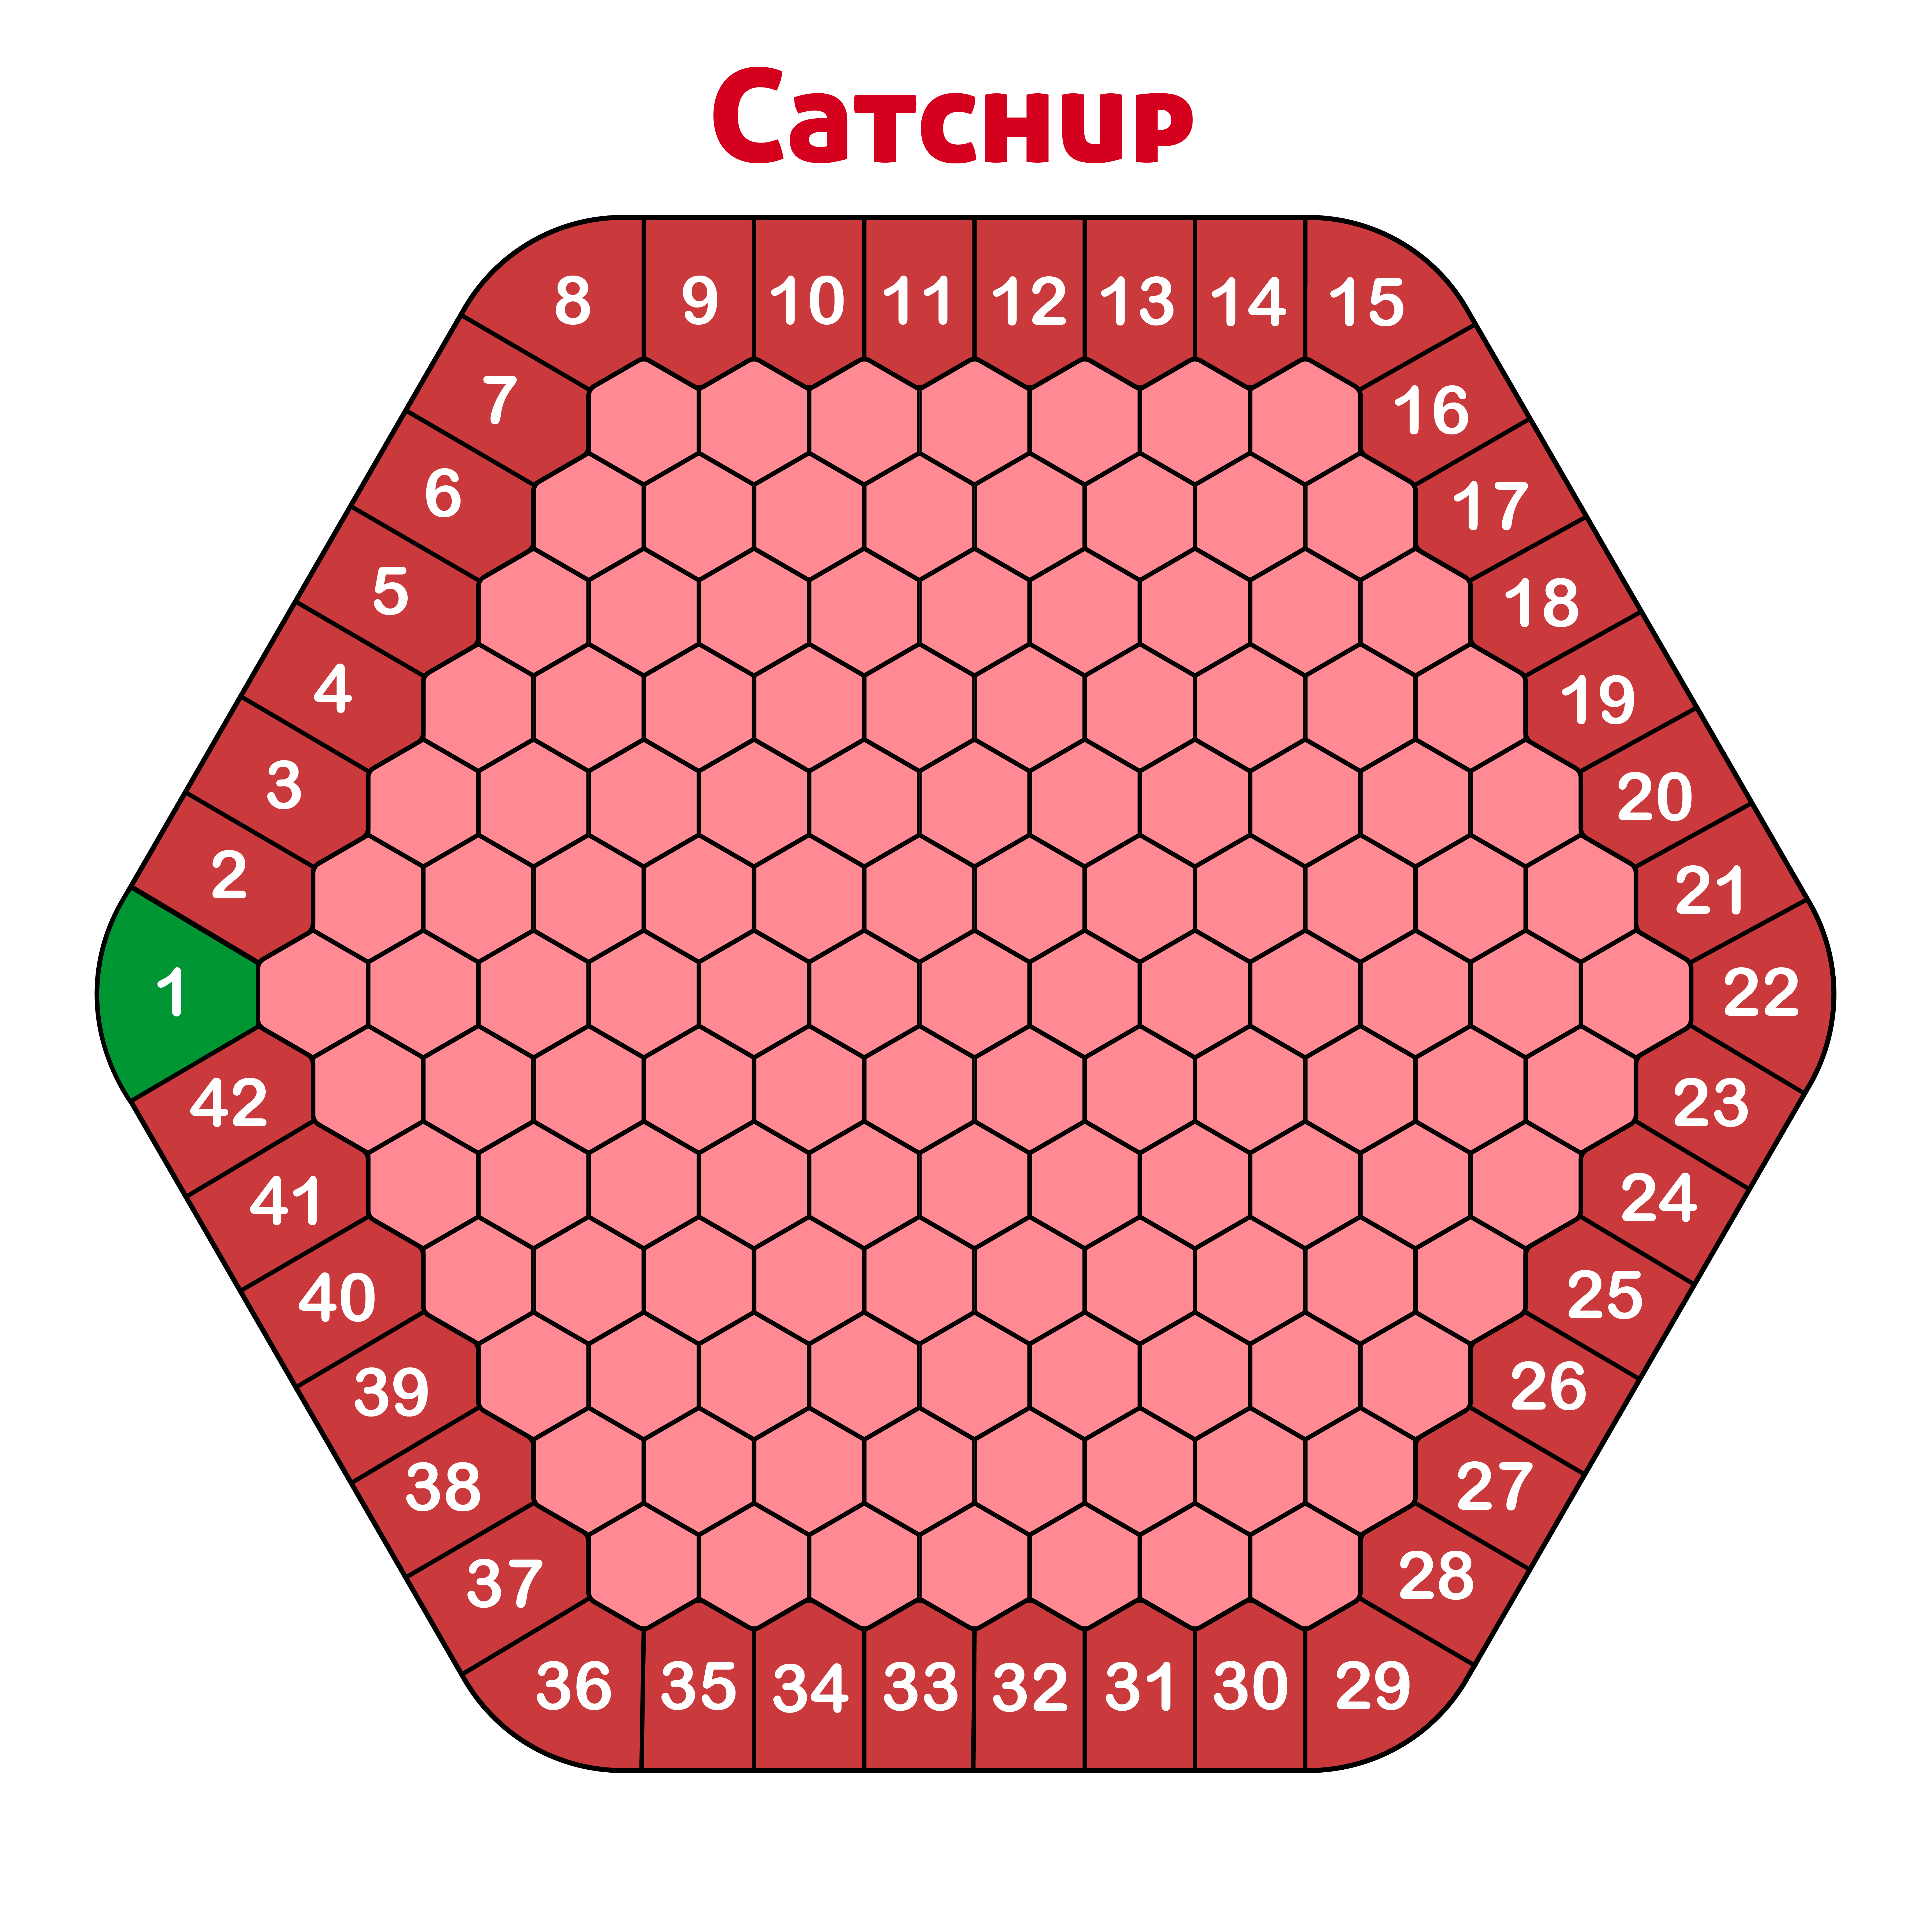
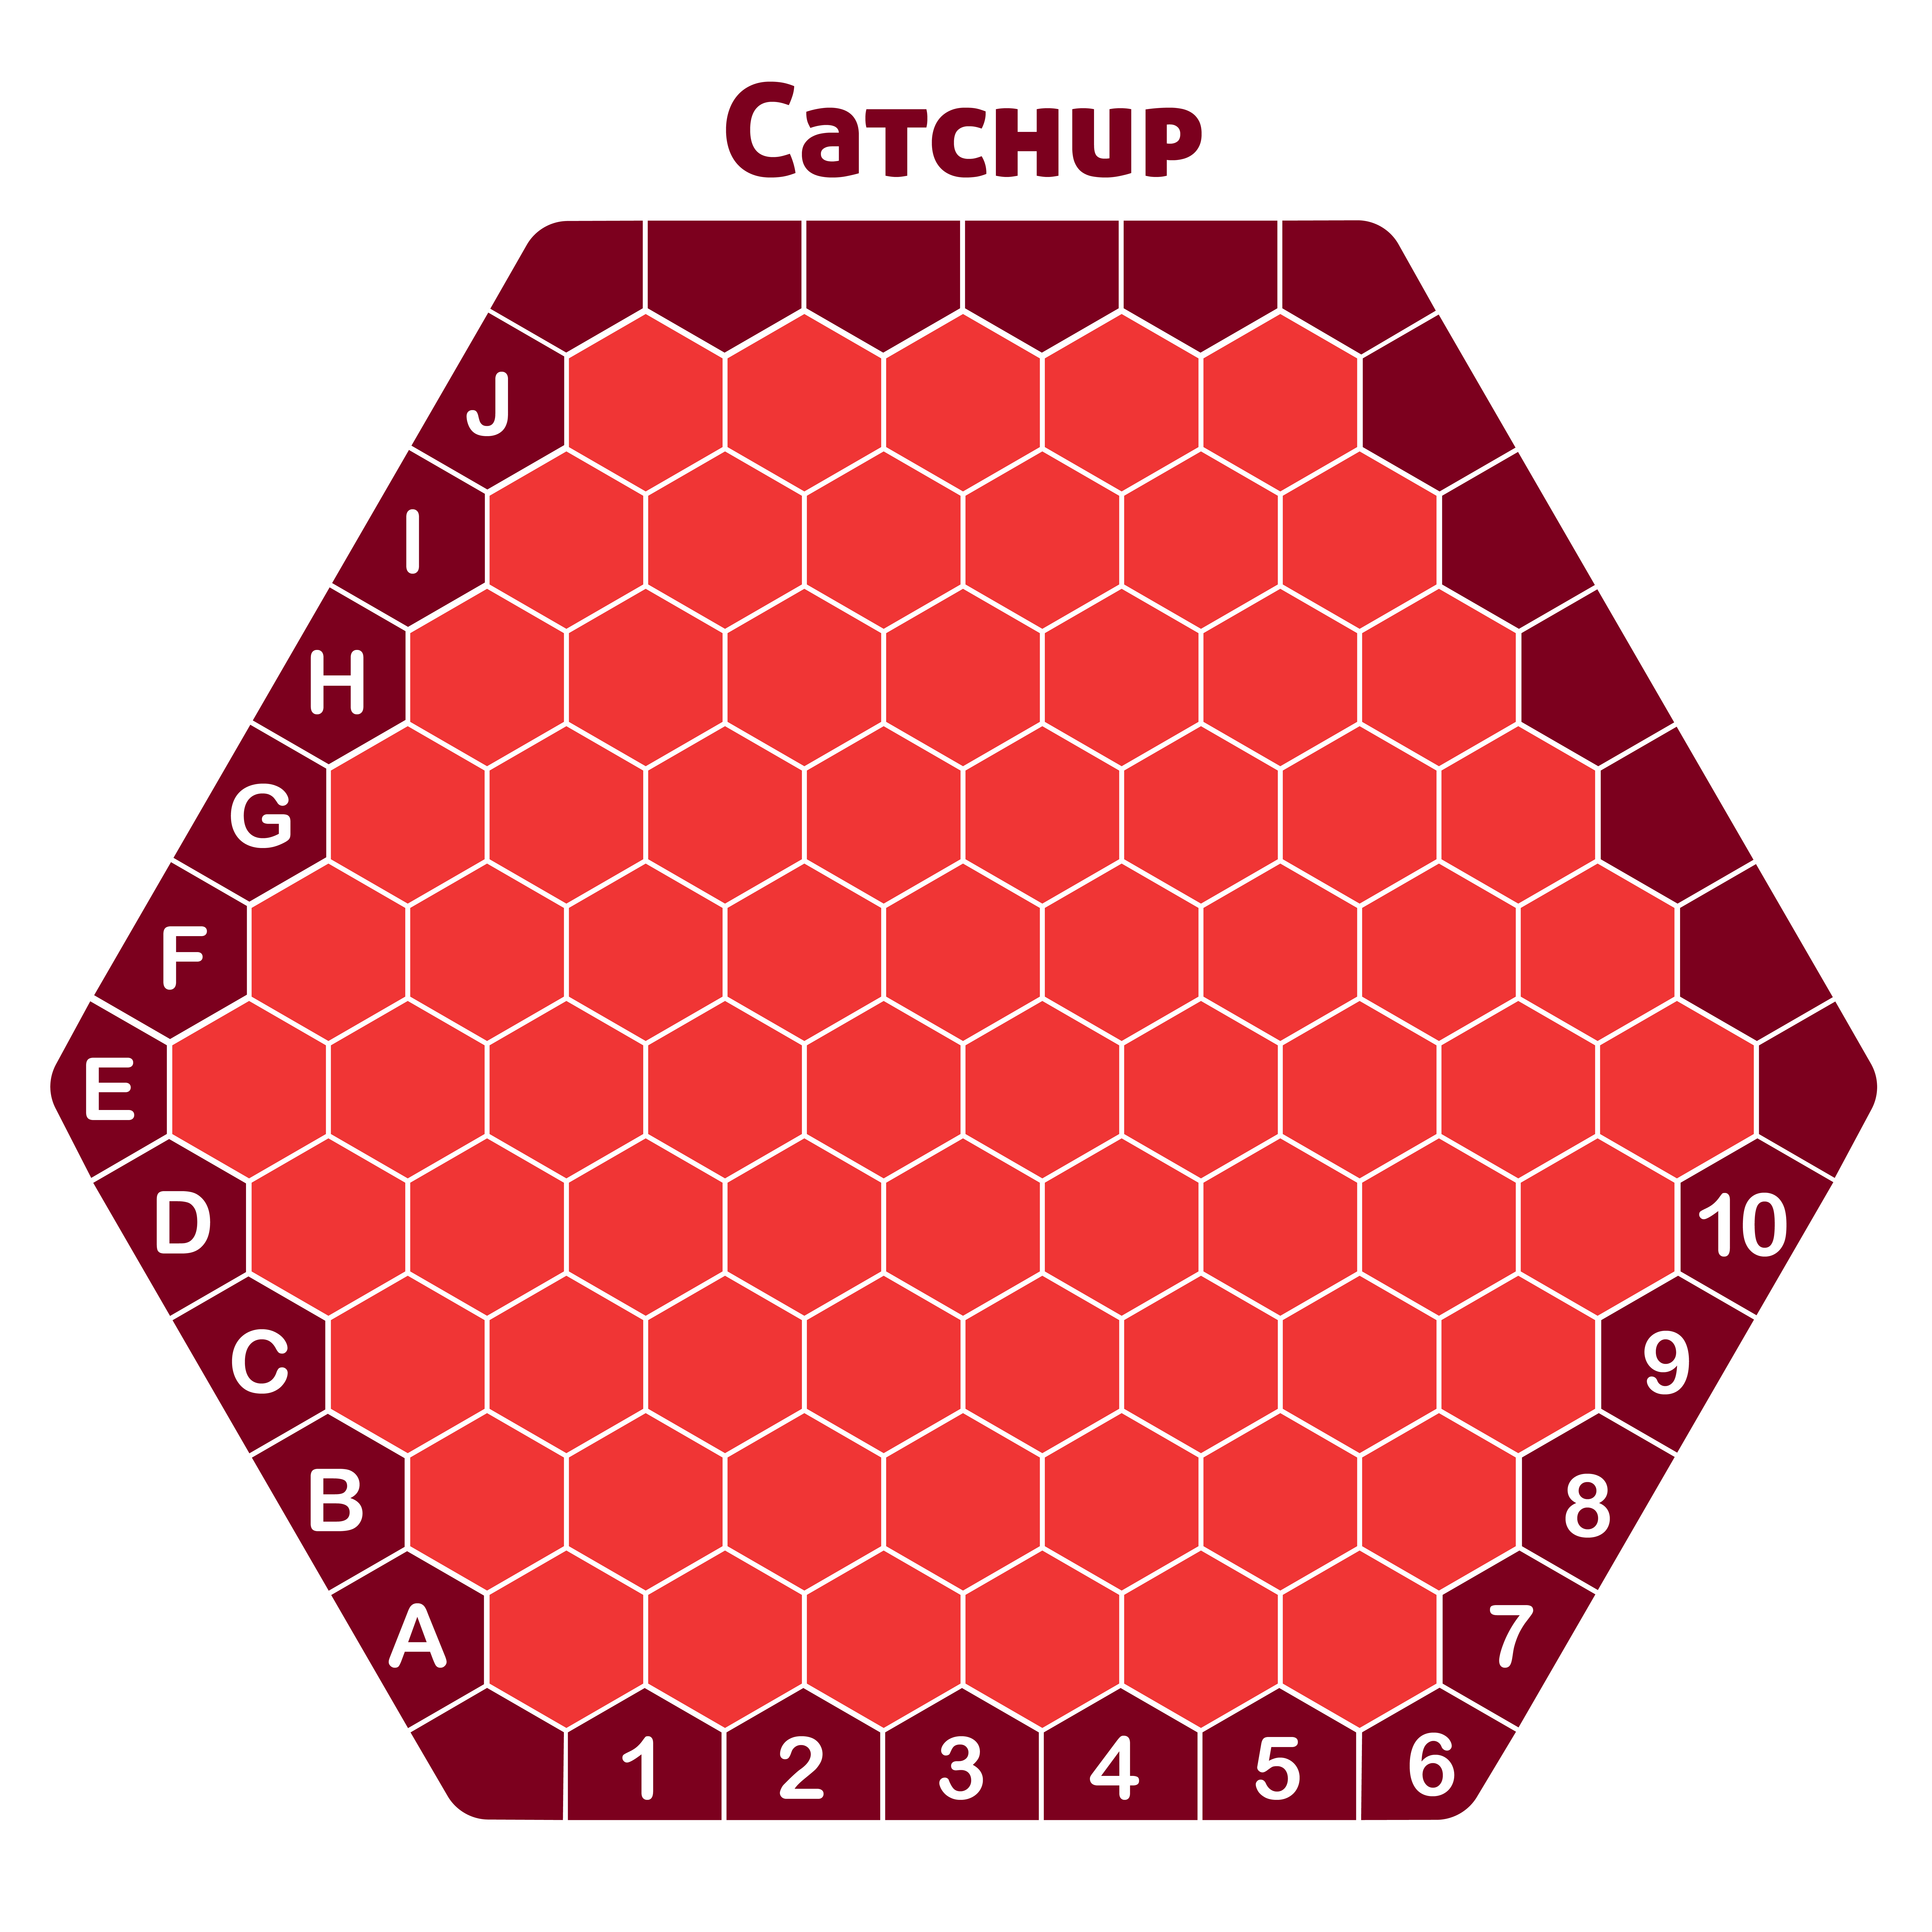
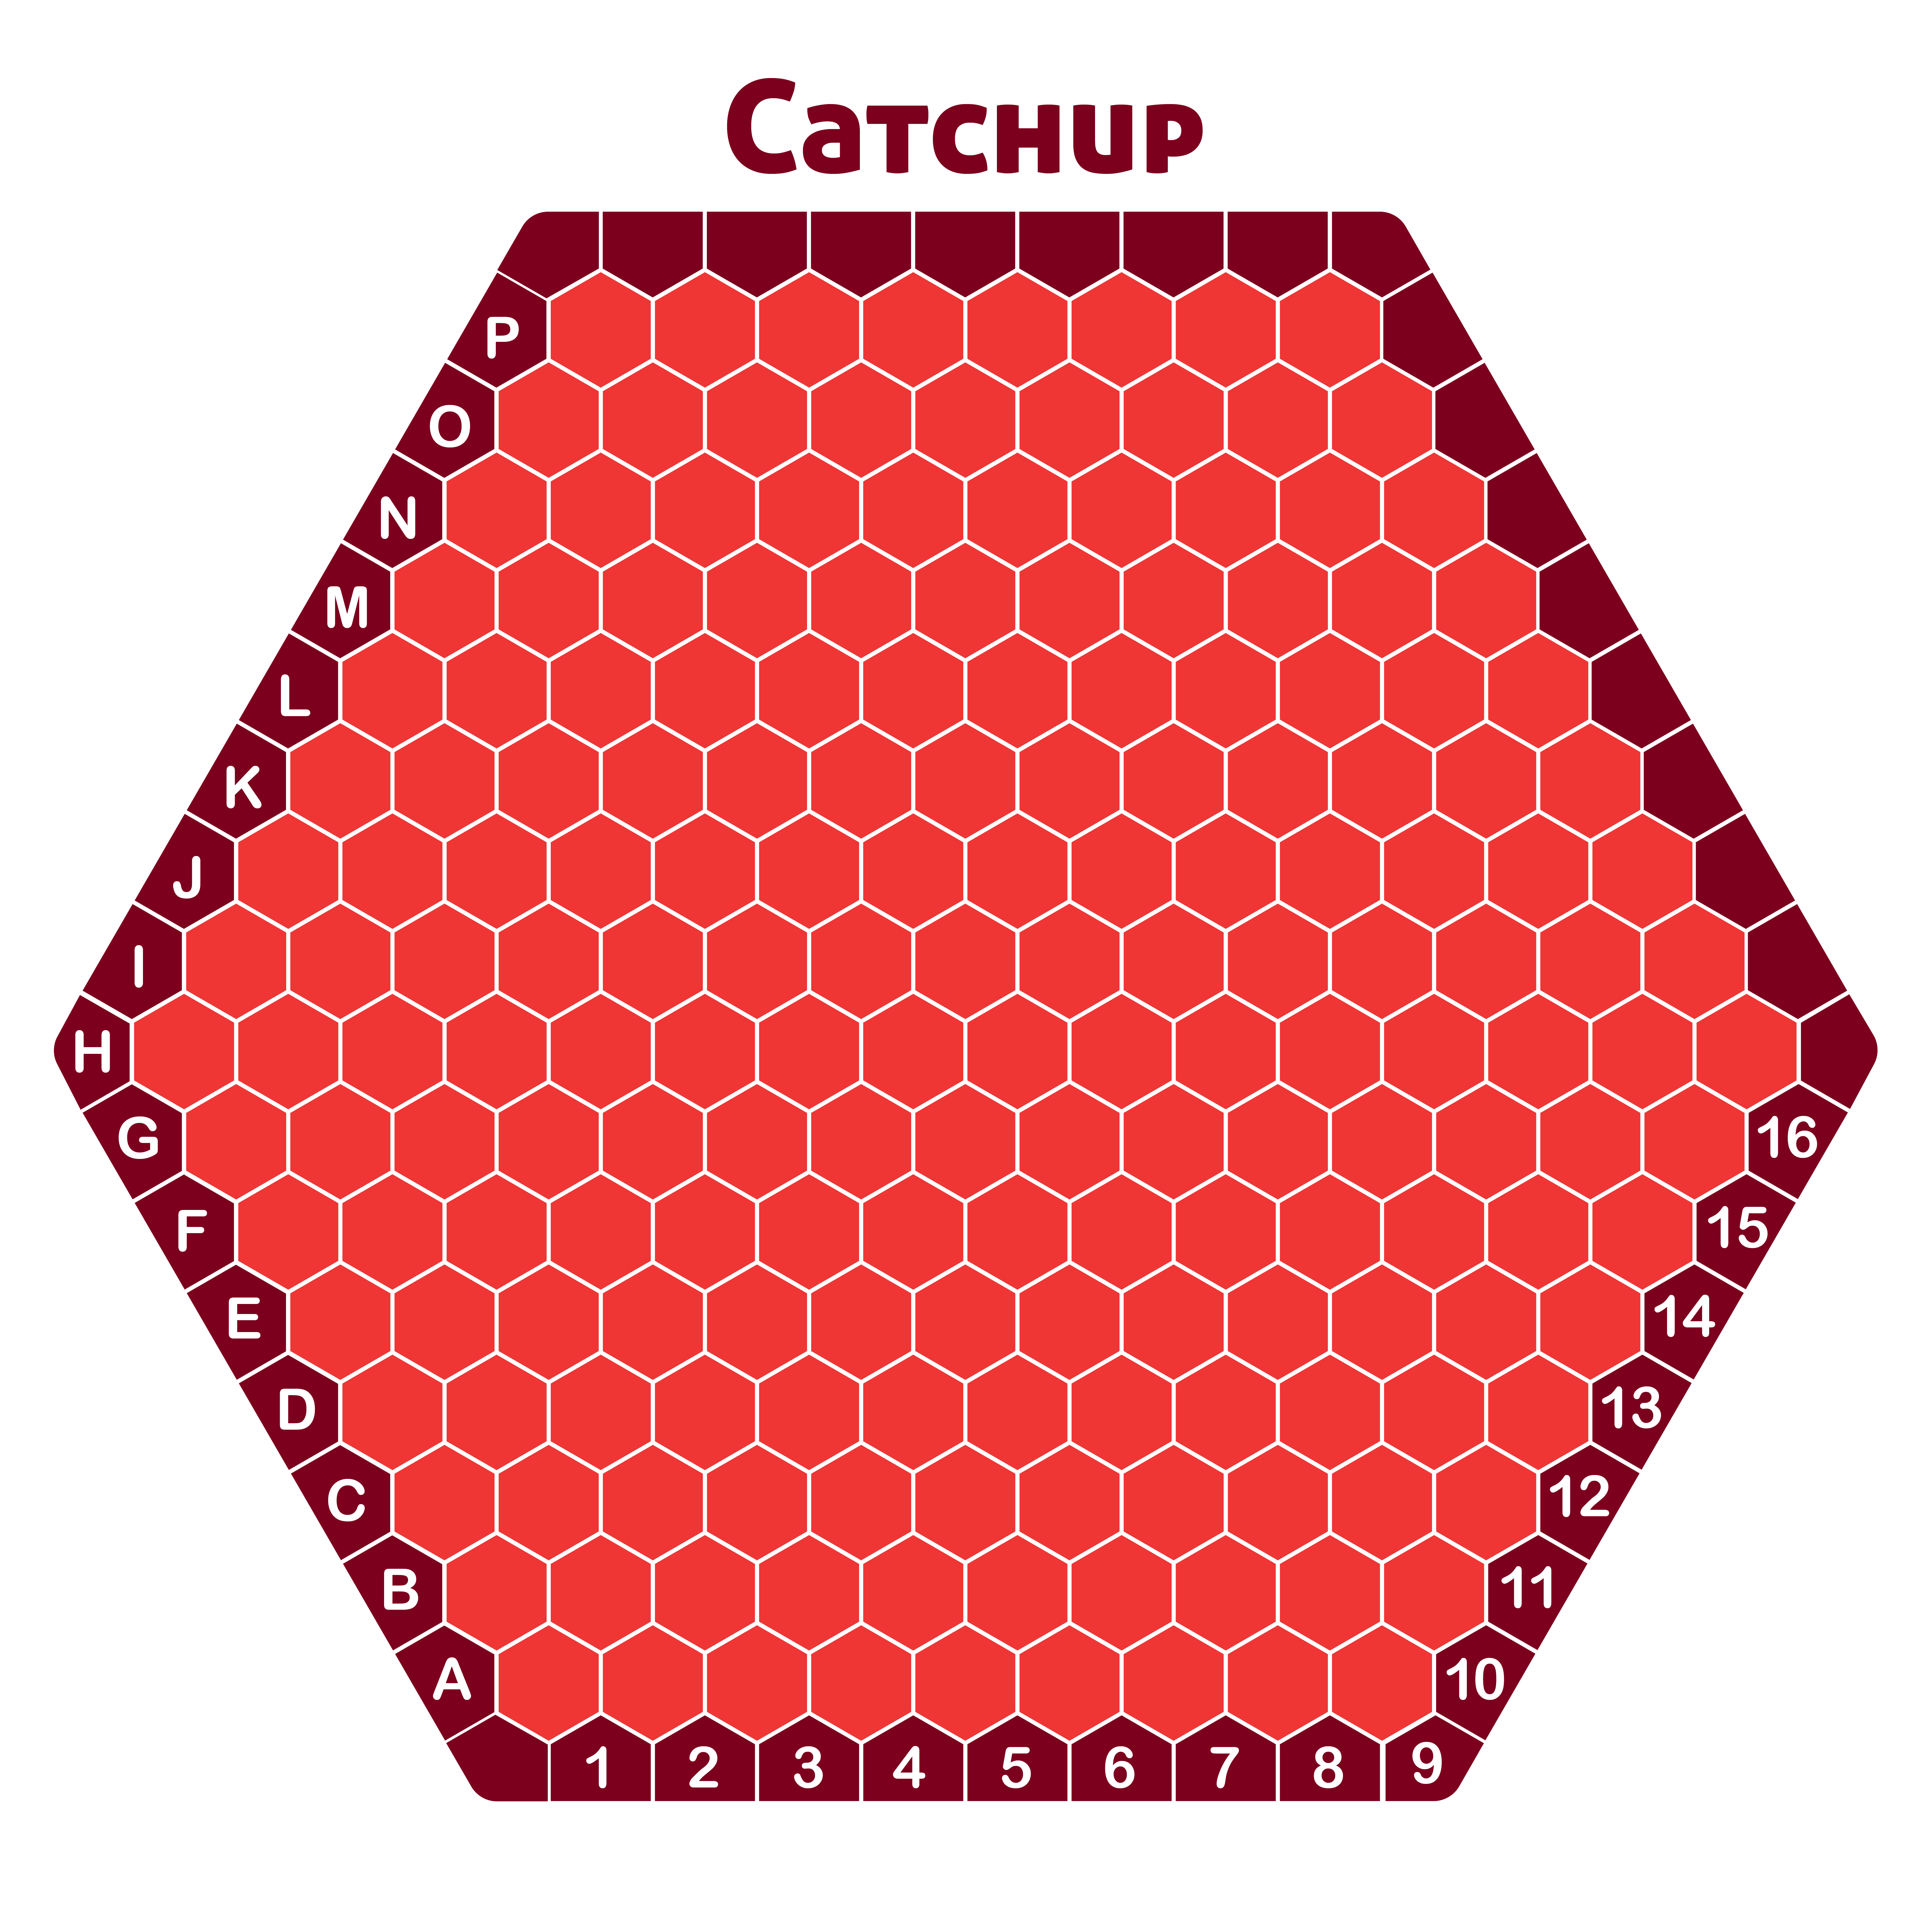
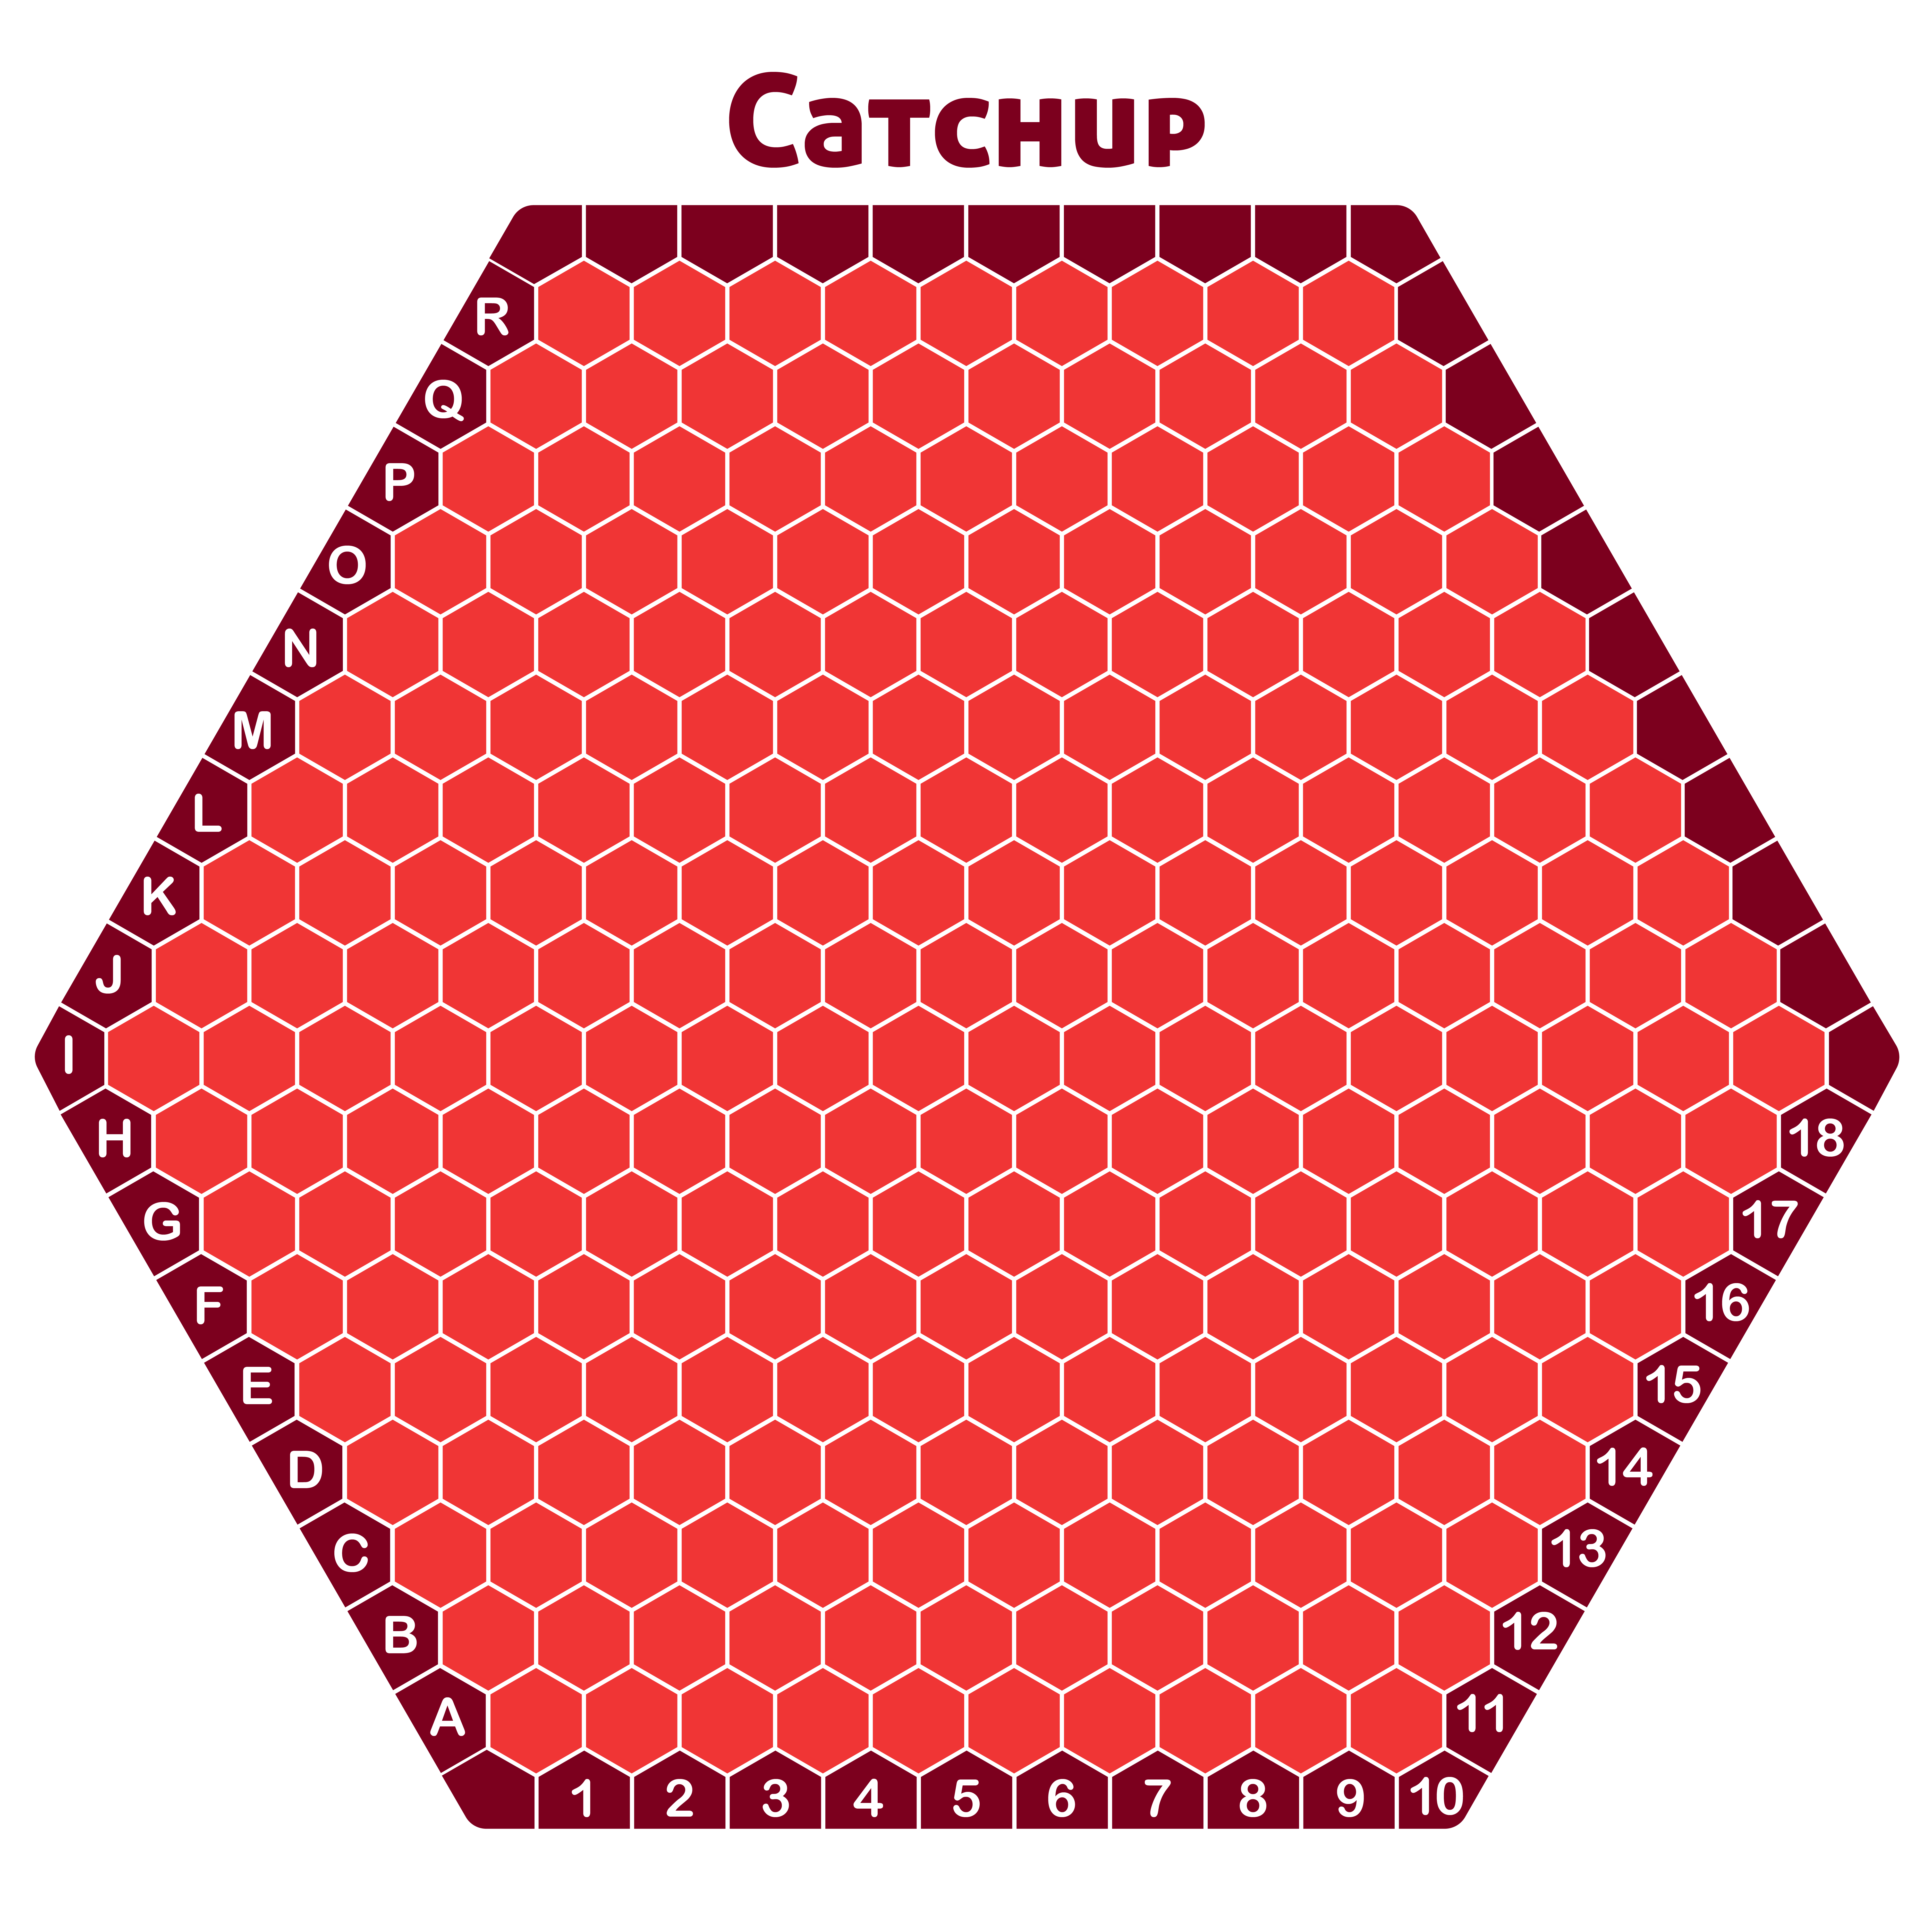
Why it’s great: Catchup’s unique feel stems from its unusual movement protocol: each turn, you place two stones anywhere on the board, unless your opponent equalled or exceeded your score after their last move, and then you can place three stones. The winner is the player who forms the largest group of connected stones at the end of the game, so the result is a tense back-and-forth where you absolutely must connect your stones to win, but each time your biggest group becomes equal to or larger than your opponent’s, they get a much more powerful move with which to fight back.
About the boards: The board on the top left above is a standard hexhex board, seven hexes on a side, with a scoring track where players can place a stone on the number representing the size of their current largest group. The other five are variant boards with uneven sides, which an experienced Catchup player has suggested may generate more interesting play.
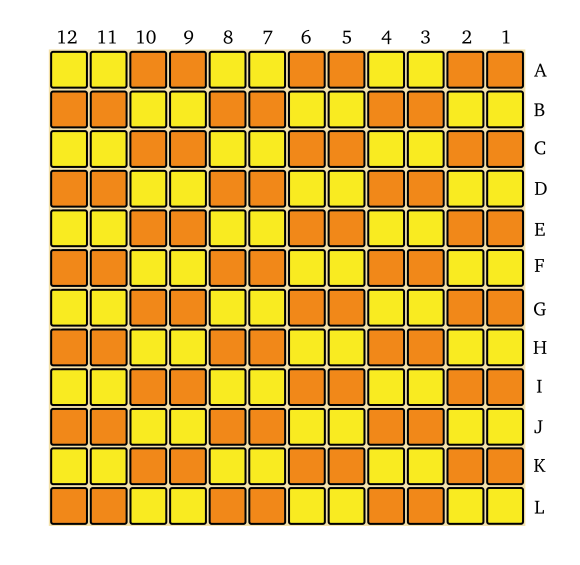
Chess: Supersized
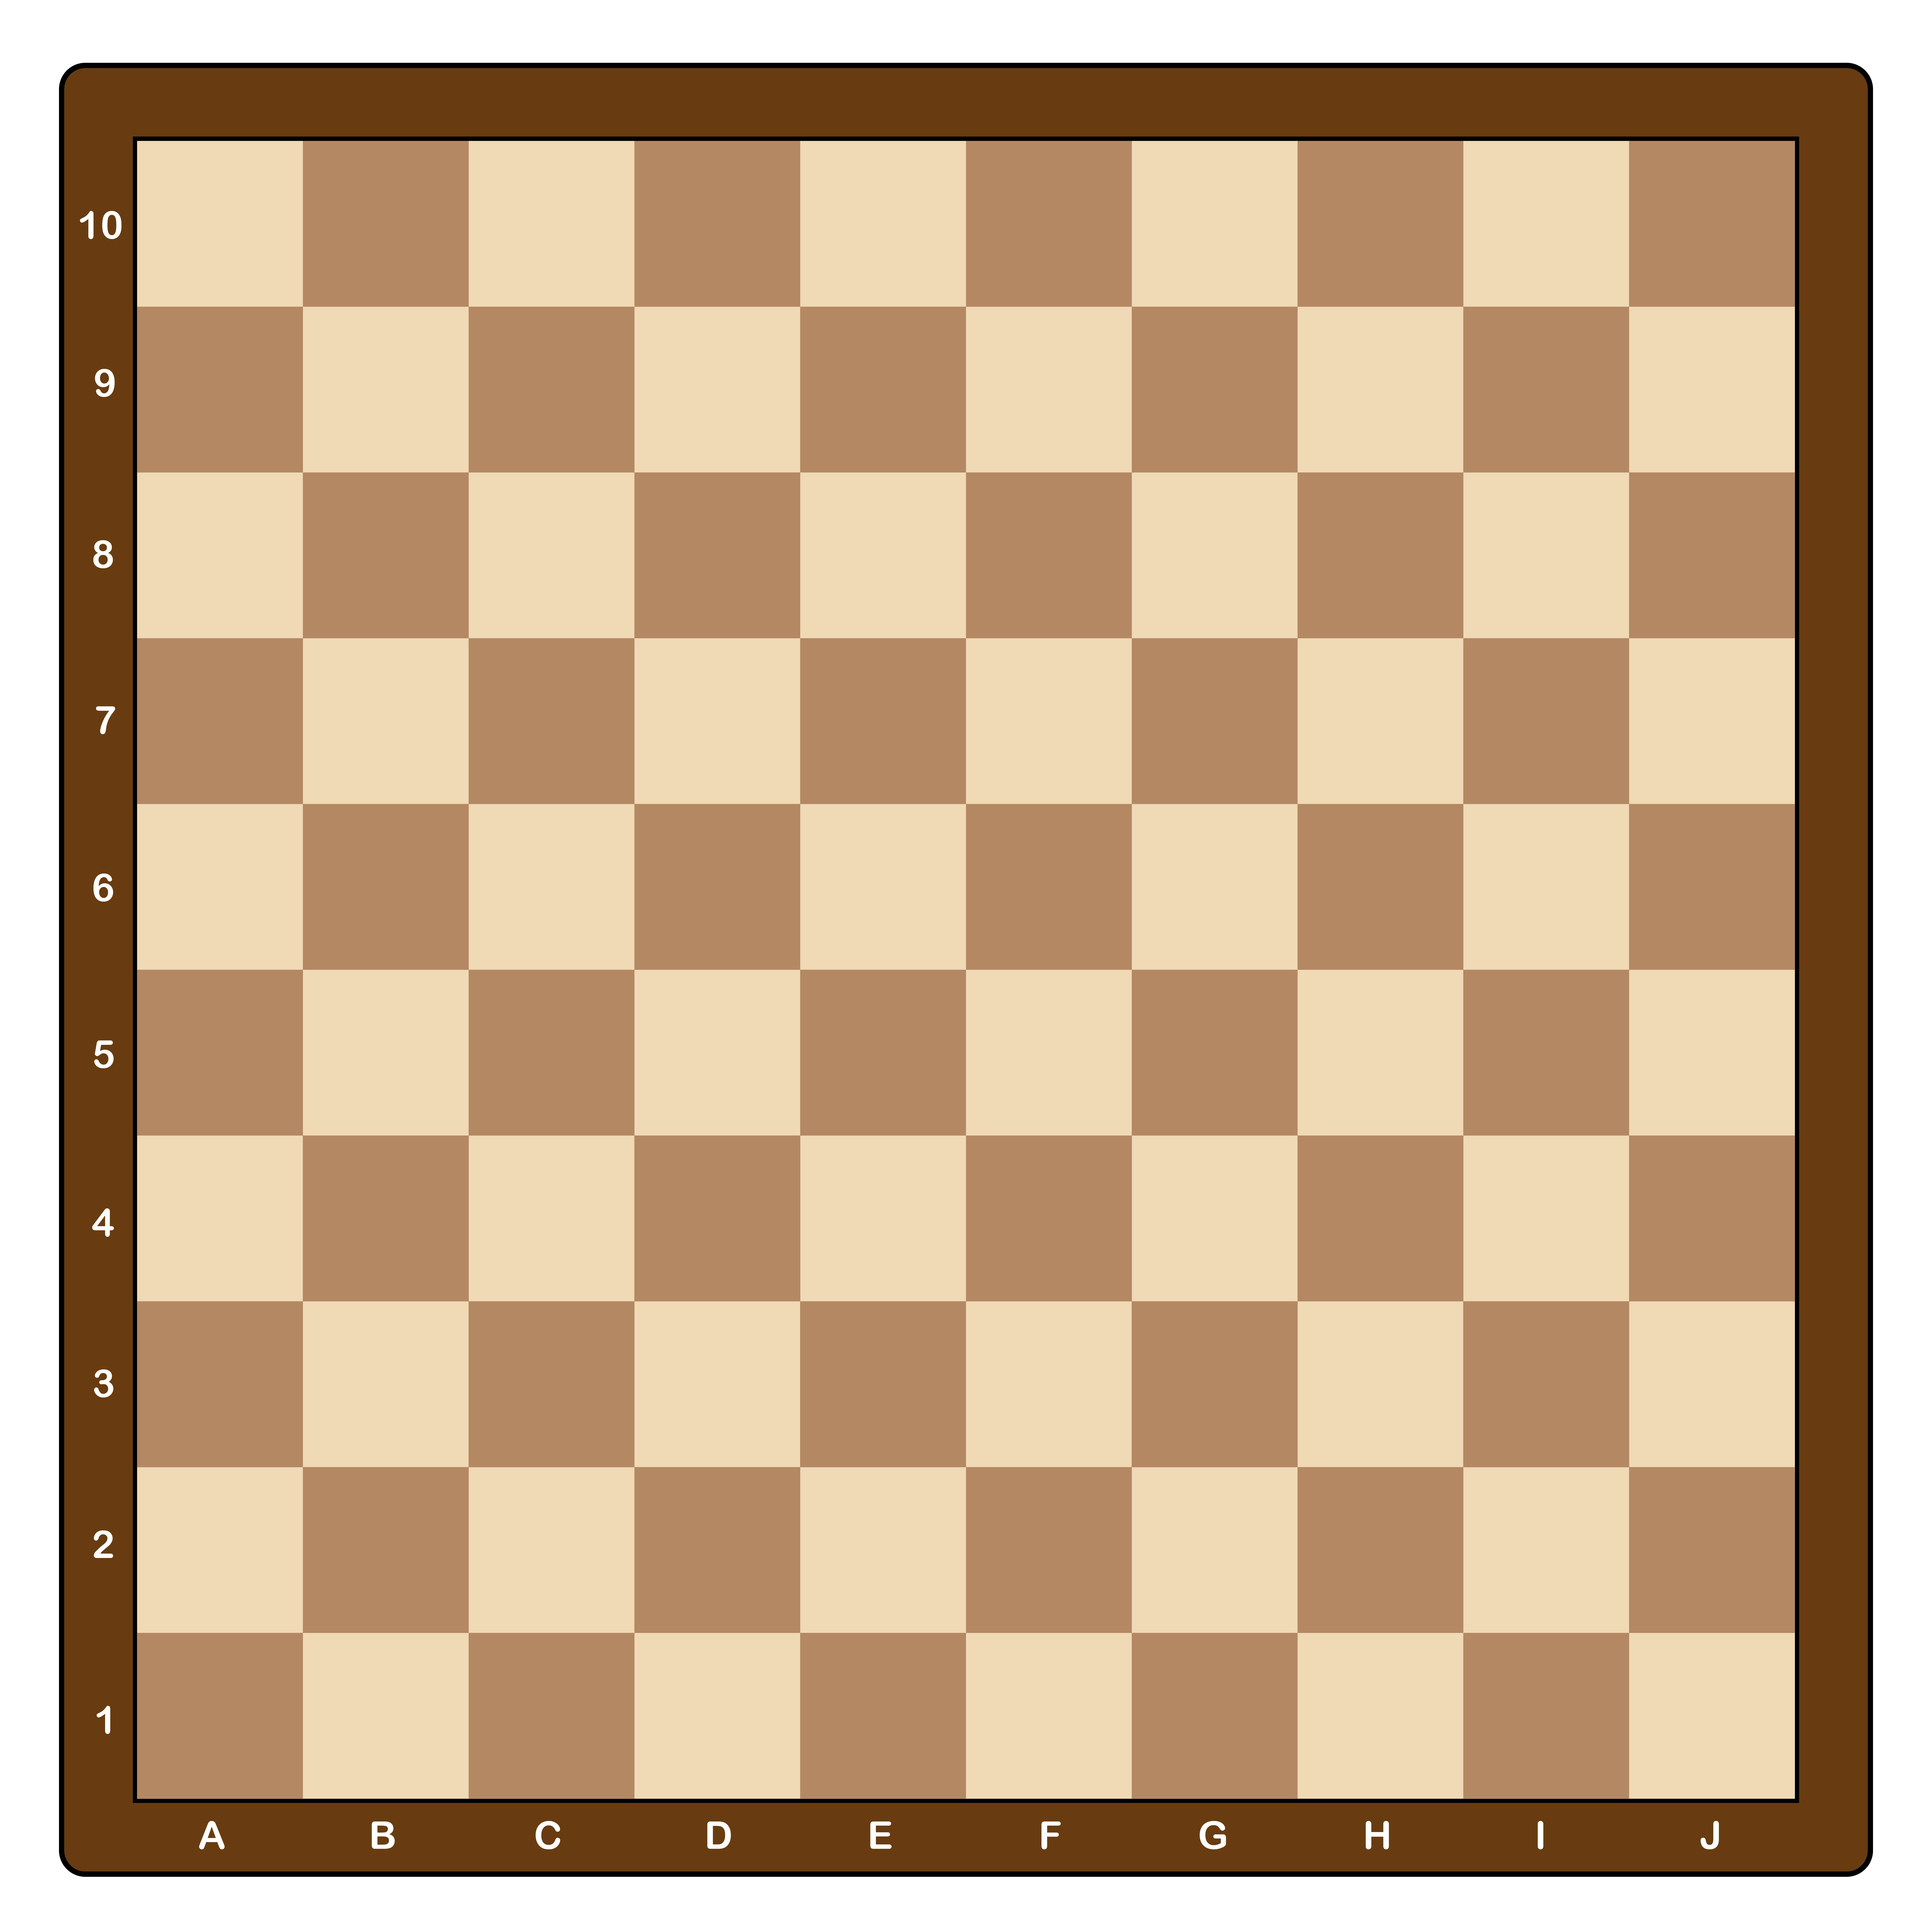

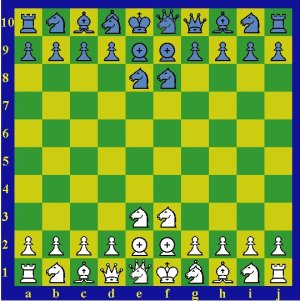
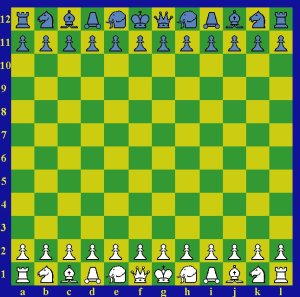
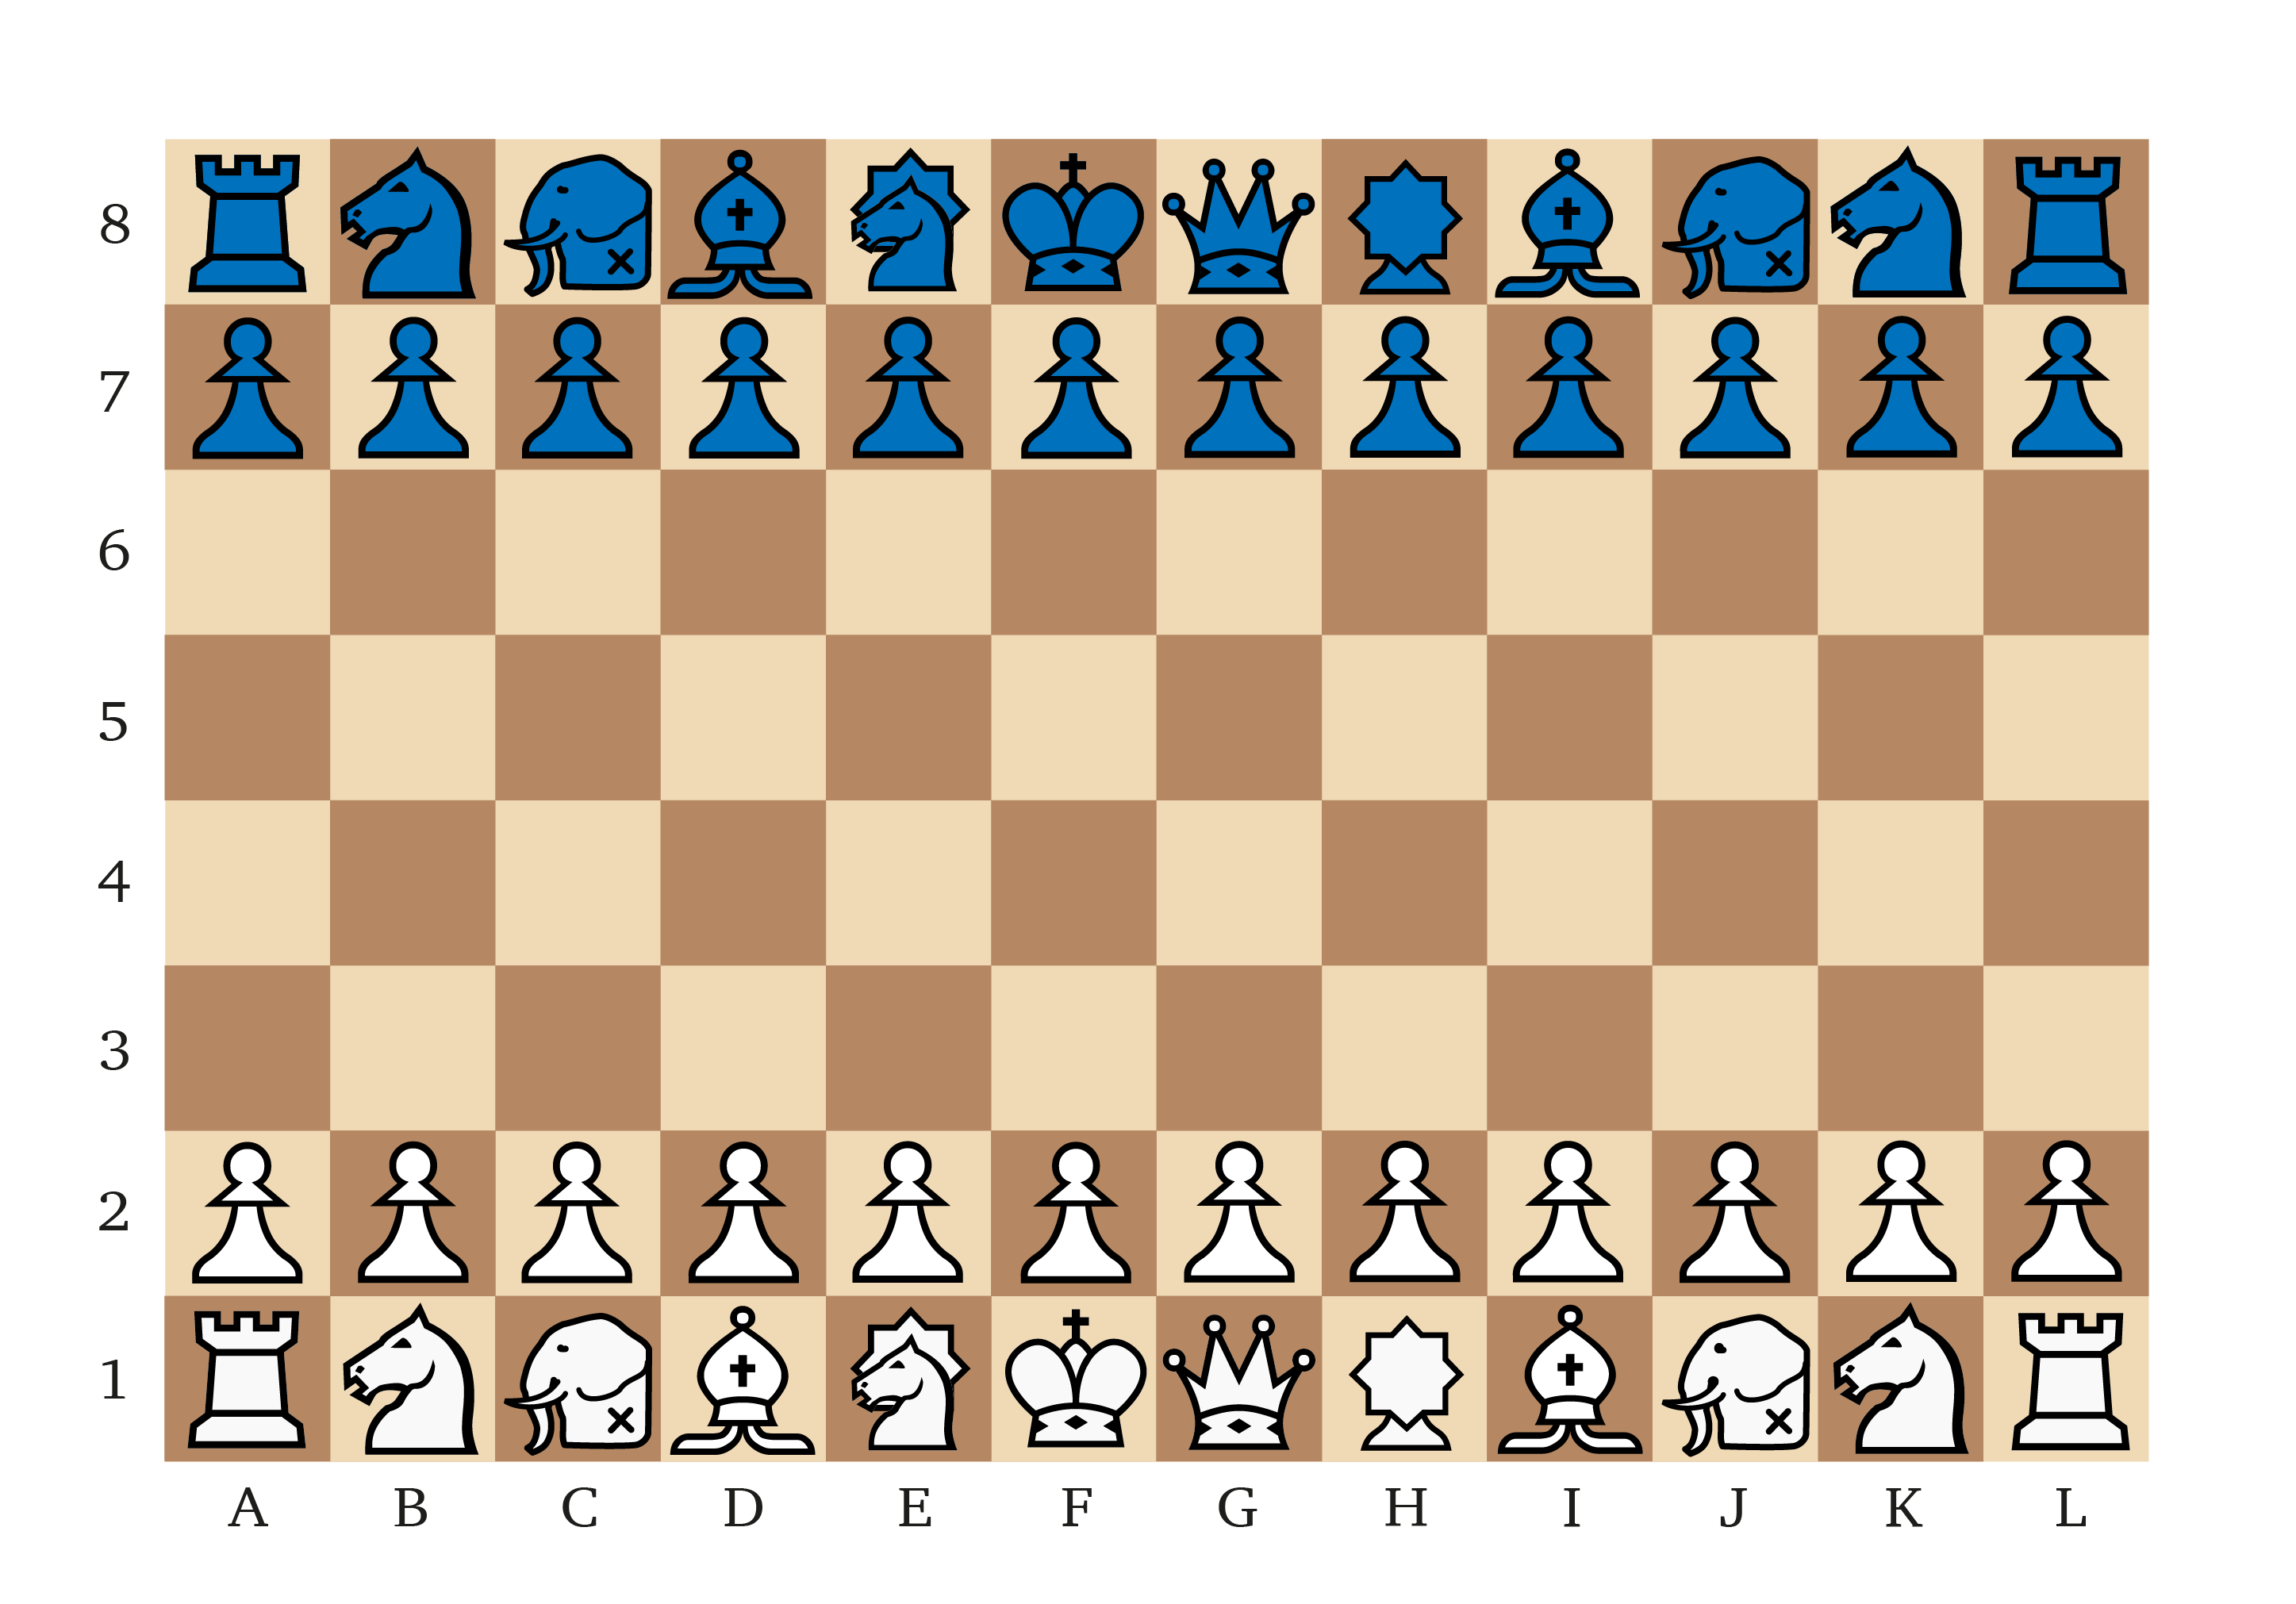
These are simply enlarged chessboards — 10×10 squares and 12×12 — that I plan to print on mats and use to play large variants of Chess. Many Chess fans over the years have attempted to transport the magic of the Royal Game to larger boards, and thankfully a number of them succeeded in creating some very enjoyable variants that feel like Chess, but still have a unique personality. I’m planning to write an article in the future that will cover a bunch of large Chess variants and give you some detailed recommendations; for now, here’s a few worth checking out on both board sizes, should you fancy giving them a go.
Some recommended 10×10 Chess variants: Caissa Brittania (checkmate the Queen instead of the King!), Decimaka (hybrid of Chess and Maka Dai Dai Shogi), Elven Chess (hybrid of Chess and Chu Shogi), Grand Chess (Christian Freeling’s most famous Chess variant), Grand Shatranj (ancient Persian Chess brought to 10×10), Omega Chess (commercial variant with Wizards and Champions), Opulent Chess (Grand Chess but more my style — higher piece density, less wild tactically), Shako (Chess with Cannons and Elephants).
Some recommended 12×12 Chess variants: Chu Shogi (the best 12×12 Chess-type game, period), Gross Chess (mix of Grand Chess, Omega and Asian variants, very playable), Metamachy (fast-paced Pawns and crazy historical pieces give it a unique and fun feel), Zanzibar-XL (dense and diverse piece selection with a variable setup).
Exo-Hex and Iris
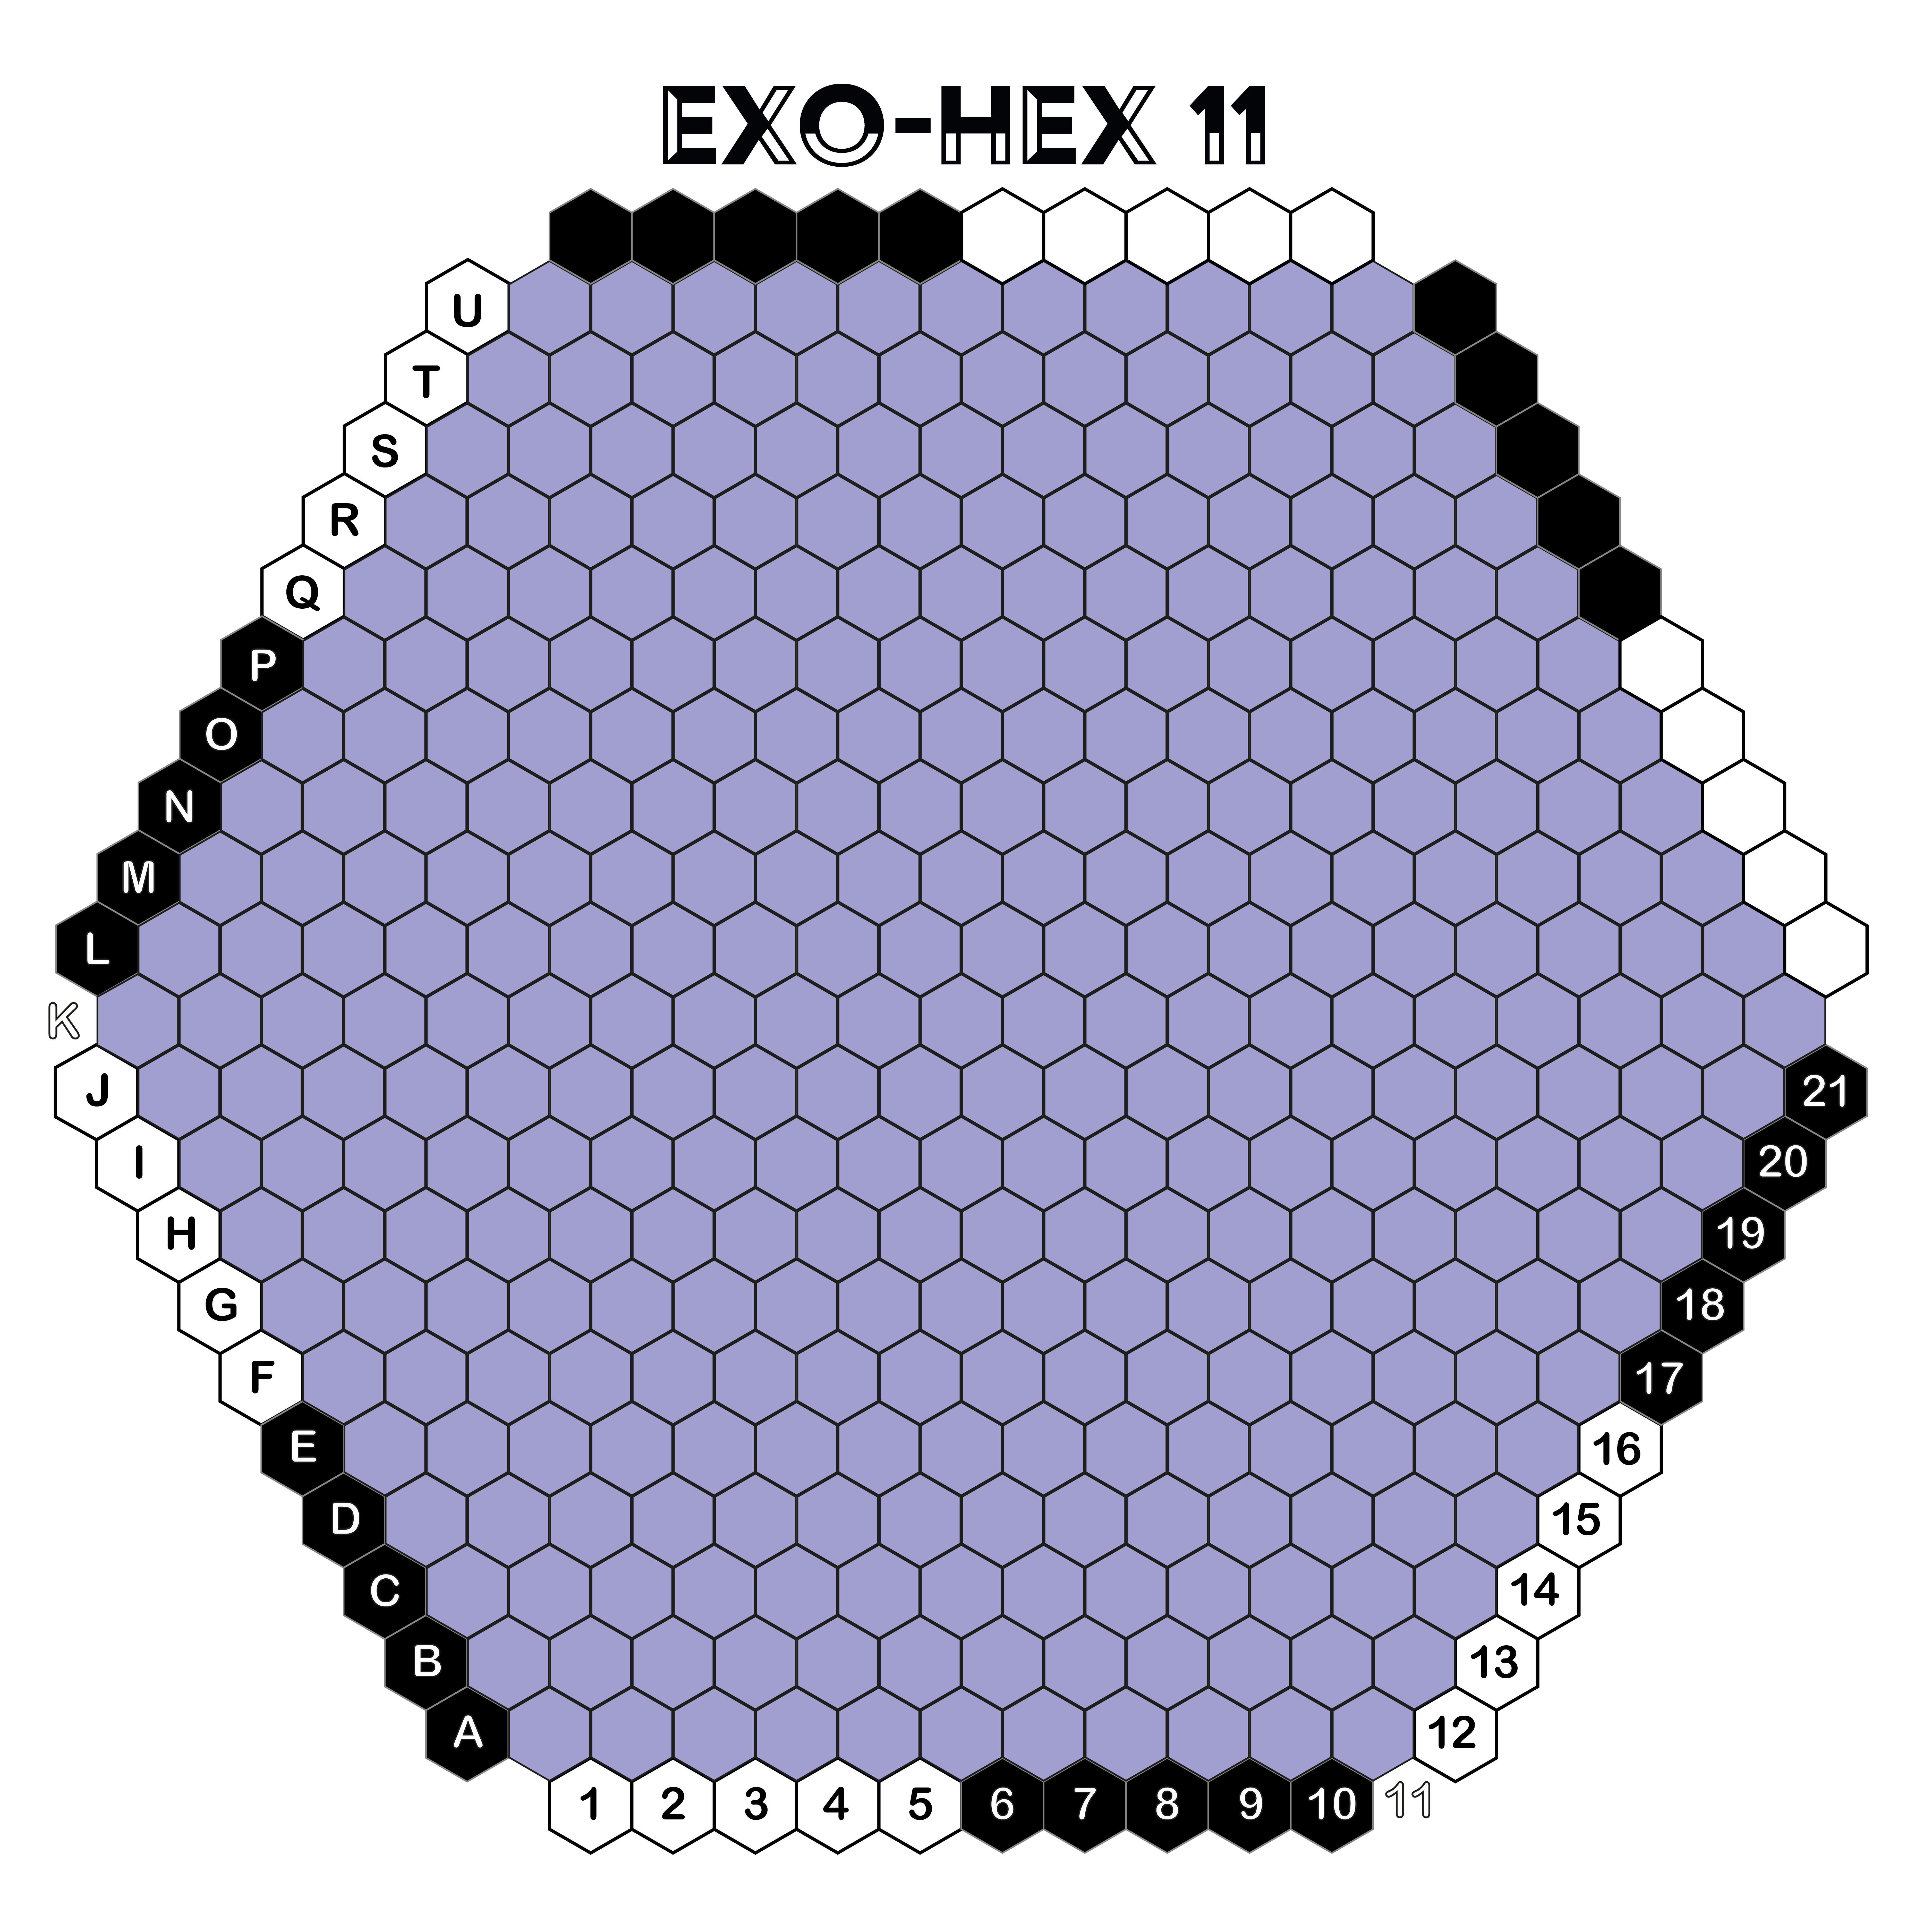
I briefly covered both these games before, but since then I’ve made some enlarged boards for myself, so I thought I’d share these here and urge you again to give them a shot. Both these games are from Craig Duncan, and they are unique connection games that are centred on scoring points rather than being the first to make a single connection. Both are rich and highly strategic, and well worth your time.
Why they’re great: Exo-Hex is essentially a distillation of Side Stitch into a simpler form, playable with a standard hexhex board with some extra stones around the edges. The more straightforward rules and minimalistic look are great for beginners who may not yet be ready to graduate to Side Stitch and its endless variety of possible playing surfaces. Exo-Hex is also much easier to construct with components you may already have around, so it’s more straightforward to pick up and play.
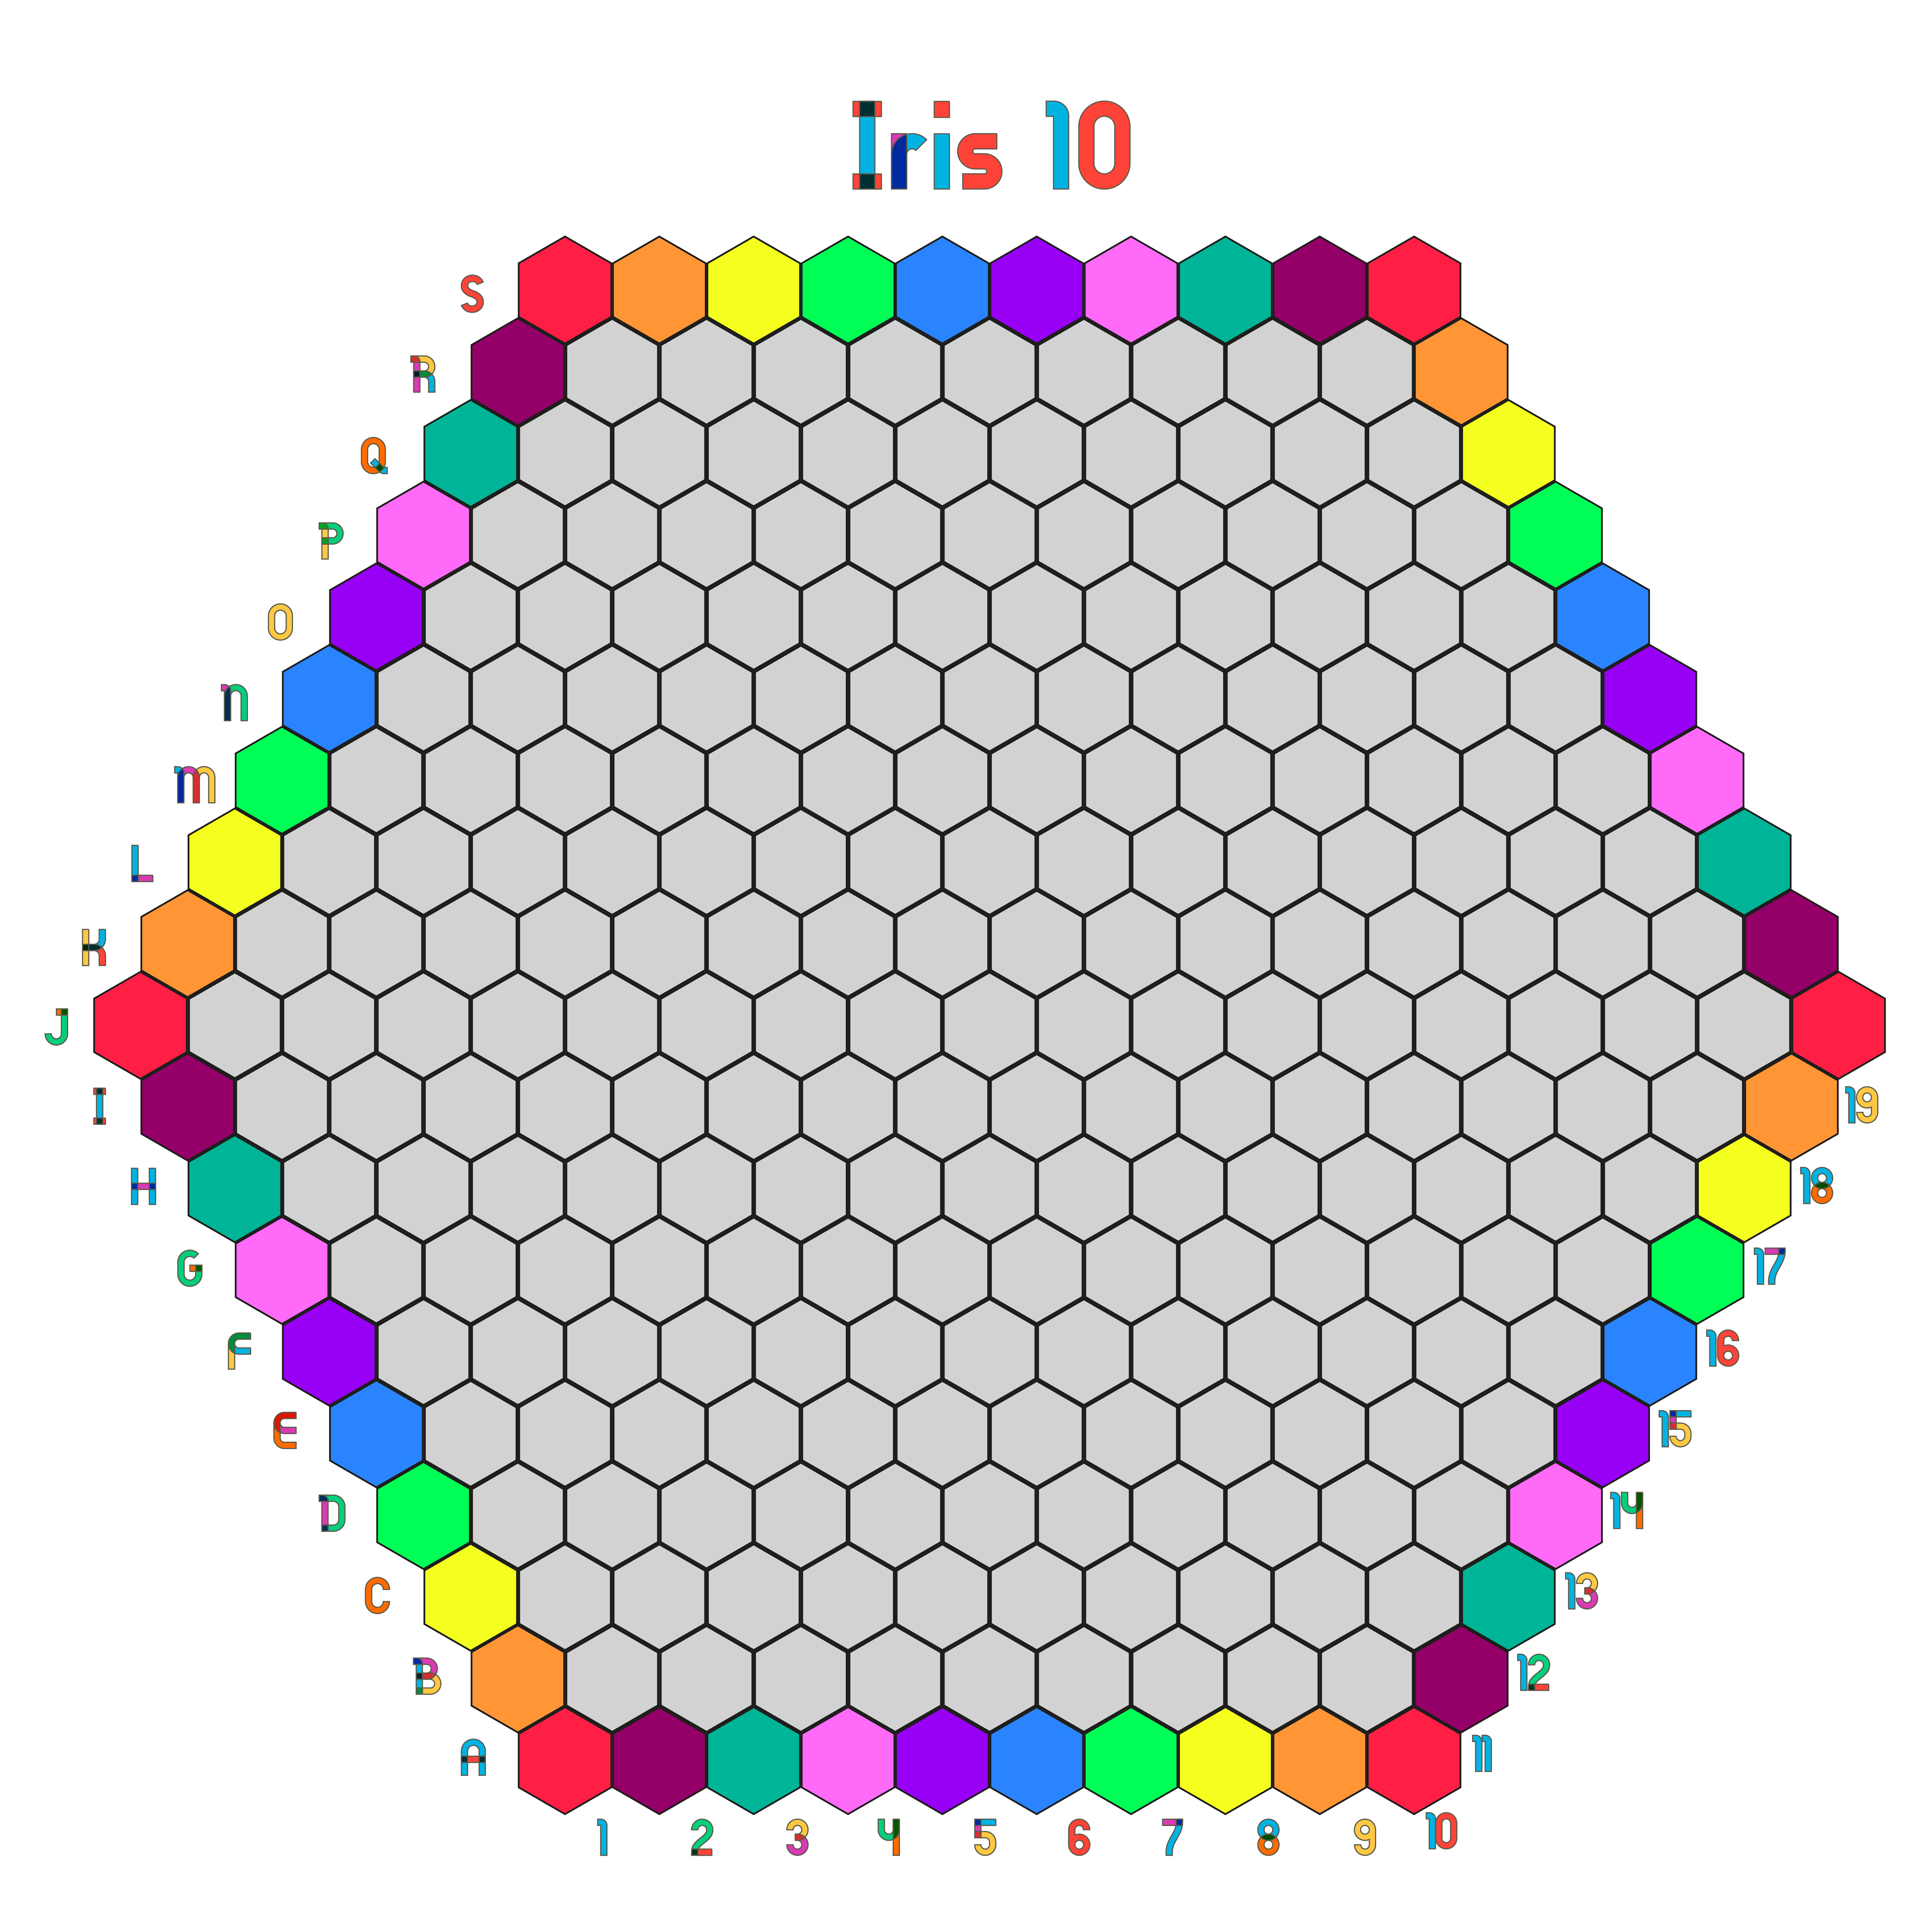
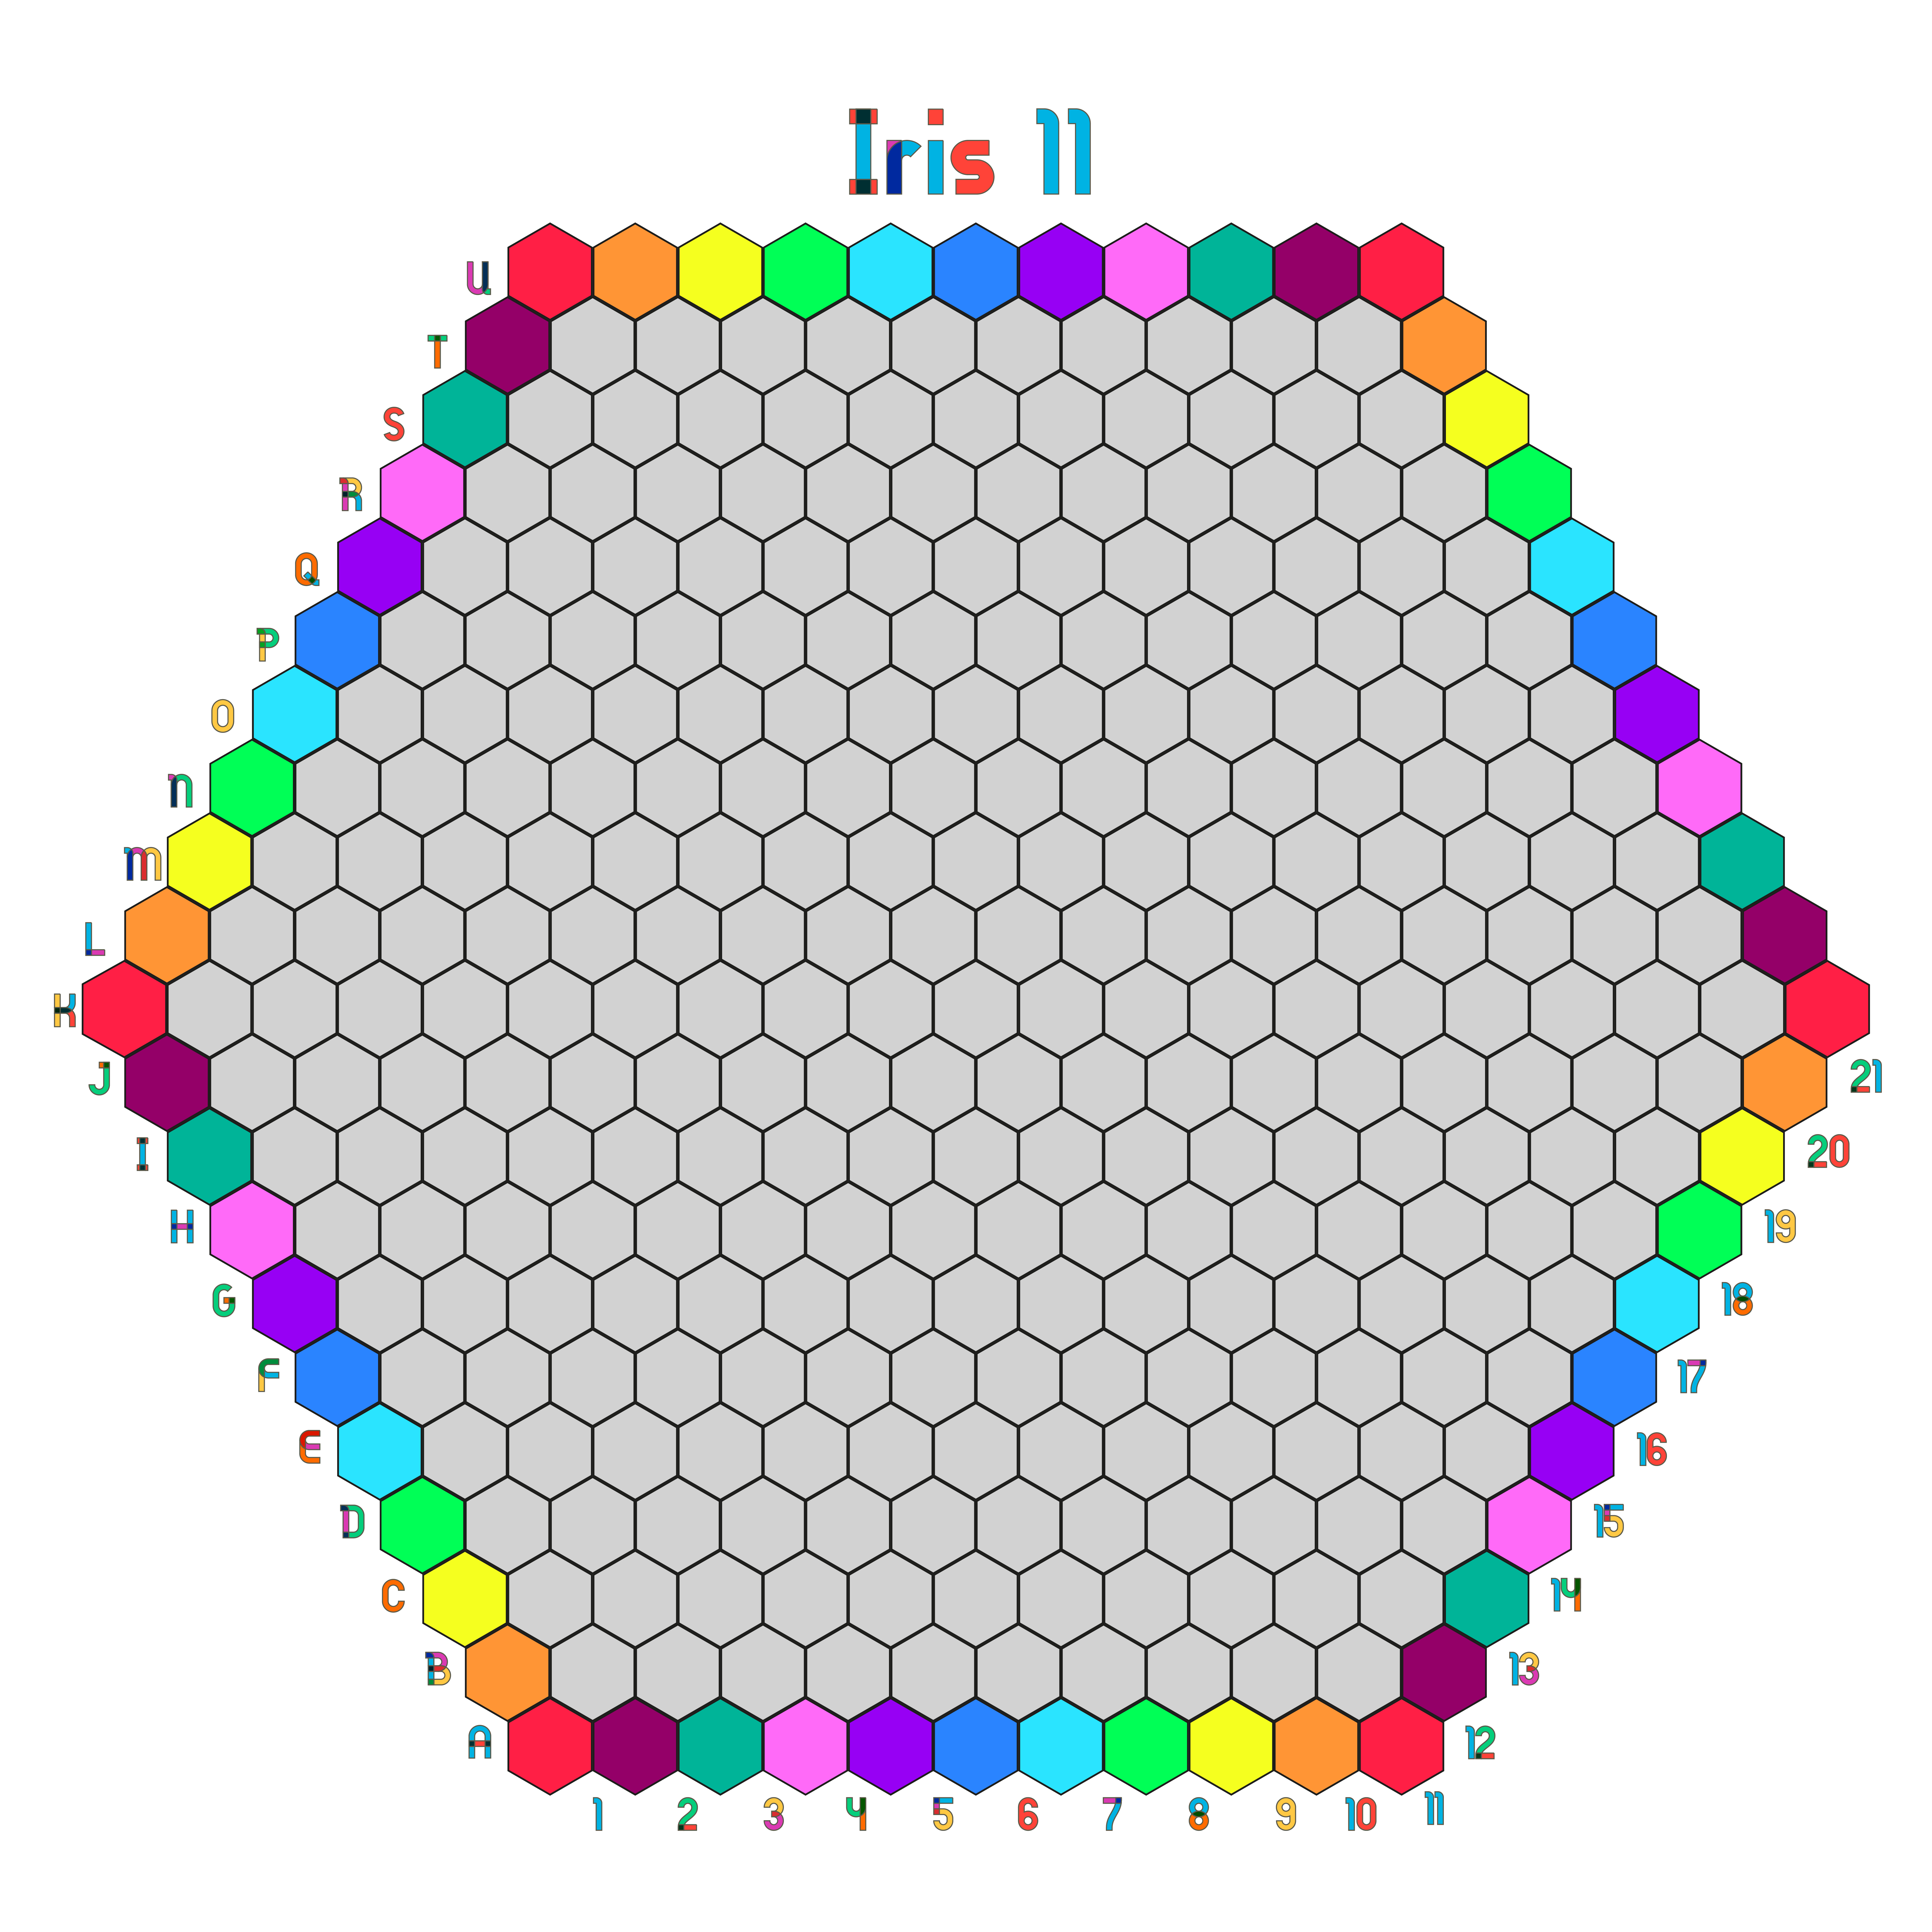
Iris, meanwhile, is part of the surprisingly small family of connection games with two-move turns. Simple restrictions on placement — you may either place two stones on same-coloured spaces on the edge of the board that are directly opposite each other, or two stones in the centre on non-adjacent spaces — means that the game moves quickly and has a huge number of possible moves per turn (a large branching factor), yet structures you will know from Hex and other one-move games still work. I’ve played Iris a lot against Ai Ai and I highly recommend it for any fan of connection games.
Lotus and Medusa
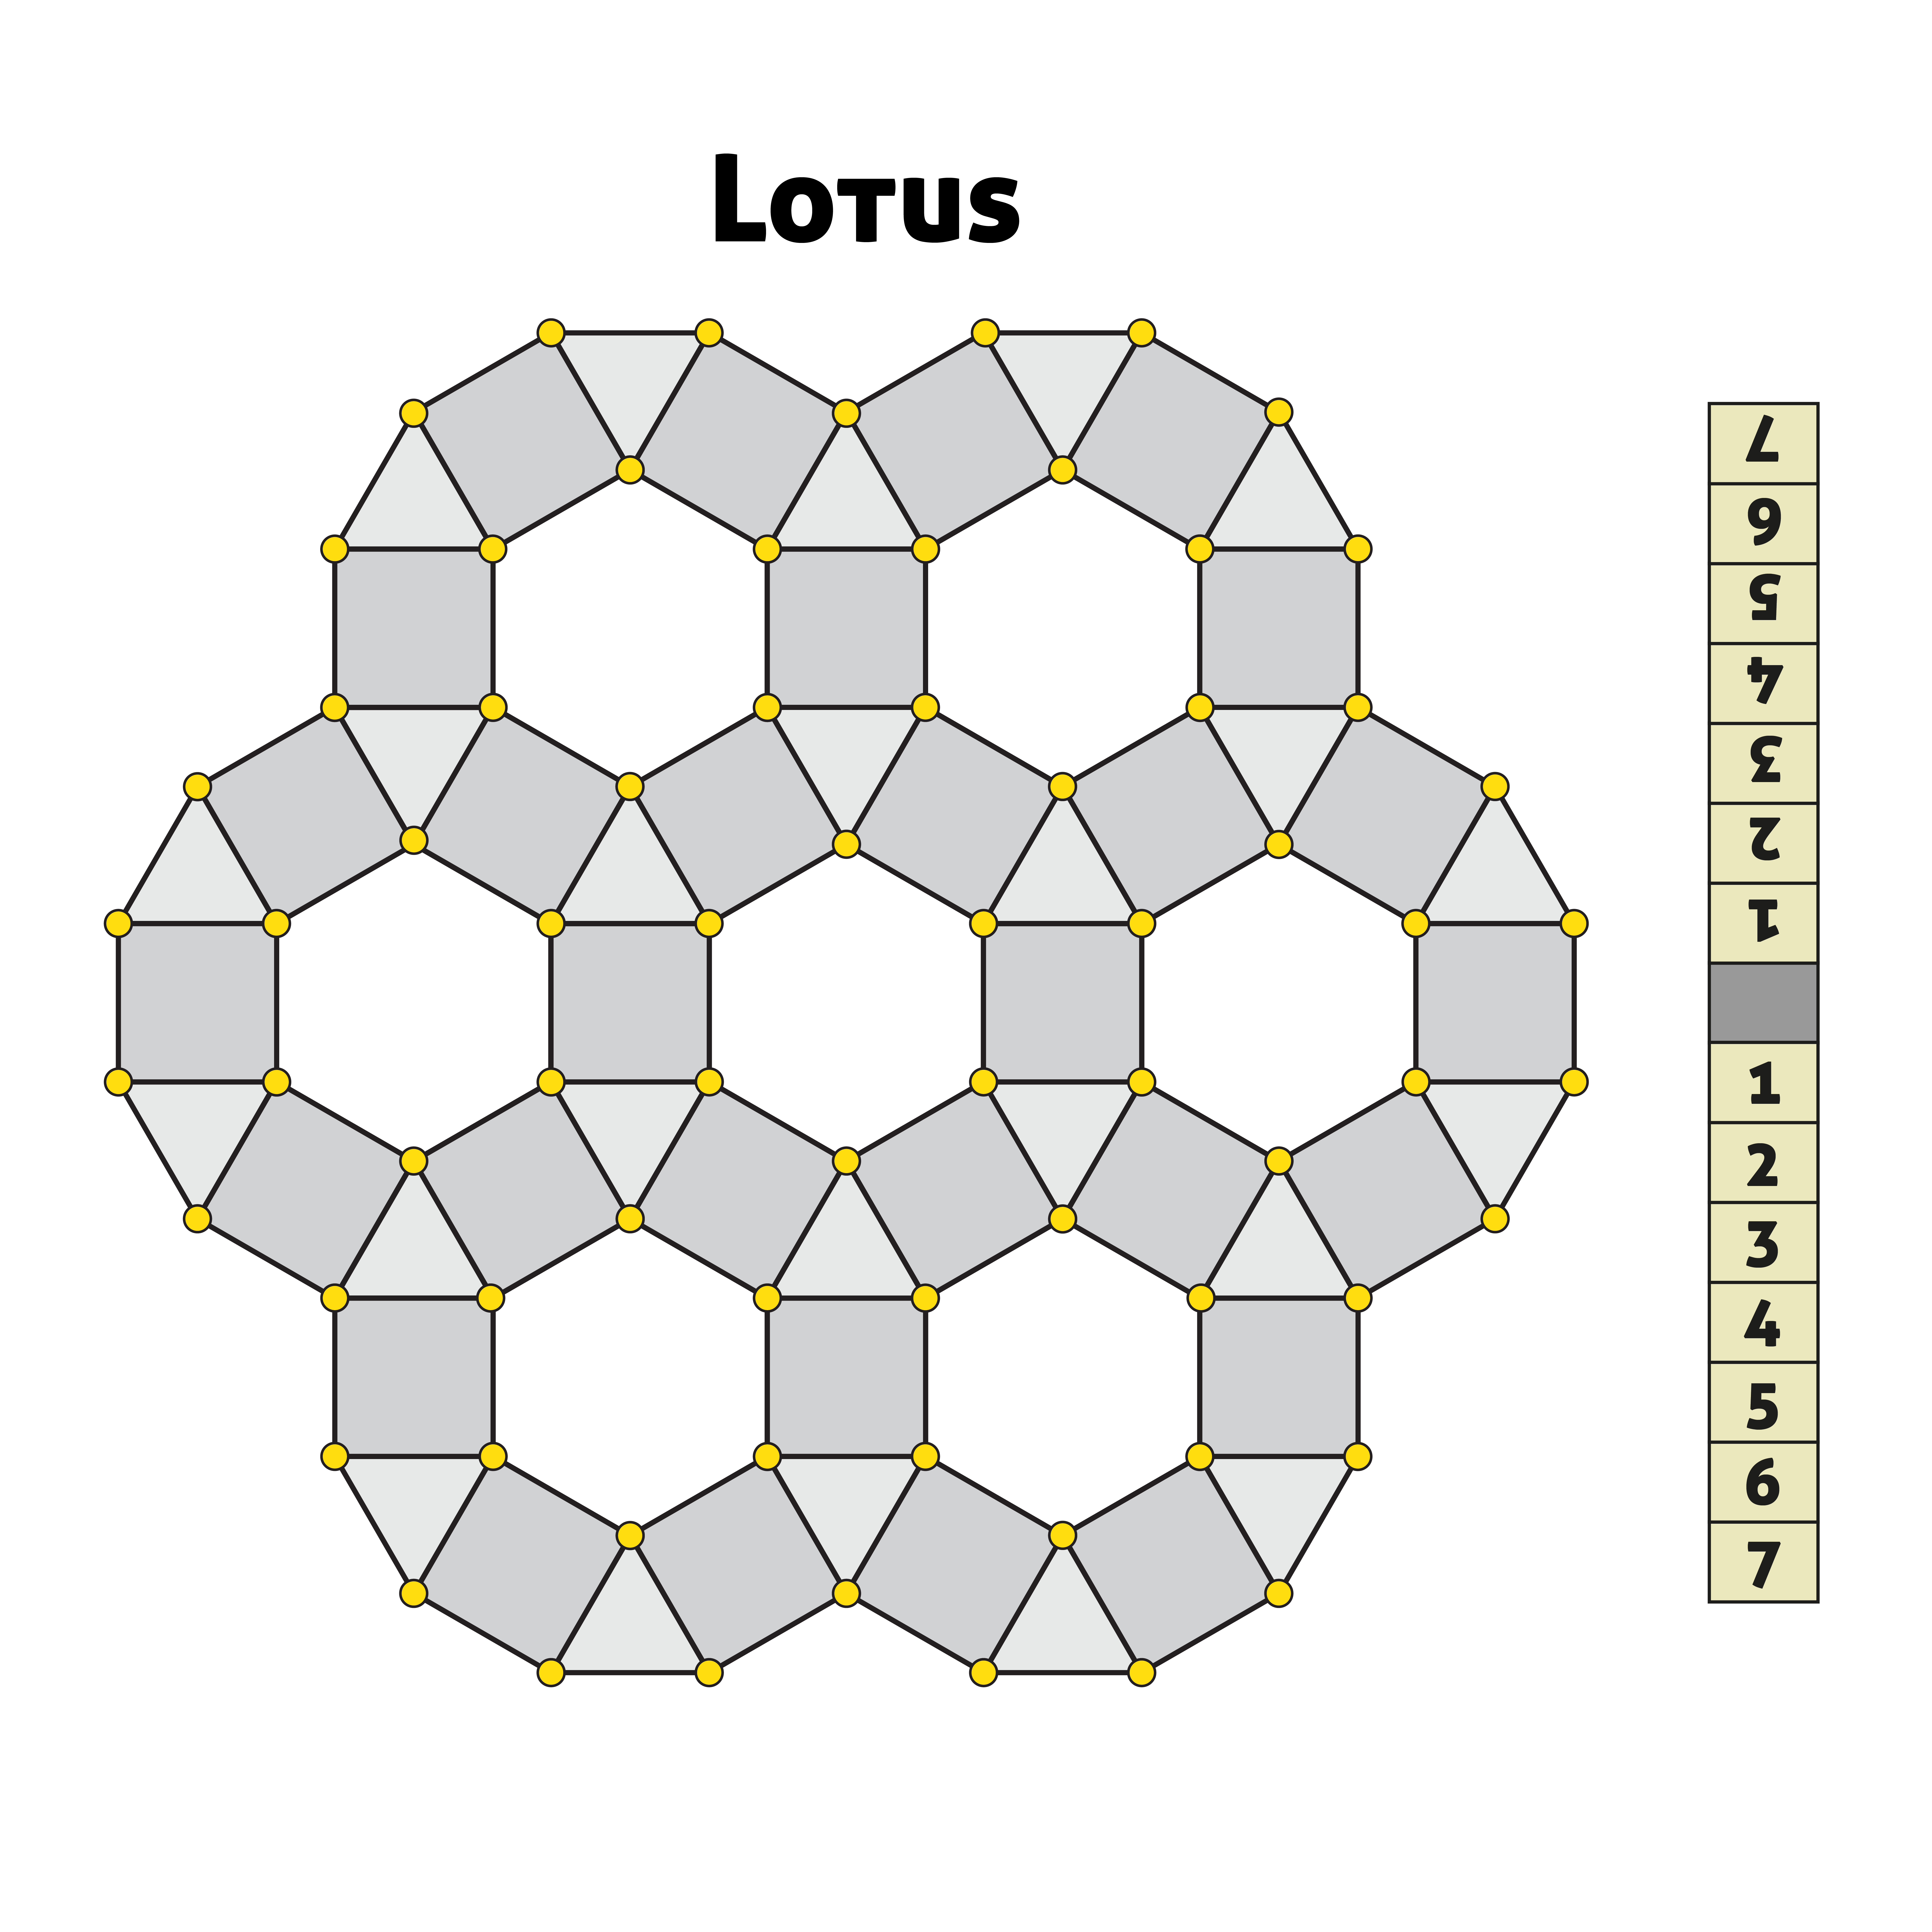

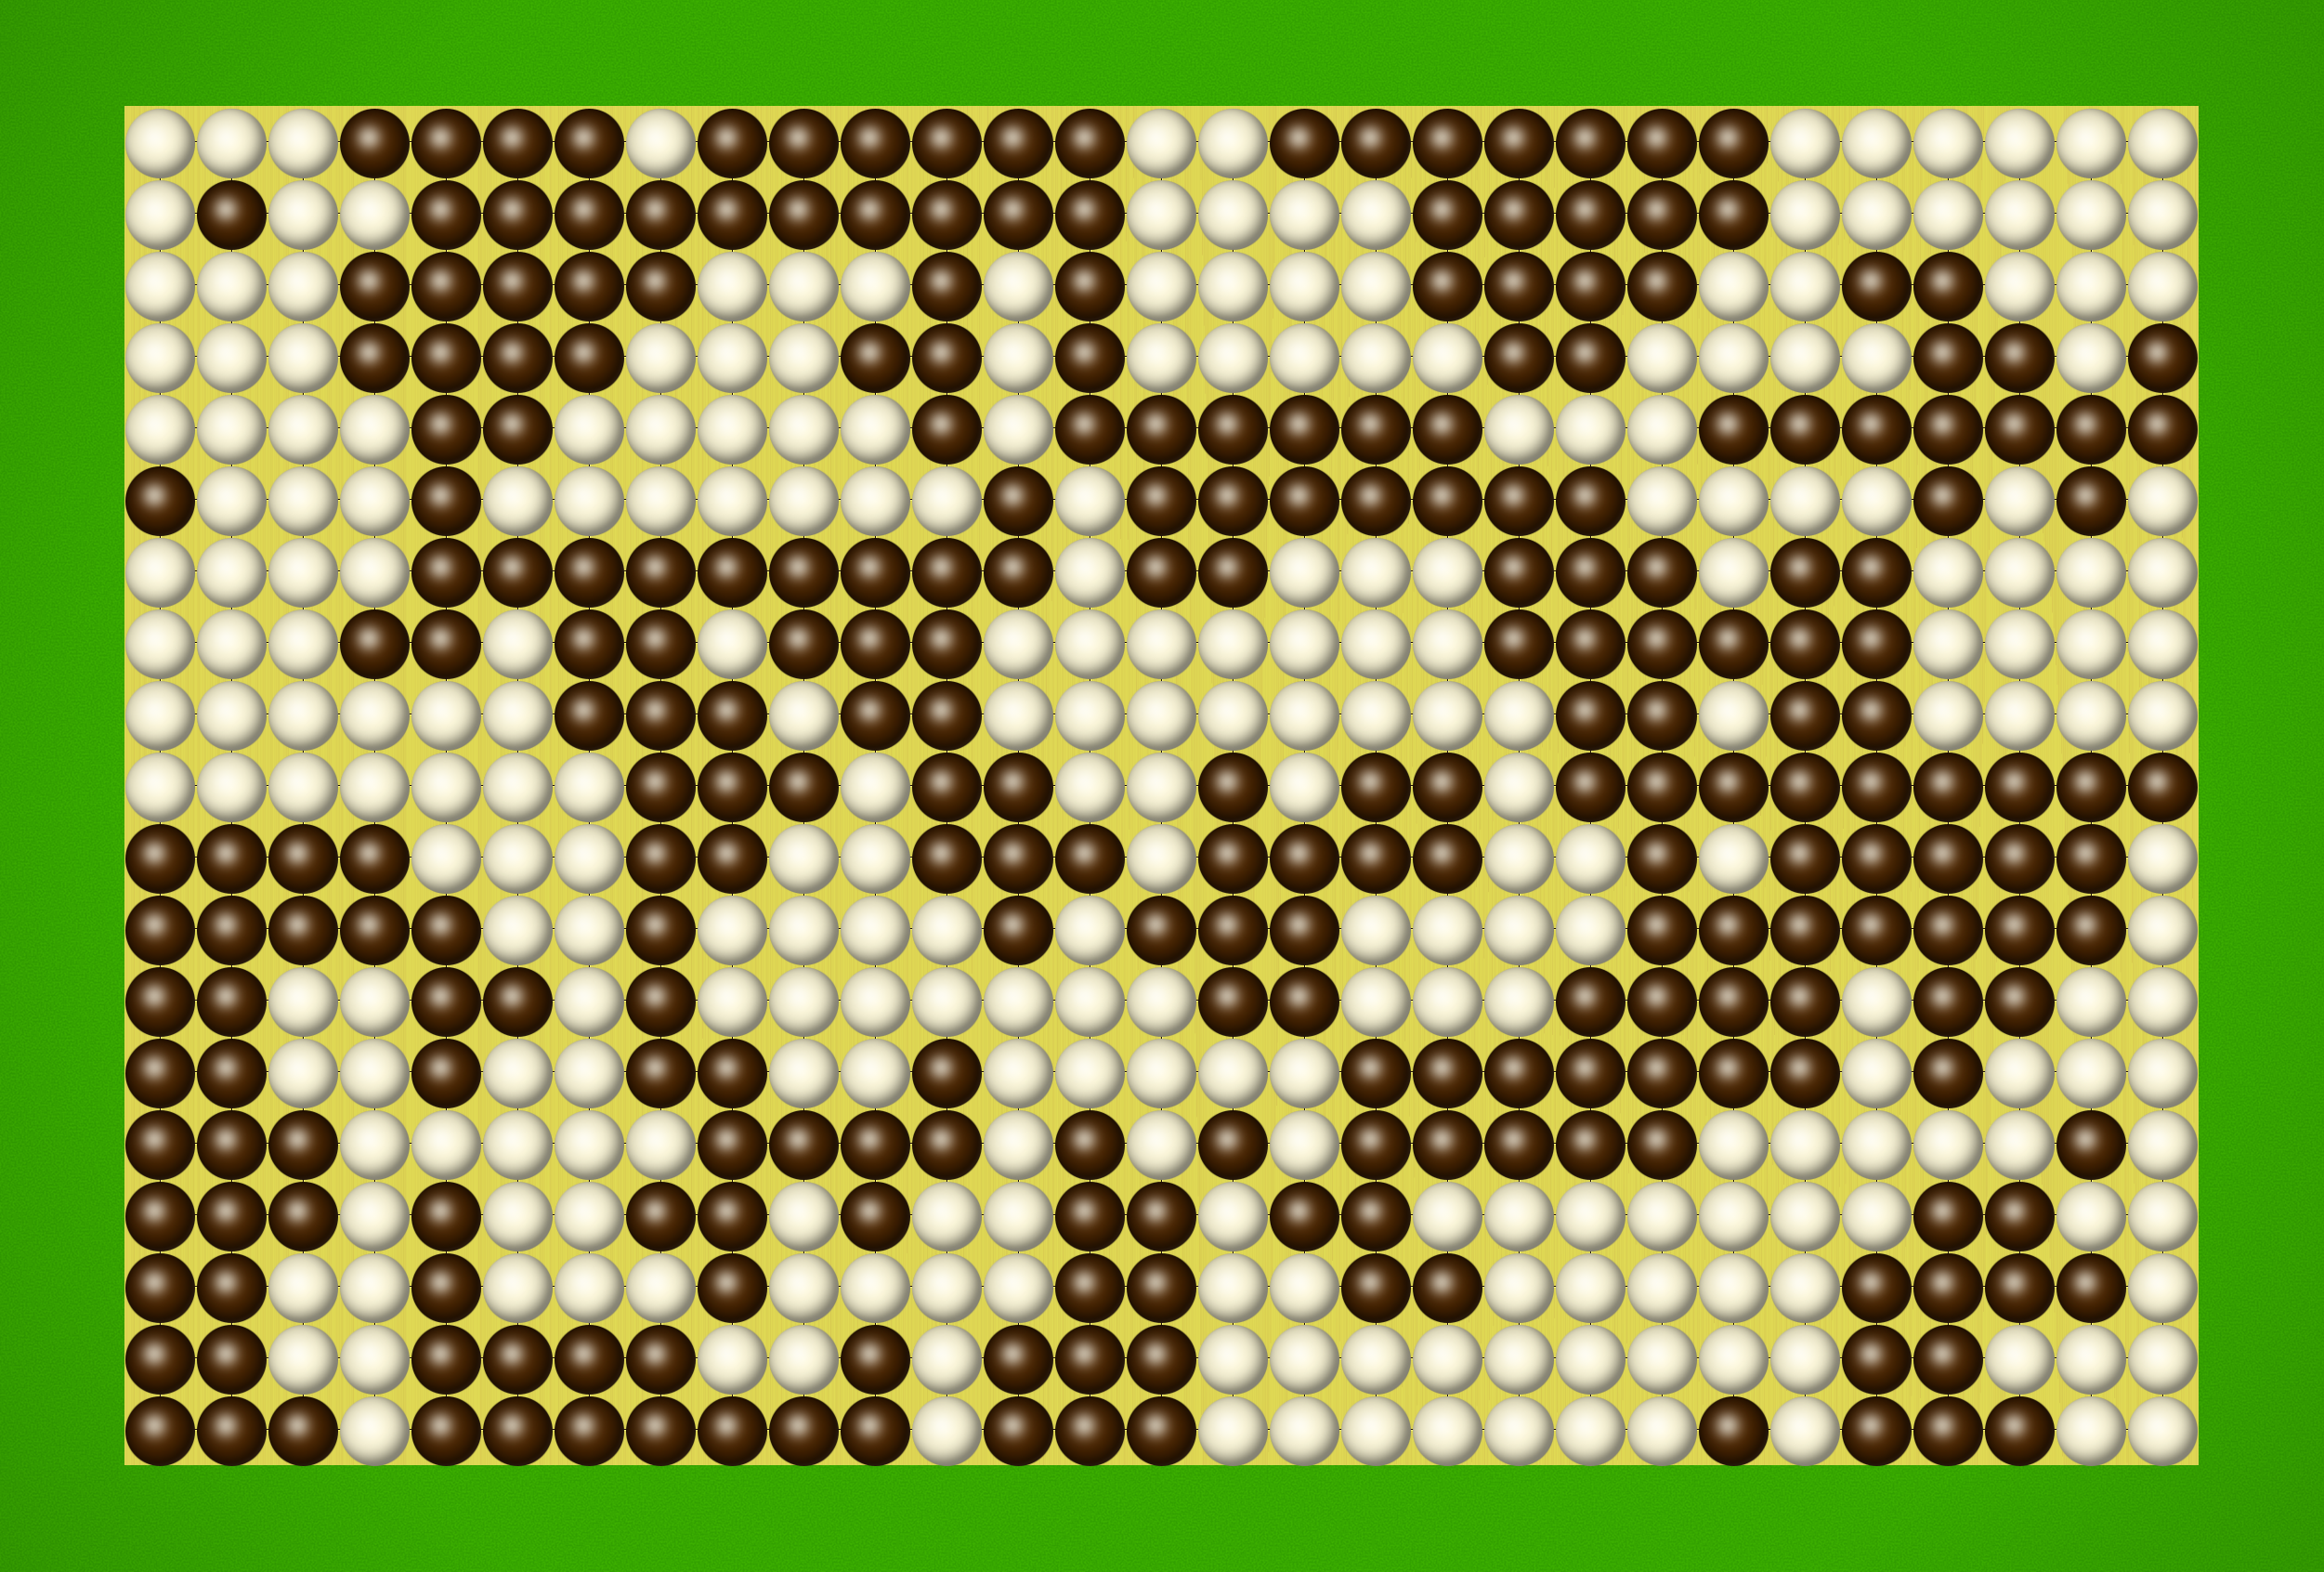
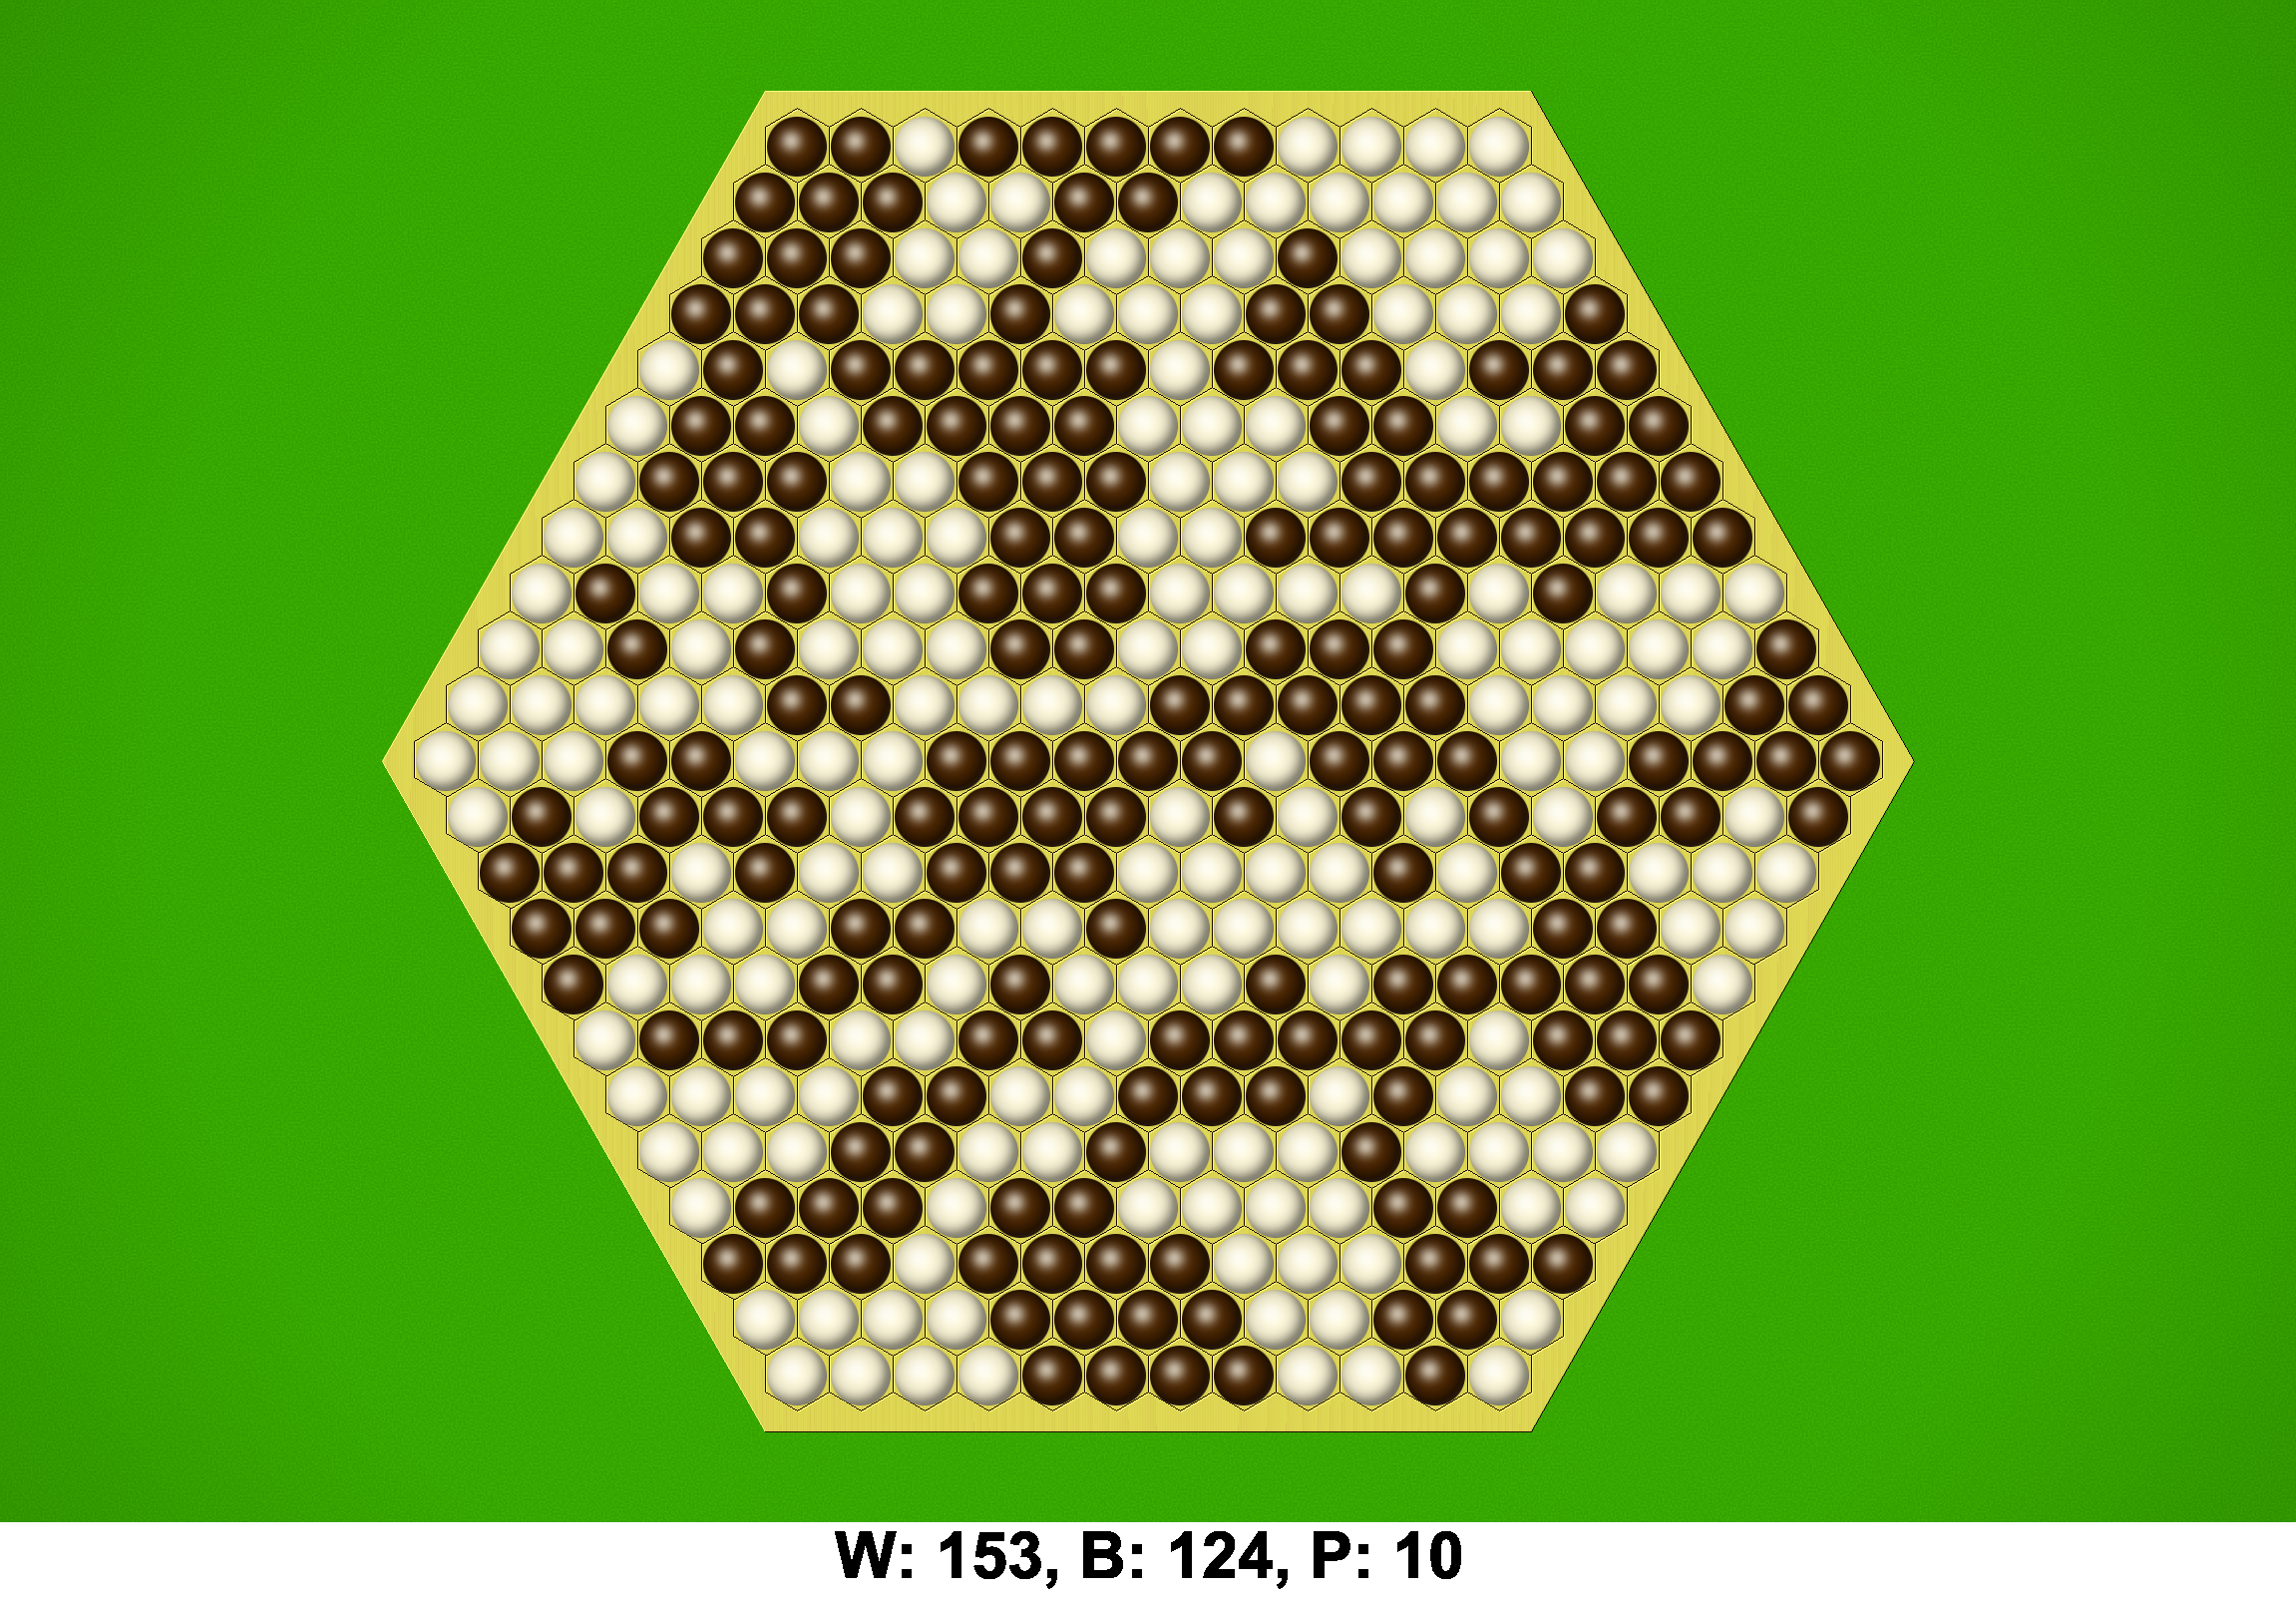
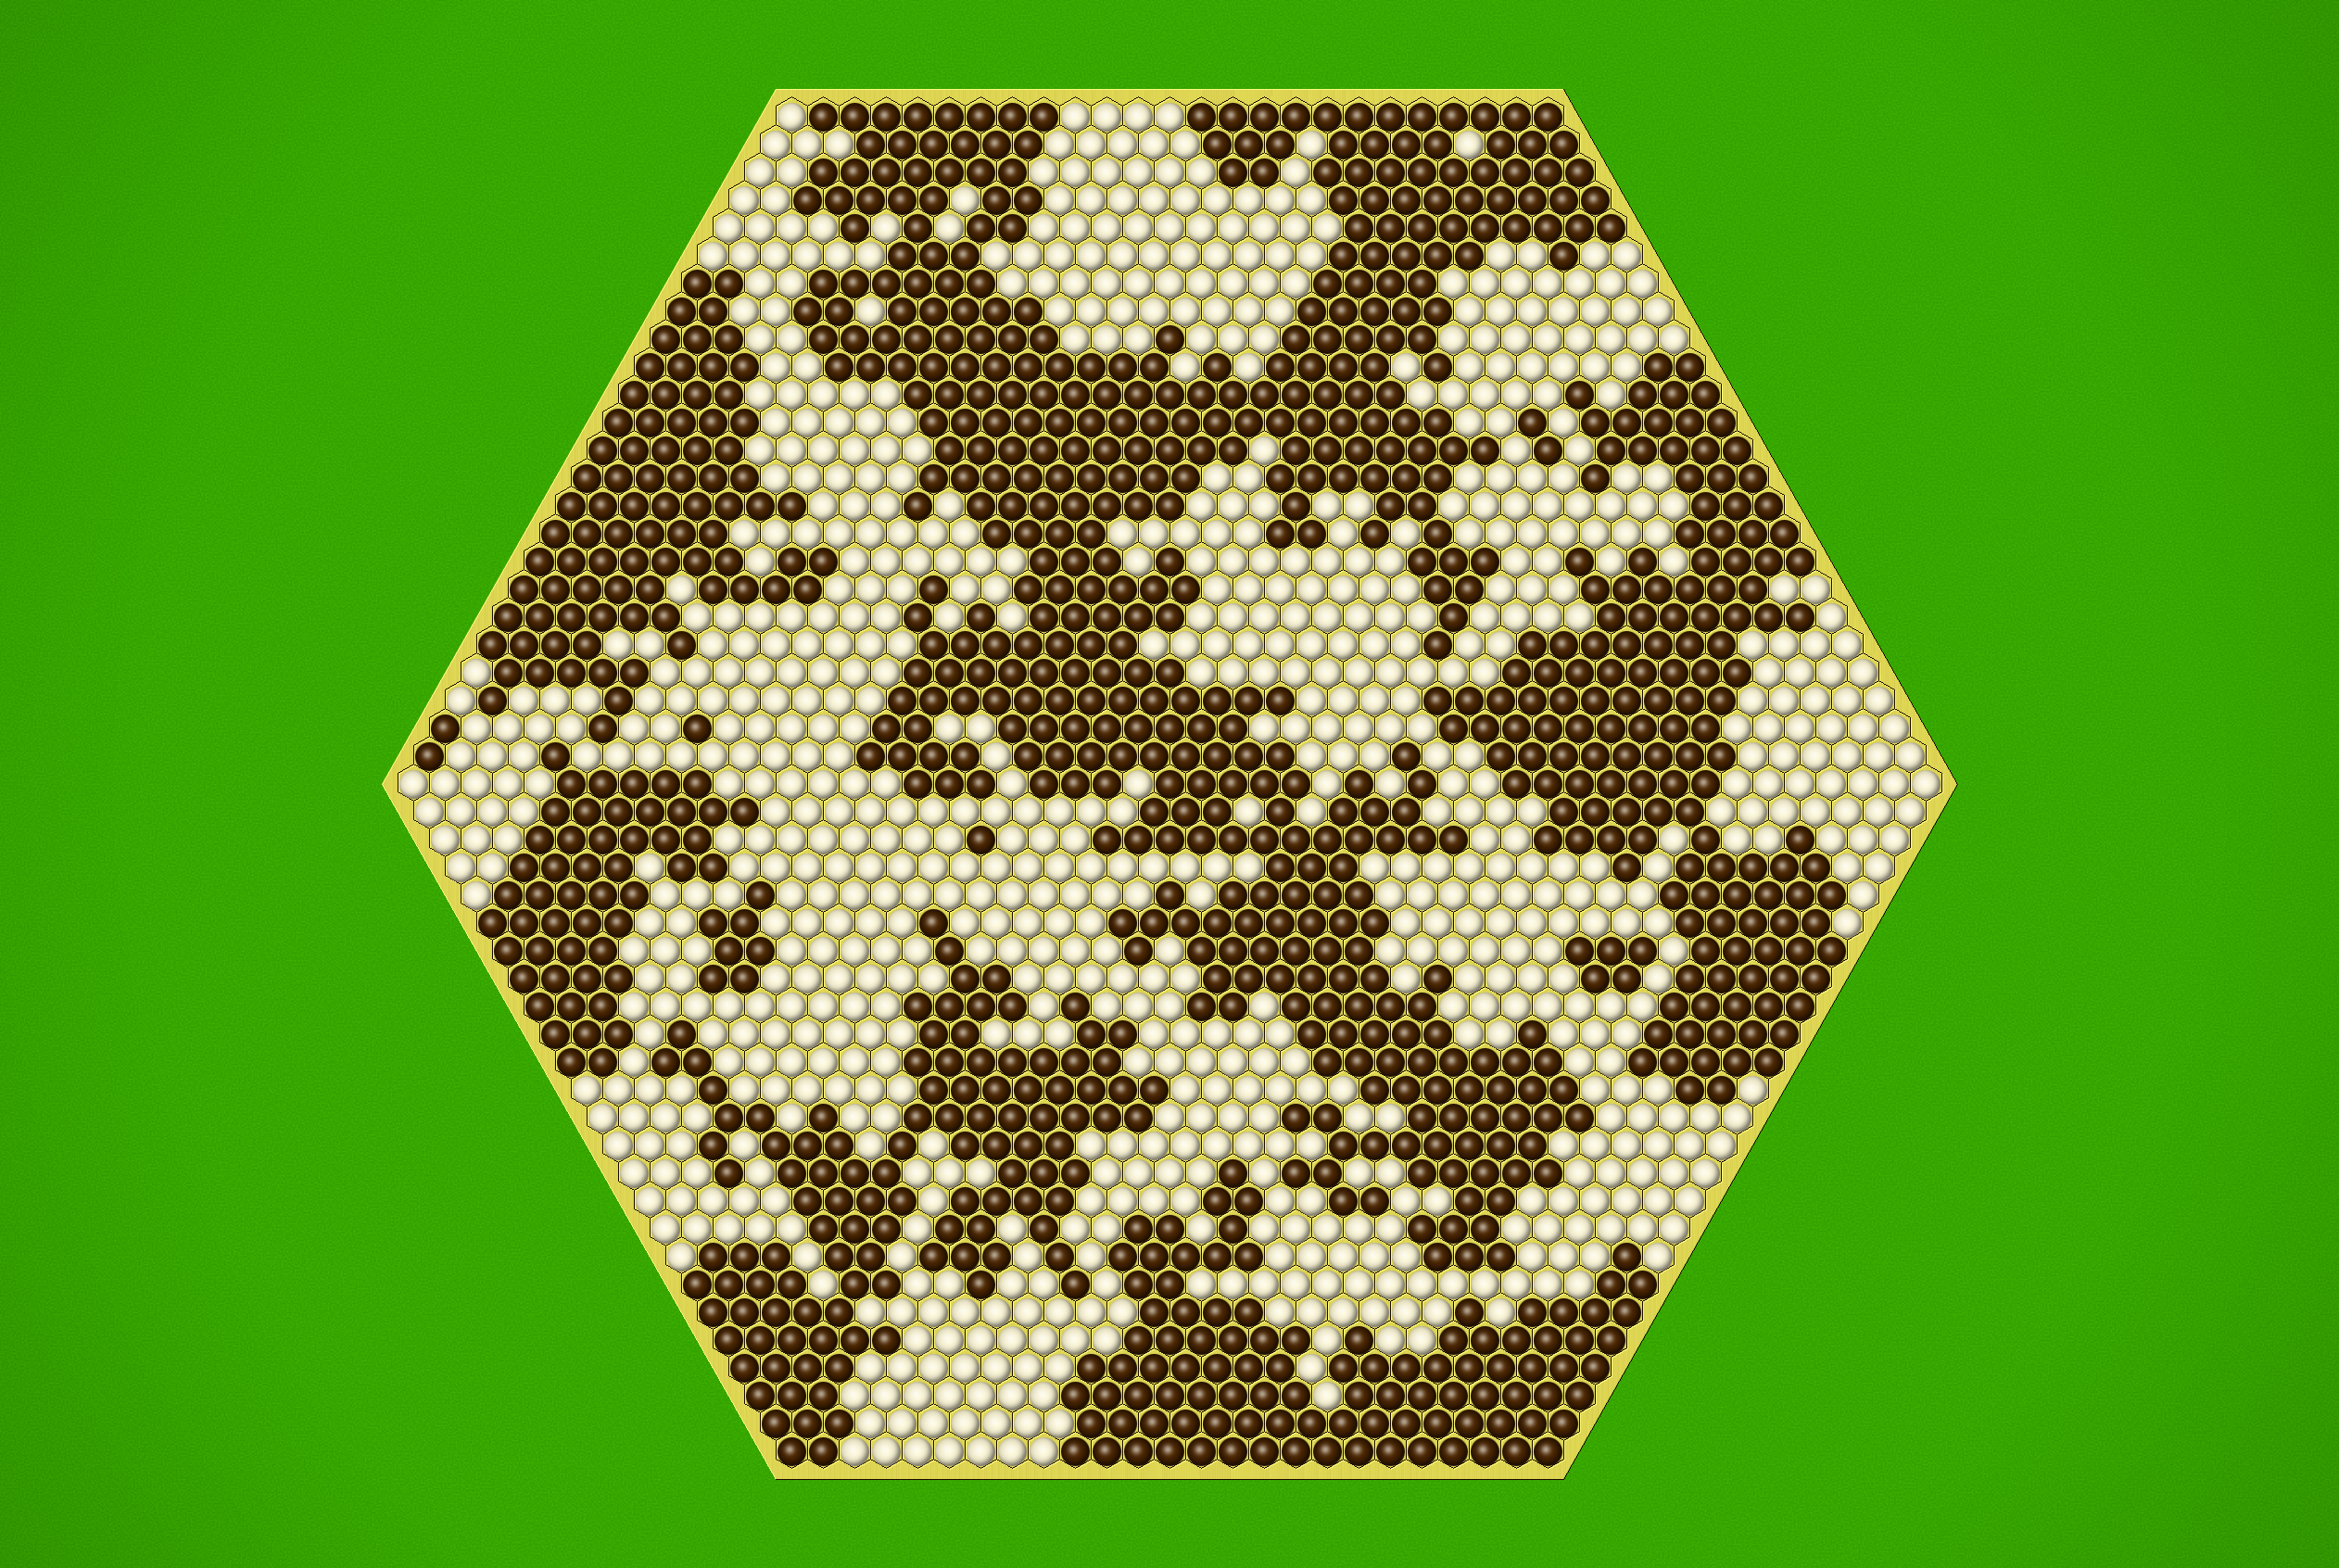
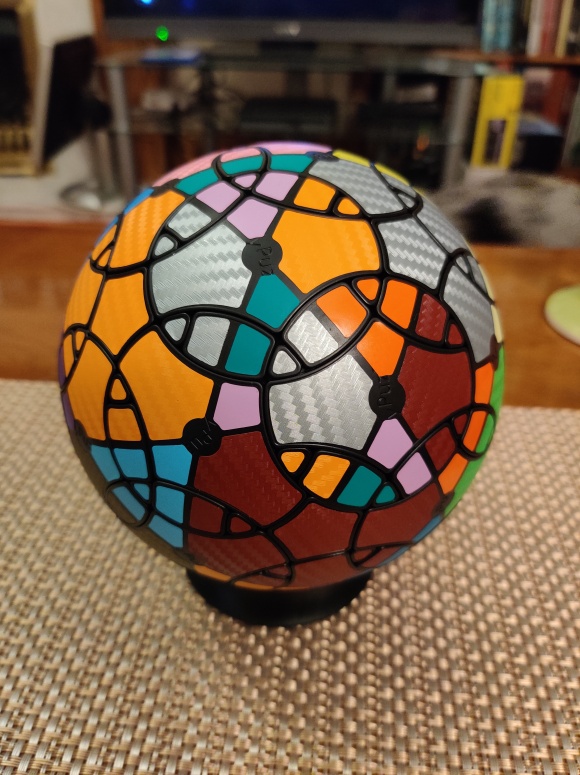
Lotus and Medusa are two under-appreciated territory games by Christian Freeling that are closely related — in fact Christian calls Lotus the ‘support act’ for Medusa. Both centre around the use of a mechanic from a game called Rosette. Over the years, numerous designers have tried to transport the game of Go to the hexagonal grid, only to find that the reduced connectivity of each point (from 4 adjacencies to 3) made it too hard for players to build stable groups of stones. Rosette addressed this by allowing groups of stones containing a rosette — a formation that occupies all six points of a single hexagon — to be immune from capture permanently. Lotus and Medusa adopt this clever tweak, while adding some fascinating additional touches.
Why they’re great: Lotus takes the cool-looking board from the rather disappointing game of Kensington, and turns it into the basis for a compelling territorial contest. Capture doesn’t just eliminate enemy stones, it flips them to your side, like in Othello, and occupying all six points of a hexagon keeps your groups alive forever, as in Rosette. Medusa takes this further by removing hexagons from the playable area of the board to further reduce its connectivity, and allowing players to either place or move a group of stones already on the board. Medusa also has the ‘Othellonian’ capture and rosettes of Lotus. Both games have the satisfying tension of a good Go-like game, but with very different play styles; Lotus is quick and deadly, while Medusa is a longer epic that allows groups to flow sinuously across the board. Both deserve more attention than they’ve received.
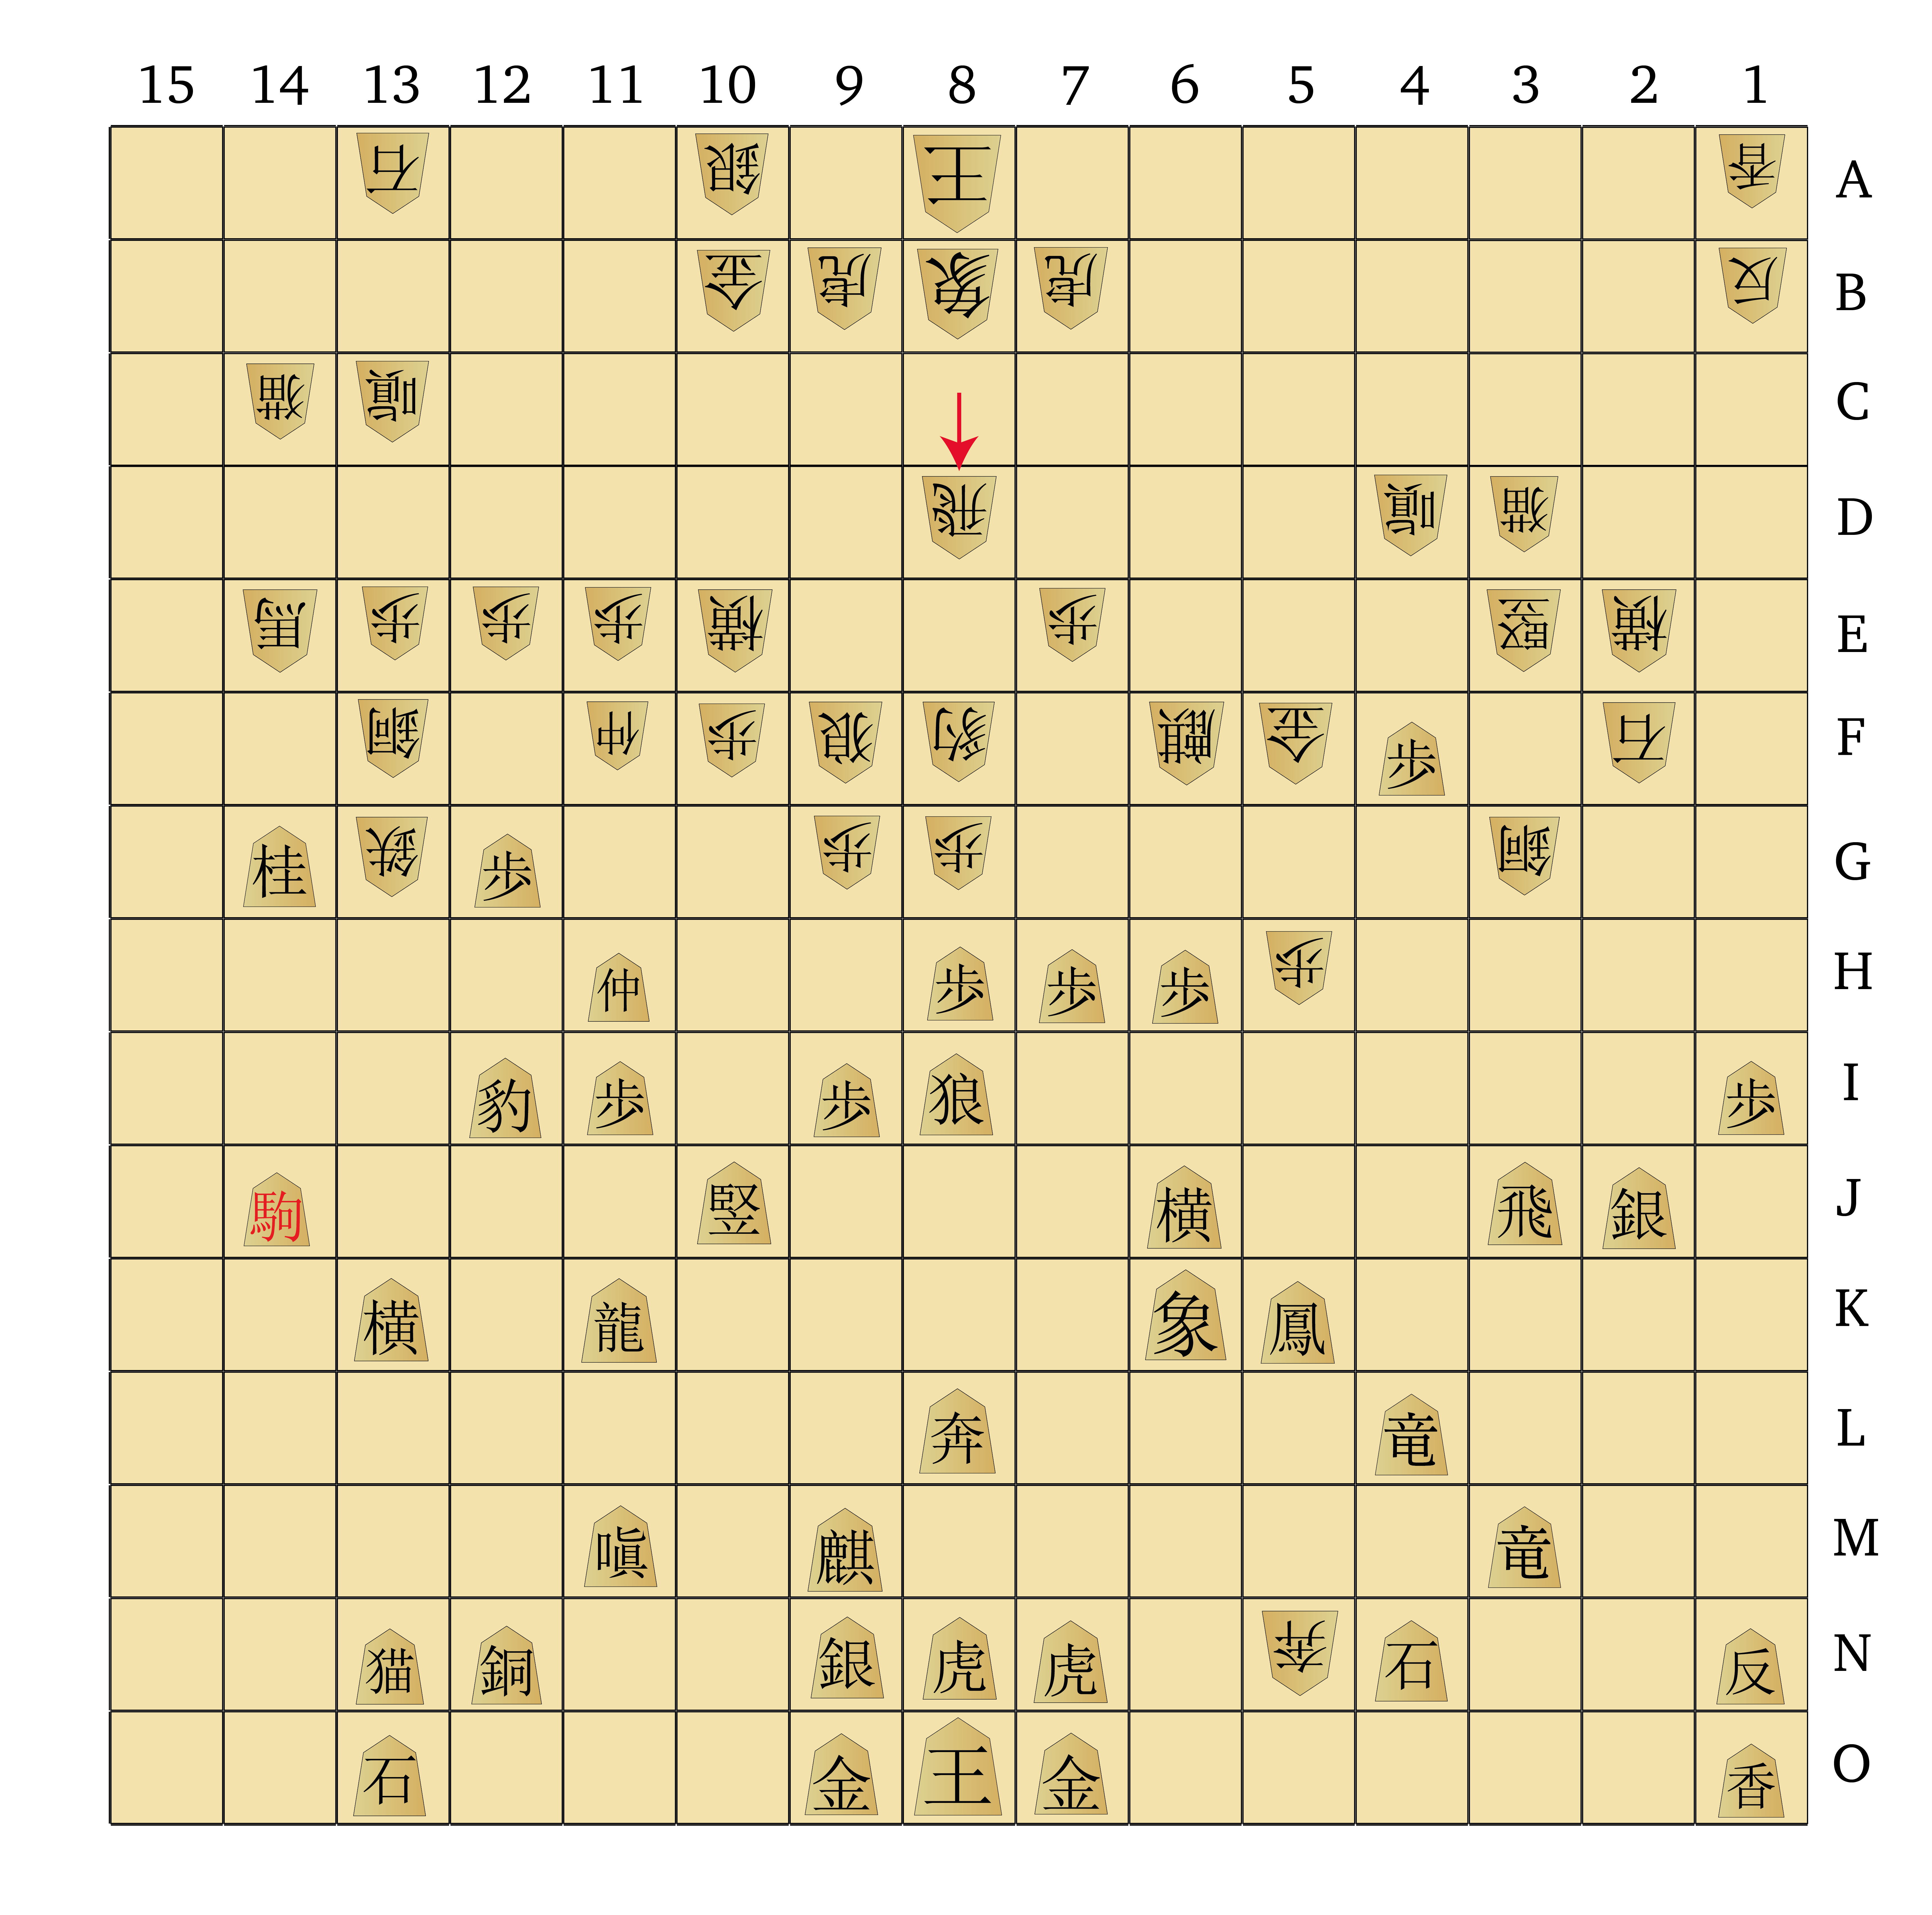
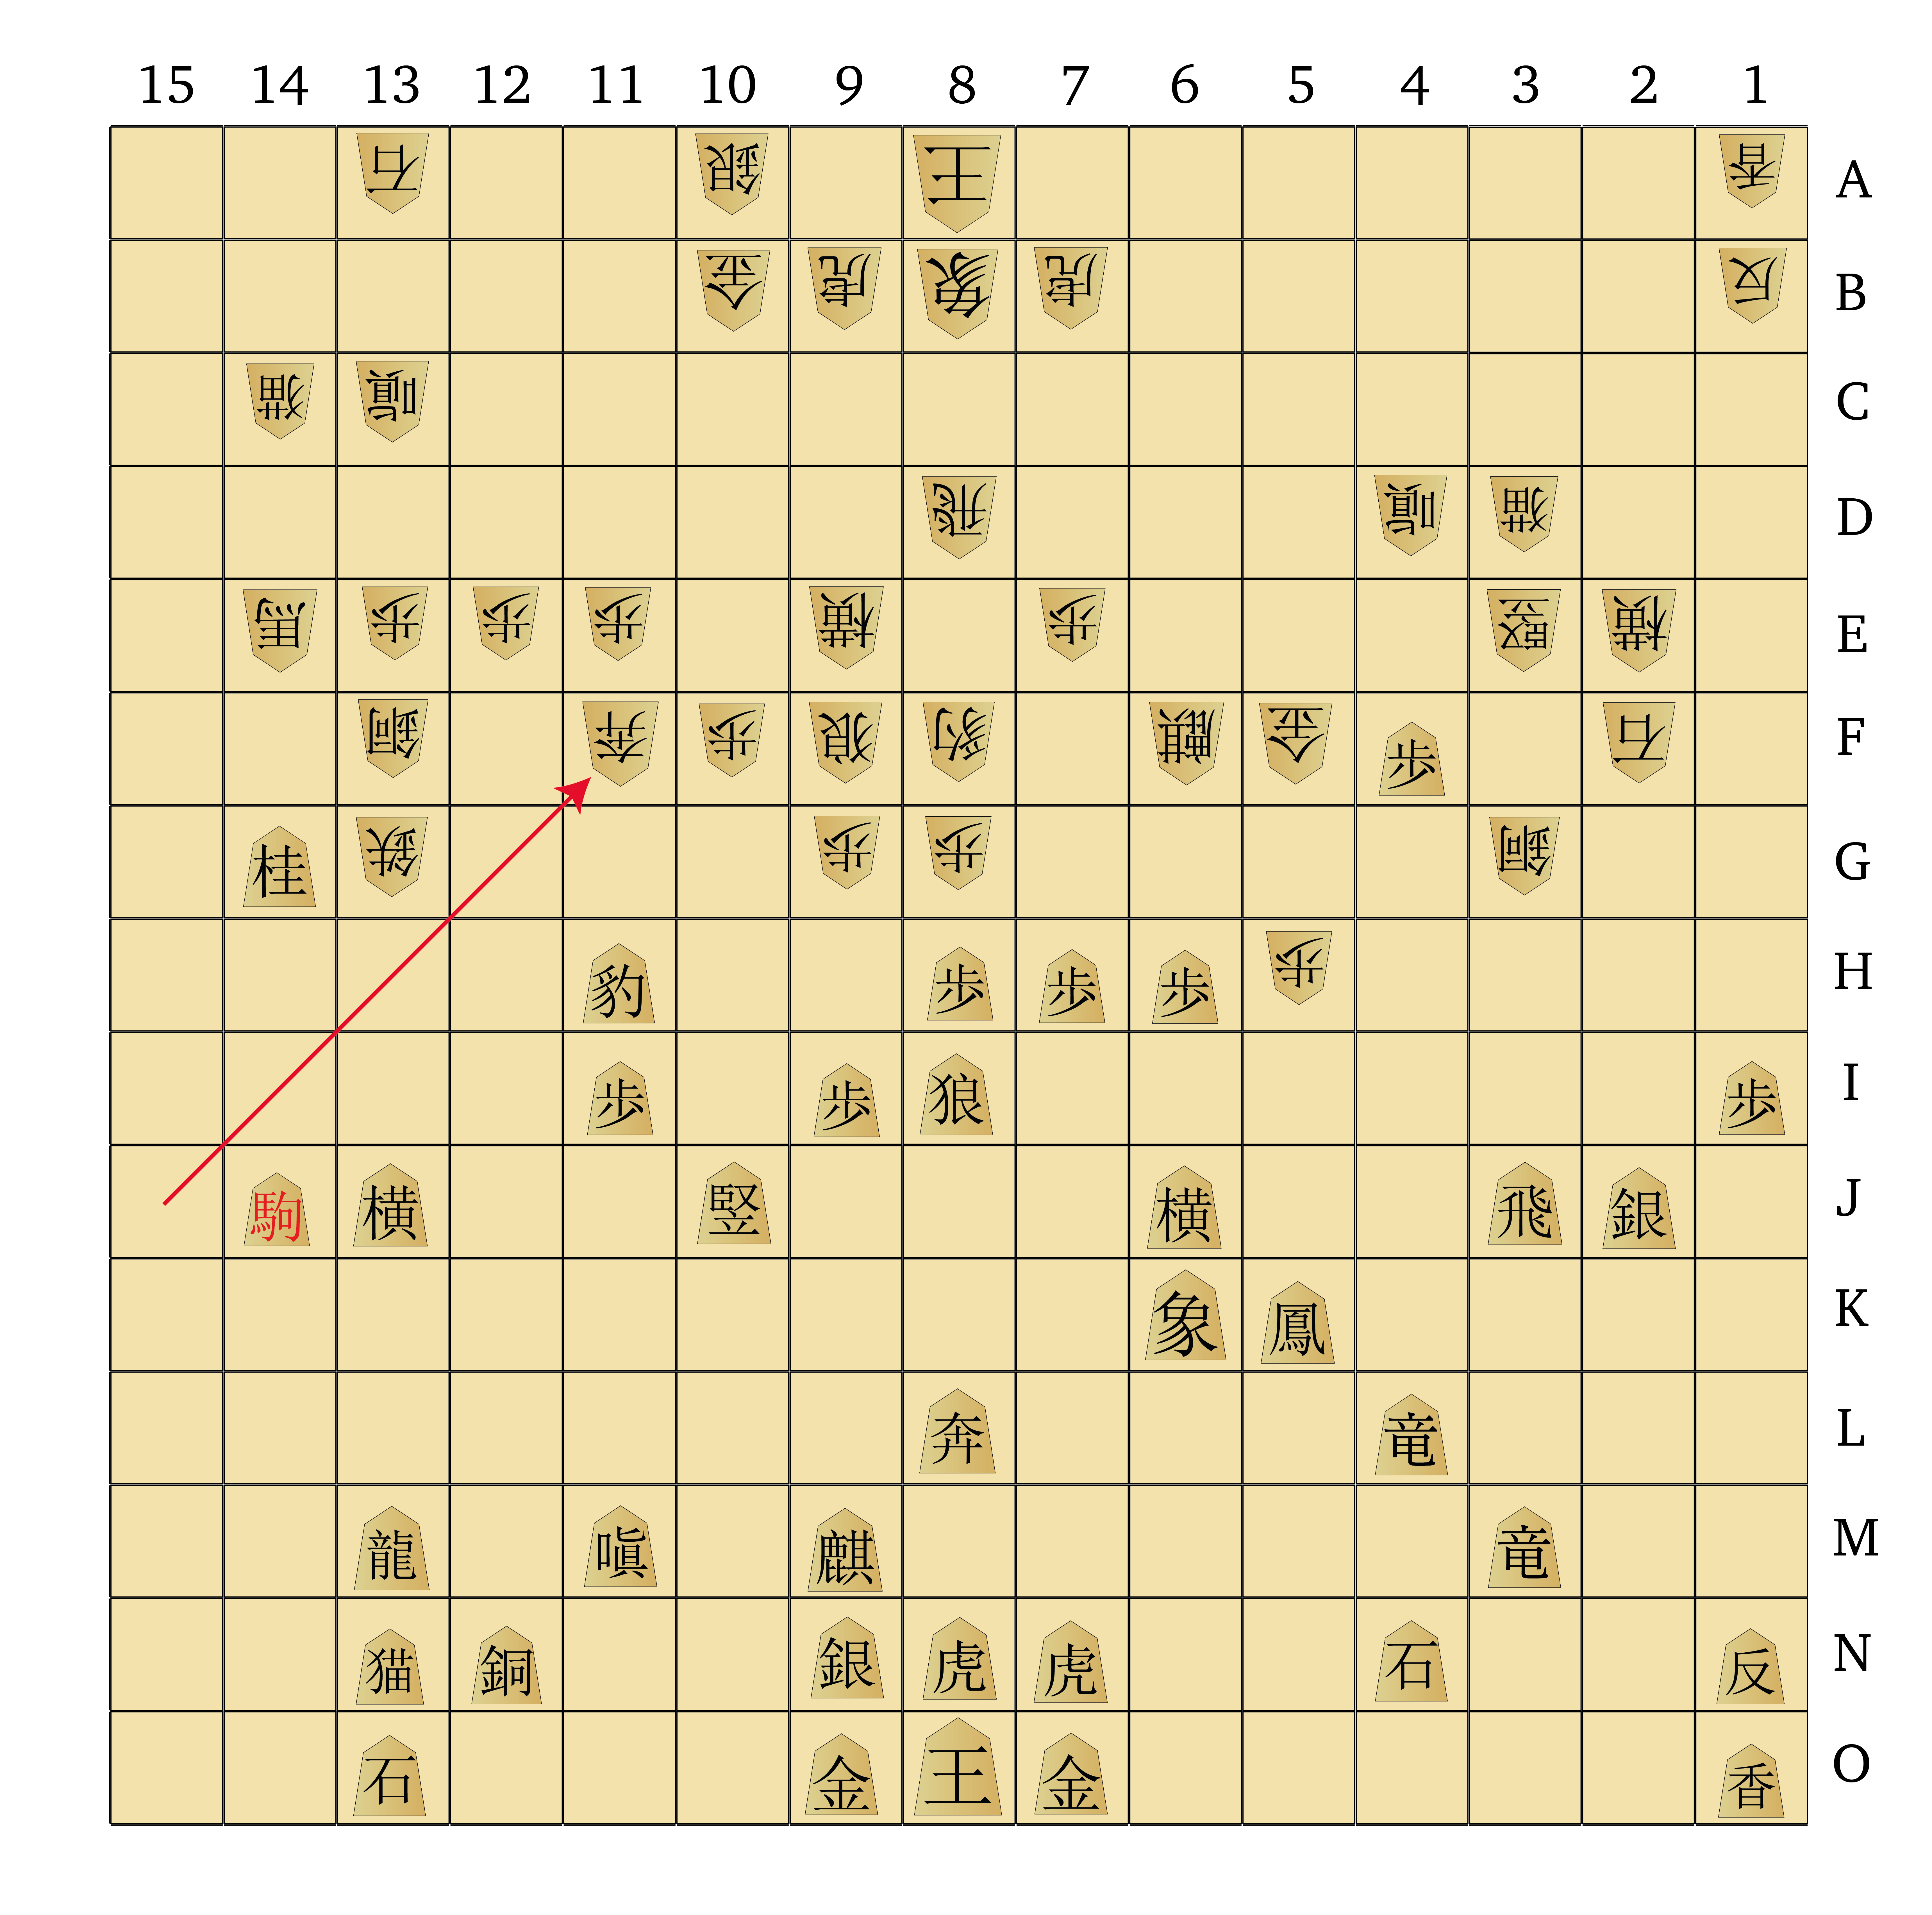
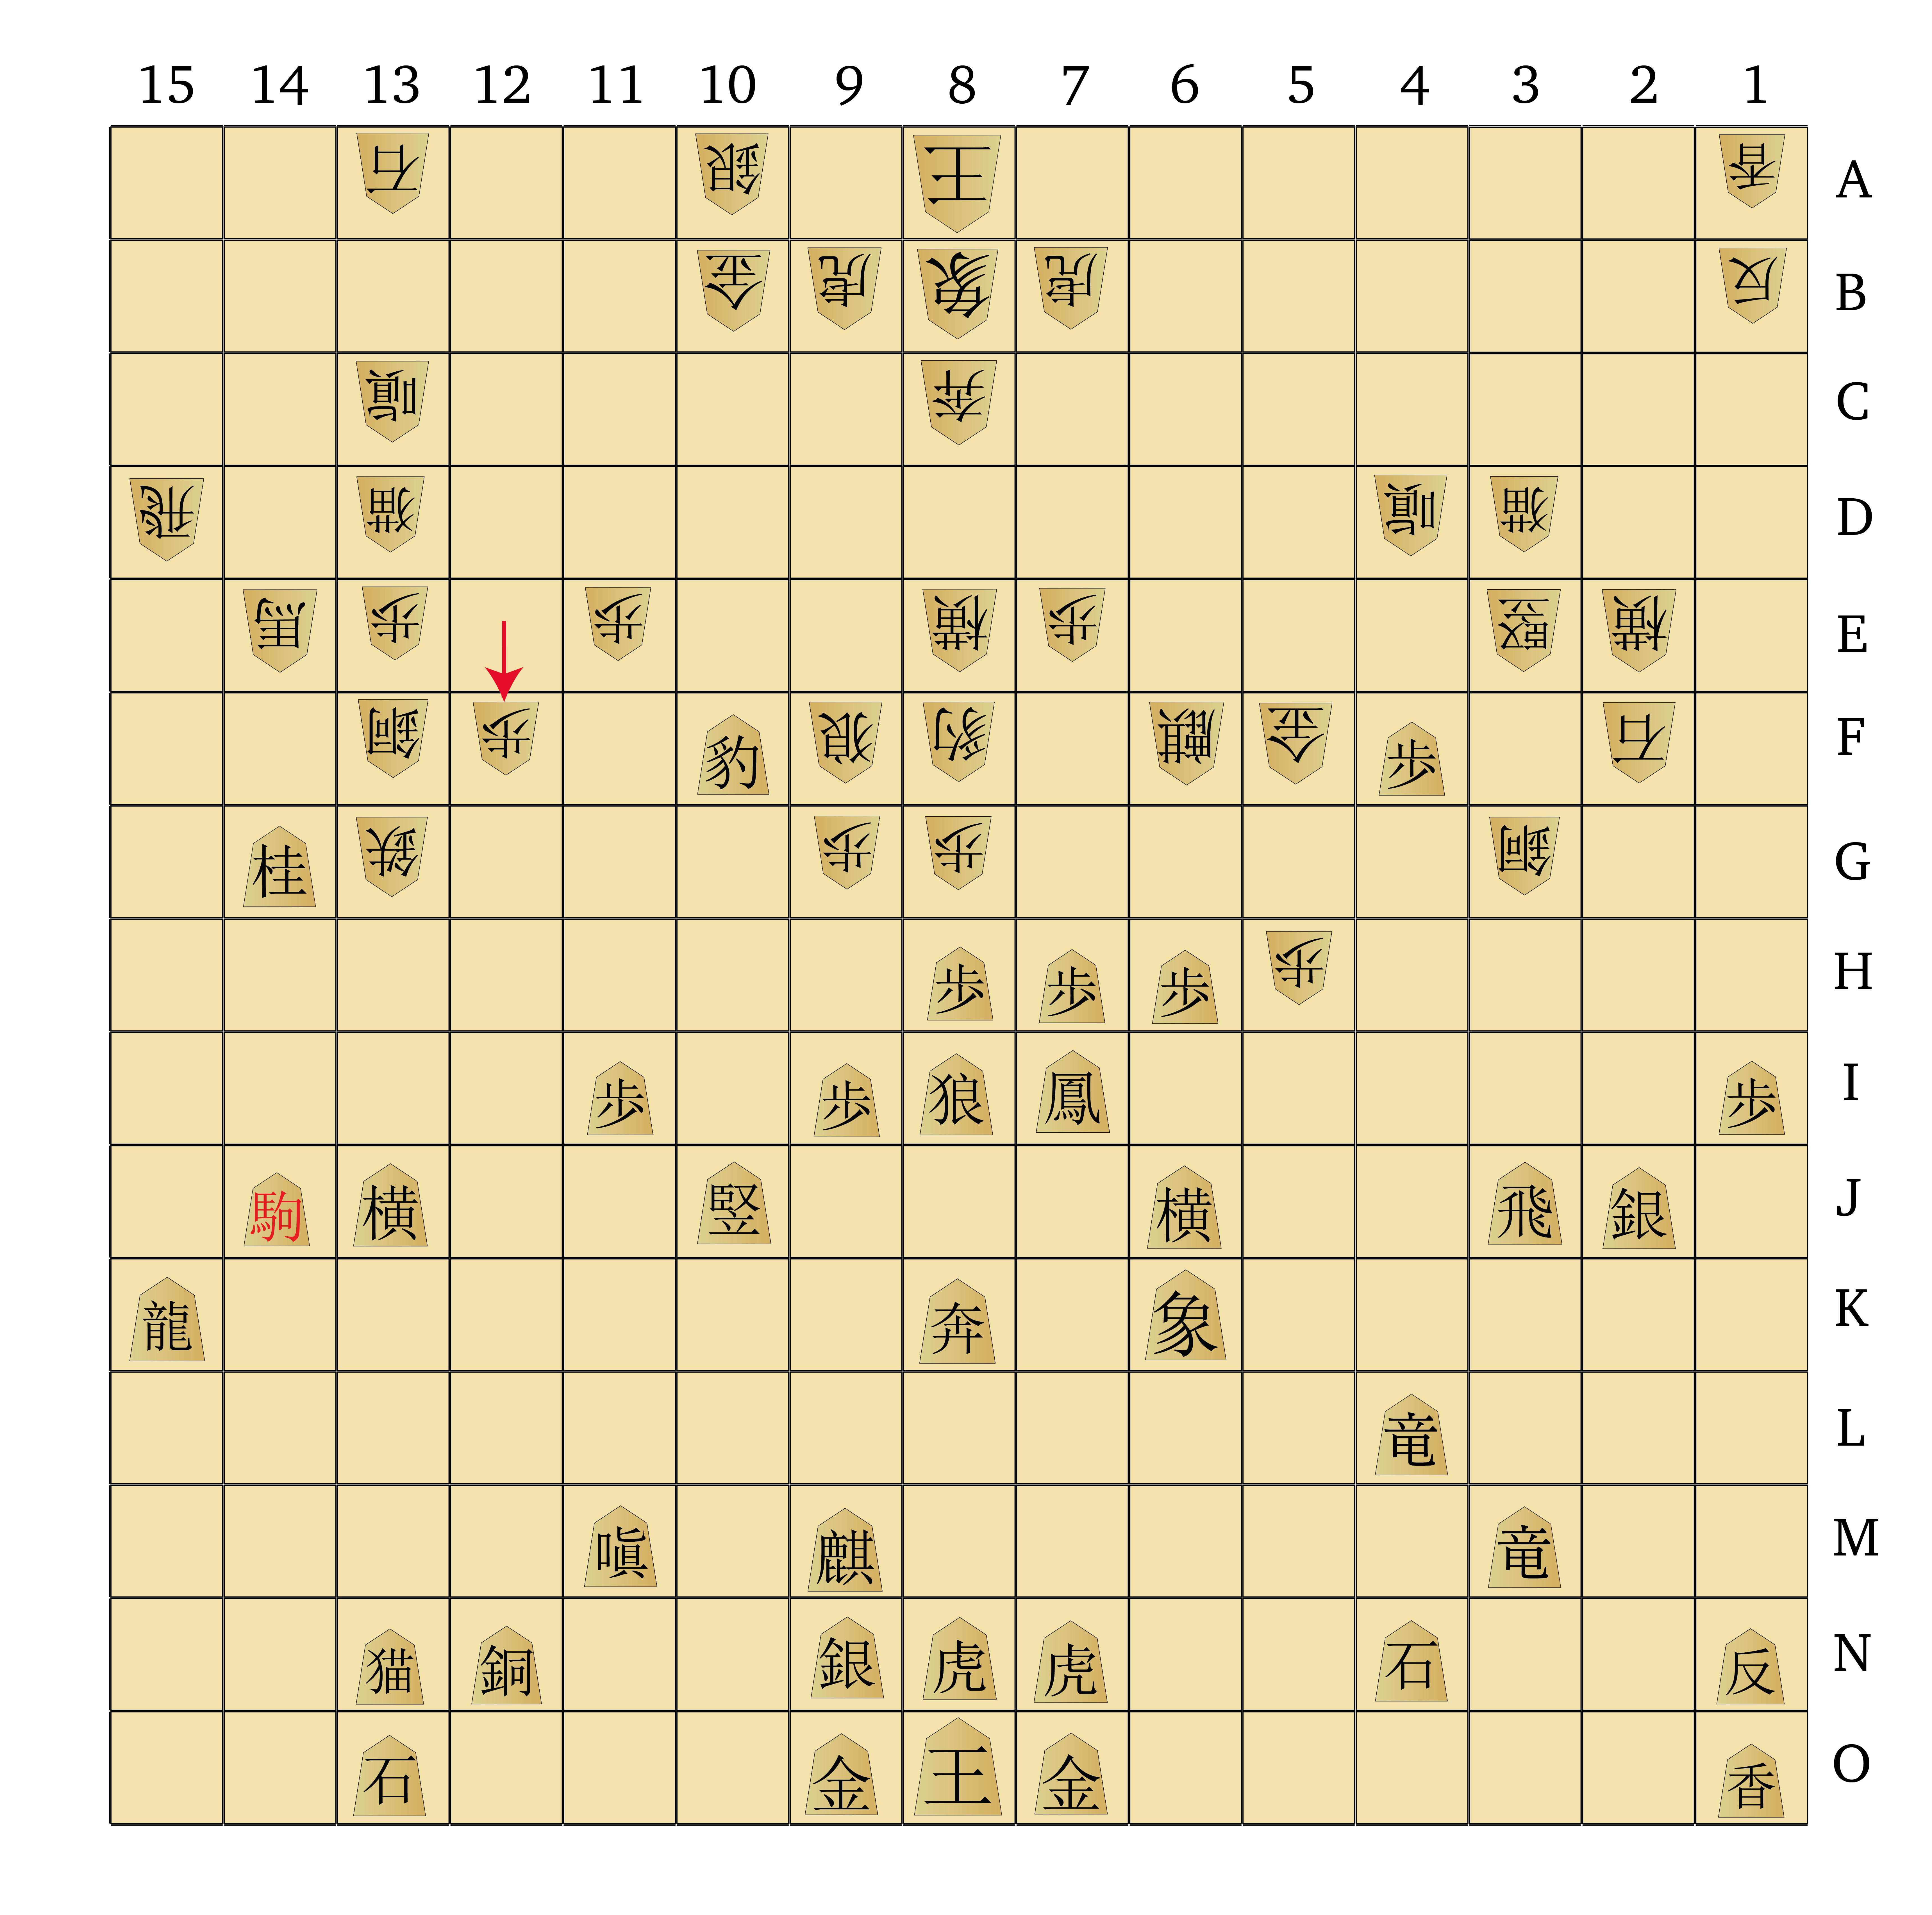
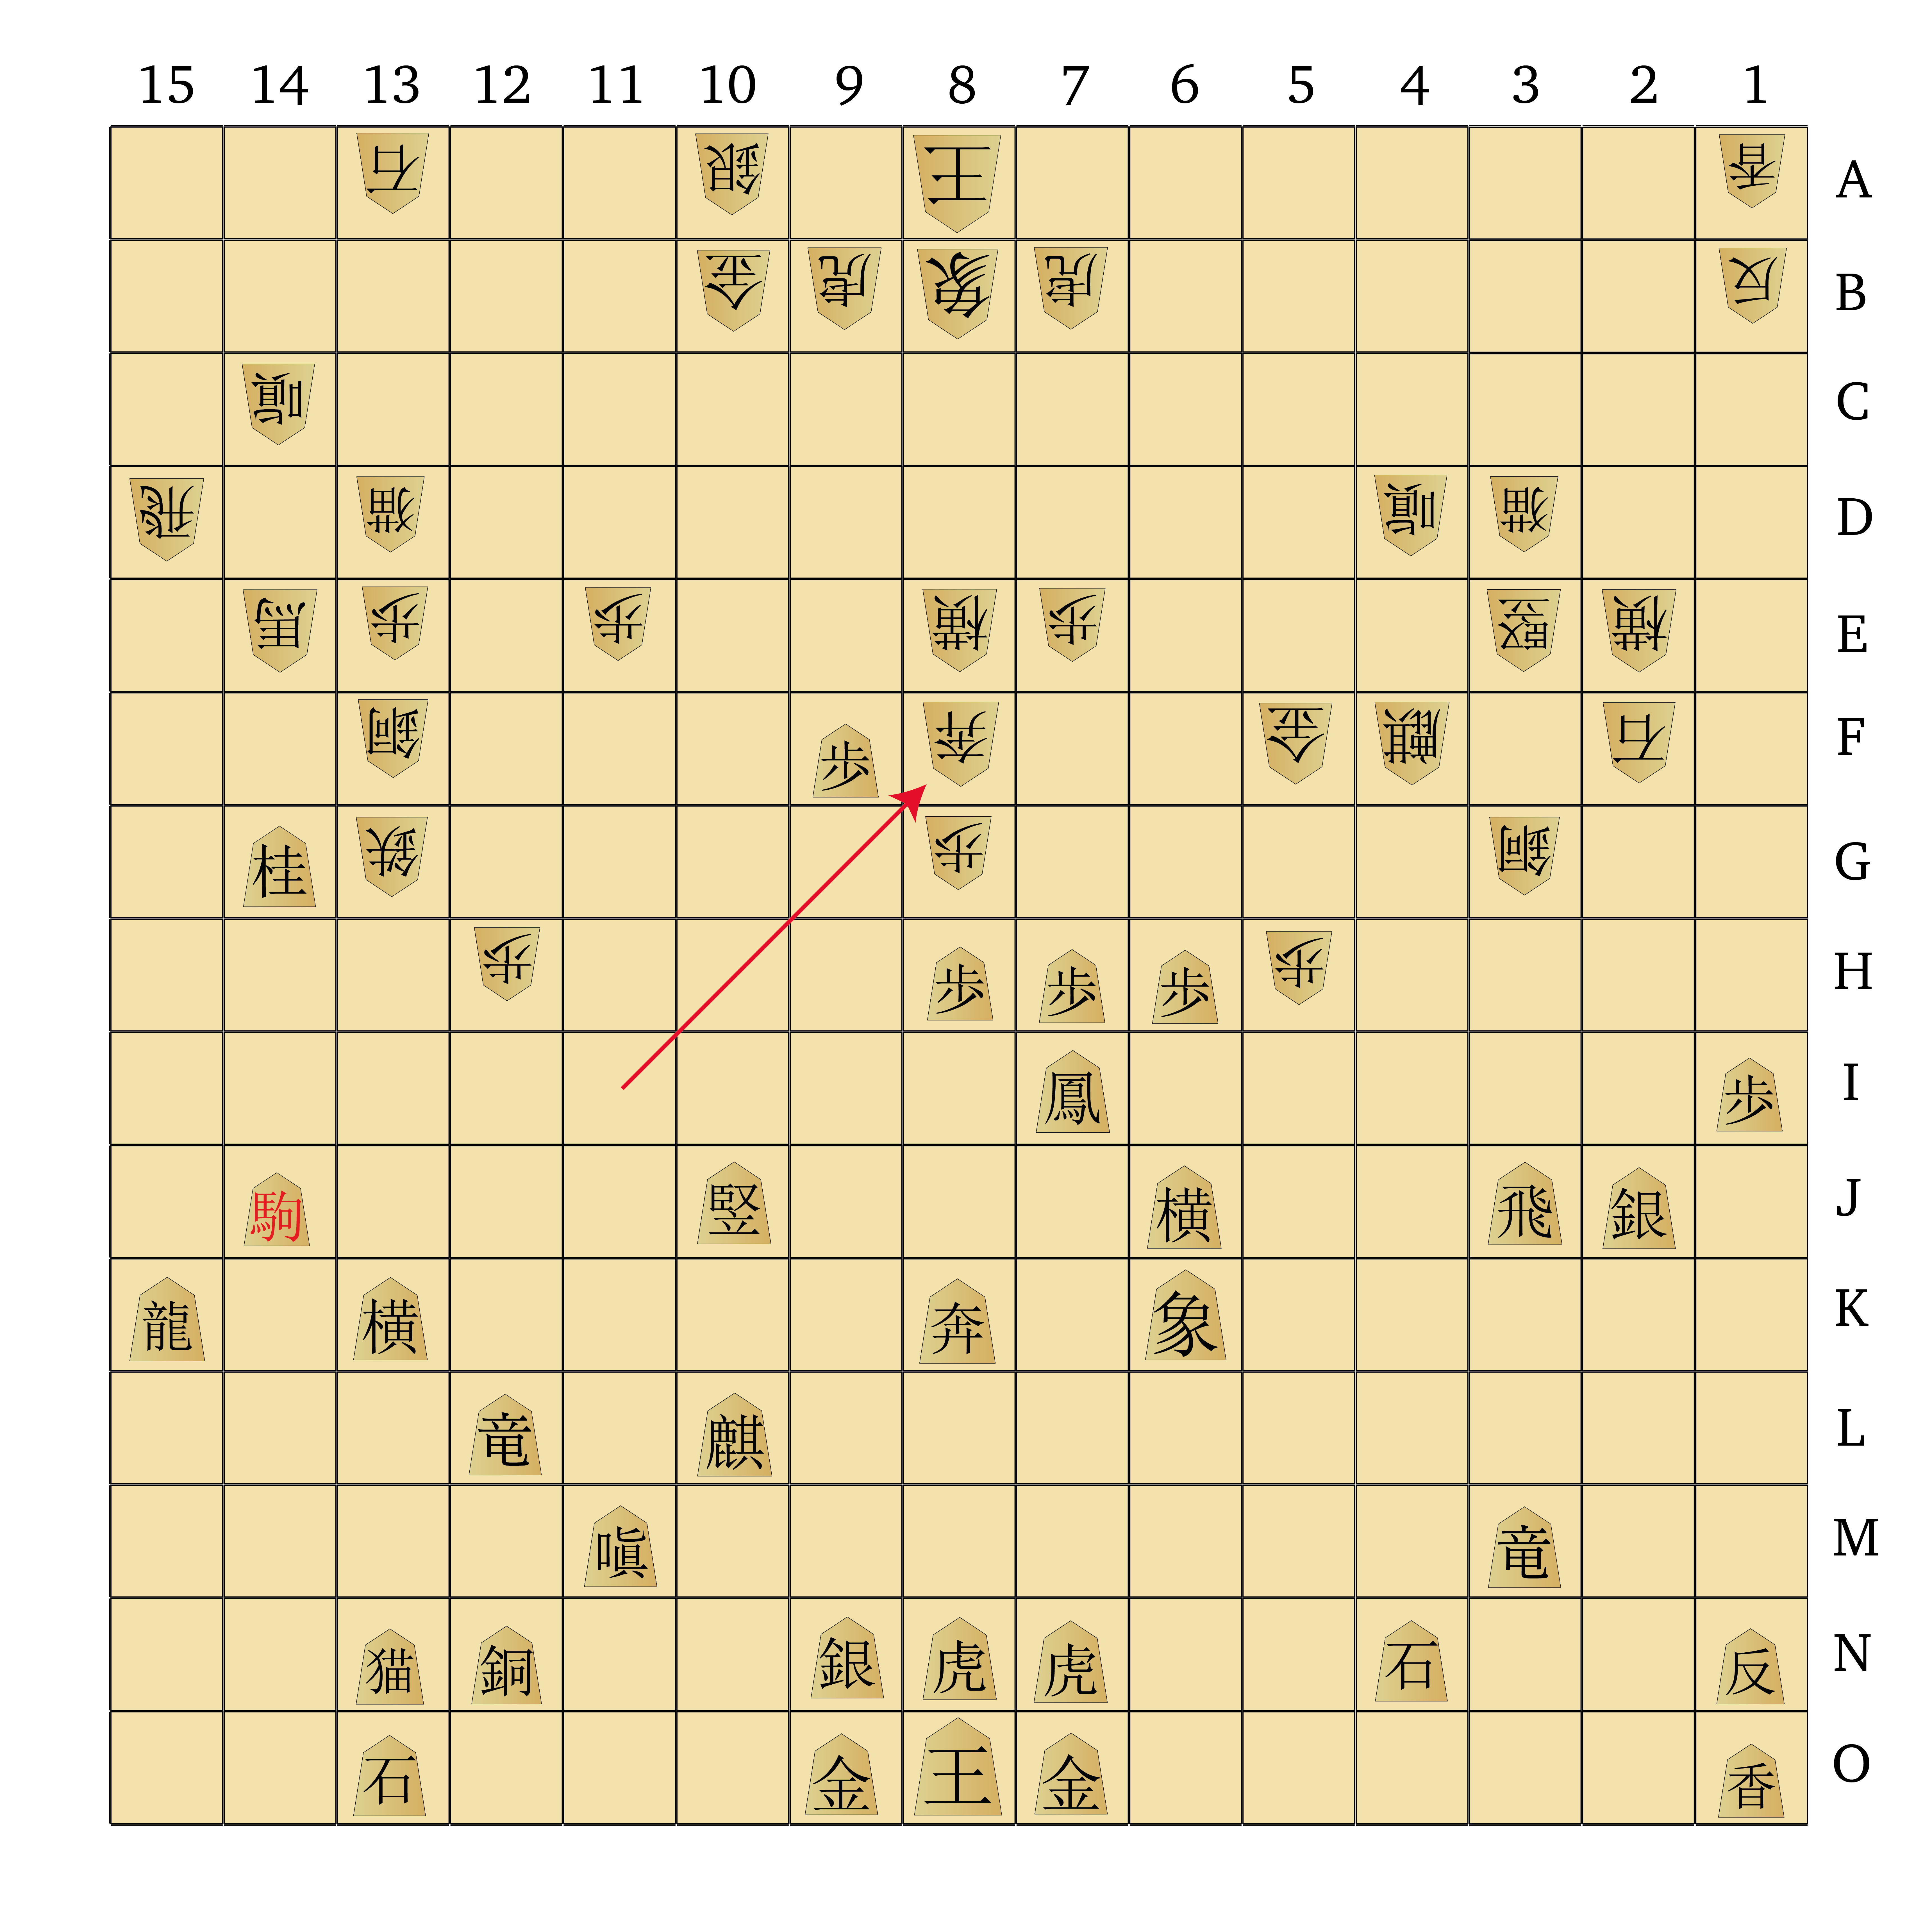
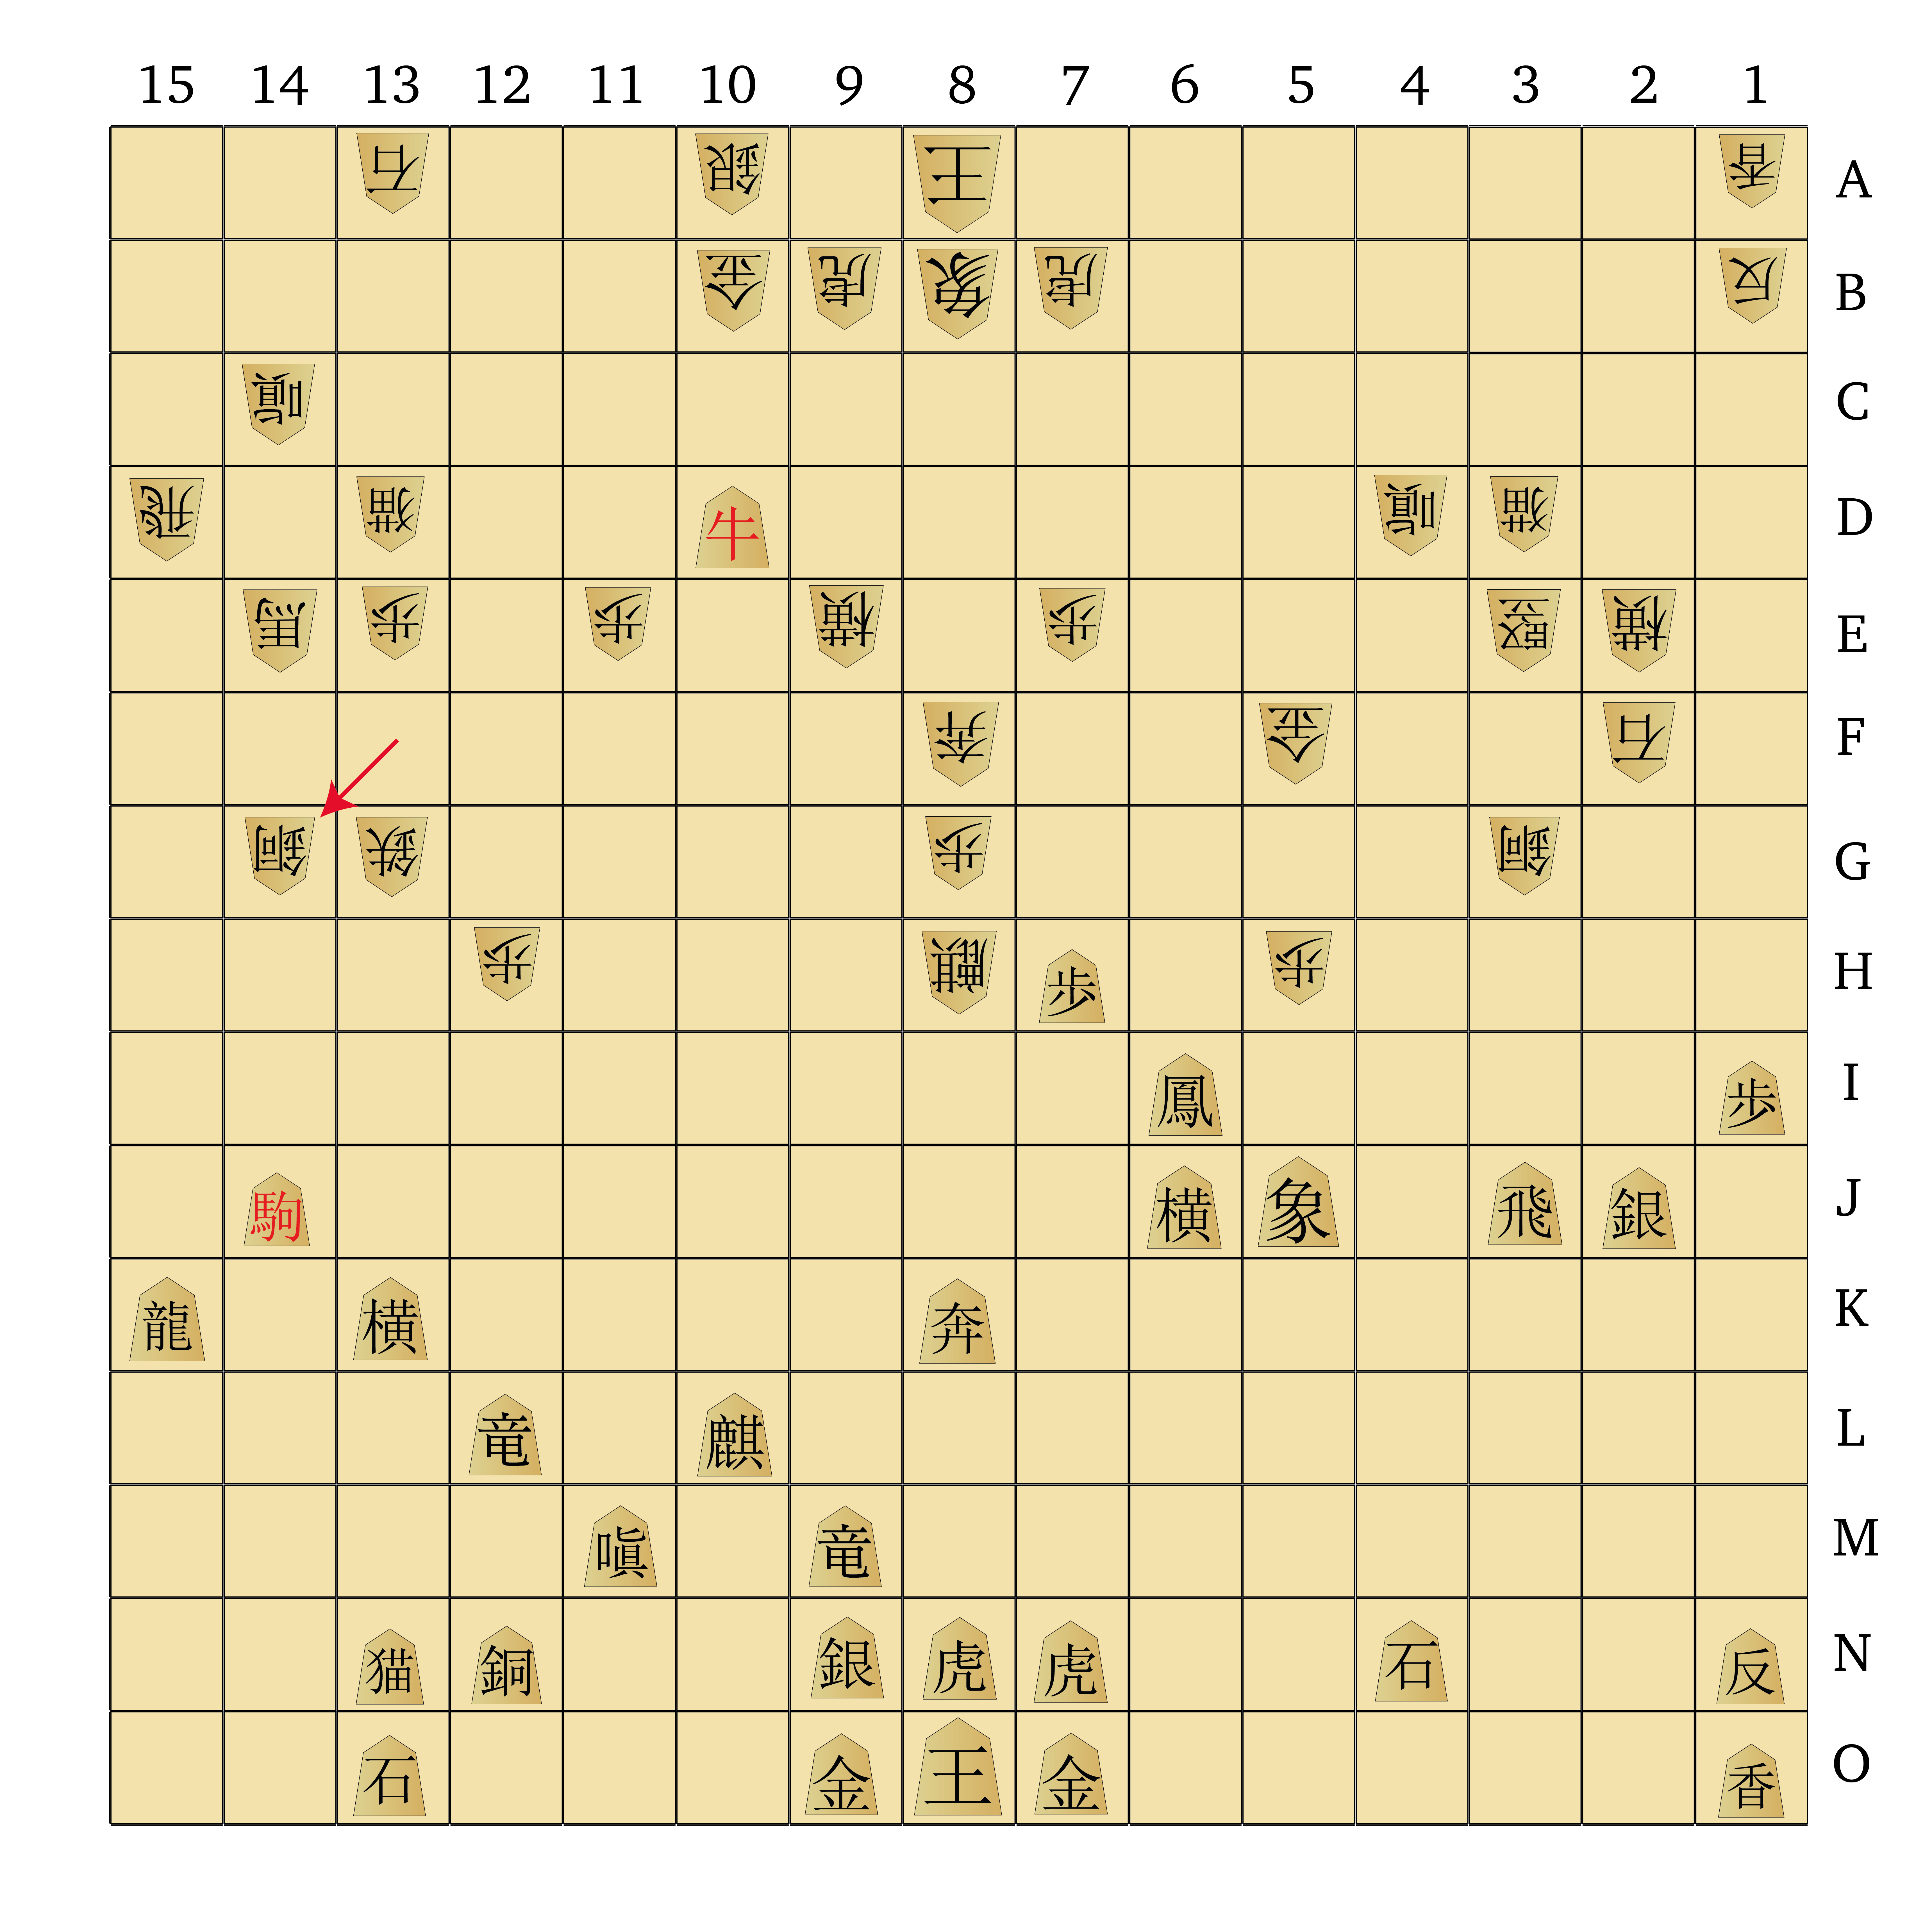
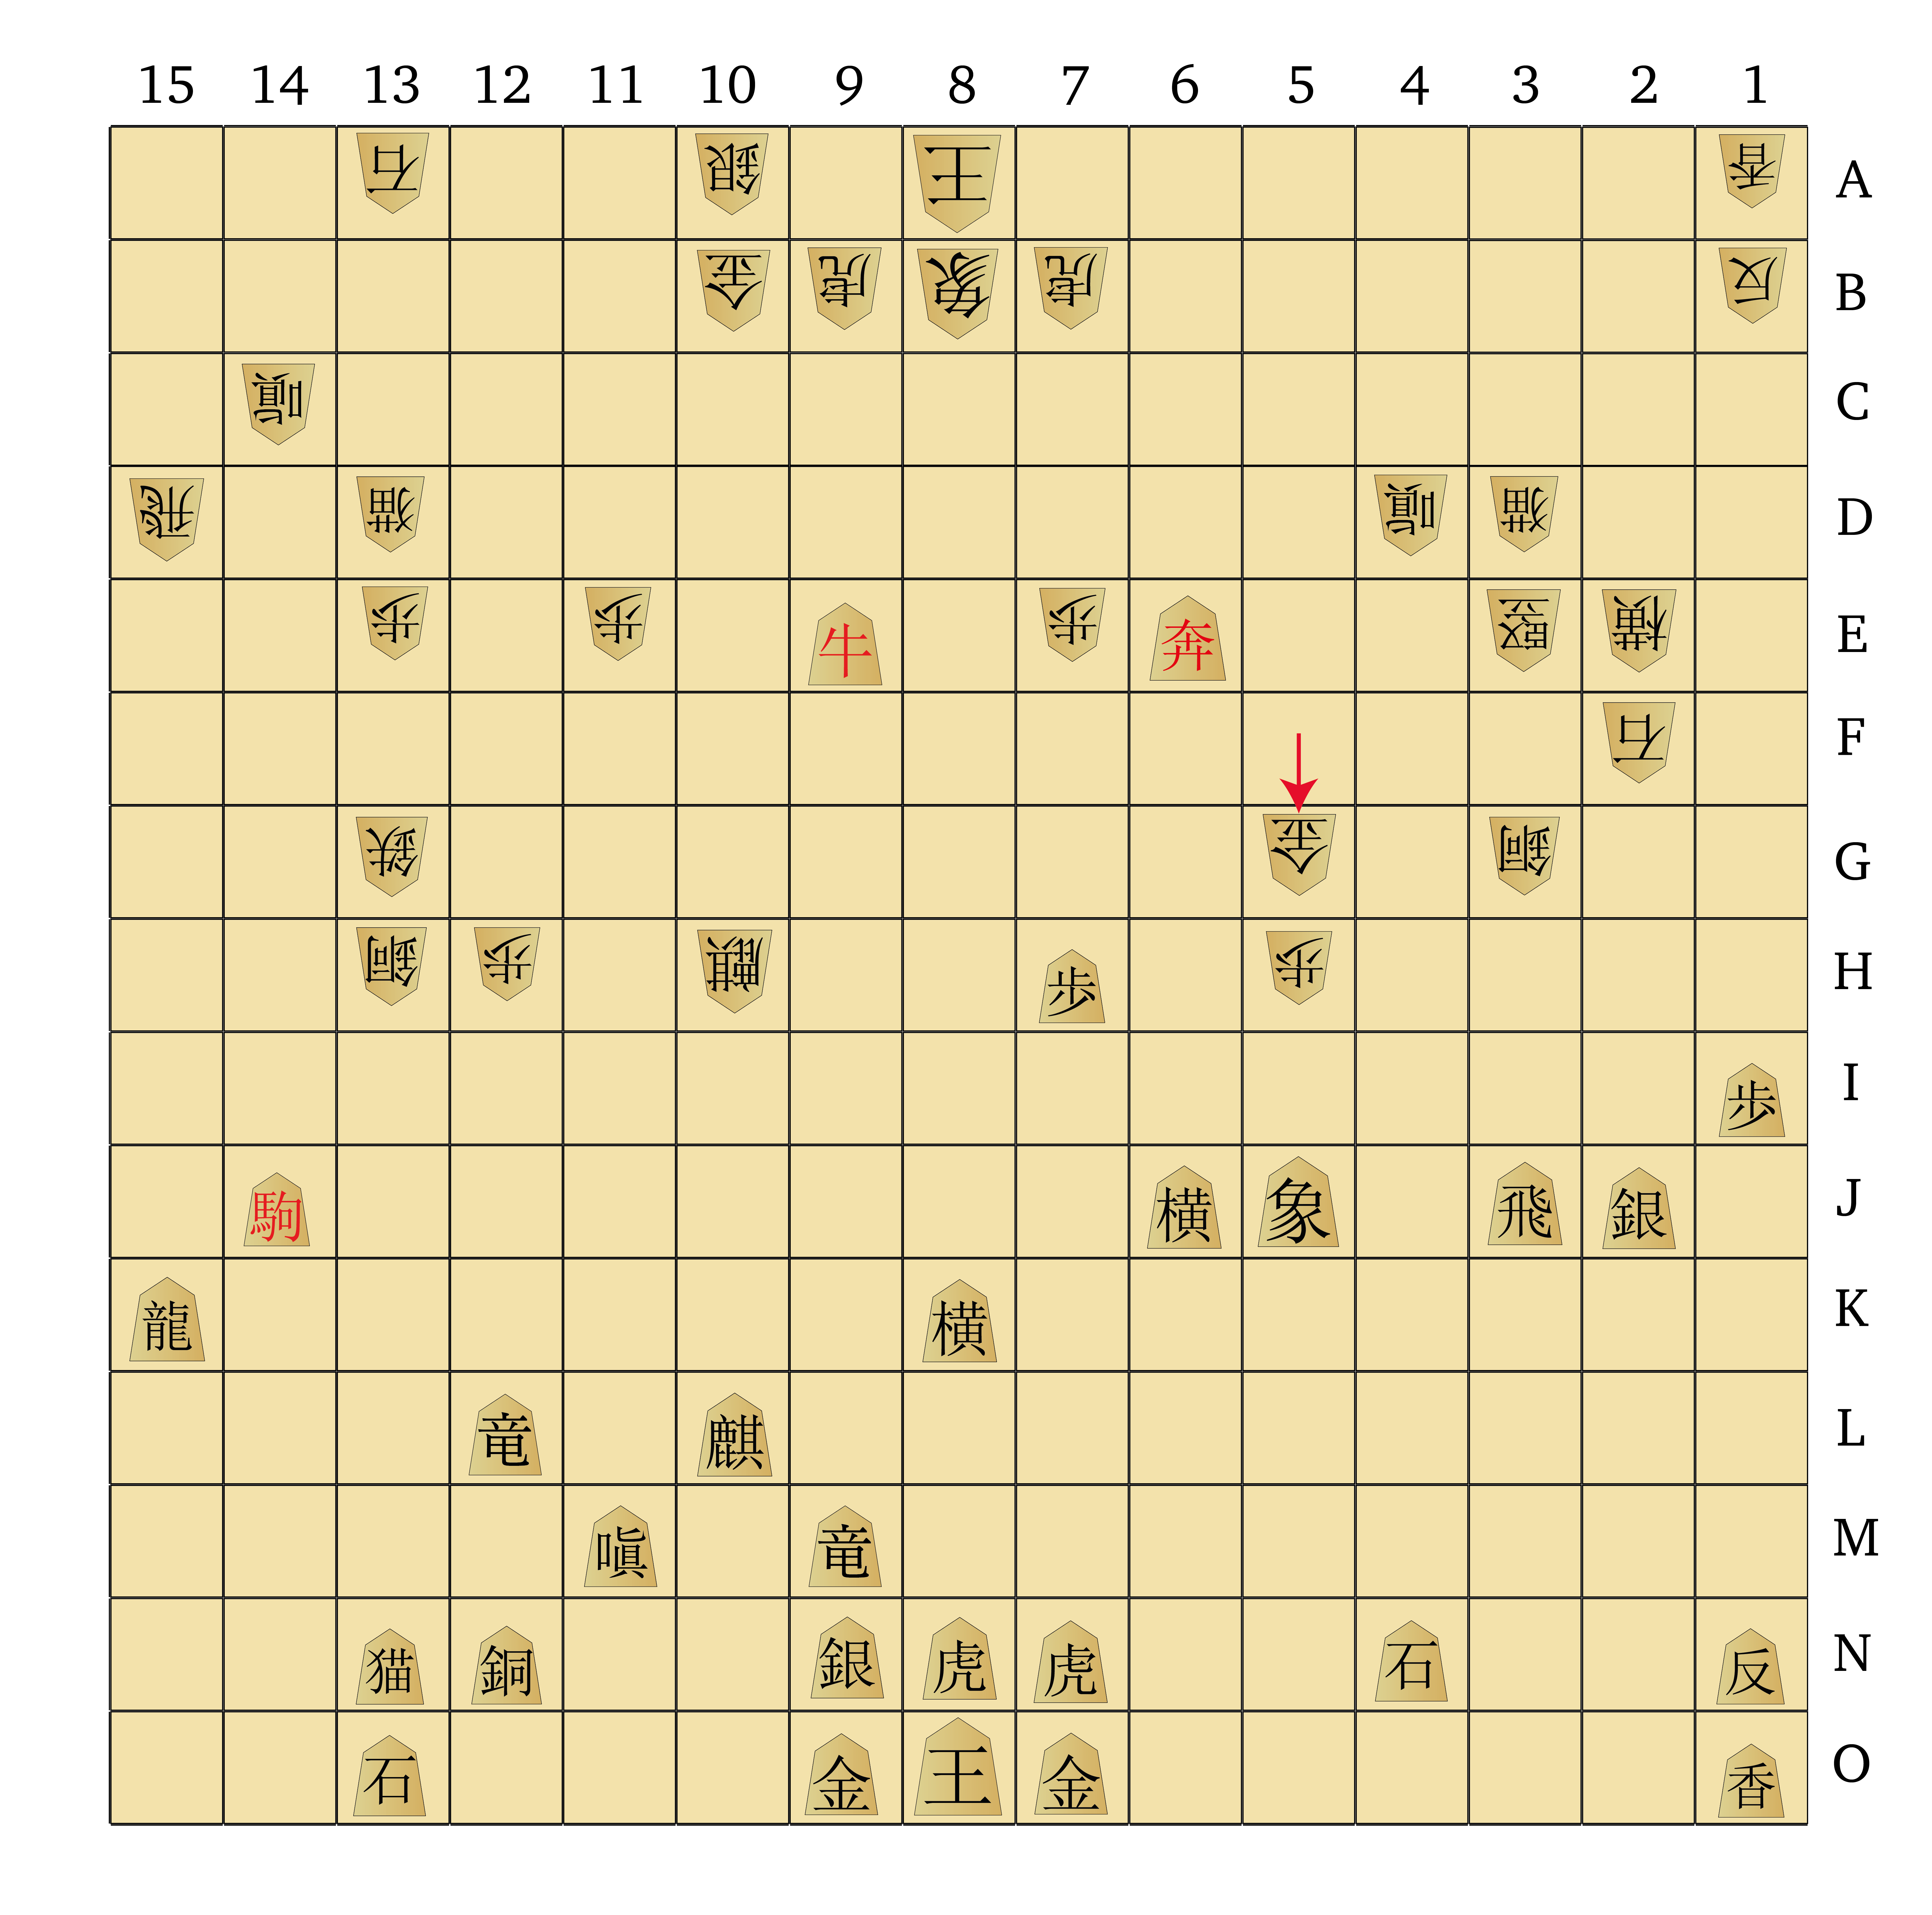
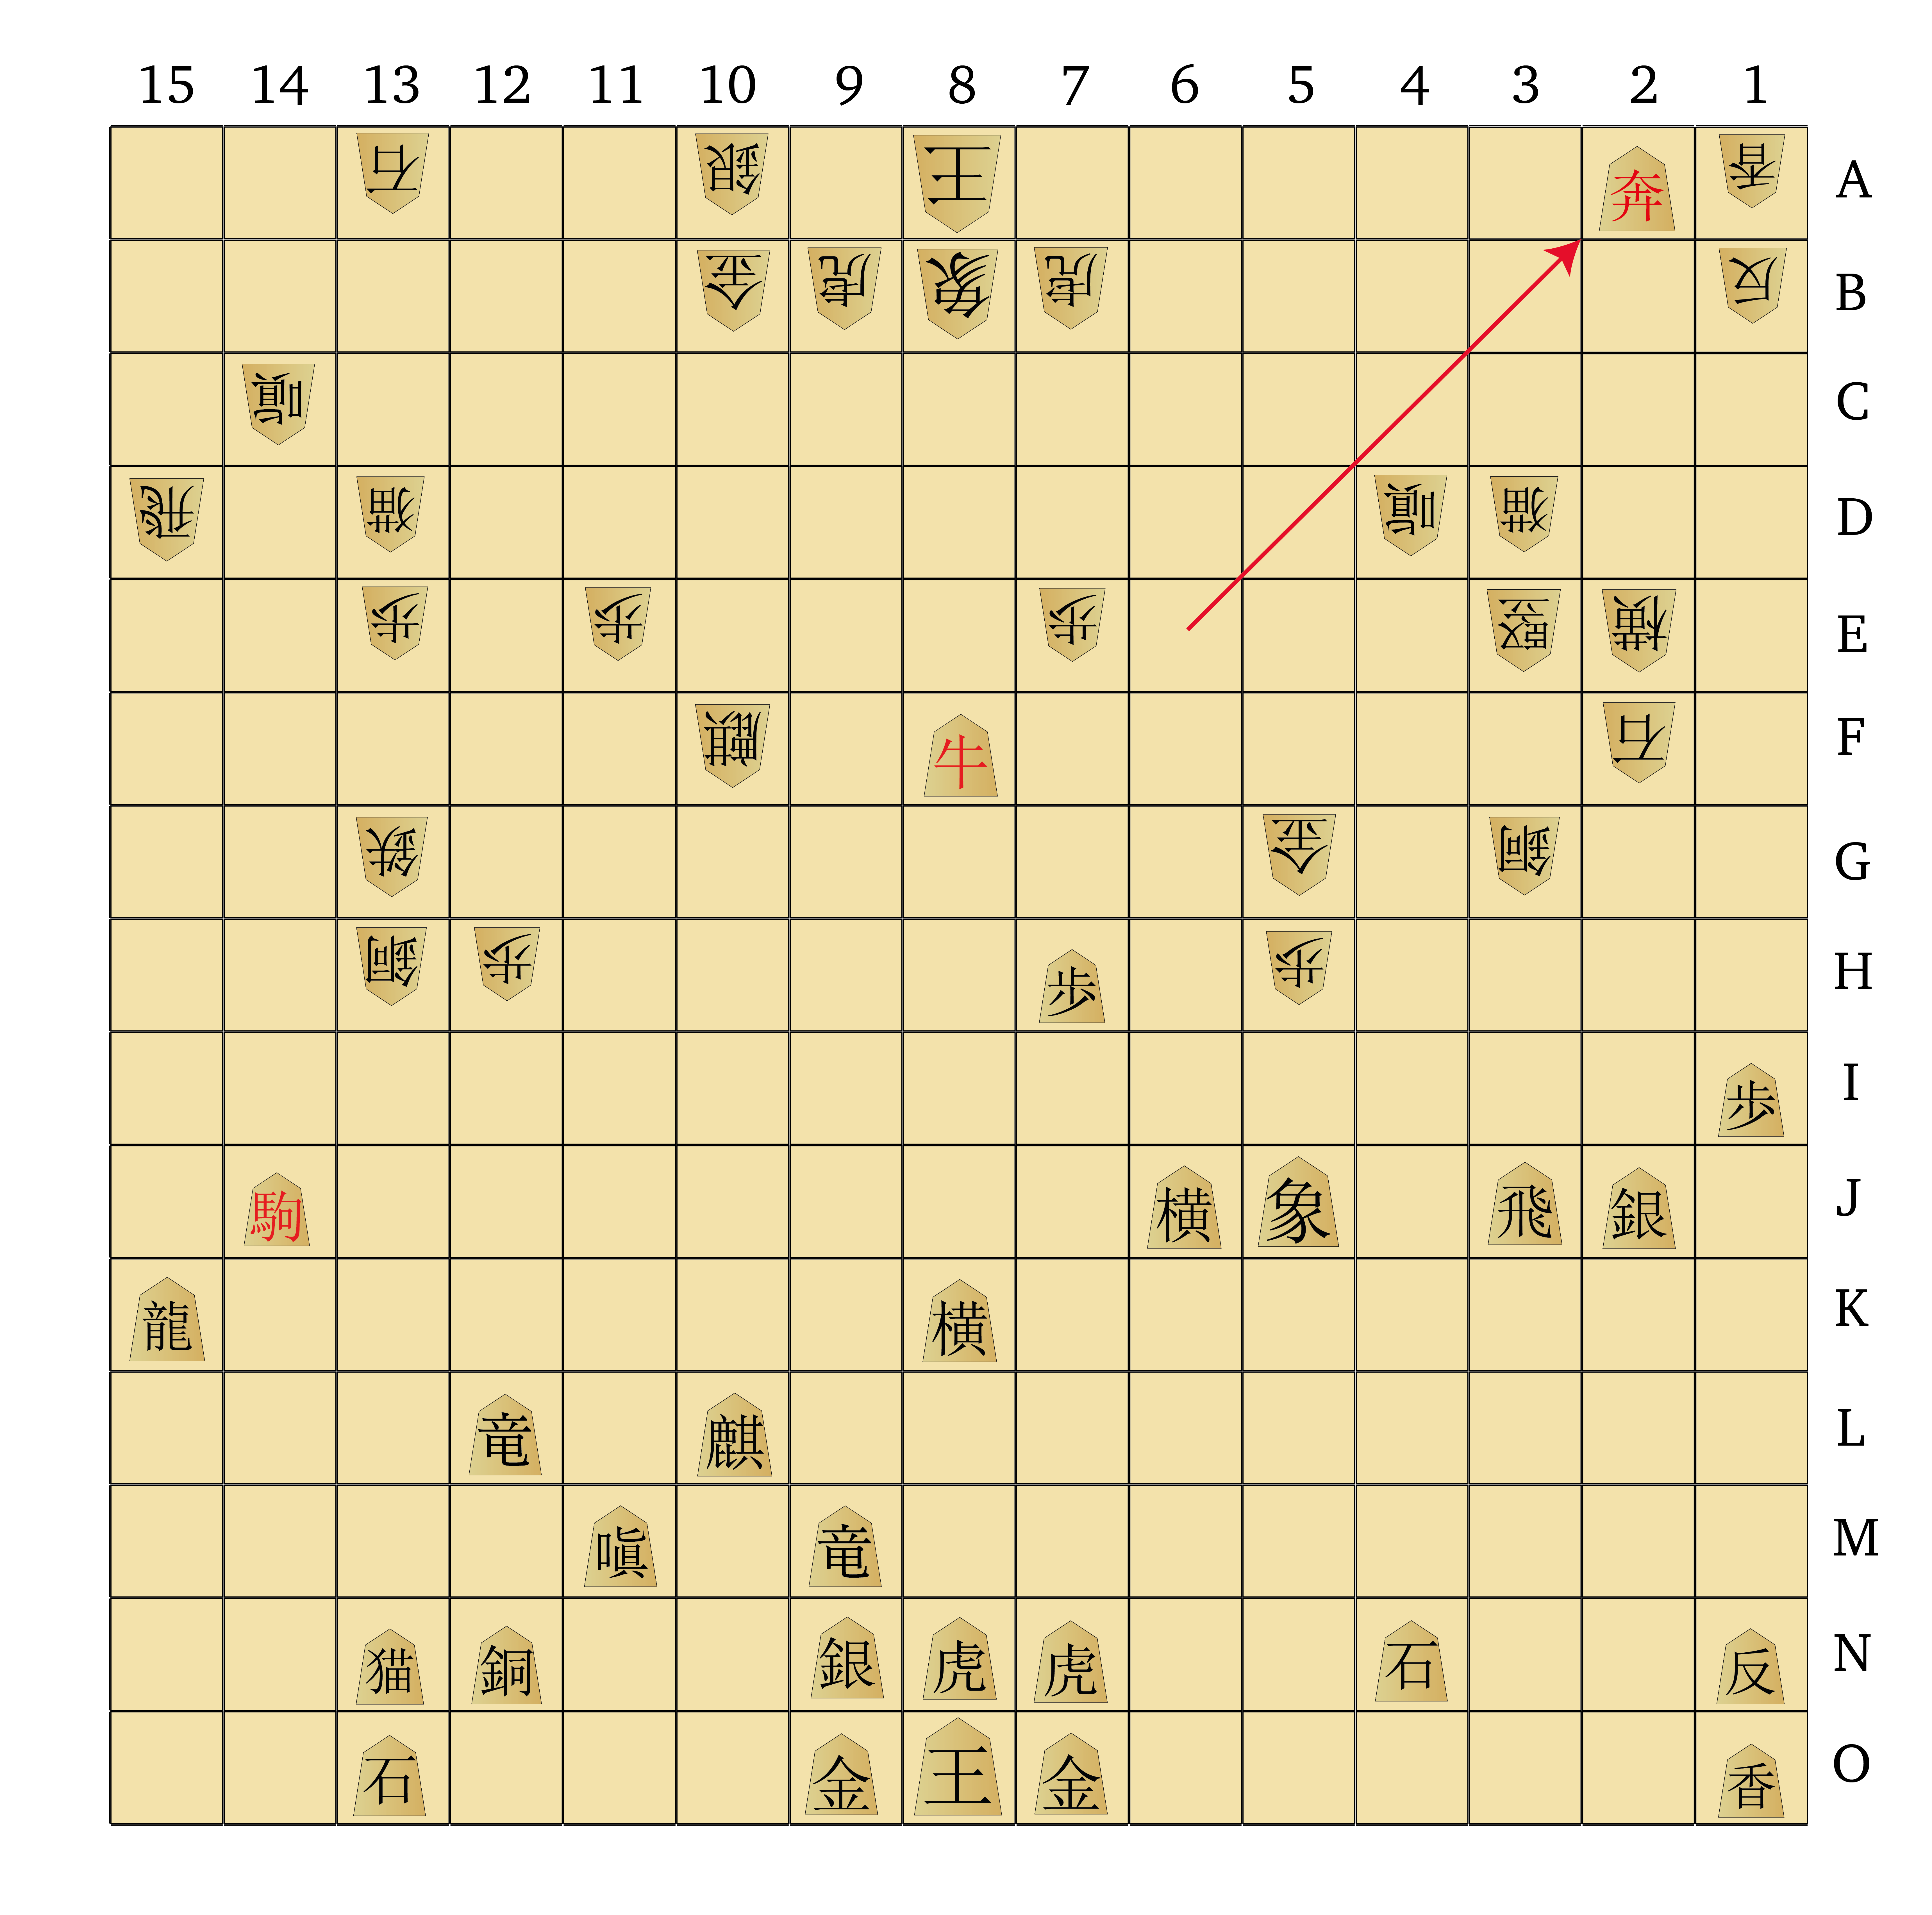
Nutty Shogi (and friends)
-
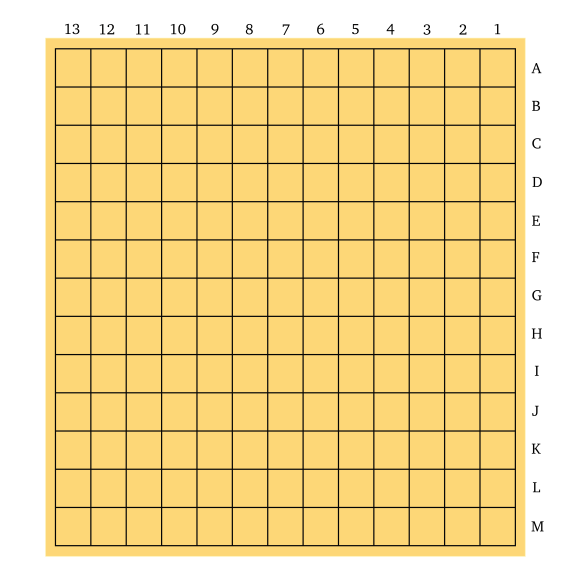
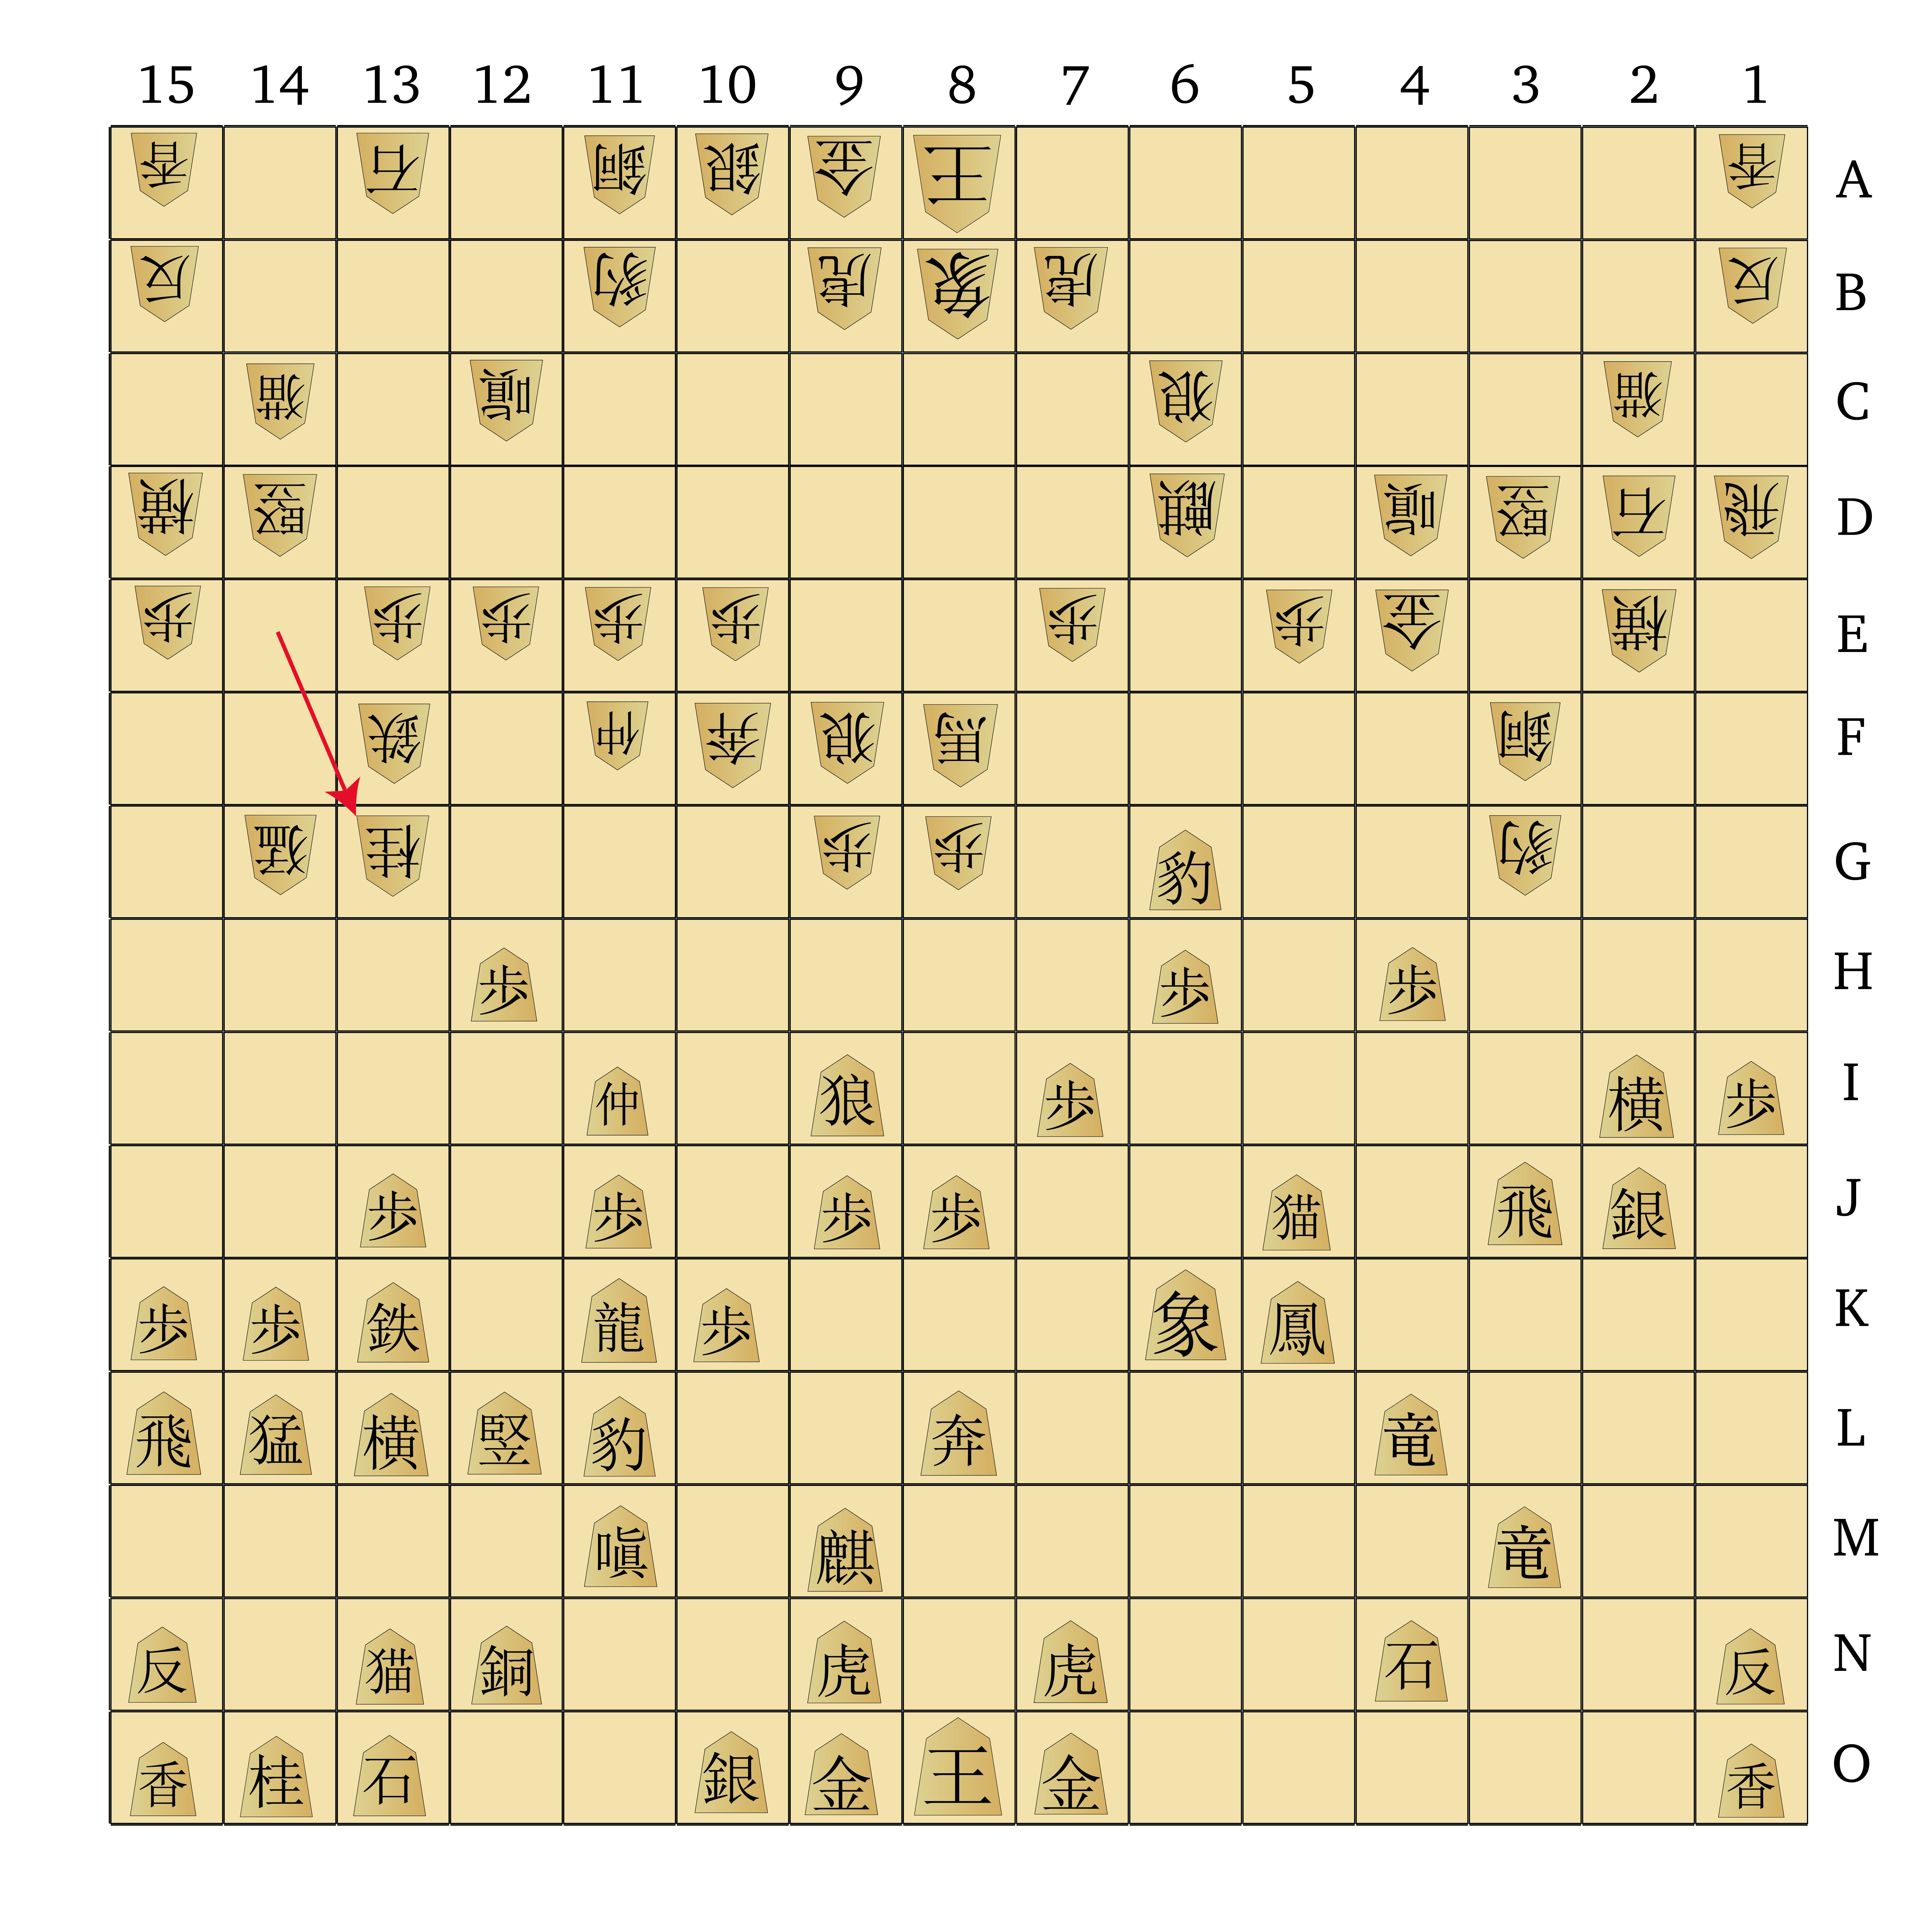
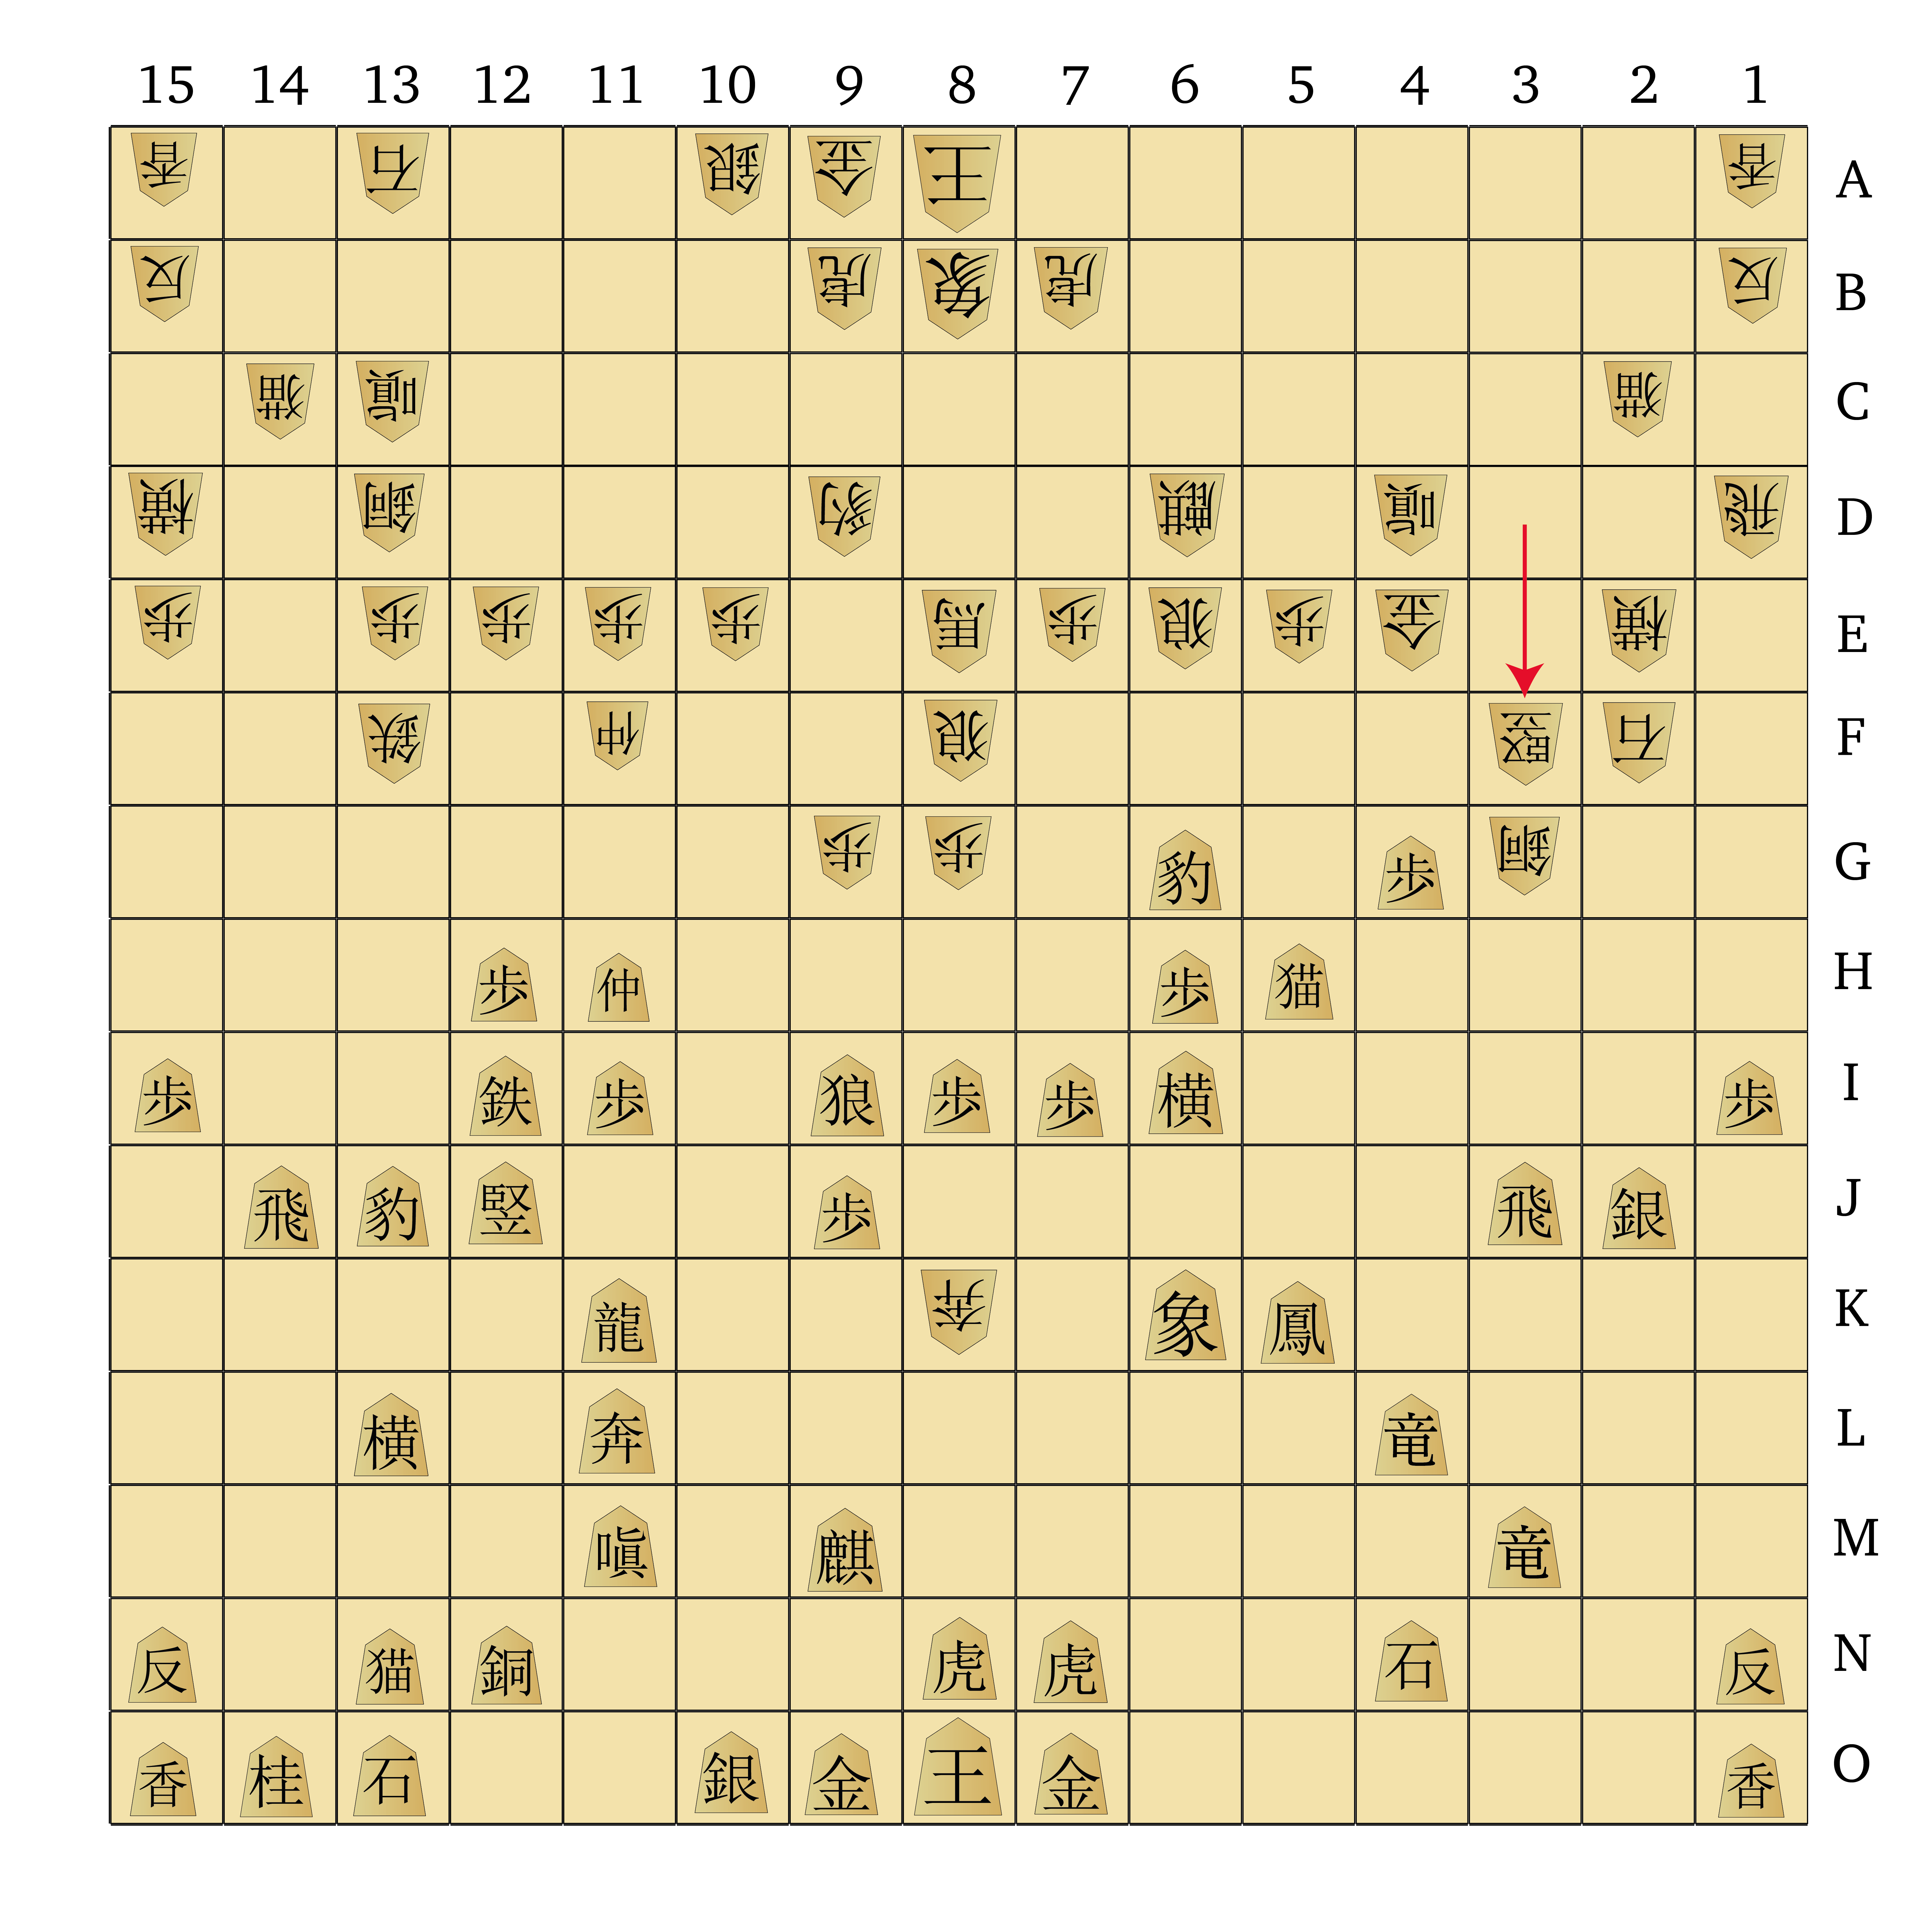
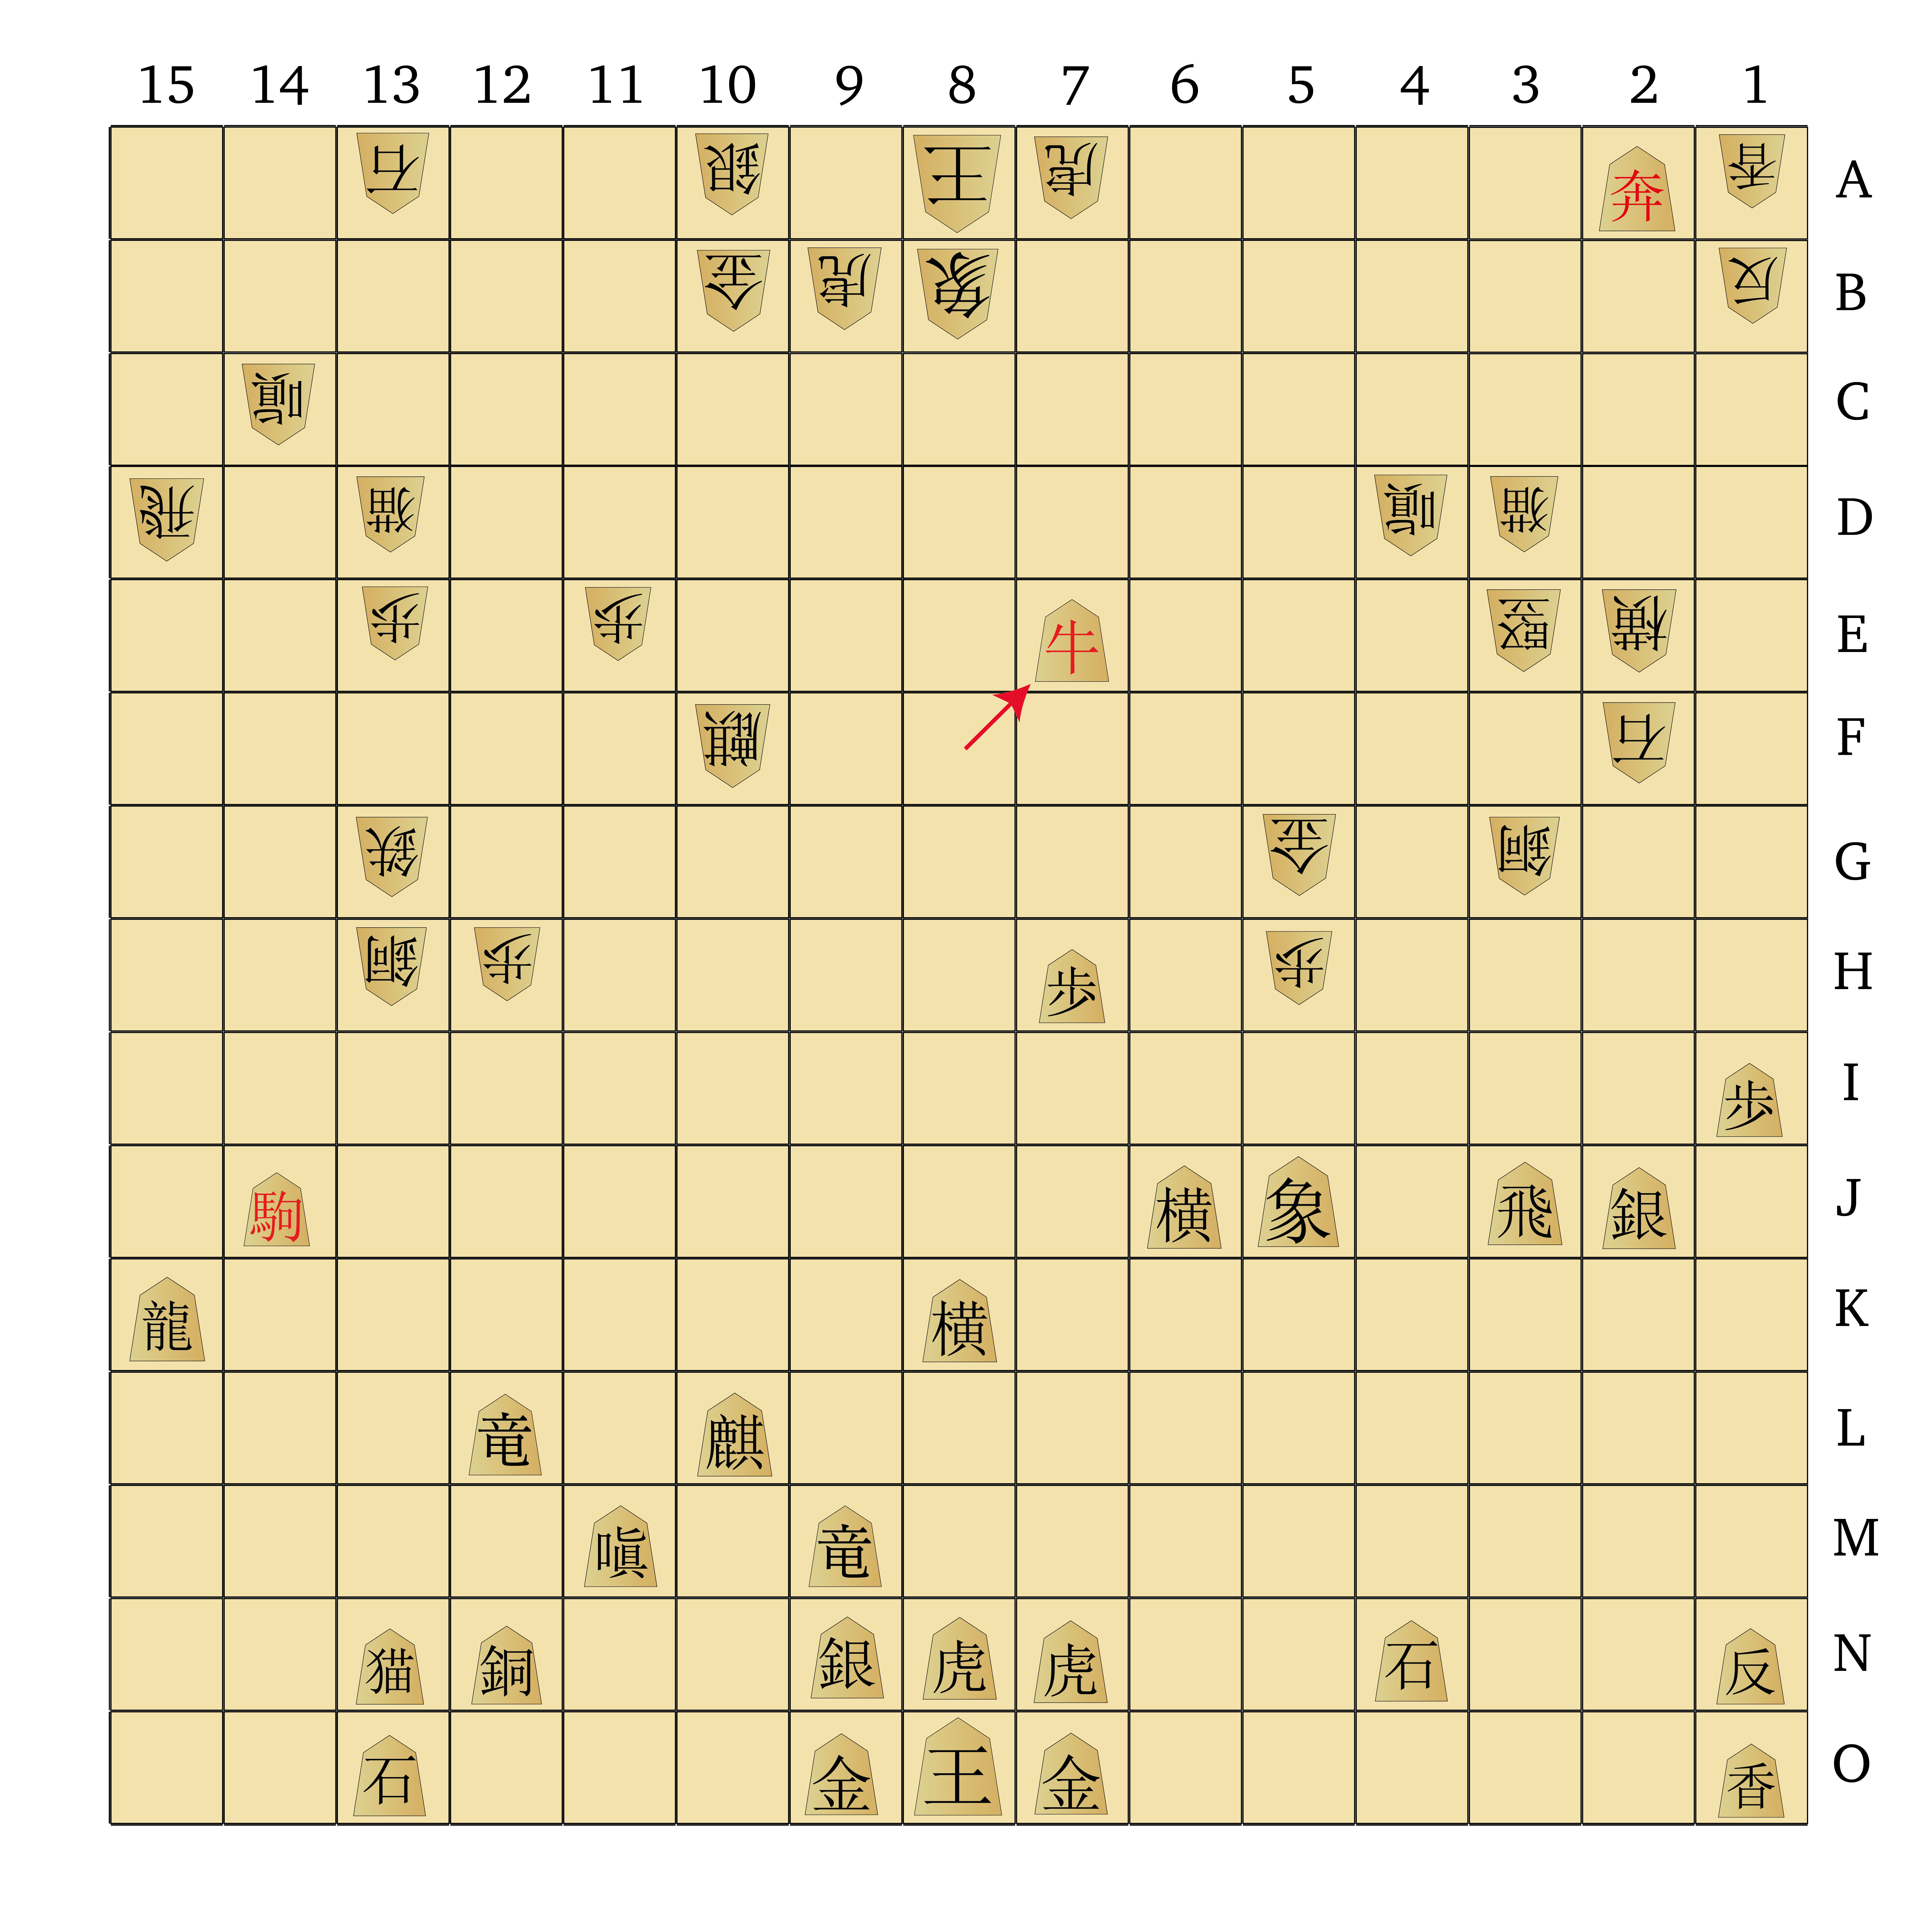
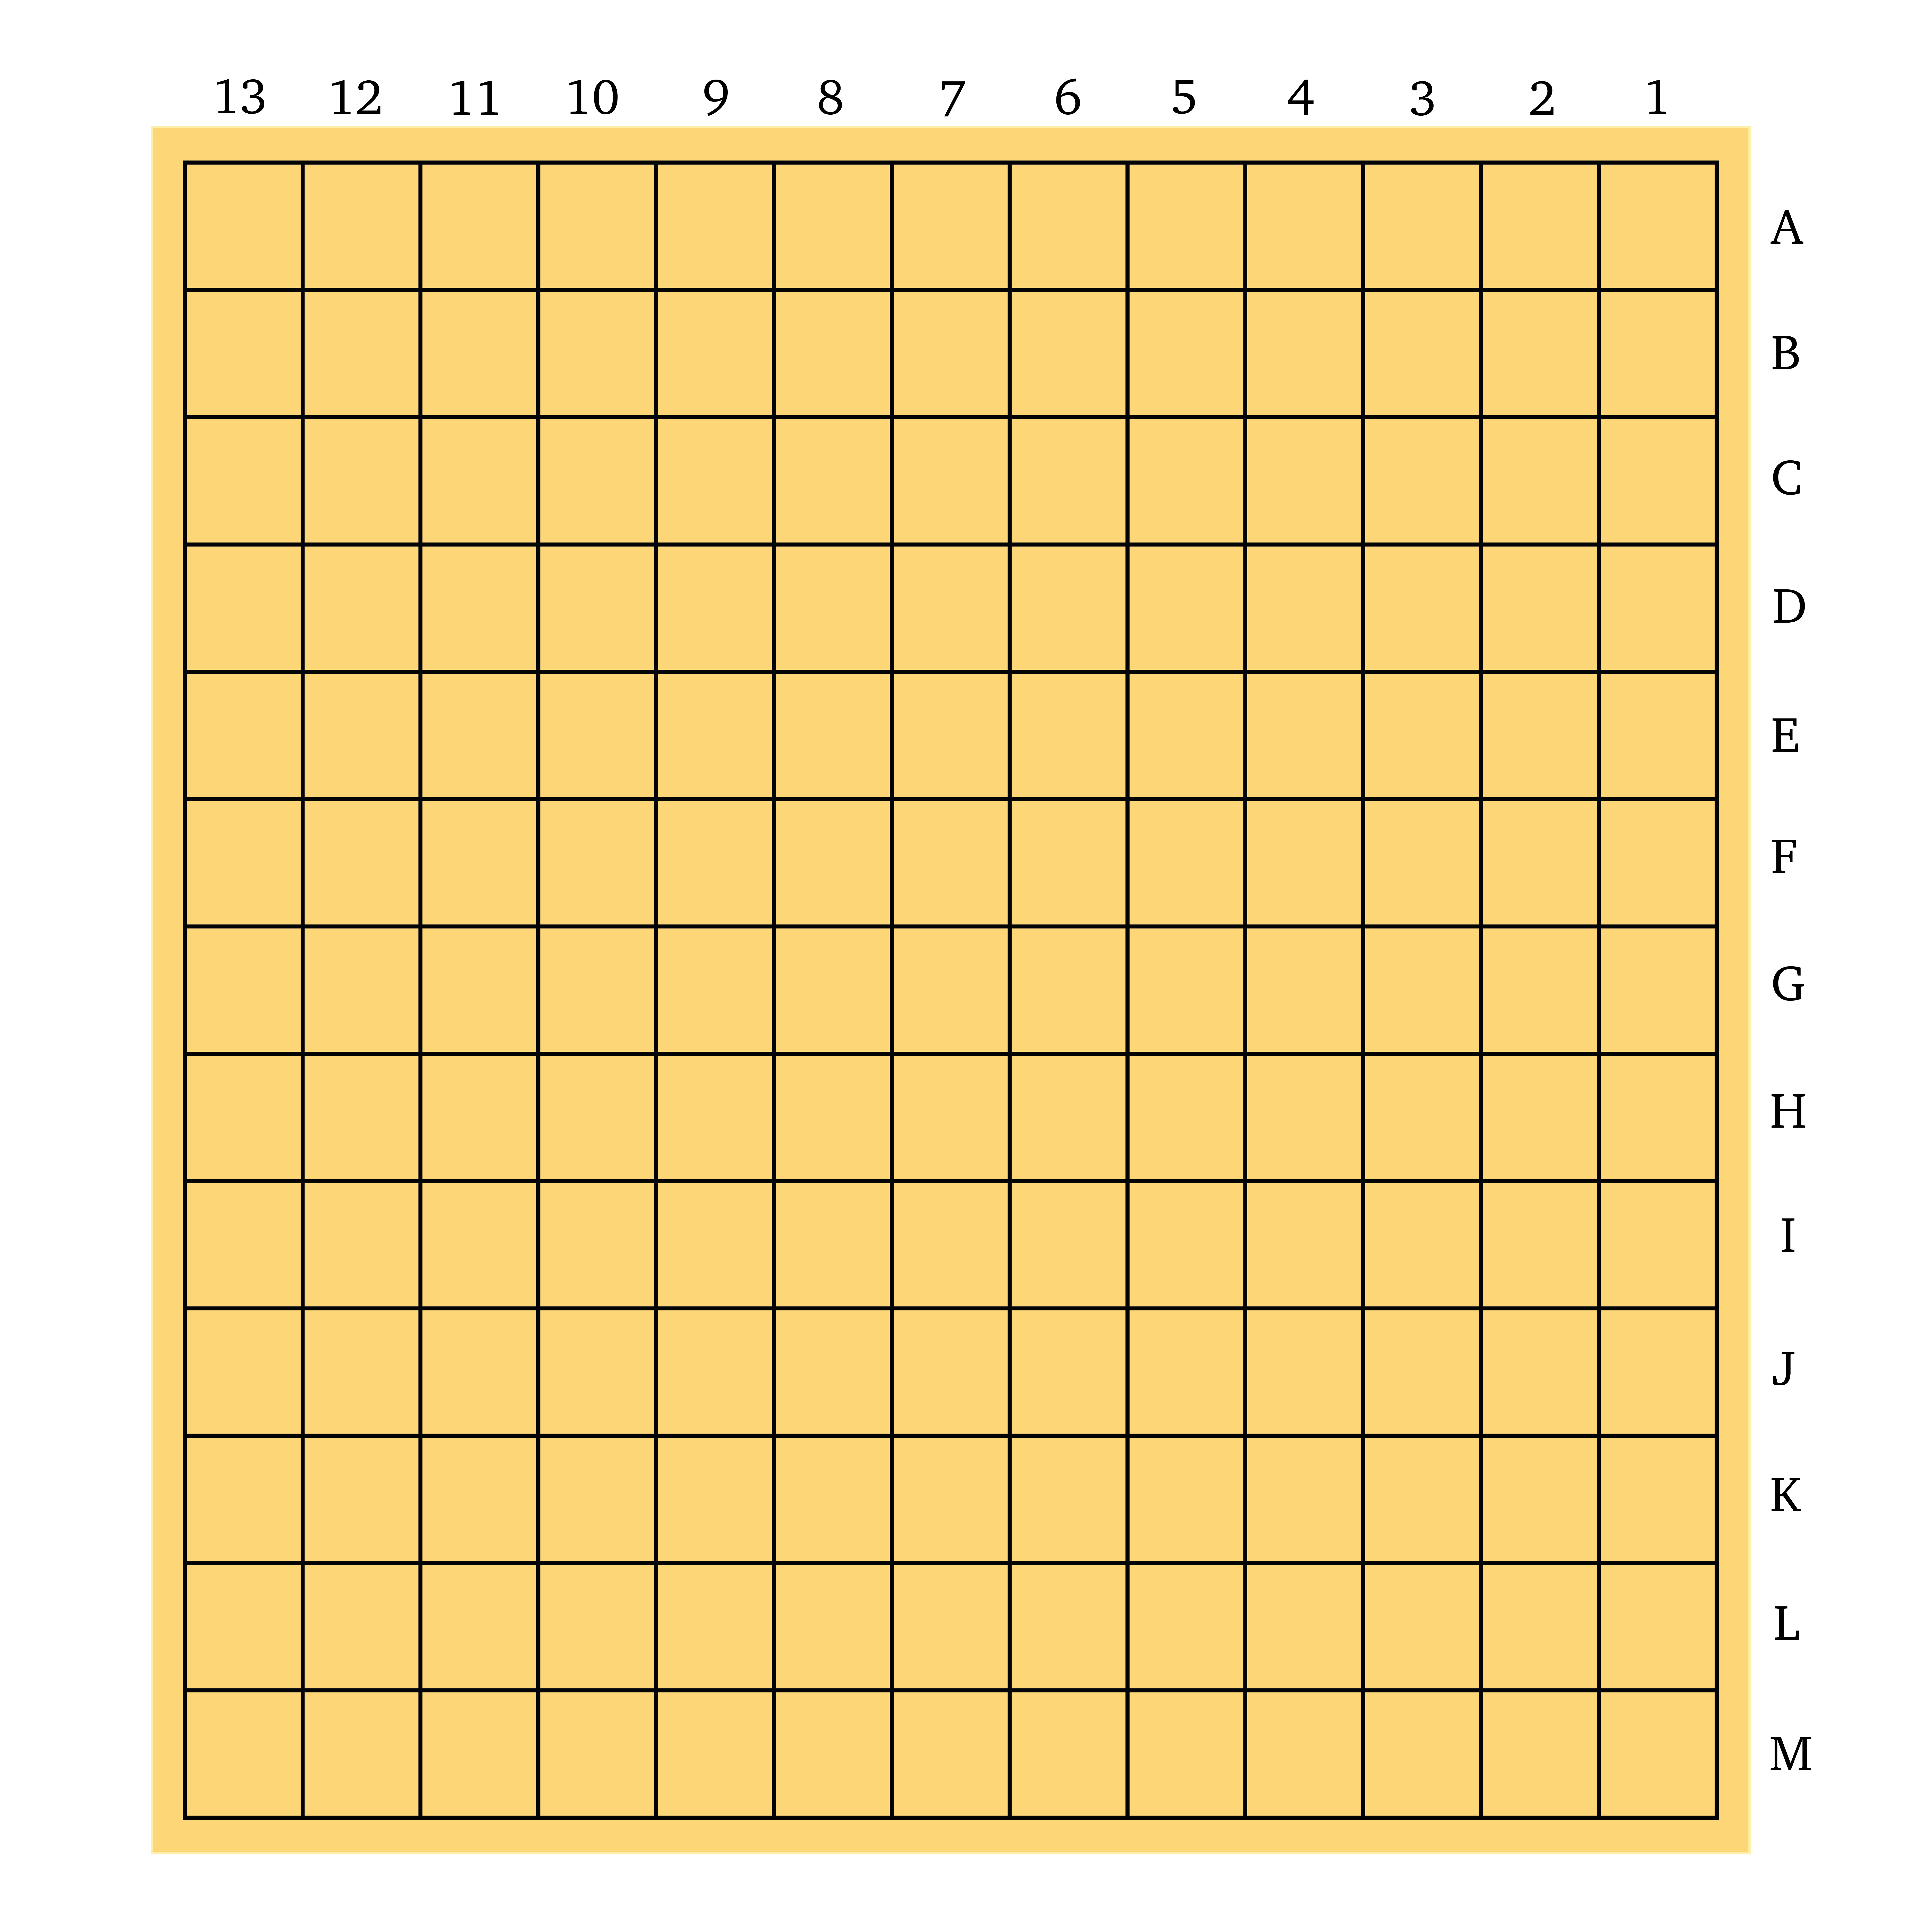
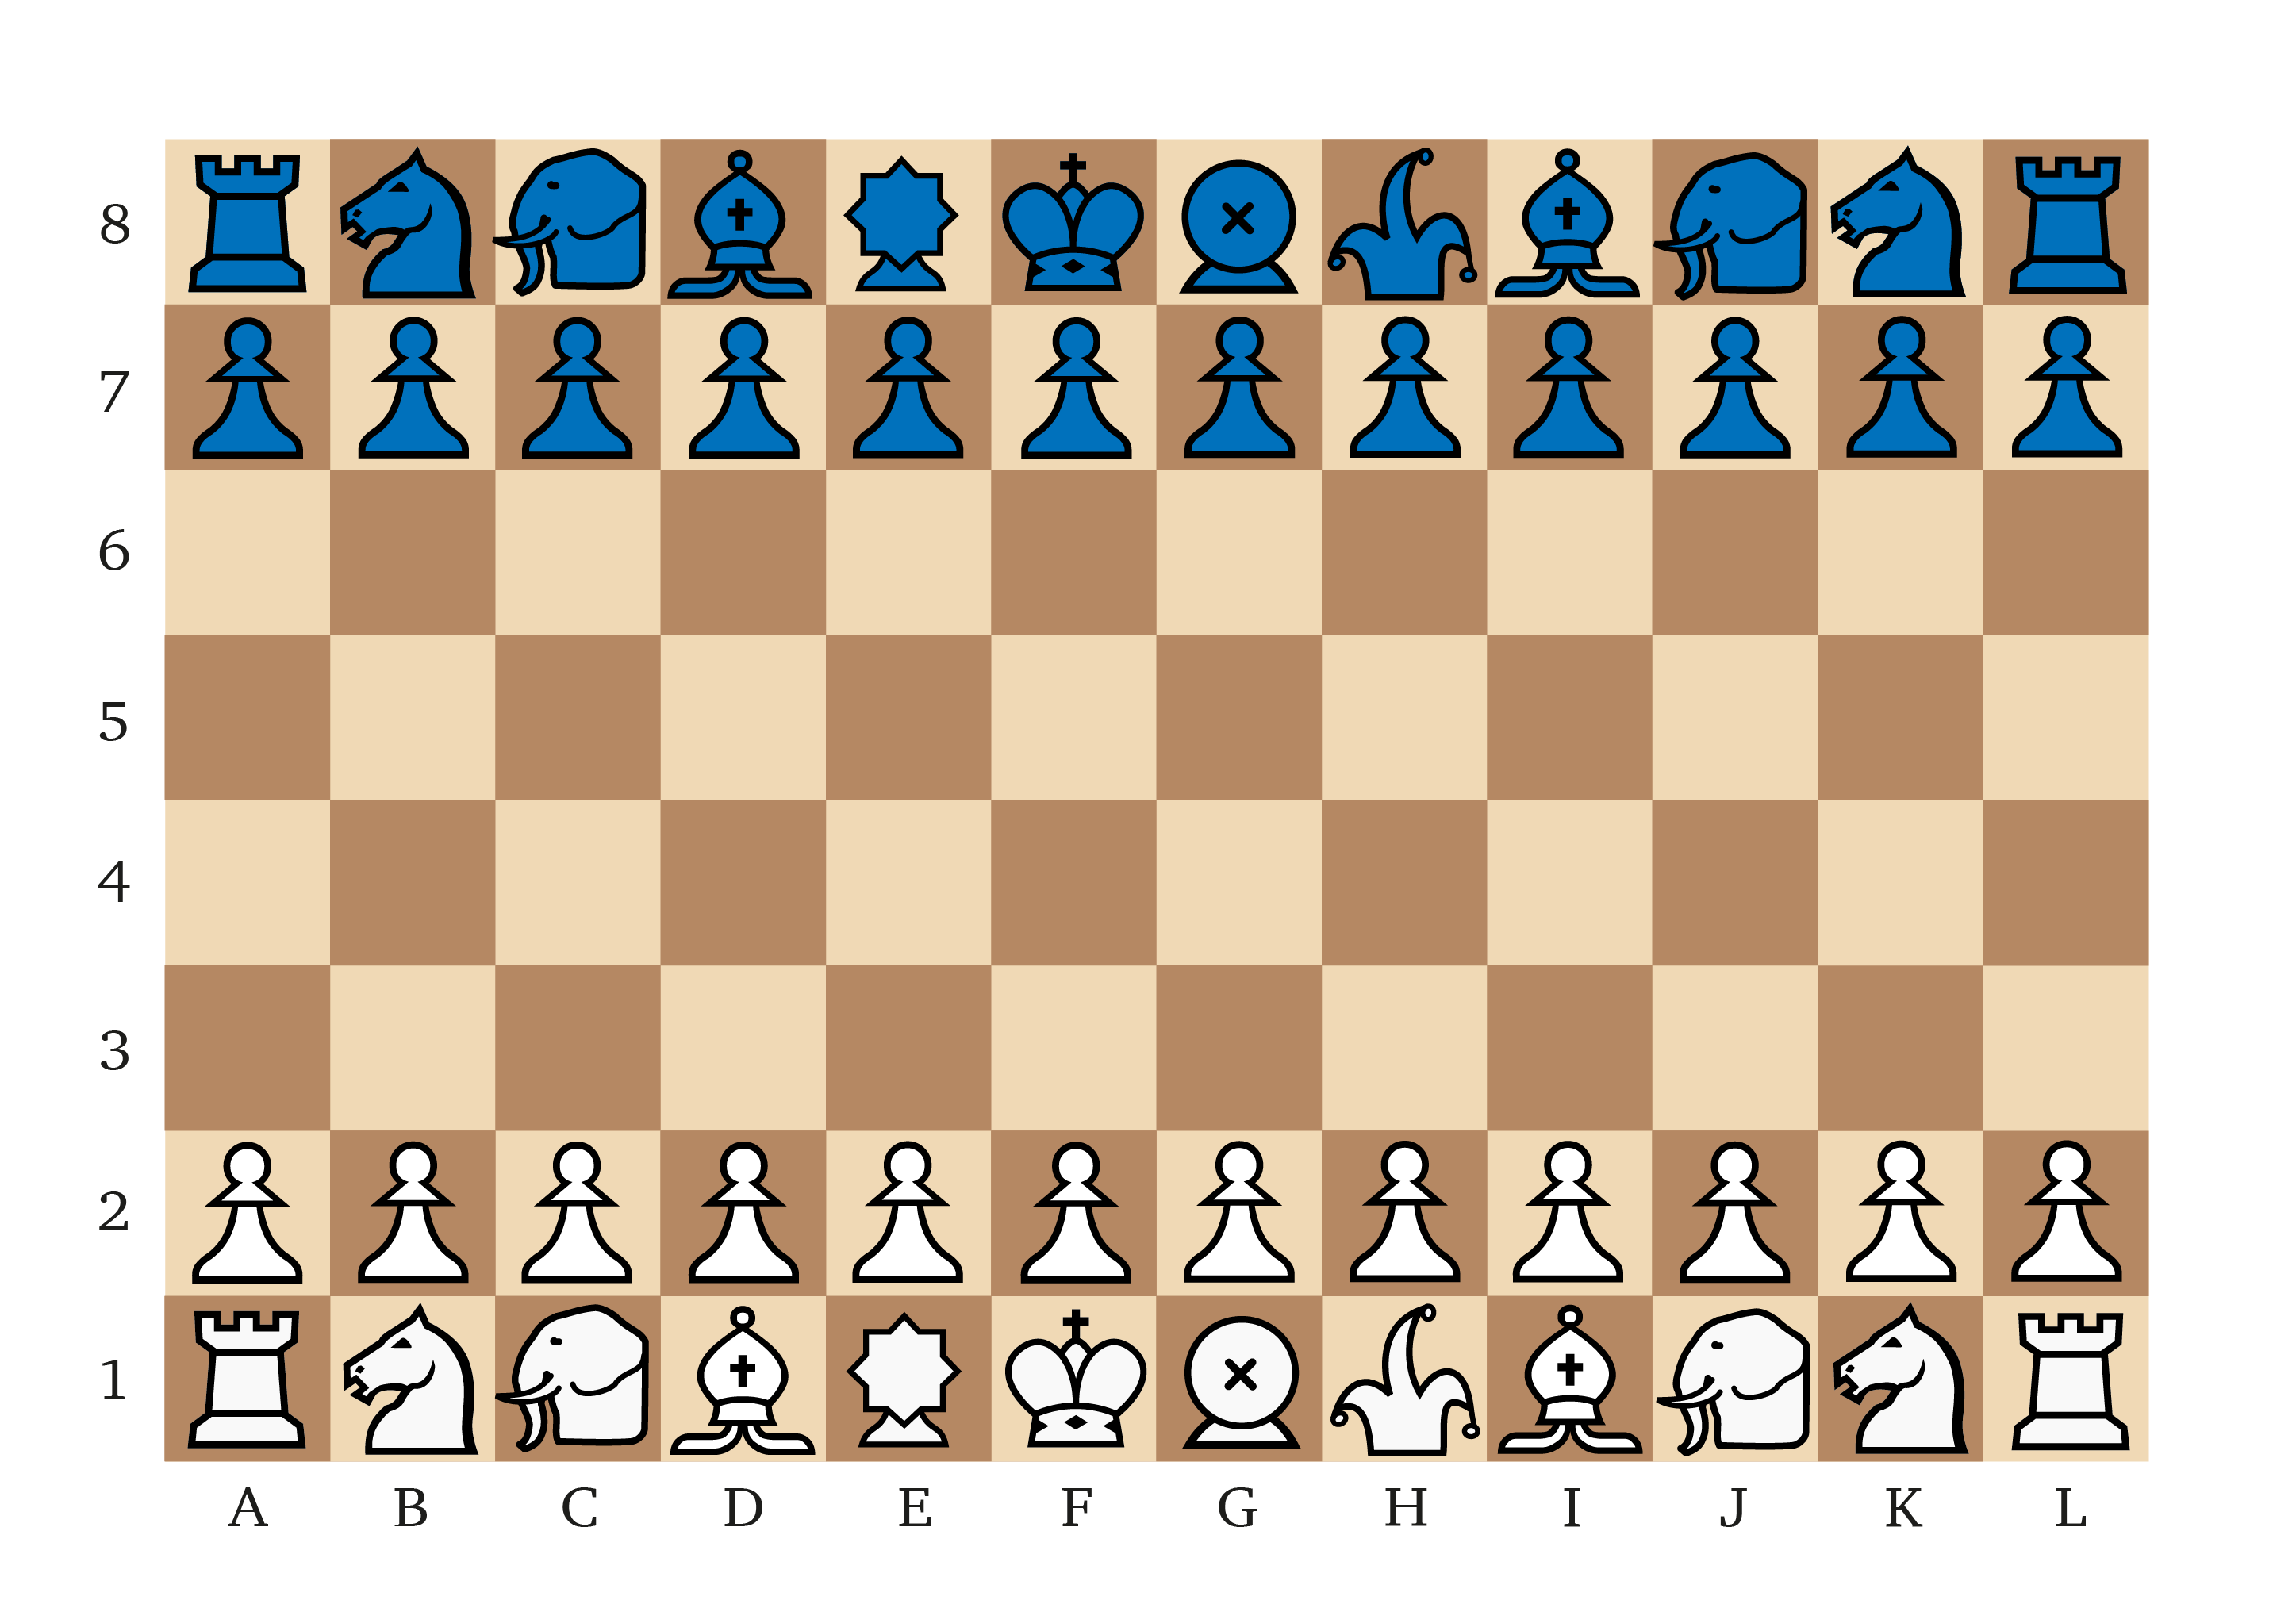
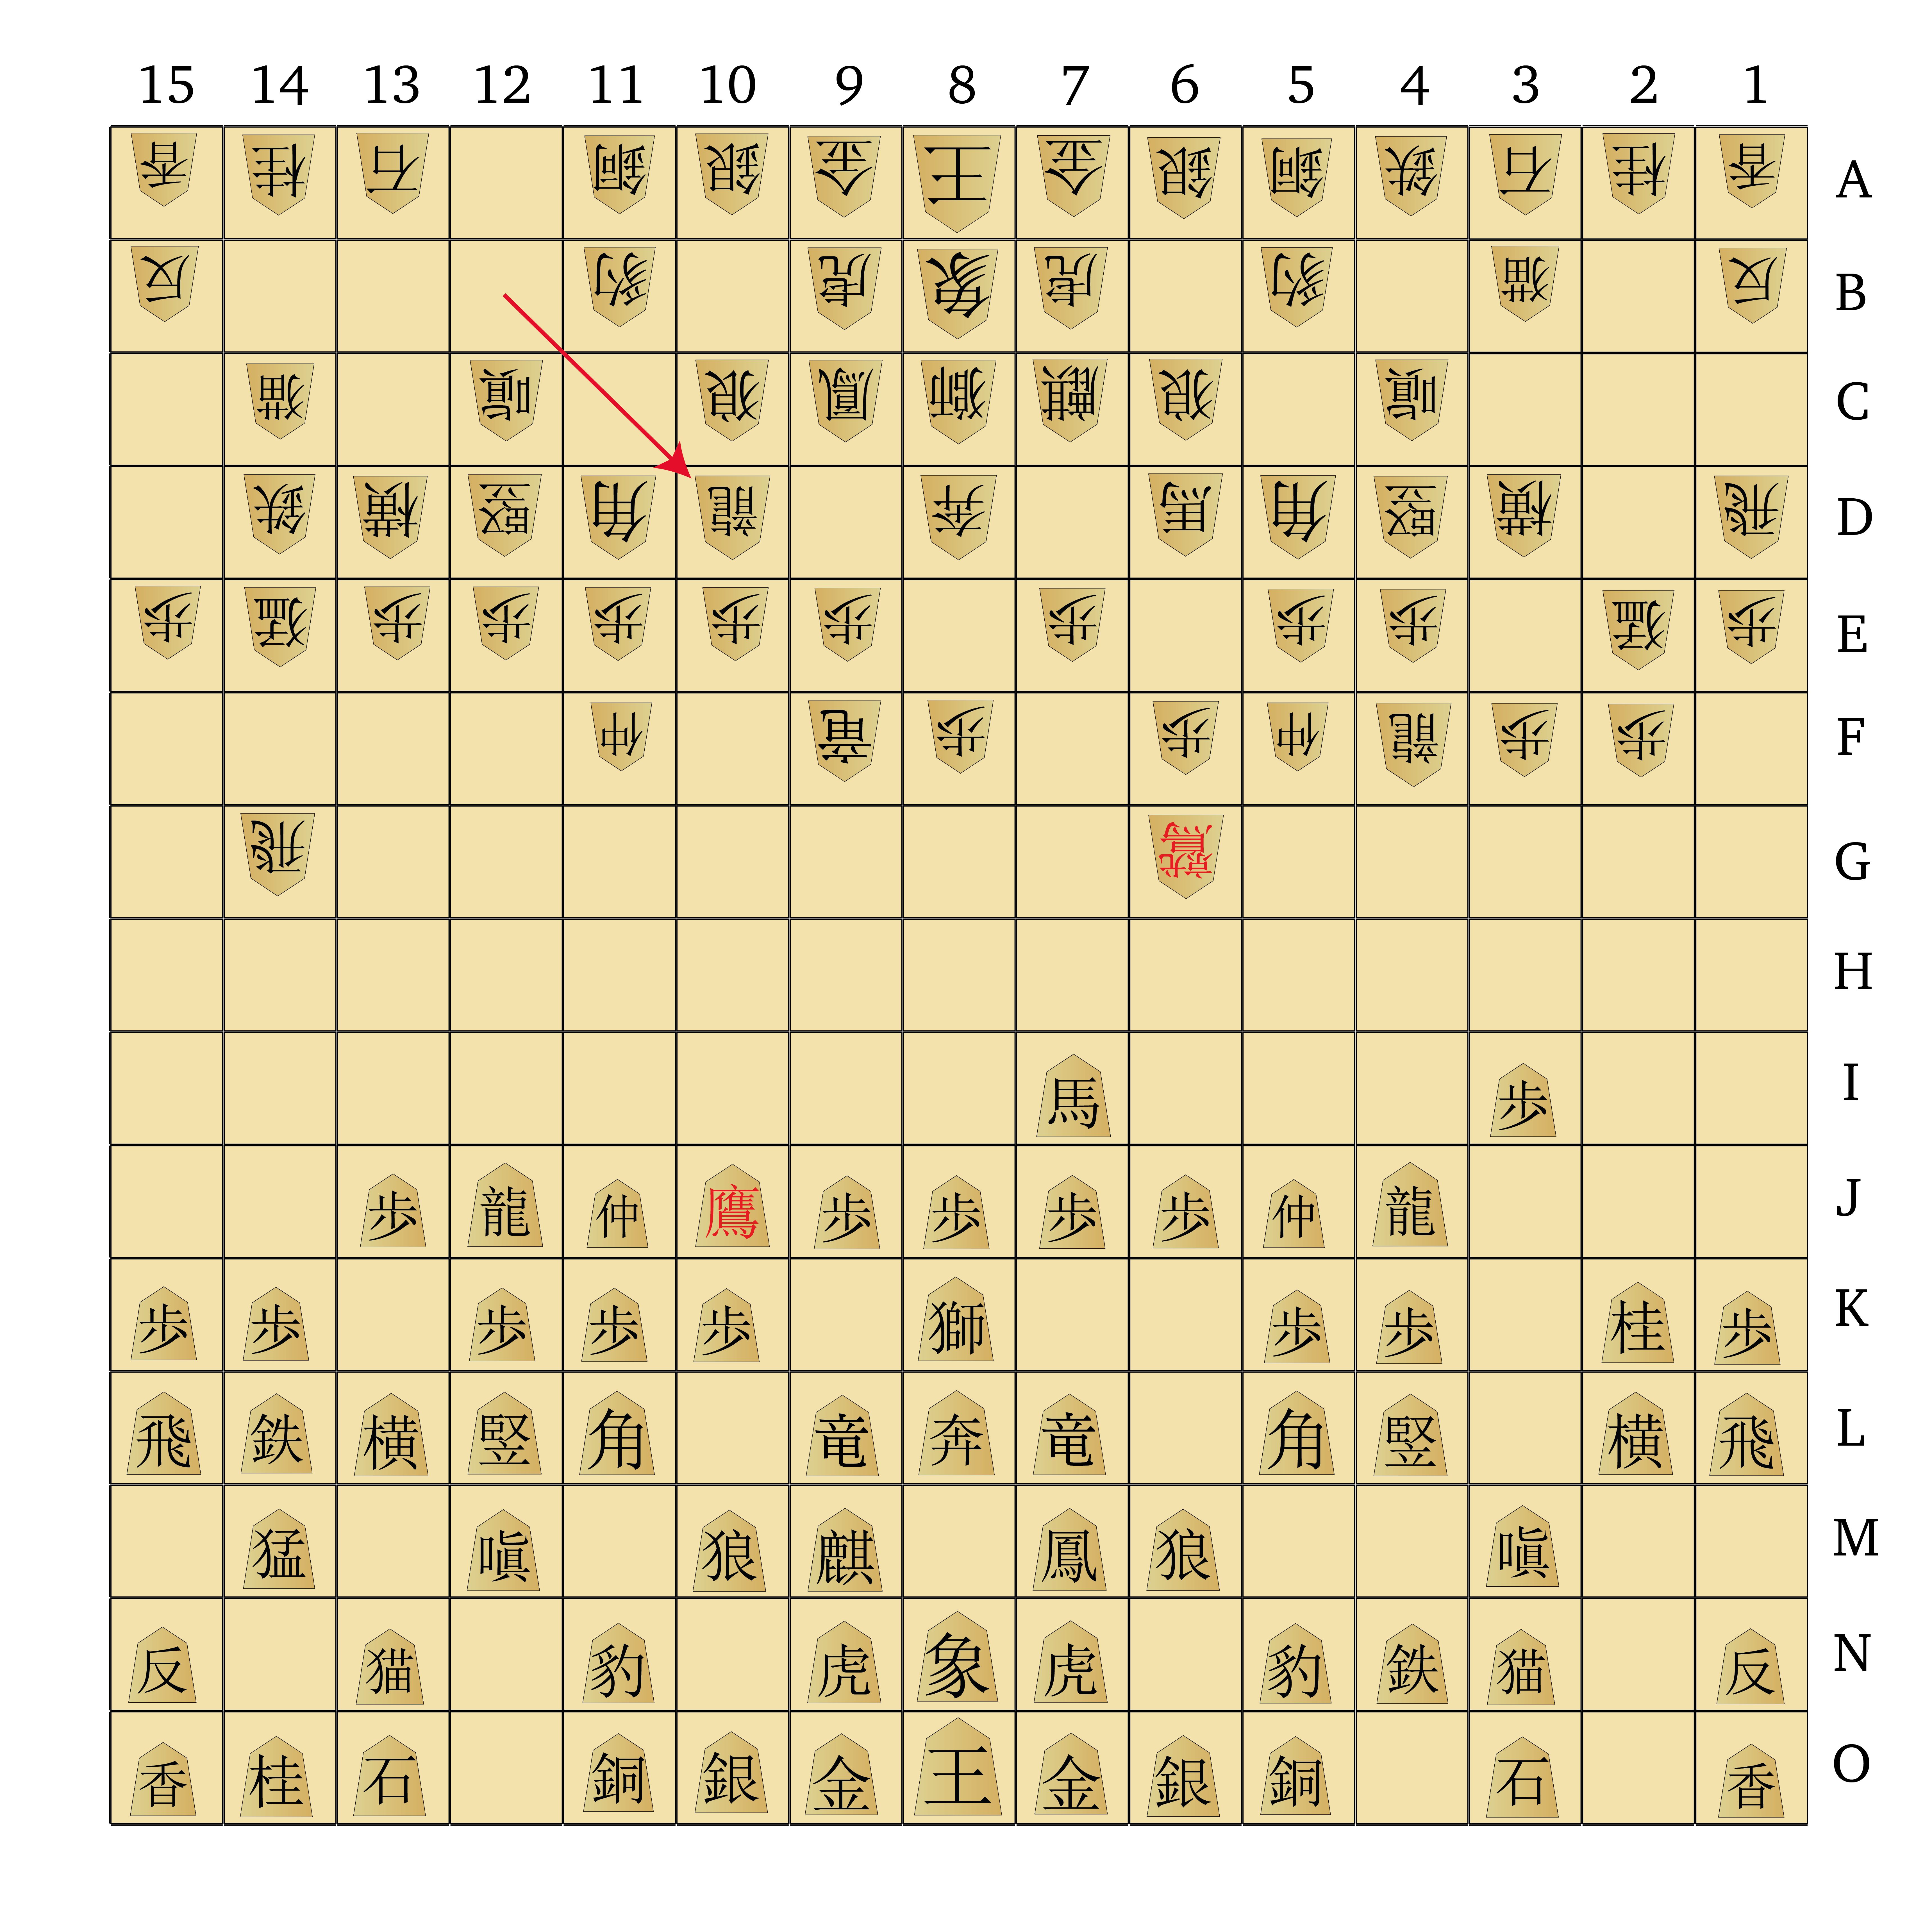
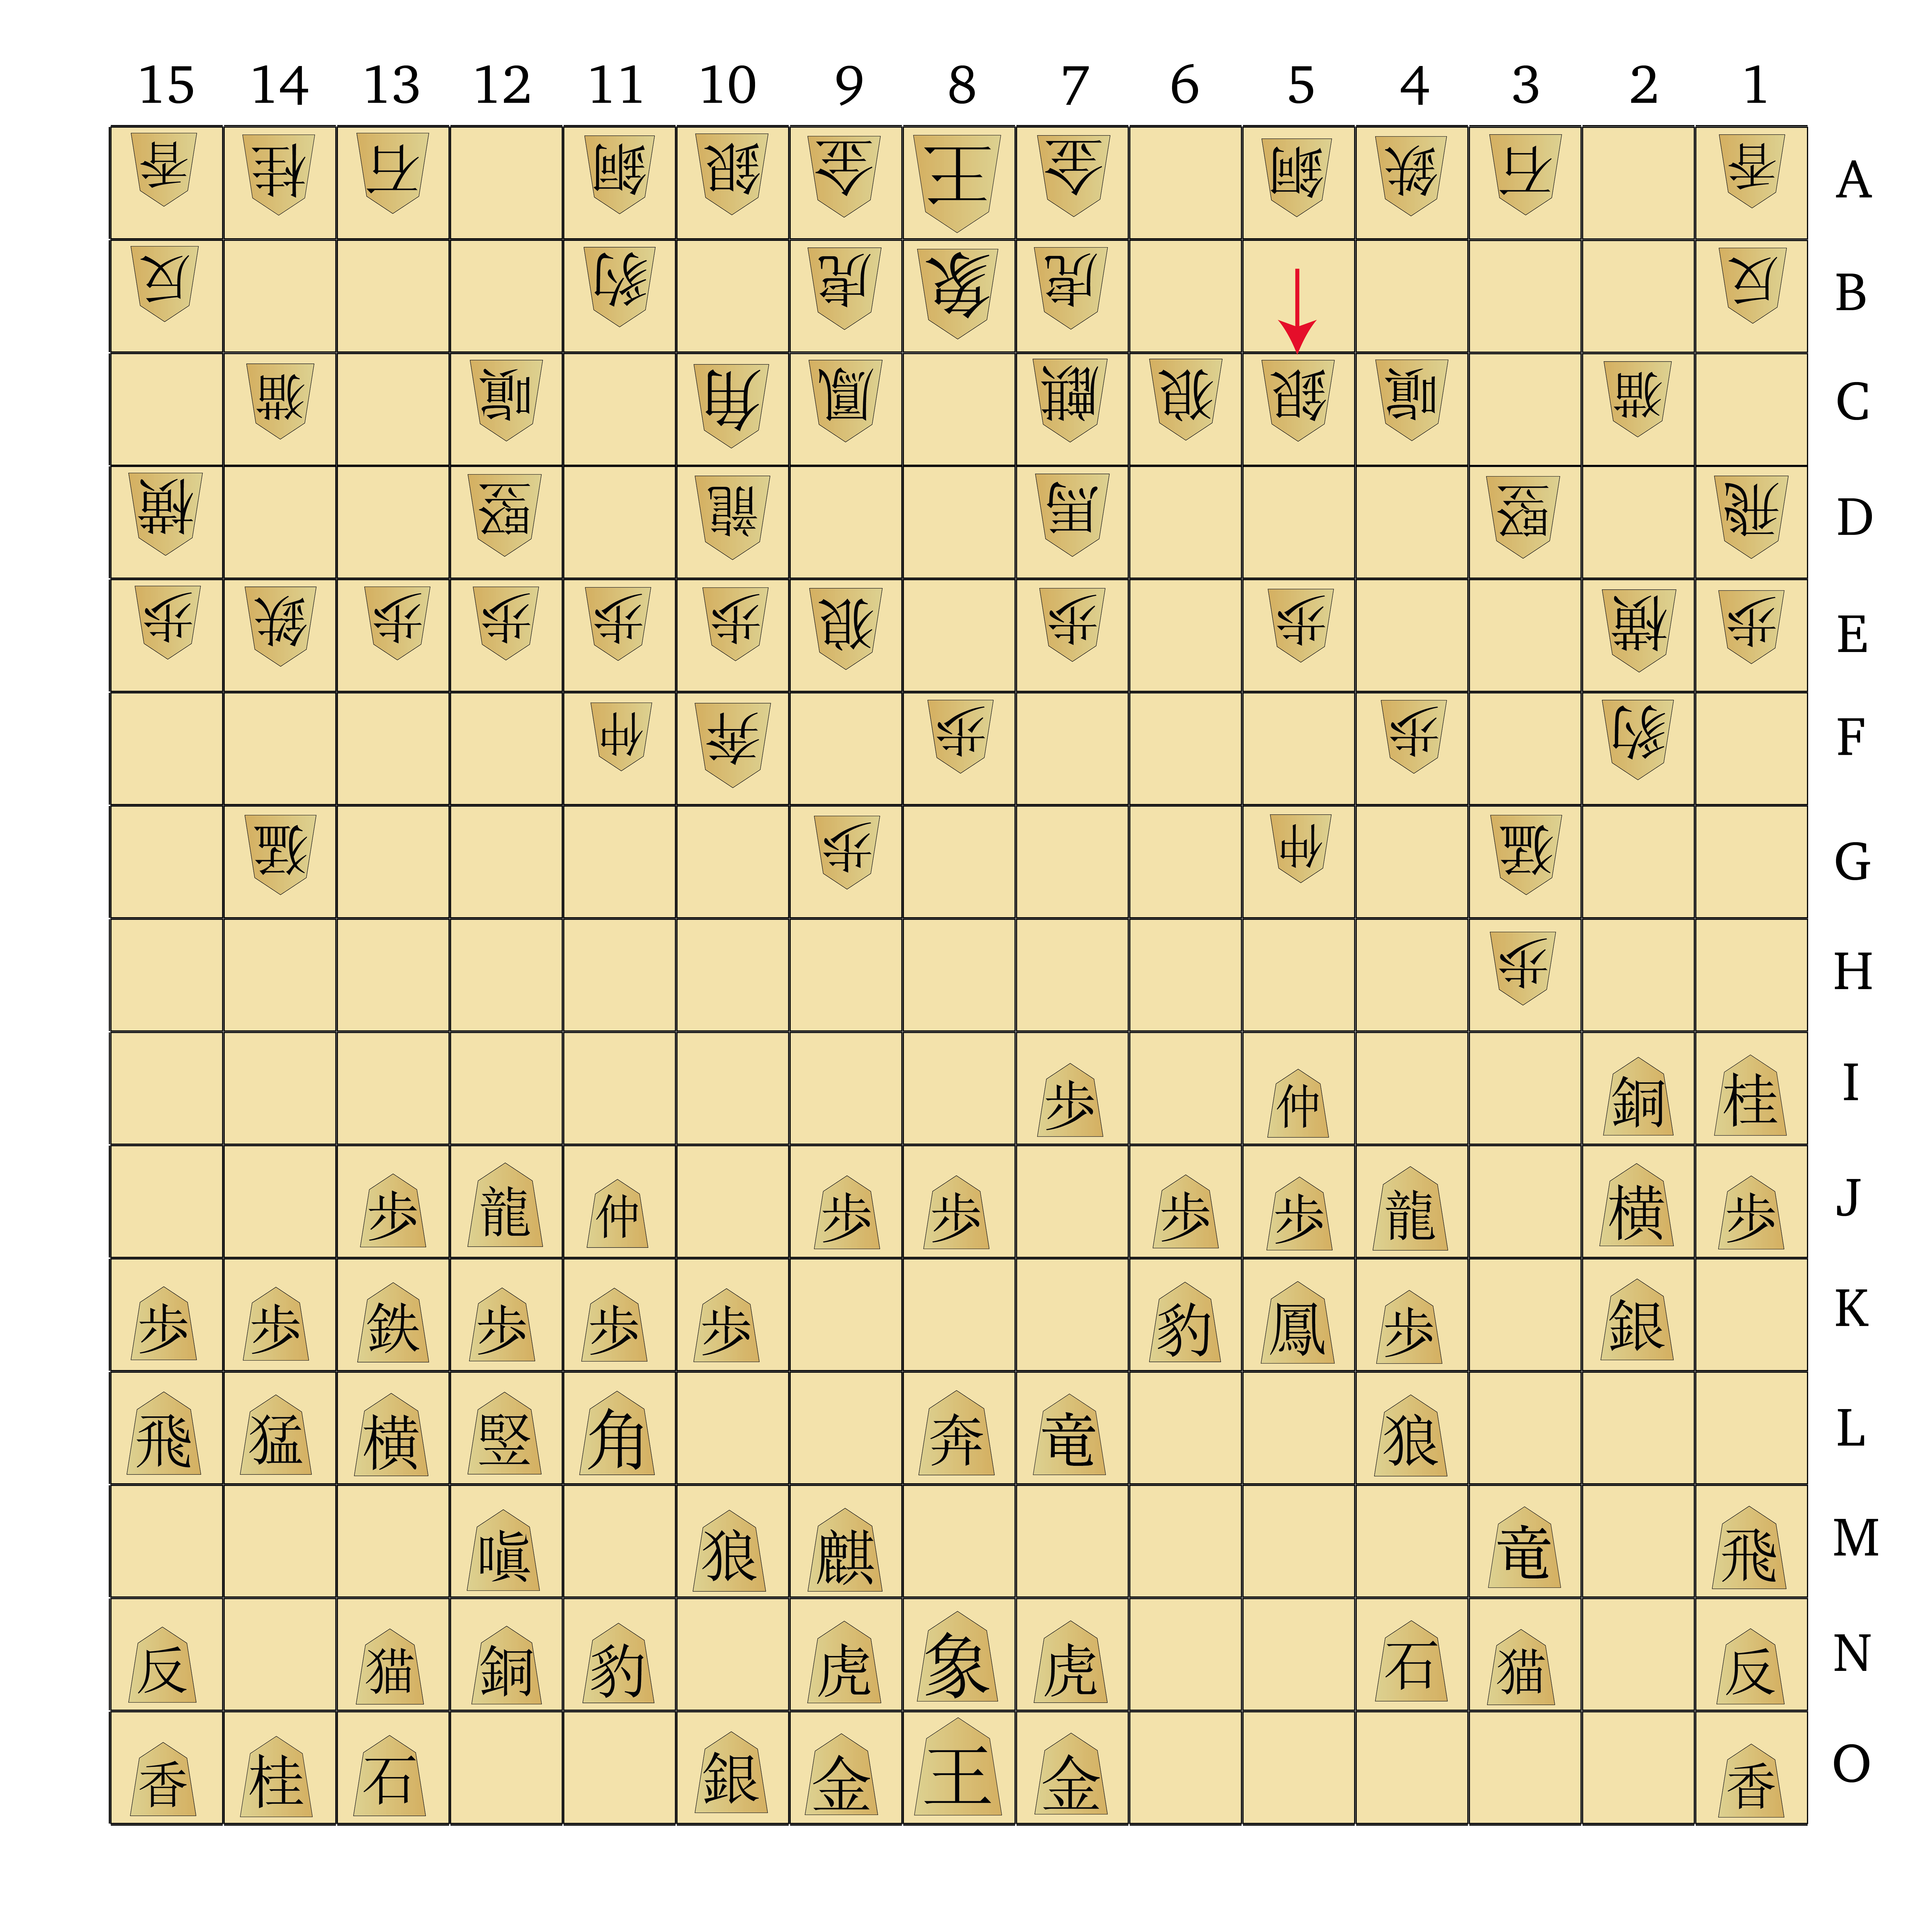
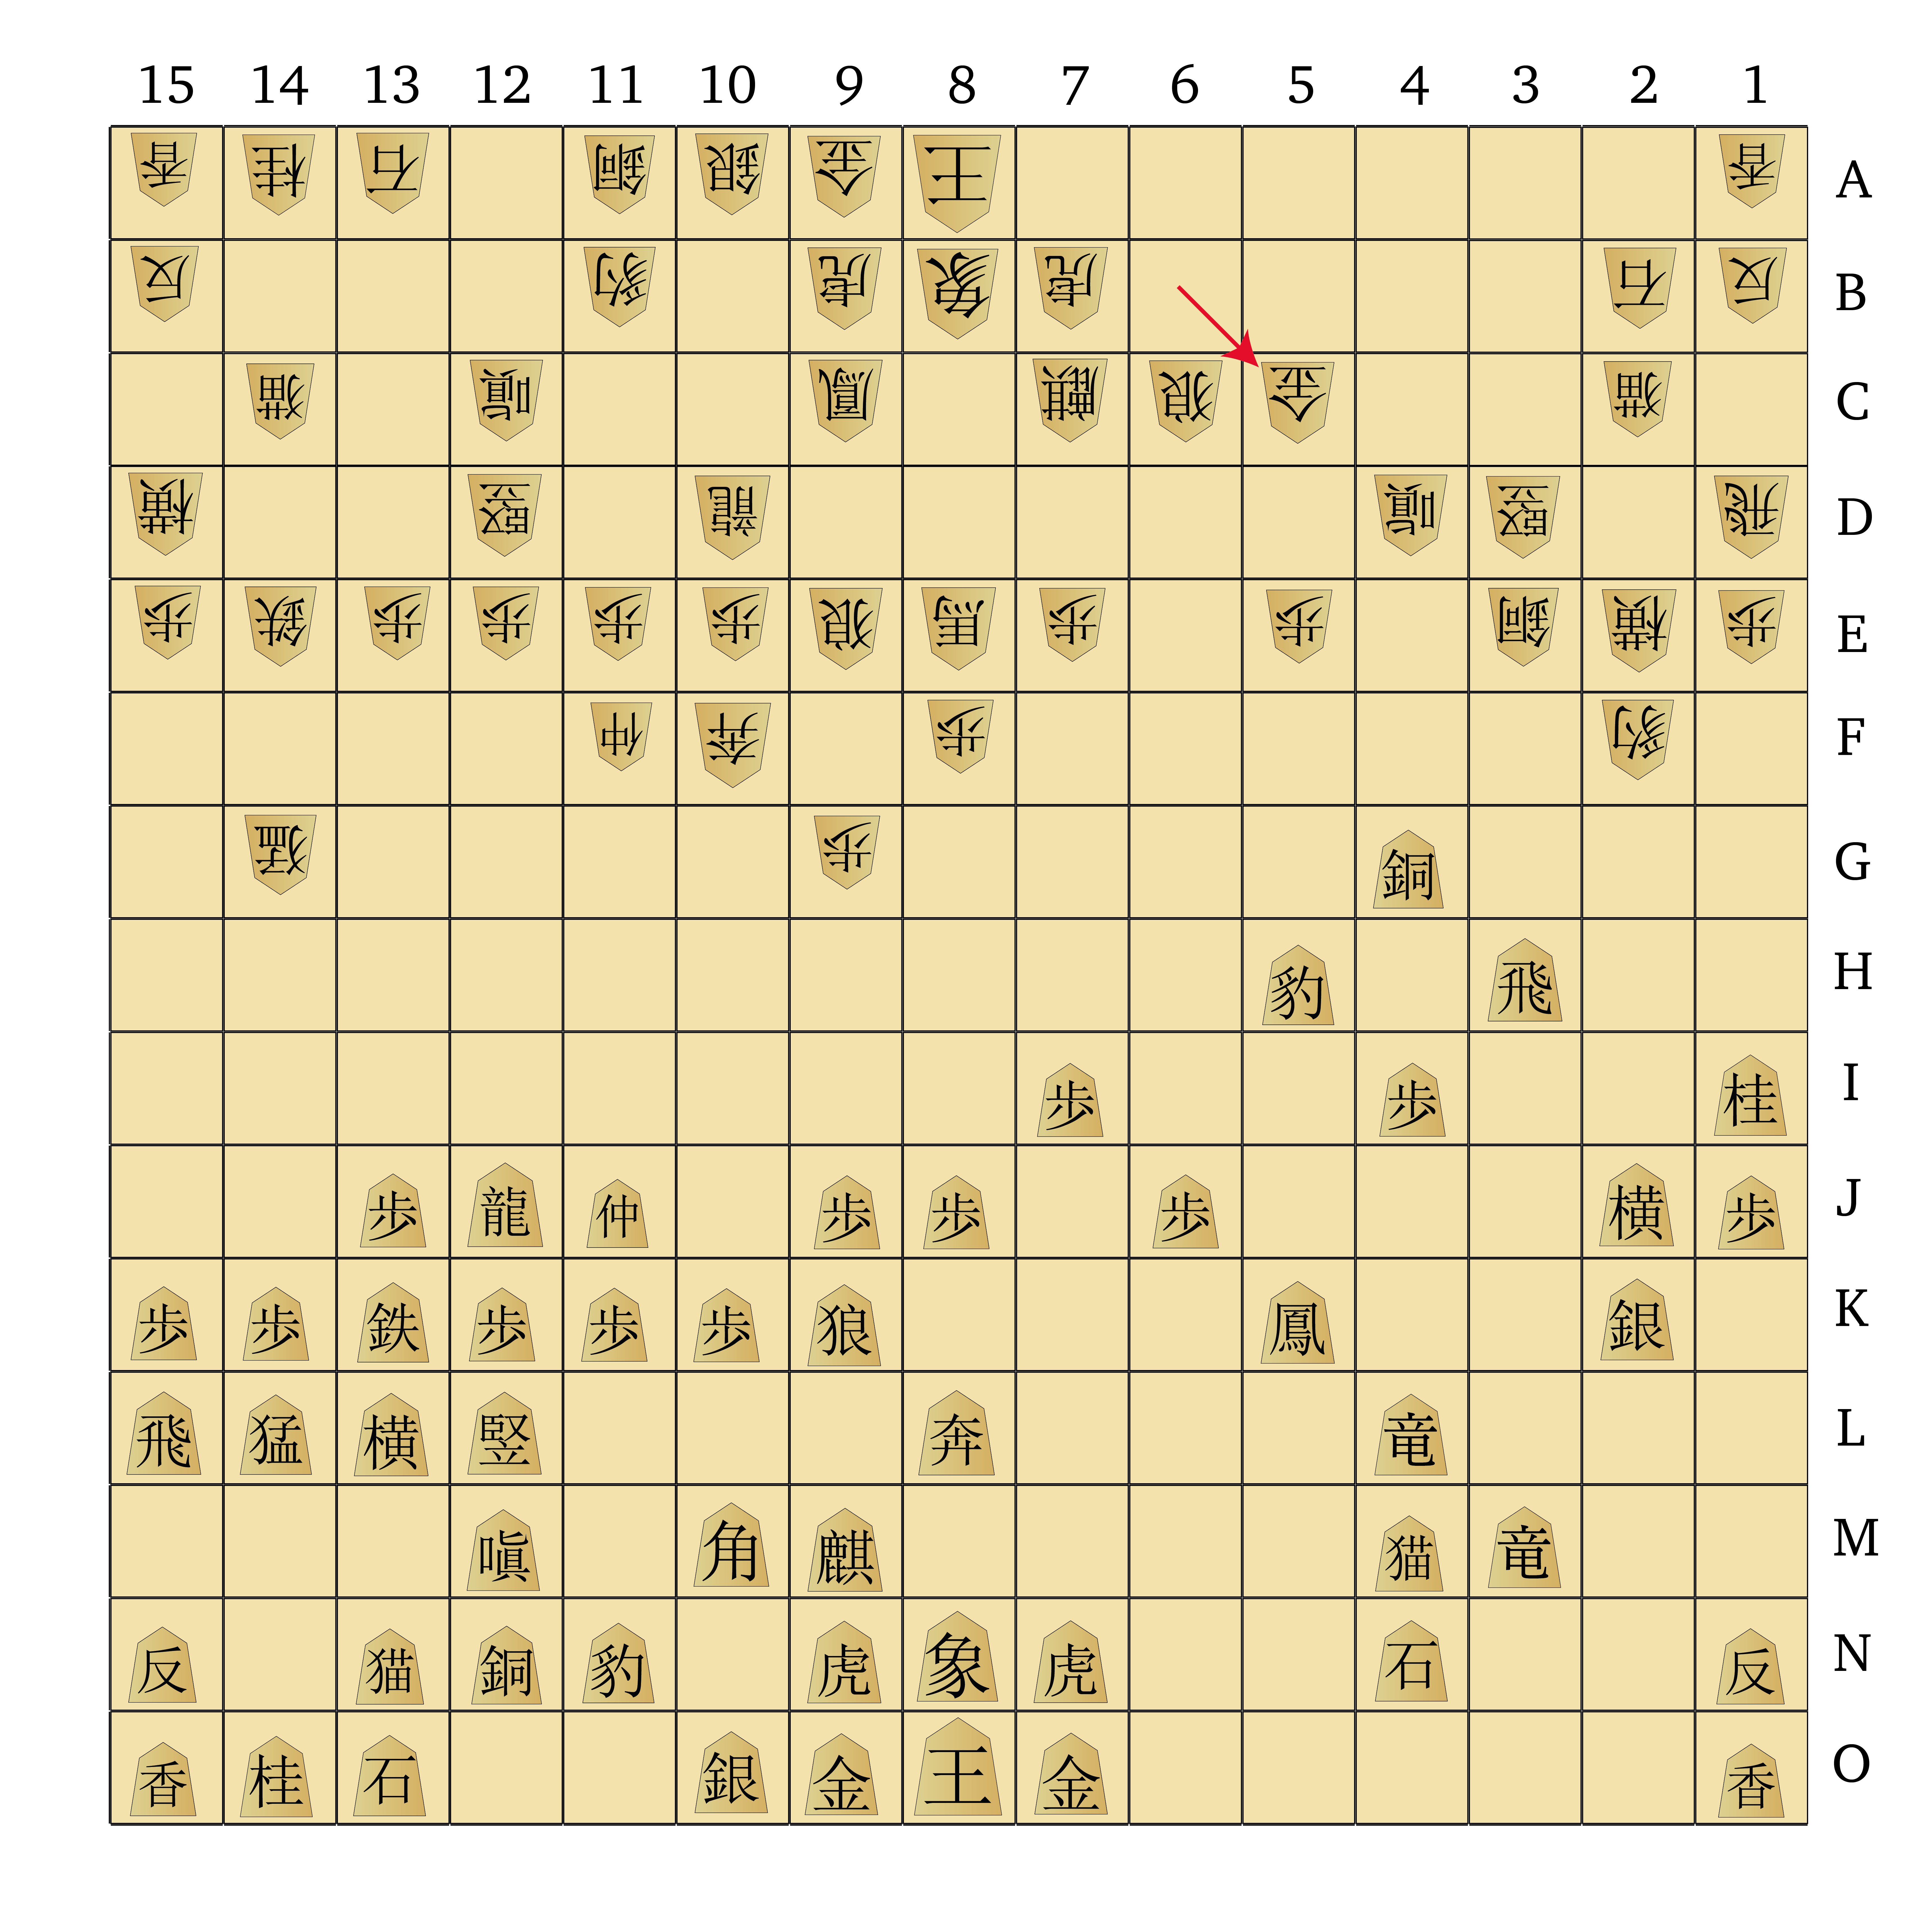
- A blank 13×13 Shogi board for all your Shogi needs.
-
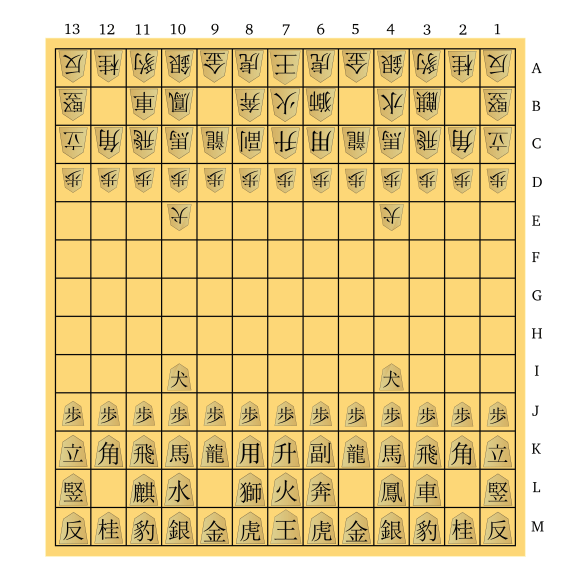
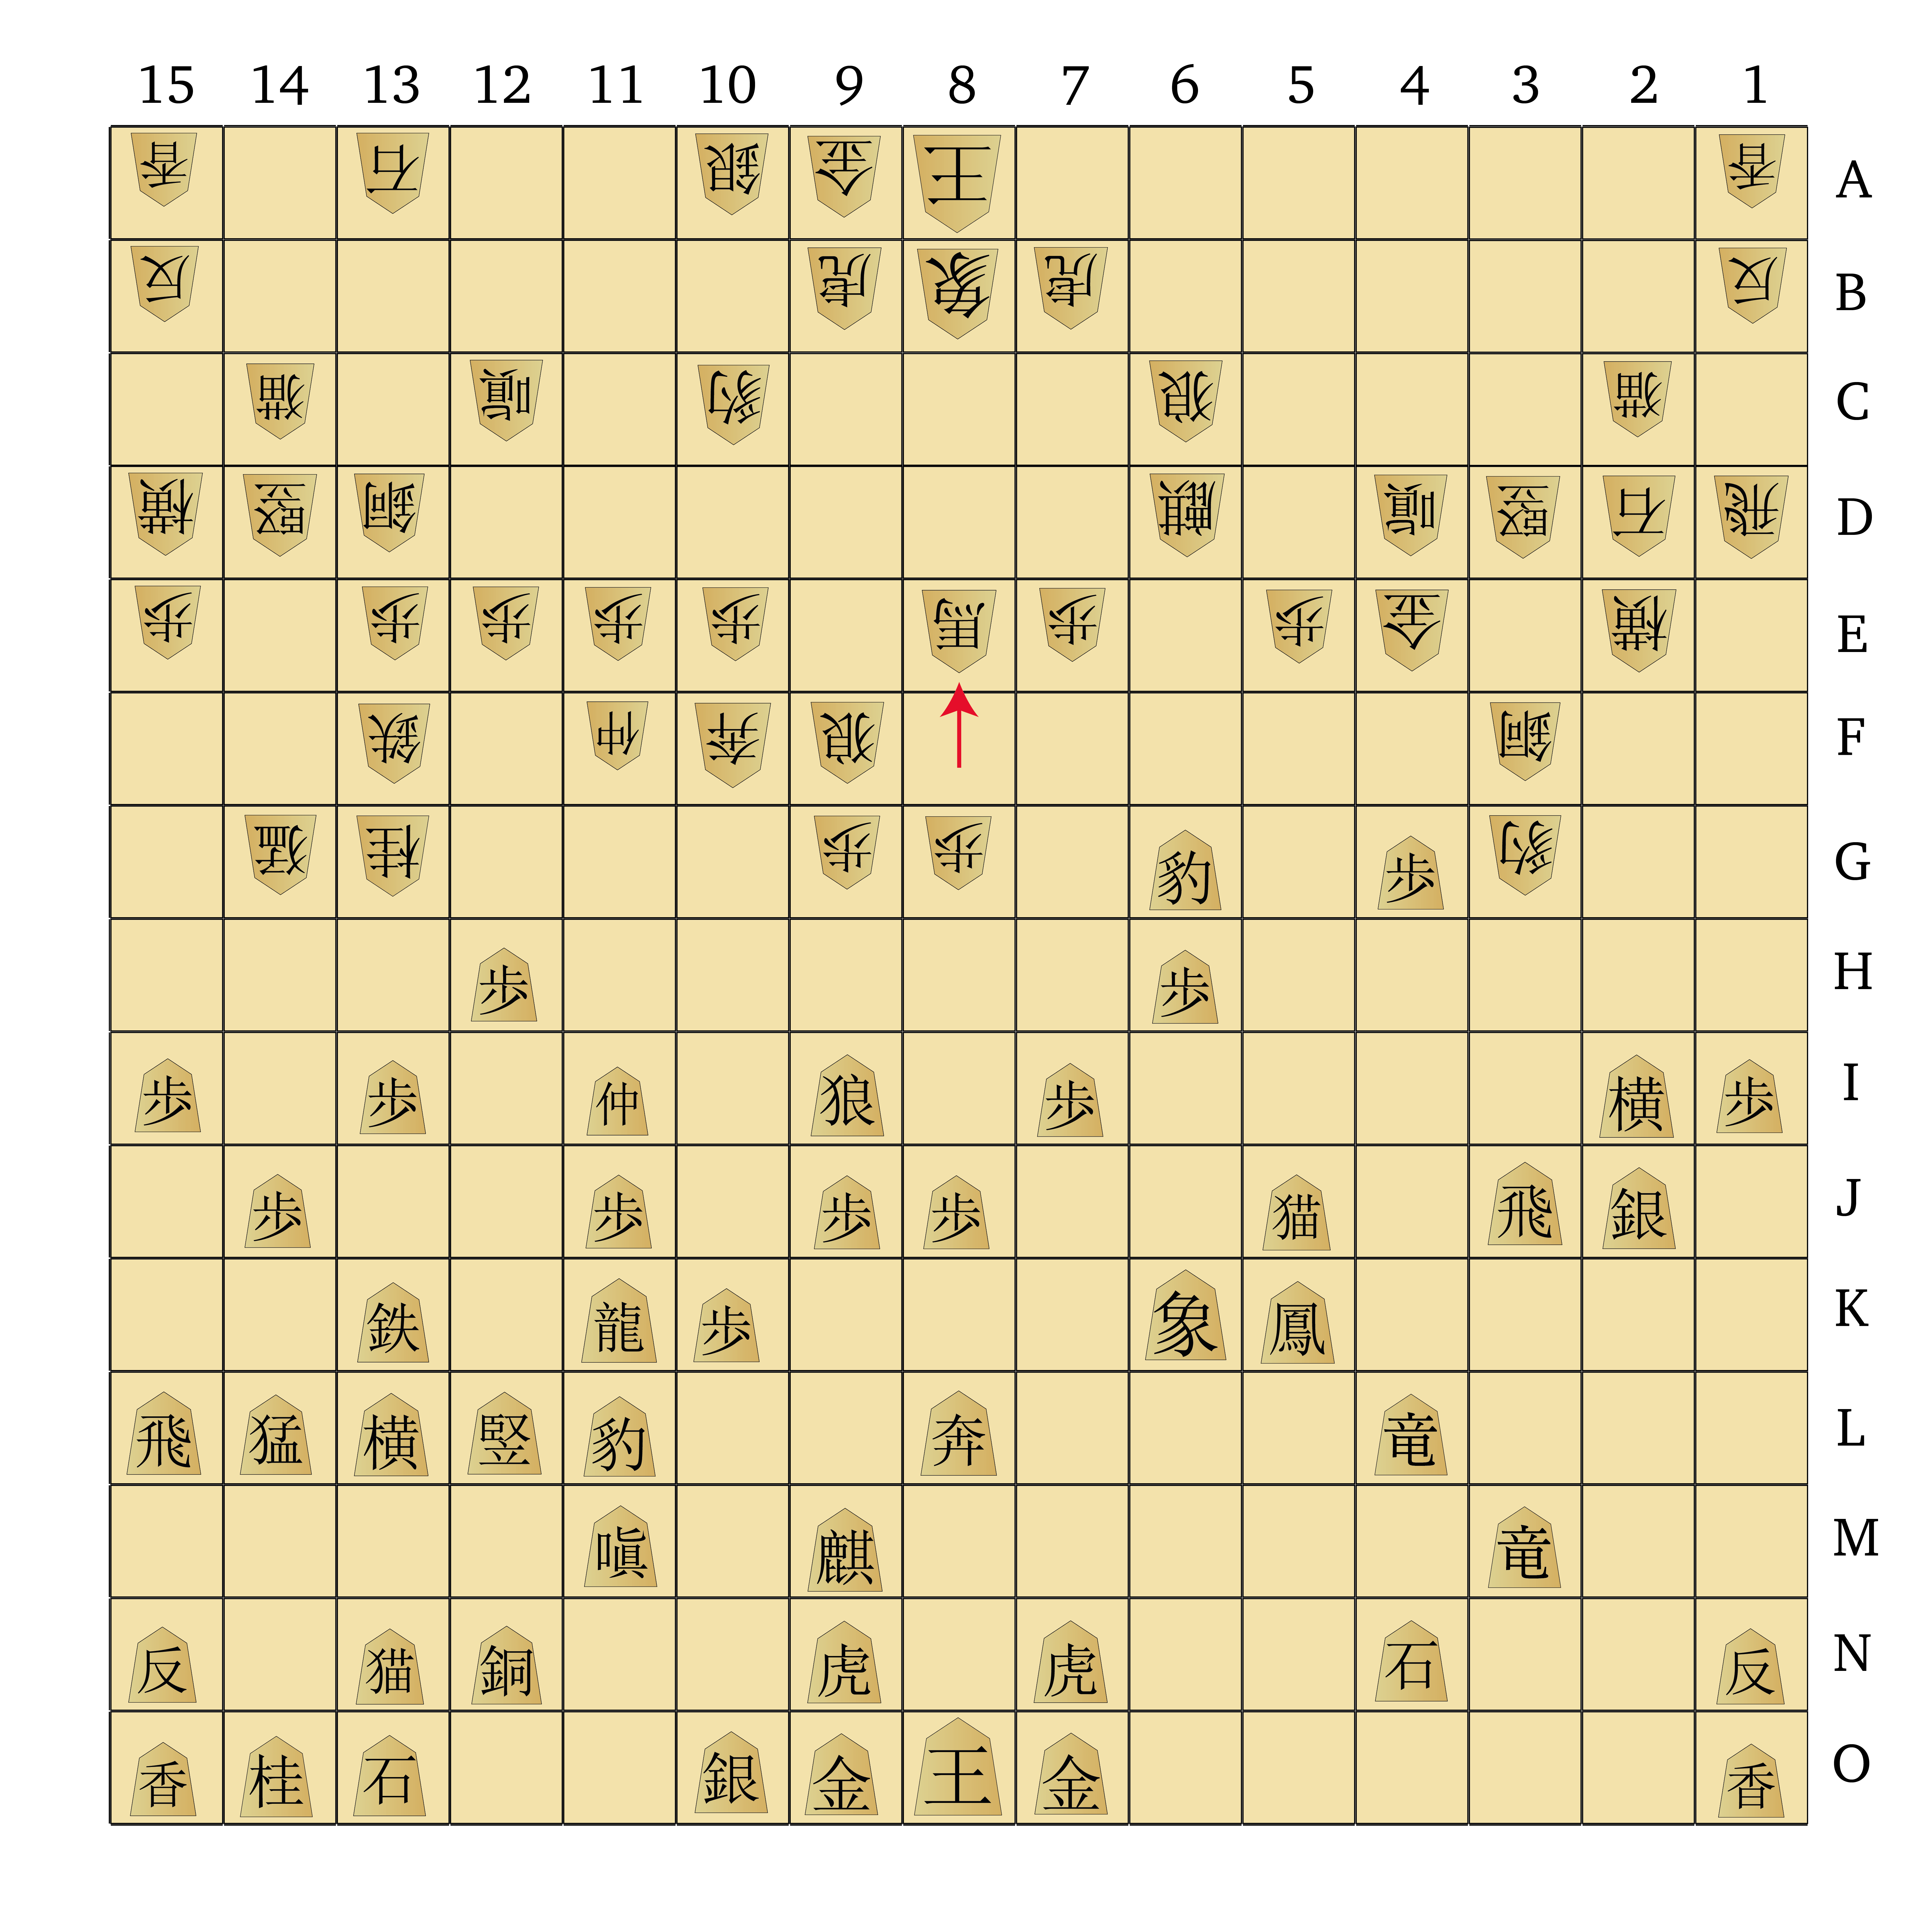
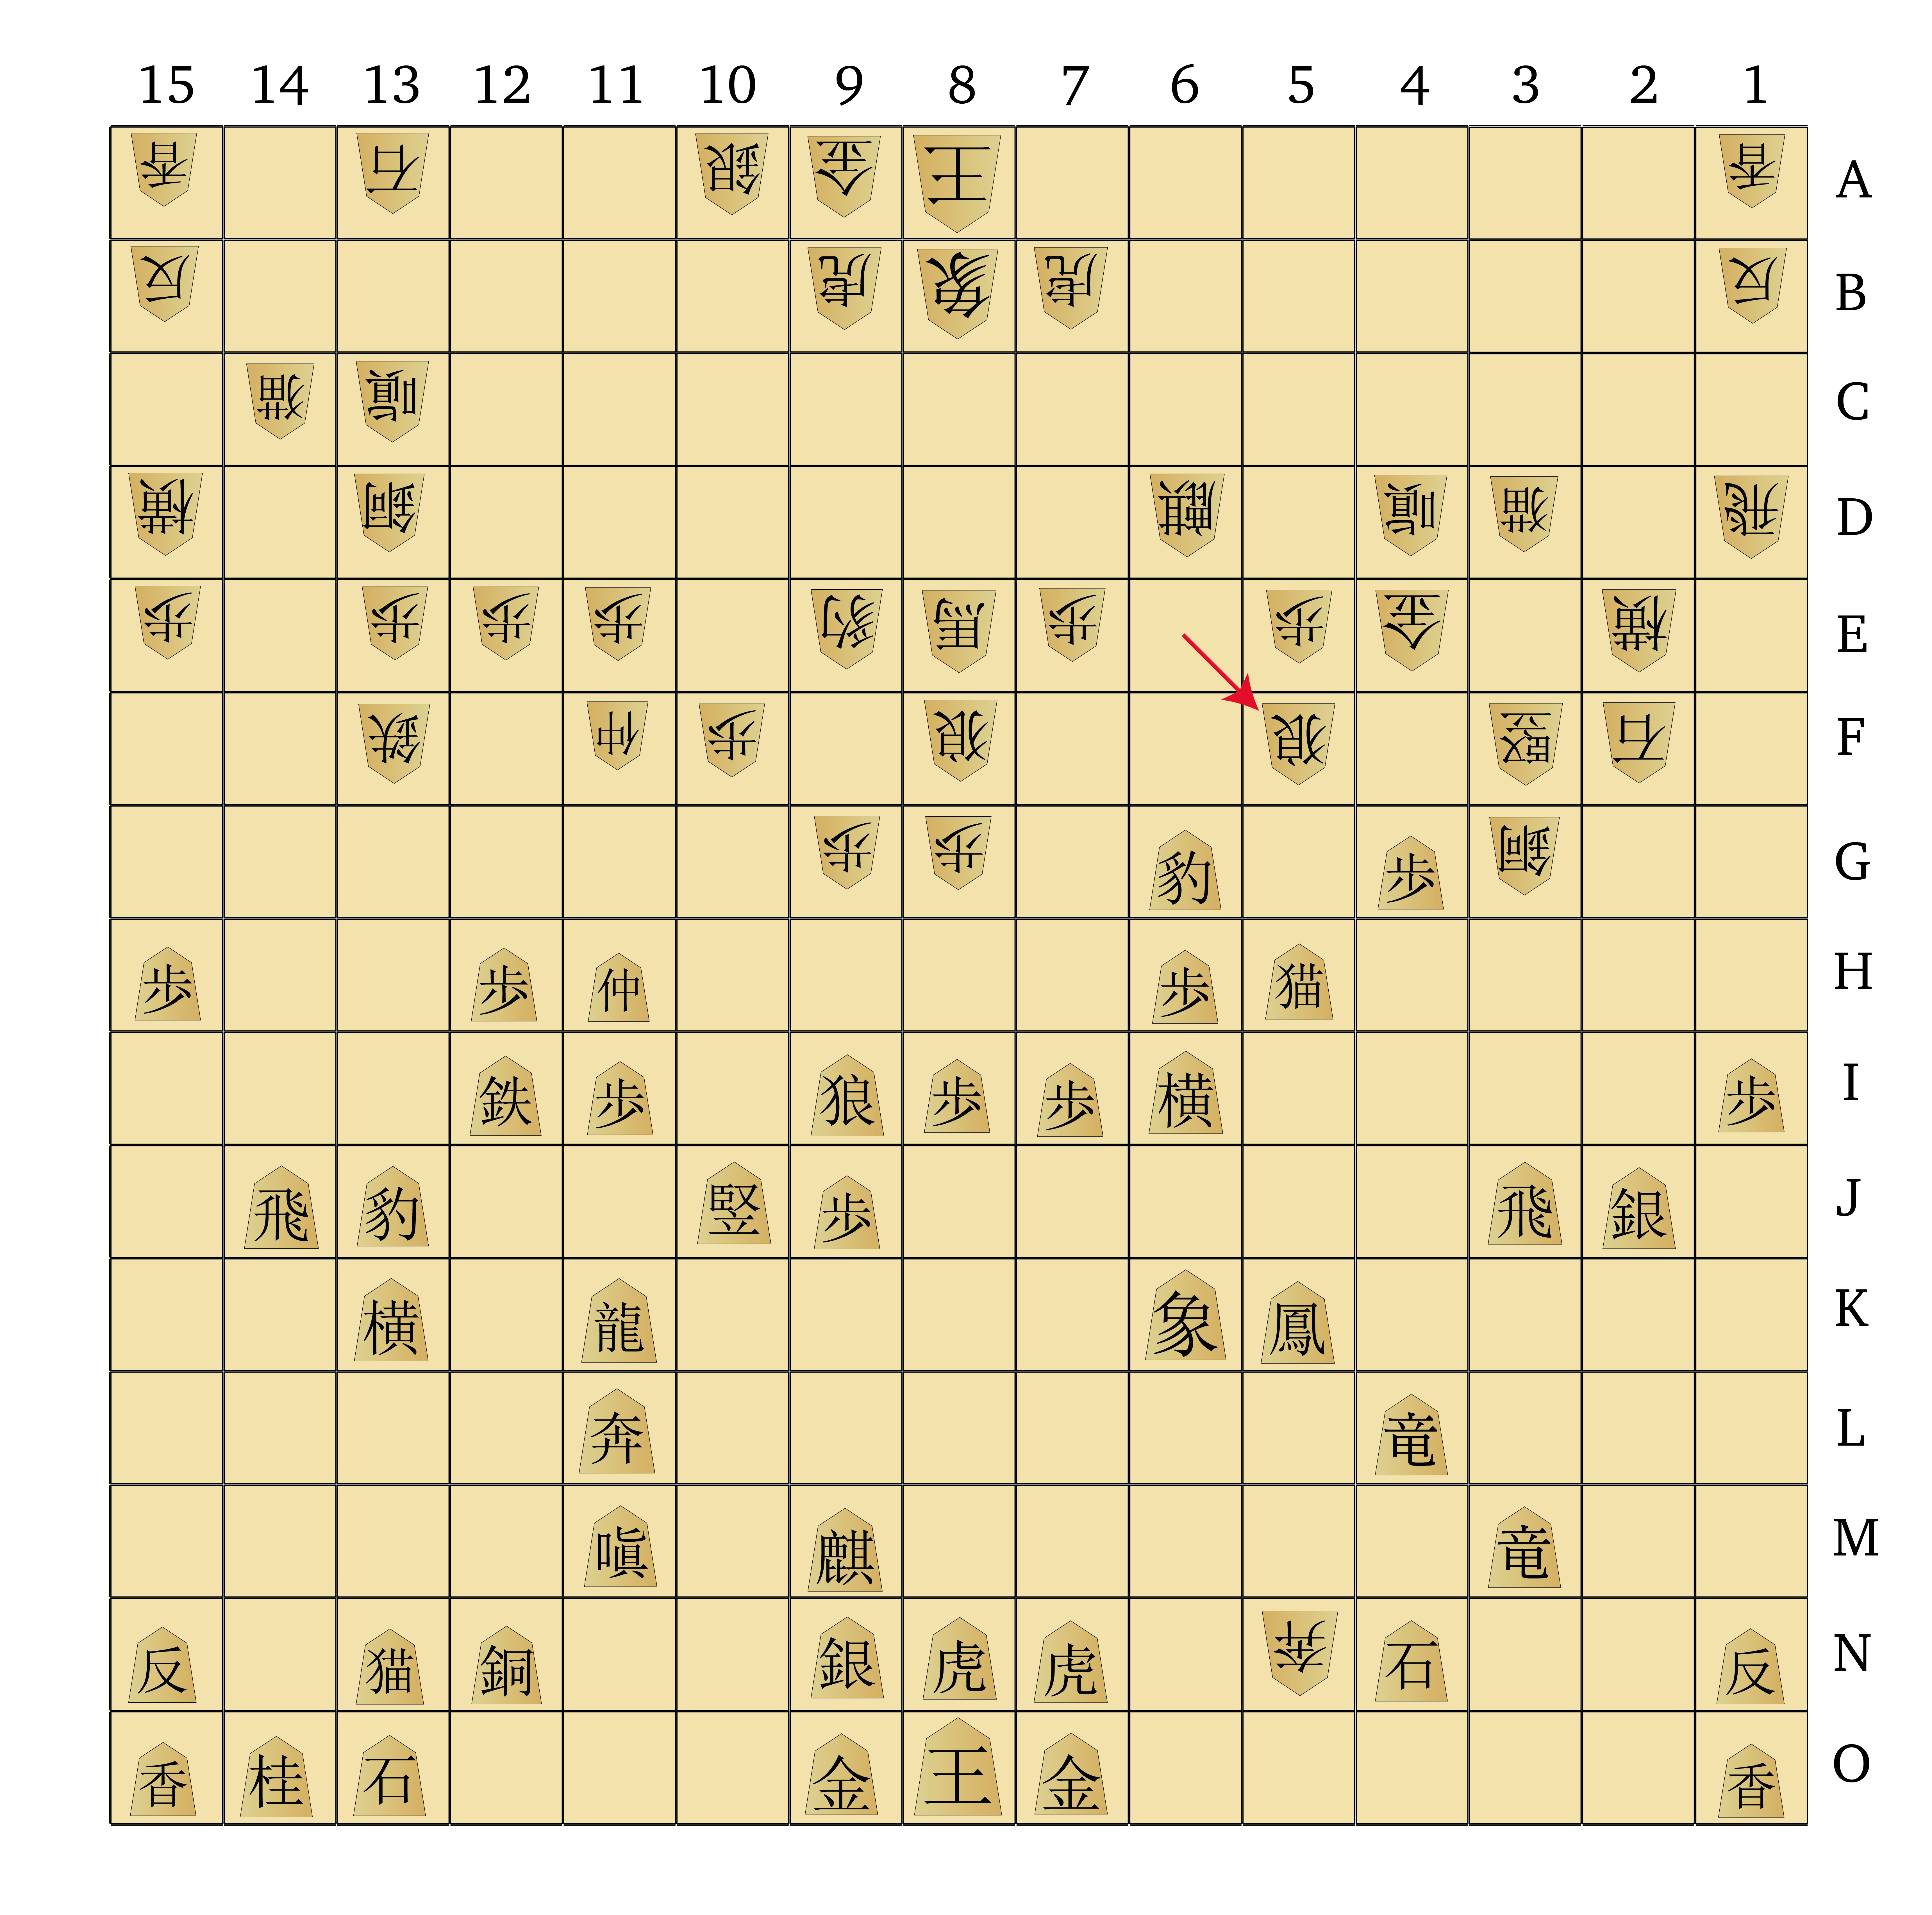
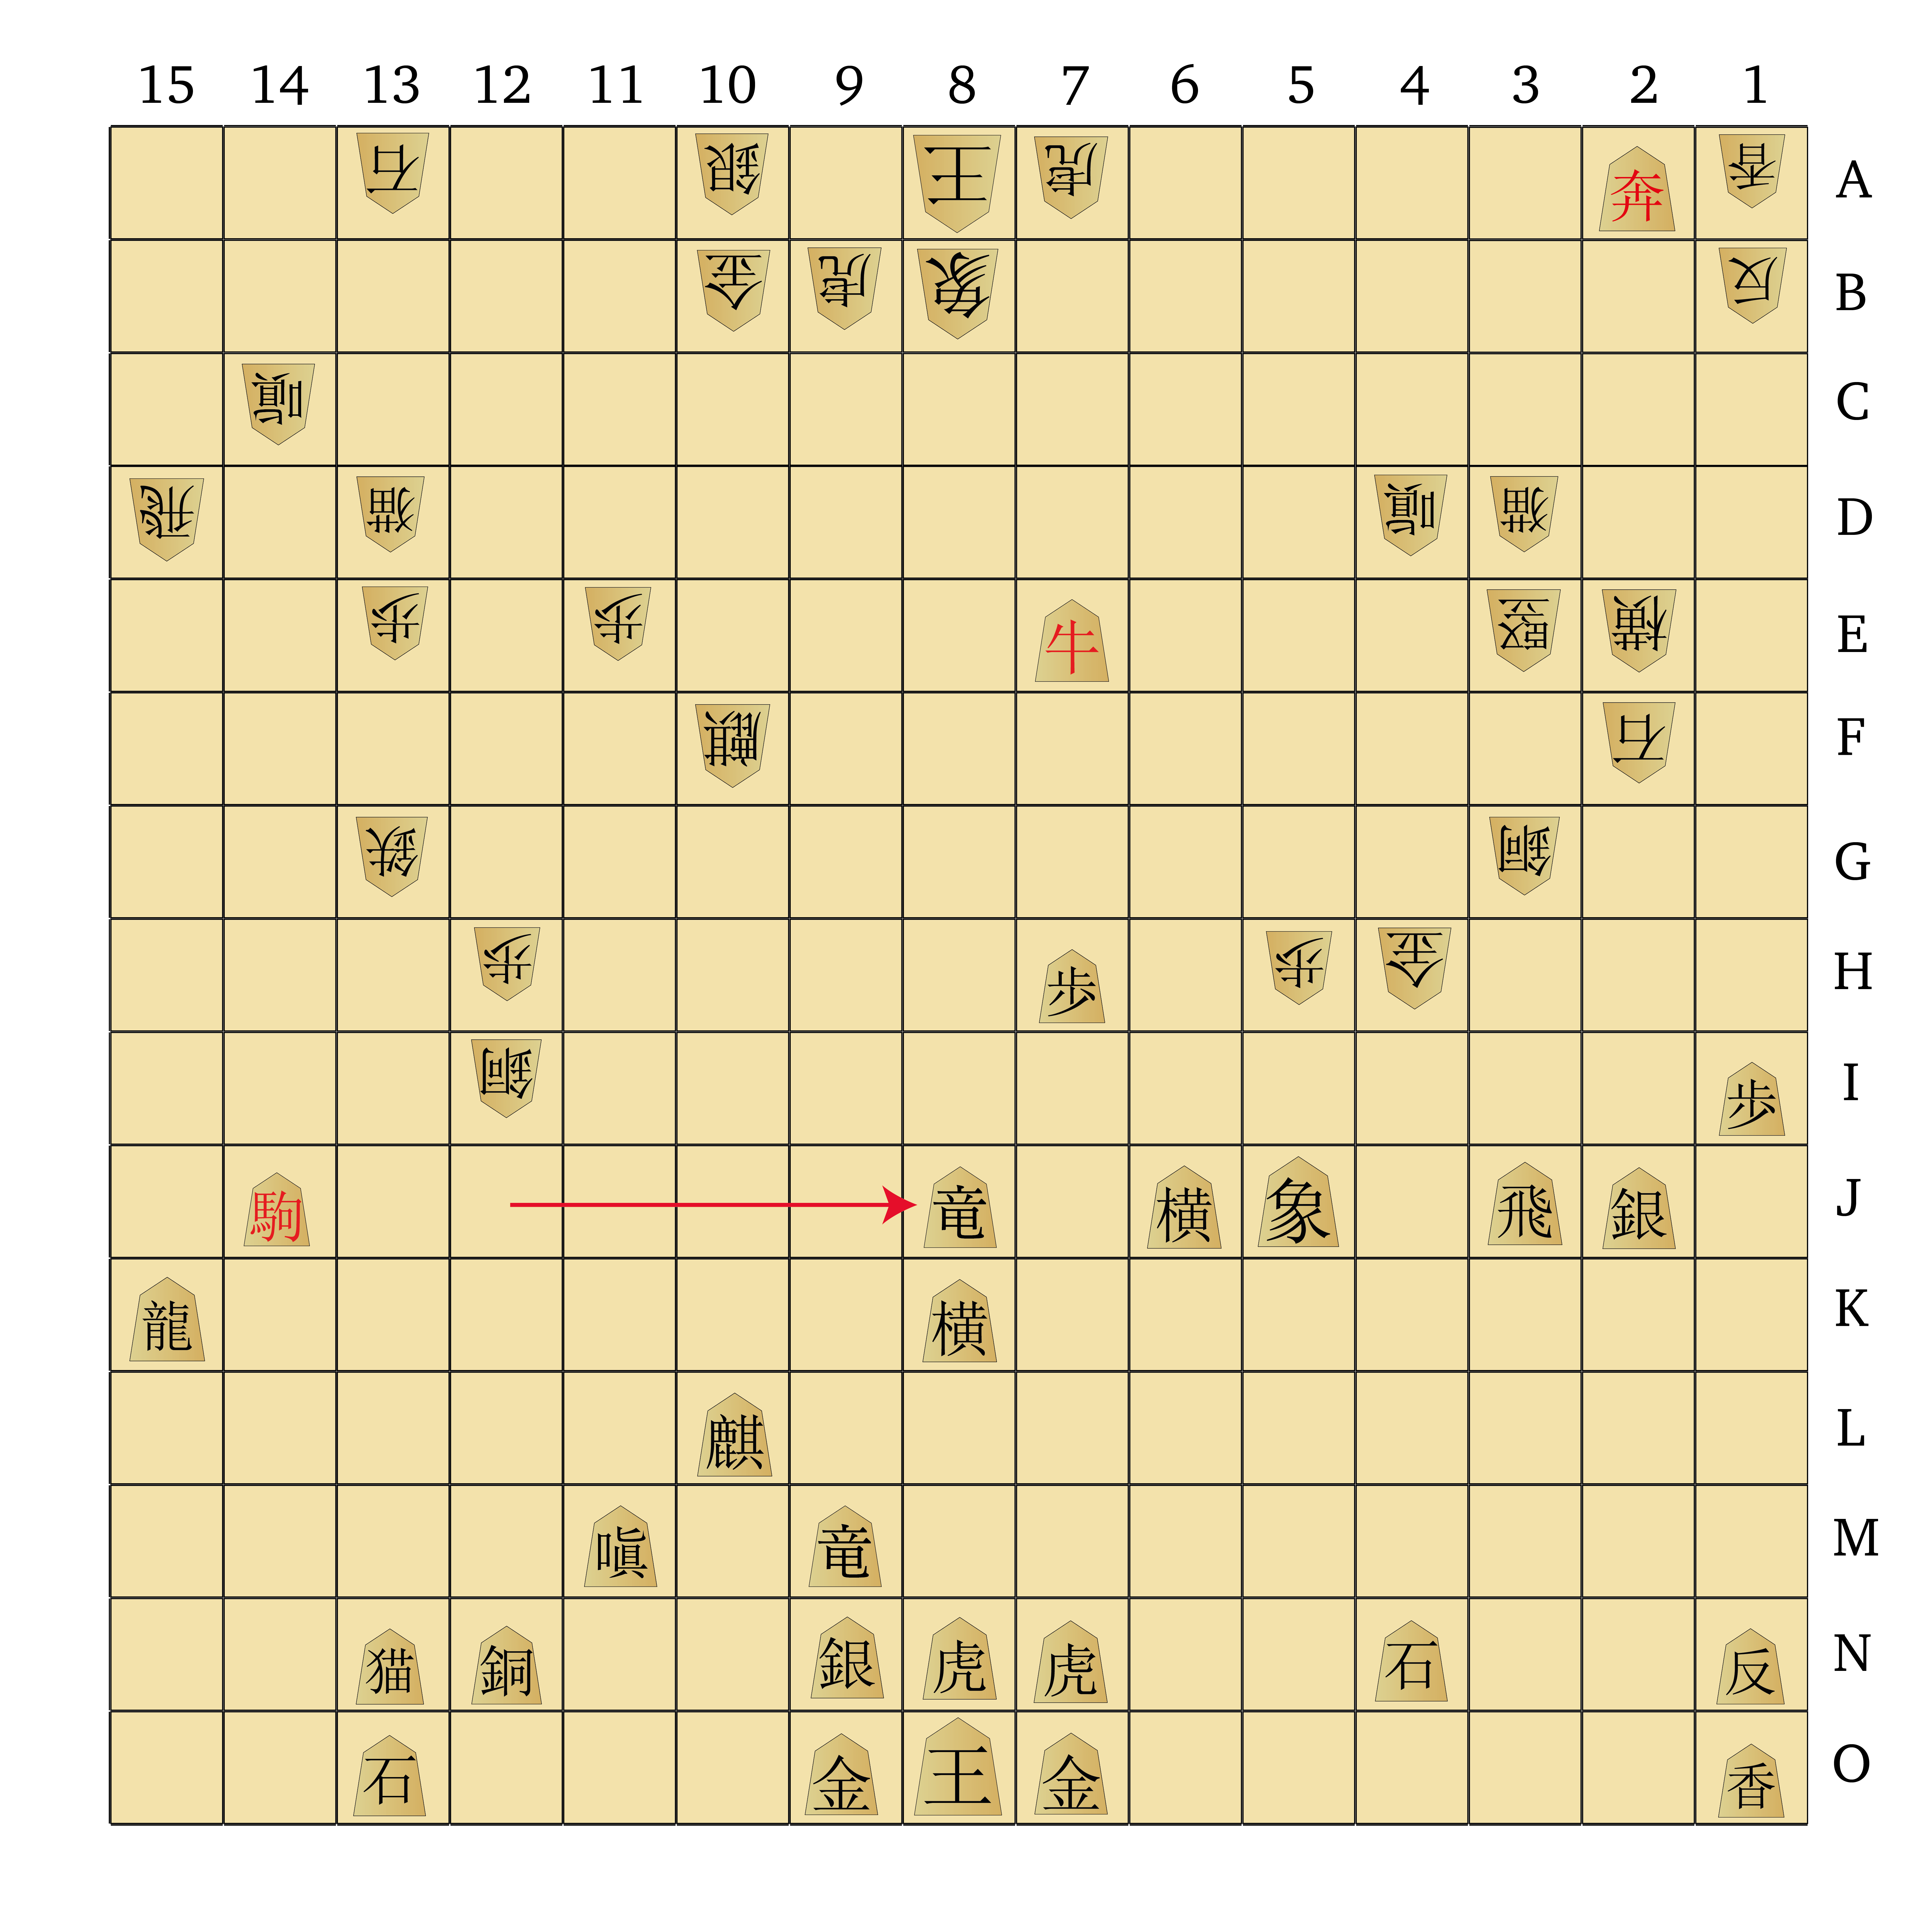
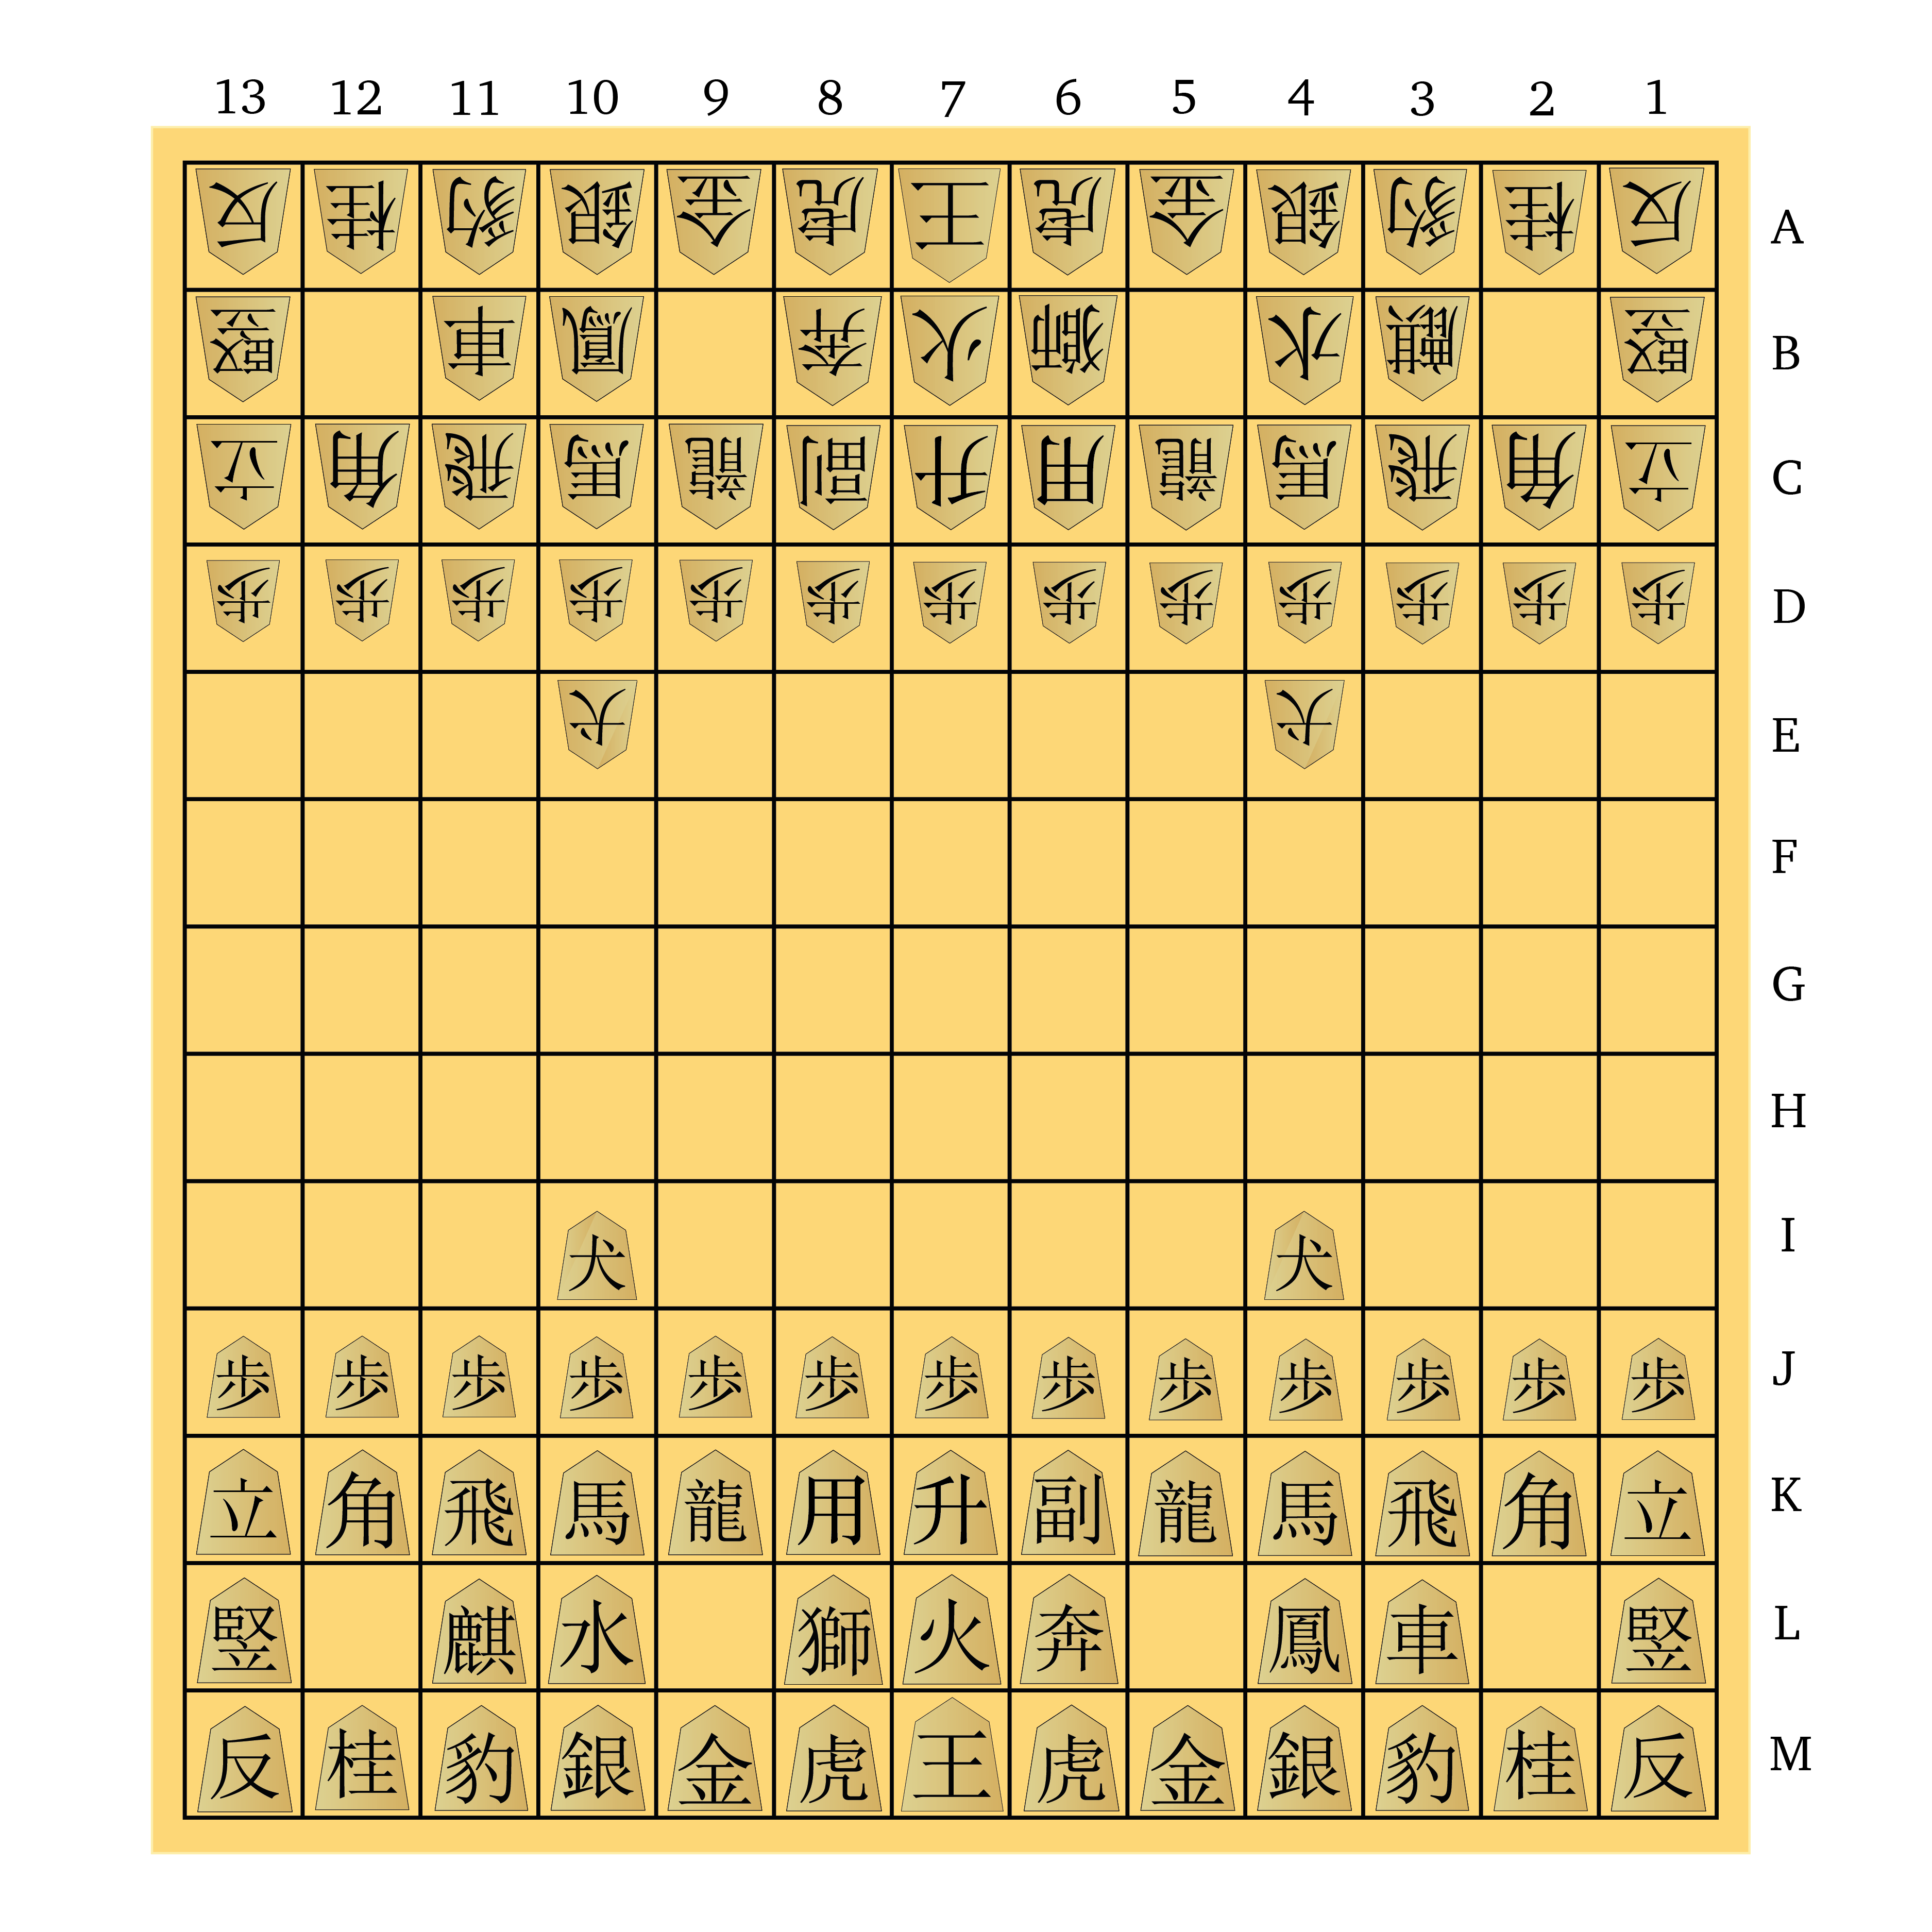
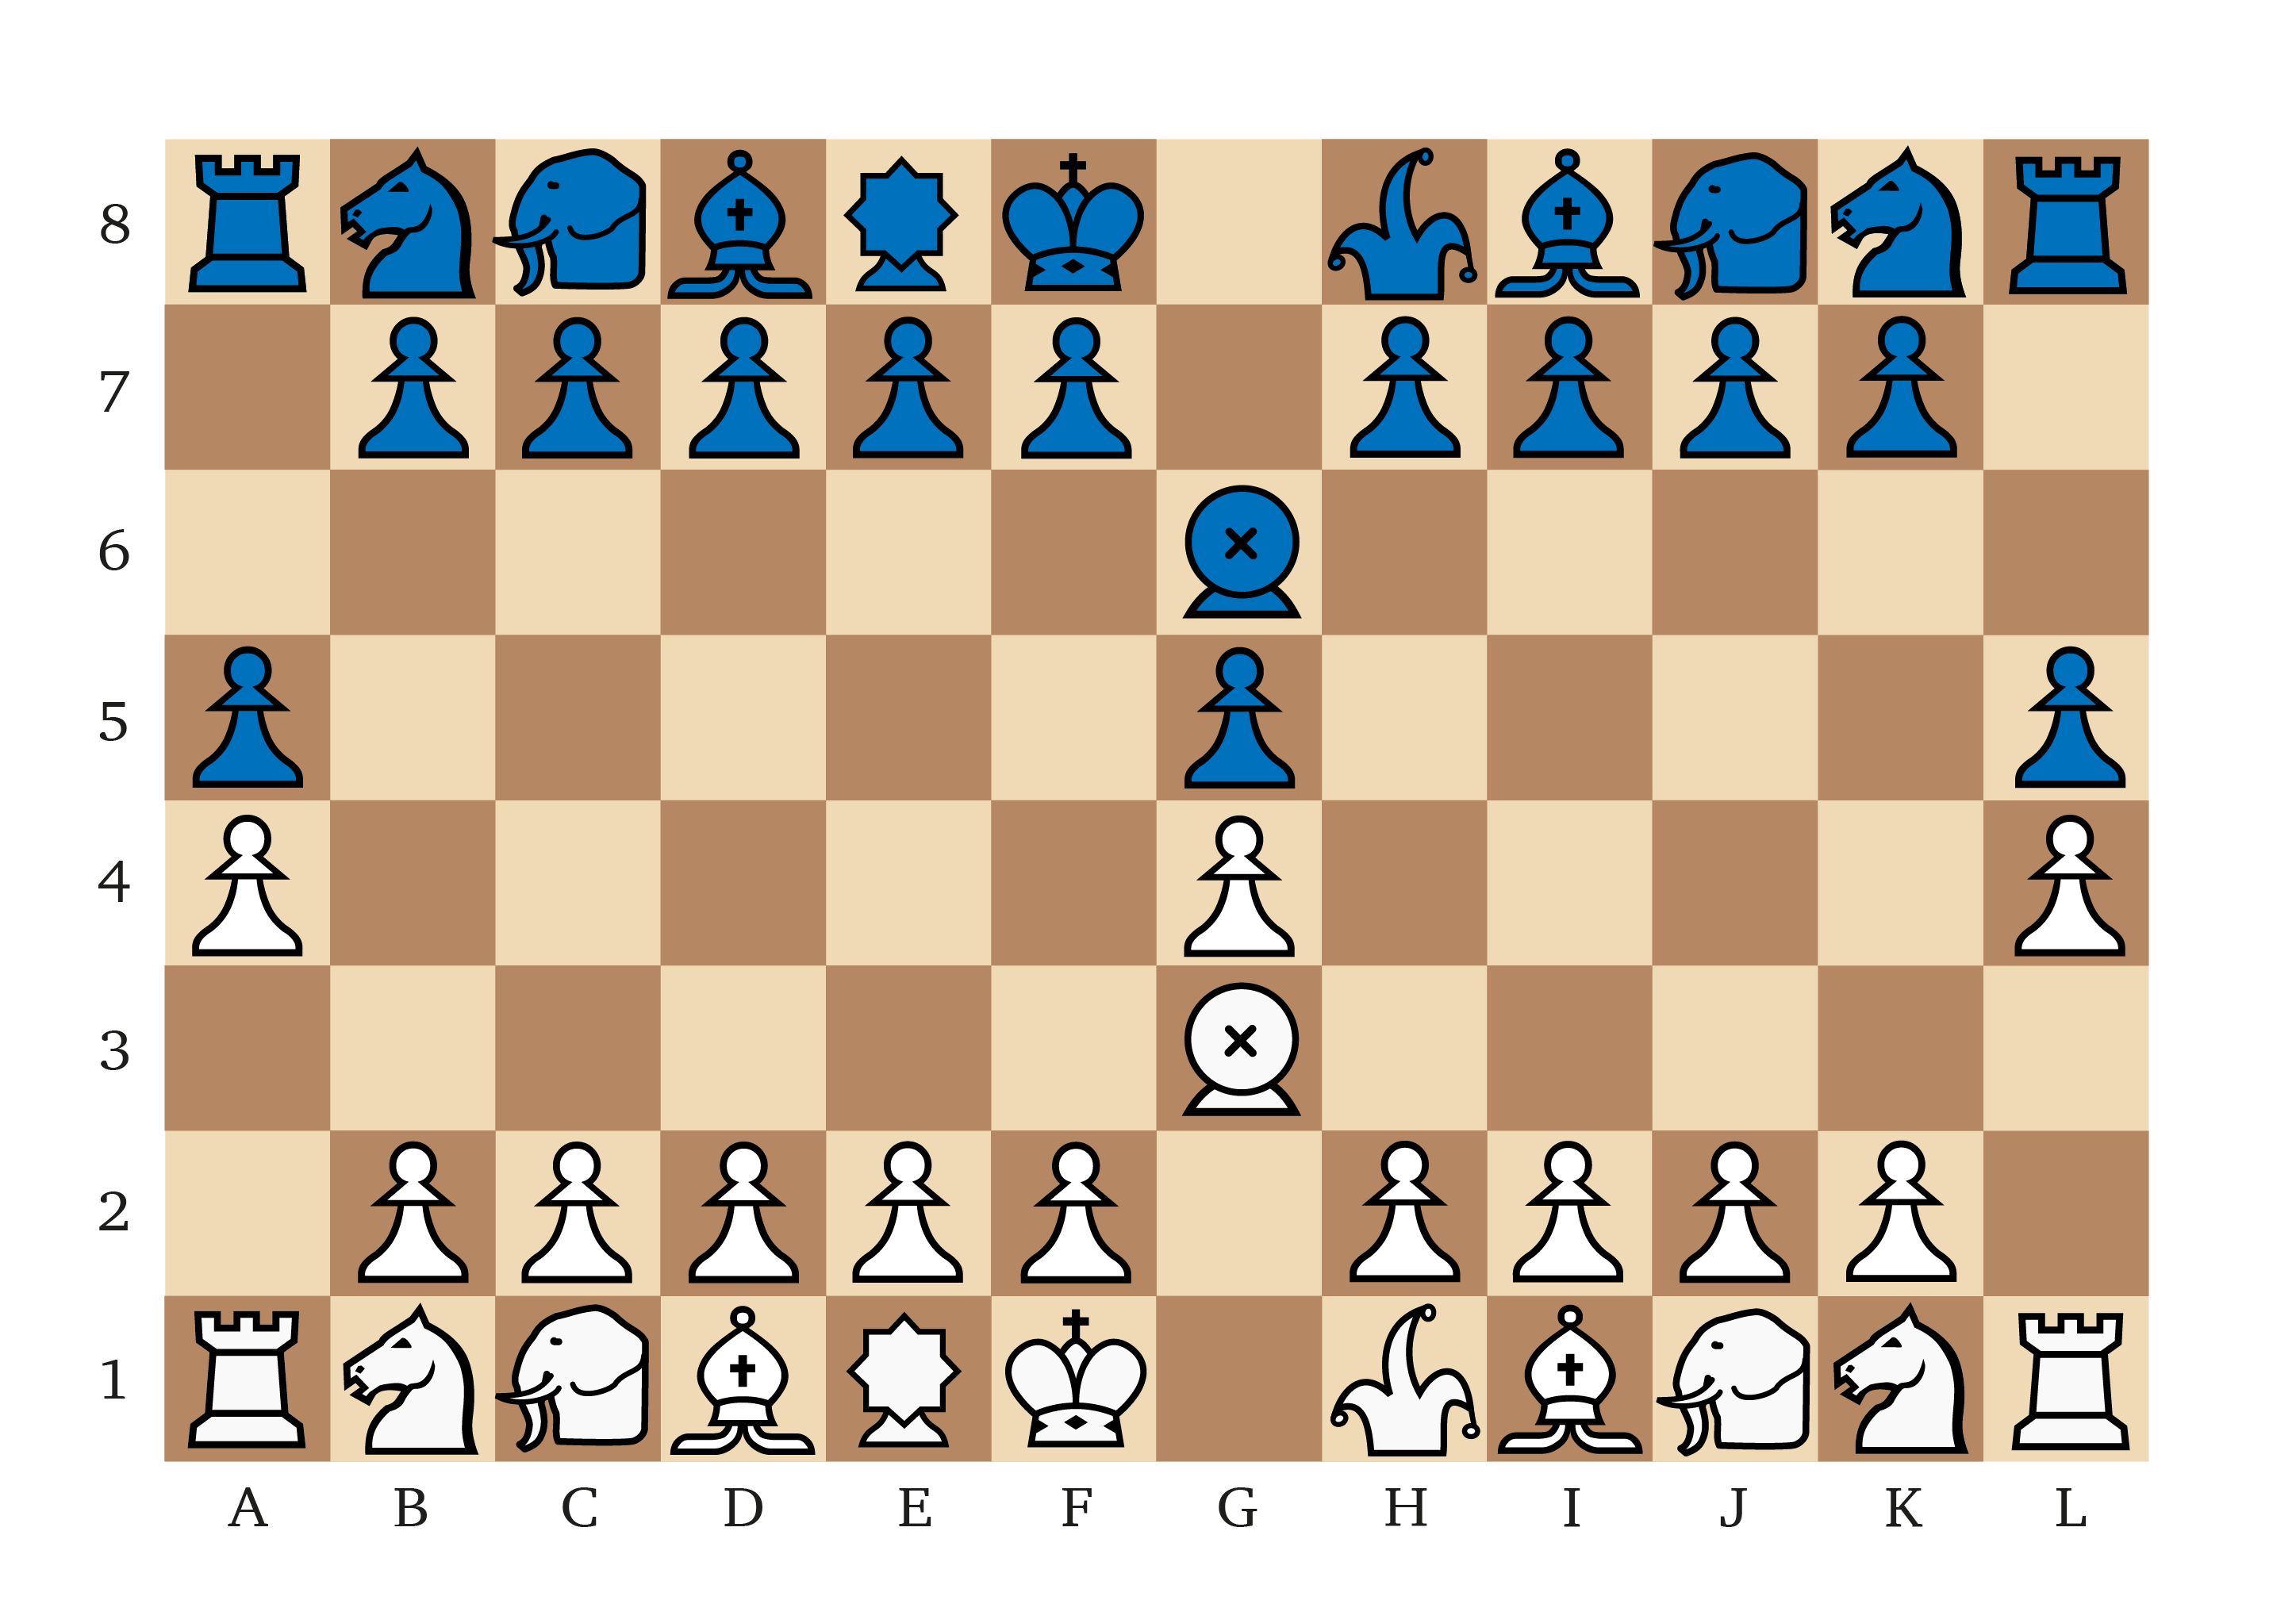
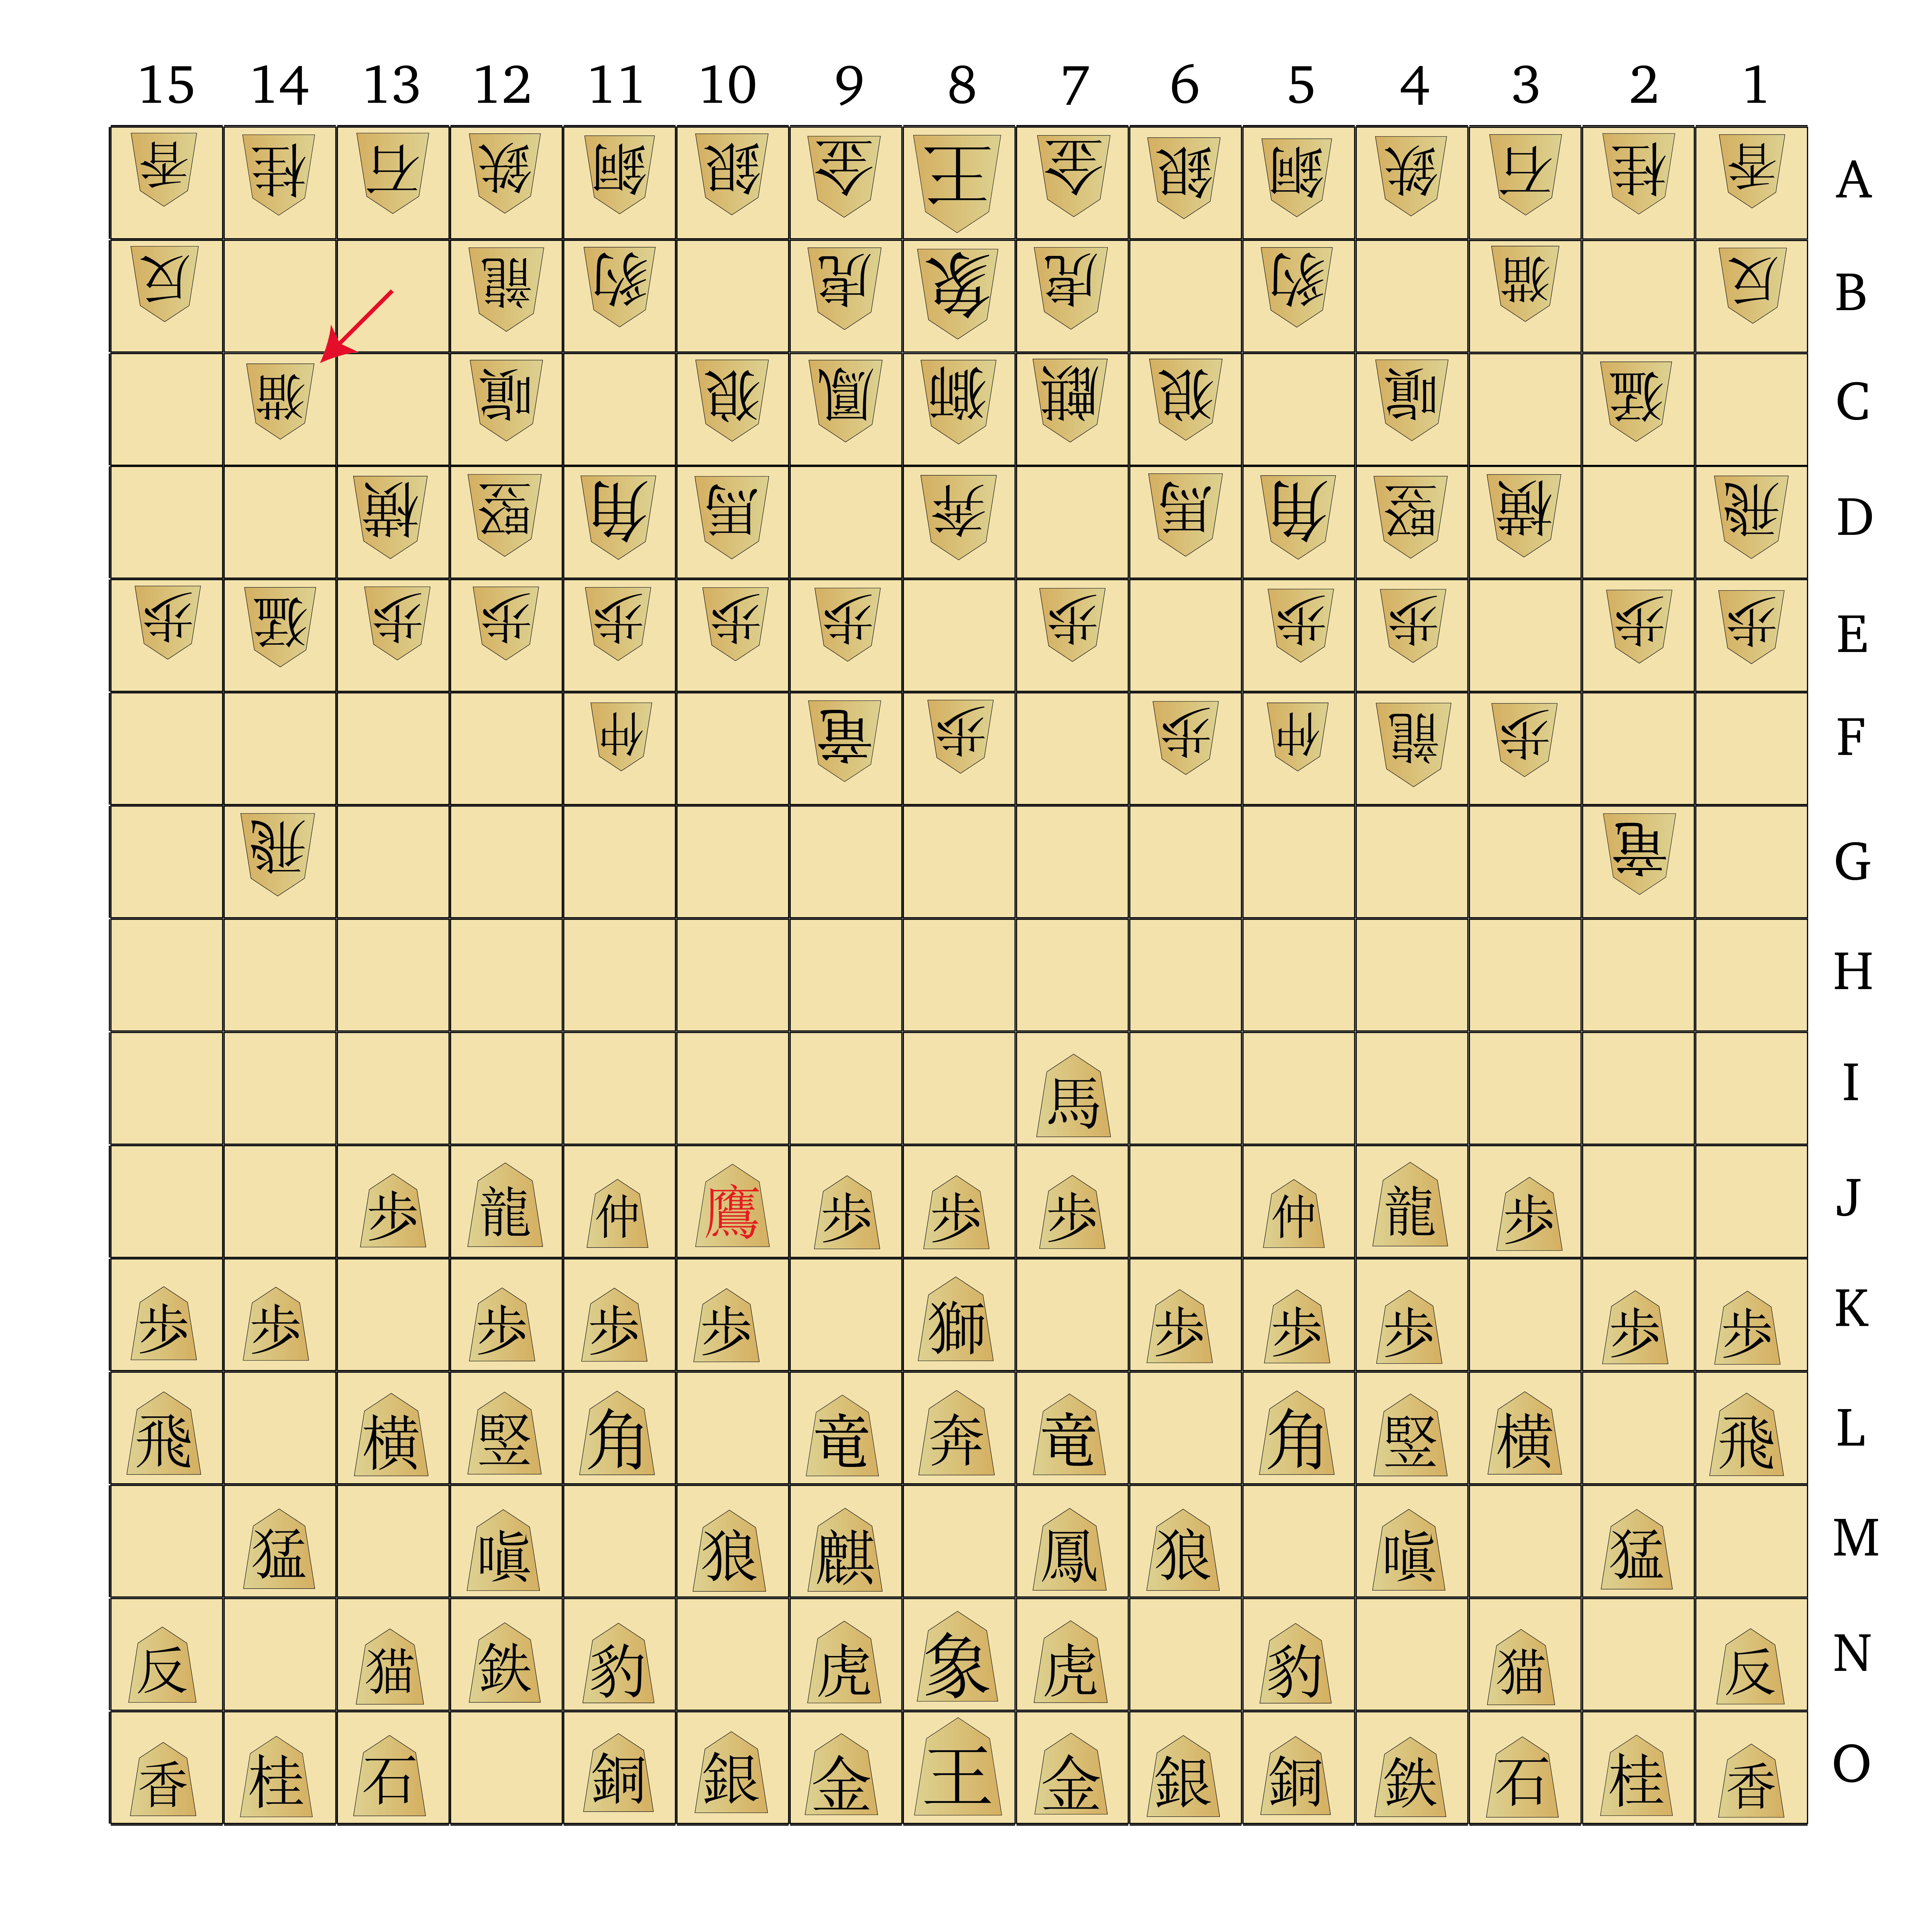
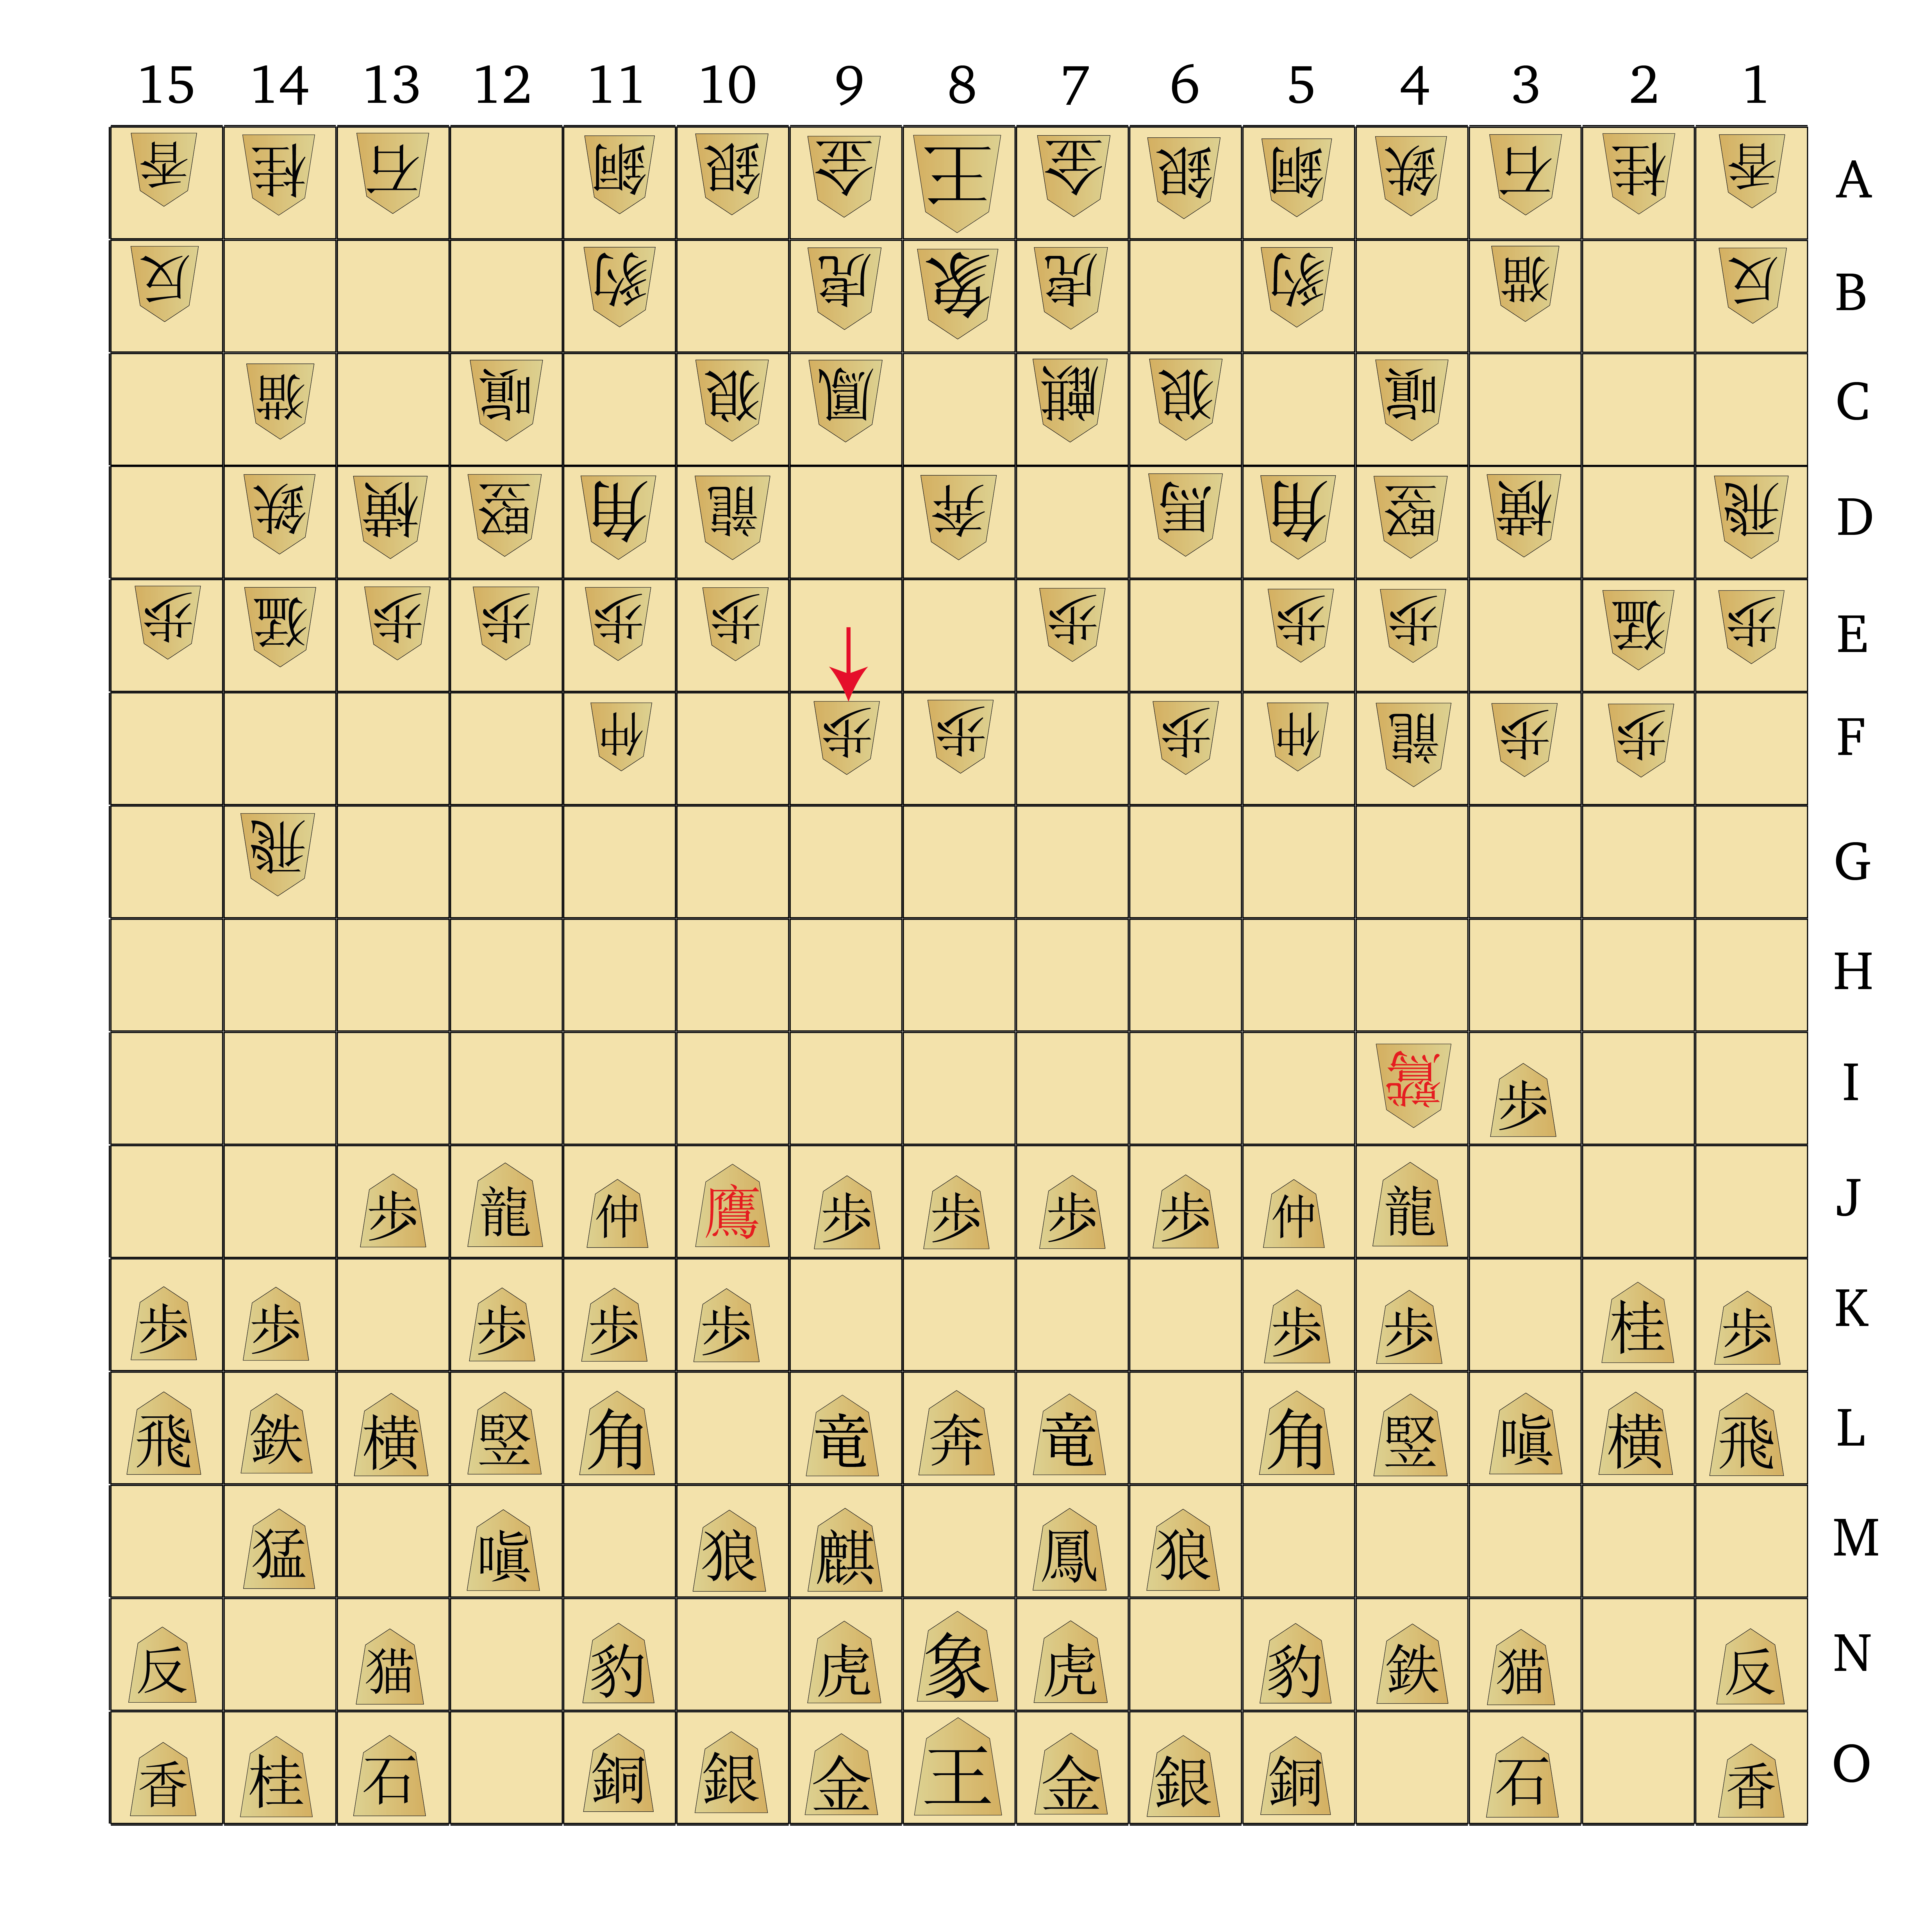
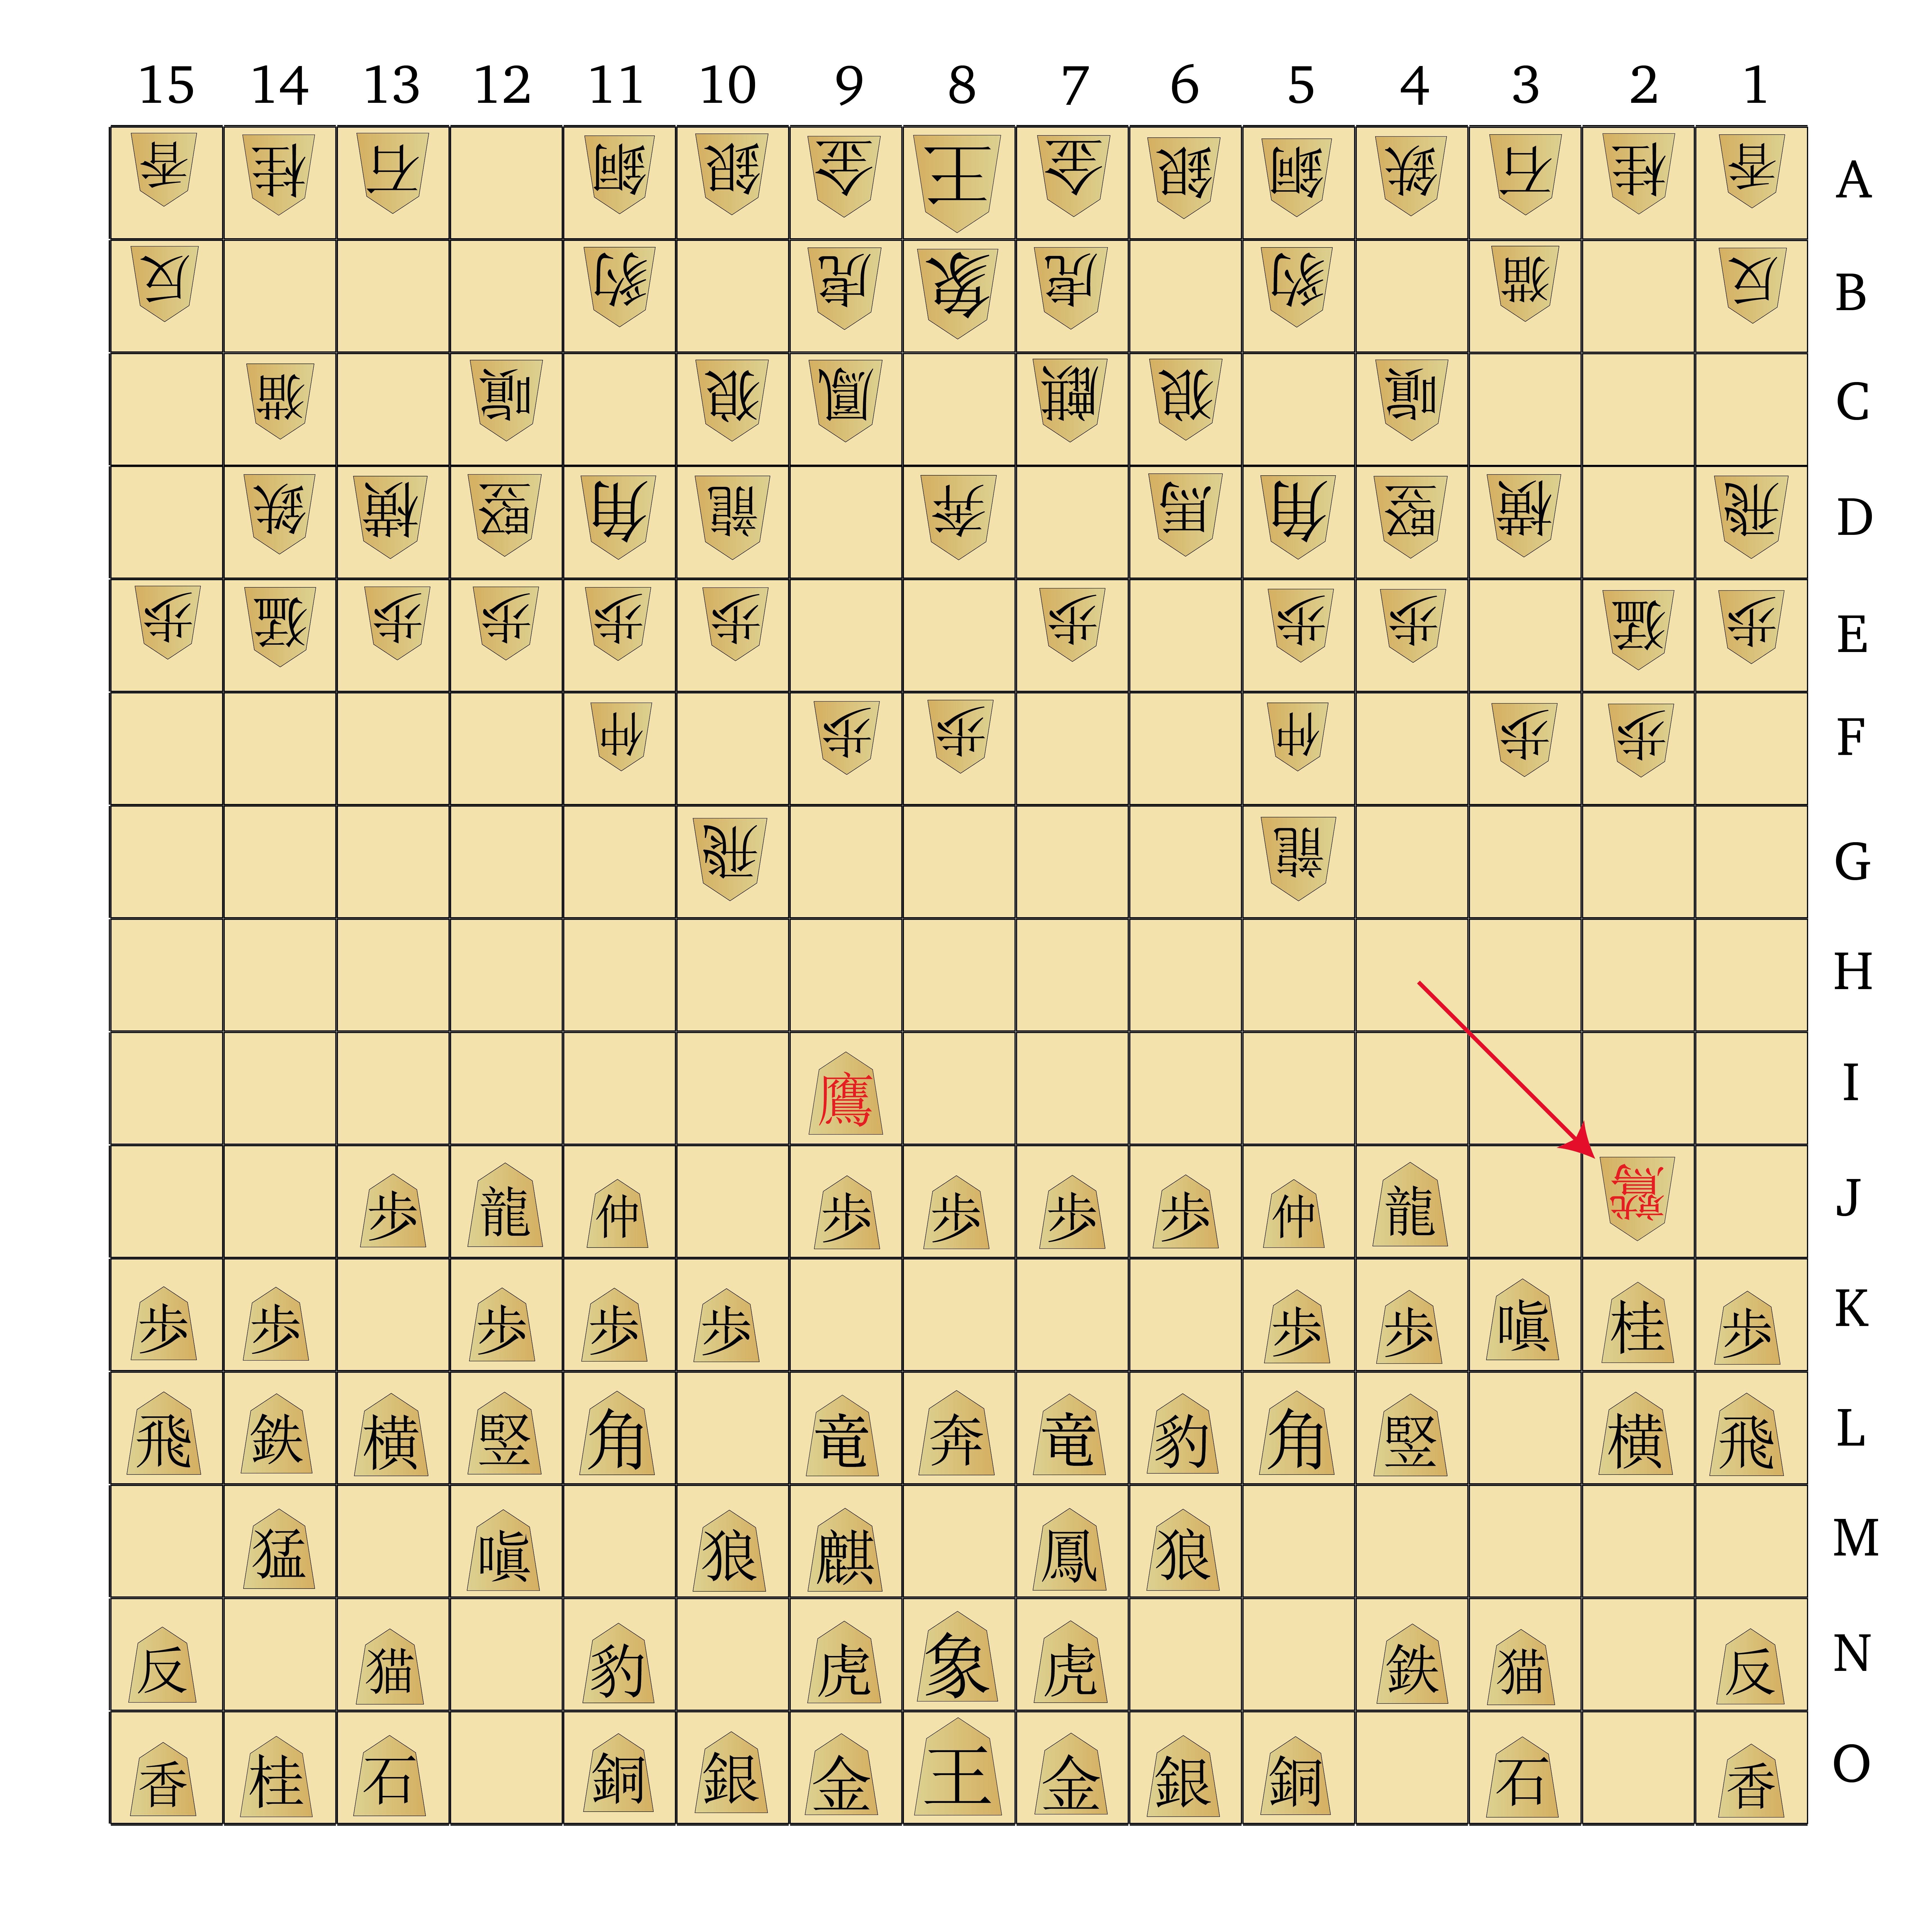
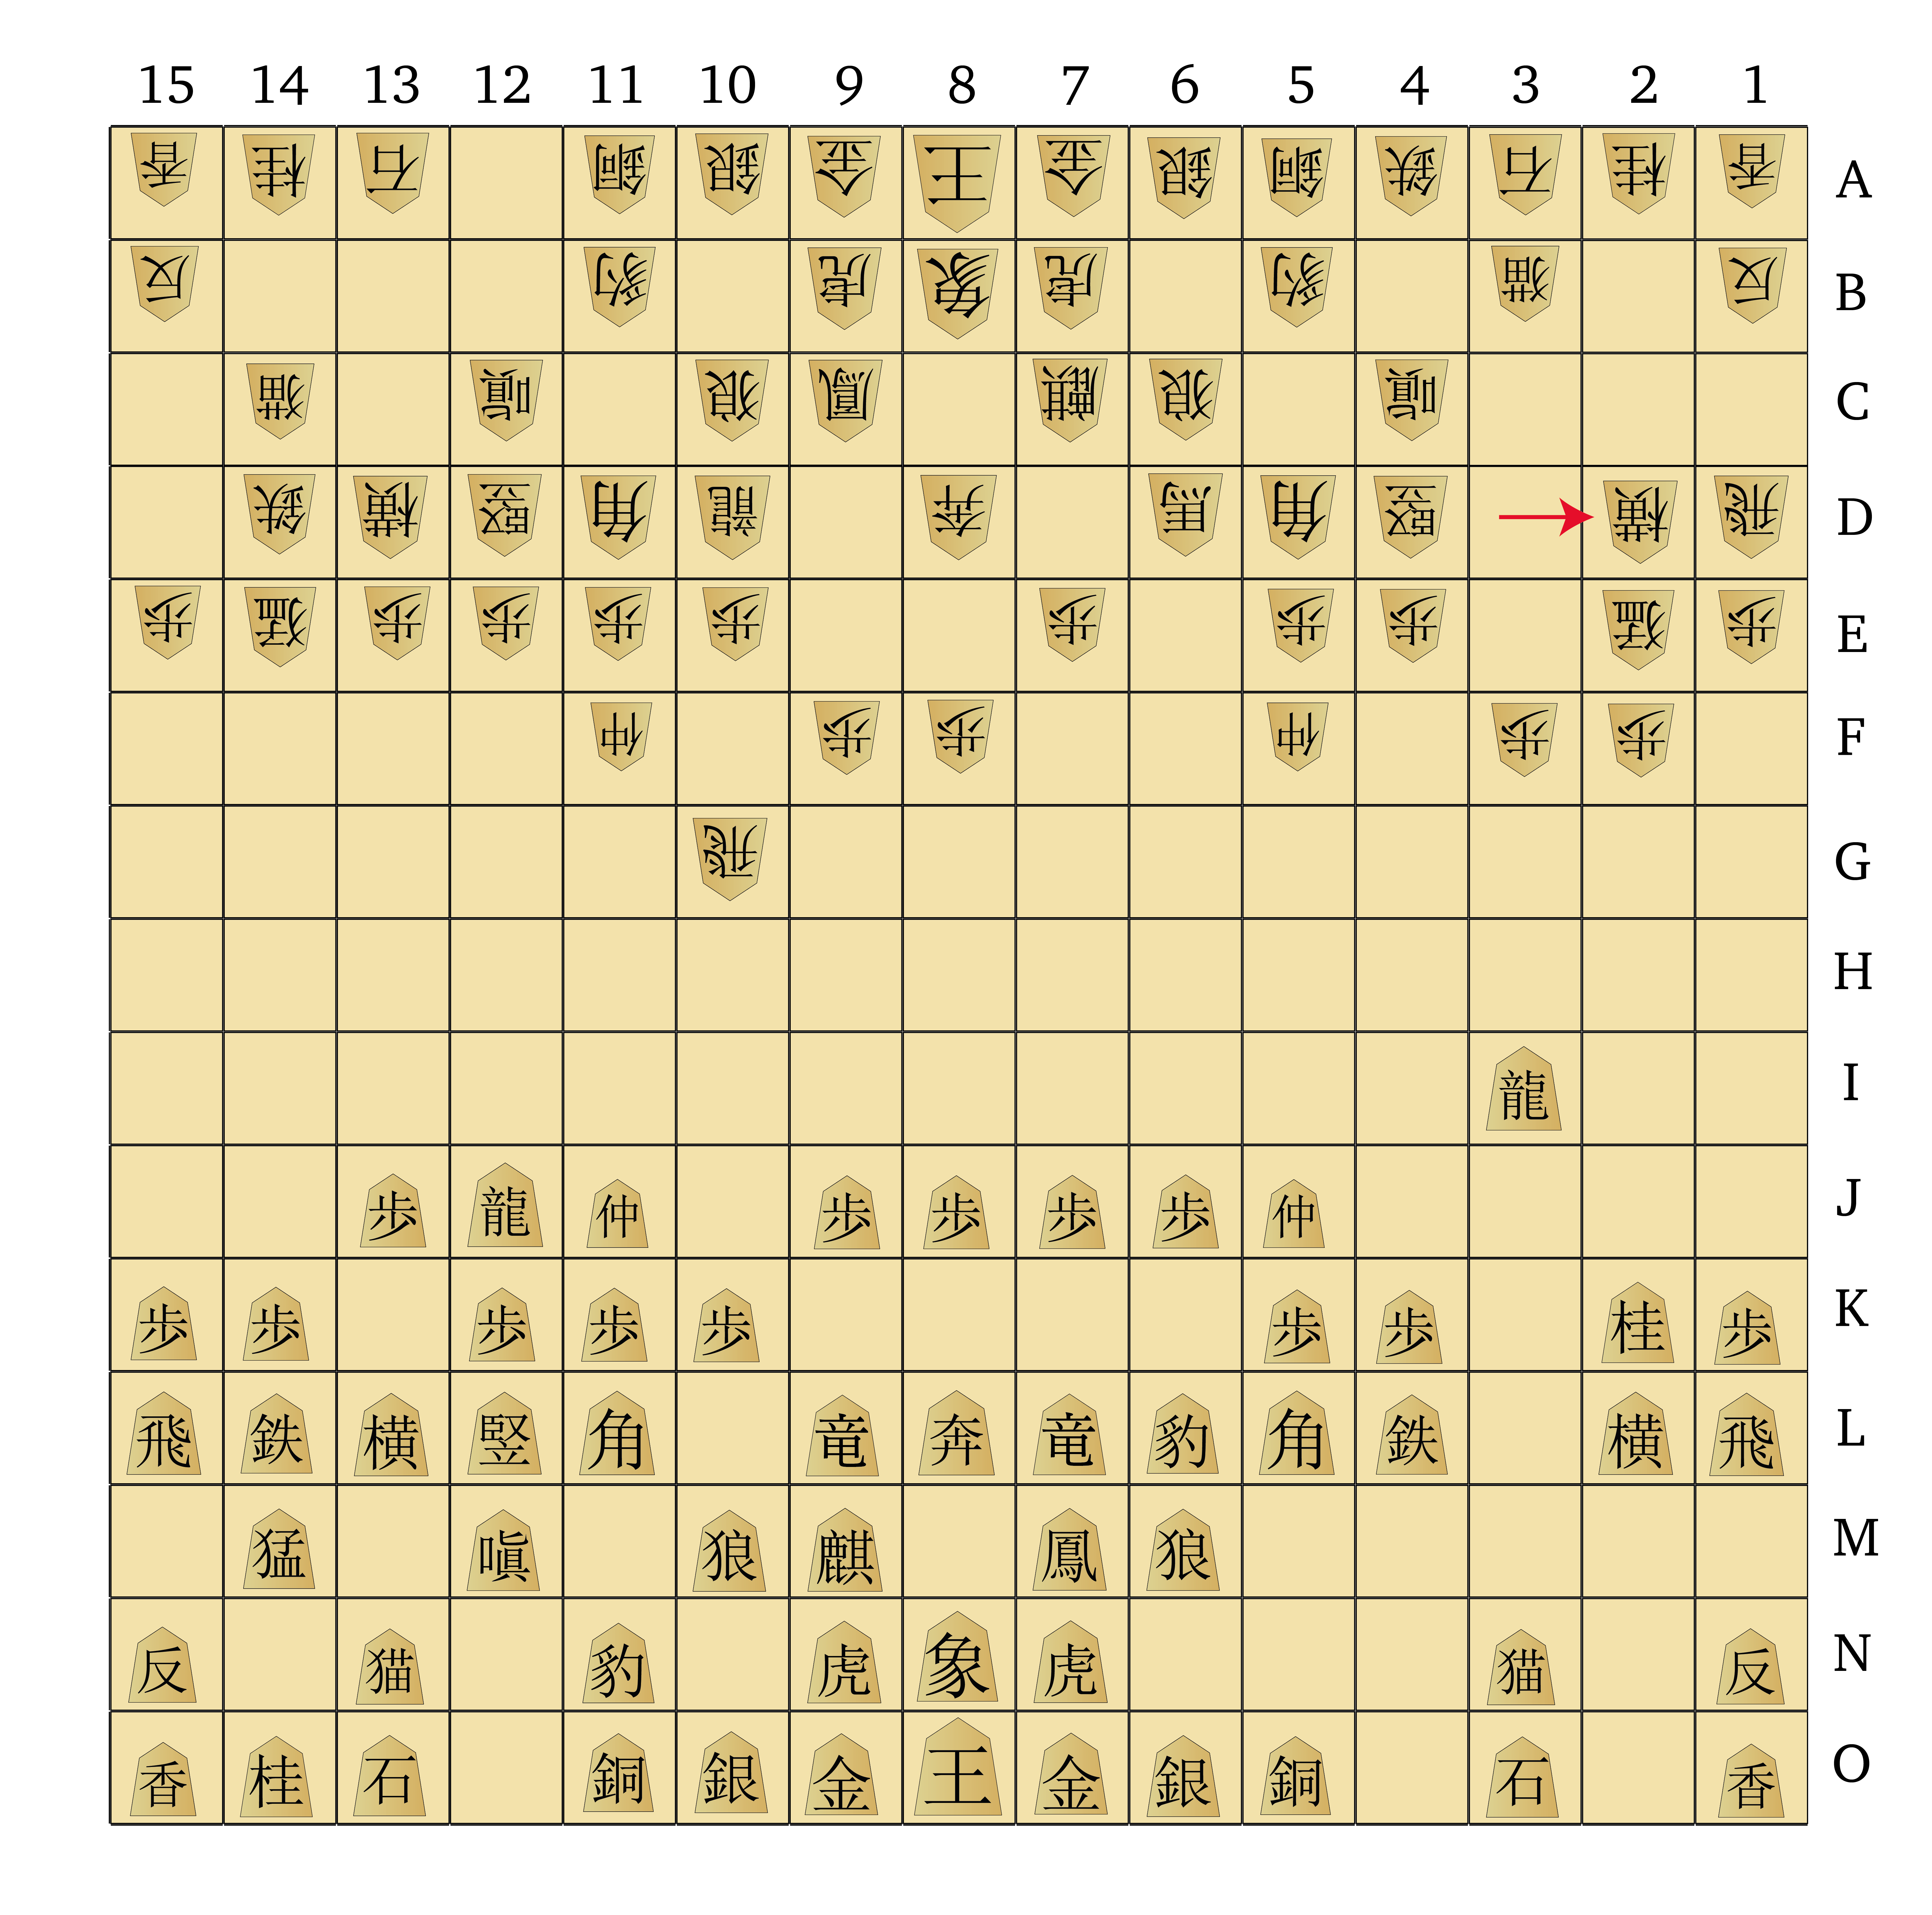
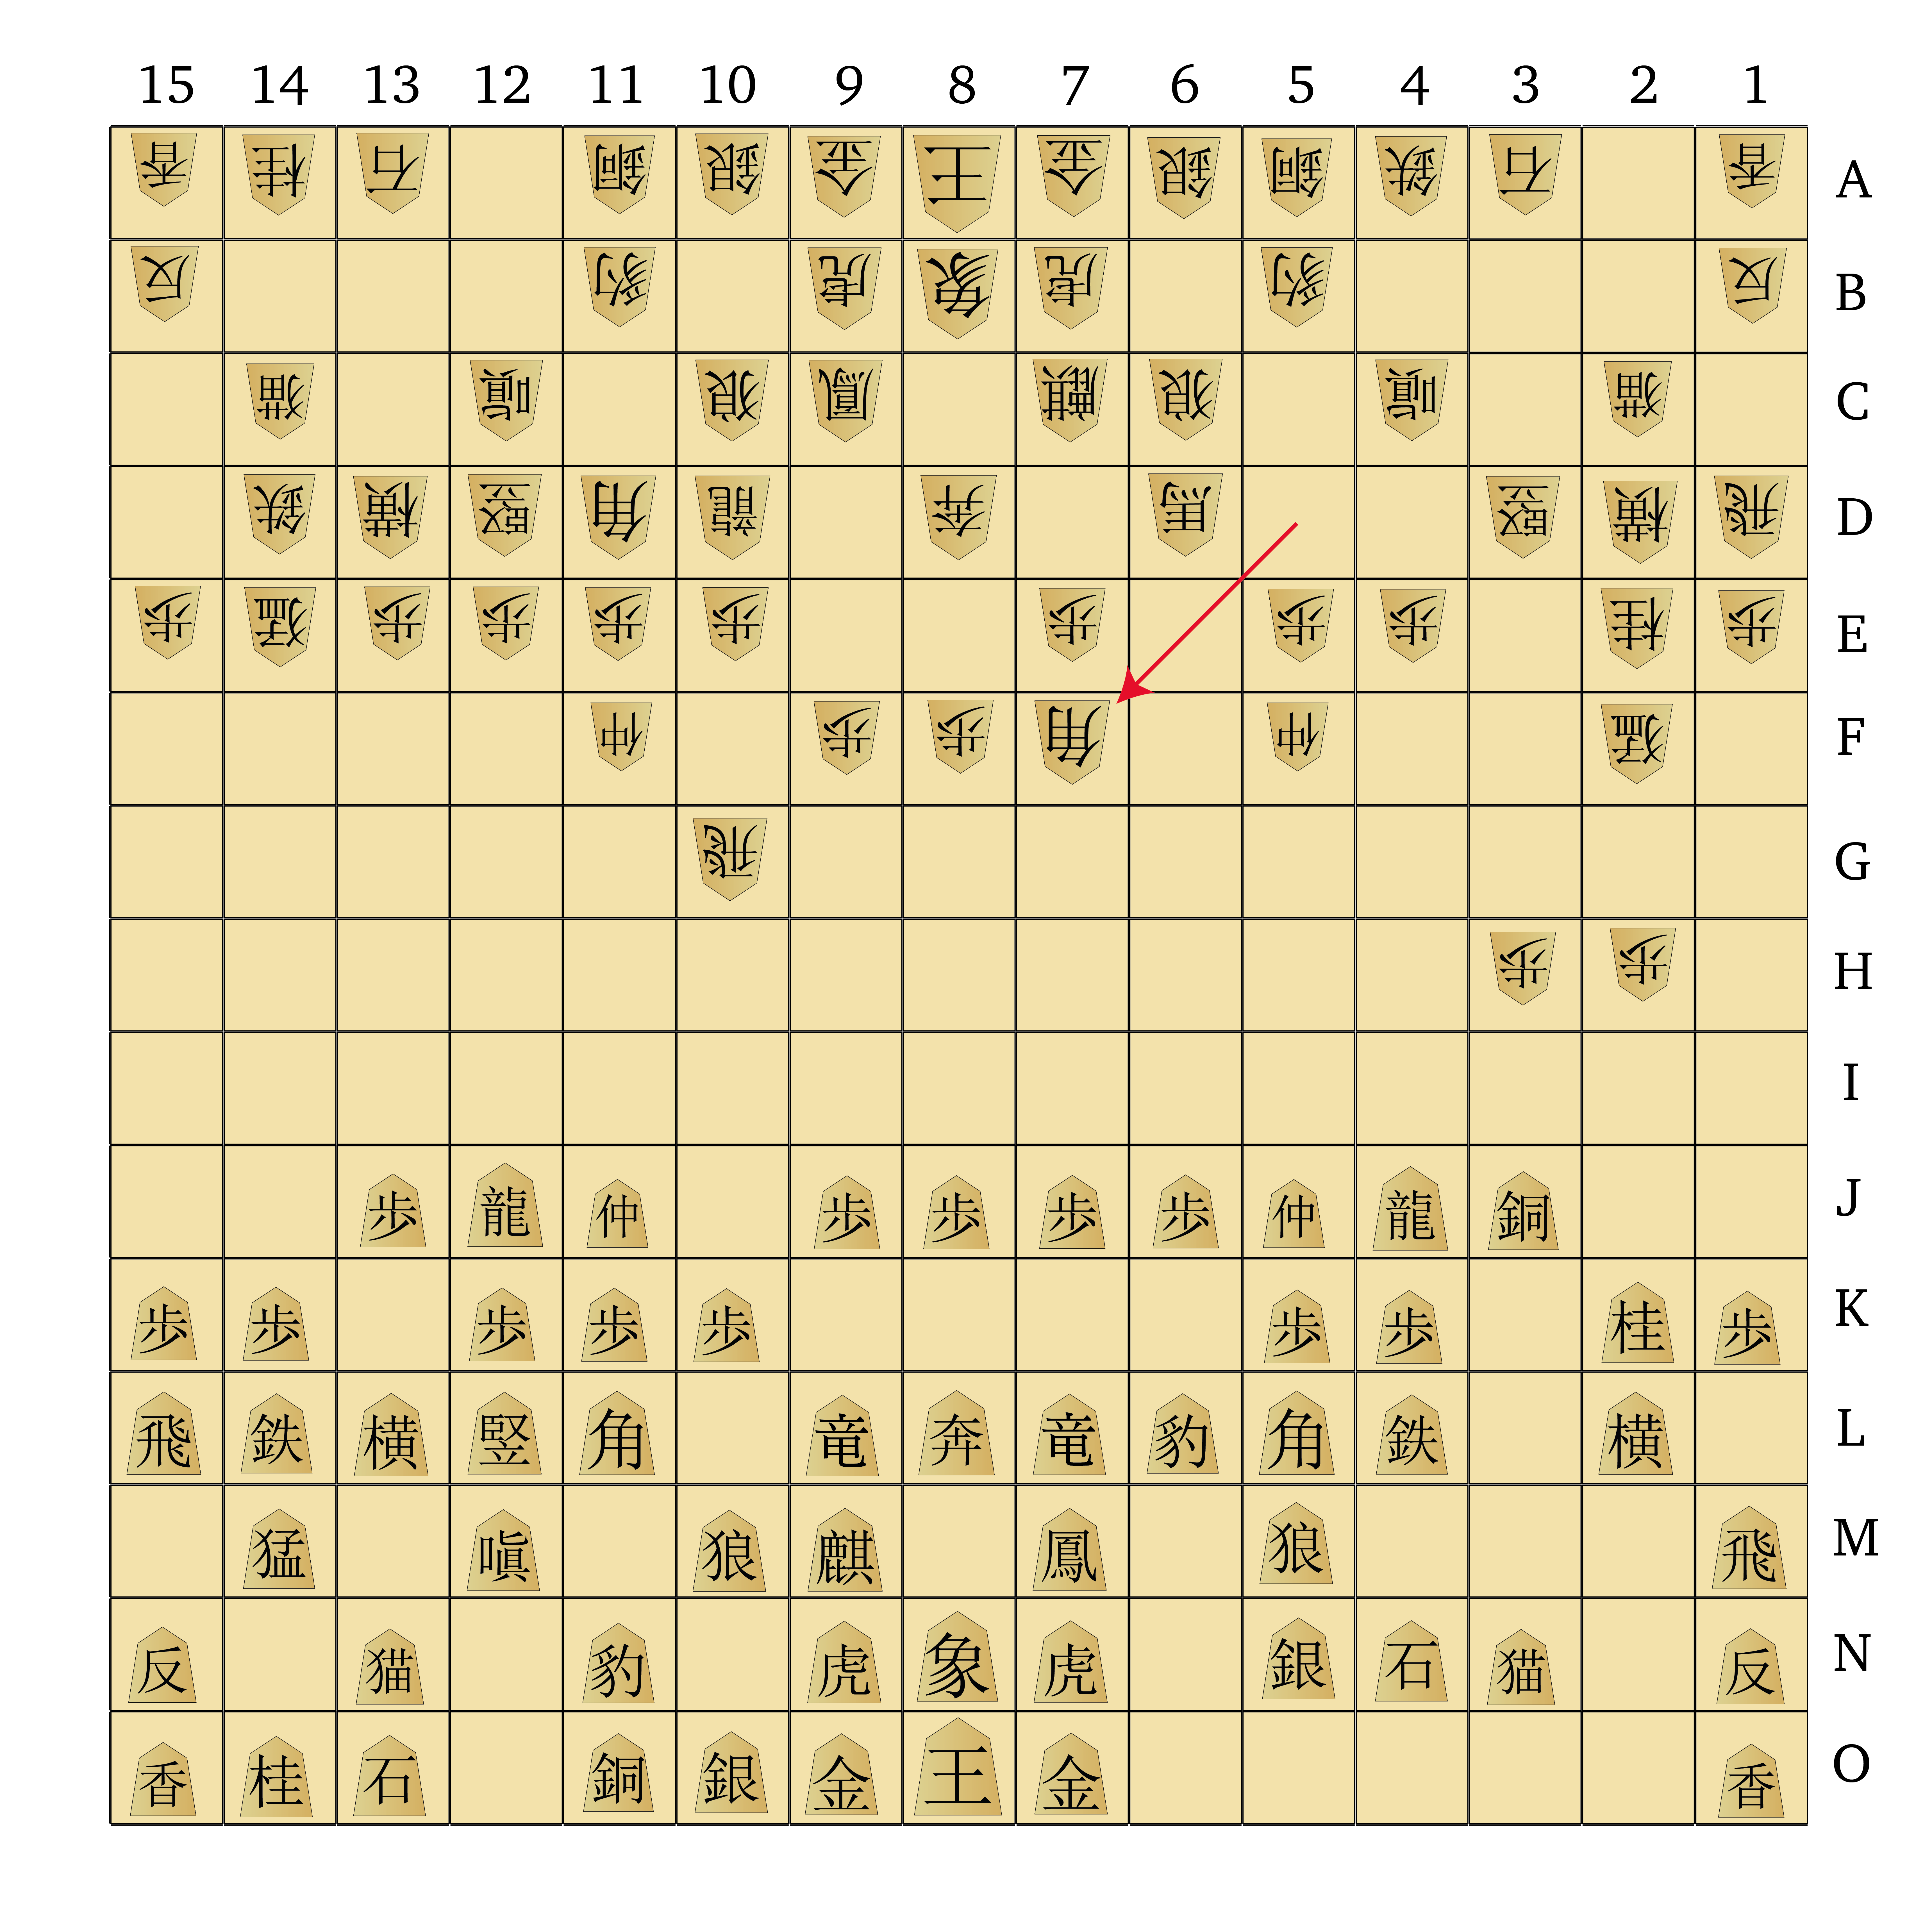
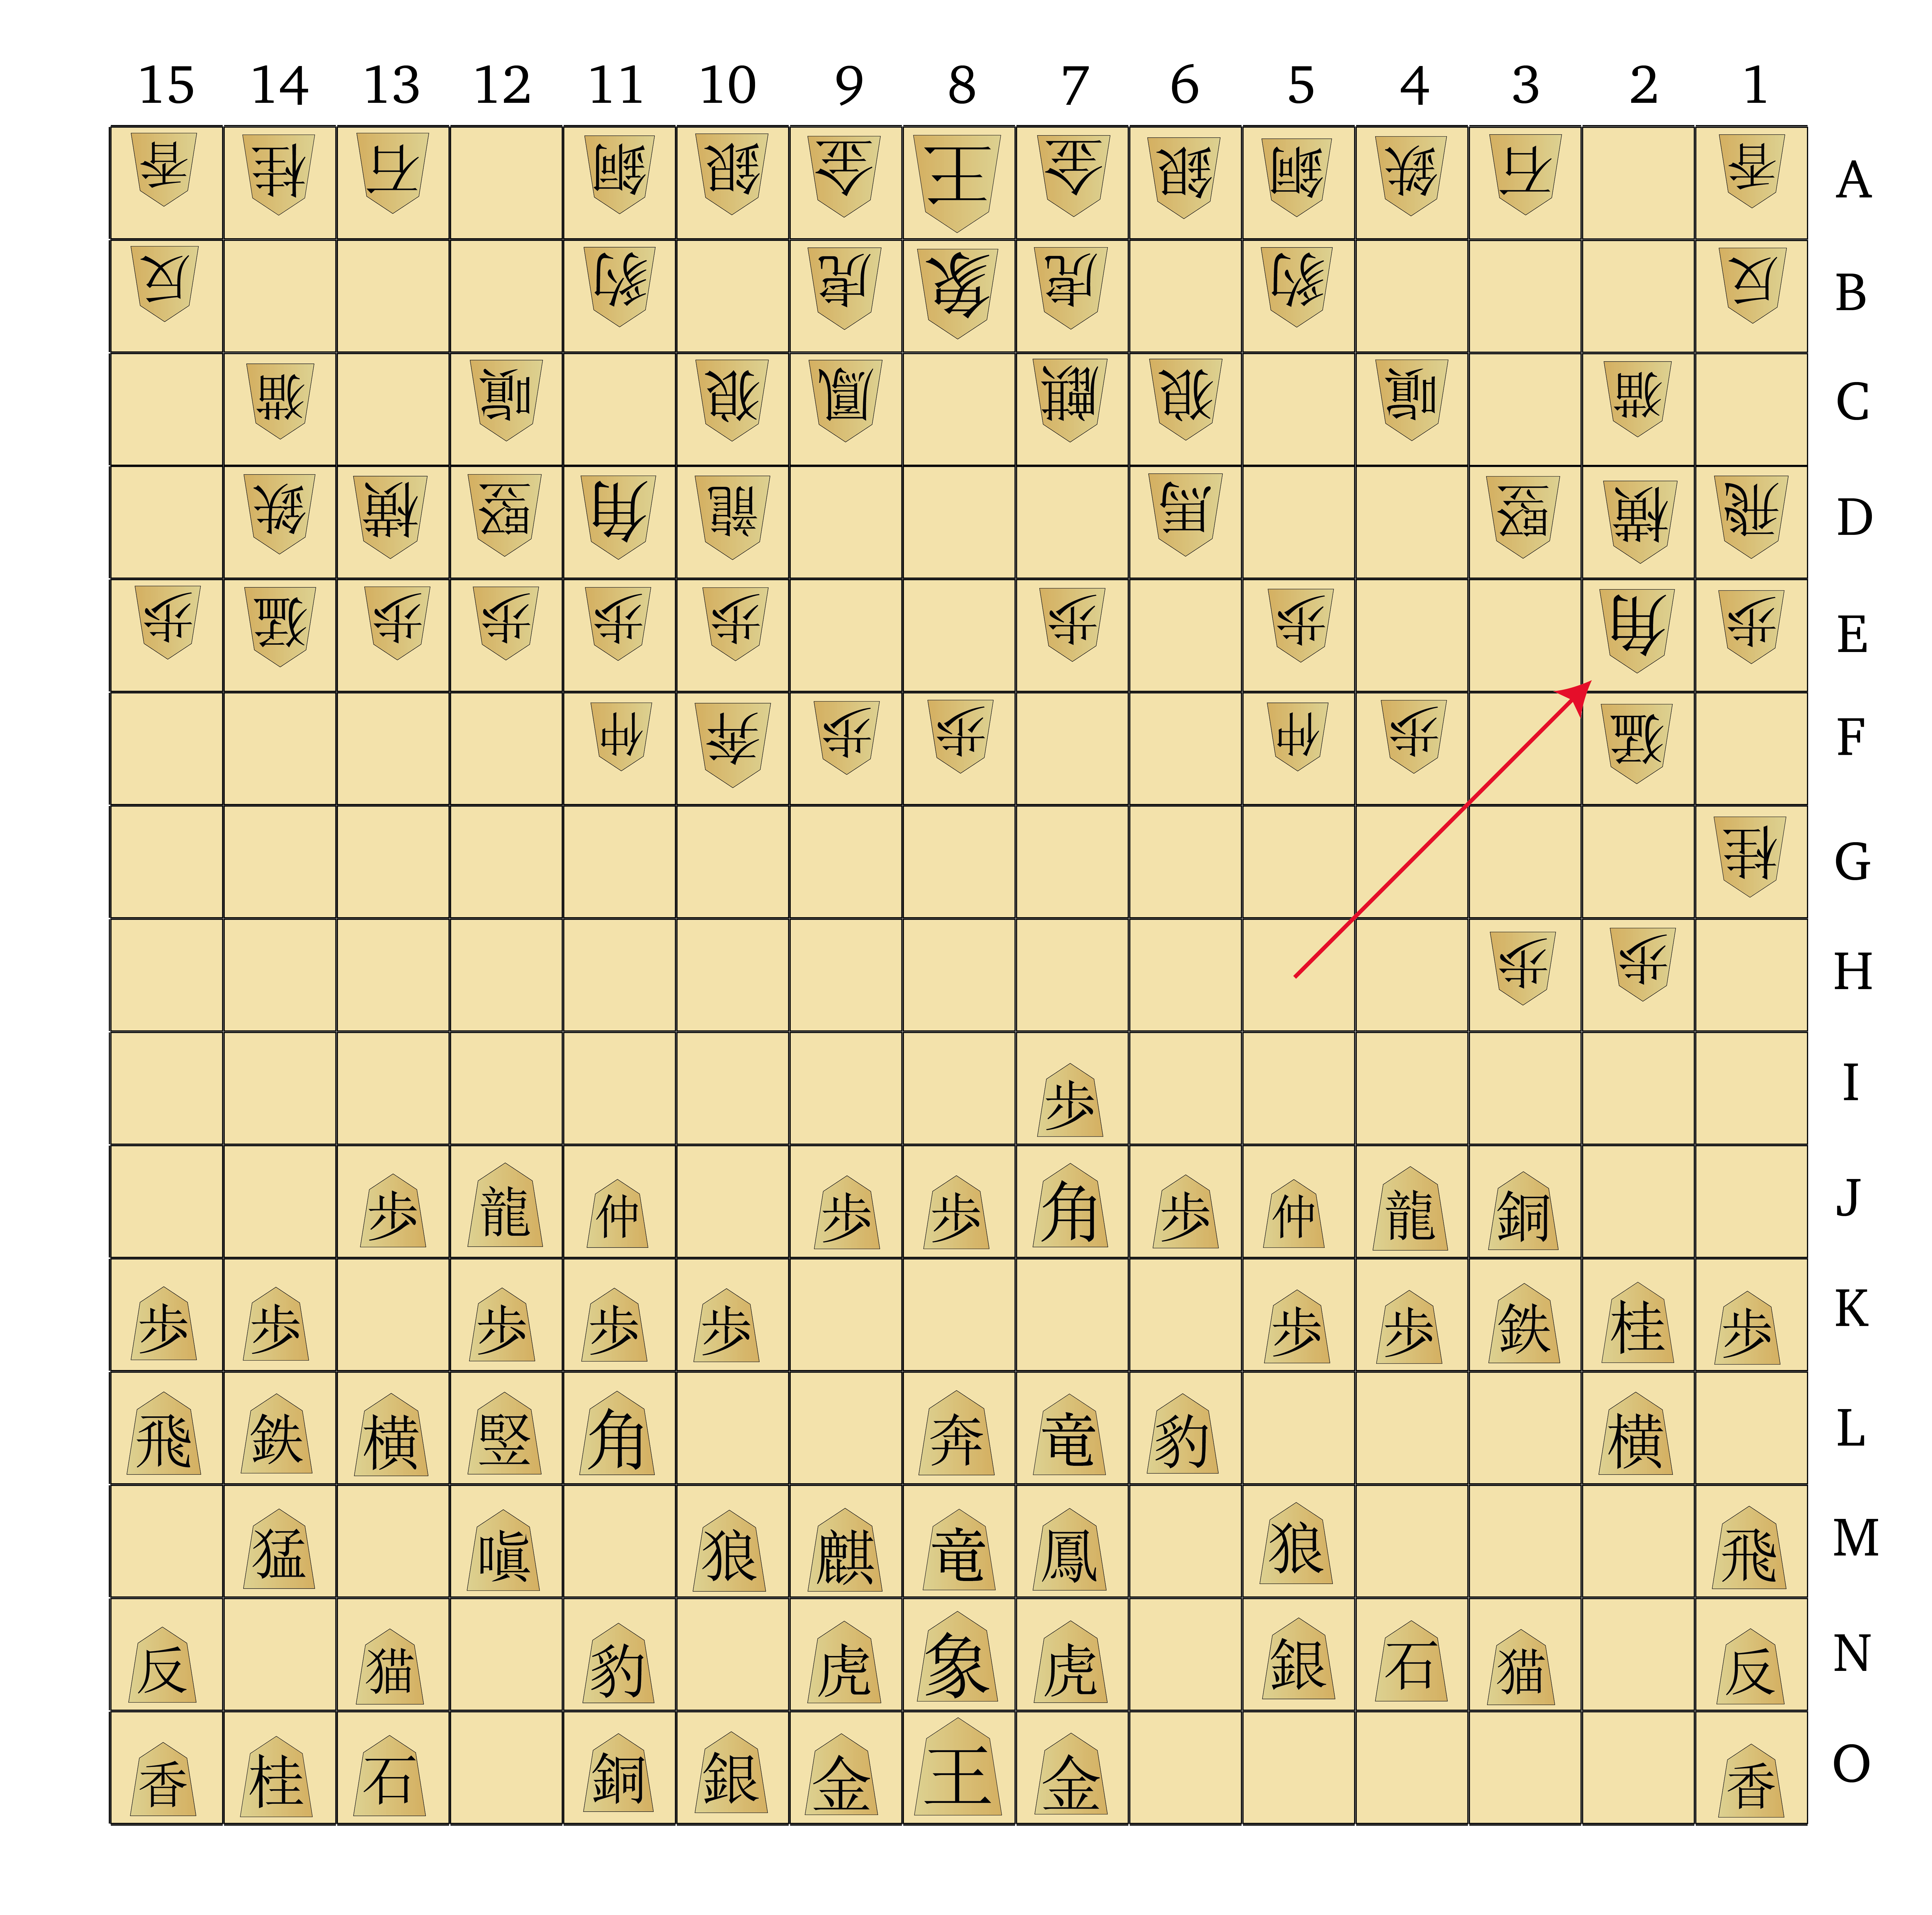
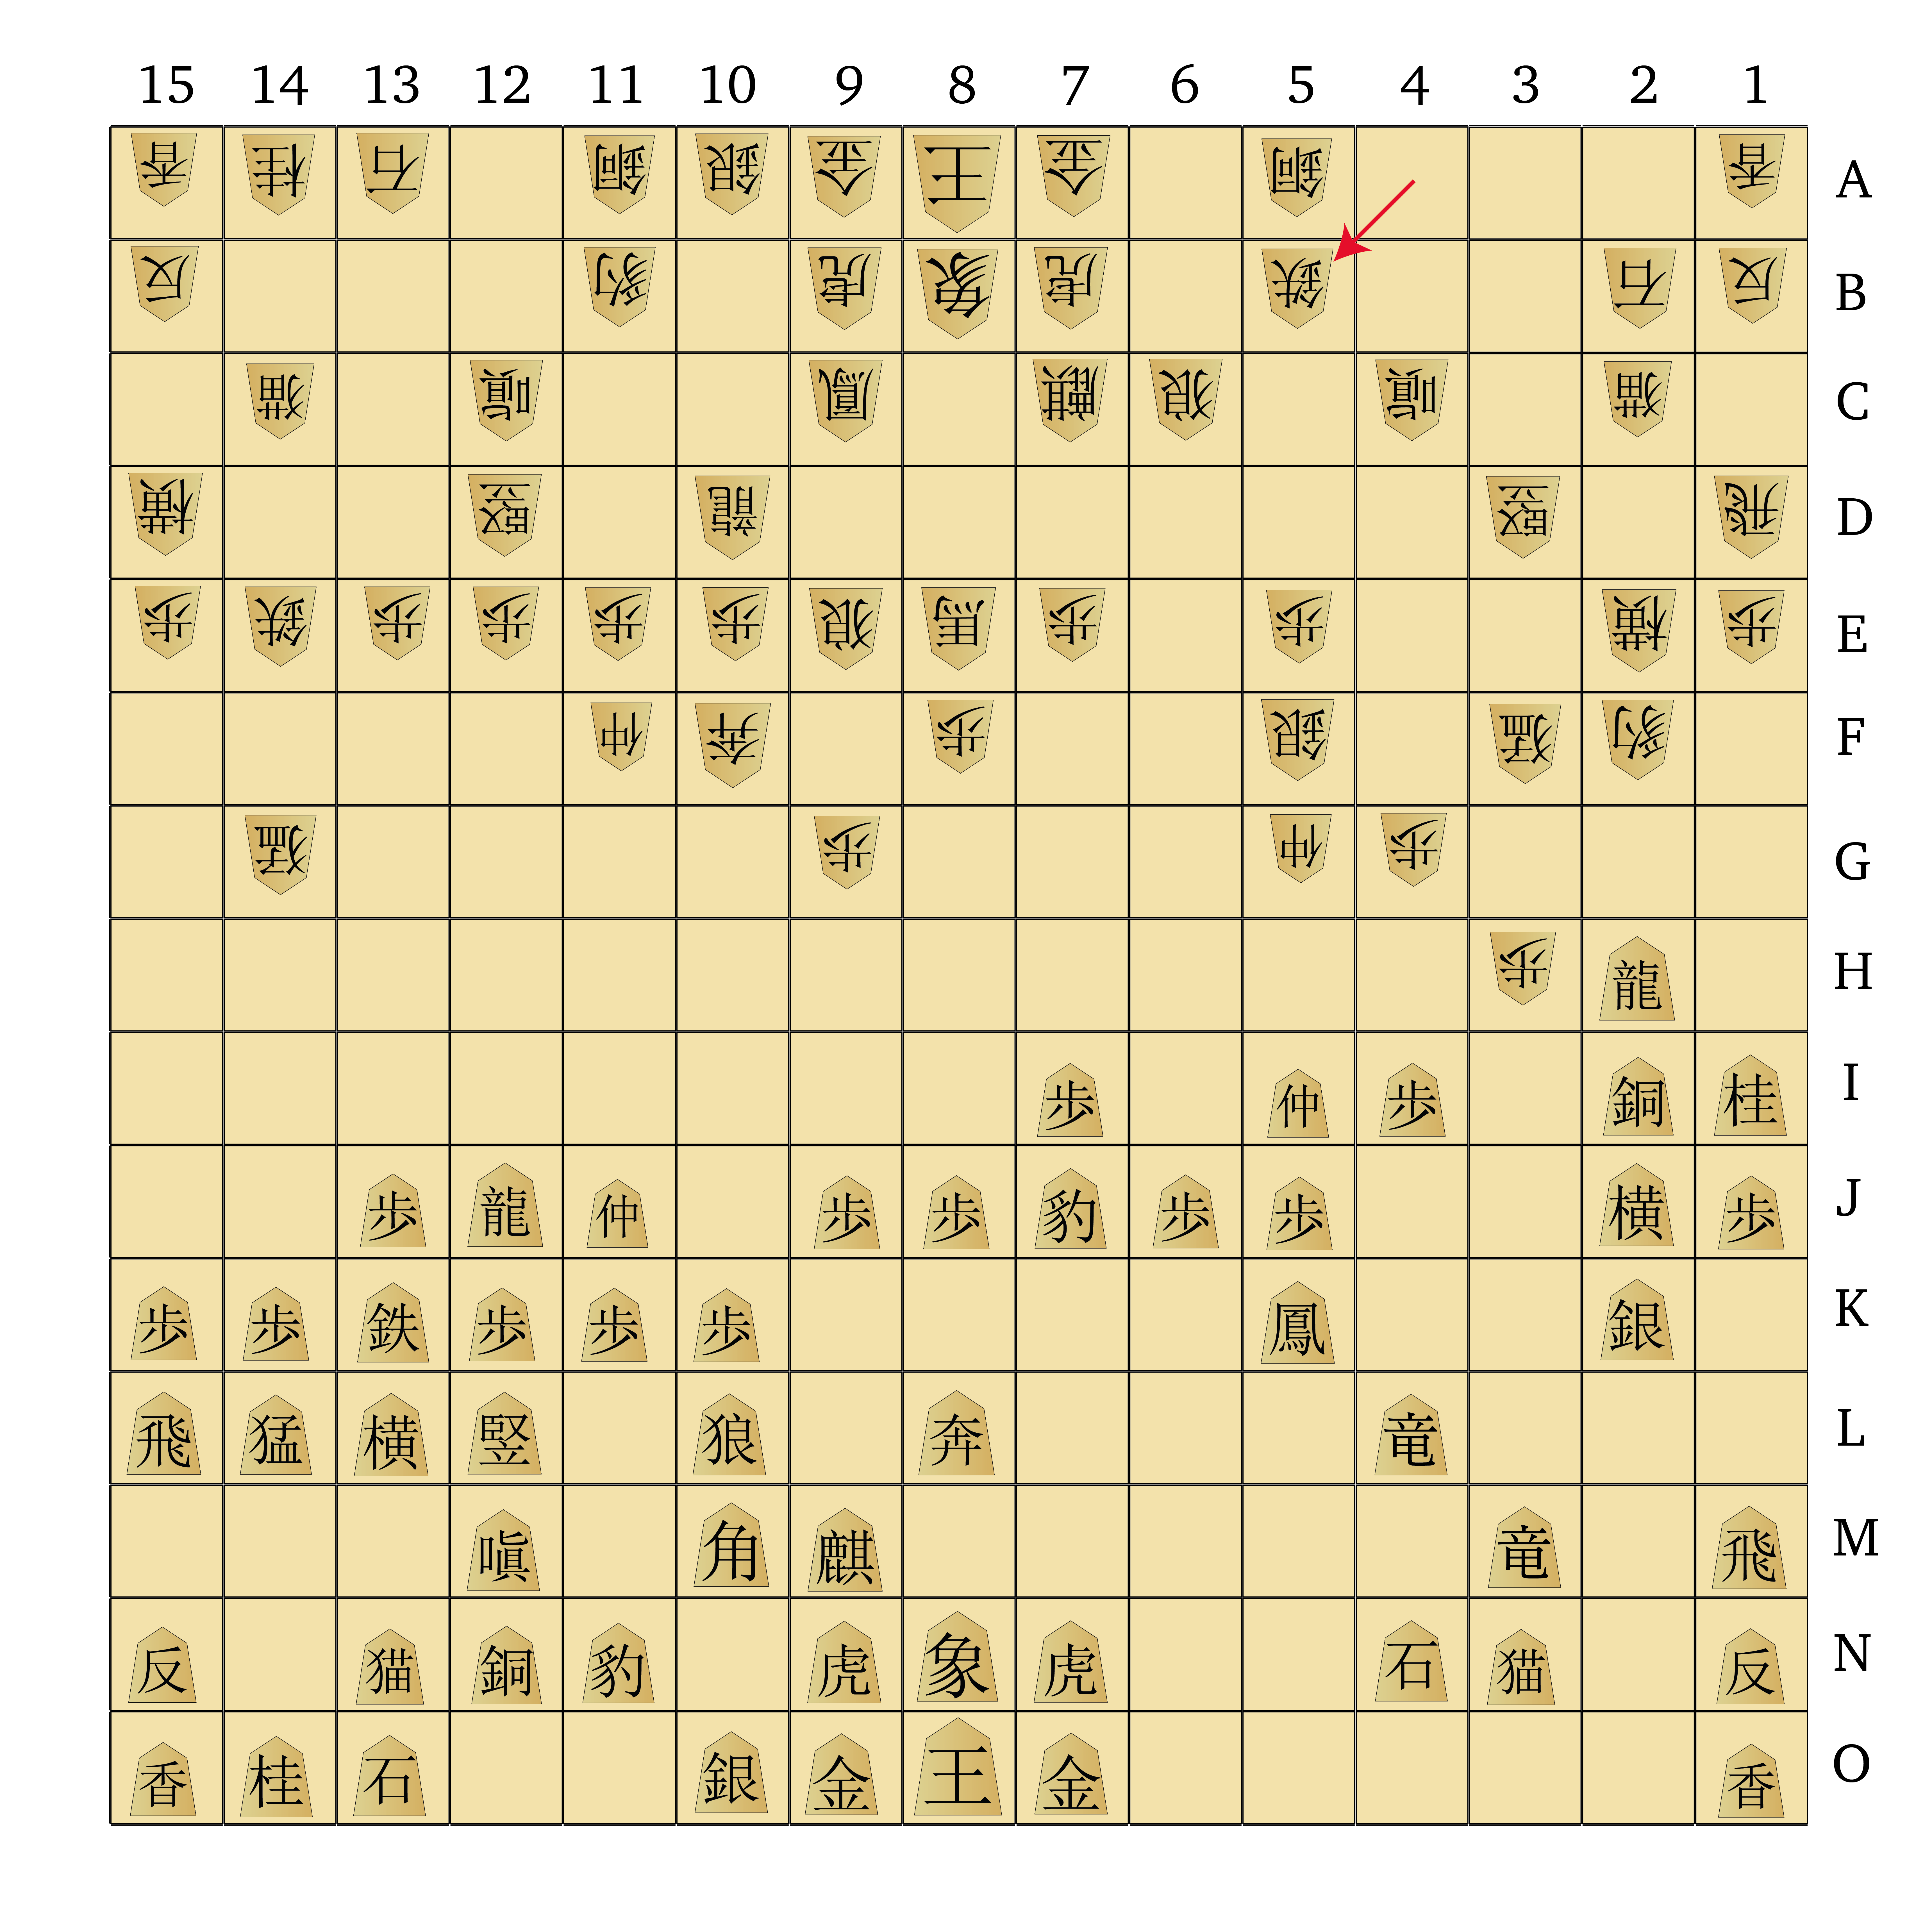
- Starting position of Nutty Shogi.
-
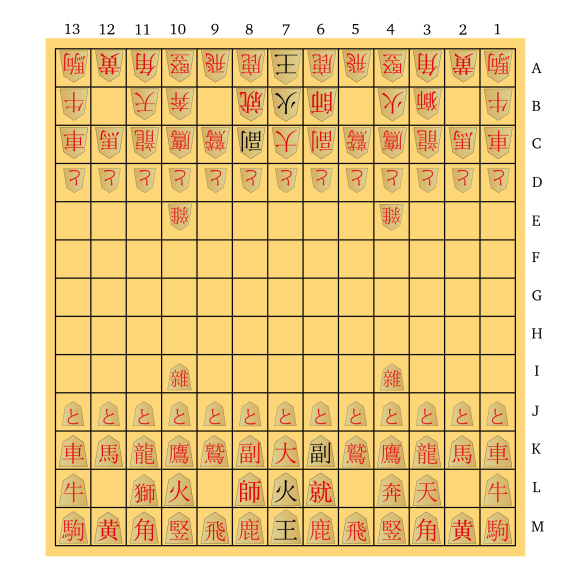
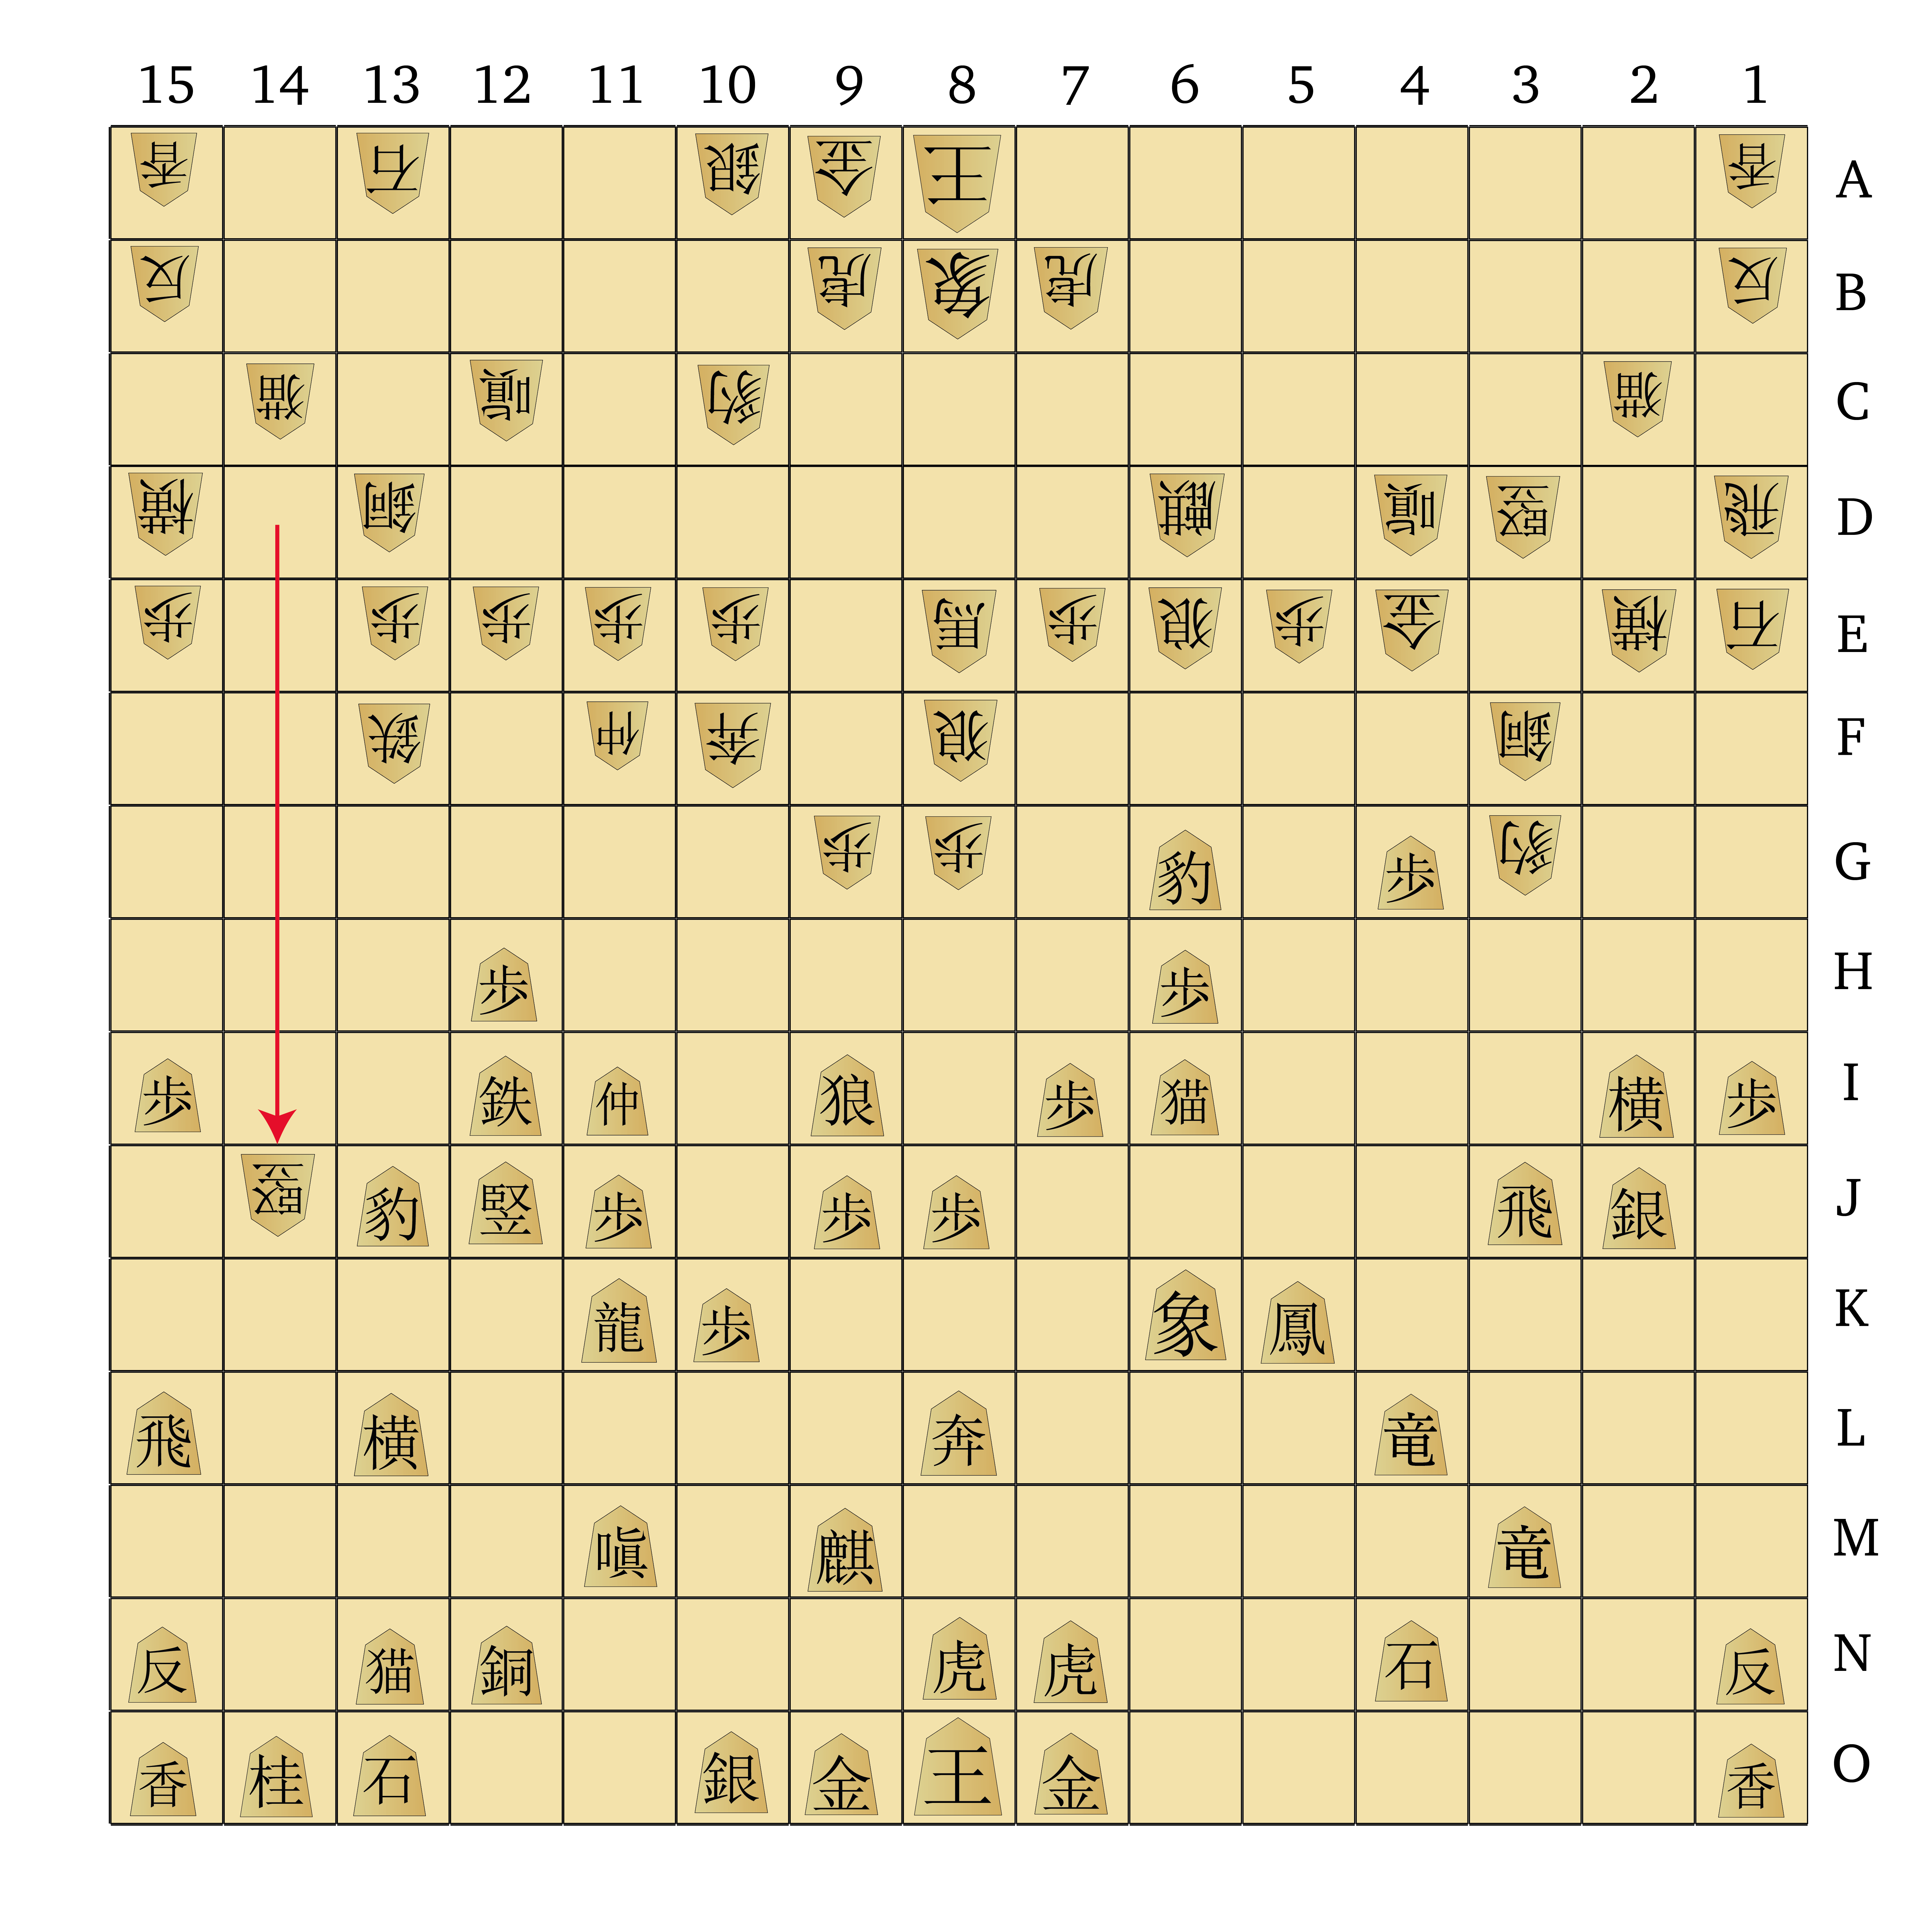
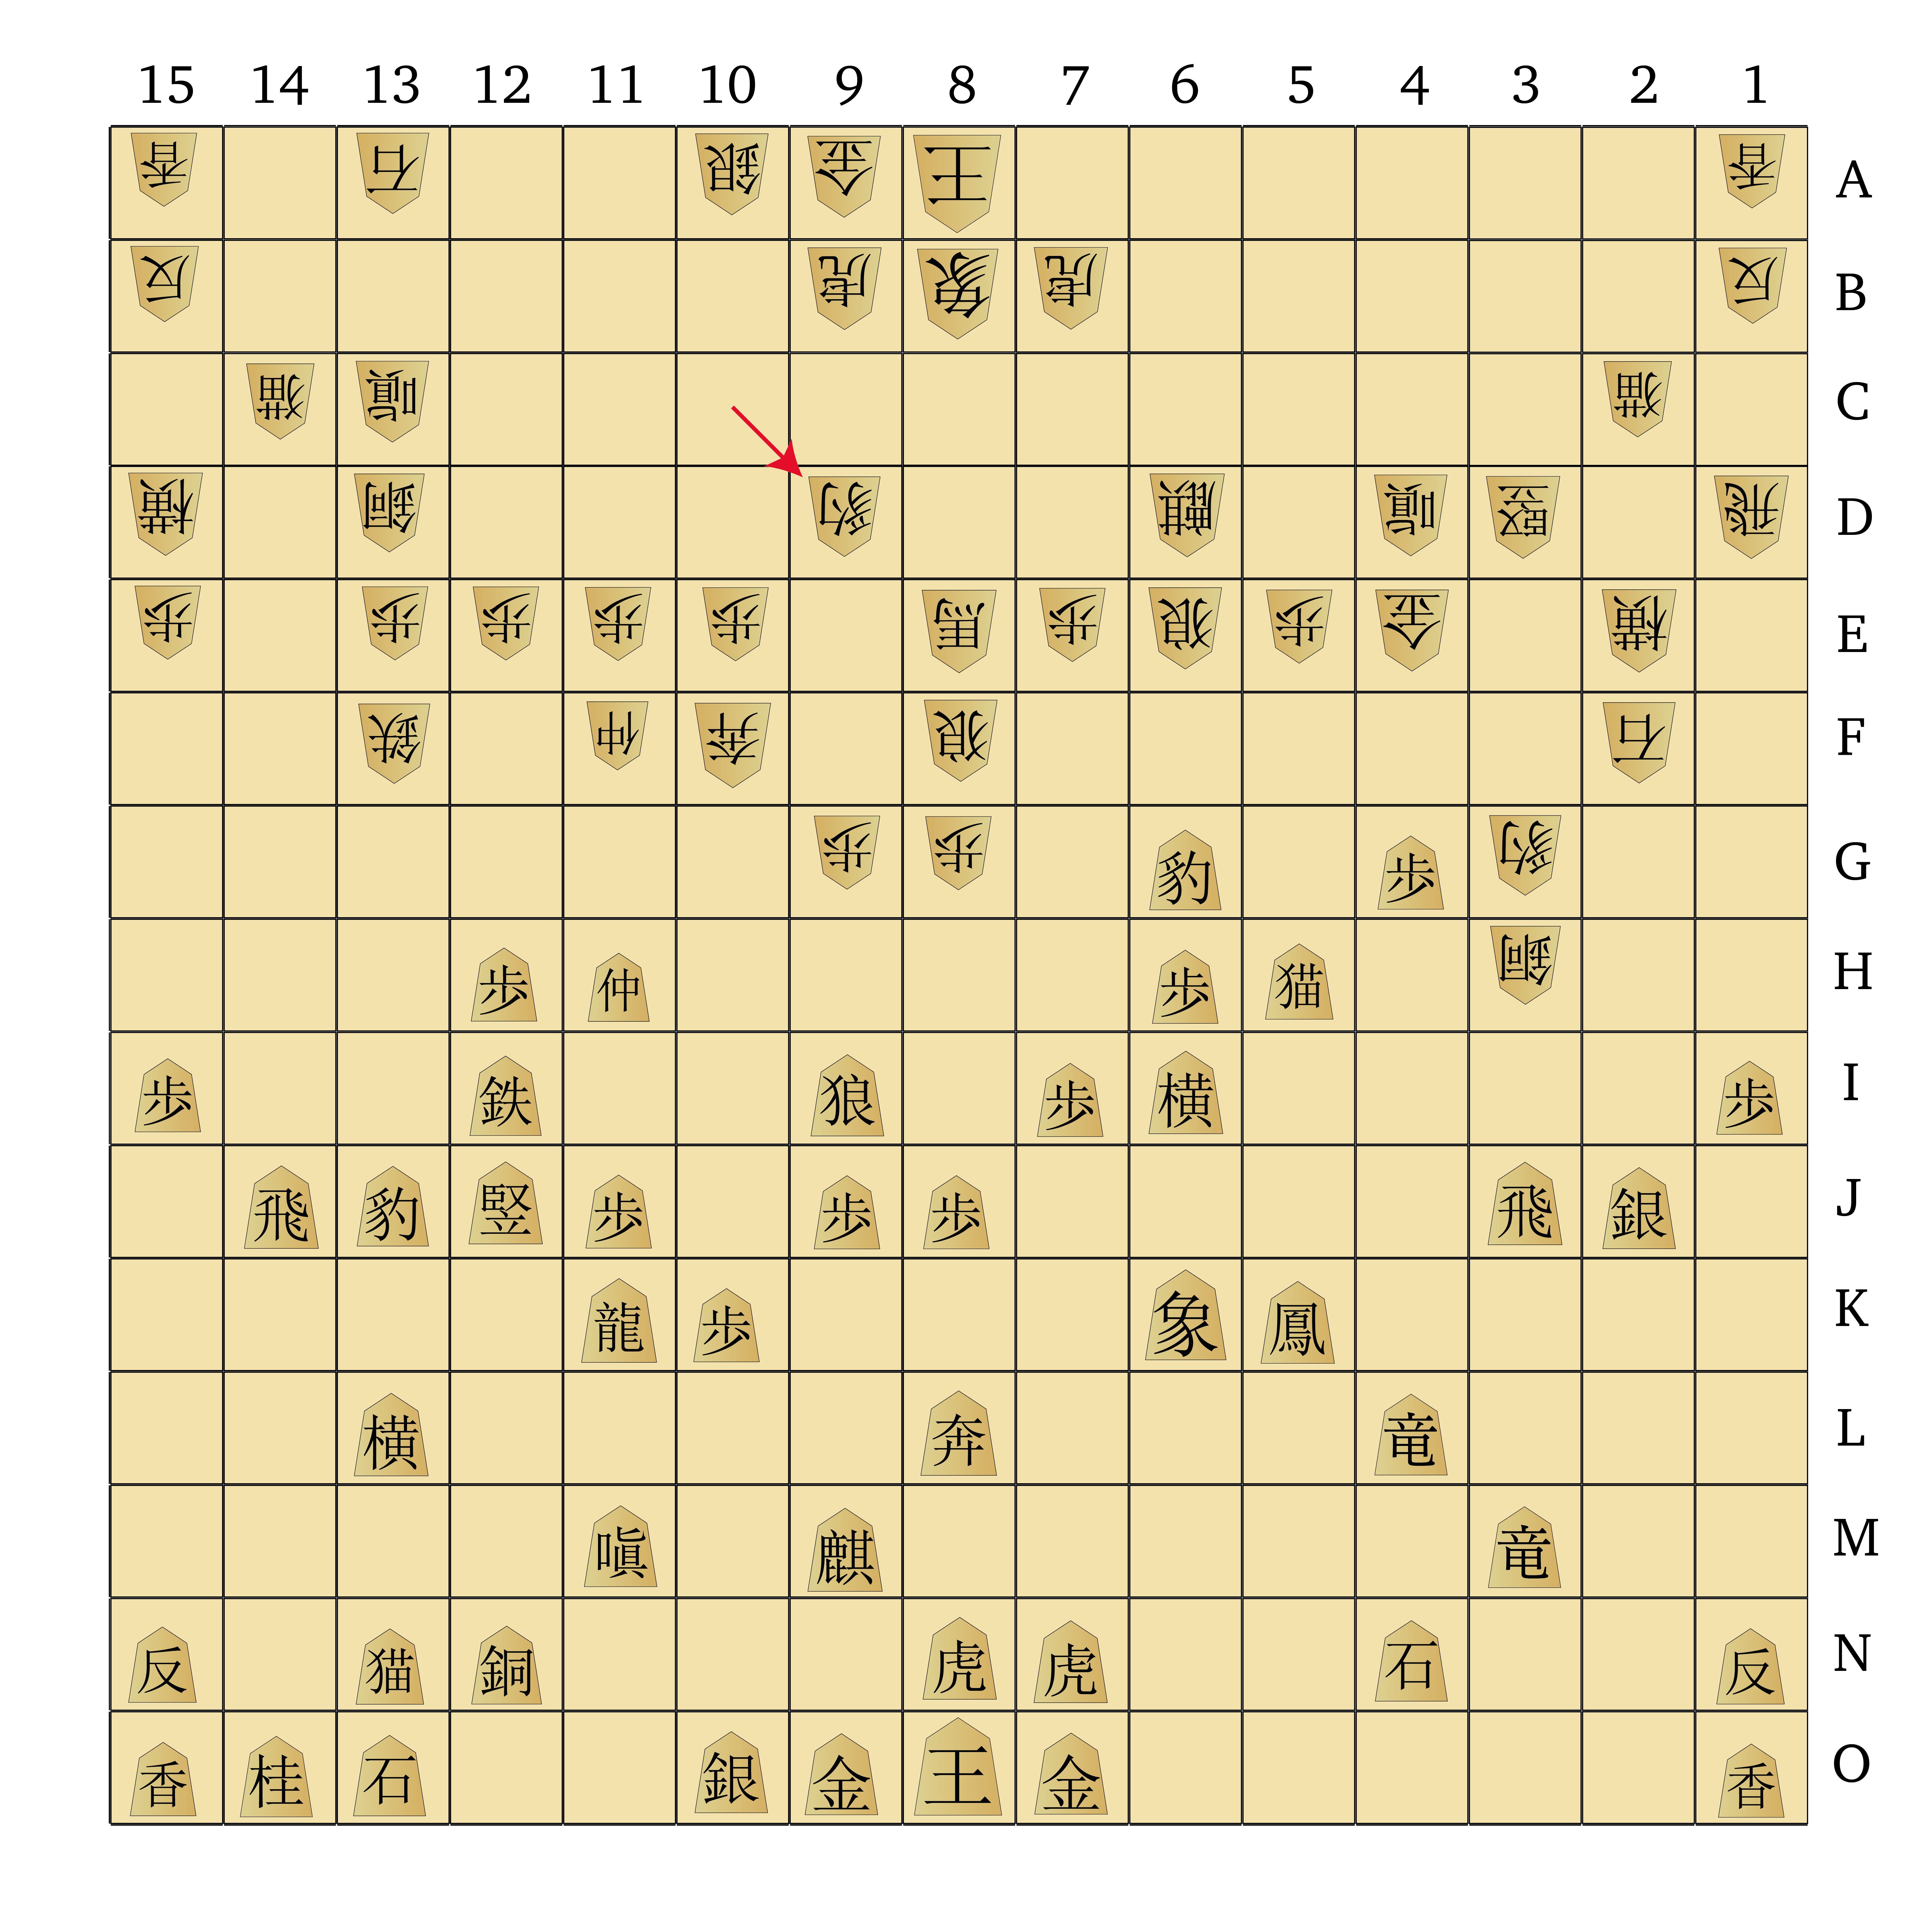
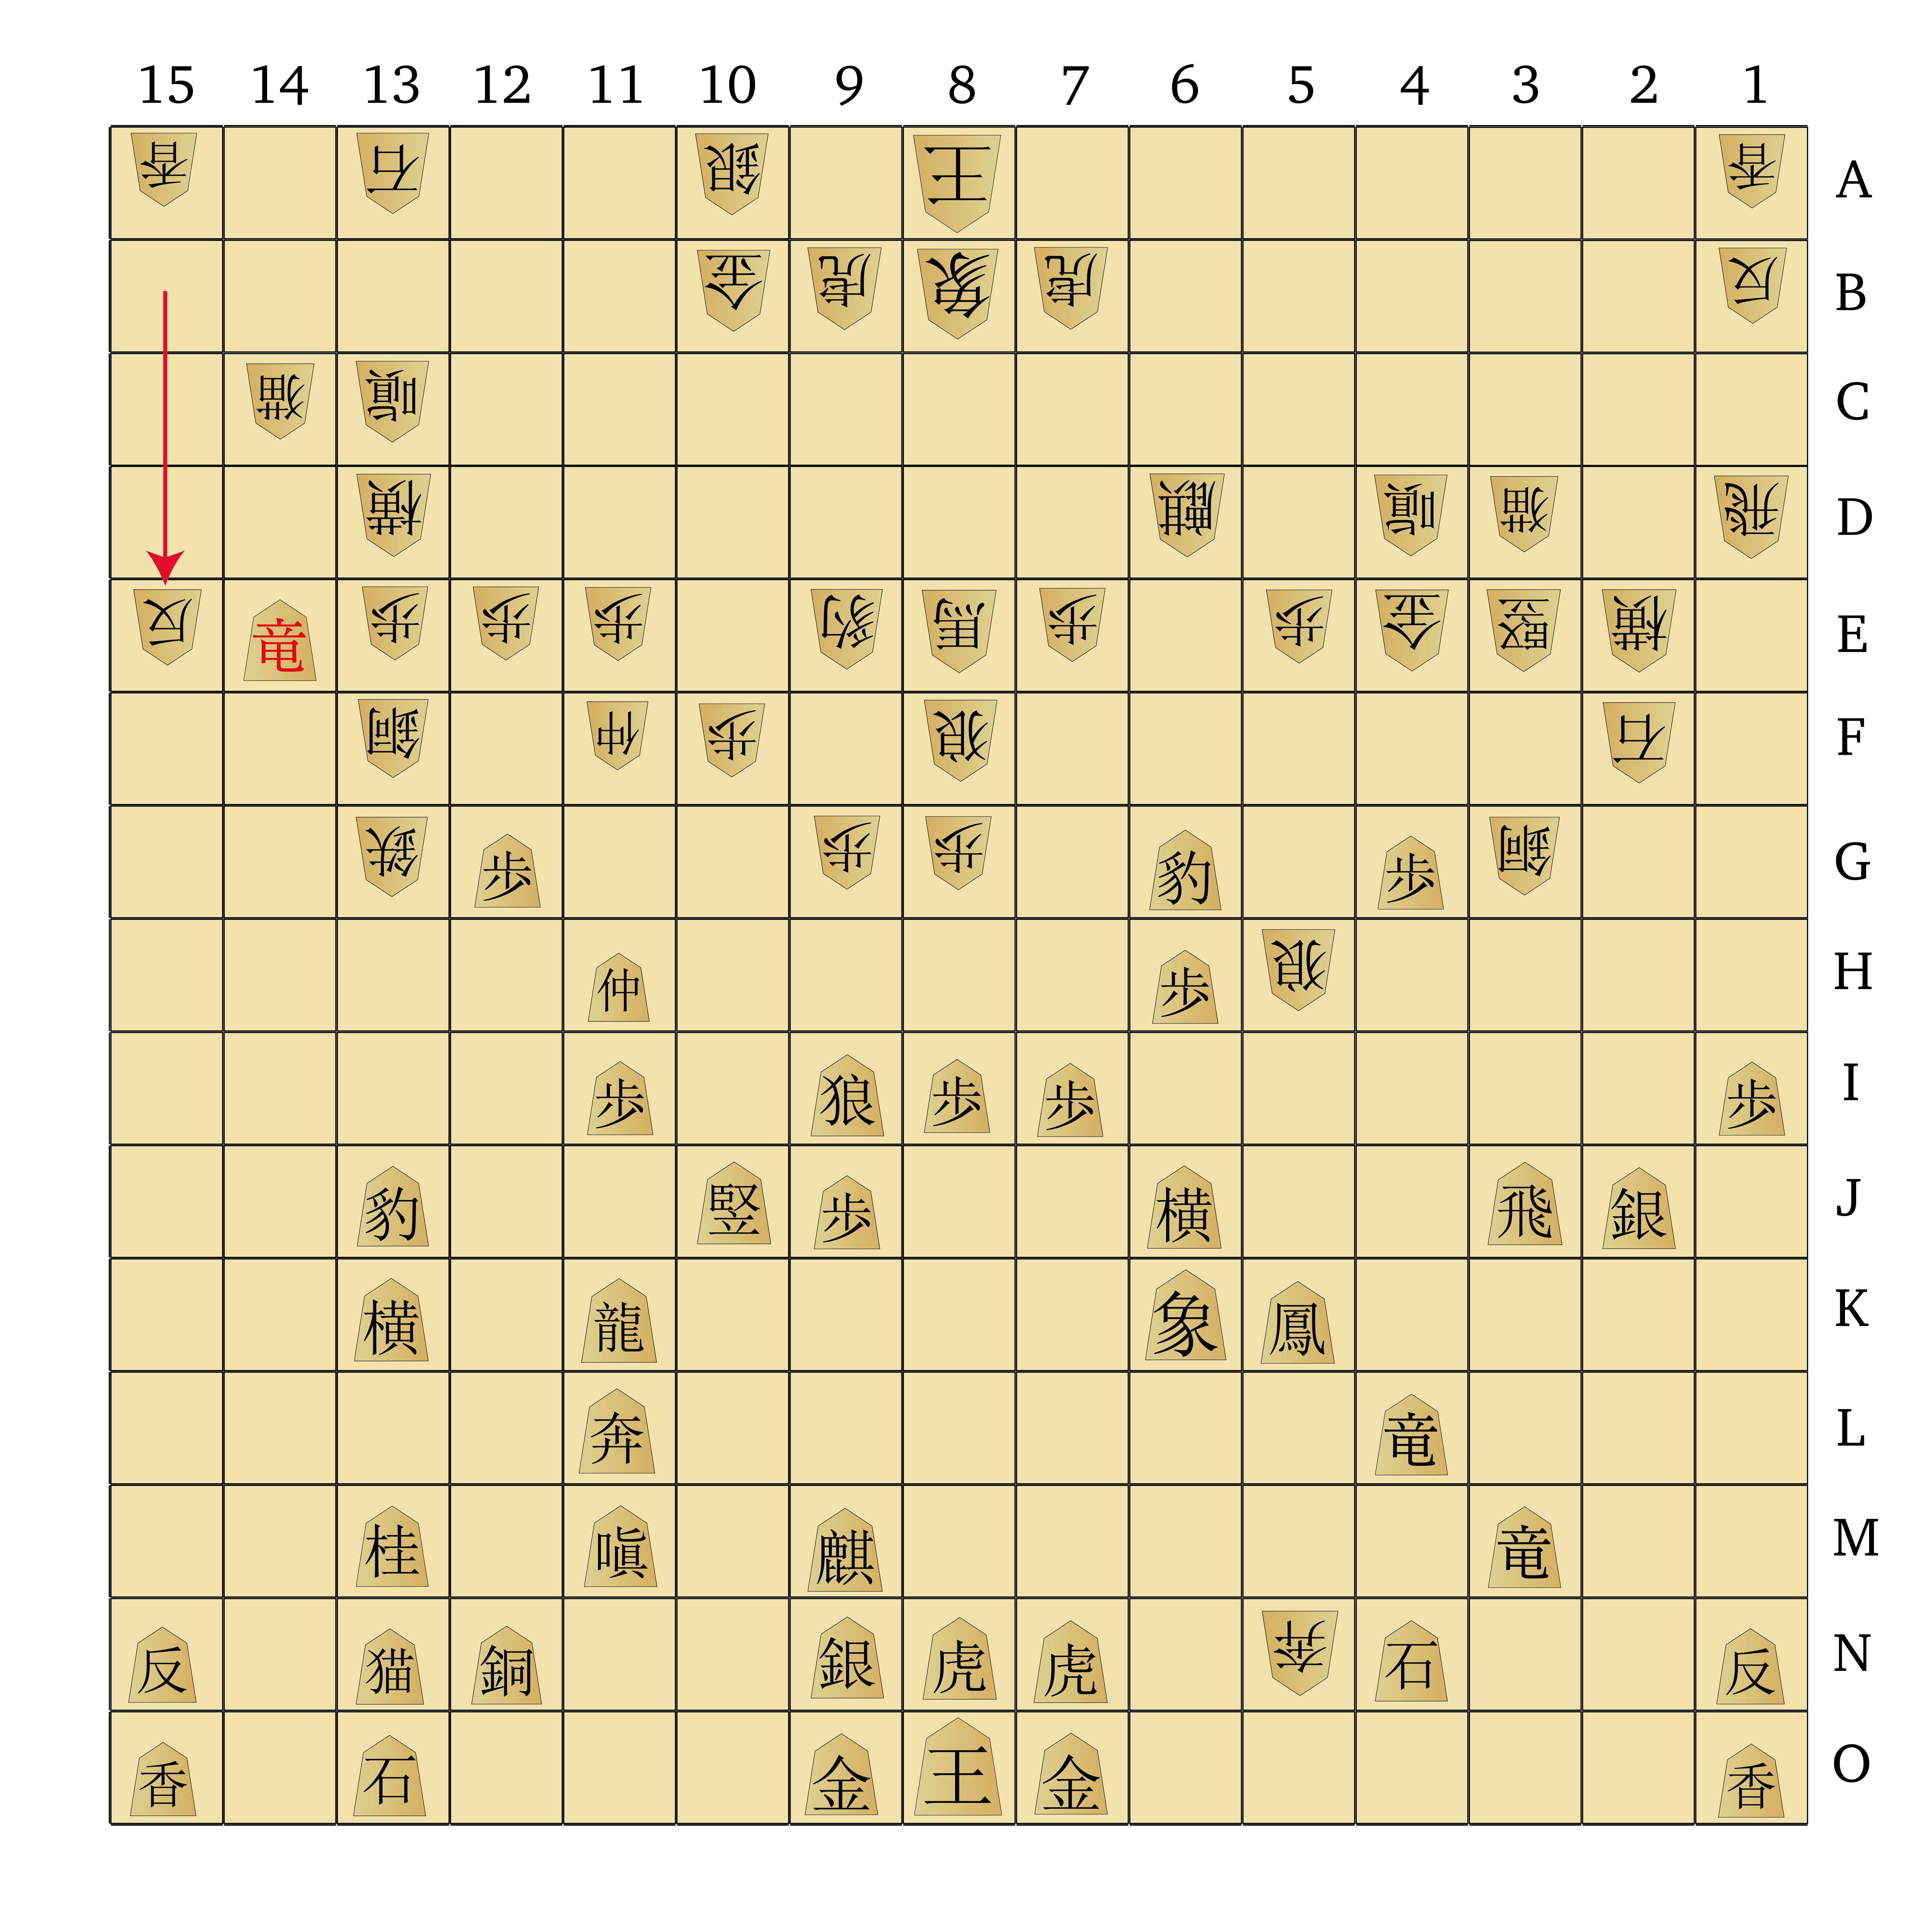
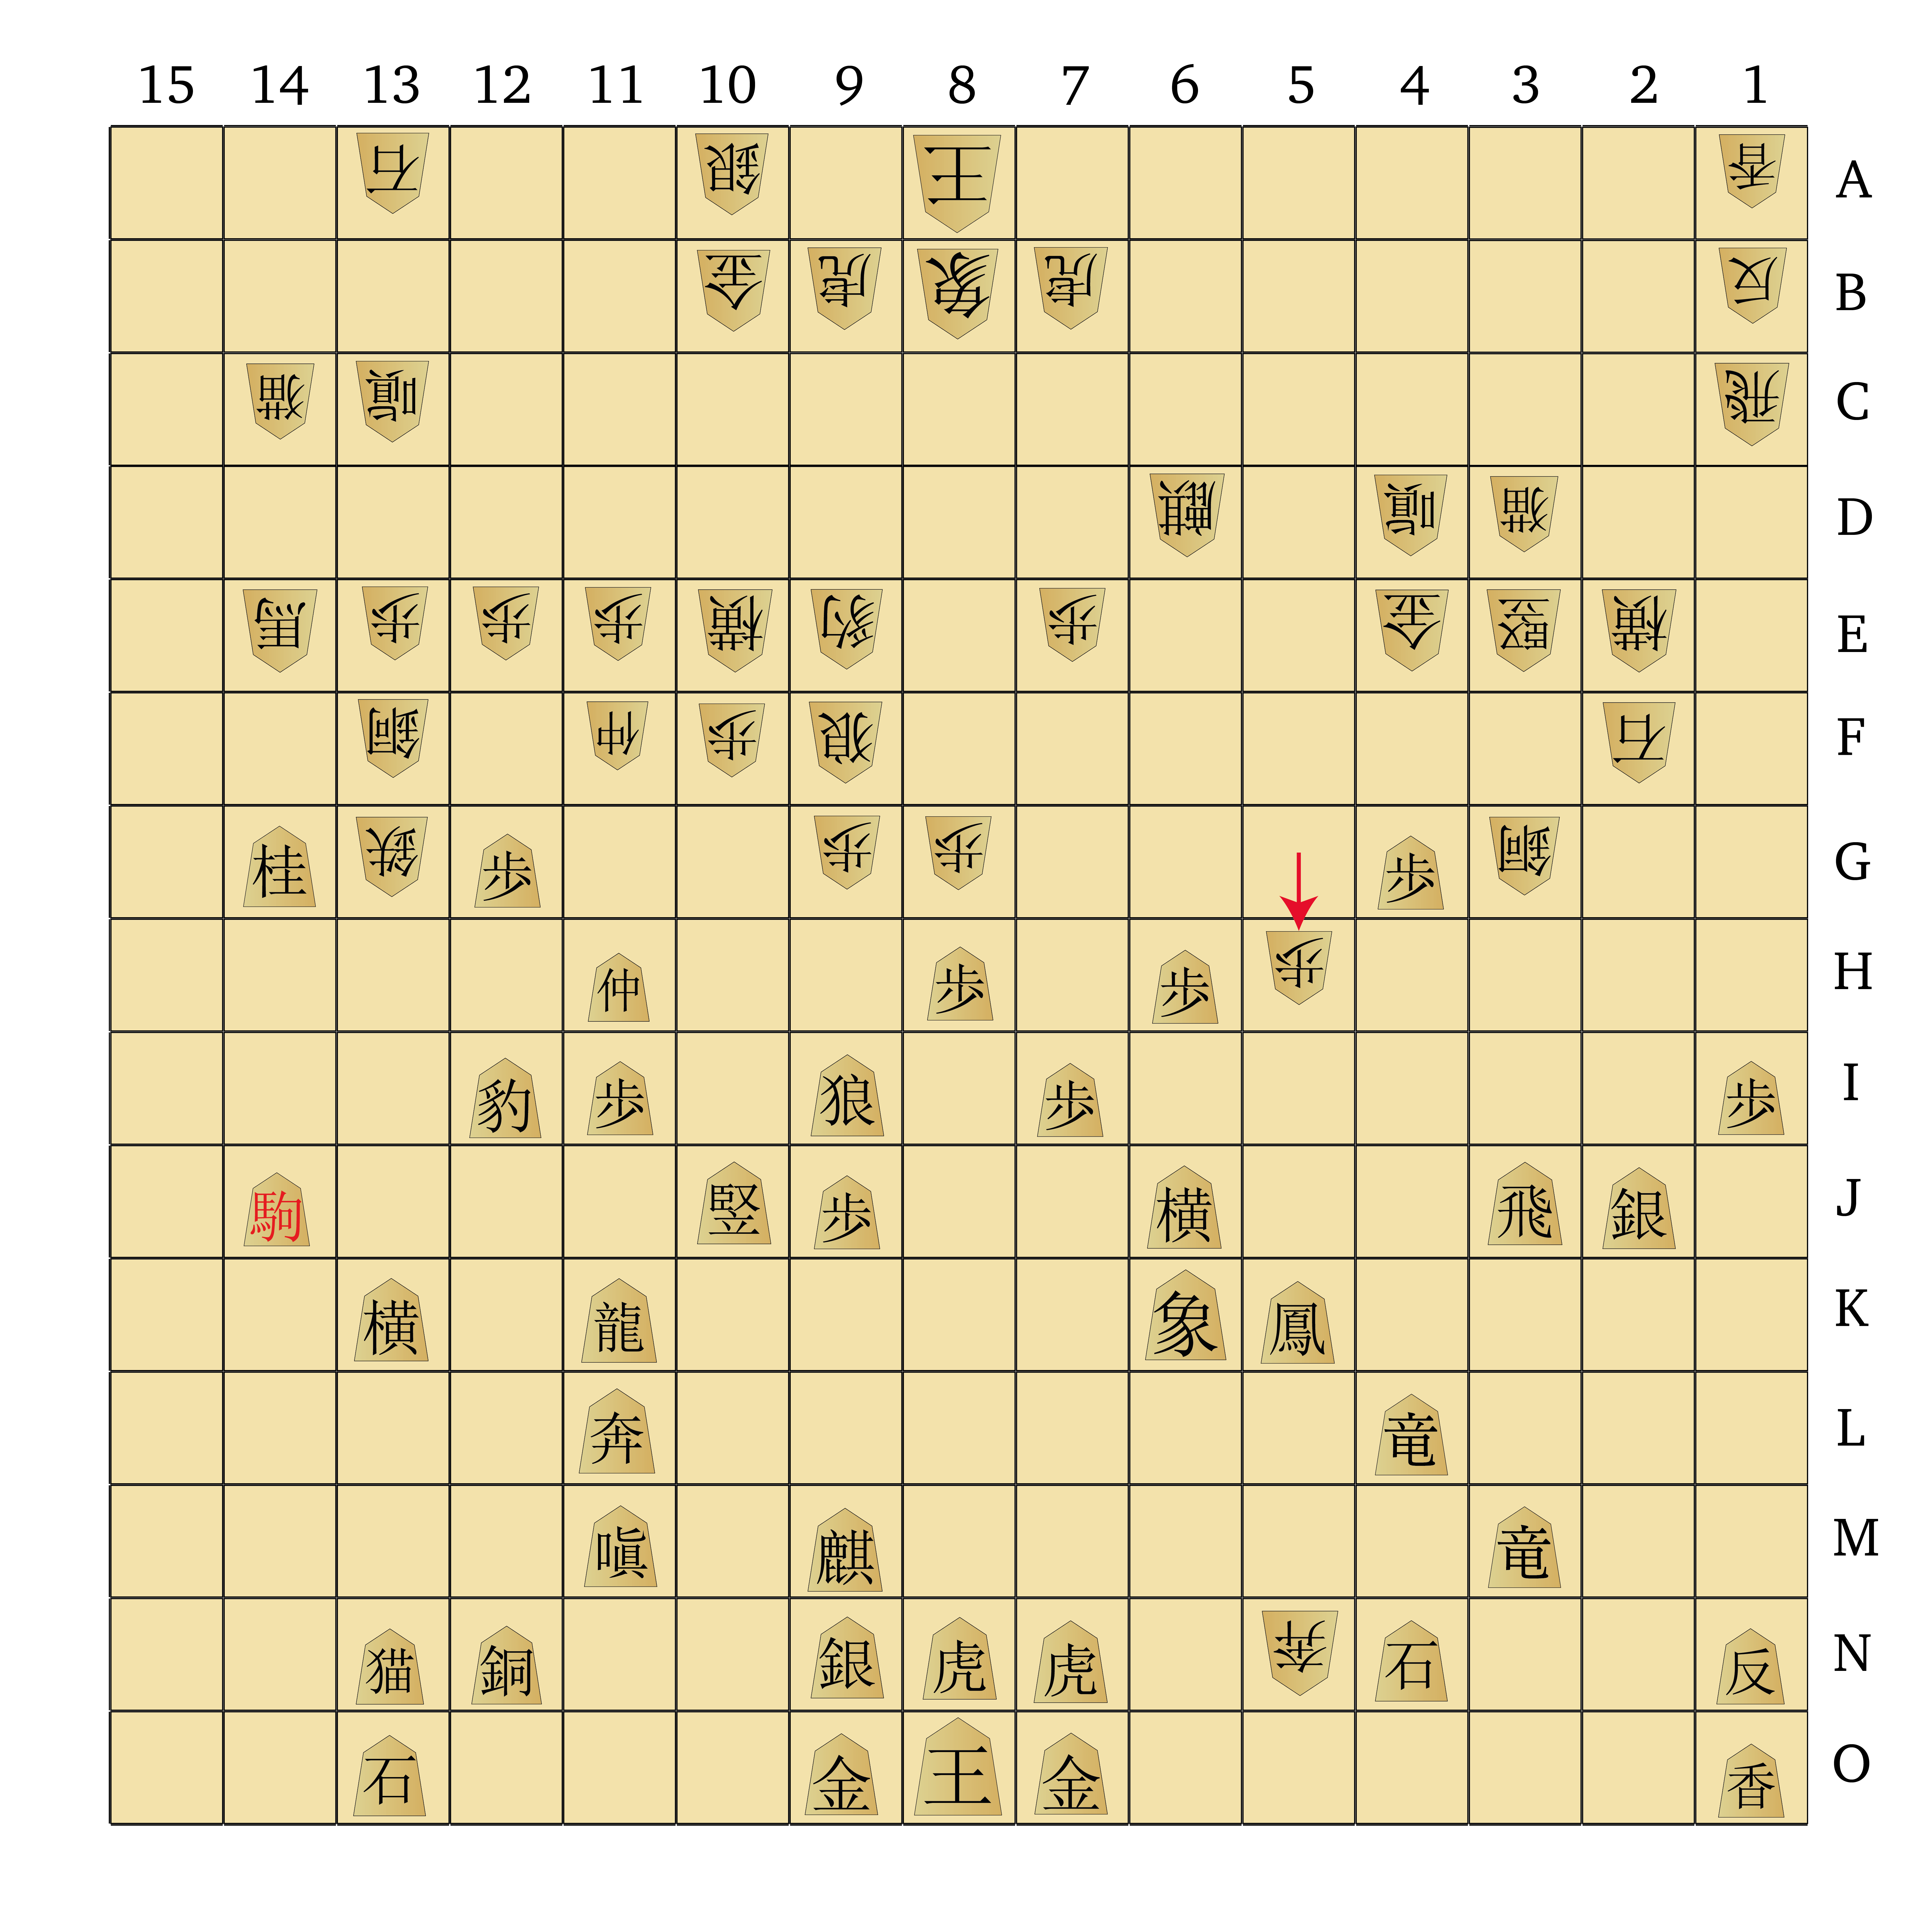
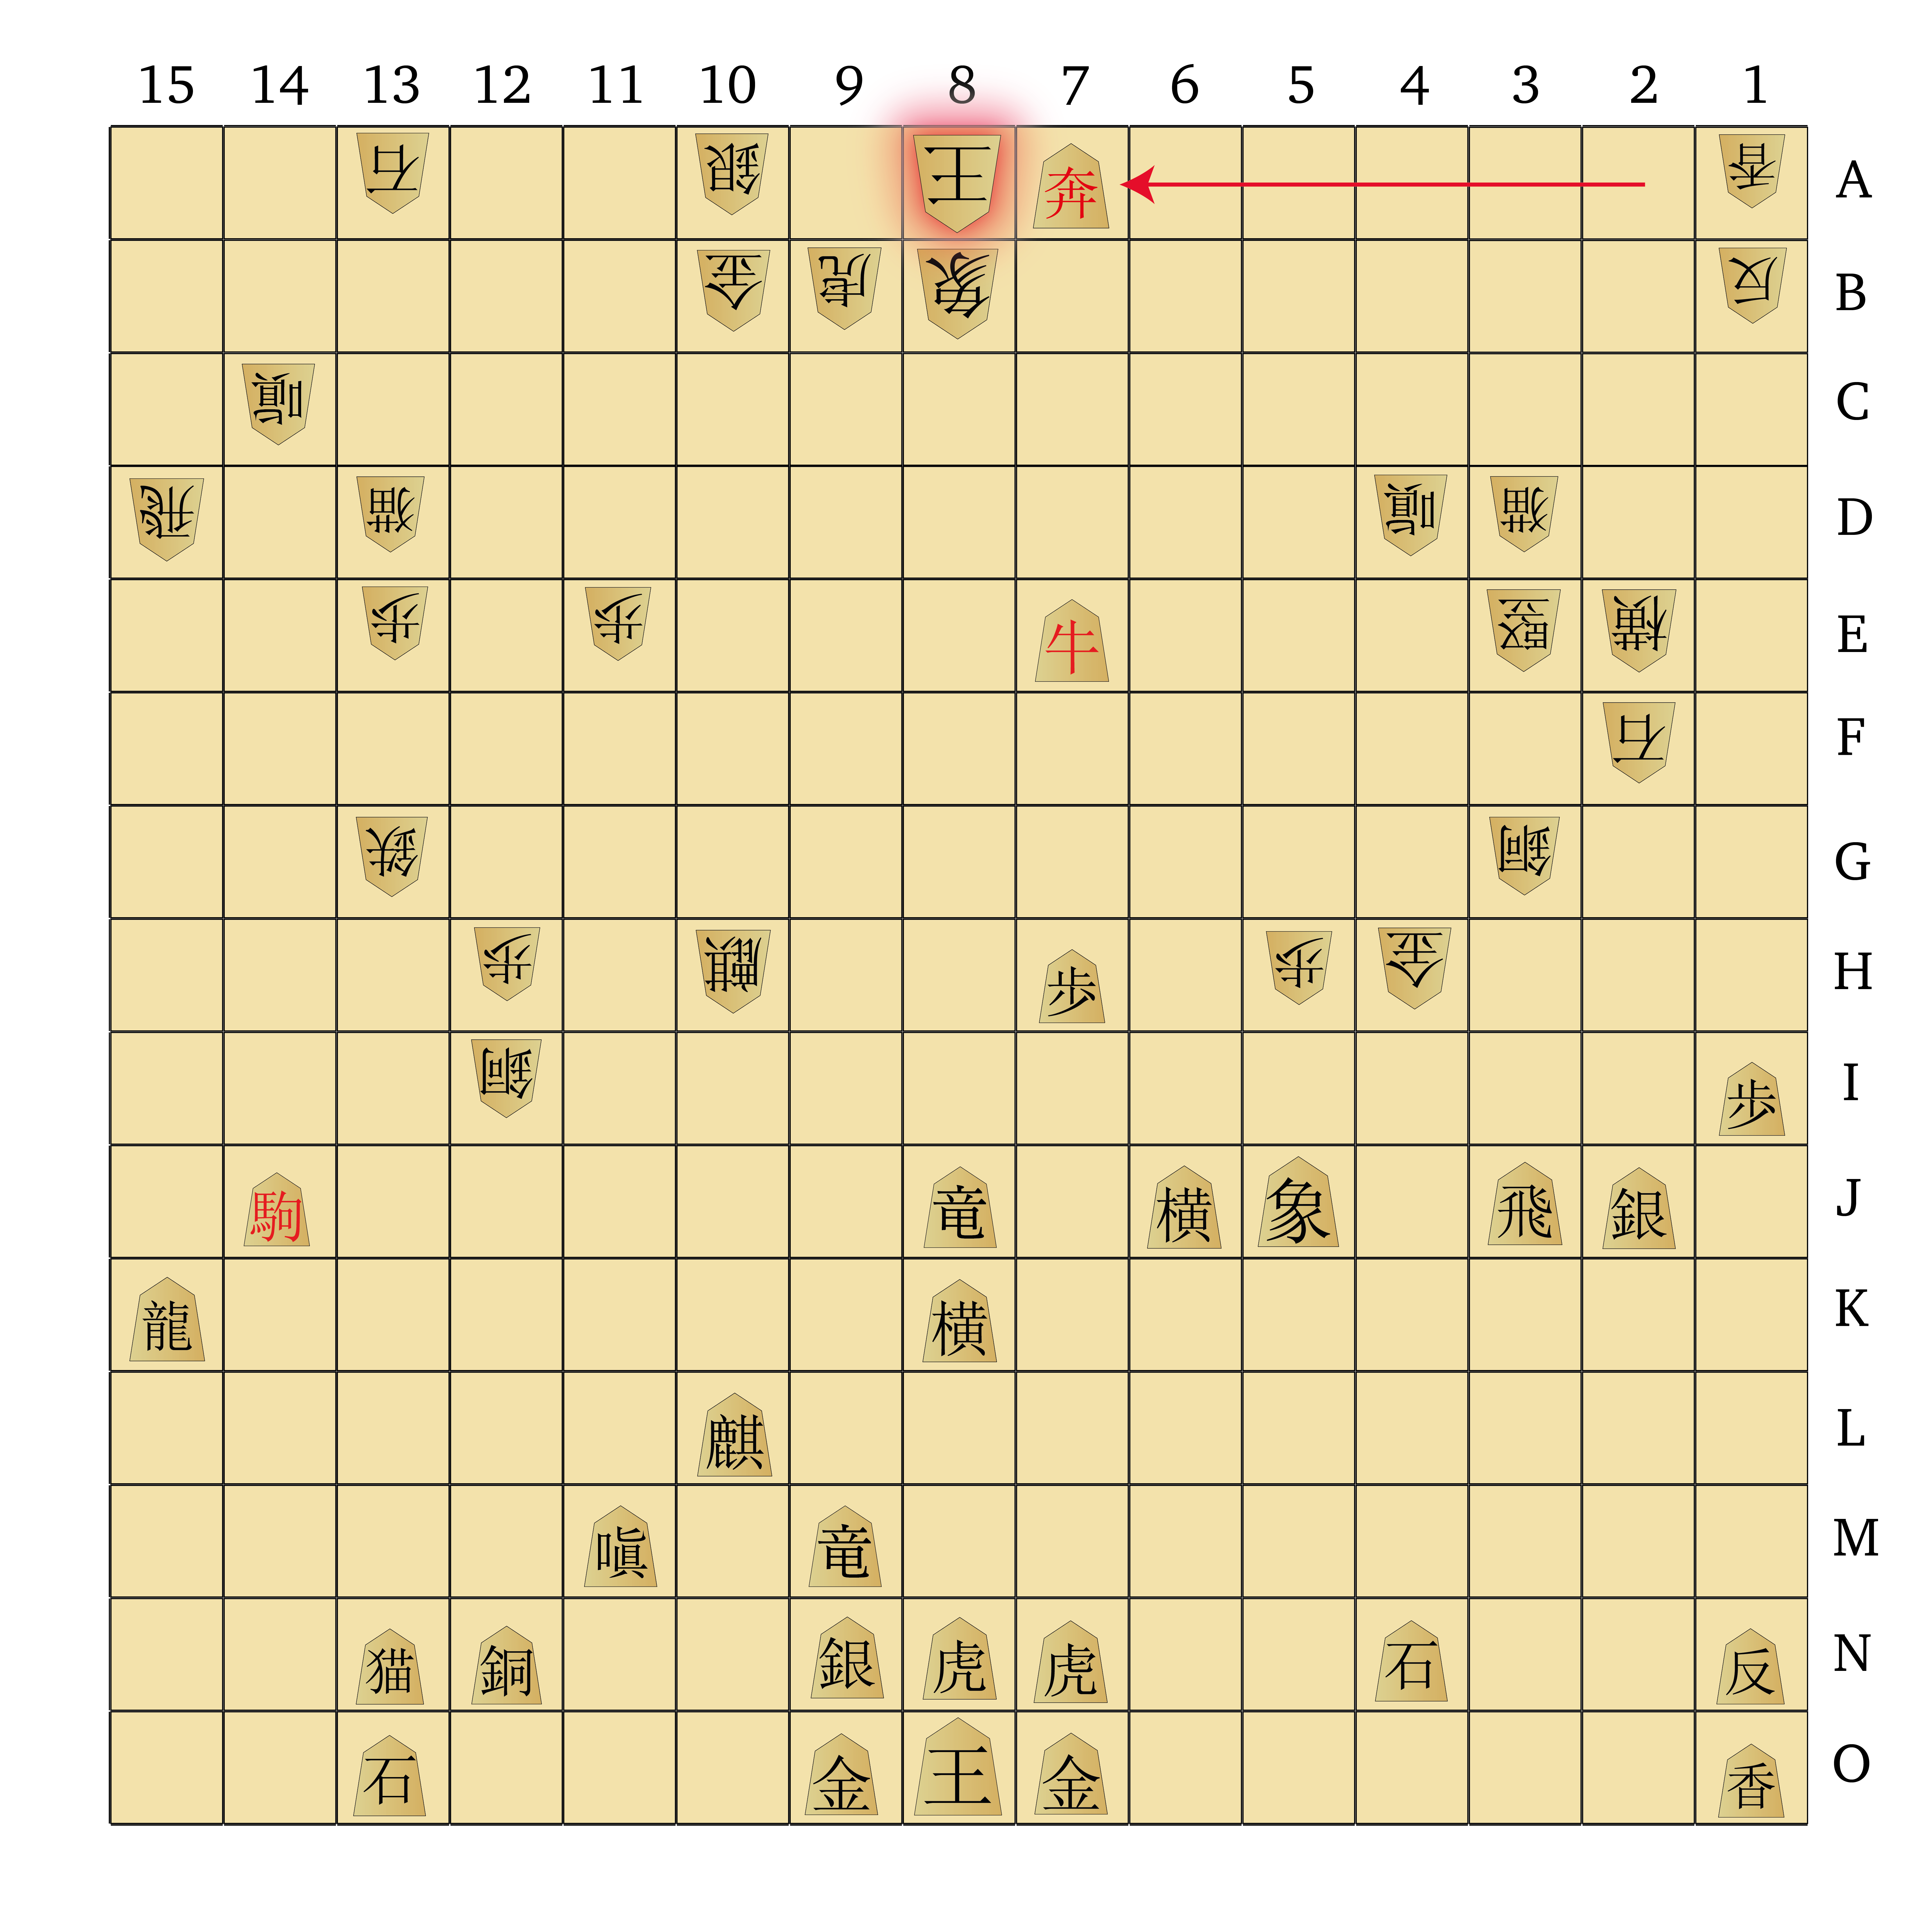
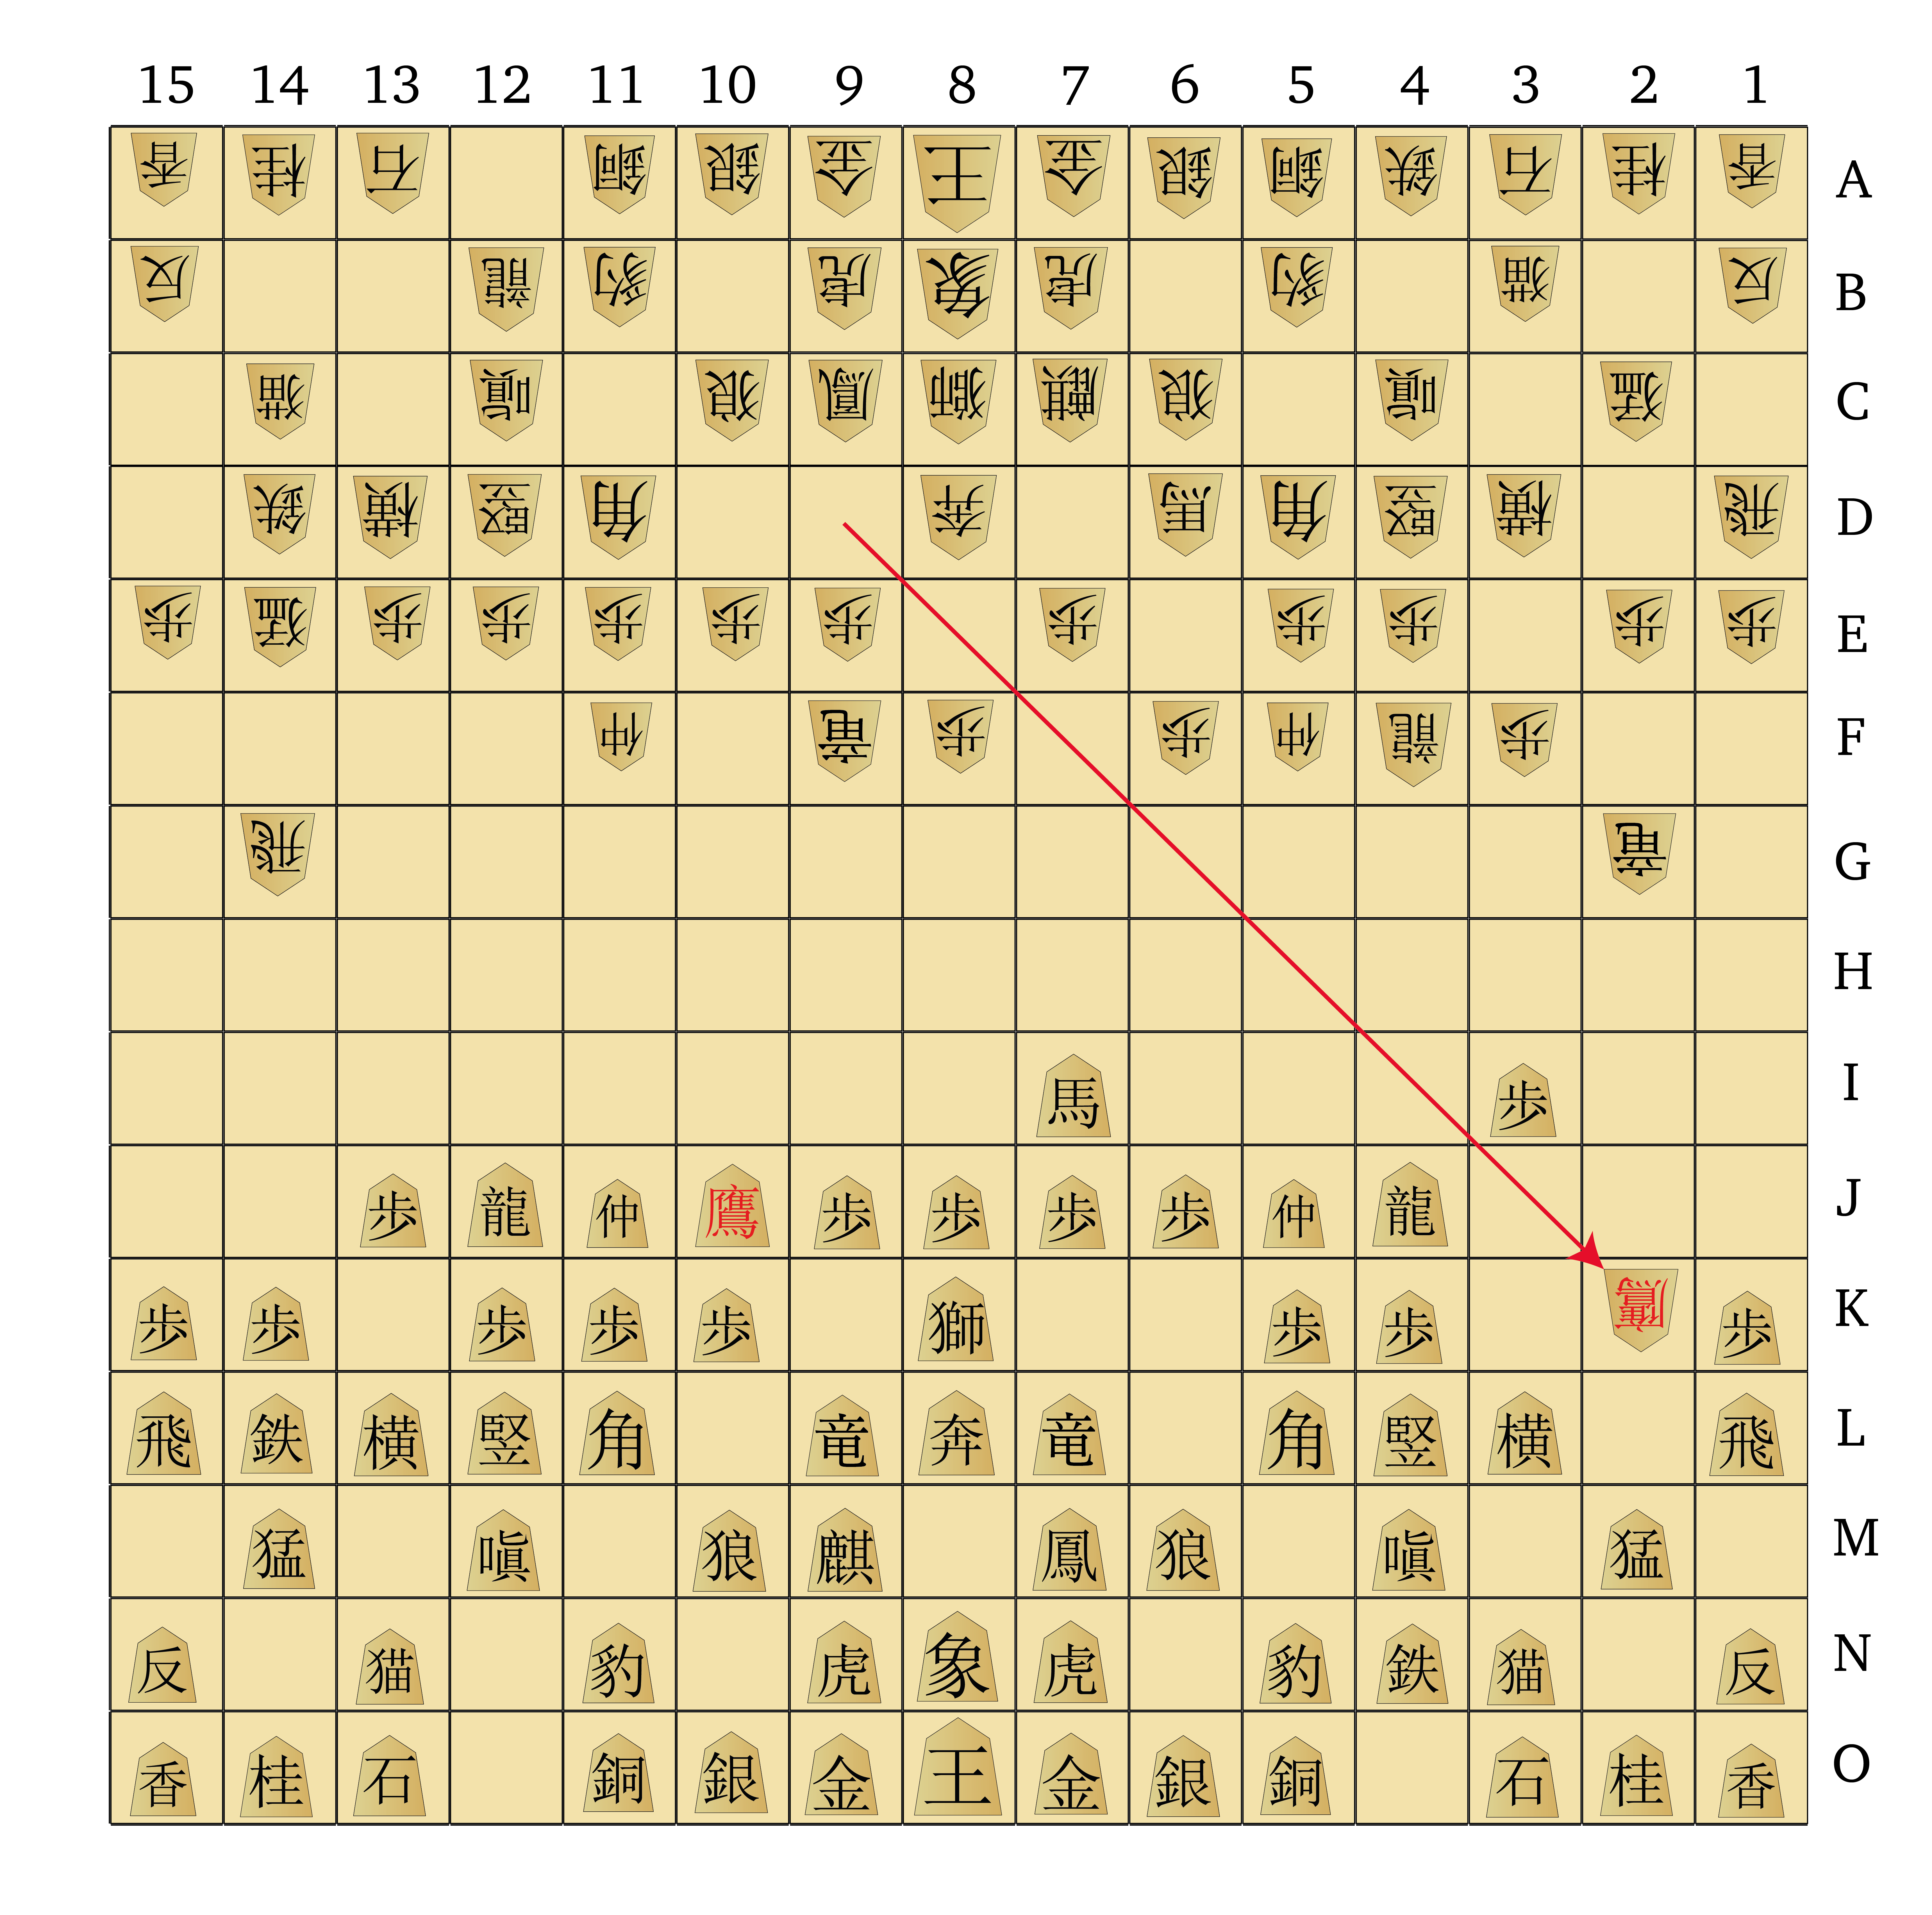
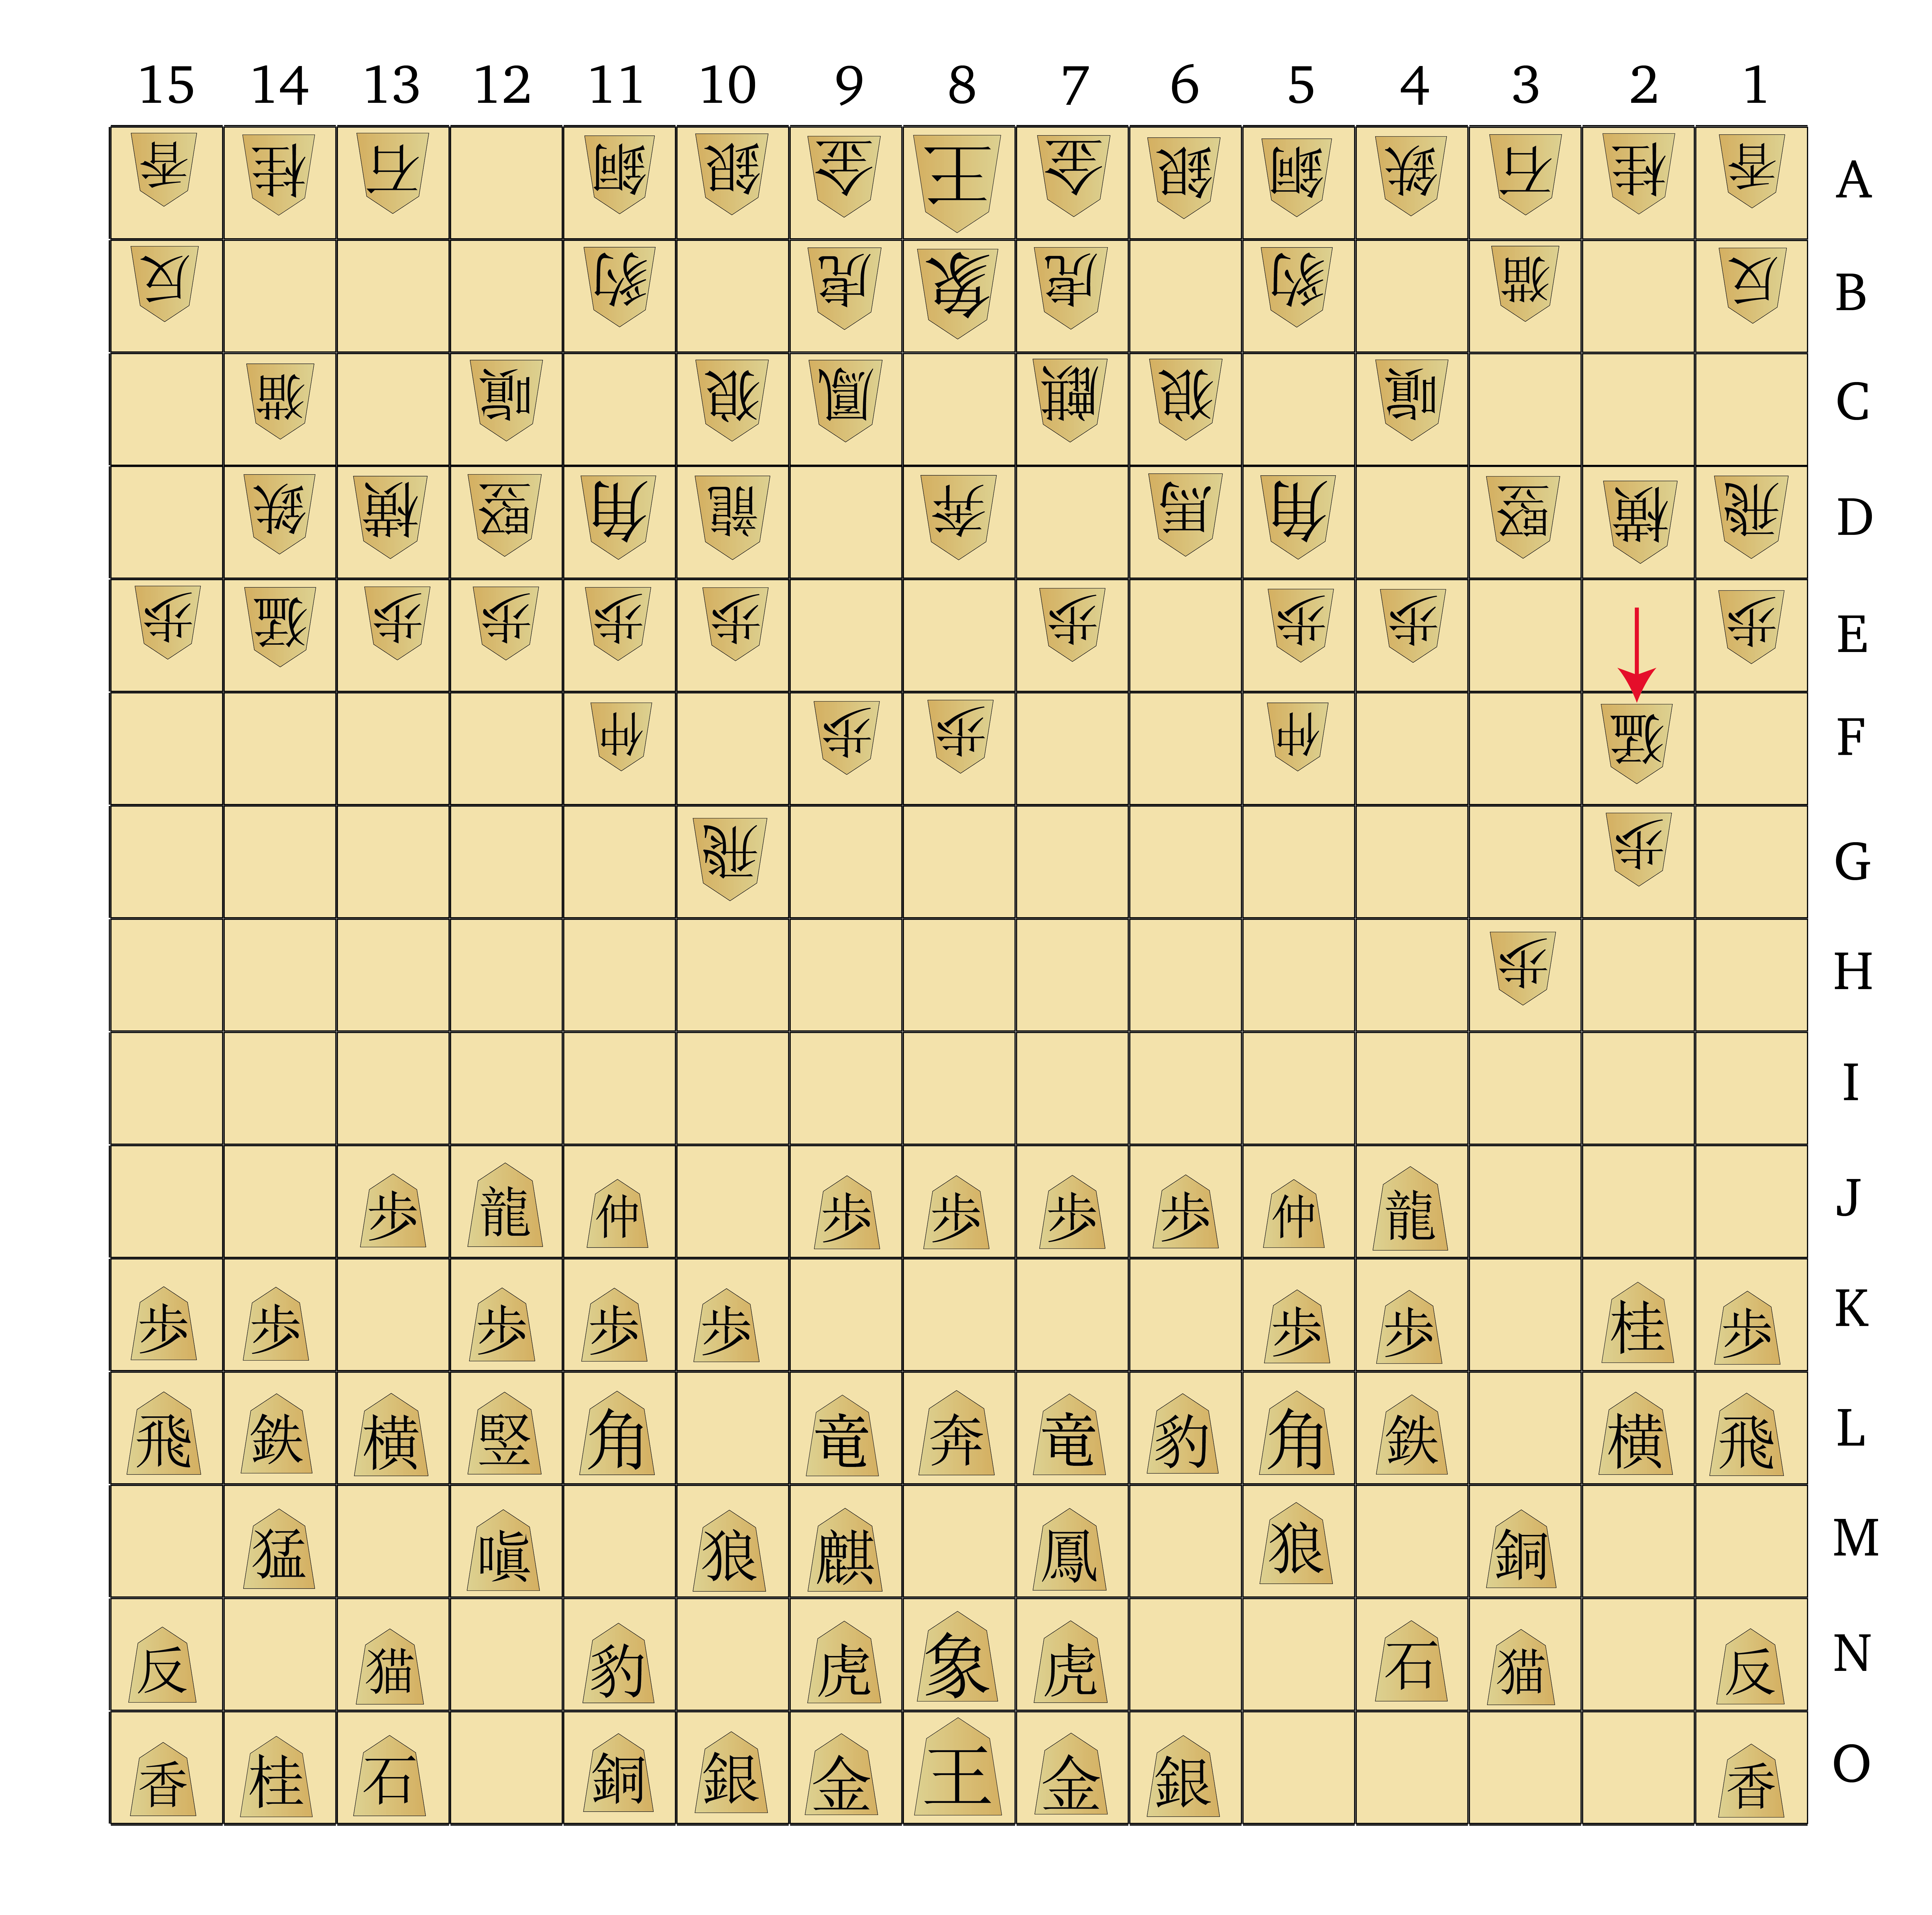
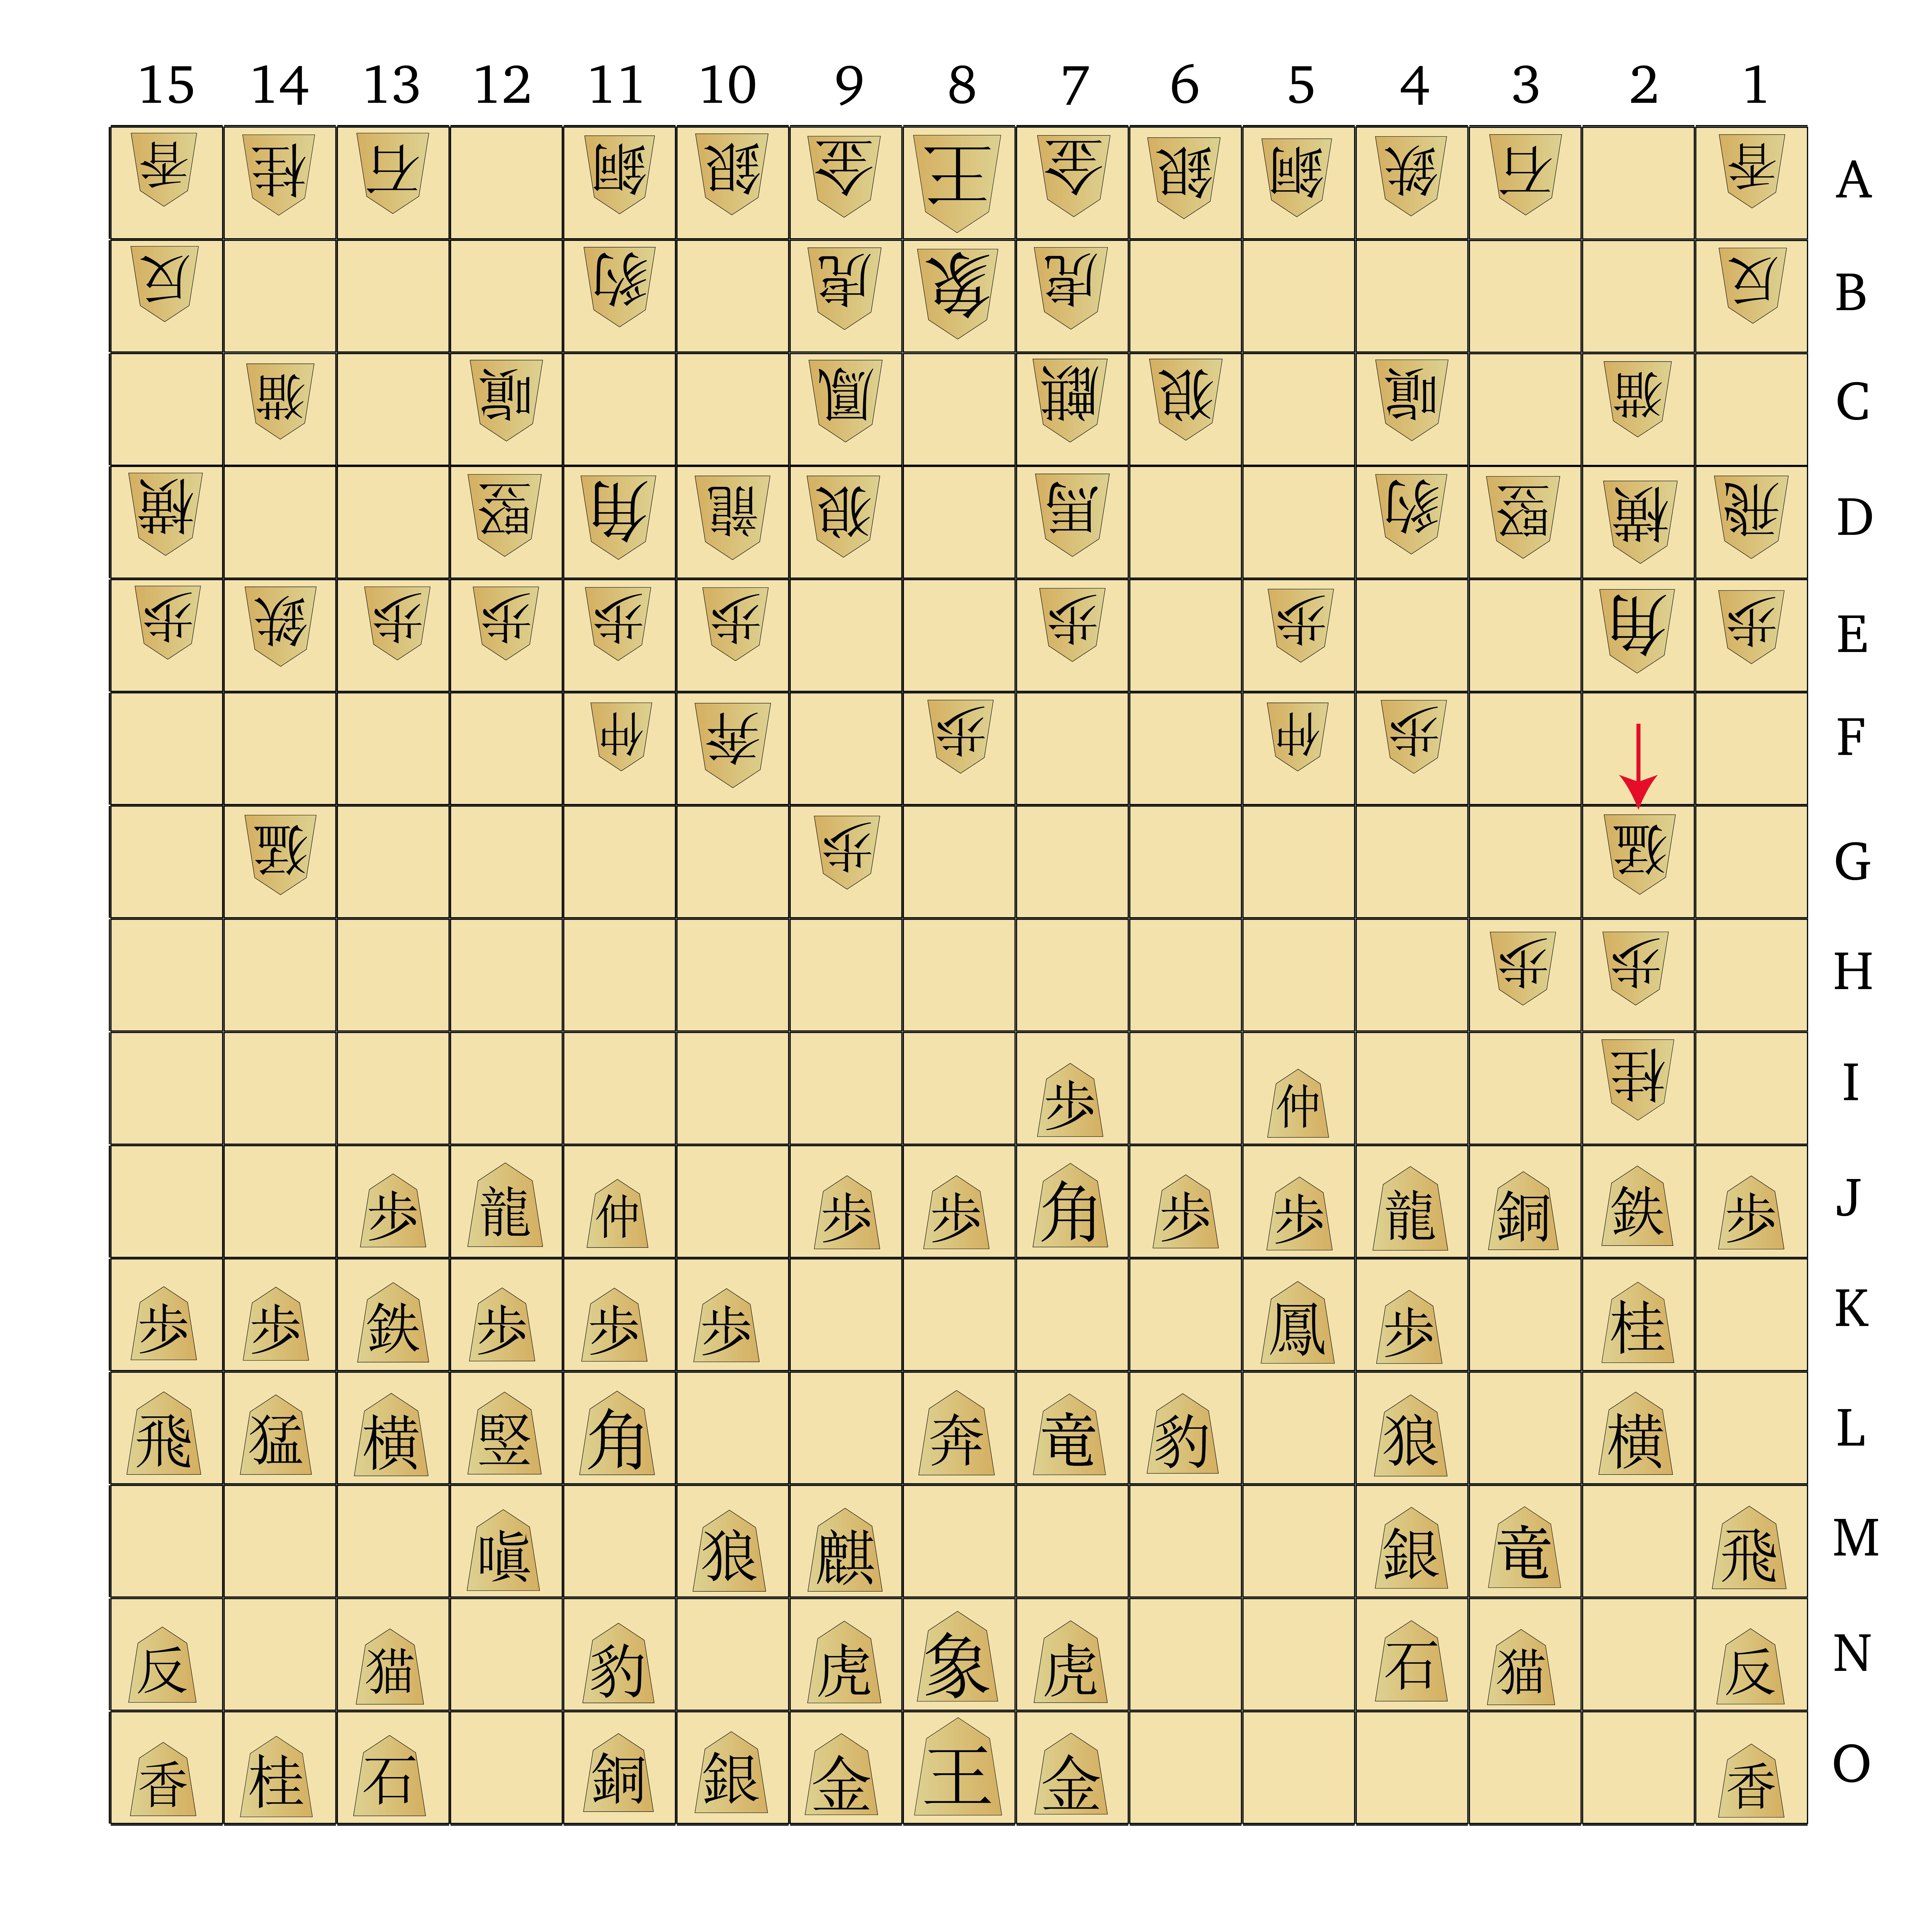
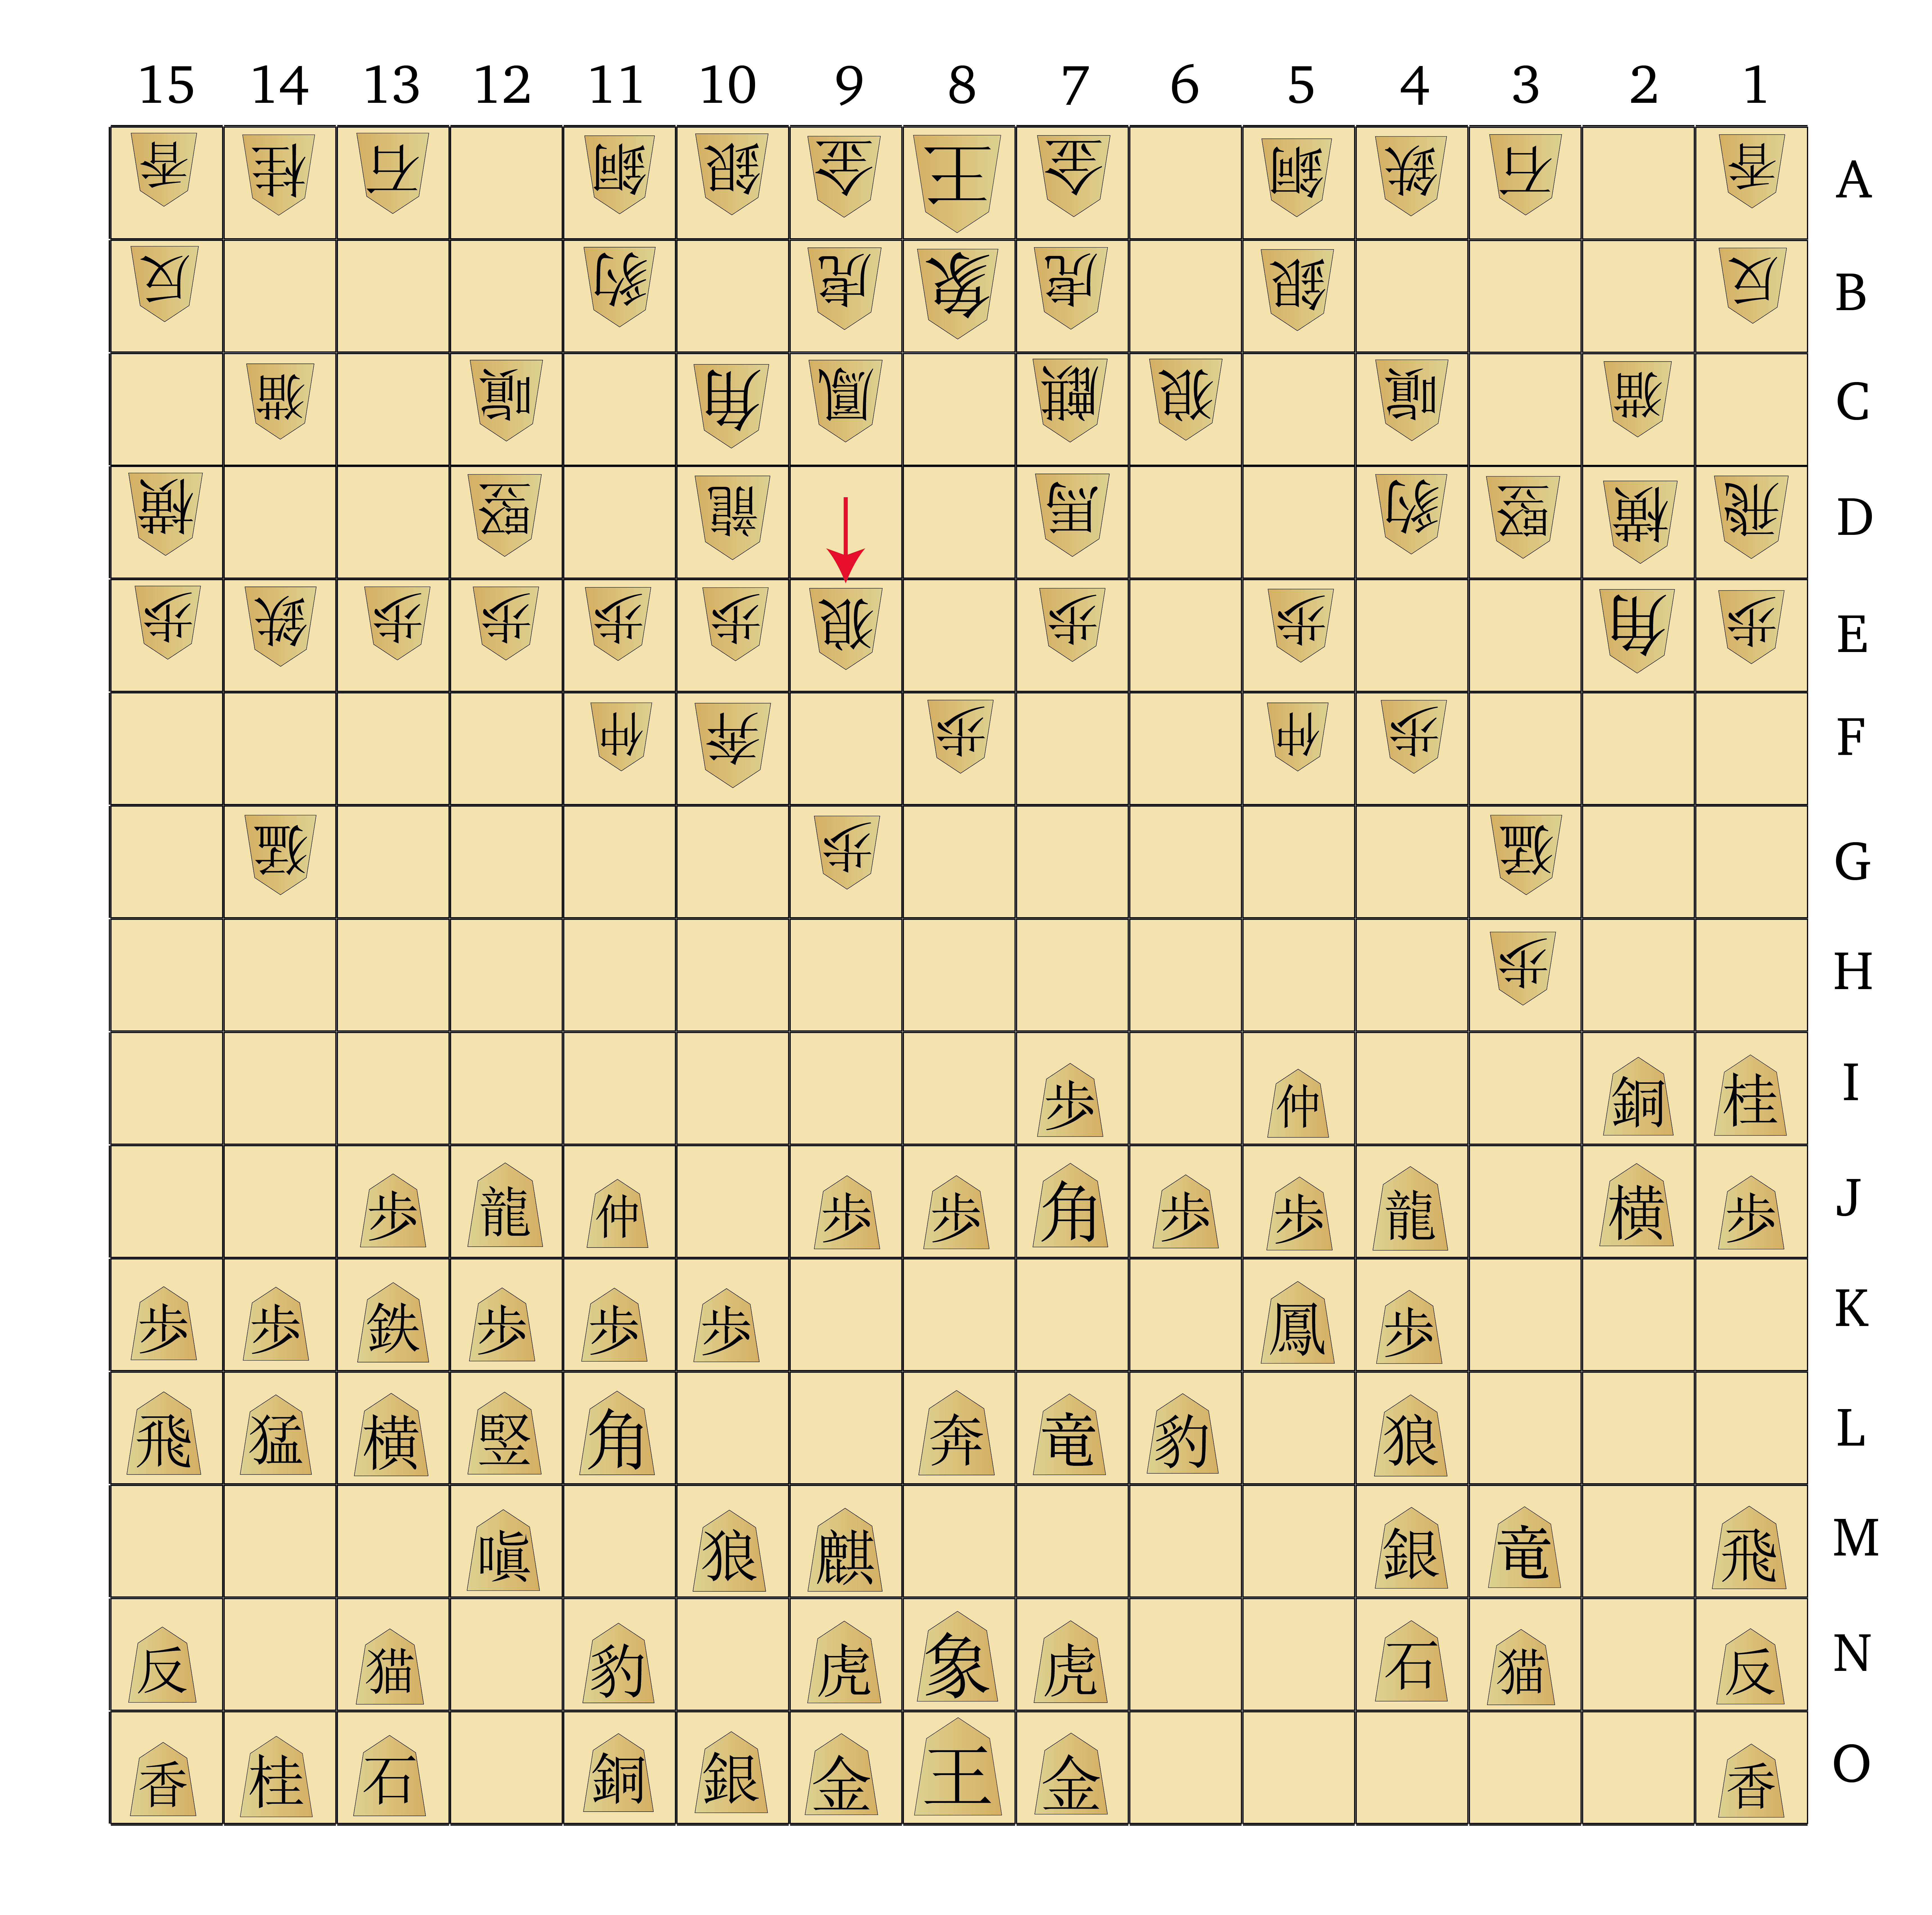
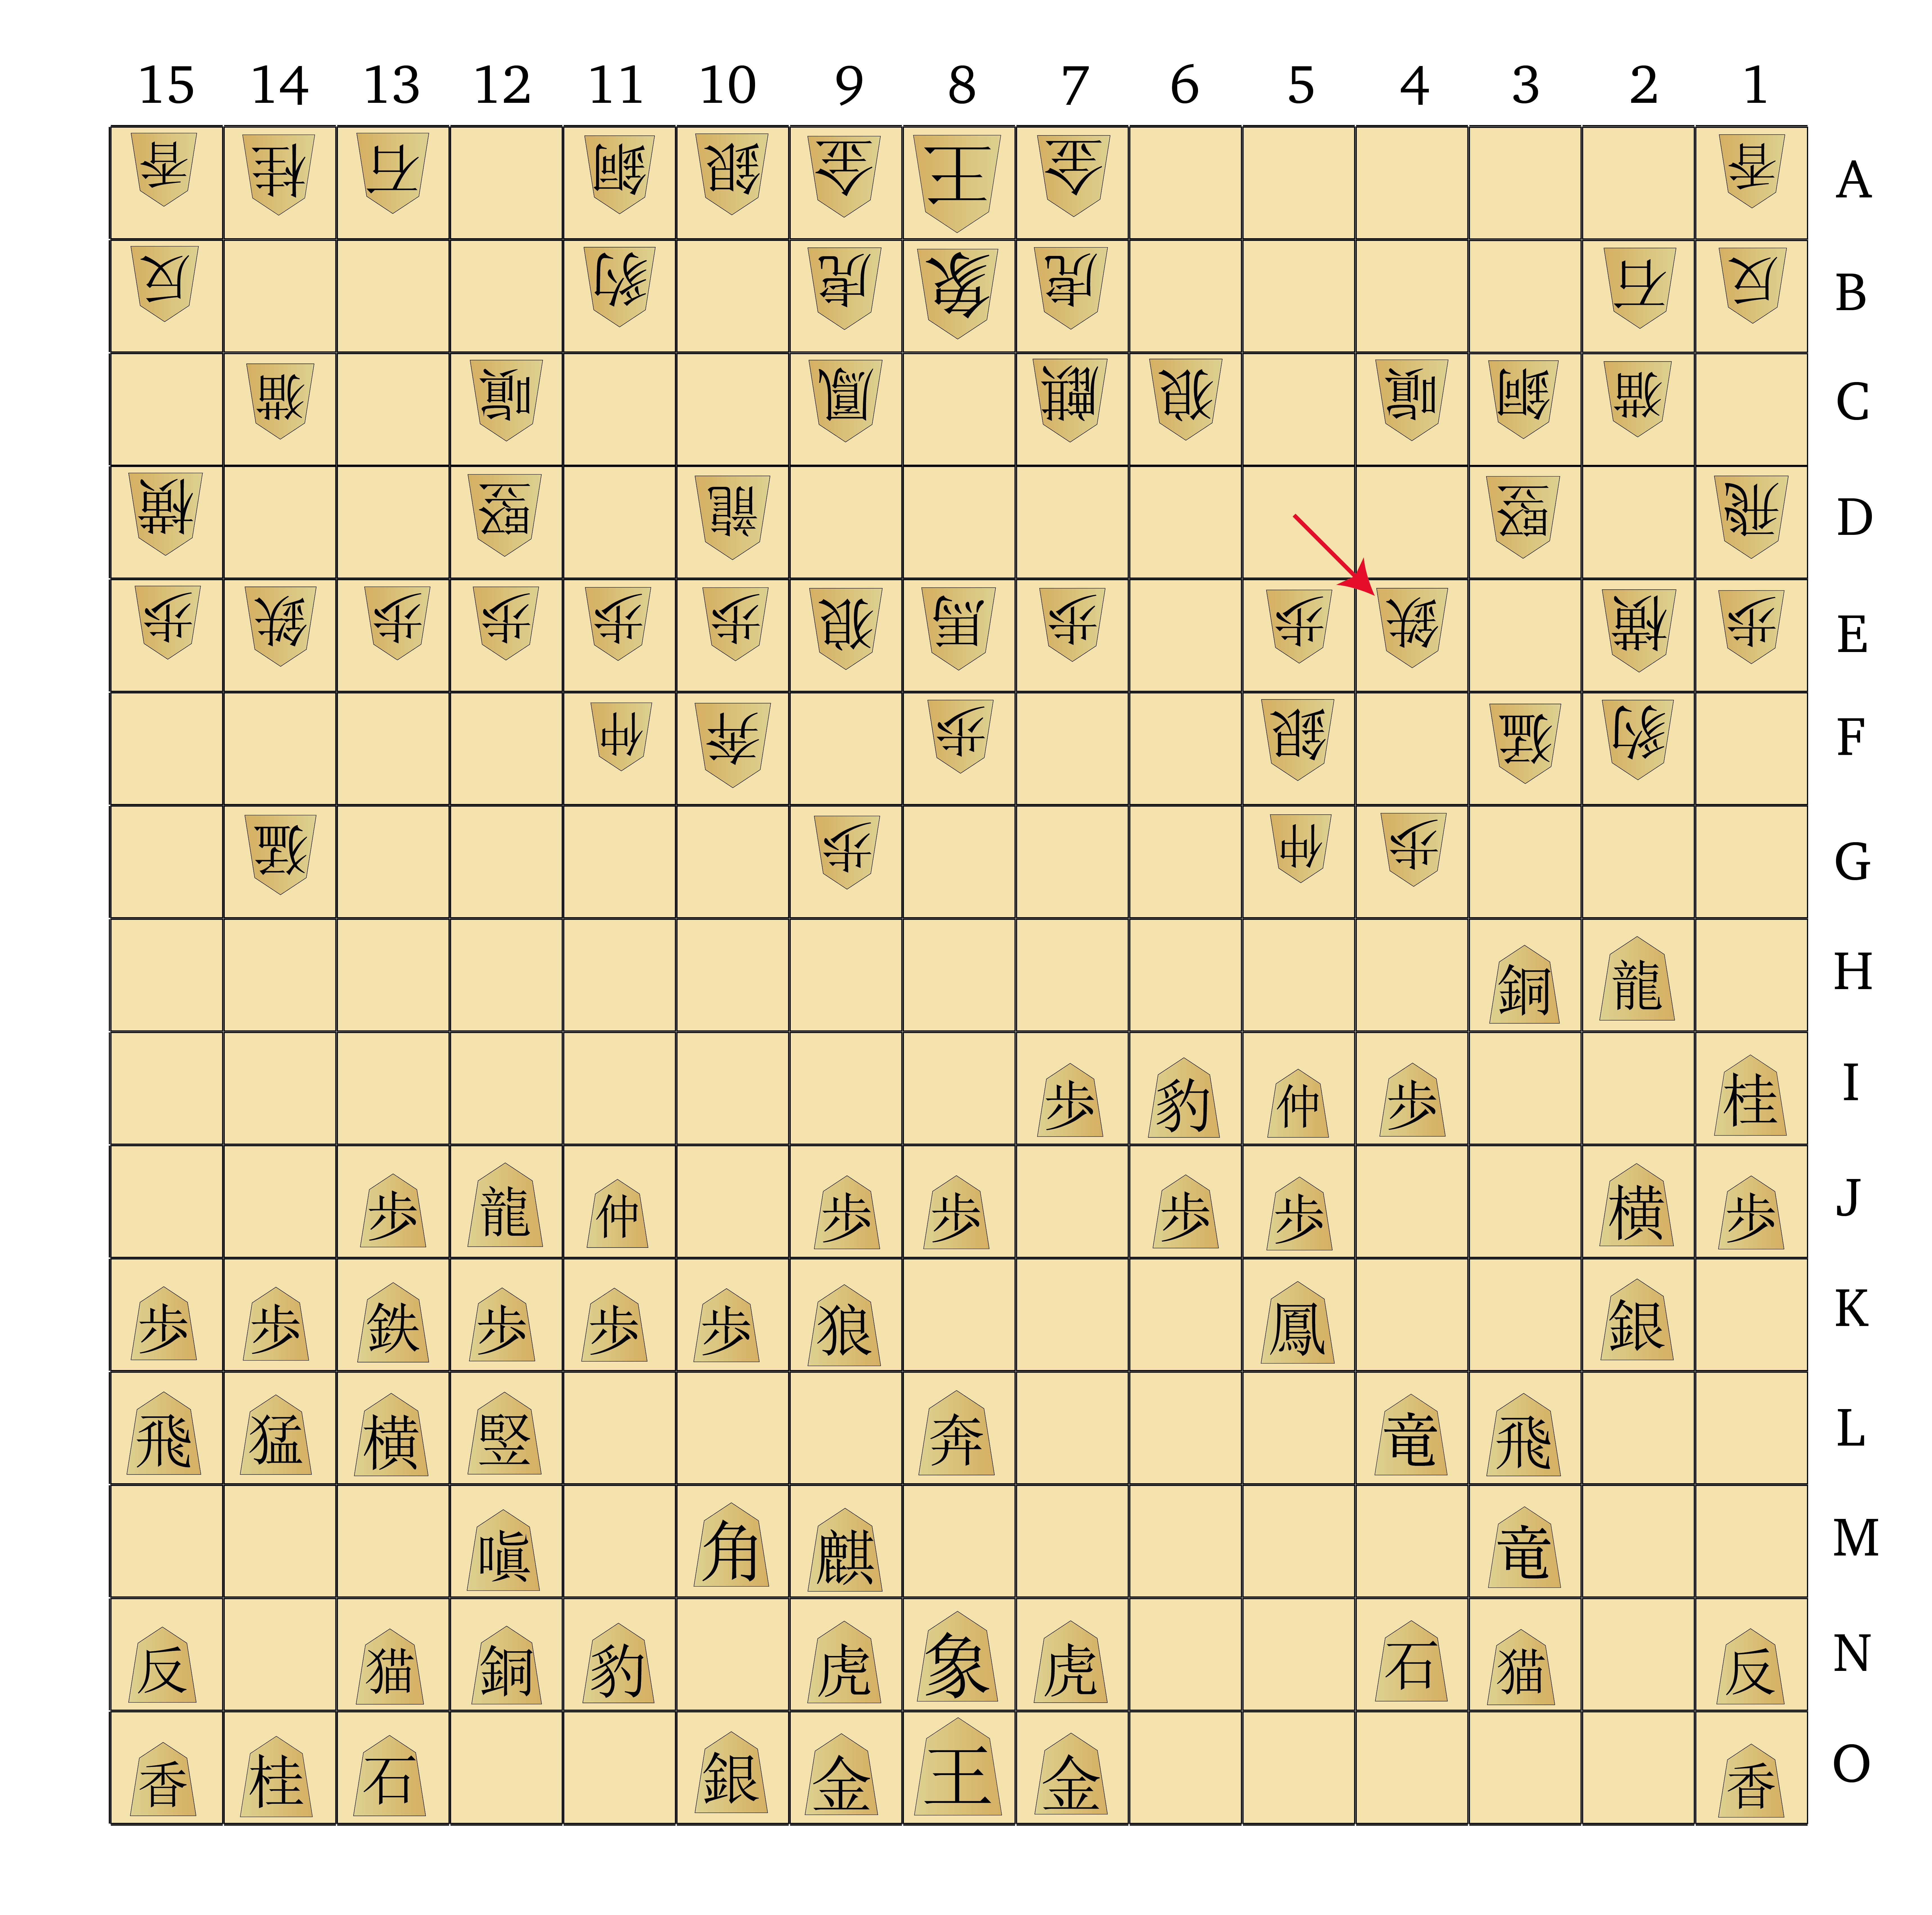
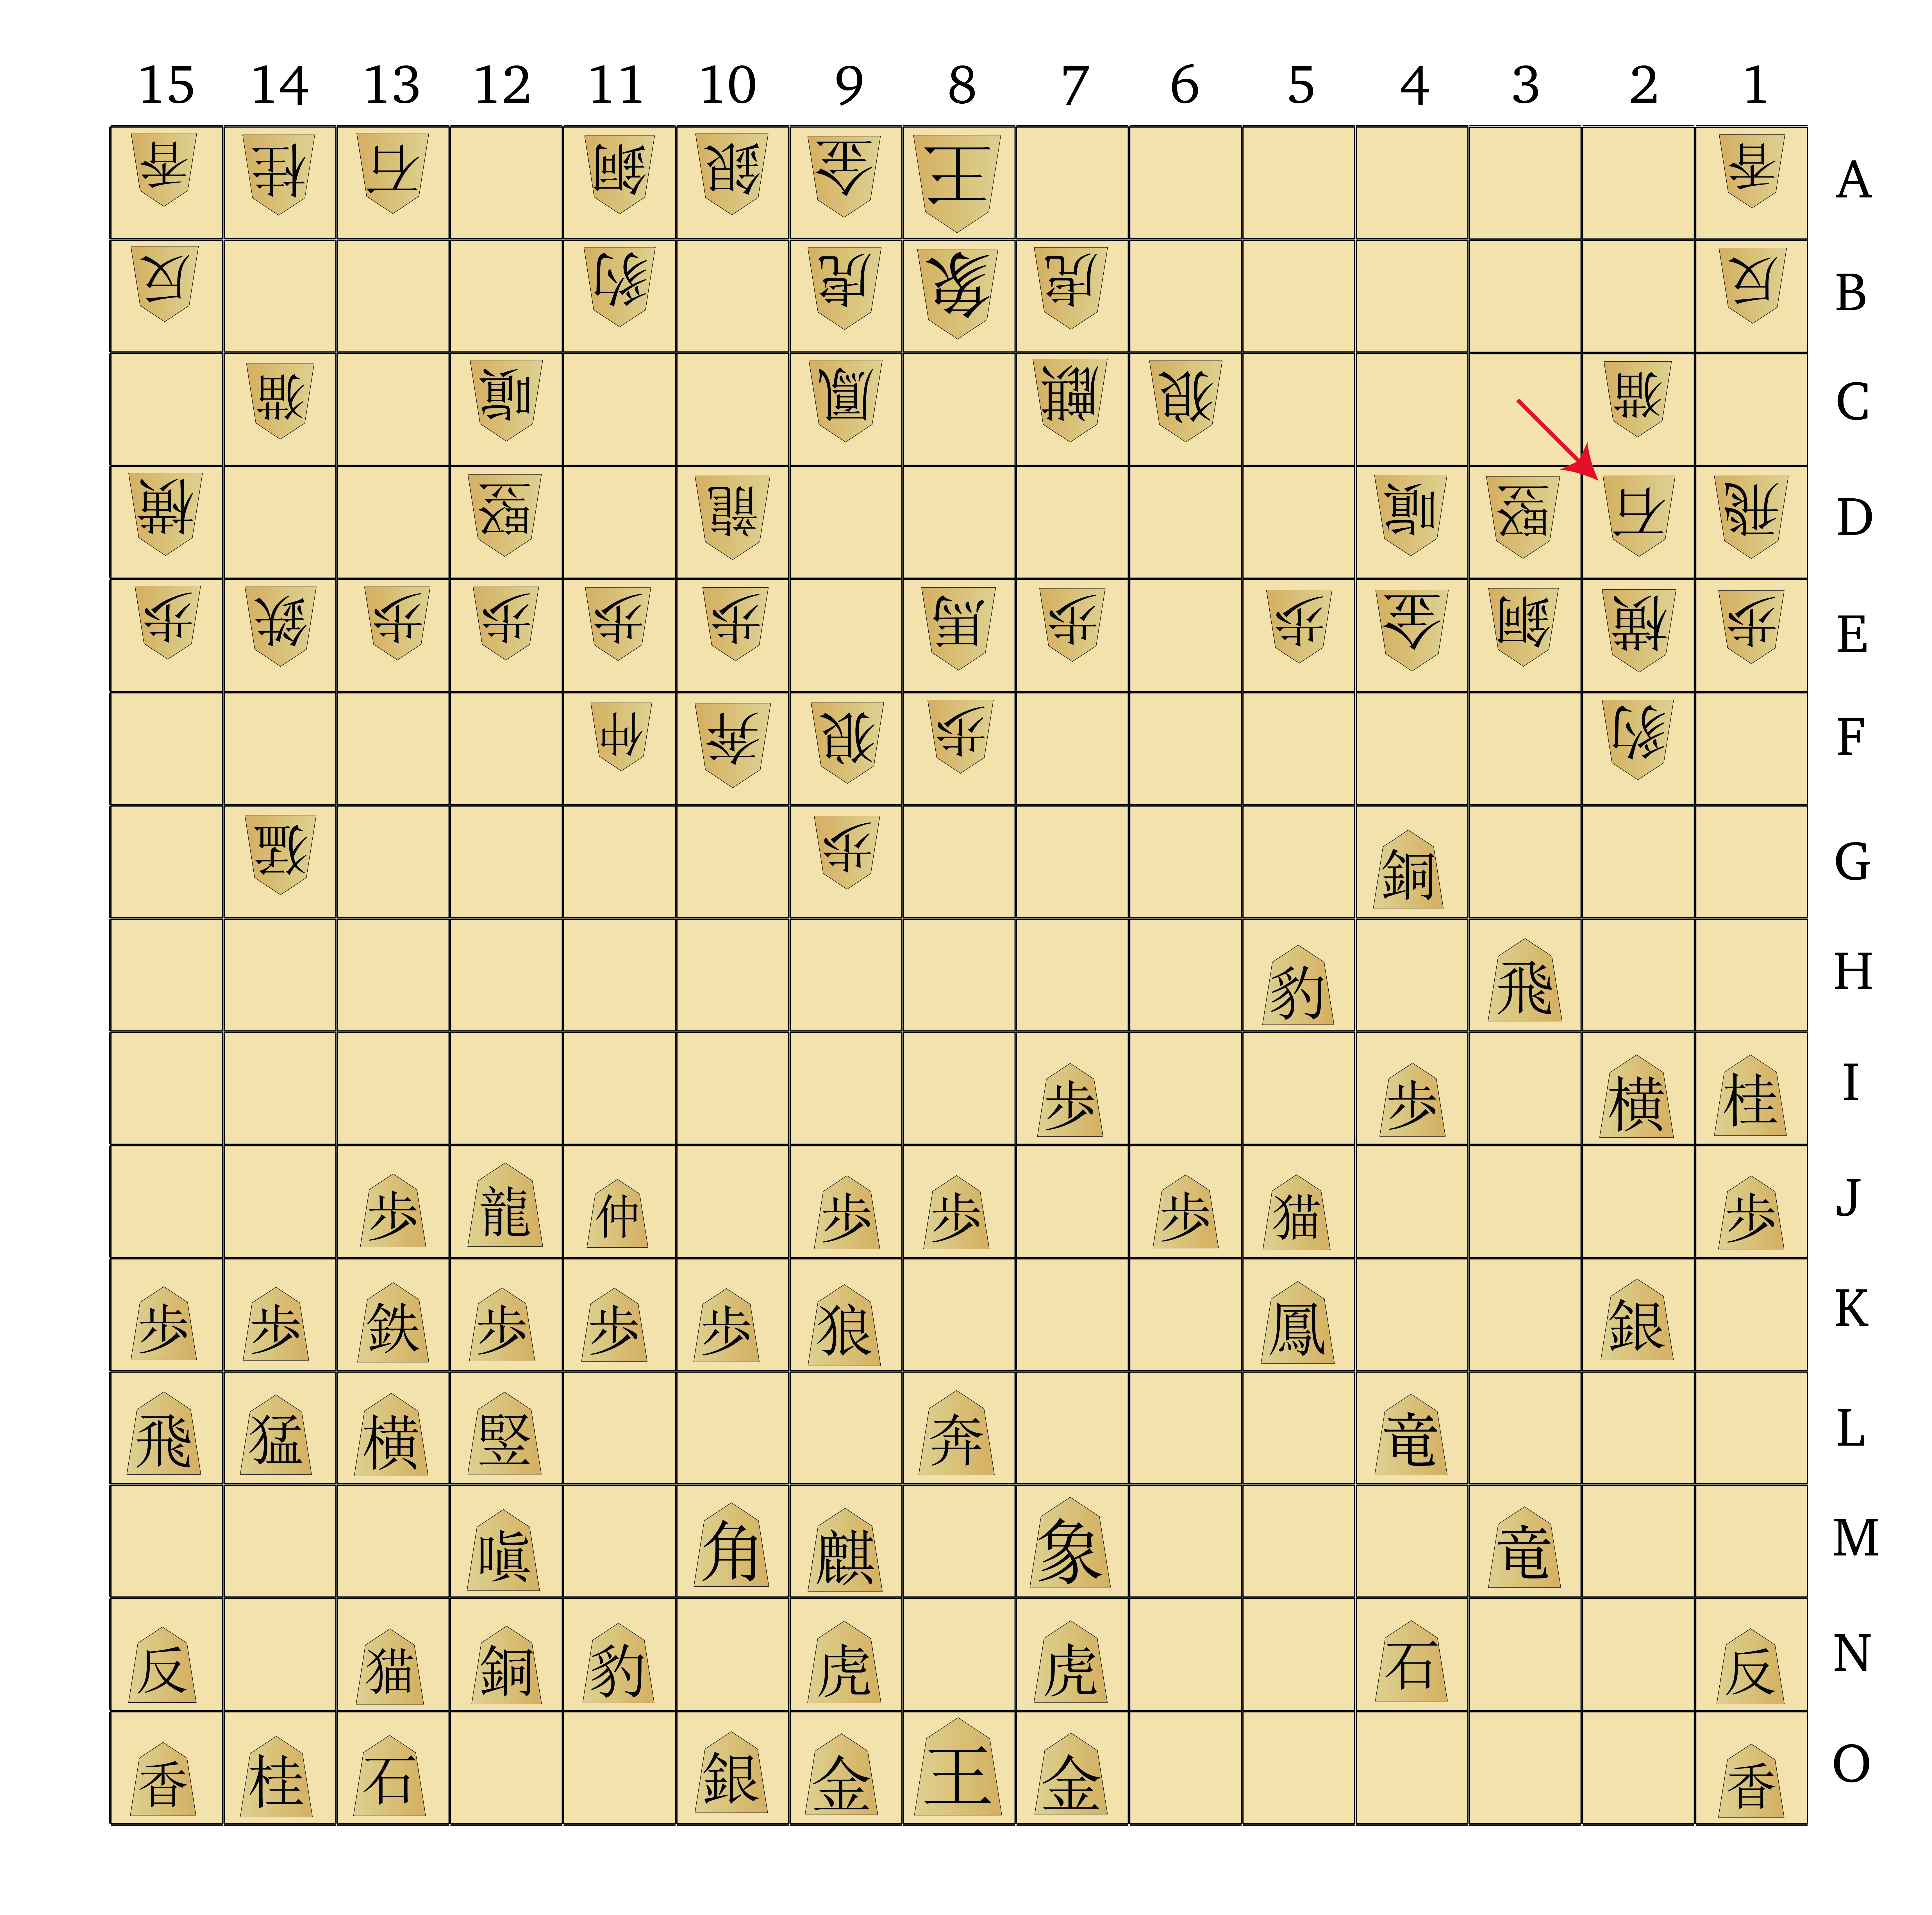
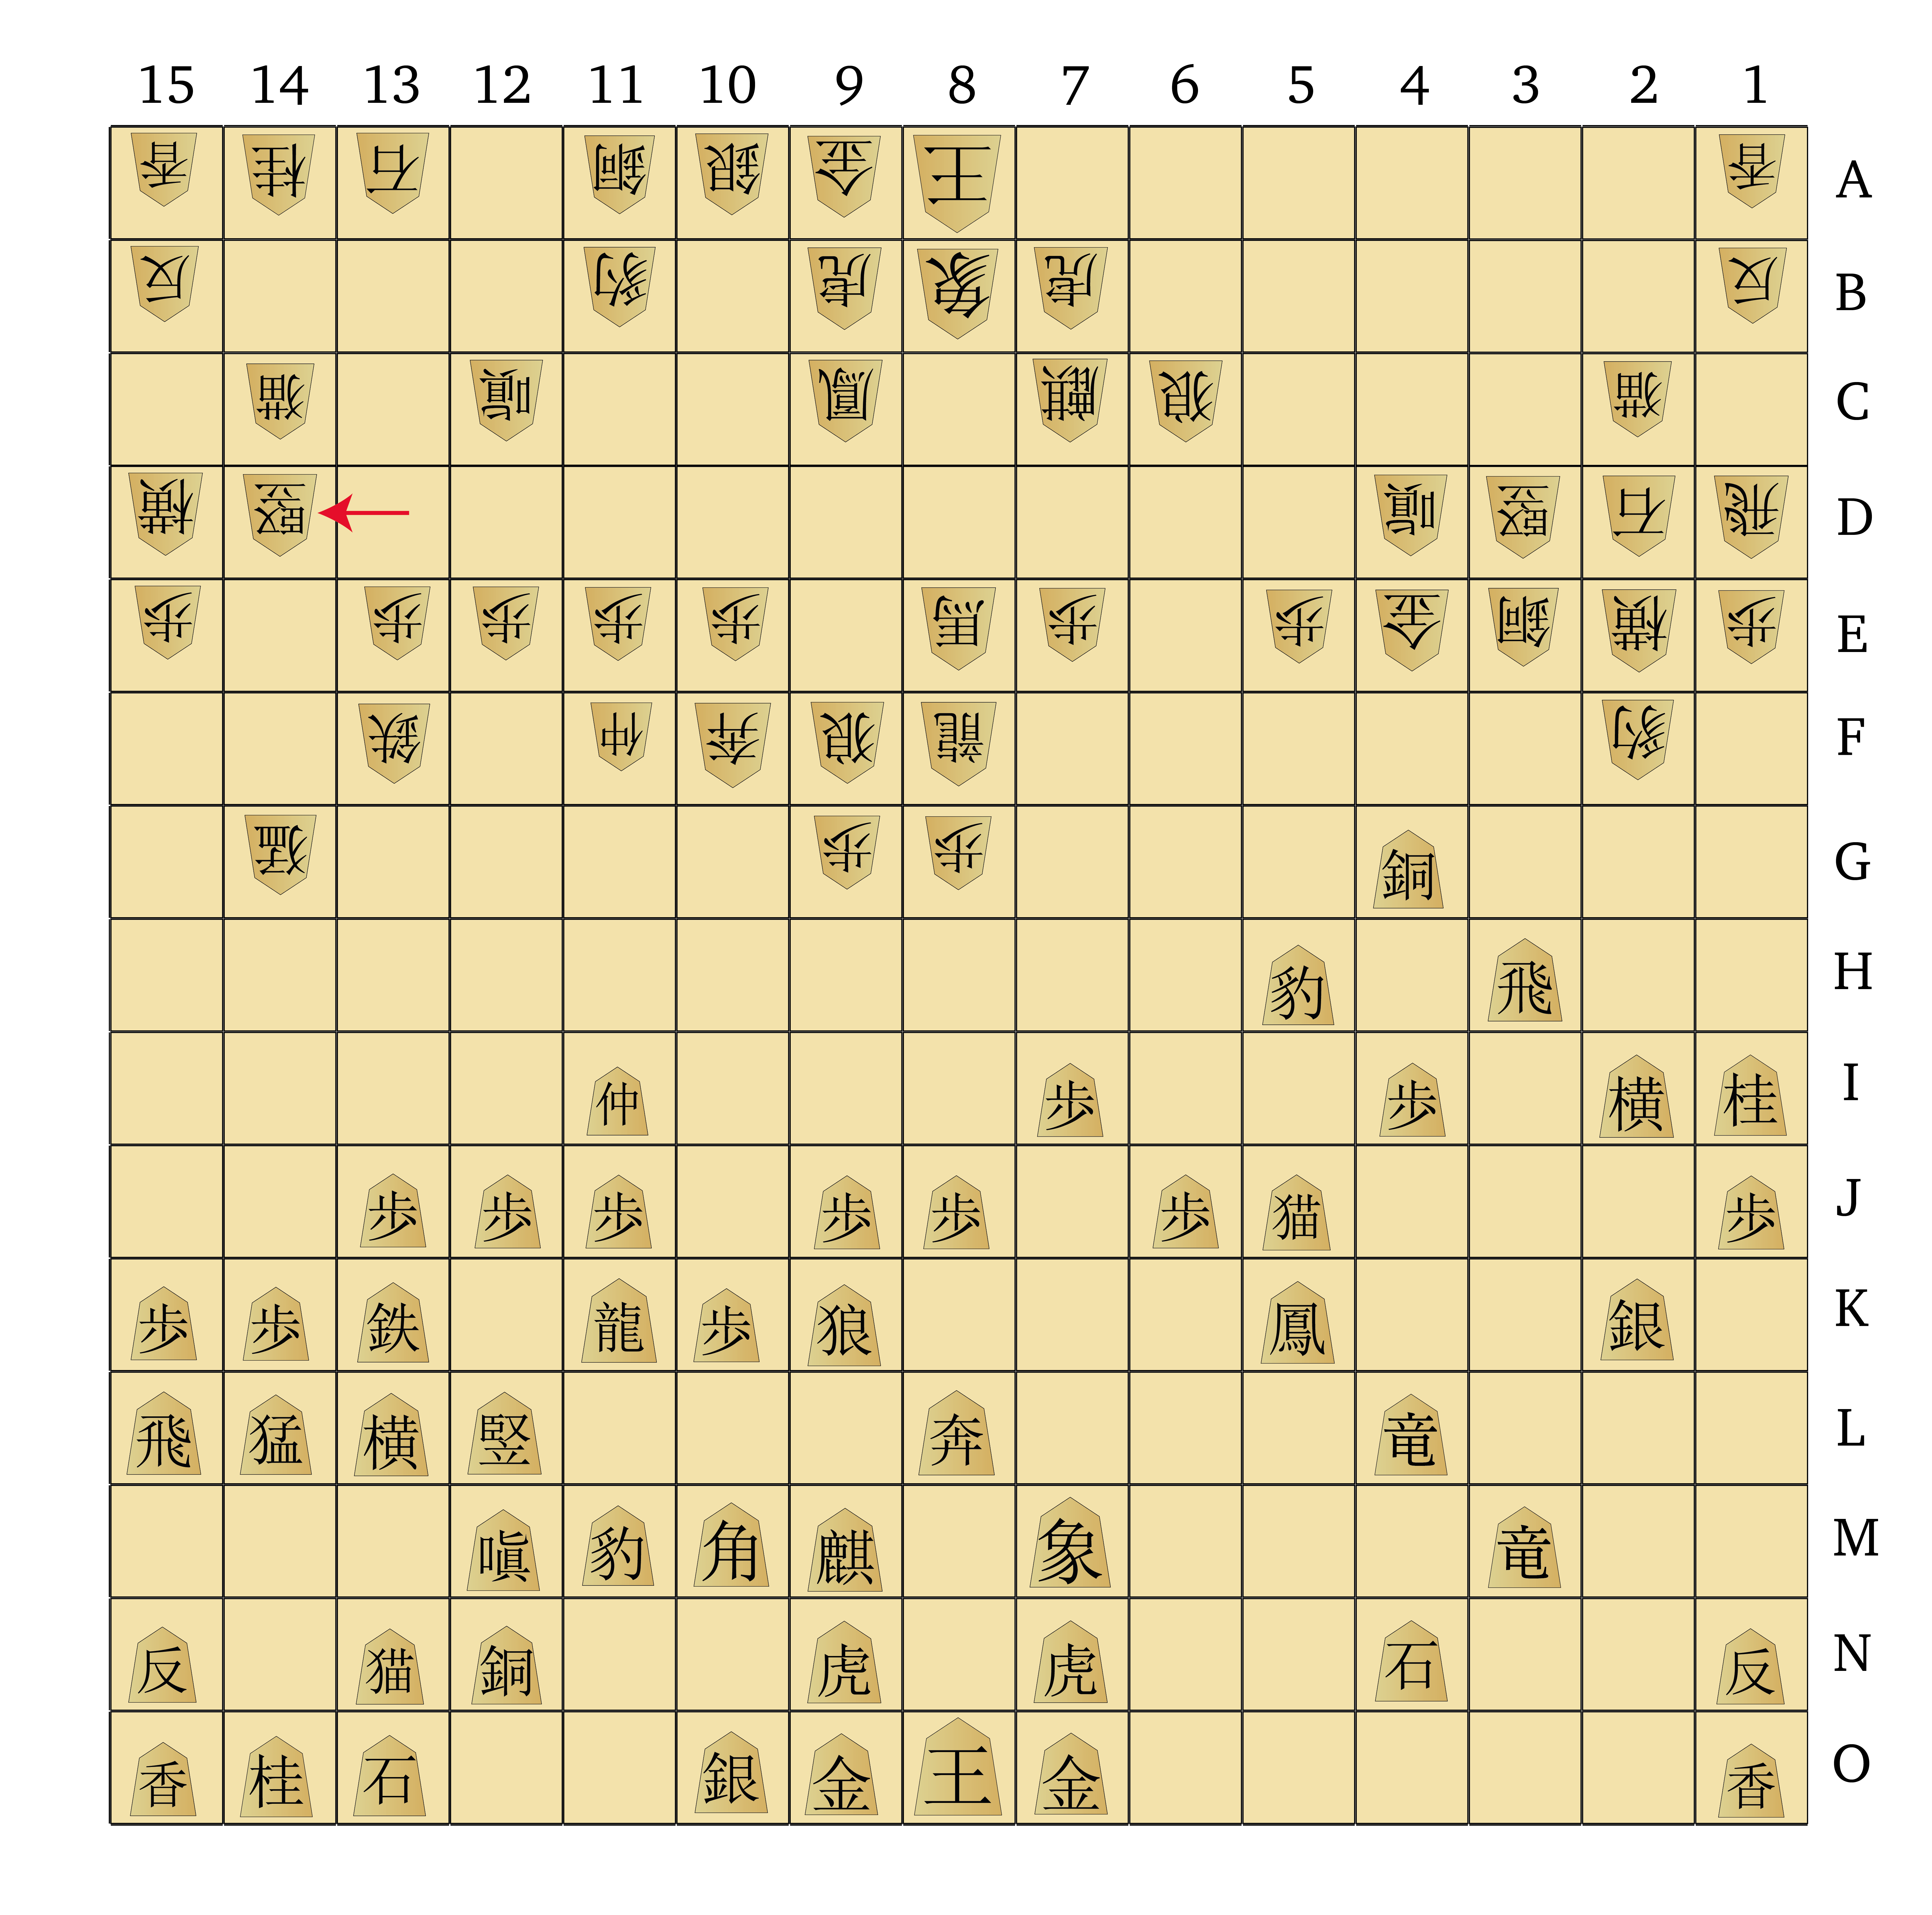
- Nutty Shogi pieces flipped to show their promoted sides.
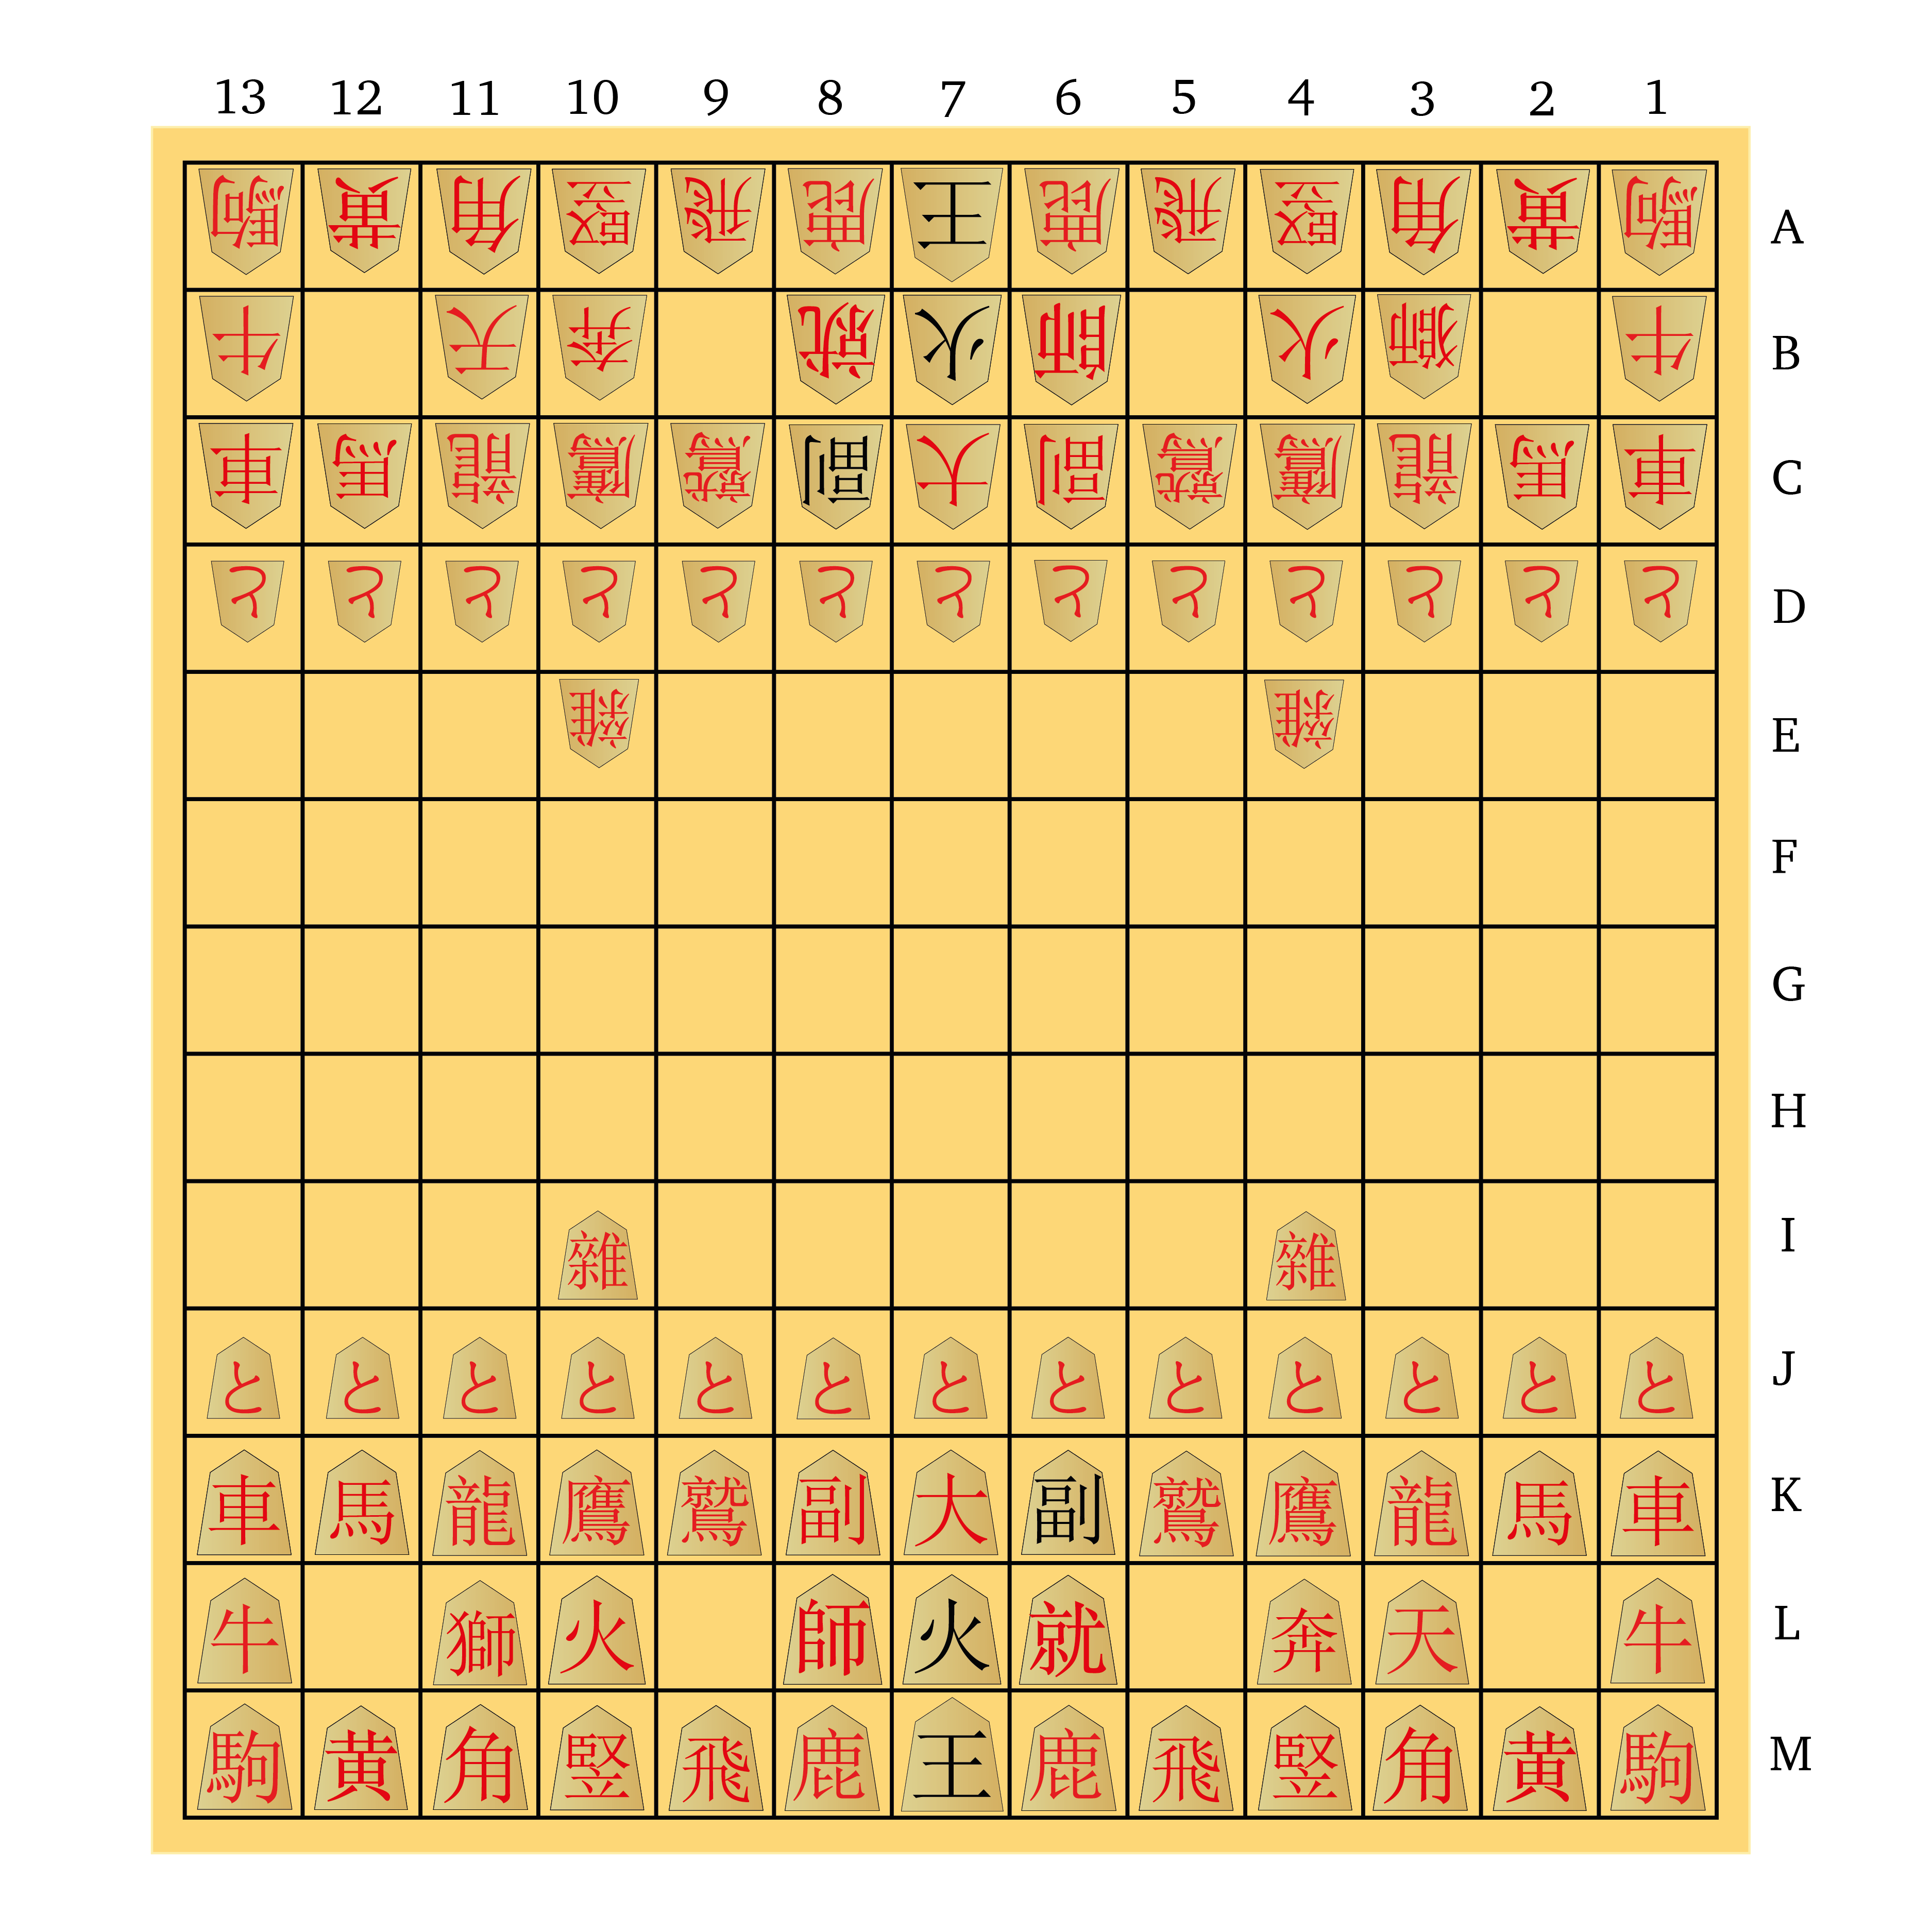
Nutty Shogi is here as a representative of the class of 13×13 Shogi variants. The only historic 13×13 Shogi variant is Heian Dai Shogi, which is a very early form of Dai Shogi that is unfortunately not very enjoyable to play. However, some modern Shogi variant fans have created some 13×13 variants that are worth your time, and given that 13×13 Shogi boards are not available anywhere, I decided to create one to print on a mat.
Why 13×13 Shogi is great: Nutty Shogi, designed by HG Muller, is a reduced version of Tenjiku Shogi, a 16×16 historic Shogi variant famous for its outrageously powerful pieces and extremely fast-paced and destructive play. Nutty Shogi condenses Tenjiku’s armies of 78 pieces per player, with 36 types of pieces, down to 50 pieces of 25 types — still much more than Chess or Shogi, but quite manageable. The selection of pieces is basically a Tenjiku Greatest Hits album, so the game retains the feel of Tenjiku in a more compact size. HG Muller also created two other worthwhile 13×13 variants: Cashew Shogi, a reduced form of Dai Dai Shogi; and Macademia Shogi, a reduced form of Maka Dai Dai Shogi. While you’re at it, do check out Mitsugumi Shogi, a condensed form of Suzumu Shogi, which is a modern variant of Tenjiku Shogi (still with me here?). All of these games pack a lot of action into that 13×13 area, so despite the large boards and starting arrays they are far from slow.
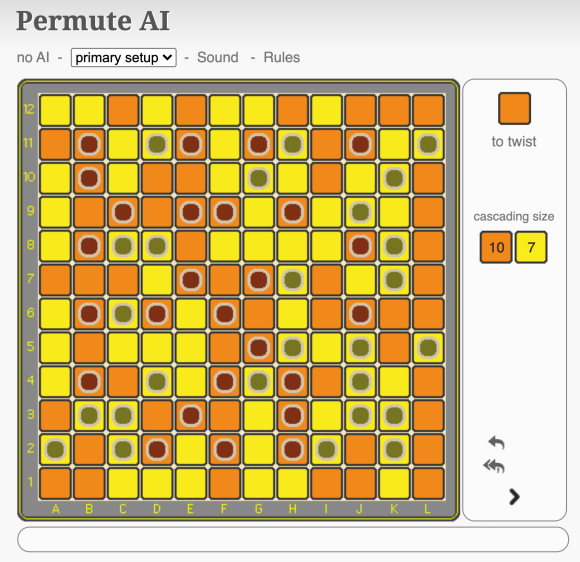
Odd-Y and Pex


Here we have two fascinating variants of the seminal connection games Hex and the Game of Y. Odd-Y extends the core concept of Y to boards with more than three sides, while Pex transports Hex to a grid of irregular pentagons.
Why they’re great: Odd-Y circumvents one of the shortcomings of Y, in my opinion, which is that the triangular Y board gives different areas of the board very different values, which means some parts of the playing area go largely unused. Odd-Y extends the goal of forming a Y — connecting three sides of the board — to boards of more sides, creating a more expansive feel. The new winning condition is a bit complicated to explain on larger boards, but Odd-Y with five sides — 5-Y — is beautifully simple: connect any three sides to win, so long as all three sides are not adjacent. This can then be translated to a six-sided hexagonal board by colouring the edges with five colours in a pattern like you see above (Craig Duncan came up with this idea). 5-Y feels very freeing — there are more winning connections available than in Y, creating more strategic complexity, and the entire board surface feels useful.
Pex was invented by connection game maestro David J Bush, world champion of TwixT and co-author of my post on that game. He transformed Hex by placing it on the irregular pentagonal grid you see above, keeping all the rules the same (not that there are many rules in Hex). The new grid forces significant changes in tactics, as cells now have different adjacencies, so standard Hex techniques won’t work. Pex is a challenging and interesting variant, definitely intriguing for experienced Hex players, but also simple enough for newcomers to pick up and enjoy within minutes.
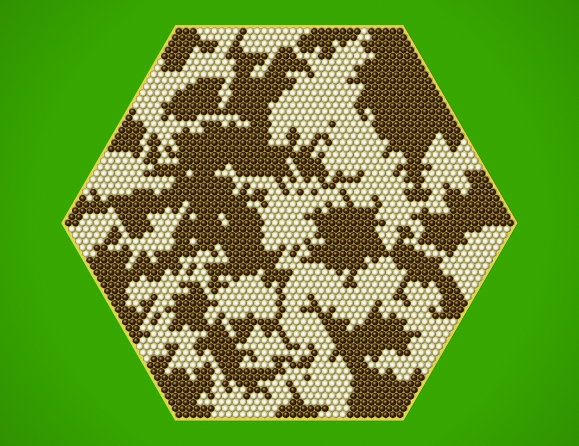
Snodd (and Xodd/Yodd)
-
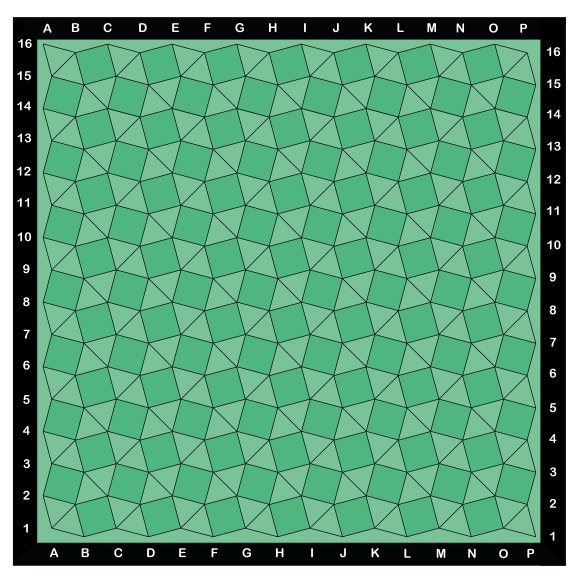
- 16×16 Snodd board.
-
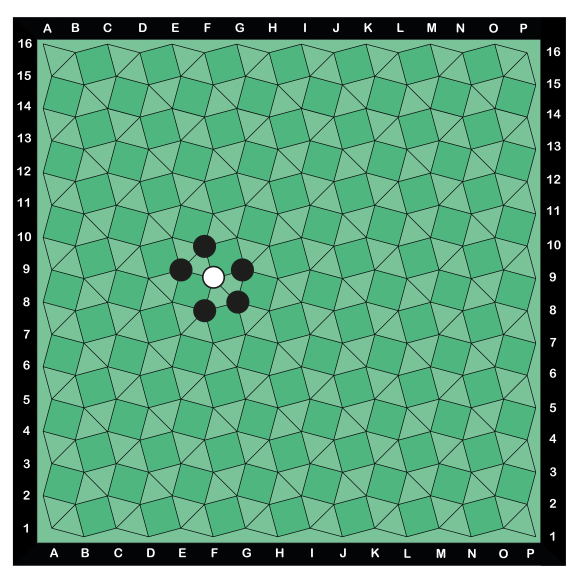
- Snodd board with placed stones, showing the changed adjacencies of points.

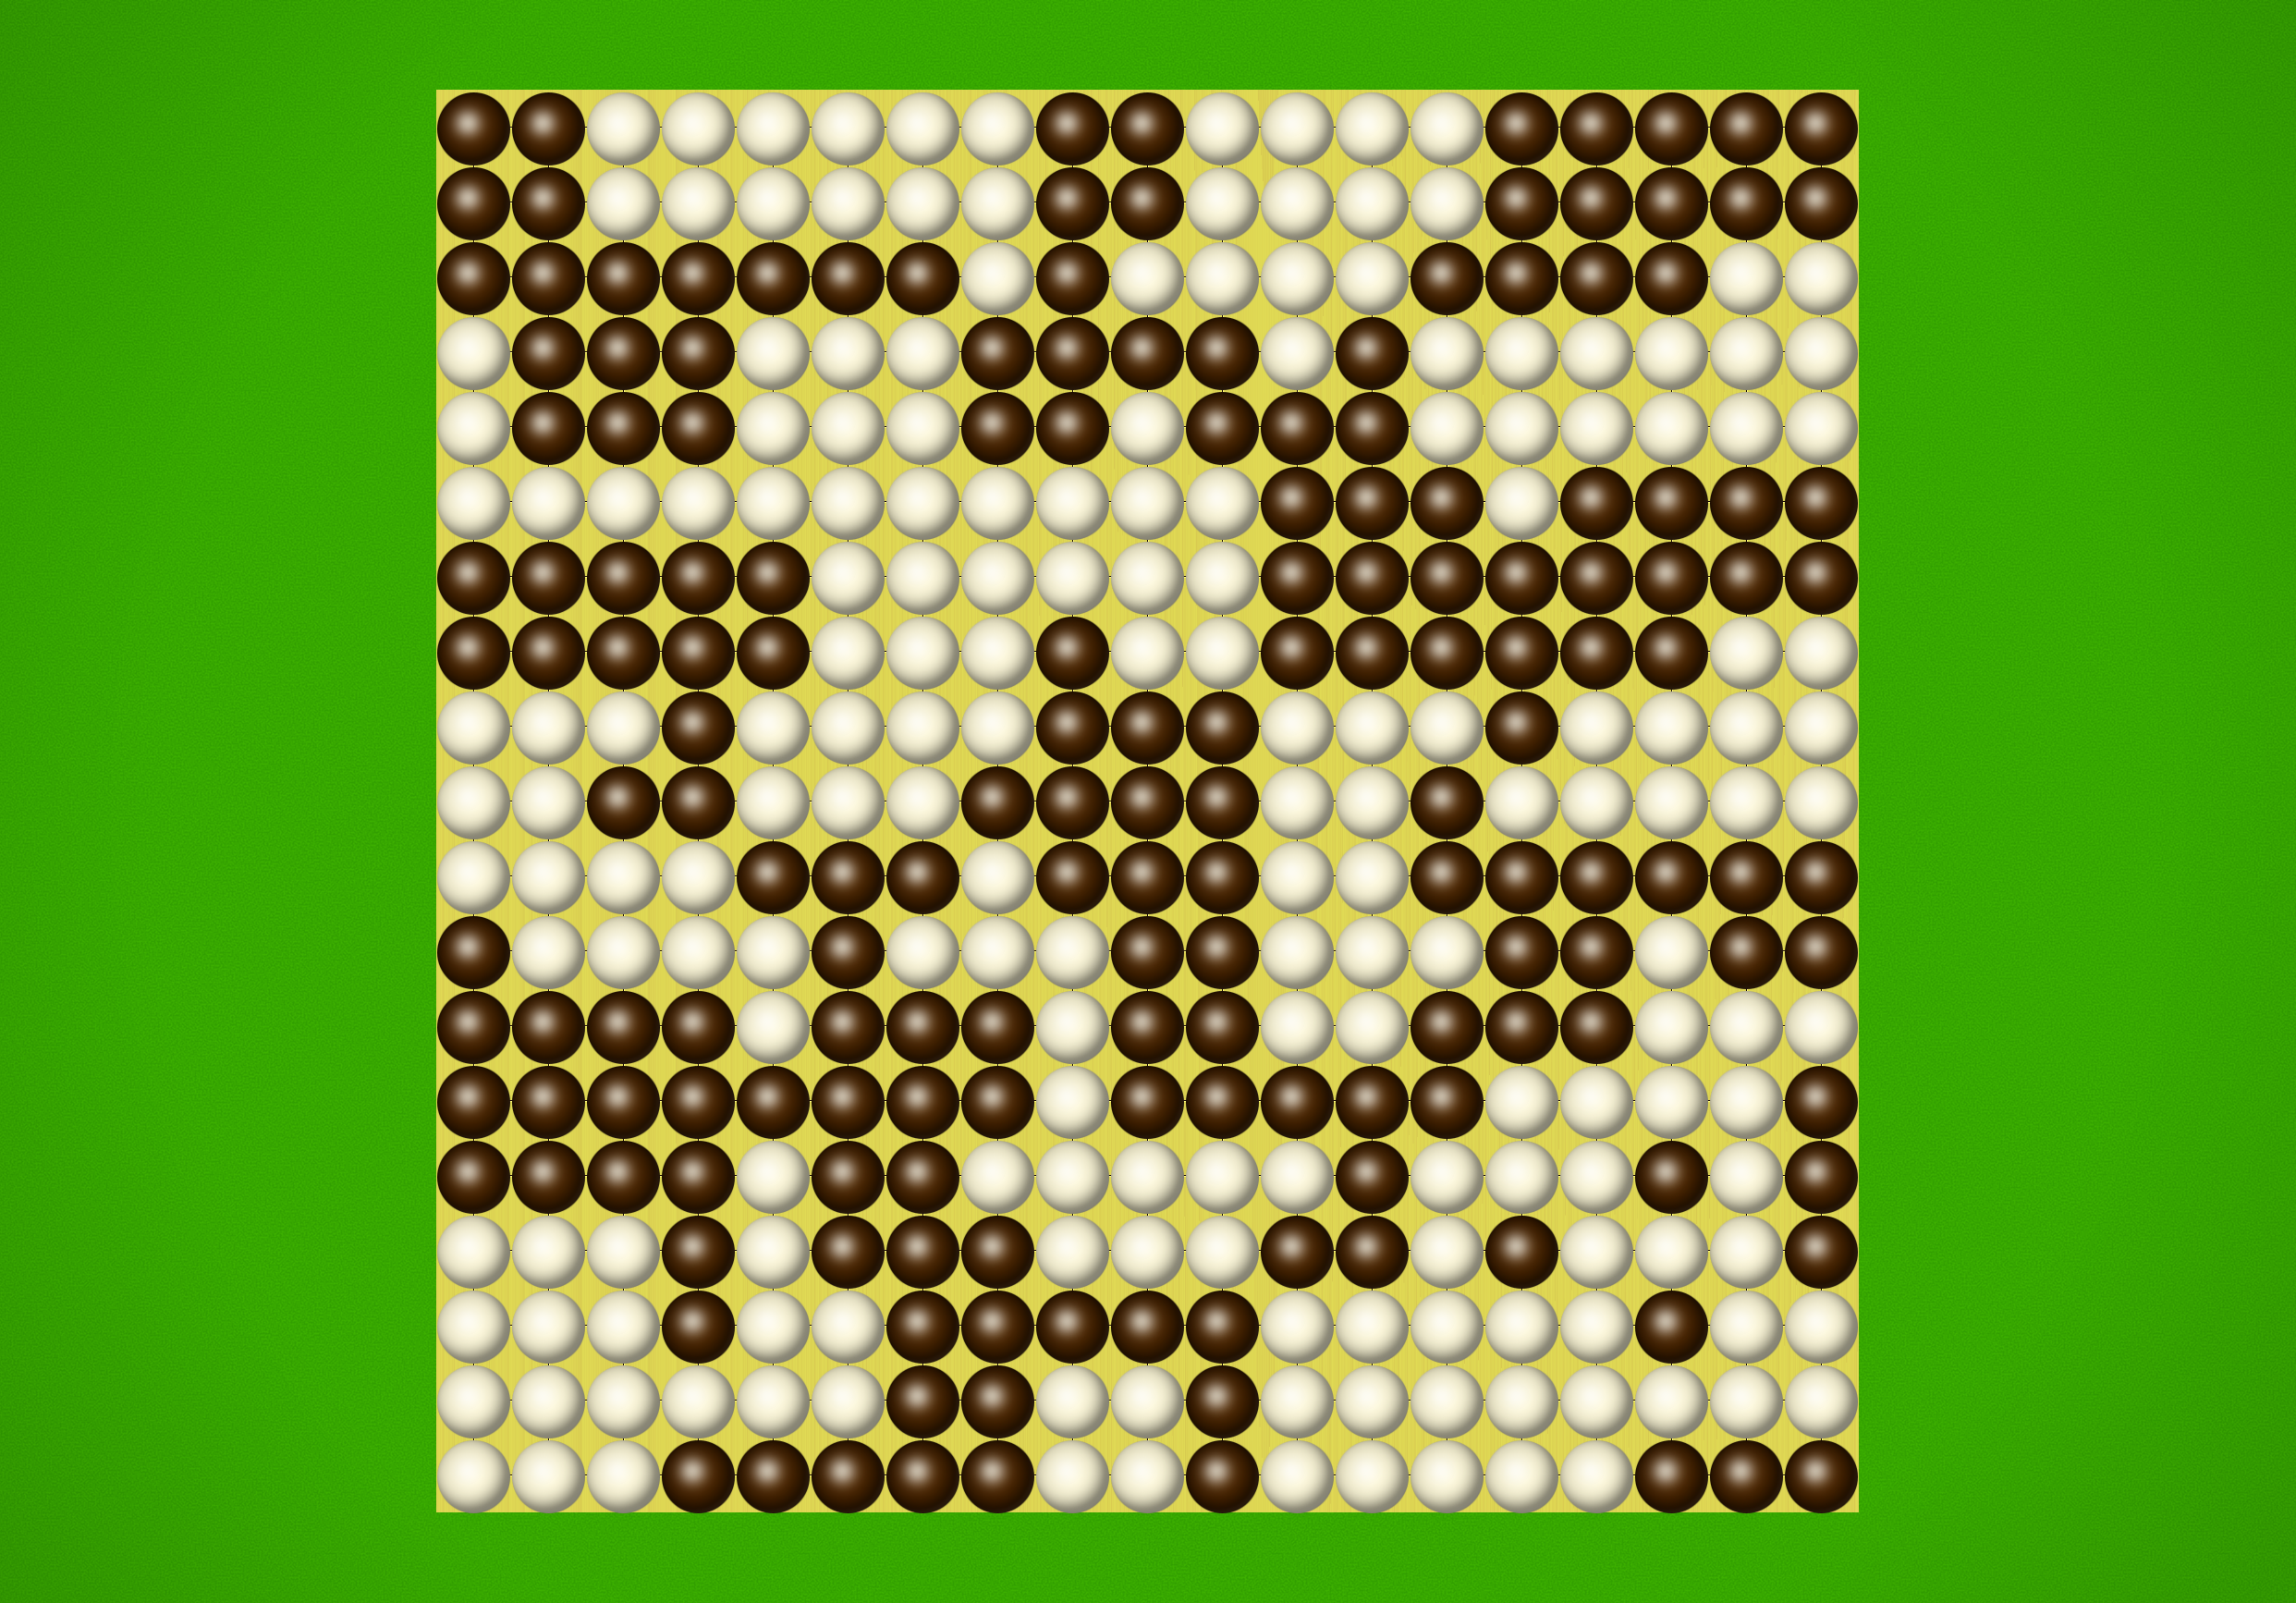
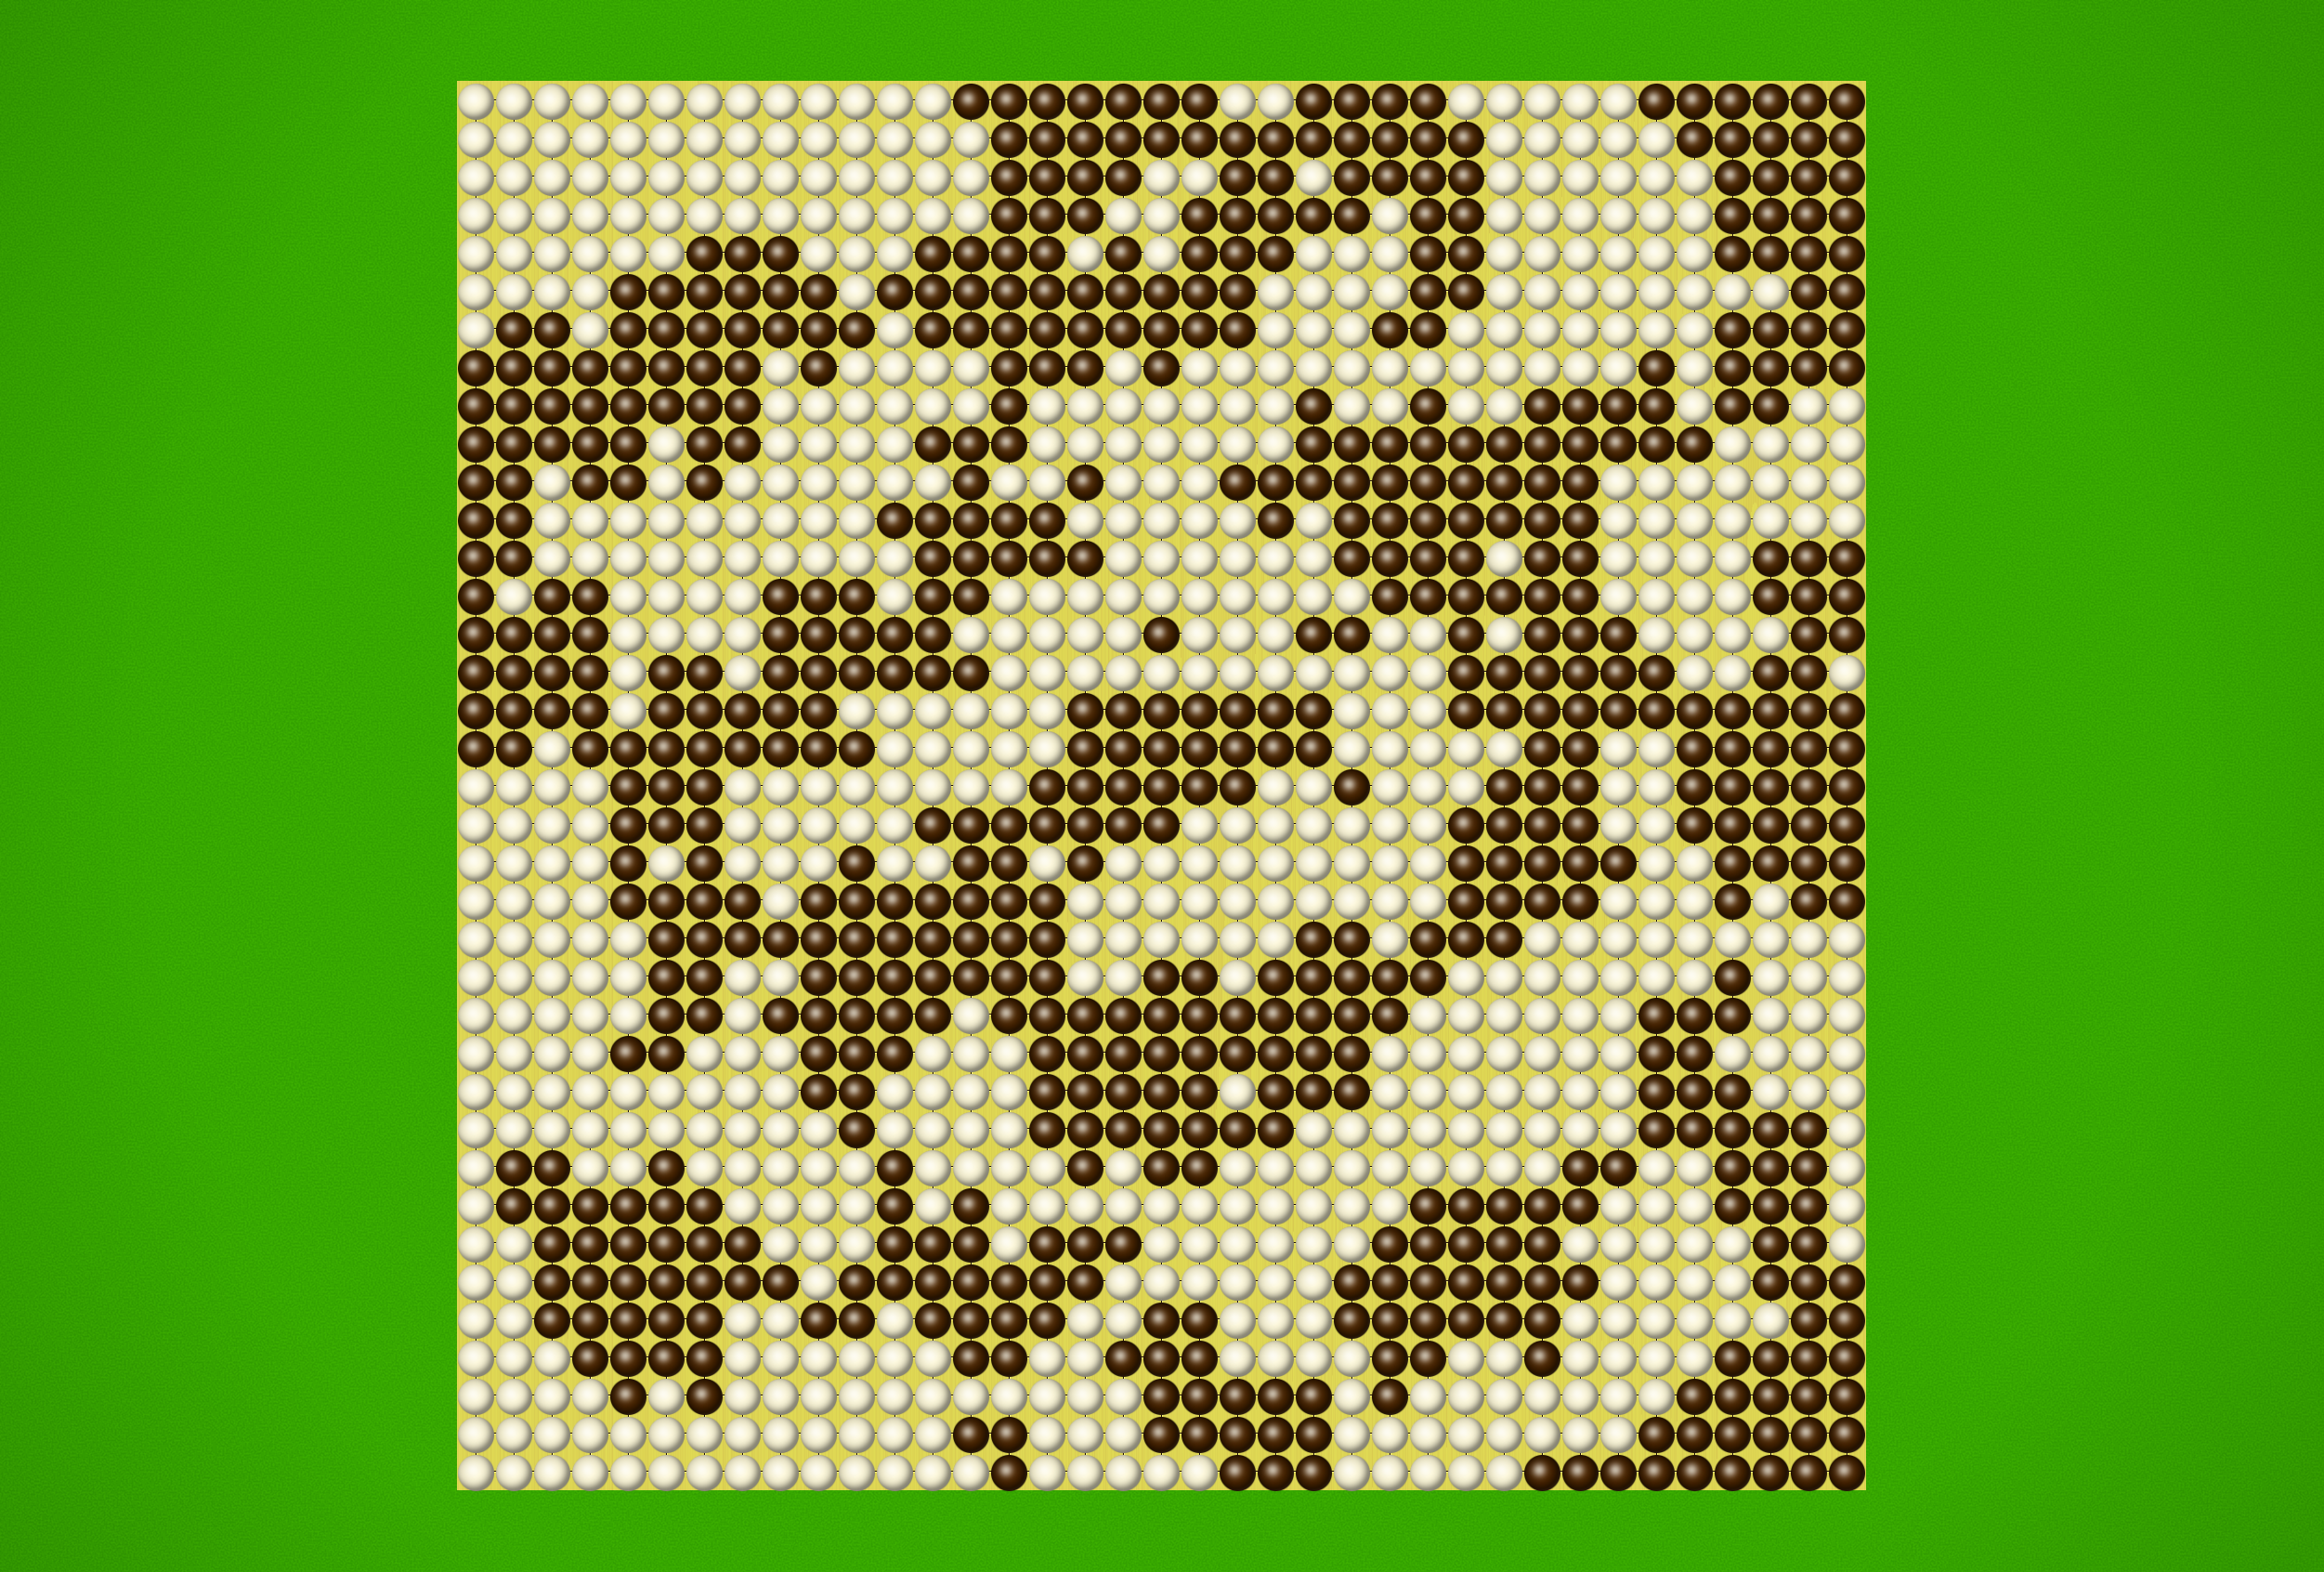
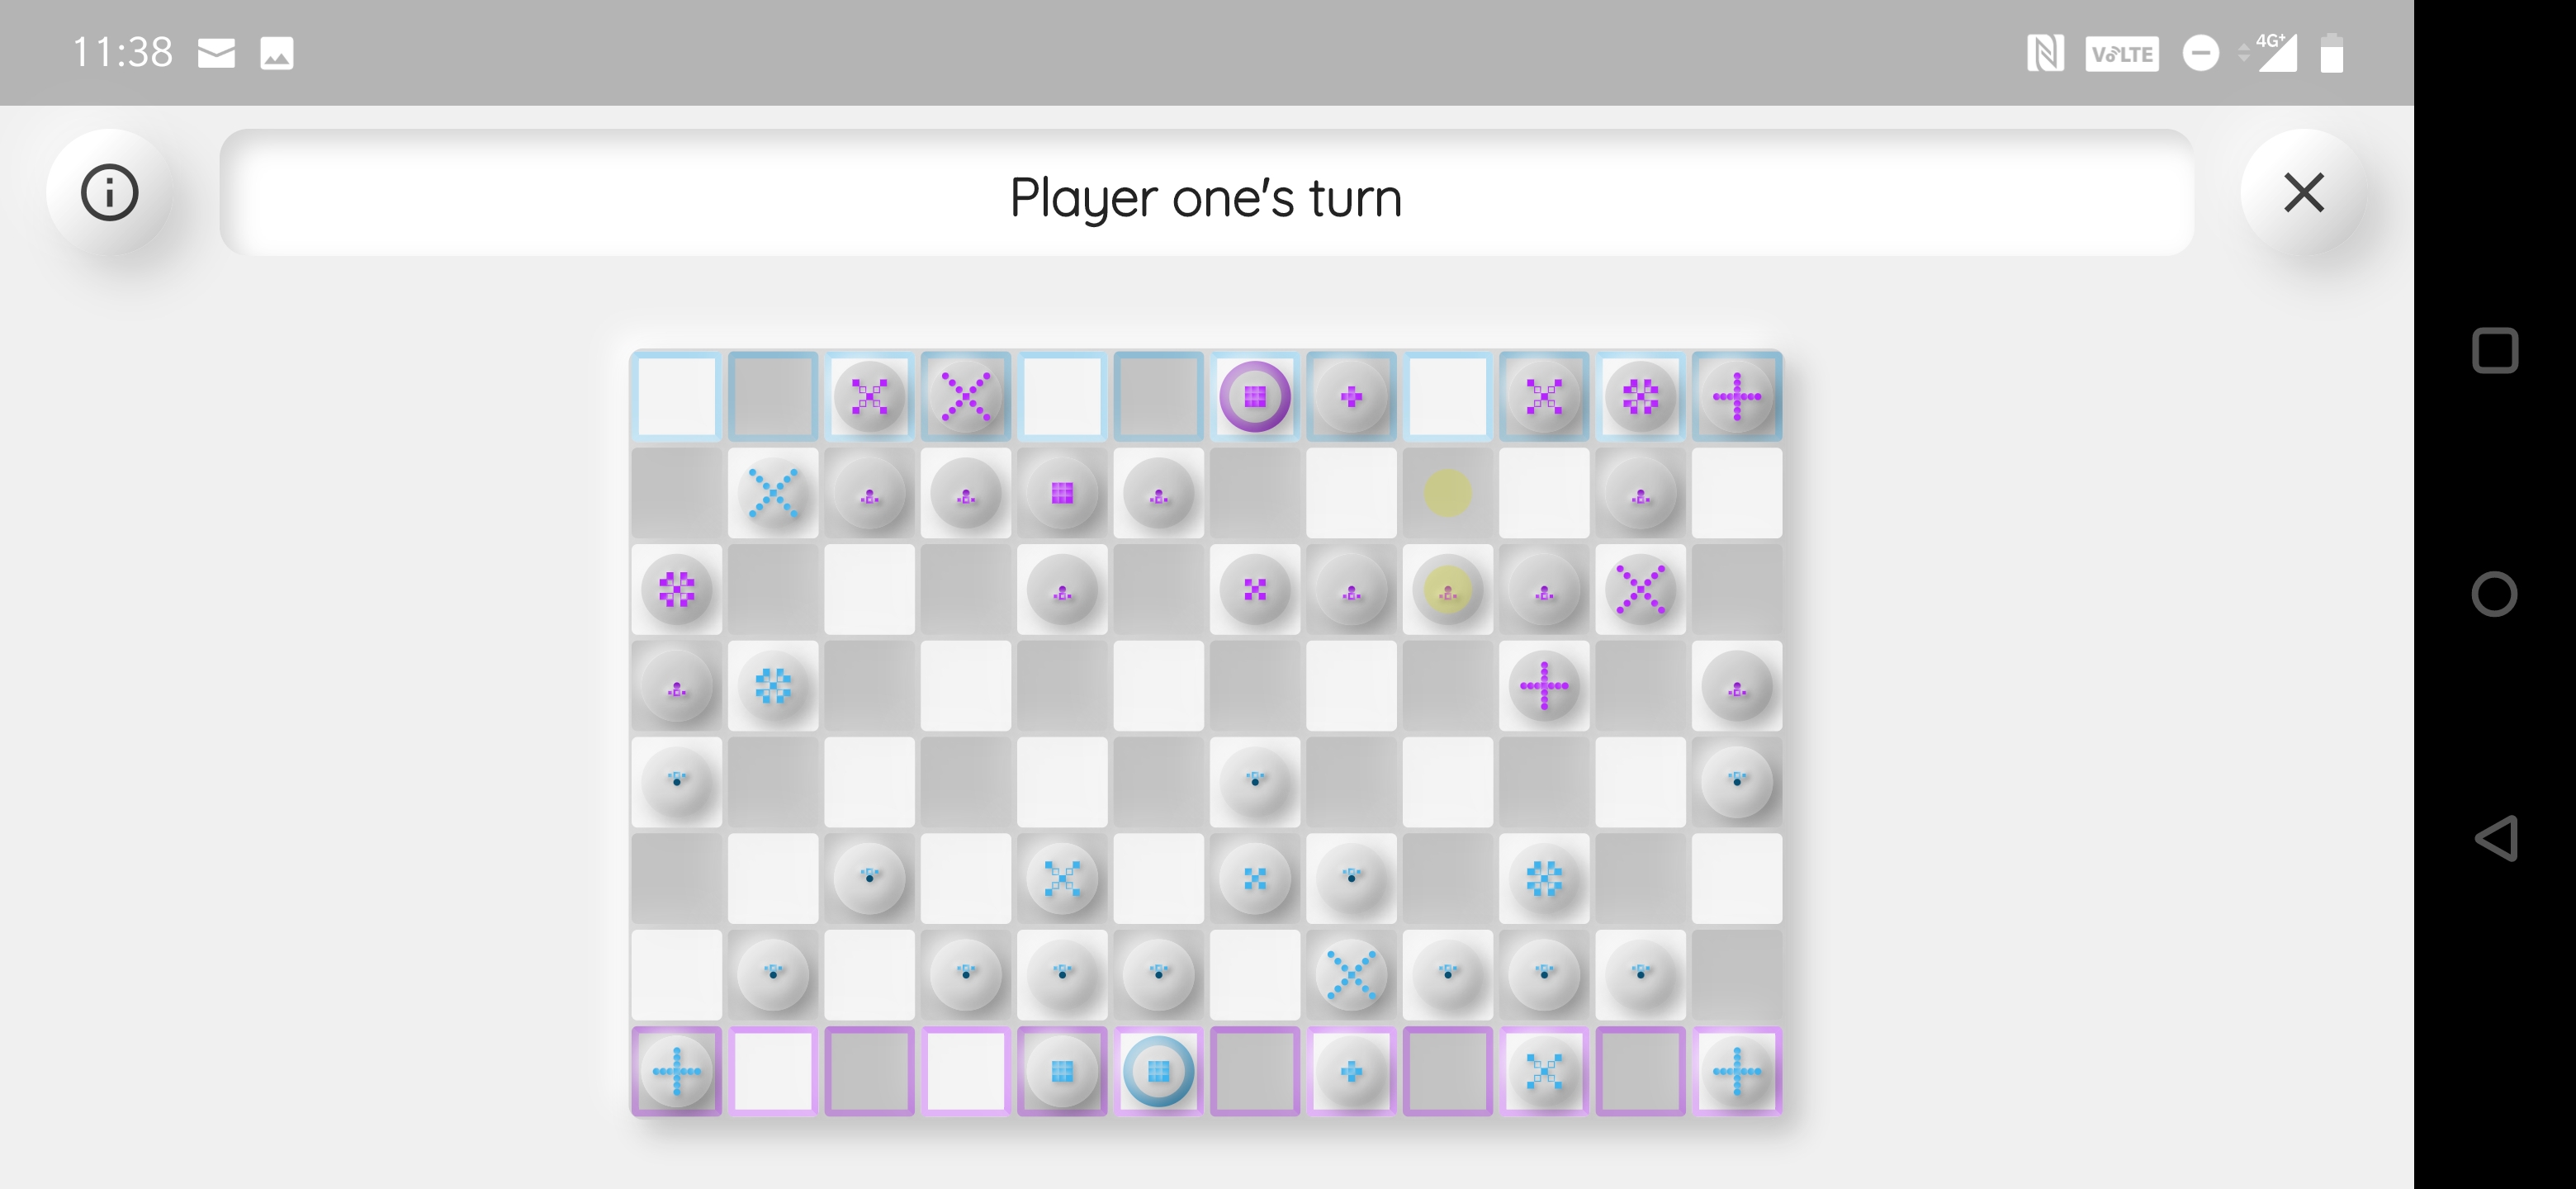
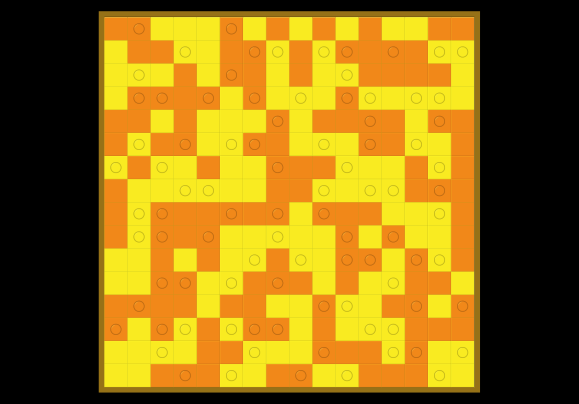
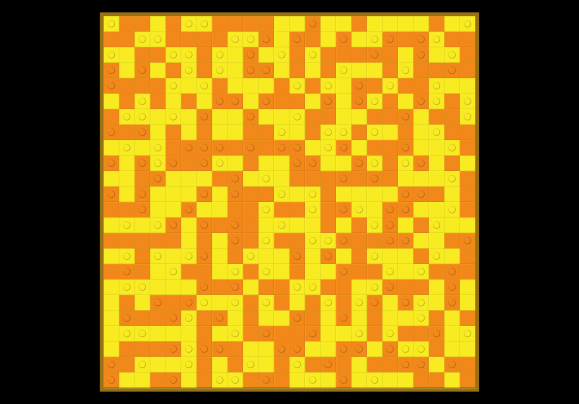
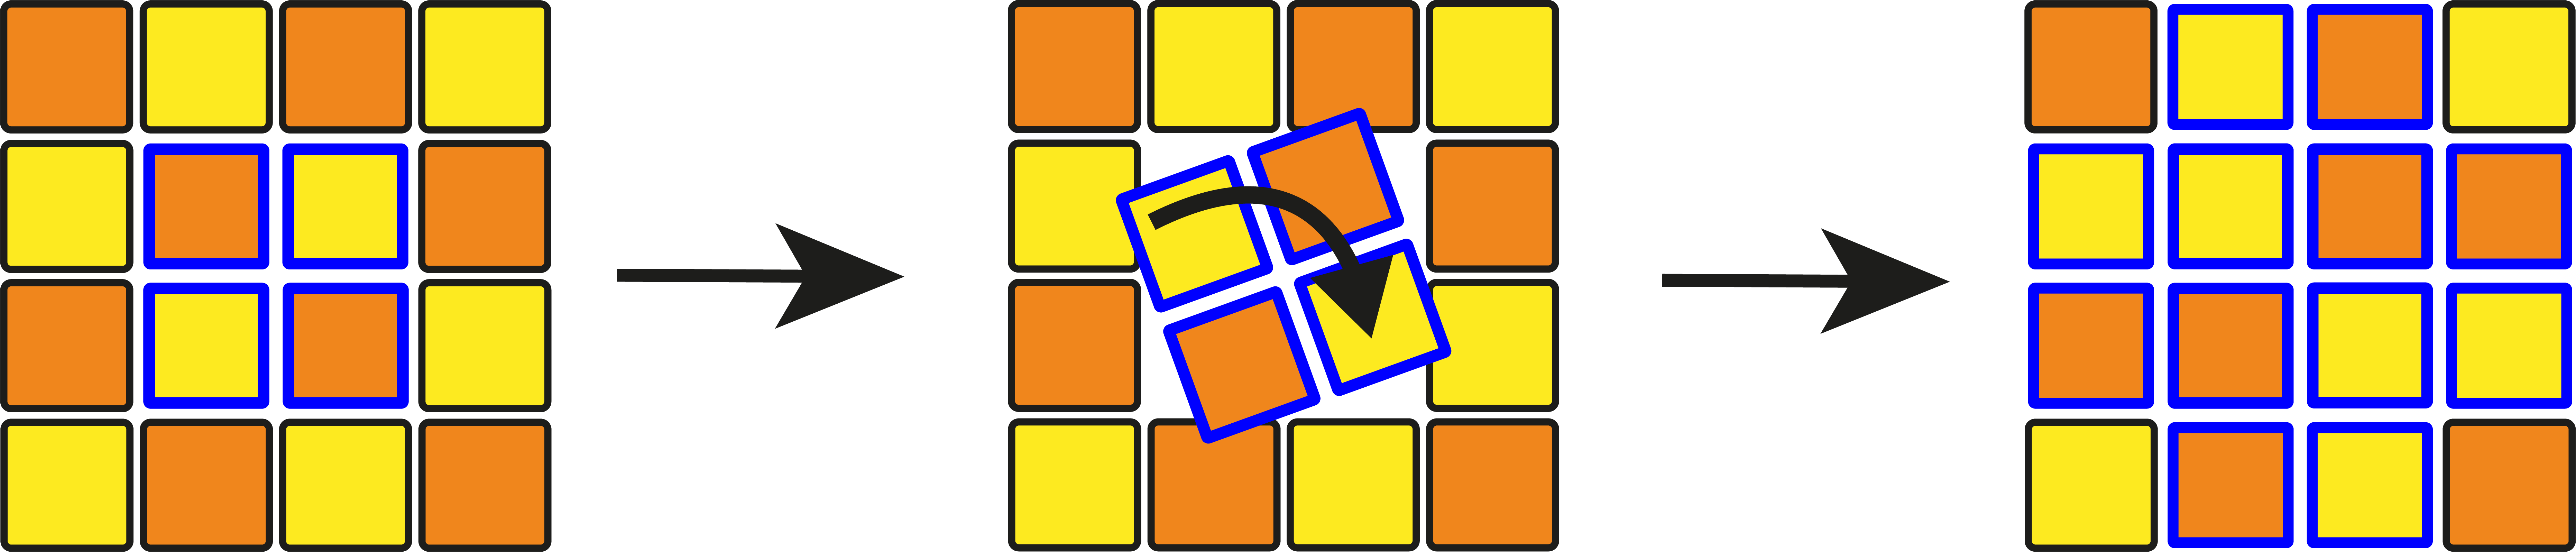
Snodd is a variant of a pair of games by Luis Bolaños Mures called Xodd and Yodd. Xodd/Yodd are mind-bending games in which players are assigned a colour, yet may play stones of both colours; Xodd is played on a square grid, while Yodd is played on a hexagonal grid. On your turn, you may place two stones on the board, each of which may be either colour, and at the end of the game the player with the smallest number of groups on the board in their colour wins the game. There’s a catch, however: at the end of any player’s turn, the total number of groups of stones on the board must be odd! This single restriction is what makes the game so challenging and unique. When you start to play you’ll soon realise how this parity restriction allows you to catch your opponent out in all sorts of clever ways.
Why Snodd might be great: Snodd is my attempt to bridge the gap between Xodd and Yodd. Xodd is played on a square grid, where each square has four adjacencies (diagonal adjacencies don’t count), resulting in a tight, tactical game where groups are often split apart. Yodd is played on a hexagonal grid, where cells have six adjacencies, meaning groups stay connected more easily and the game feels more deliberate and strategic.
In Snodd I took the exact same rules and ported them to a snub-square tiling. When you play on the points of this pattern, each point has five adjacencies, placing it right between Xodd and Yodd’s geometries. In theory, this should make a version of the game with a nice balance between tactical fights and global strategies. Test games against myself have been promising, but more investigation is needed. Give it a try and let me know how you find it!
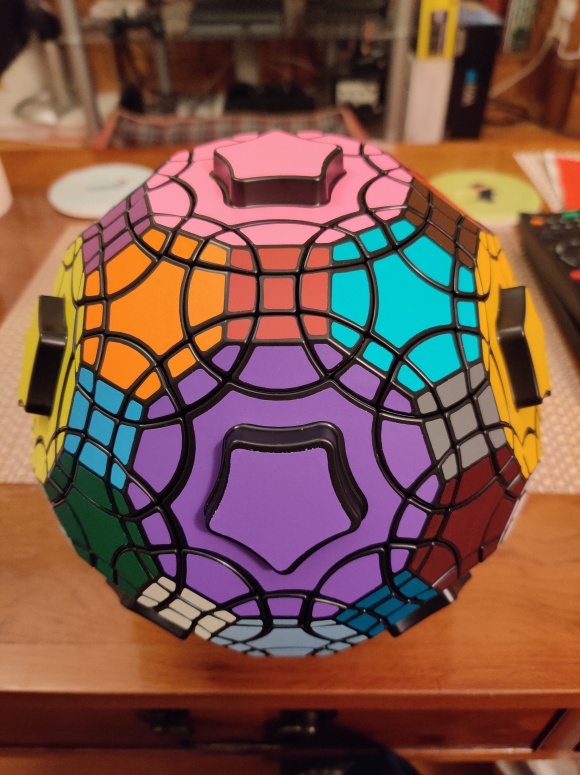
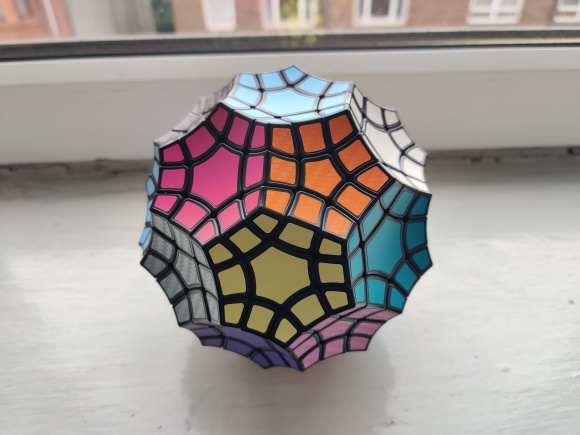
*Star and Superstar
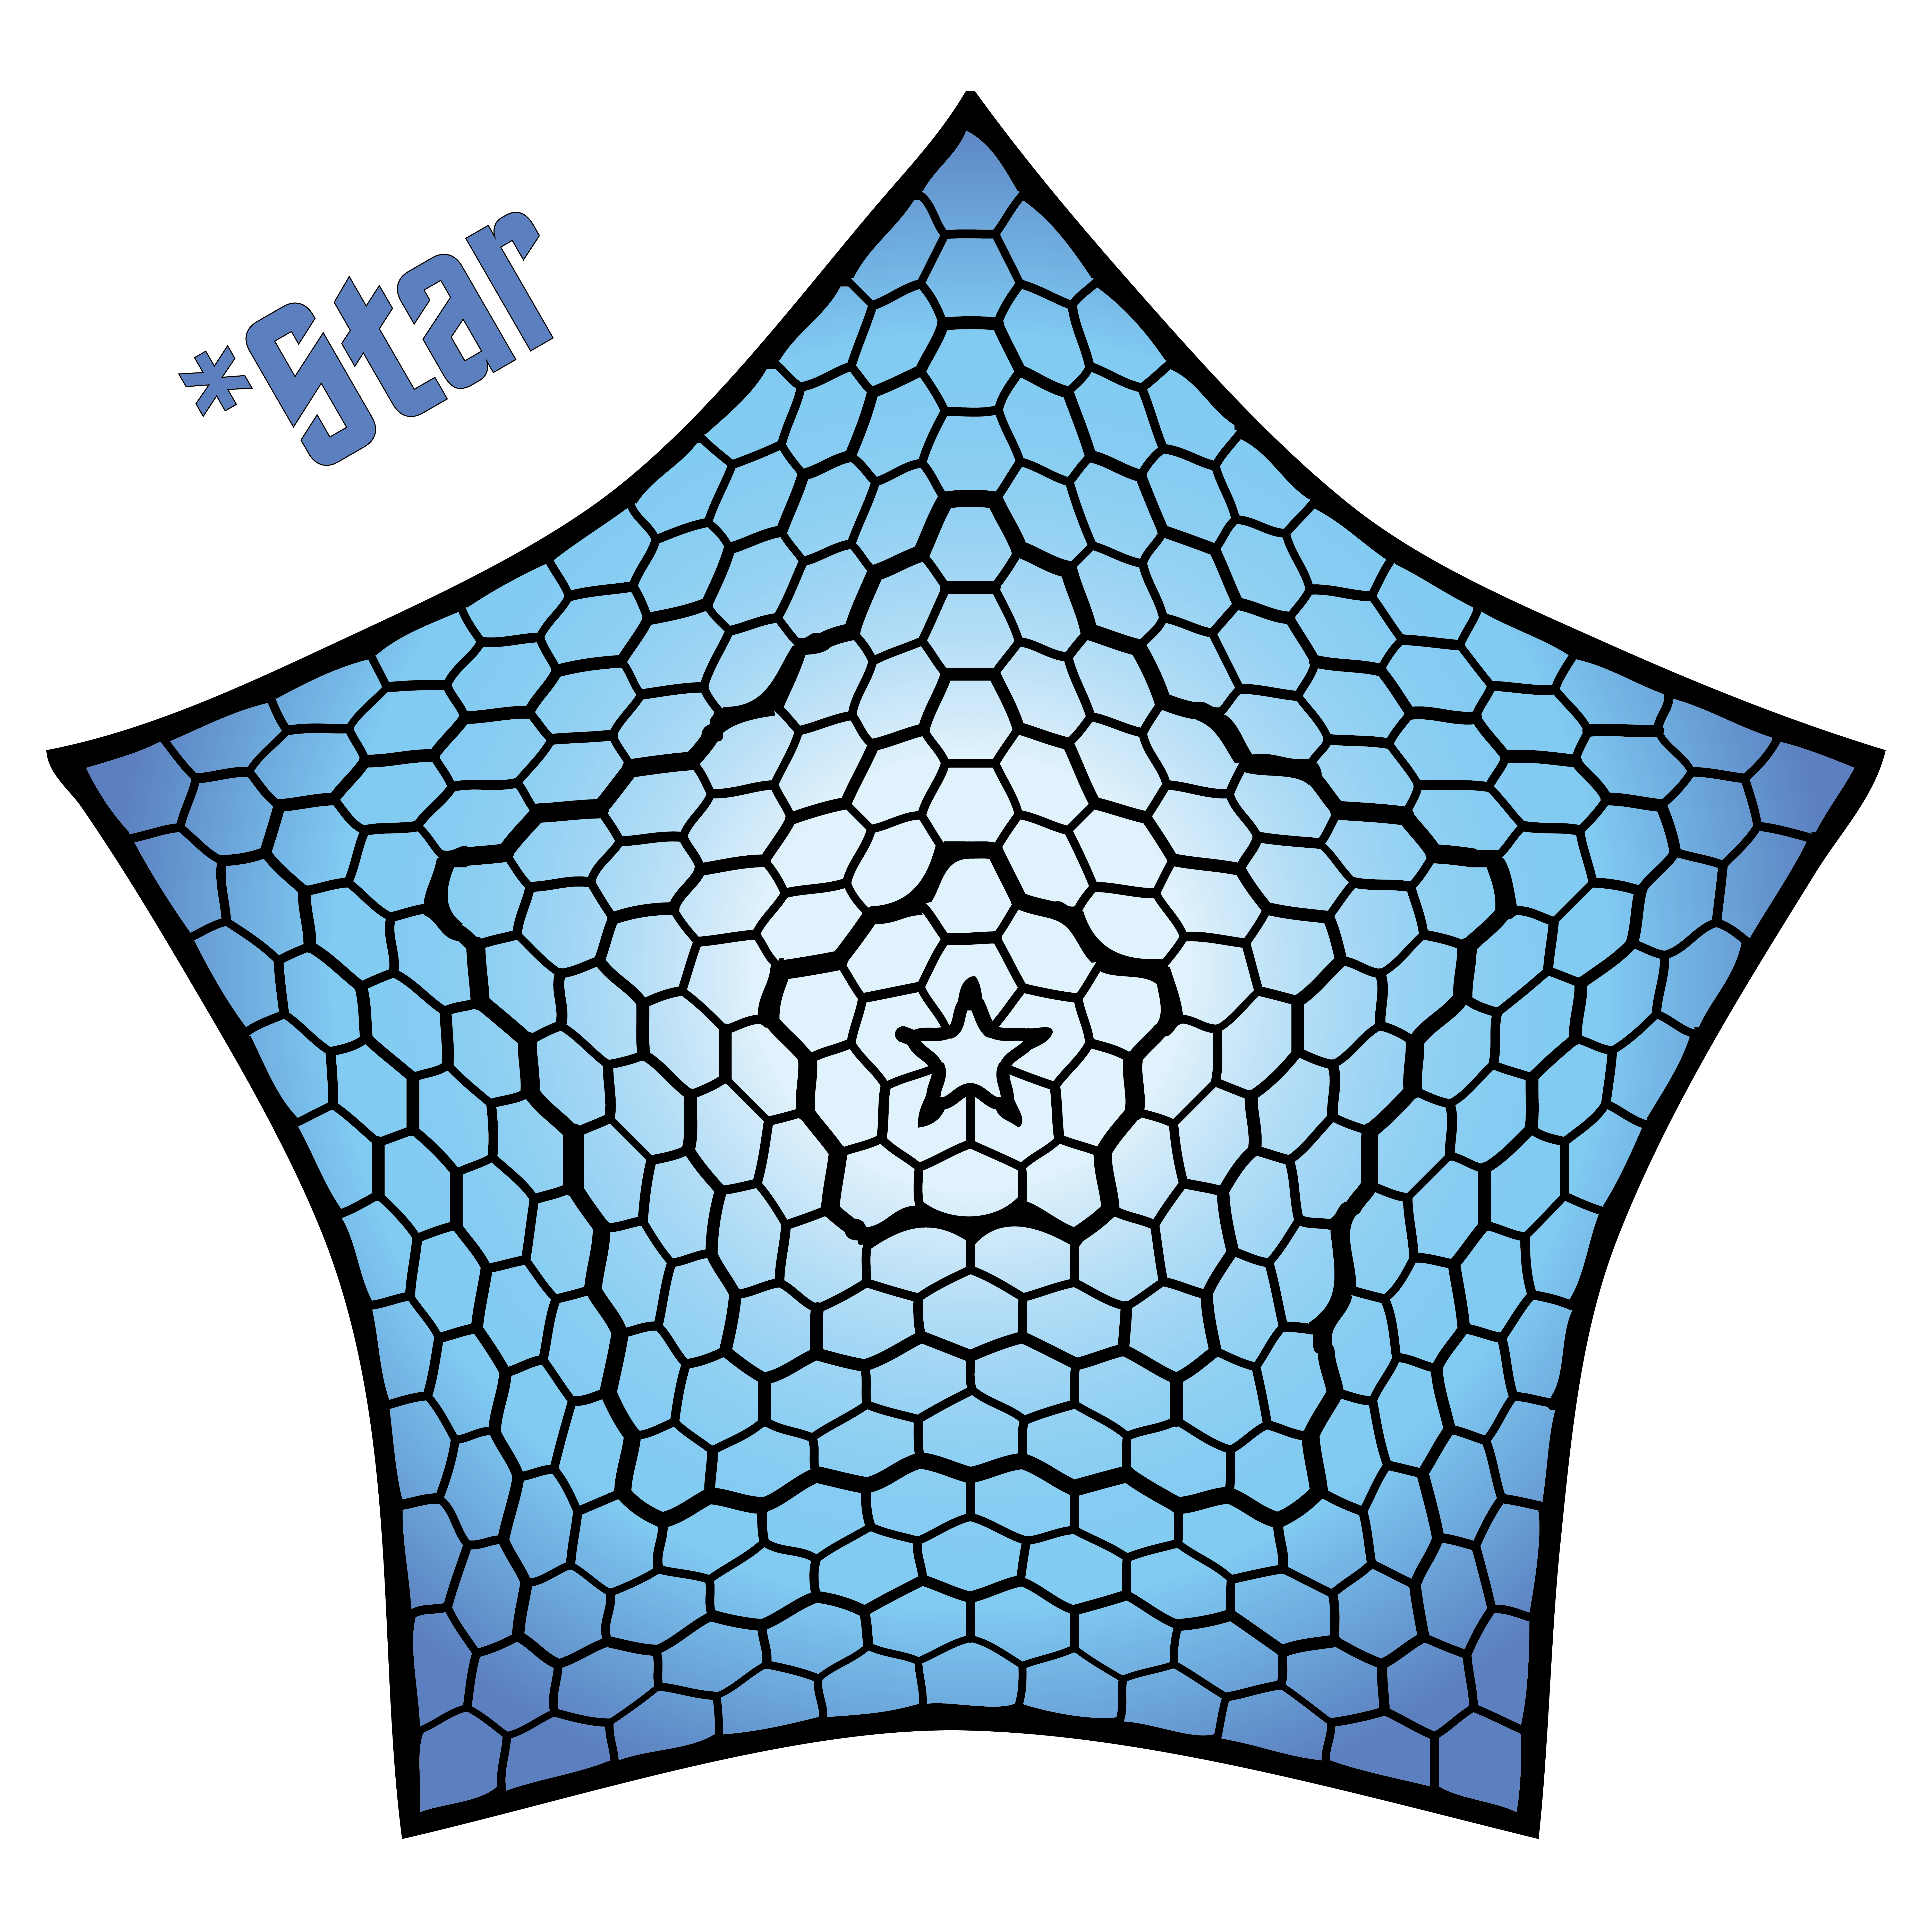
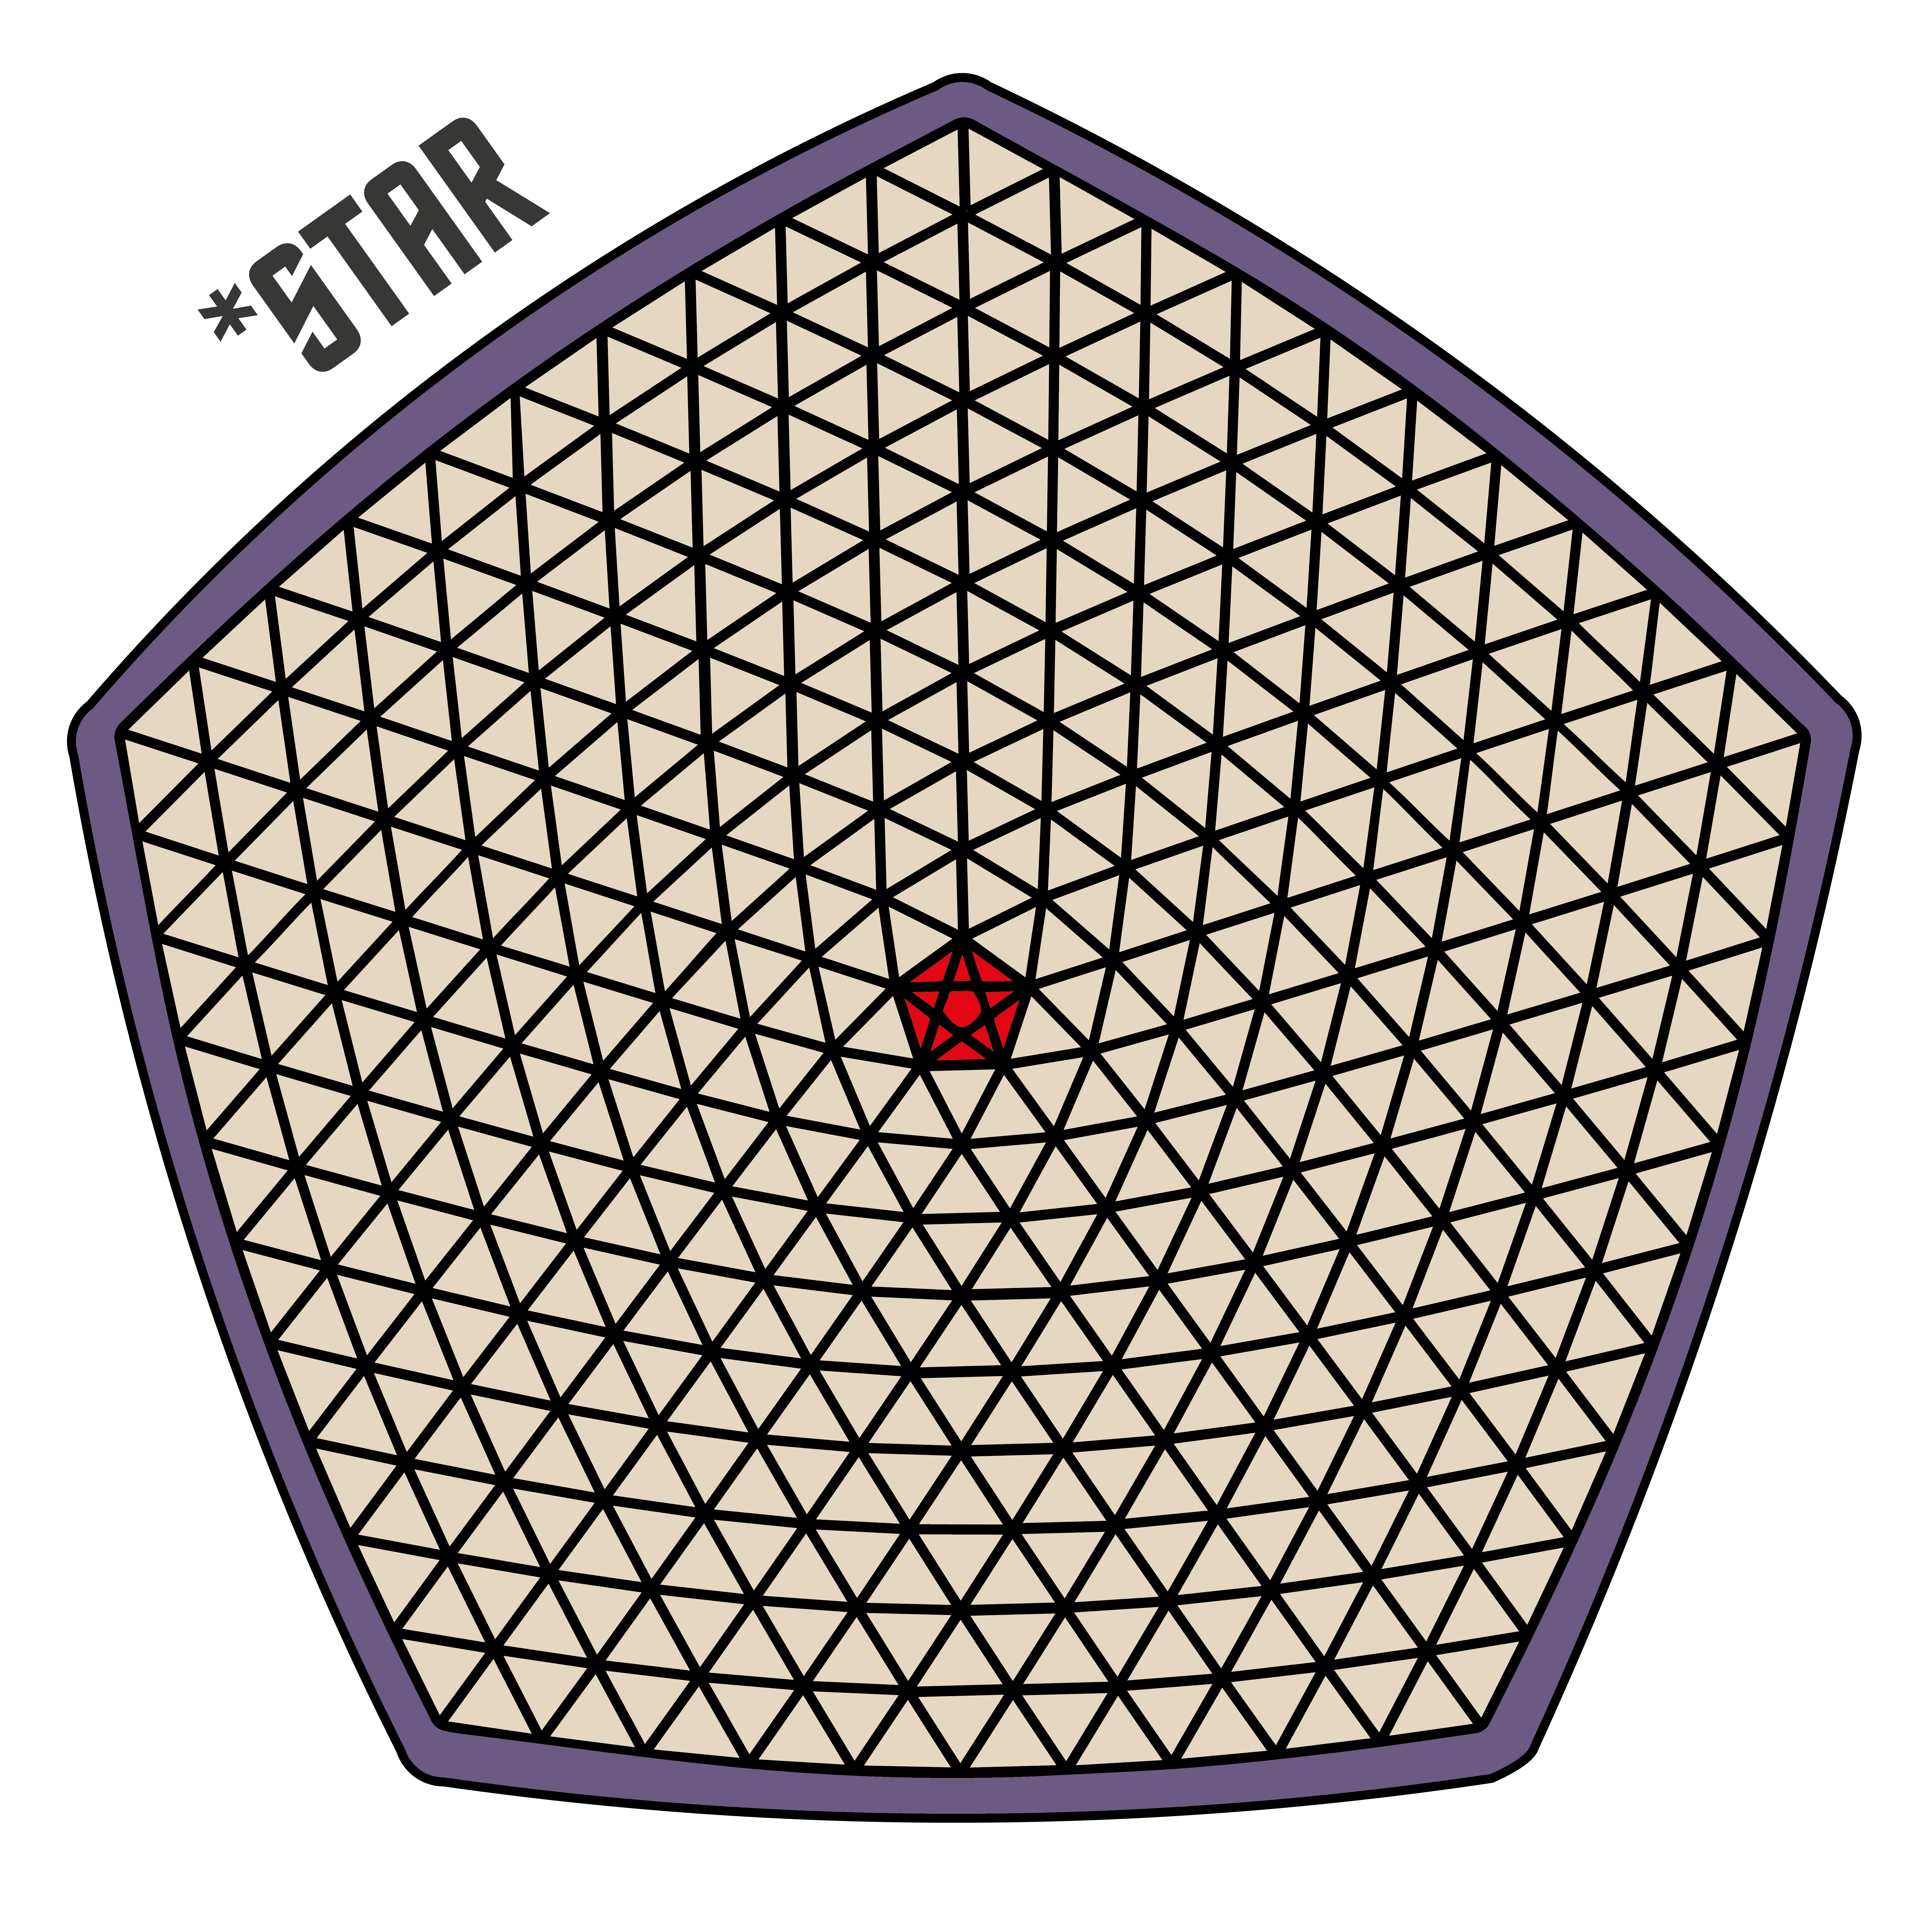
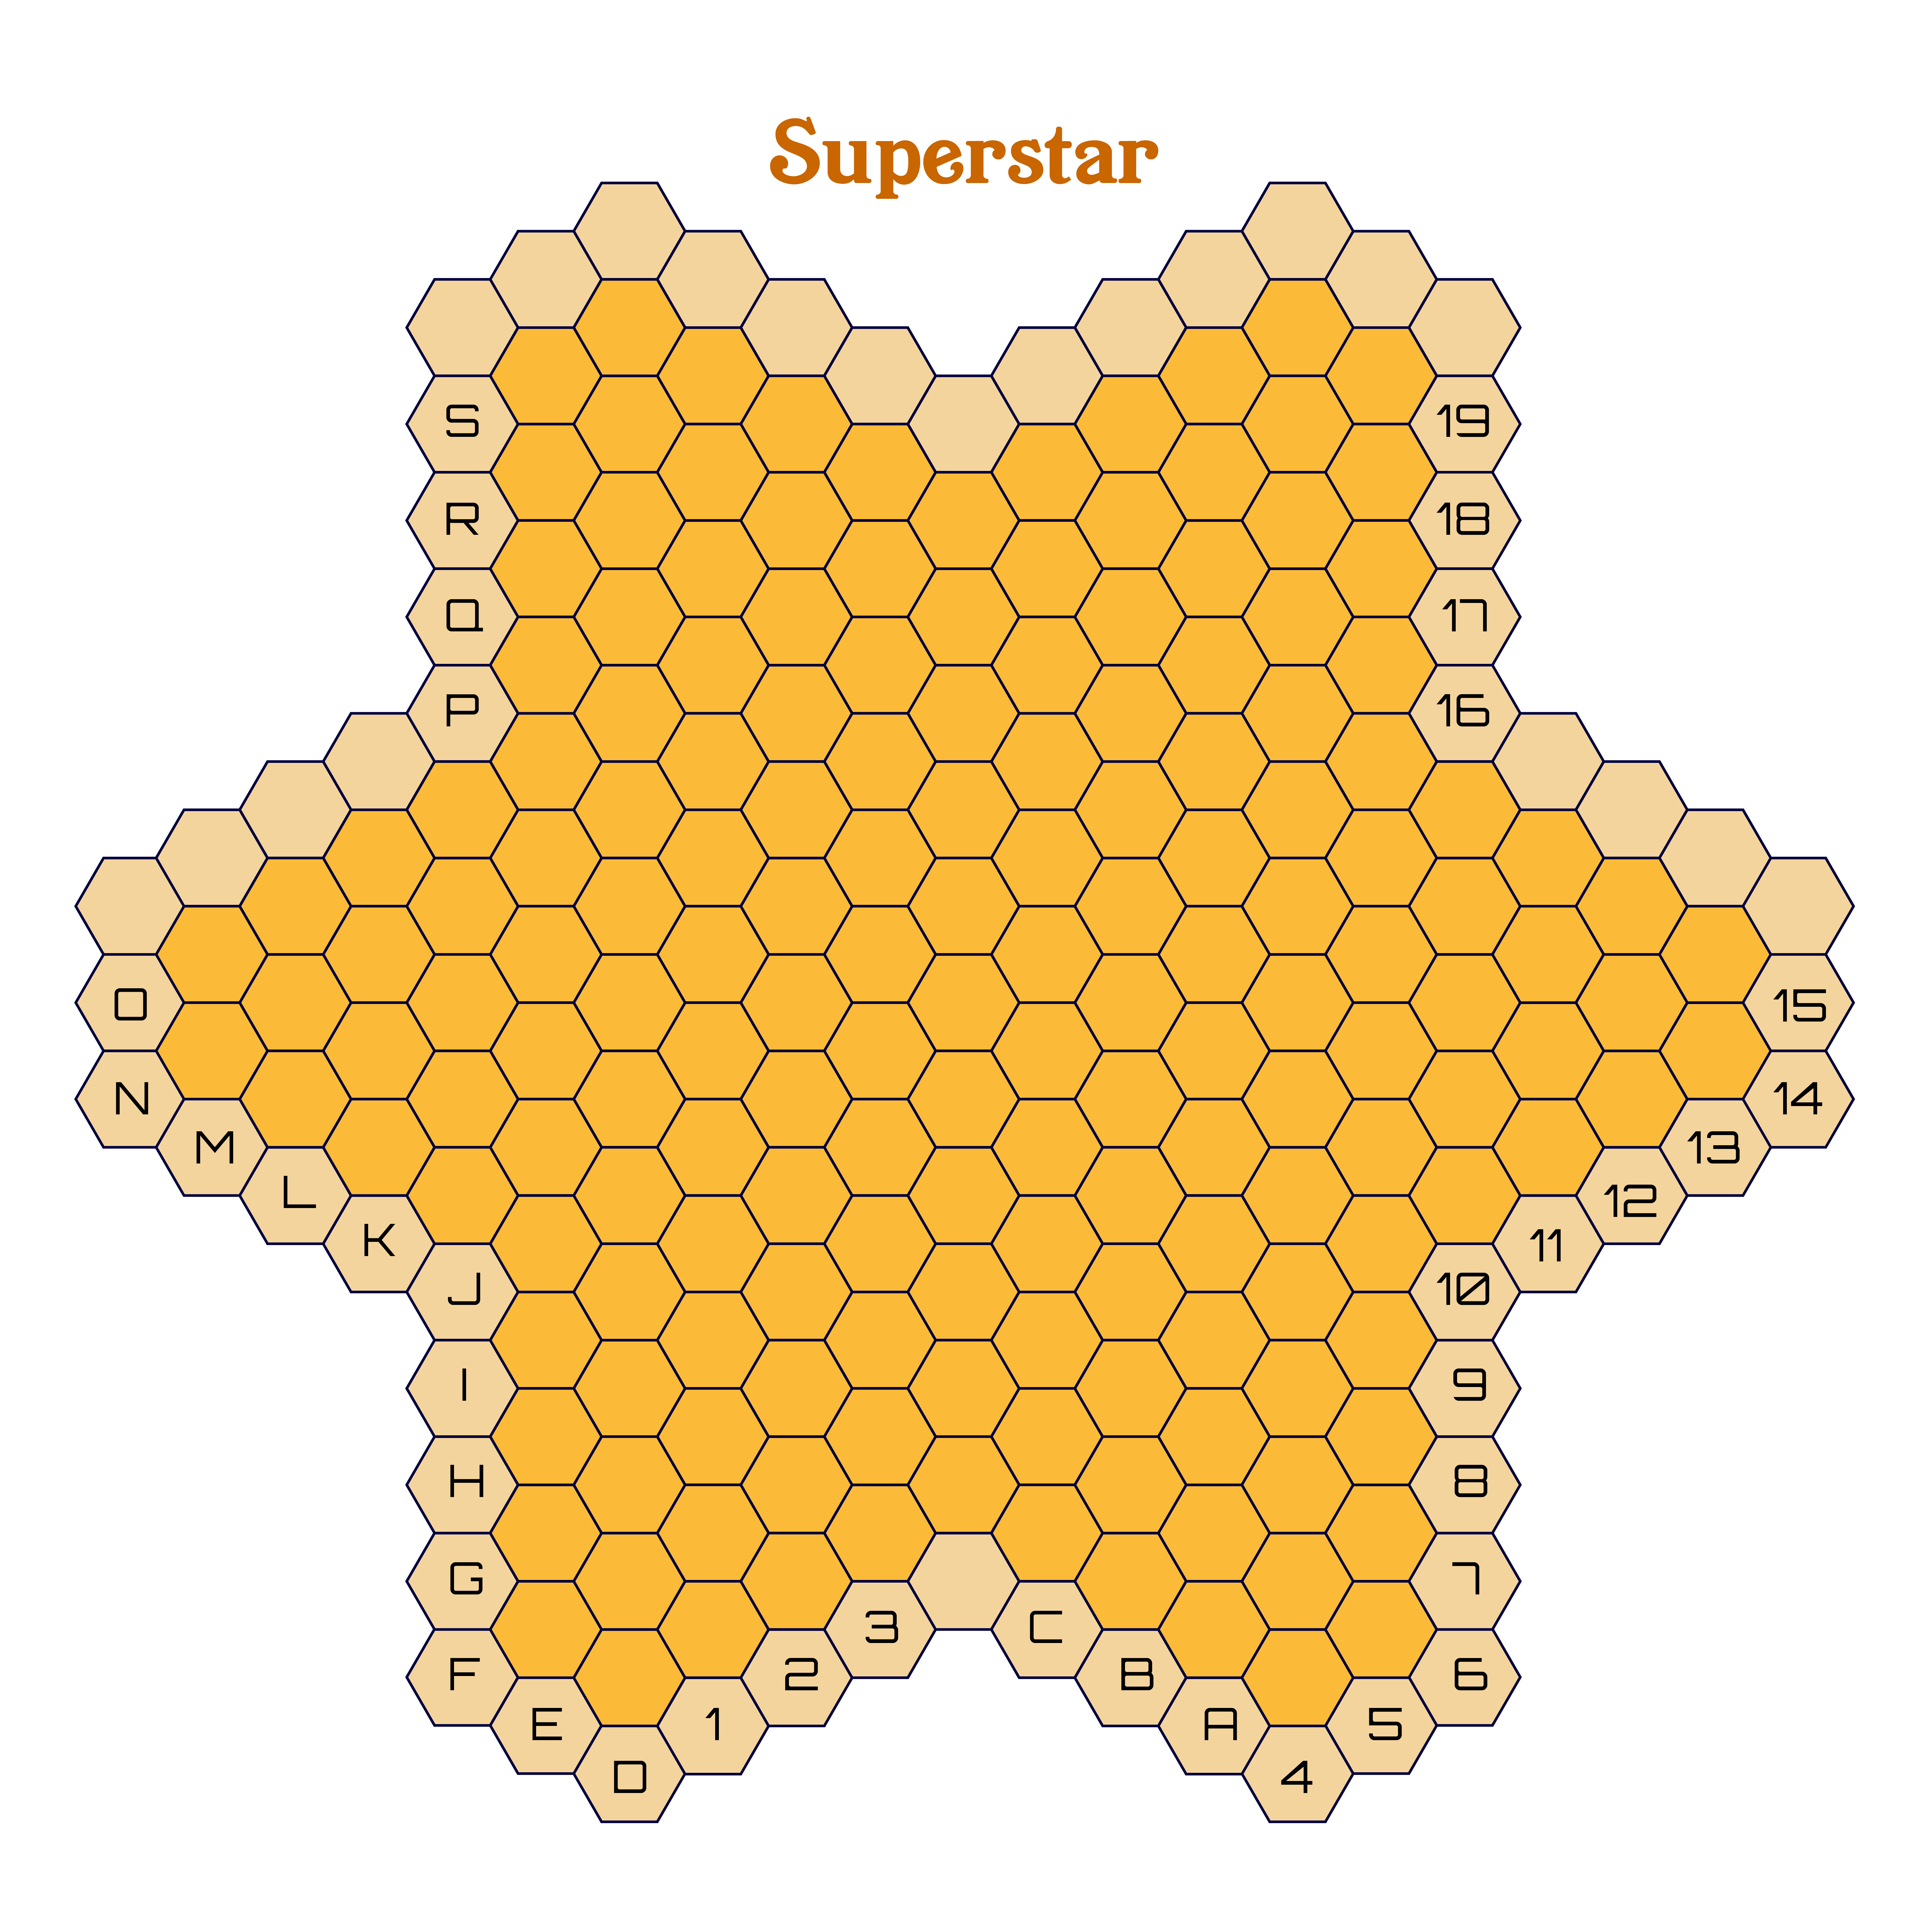
*Star is another game I’ve covered before, but at the time I was a bit confused about the rules and had yet to try it. Boards are also hard to obtain, as they can only be ordered from America, and shipping from America now is ludicrously expensive, so I made two variations of the *Star board to print myself. Superstar is a predecessor of Starweb, a fantastic connection game from Christian Freeling; Christian says Superstar is no good now and fully superseded by Starweb, but he thinks lots of things are no good, so I wouldn’t take that to heart.
Why they’re great: *Star is the final iteration of Craige Schensted/Ea Ea’s set of connection games built around the goal of claiming edges and corner cells, then connecting groups of those cells together. *Star is a bit hard to understand at first, but once you get going, you’ll find a dynamic game of territory and connection, where both players writhe hectically around each other trying to weave their scoring groups together. The resulting play is complex and challenging, and games of *Star often exhibit subtle and sophisticated strategies. The *Star board also supports two excellent variants: Double Star, where players may place two stones per turn instead of one; and Star-Y, a pure connection game where players must connect three sides which are not all adjacent (just like 5-Y above).
Superstar’s relationship to Starweb is about more than the shape of the board — there’s a clear lineage here, where Christian was moving from Star/*Star toward what would eventually become Starweb. Despite Christian’s misgivings, I enjoy this game — it has a remarkable diversity, in that multiple types of formations are available for point-scoring: stars (a group touching at least 3 edge cells); superstars (groups connecting 3 or more sides, worth many points); and loops (worth more points for enclosing more cells, and many more points for enclosing enemy stones within). The feel in play is like a heady mix of Star and Havannah, where each player has incredible flexibility and must keep their wits about them to spot the myriad ways their opponent may be seeking to score. The mix of connection and surrounding elements gives it a bit of a territorial feel as well. For me it is a worthy entry in the Freeling canon, distinct enough from both Starweb and Havannah to have its own identity.
About the boards: The two *Star boards above are equivalent — on the blue one you will play your stones in the cells, and on the other you will play on the intersections. I made both since different players may find one or the other easier to parse visually, so I wanted to have both options available. The Superstar board is very similar to the Starweb board, with the notable difference that the light-shaded cells are not playable, but instead are there to indicate the point values of cells adjacent to them. The game would definitely be extendable to larger boards, but uncharacteristically I haven’t yet made one; I plan to write a full post on this game at some point (along with some other connect-key-cells games), so I will be sure to make a bigger board when that day comes.
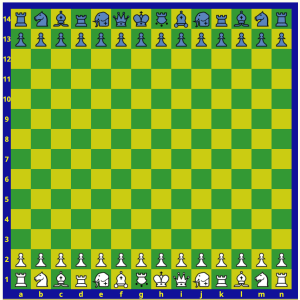
Tamerlane Chess
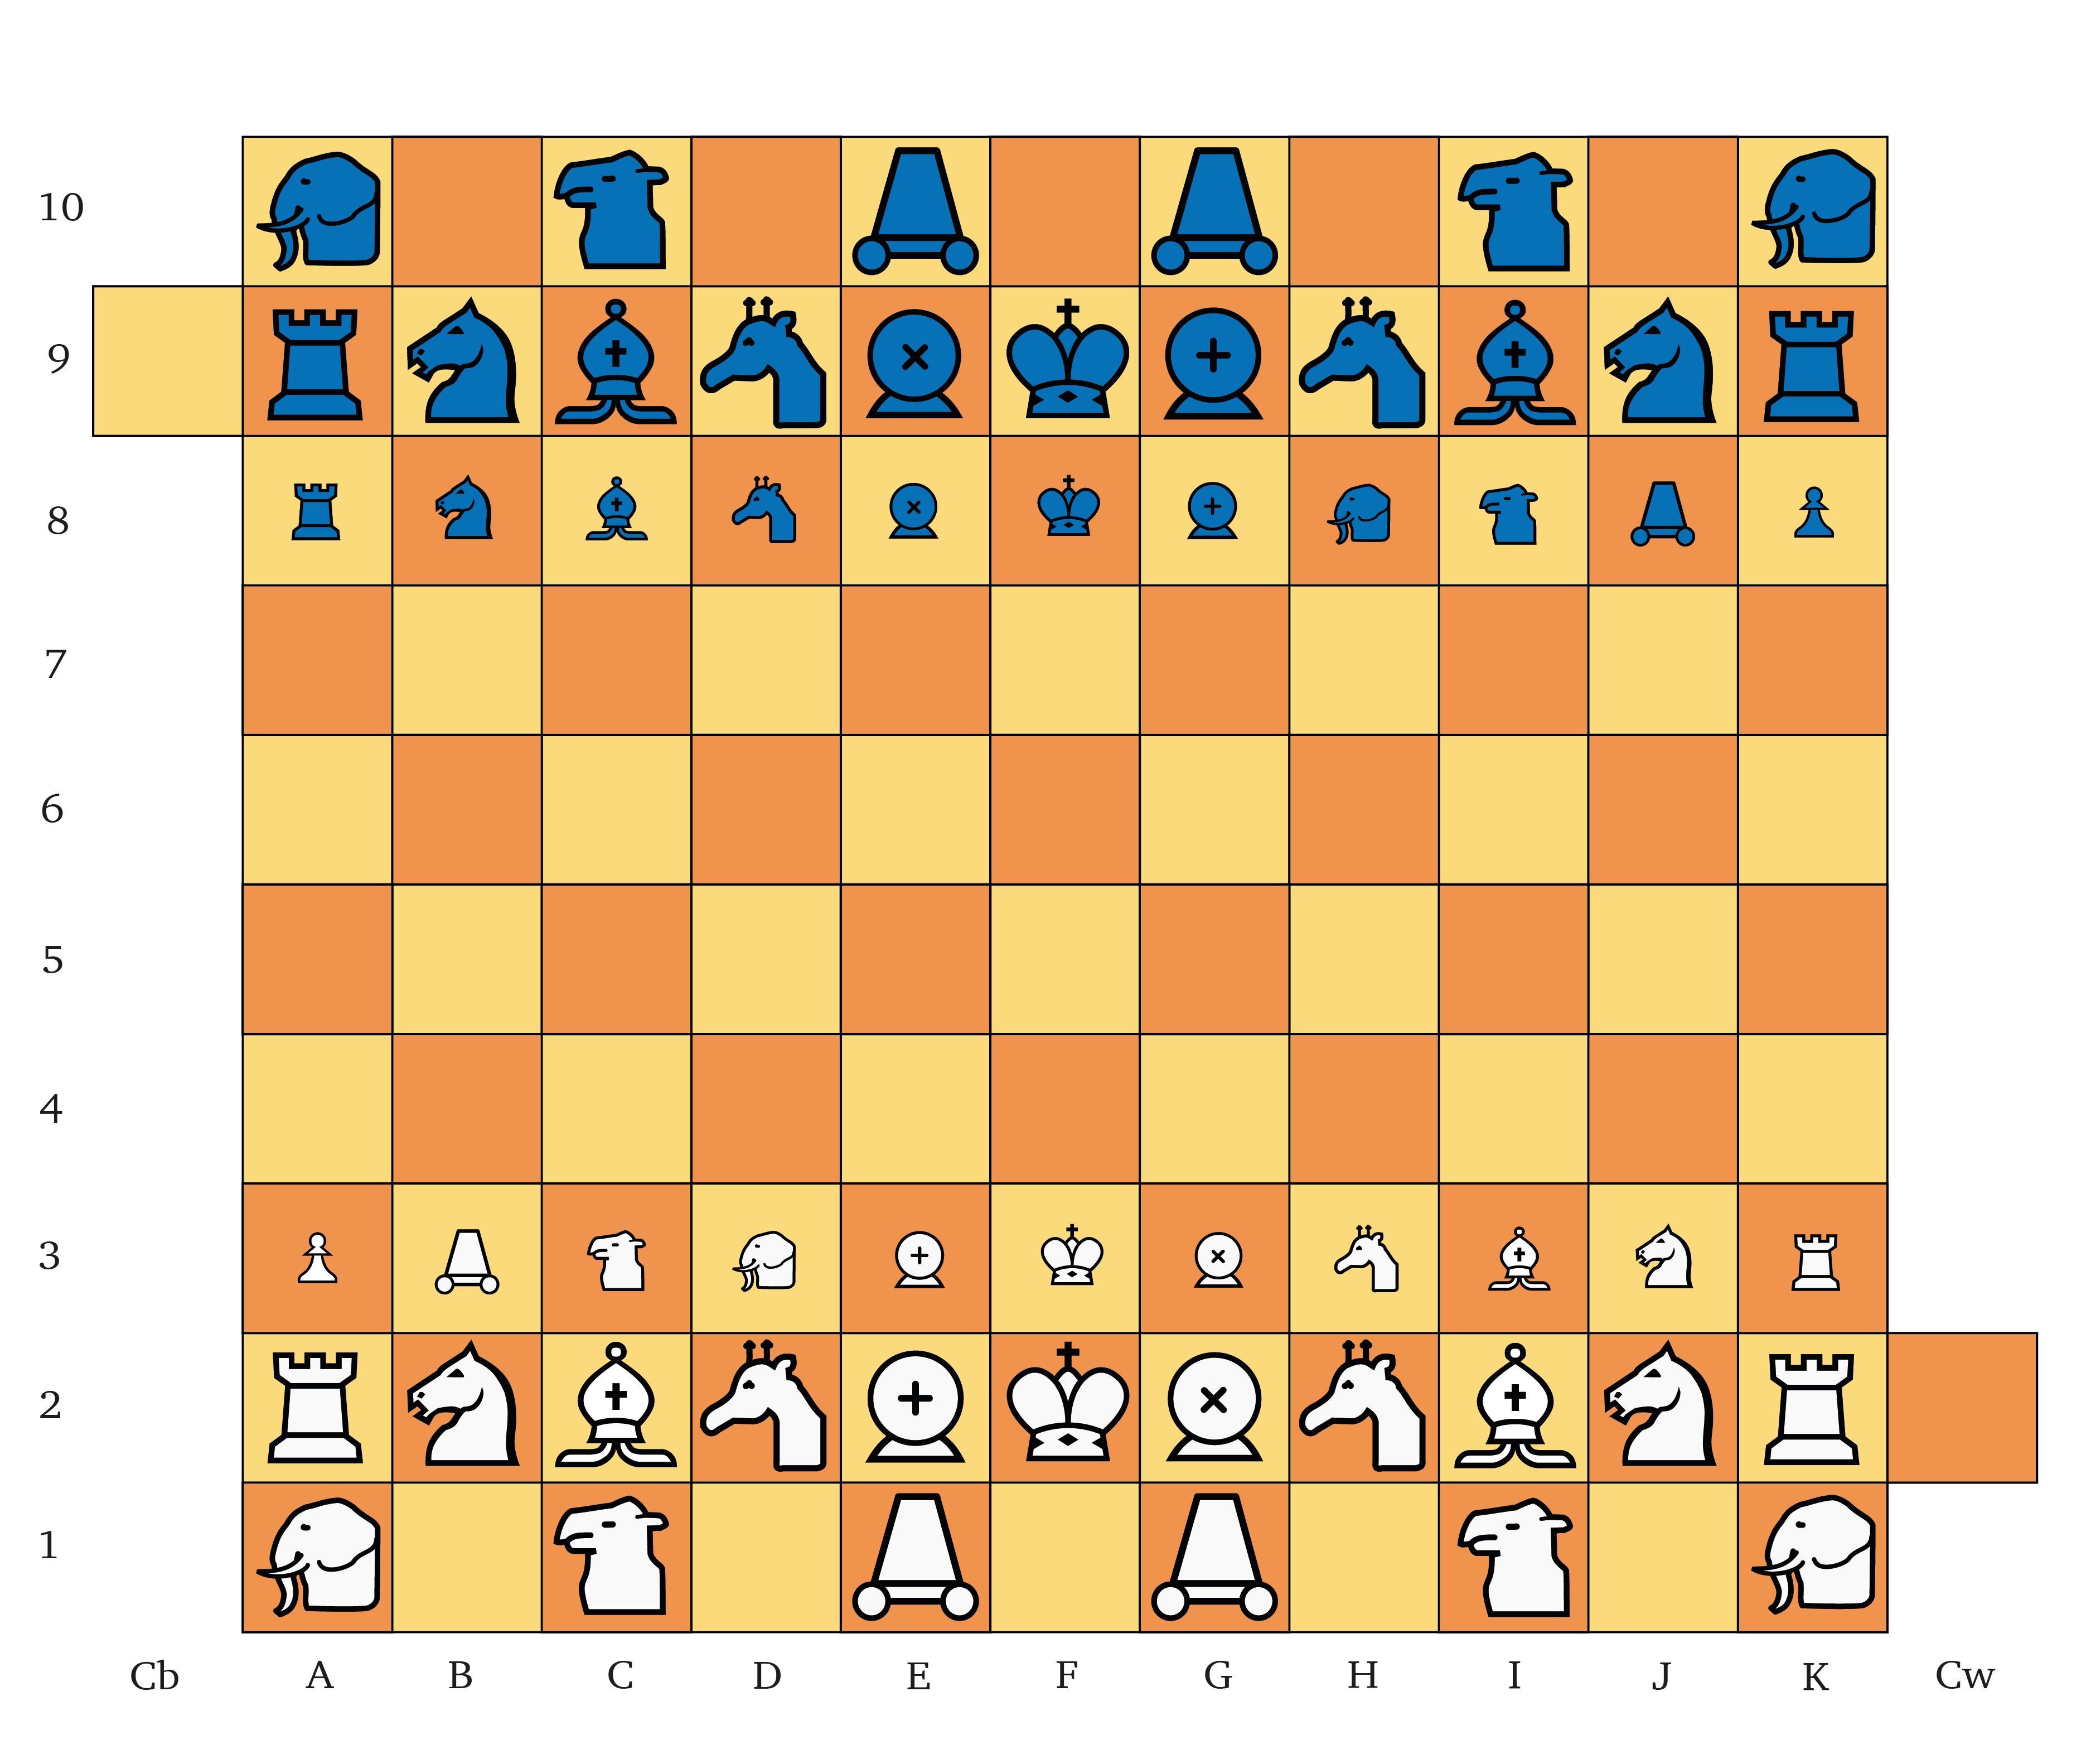
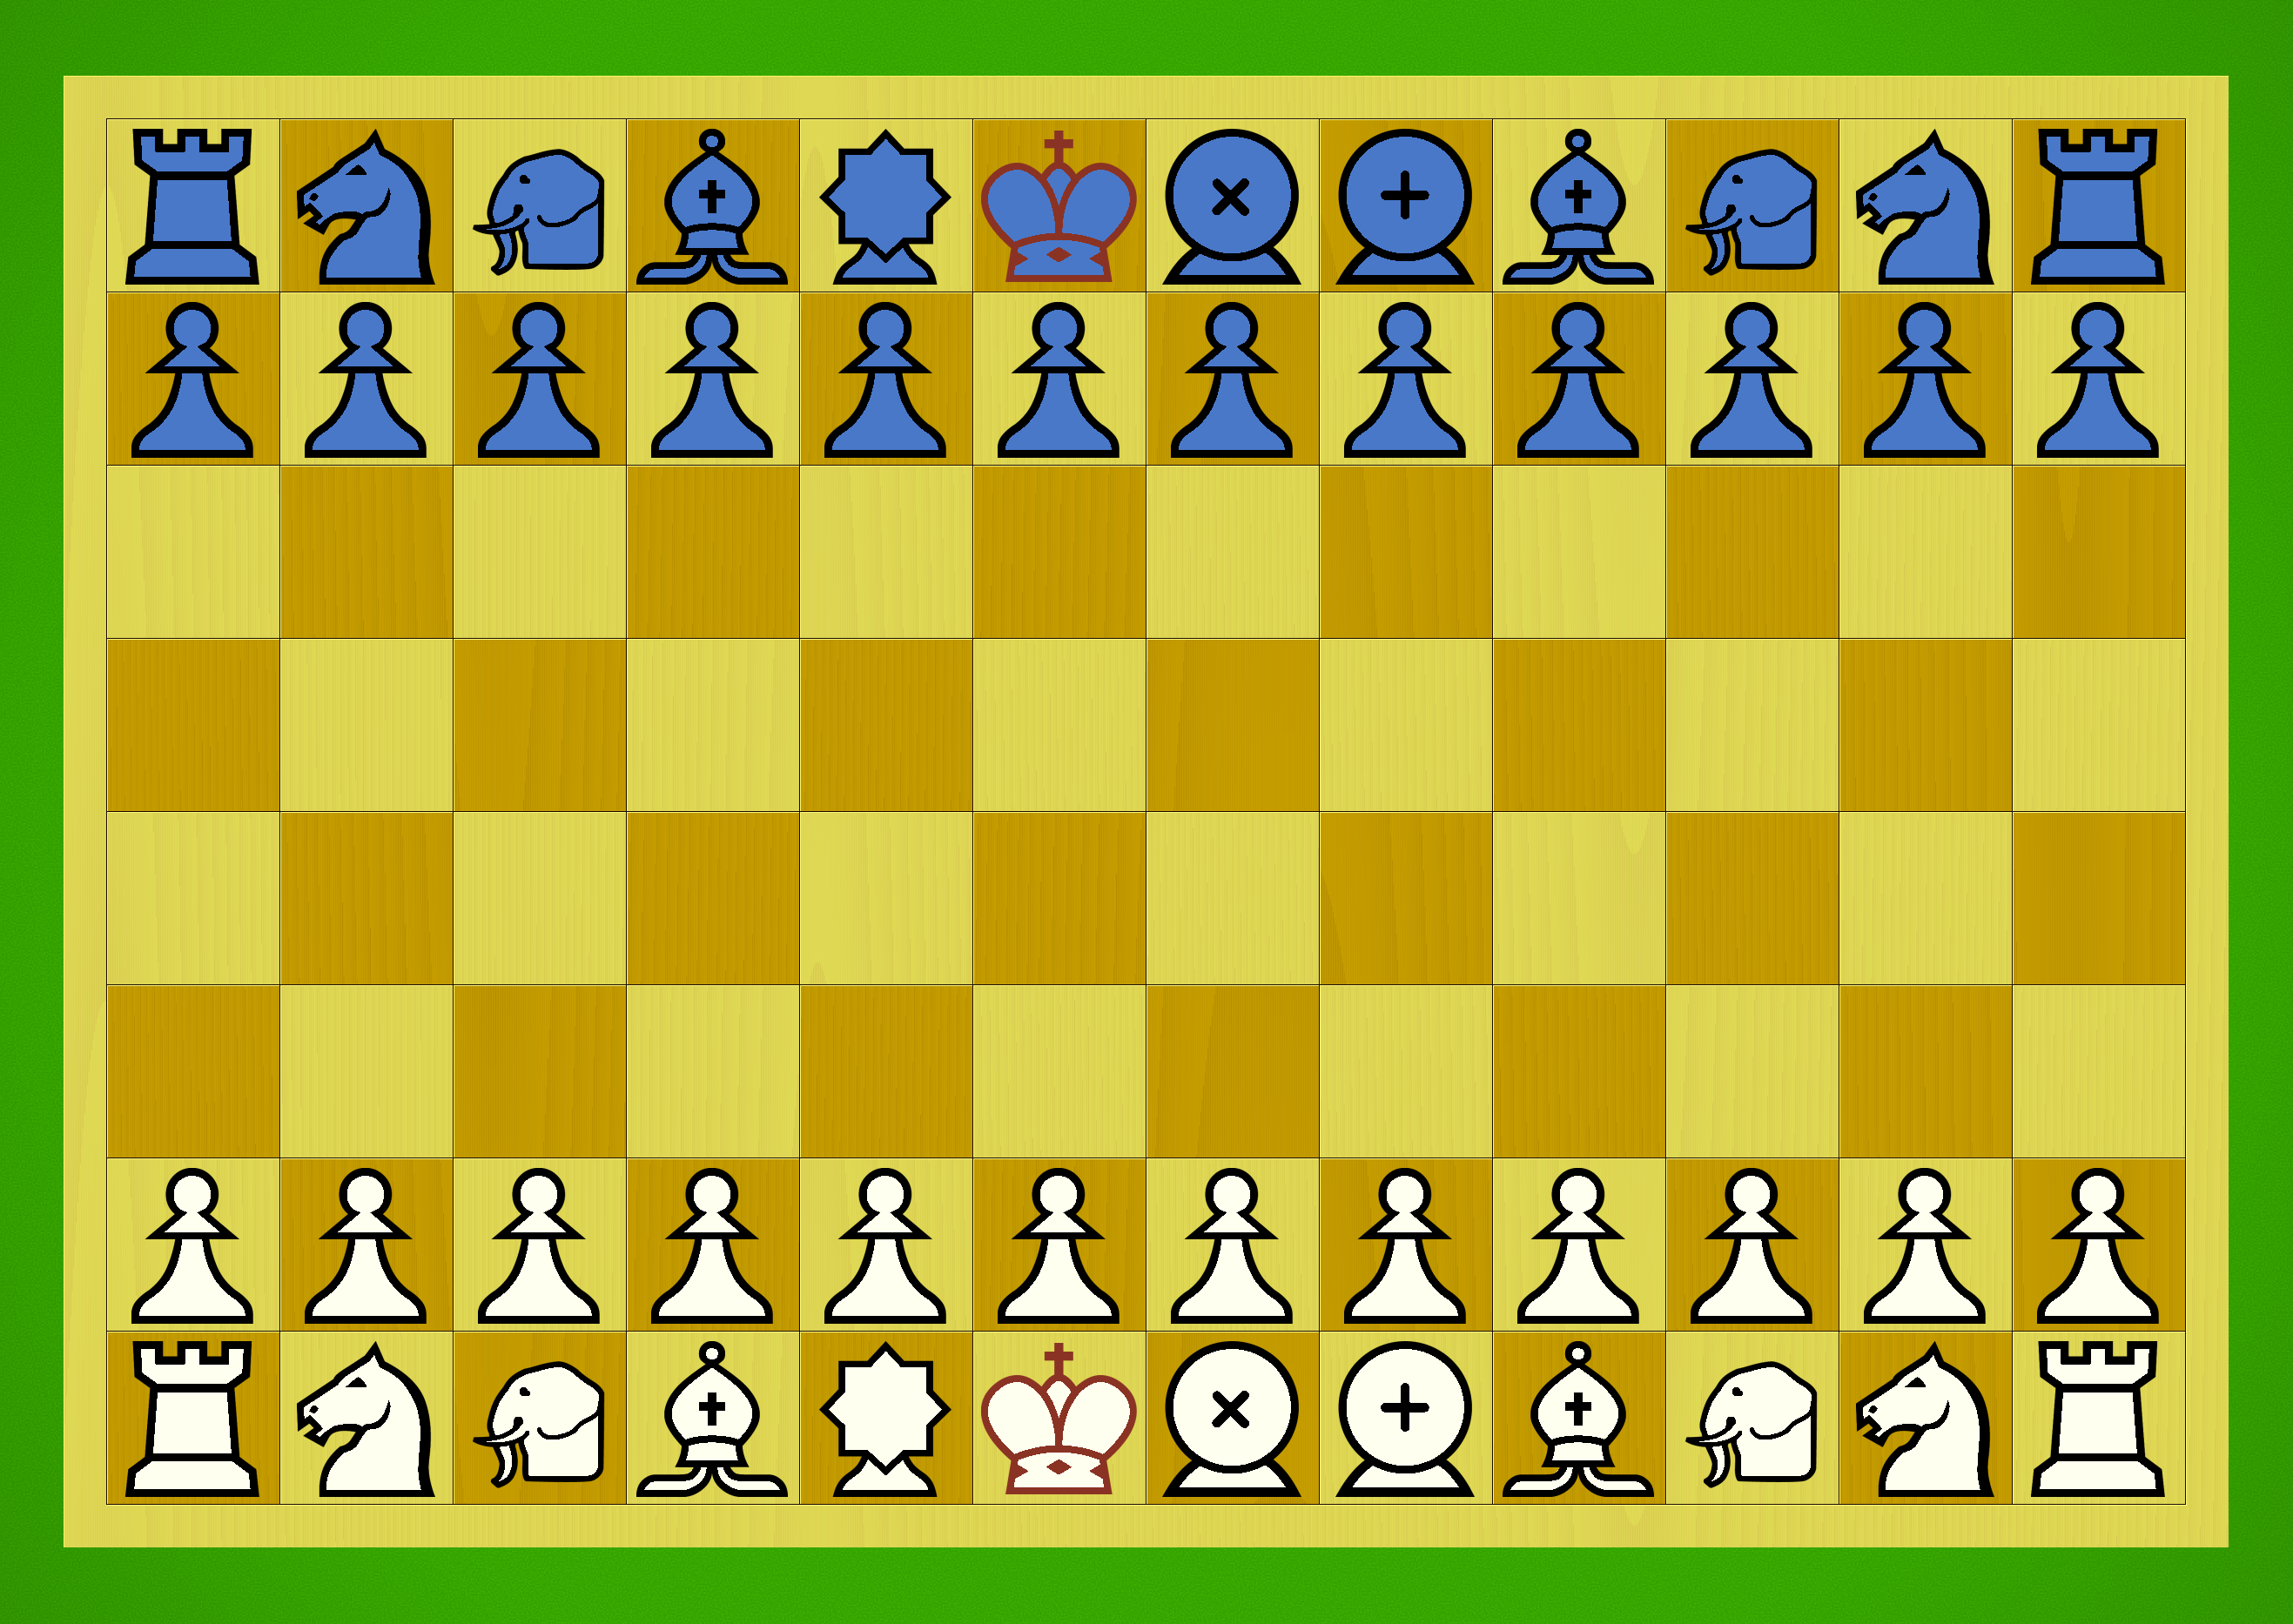
Tamerlane Chess is a historic Chess variant from the 14th century; the game was allegedly invented by the Persian ruler Timur Lenk, but that may well be a myth. Tamerlane is a large-board variant of Shatranj, the Persian form of Chess and direct ancestor to the Royal Game we know today. This game takes the core of Shatranj and adds a bunch of unusual elements to the game, giving it a confusing and beguiling personality.
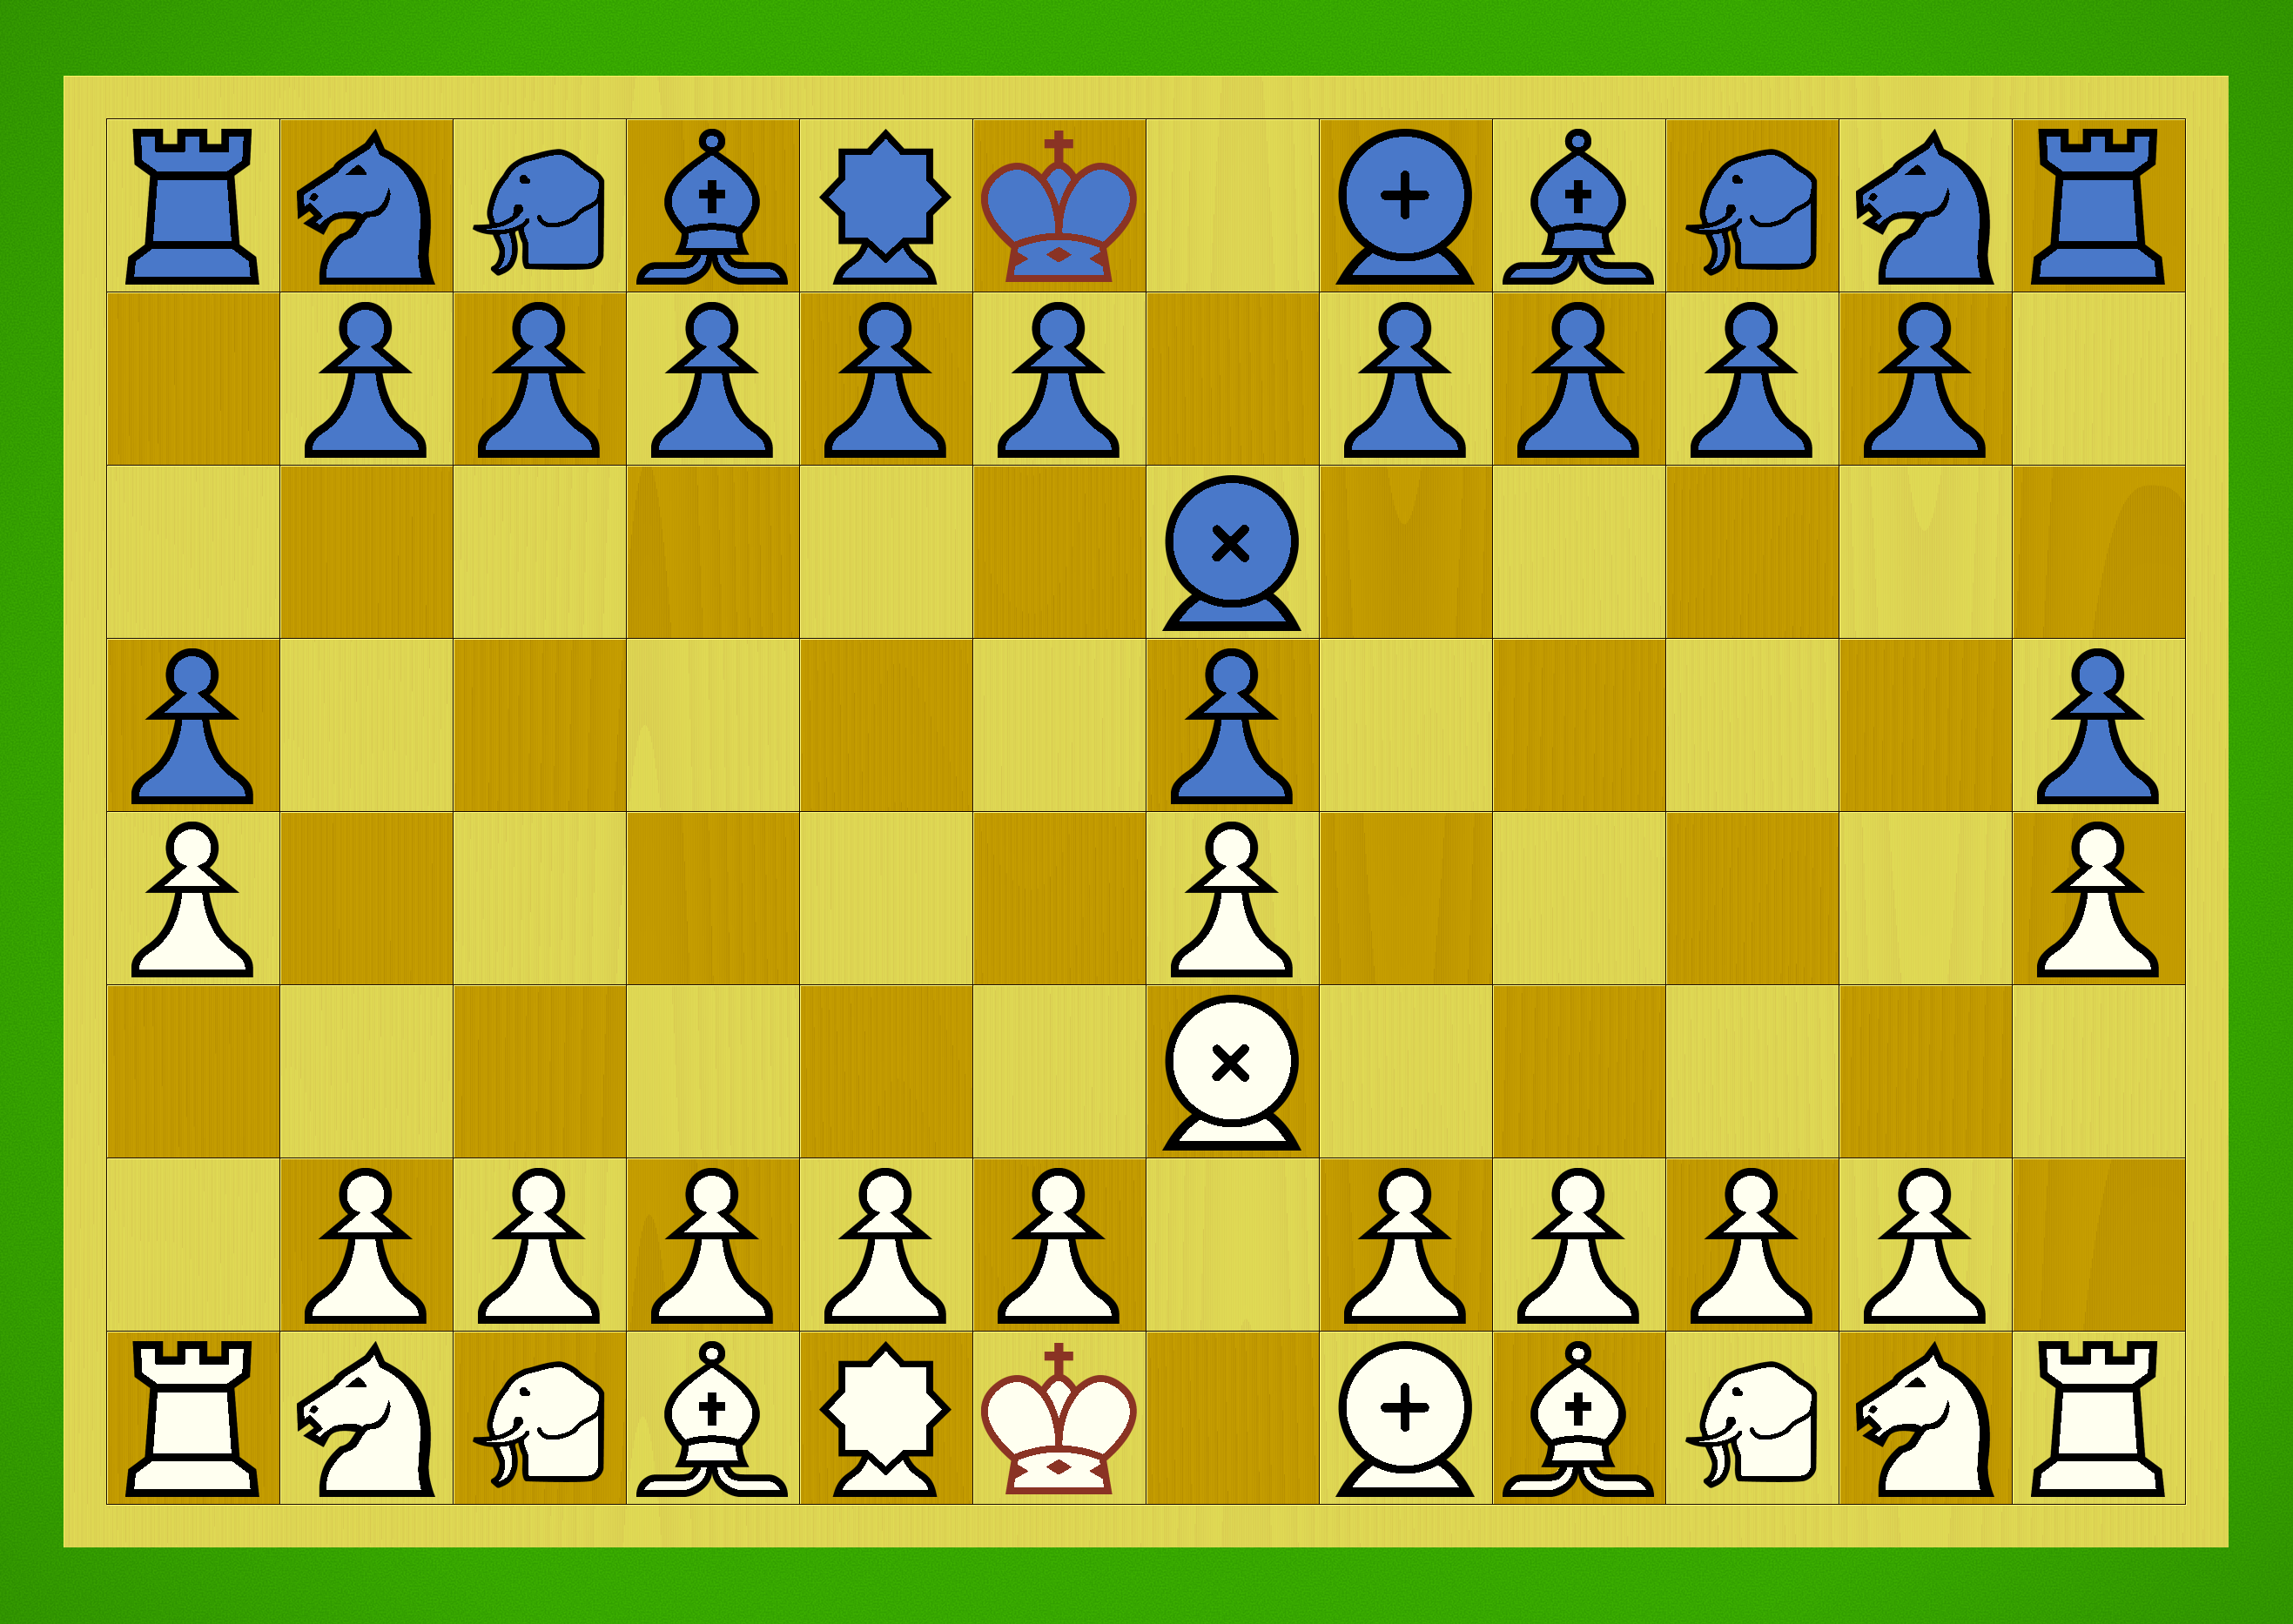
Why it’s great: Tamerlane’s board immediately stands out — not only is it large and oblong, forming a 10×11 grid, but there are two extra squares sticking off the sides. These squares are called citadels, and they serve a special purpose: if your King can reach the citadel on your opponent’s side of the board, you can secure a draw. These little boltholes of safety are just one of the quirks of Tamerlane:
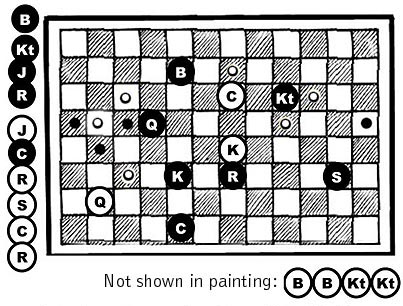
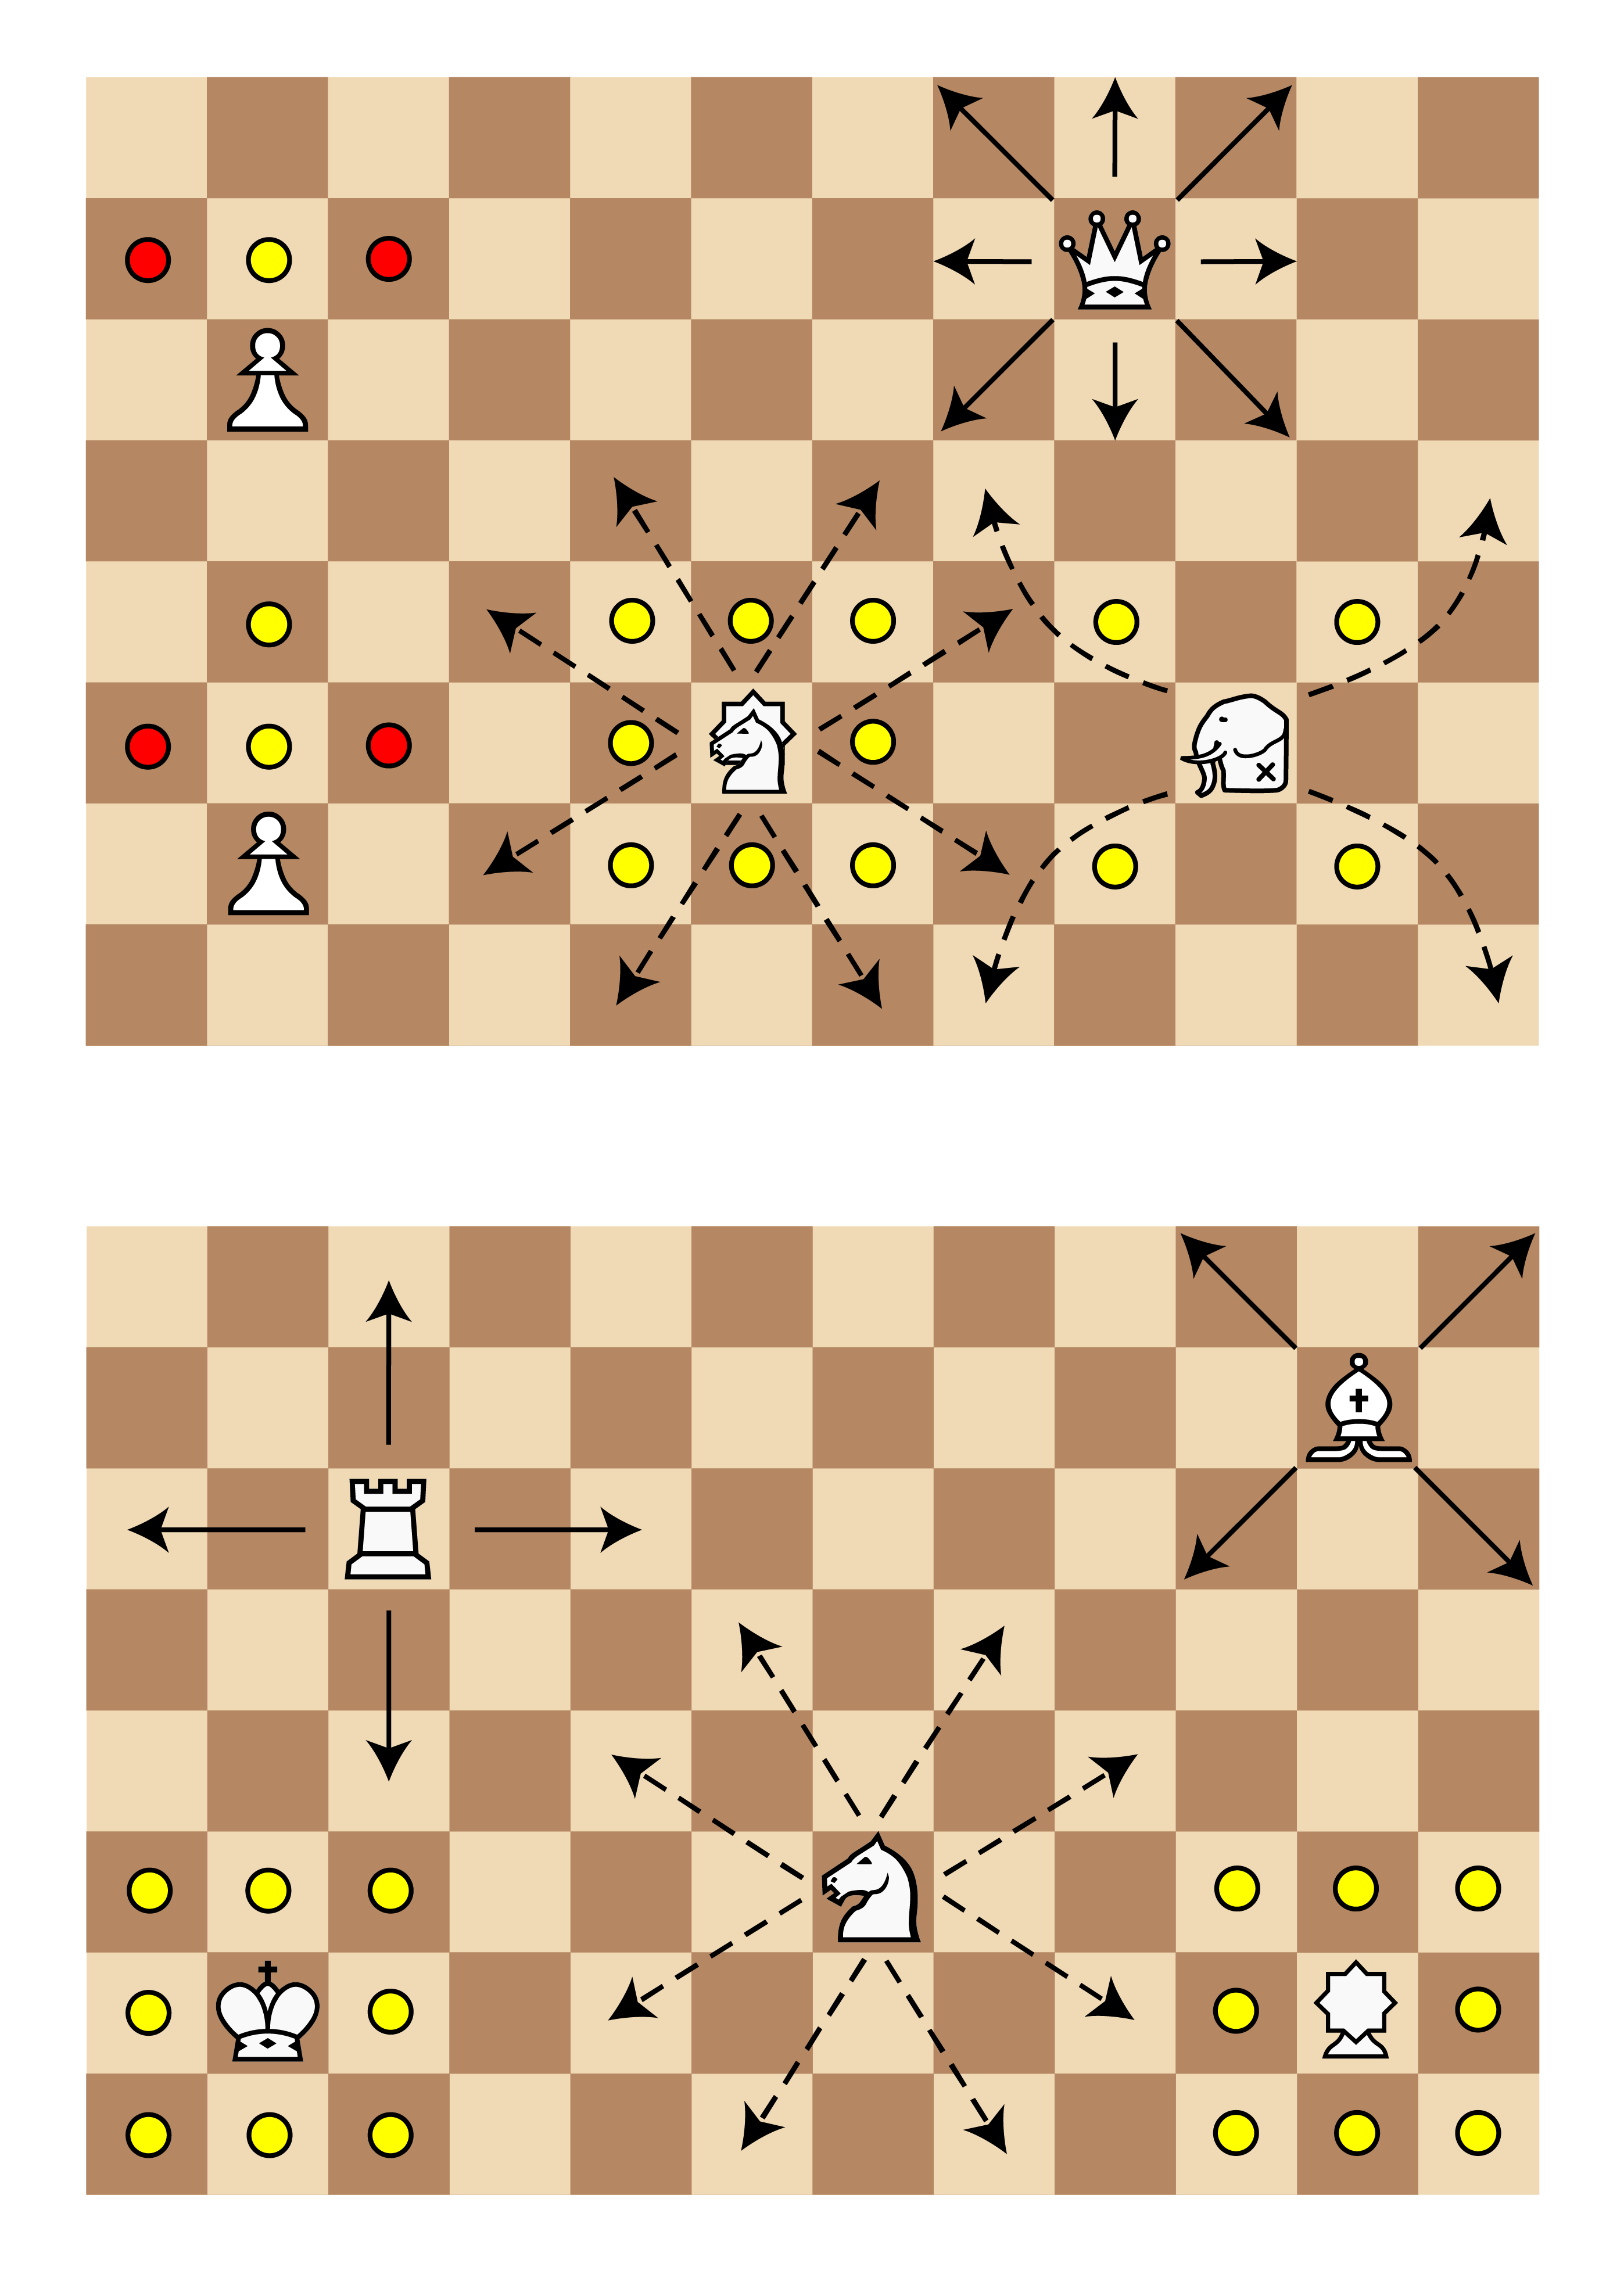
- Several unusual pieces are added to the base Shatranj army, including two pieces that leap like the Knight but in different patterns (the Camel and the Giraffe)
- The Pawns — shown above as tiny versions of the other pieces — promote differently depending on what column they start from, and the ‘Pawn of Pawns’ (on A3 and K8) can promote three times to become an extra King
- The Pawn of Kings promotes to a Prince, which also must be mated to win the game, so each player may have up to three Kings on the board
The result of all this craziness is a remarkably exciting game, with varied tactics thanks to the diverse pieces and unusual endgame strategies resulting from the promotion rules and citadels. Shatranj pieces are generally shorter-range than modern-day Chess pieces, and Tamerlane extends Shatranj with more leapers rather than long-range sliding pieces, so the feel is very different from Chess. Tamerlane may be 600 years old, but it feels modern and creative. I enjoy it a great deal, so I plan to do an article on this game once I finish writing about Courier Chess.
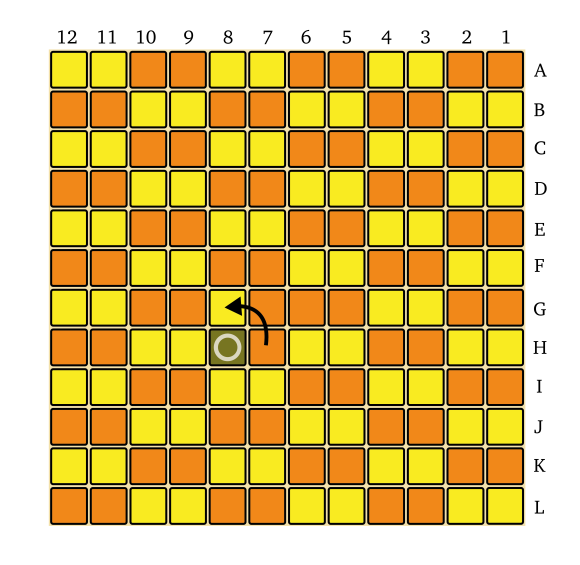
Trike and Tumbleweed
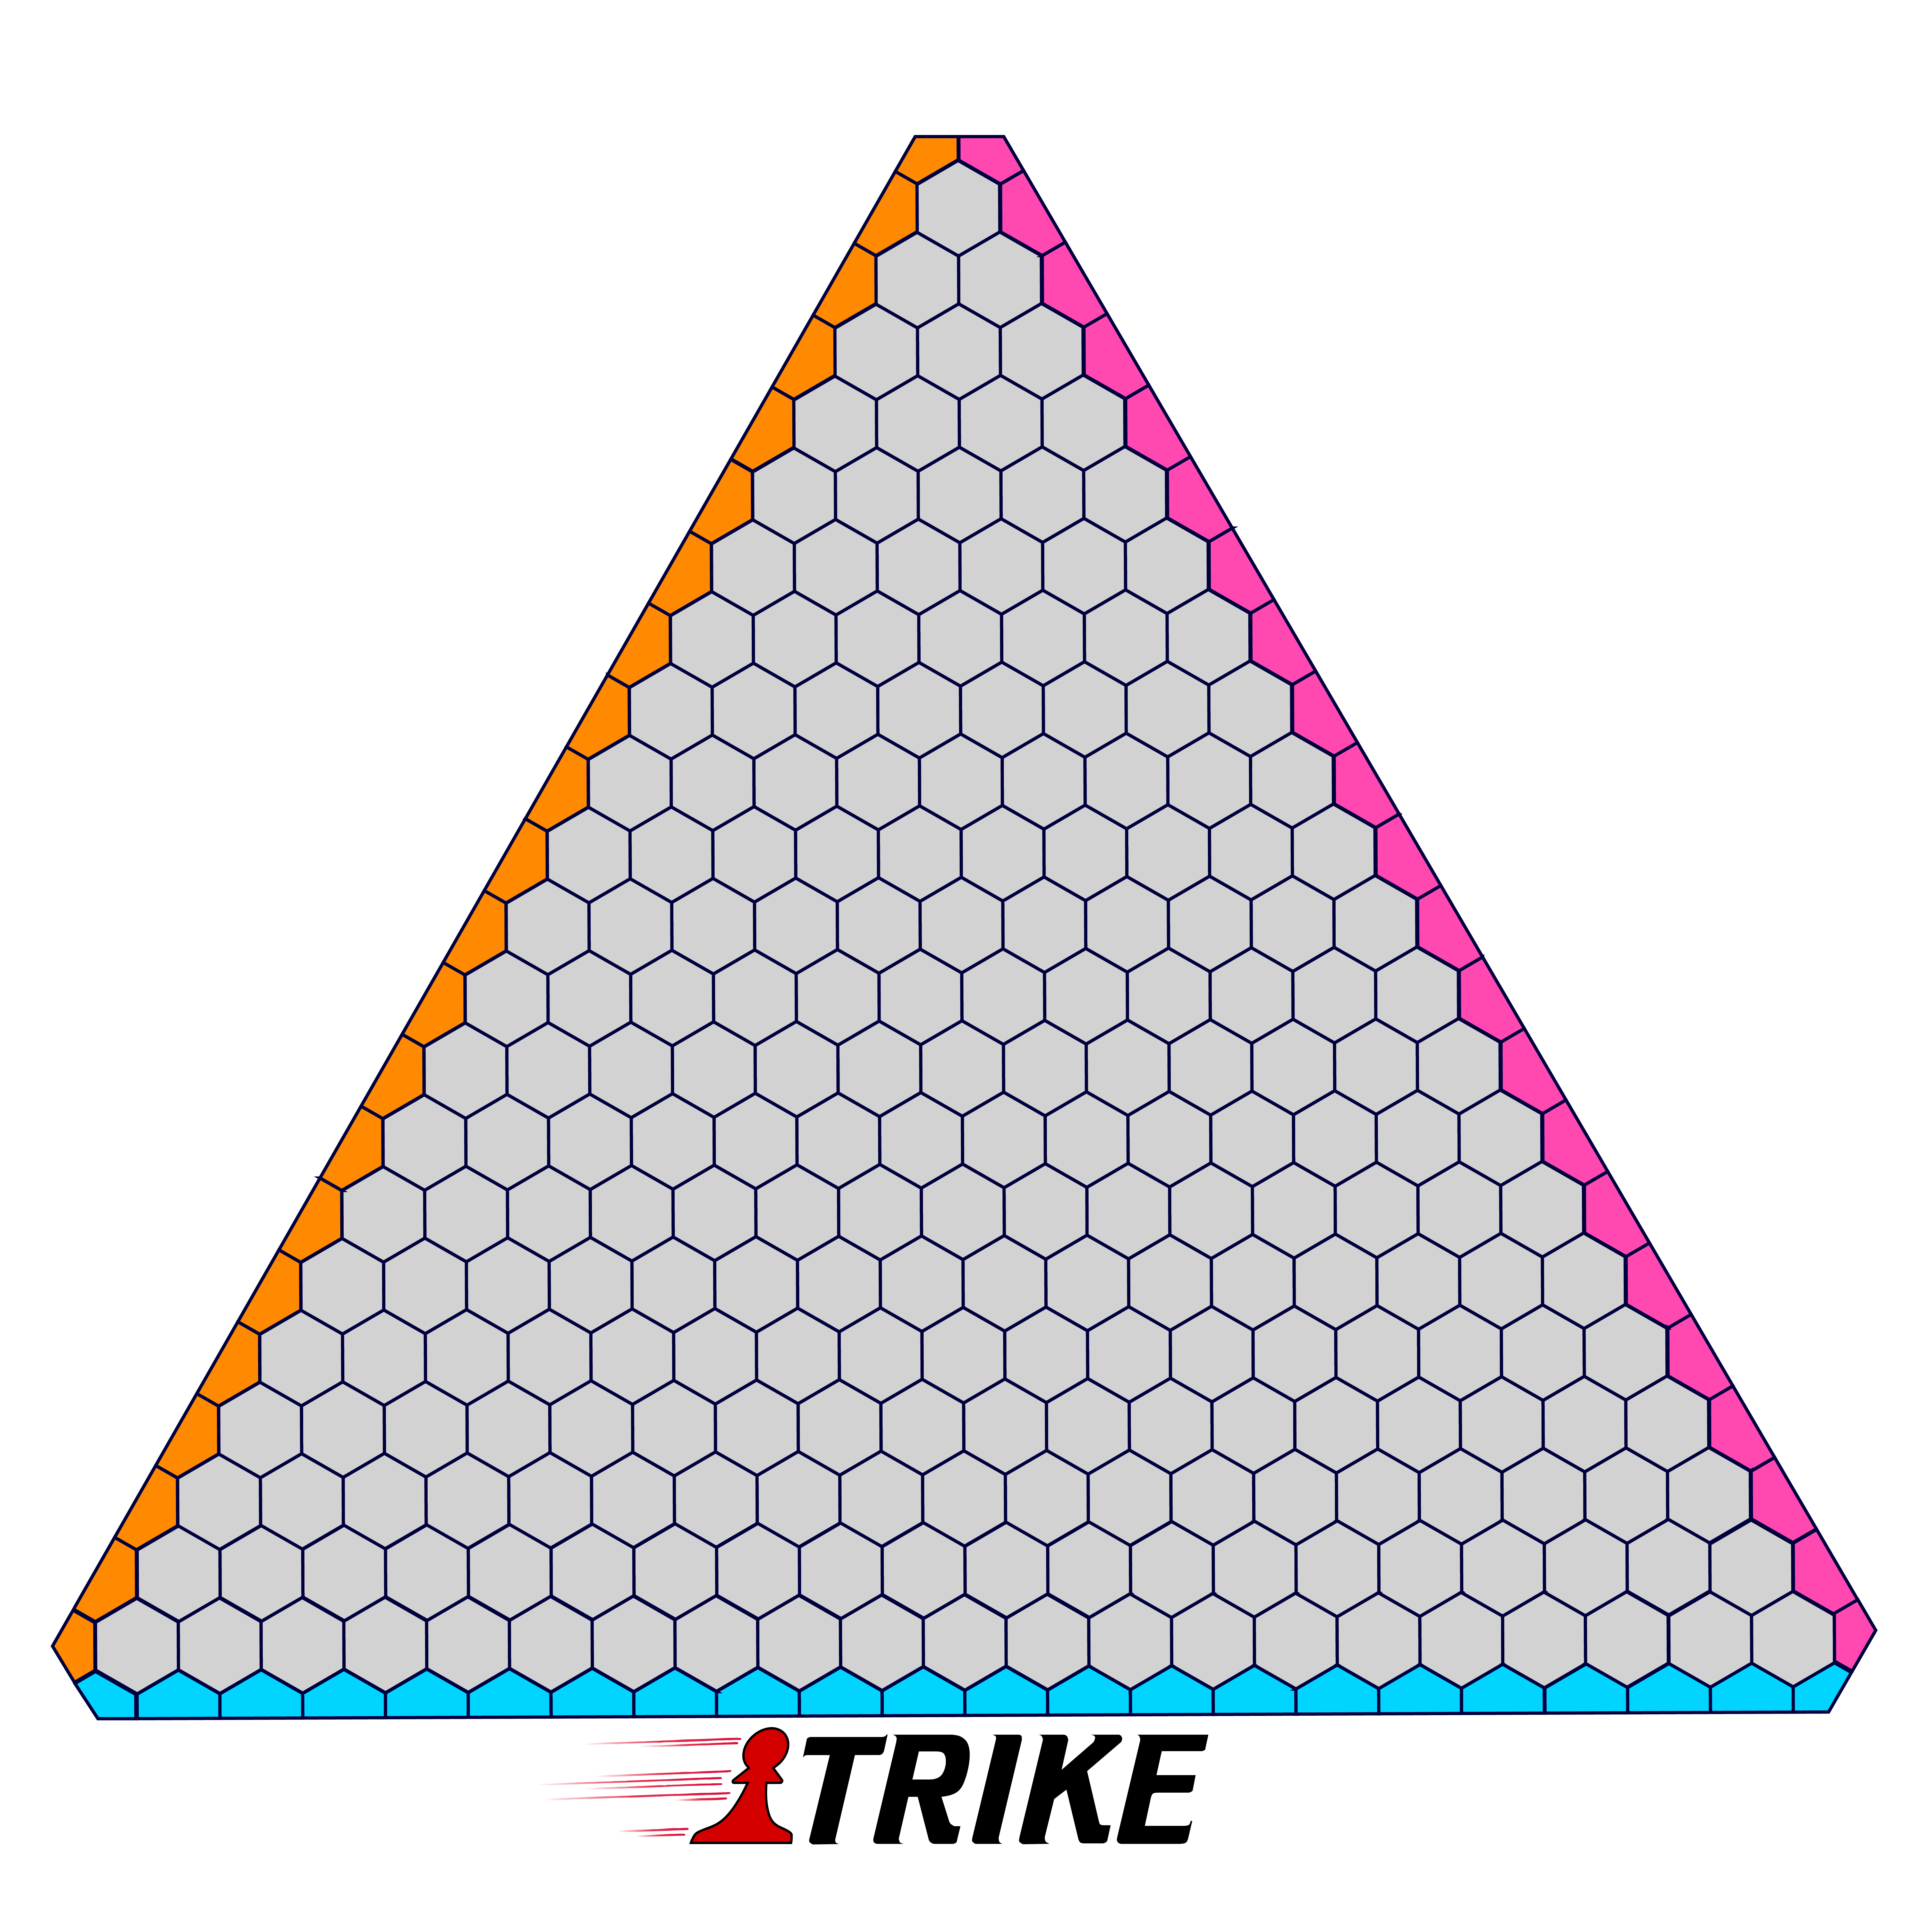

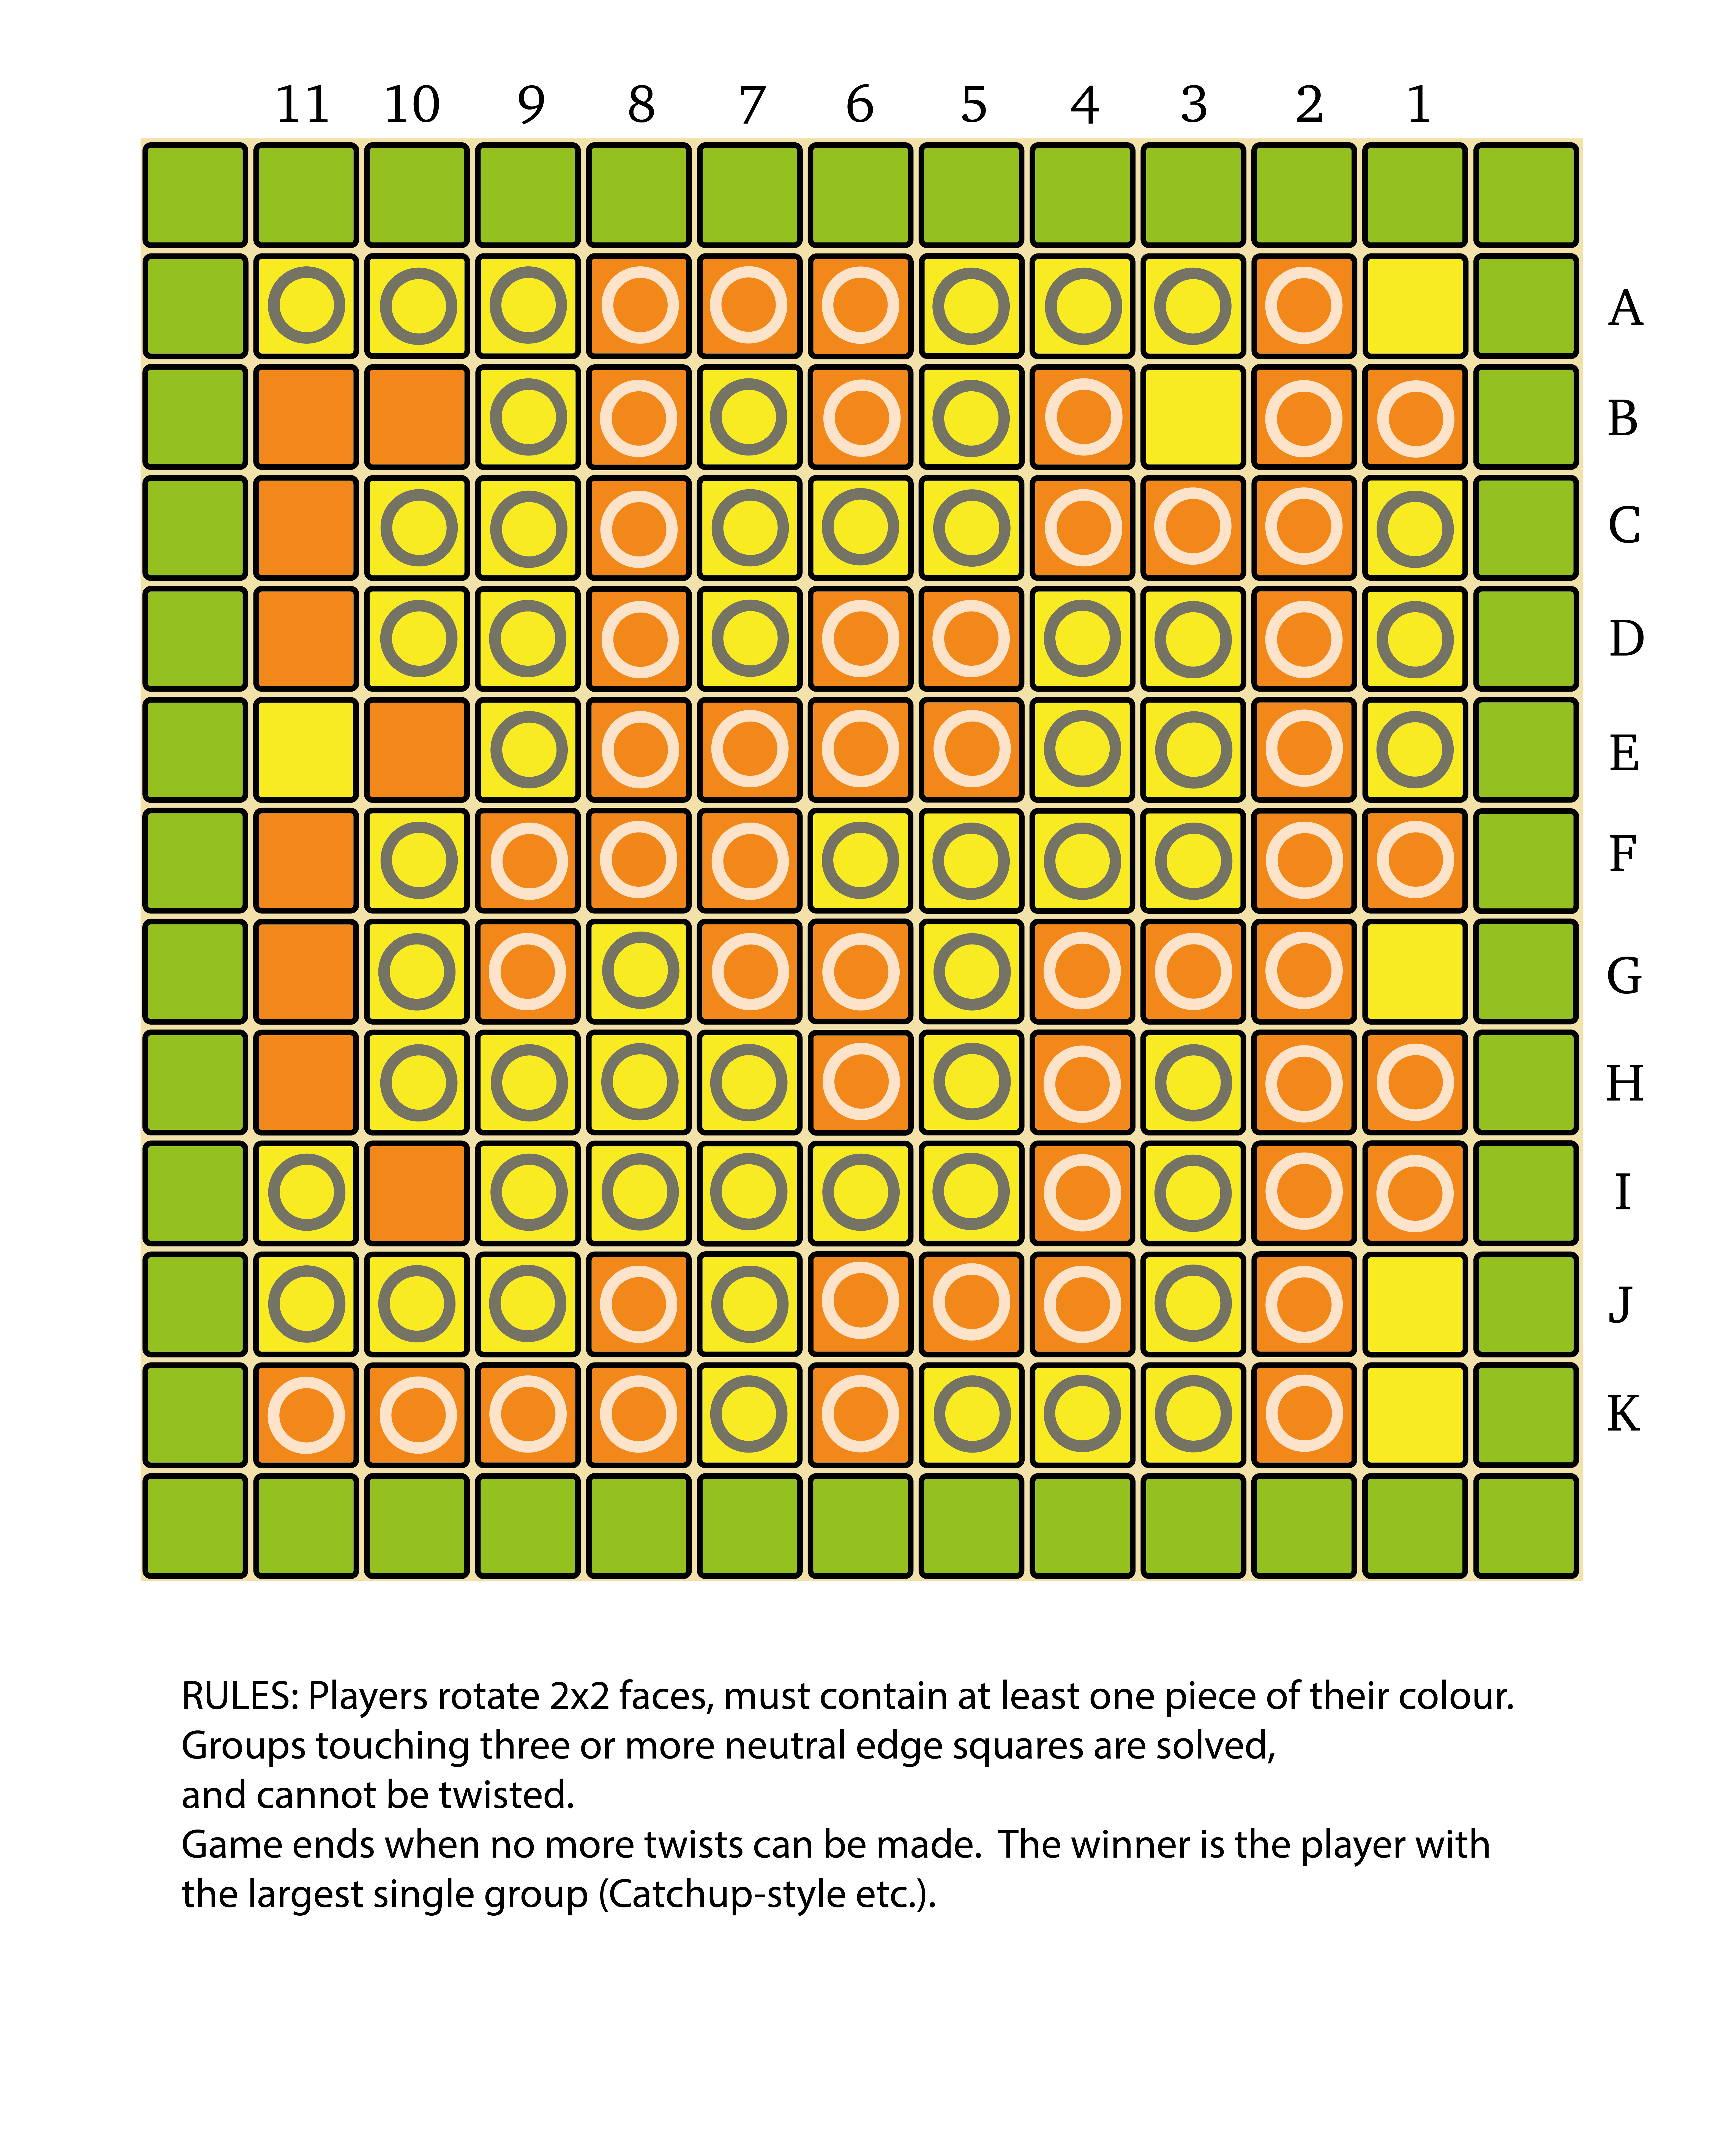
Unlike much of the rest of this list, these two games are extremely new — both Trike (designed by Alek Erickson) and Tumbleweed (designed by Mike Zapawa) were invented in 2020, and in fact are currently slugging it out to take the win in the yearly Best Combinatorial Game competition at BoardGameGeek. Both are very modern designs — they have extremely minimal rules, and are built to do one thing and do it well.
Why they’re great: Trike is an intriguing game in which players place pieces in their colour by moving a neutral pawn piece, then placing their stone underneath it. As the board fills up, the pawn has less freedom of movement, until eventually it can’t go anywhere; at that point, the player with the most stones of their colour adjacent to the neutral pawn wins the game. Trike is very tactically sharp and full of twists and turns, so despite its simplicity the play is complex and exciting. This game reminds me somewhat of Tintas, a brilliant game of moving a neutral pawn to claim a majority of pieces of seven colours. Trike has a quite different feel though and is inherently more flexible and scalable.
Tumbleweed is a game of territory based on a line-of-sight mechanic — on each turn you may place a stack of pieces of your colour in one cell on the board, with the height of that stack determined by the number of your pieces within unobstructed line-of-sight of that cell. You may capture and remove an enemy stack in that cell if your stack would be larger, or you can reinforce your own stack in the same way. At the end of the game, the player who holds the majority of the board wins. Tumbleweed is gaining a lot of attention since its creation, because the simple line-of-sight stack placement idea immediately creates interesting tactical situations and strategic dilemmas. Apparently the community of players is settling on hexhex-8 boards, but I prefer to play on the original hexhex-11 board. Playing in real life is a bit challenging, mainly because you need a huge number of counters to potentially stack them six deep on numerous cells, but playing online or via Ai Ai is straightforward and very enjoyable. My board above plays on the intersections rather than in the cells, which just intuitively makes more sense to me given the line-of-sight mechanic.
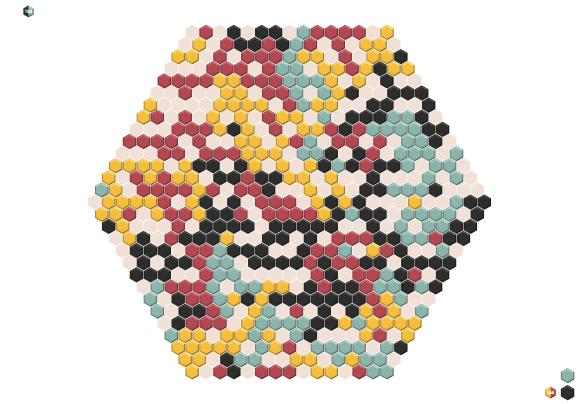
Volo
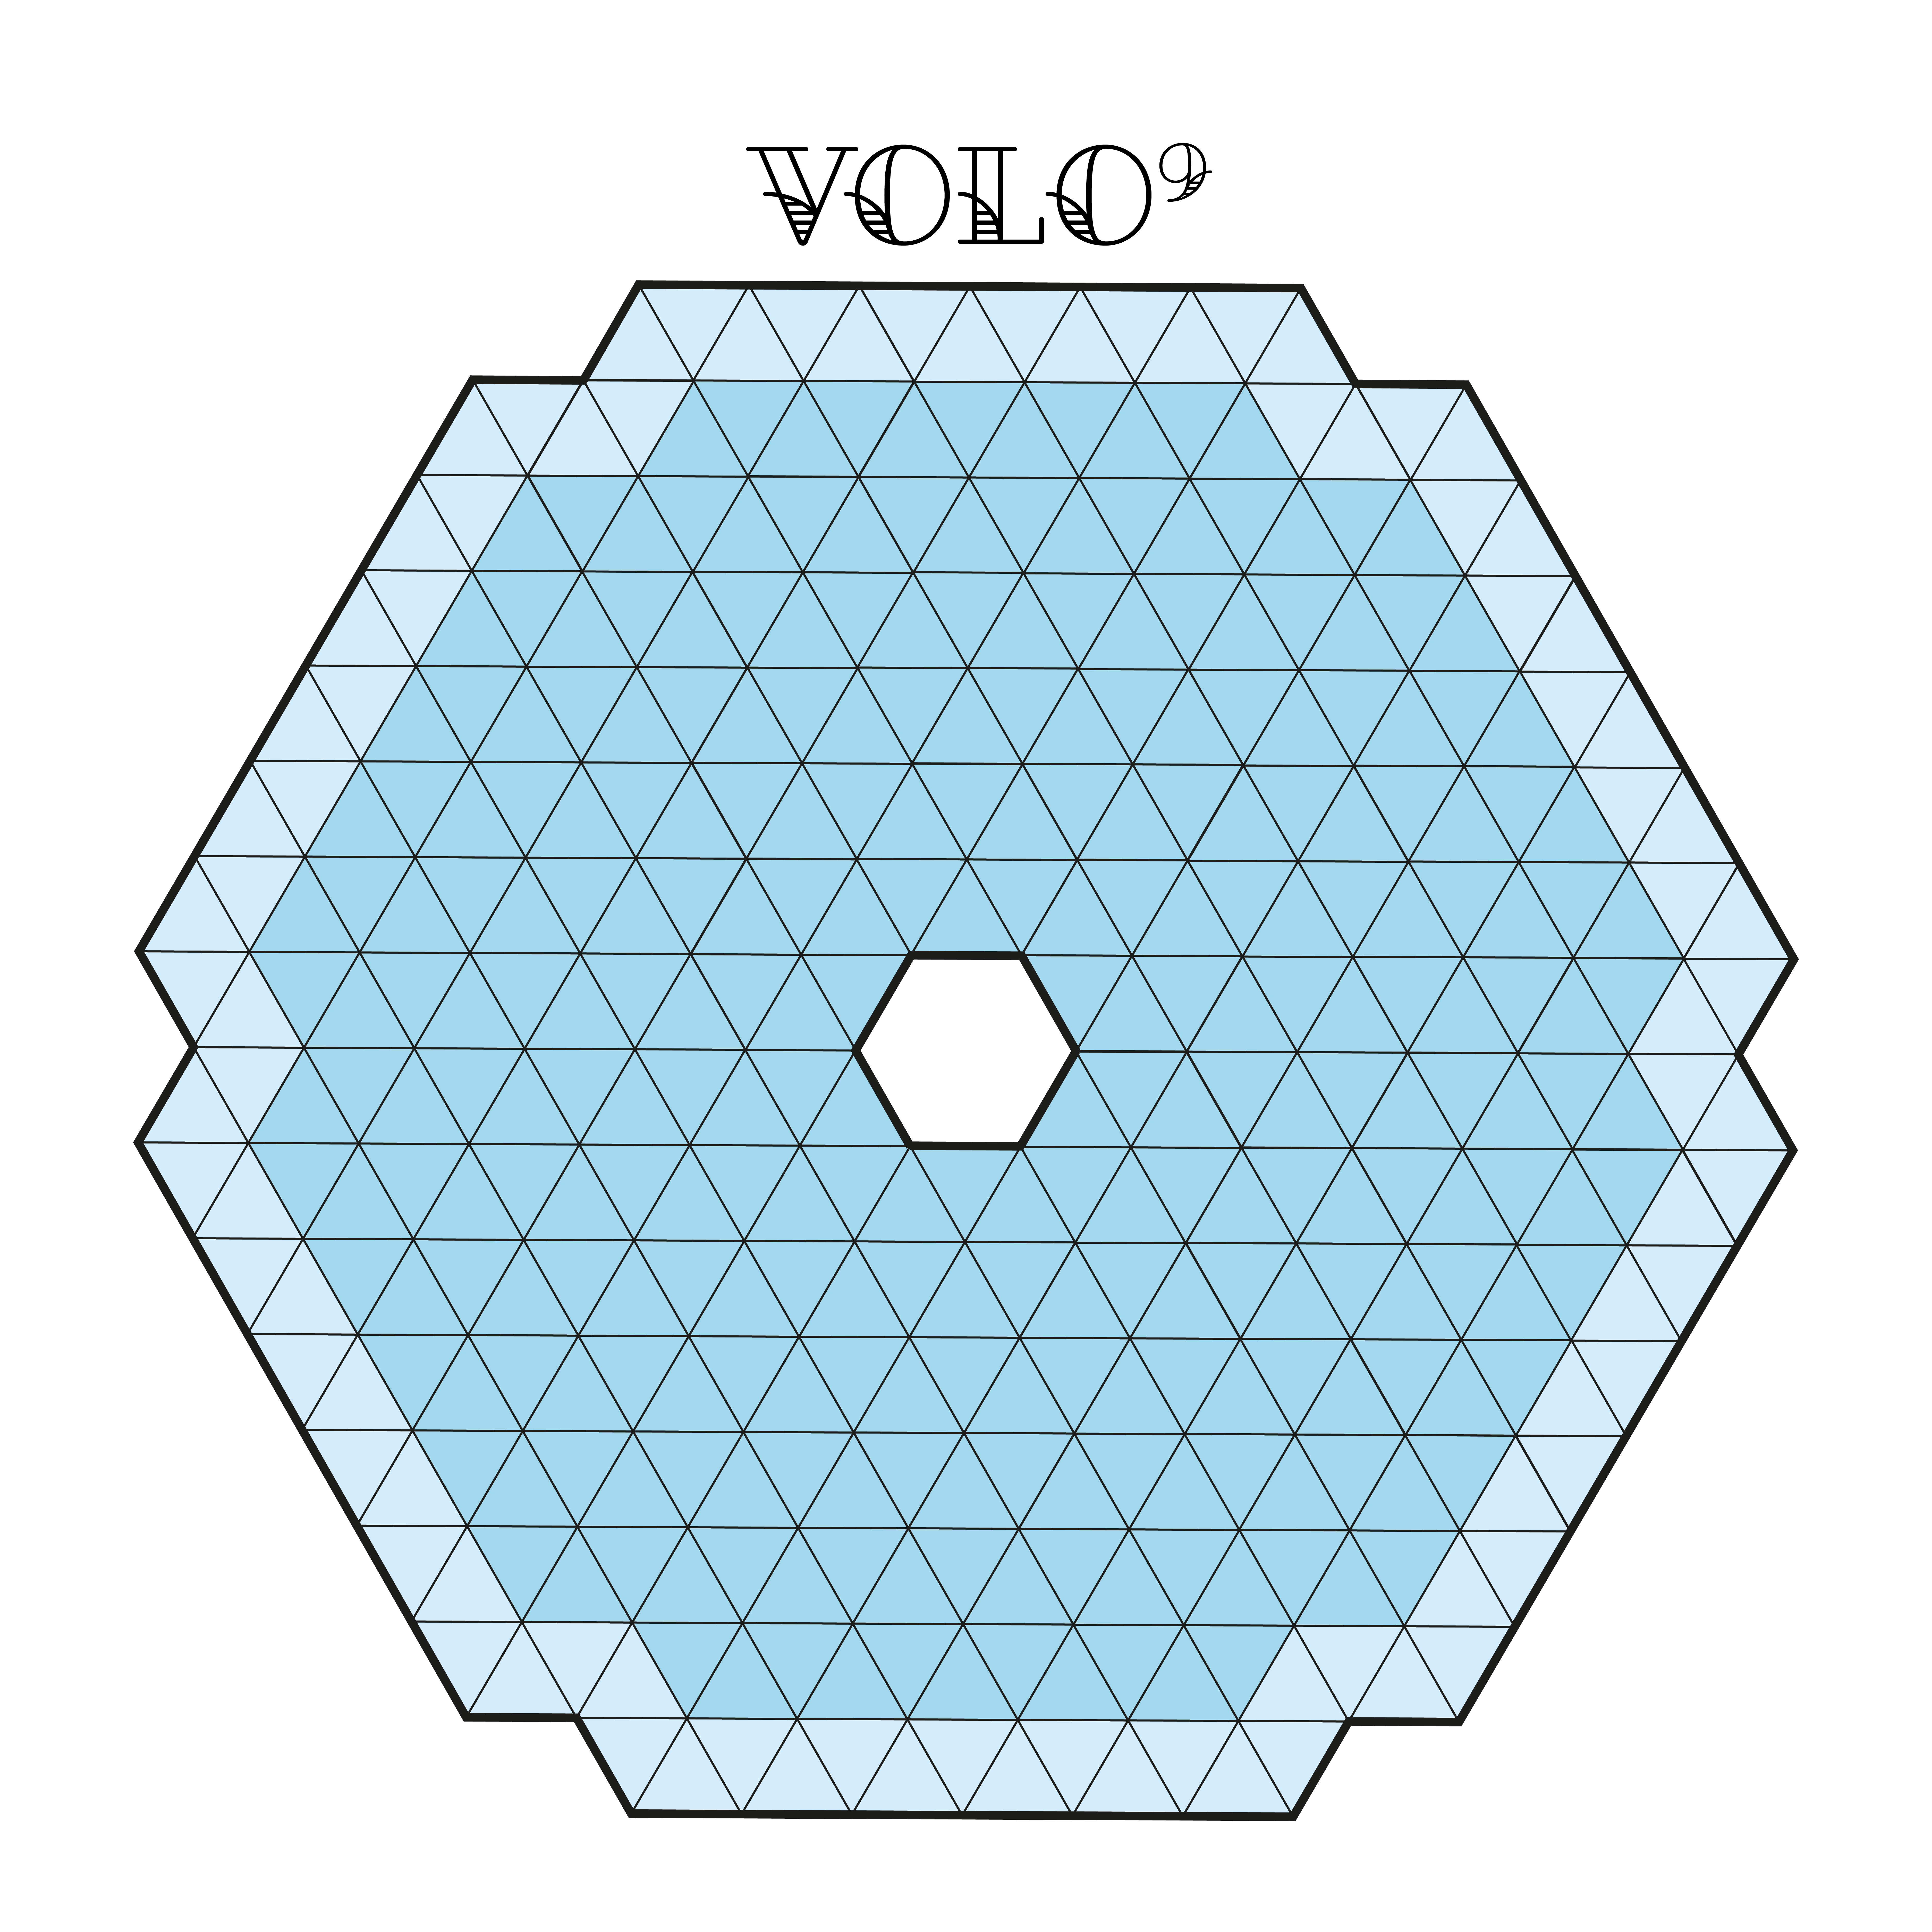
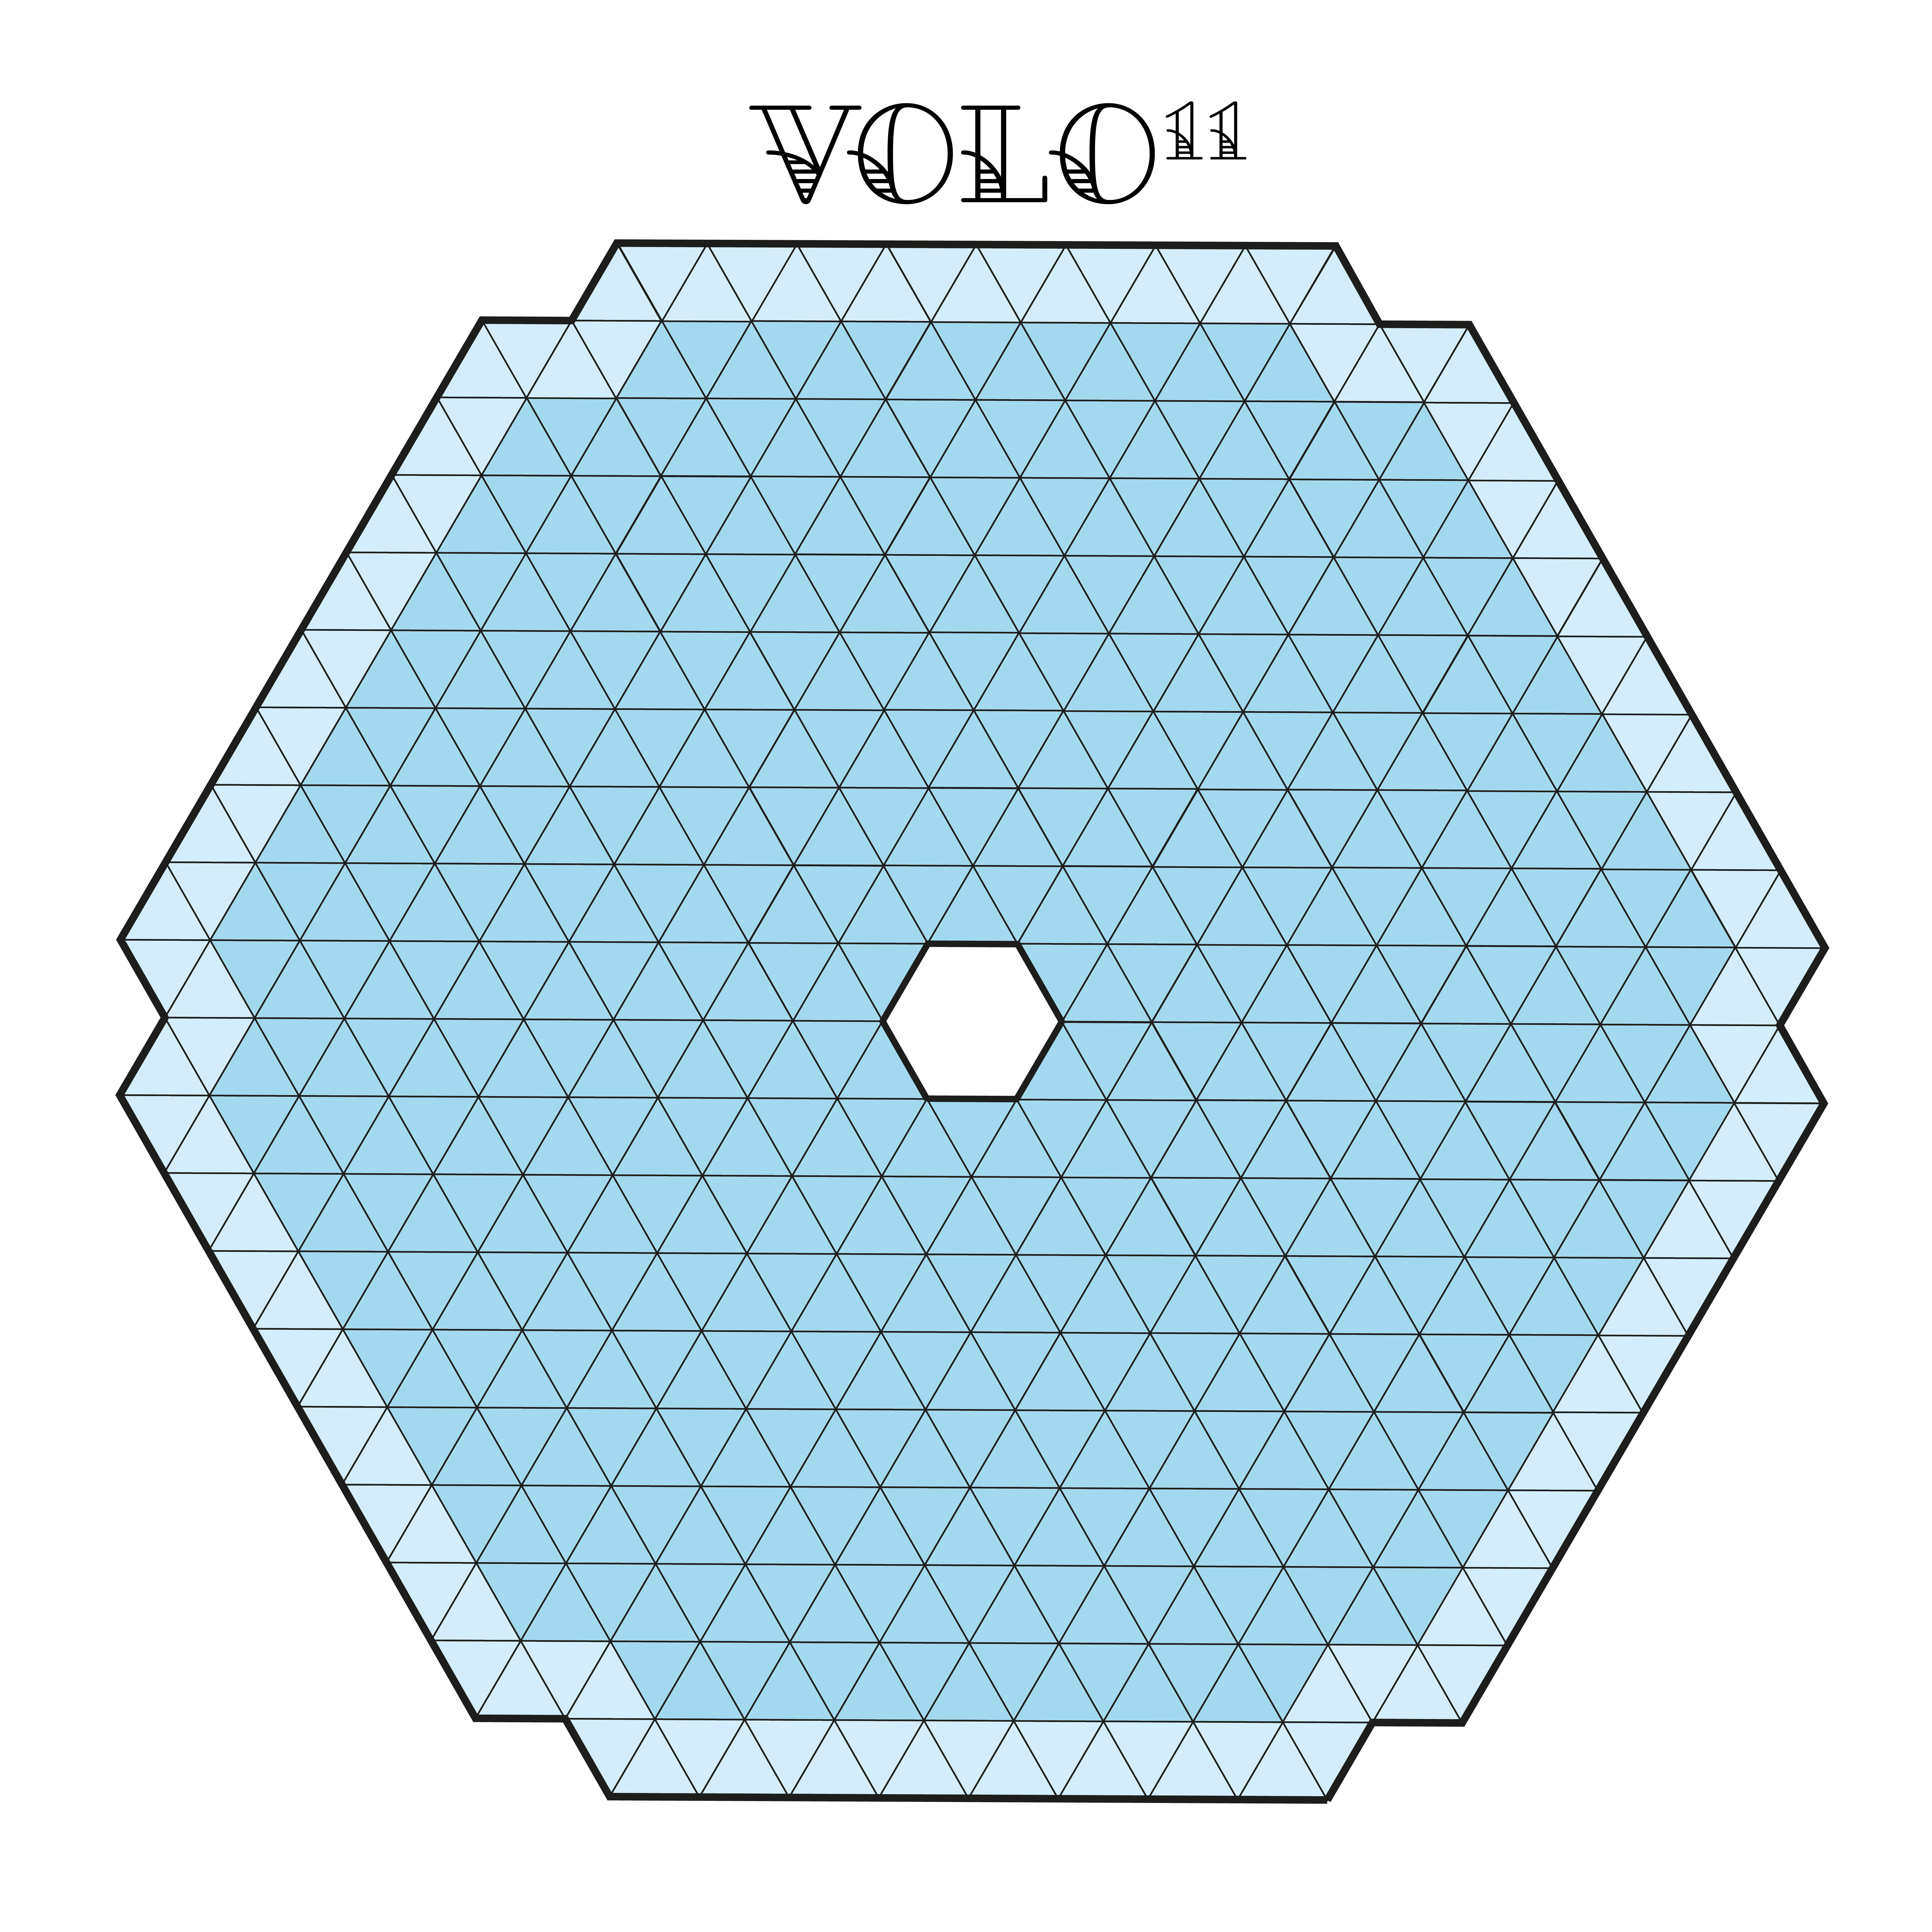
Volo is an innovative game of unification by Dieter Stein. The game was inspired by the flocking of birds, as illustrated in the famous Boids paper by Craig Reynolds (read more about the game and its influences in this paper). The Boids simulation was also seriously influential on me when I was young and first discovered the scientific field called Artificial Life, so I feel a certain kinship with this game. Volo’s rules are fairly simple, but the mechanics are evocative of the theme: the board starts empty, and as you gradually place birds you will need to fly whole flocks of them around the board at once in an attempt to join them together into one giant flock. Being able to move an entire line of pieces at once is fairly unusual in abstract games, so it feels quite satisfying. The first player to create one unified flock including all their birds is the winner.
Why it’s great: Volo is a creative game, and its inspiration comes through beautifully in its clever rules. You will feel like you’re navigating your flocks through treacherous skies, trying to bring your birds together to safety. Volo is also a fine example of the unification genre, which is surprisingly small; the most famous examples are probably Lines of Action, which is a brilliant game with an oddball movement mechanic, and Ayu, a compelling game playable on a Go board where every move is an approach move. The unification genre is small but mighty, and Volo may just be my favourite of the lot; the ability to move lots of pieces in a single turn gives it a sense of freedom and allows for some highly creative moves.
About the boards: The standard Volo board is a hexhex-7 board with corners and the center point removed. In the spirit of experimentation I’ve been playing with larger boards, so you can see above I’ve constructed hexhex-9 and hexhex-11 boards for more epic Volo games. On all the Volo boards you place your birds on the intersections, rather than within the triangular spaces.
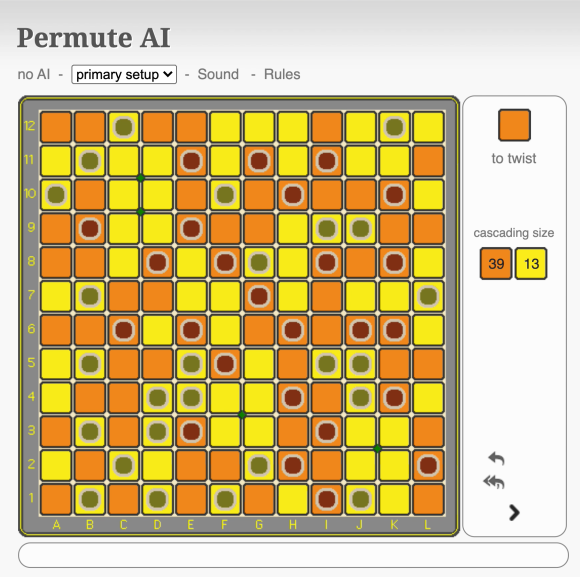
YvY
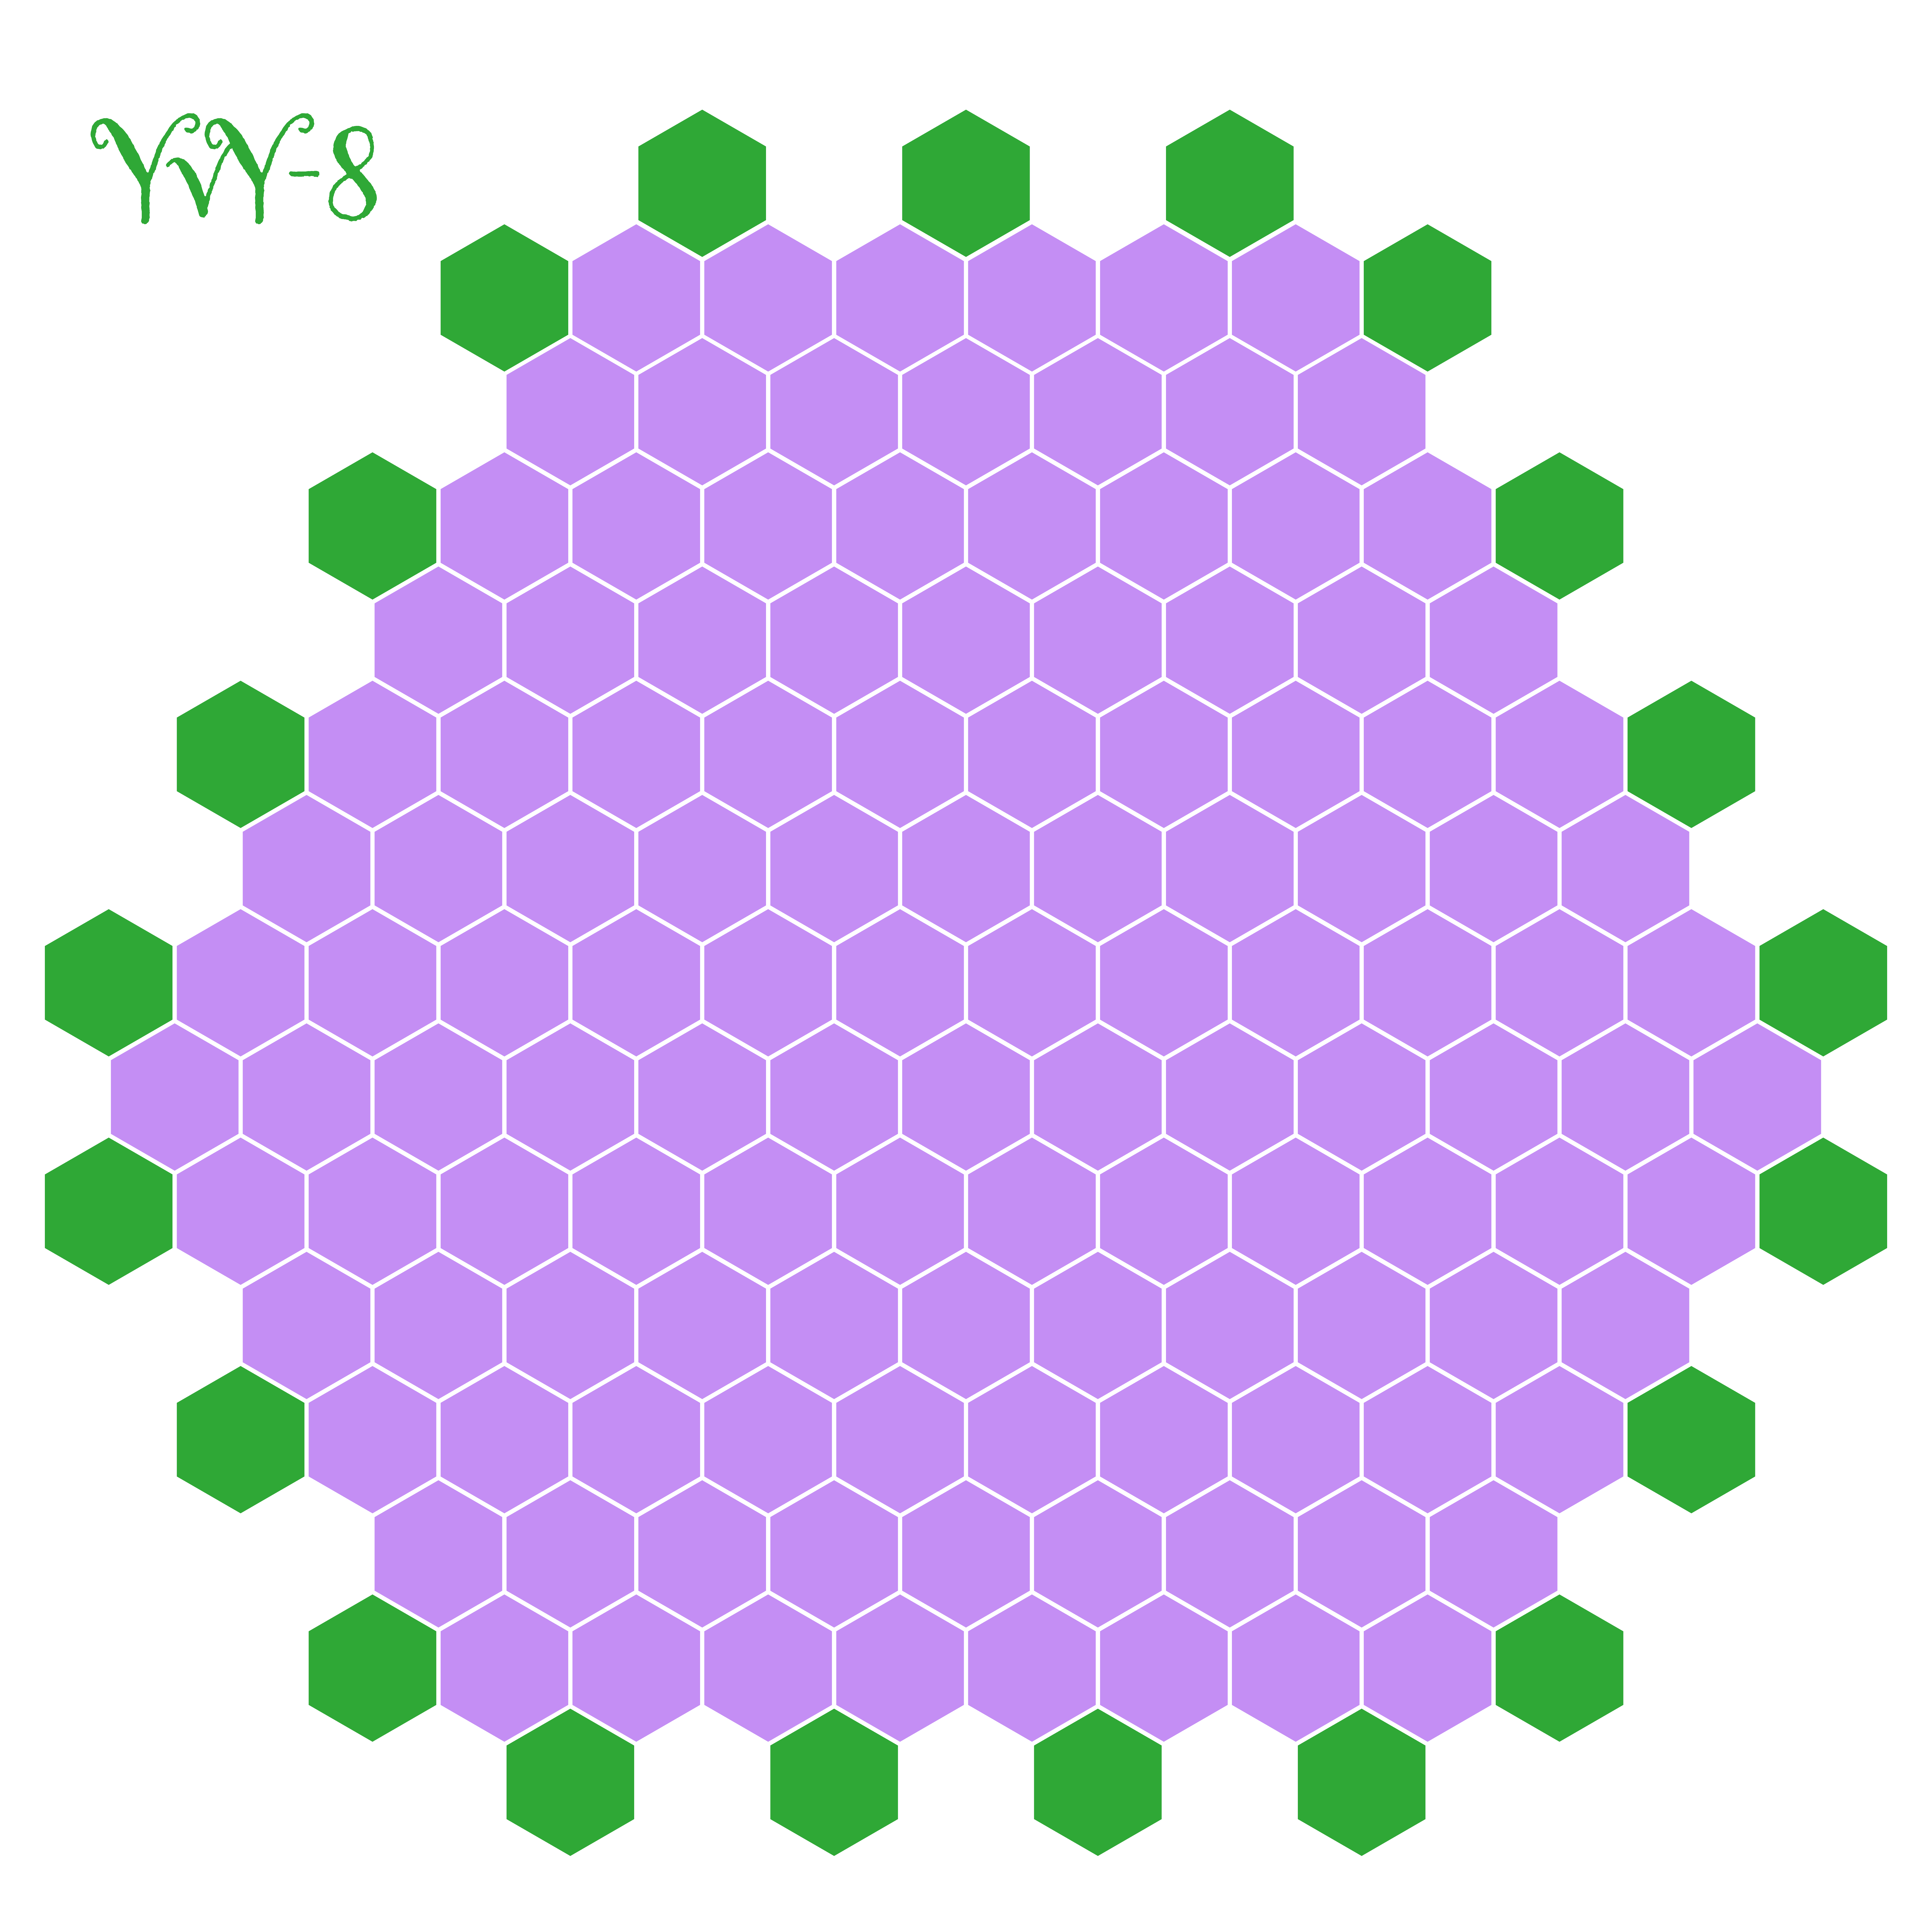
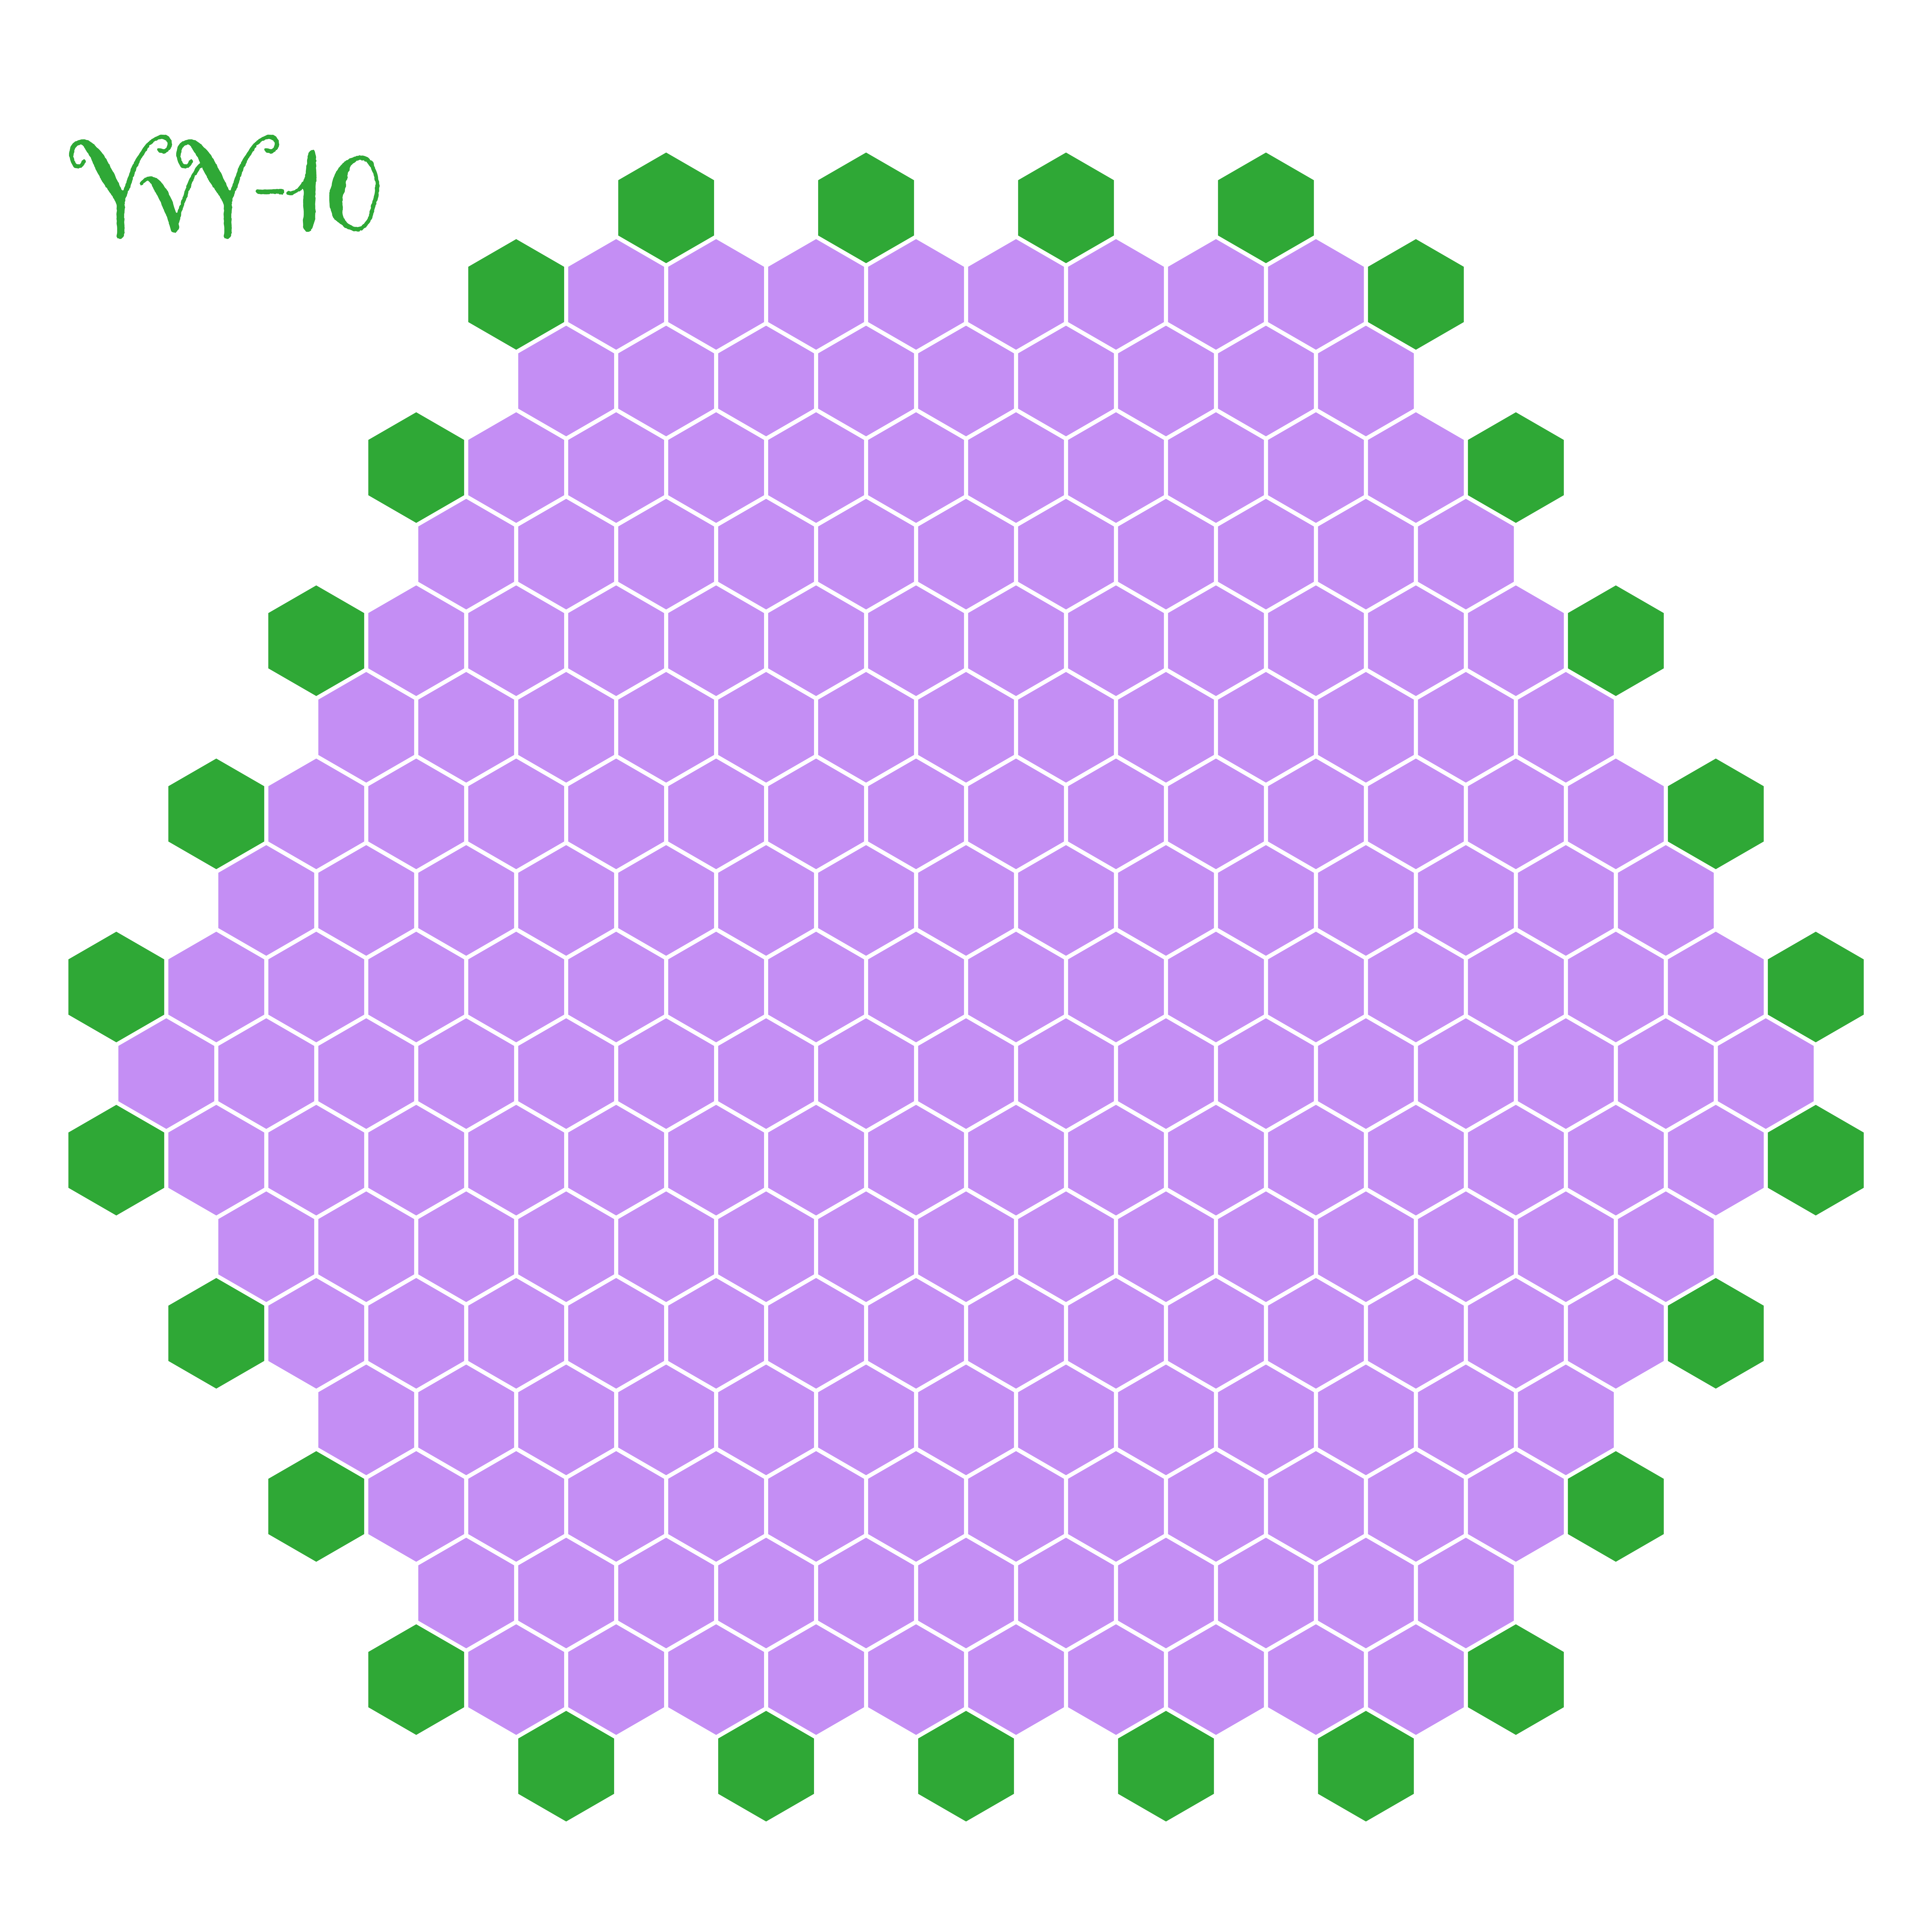
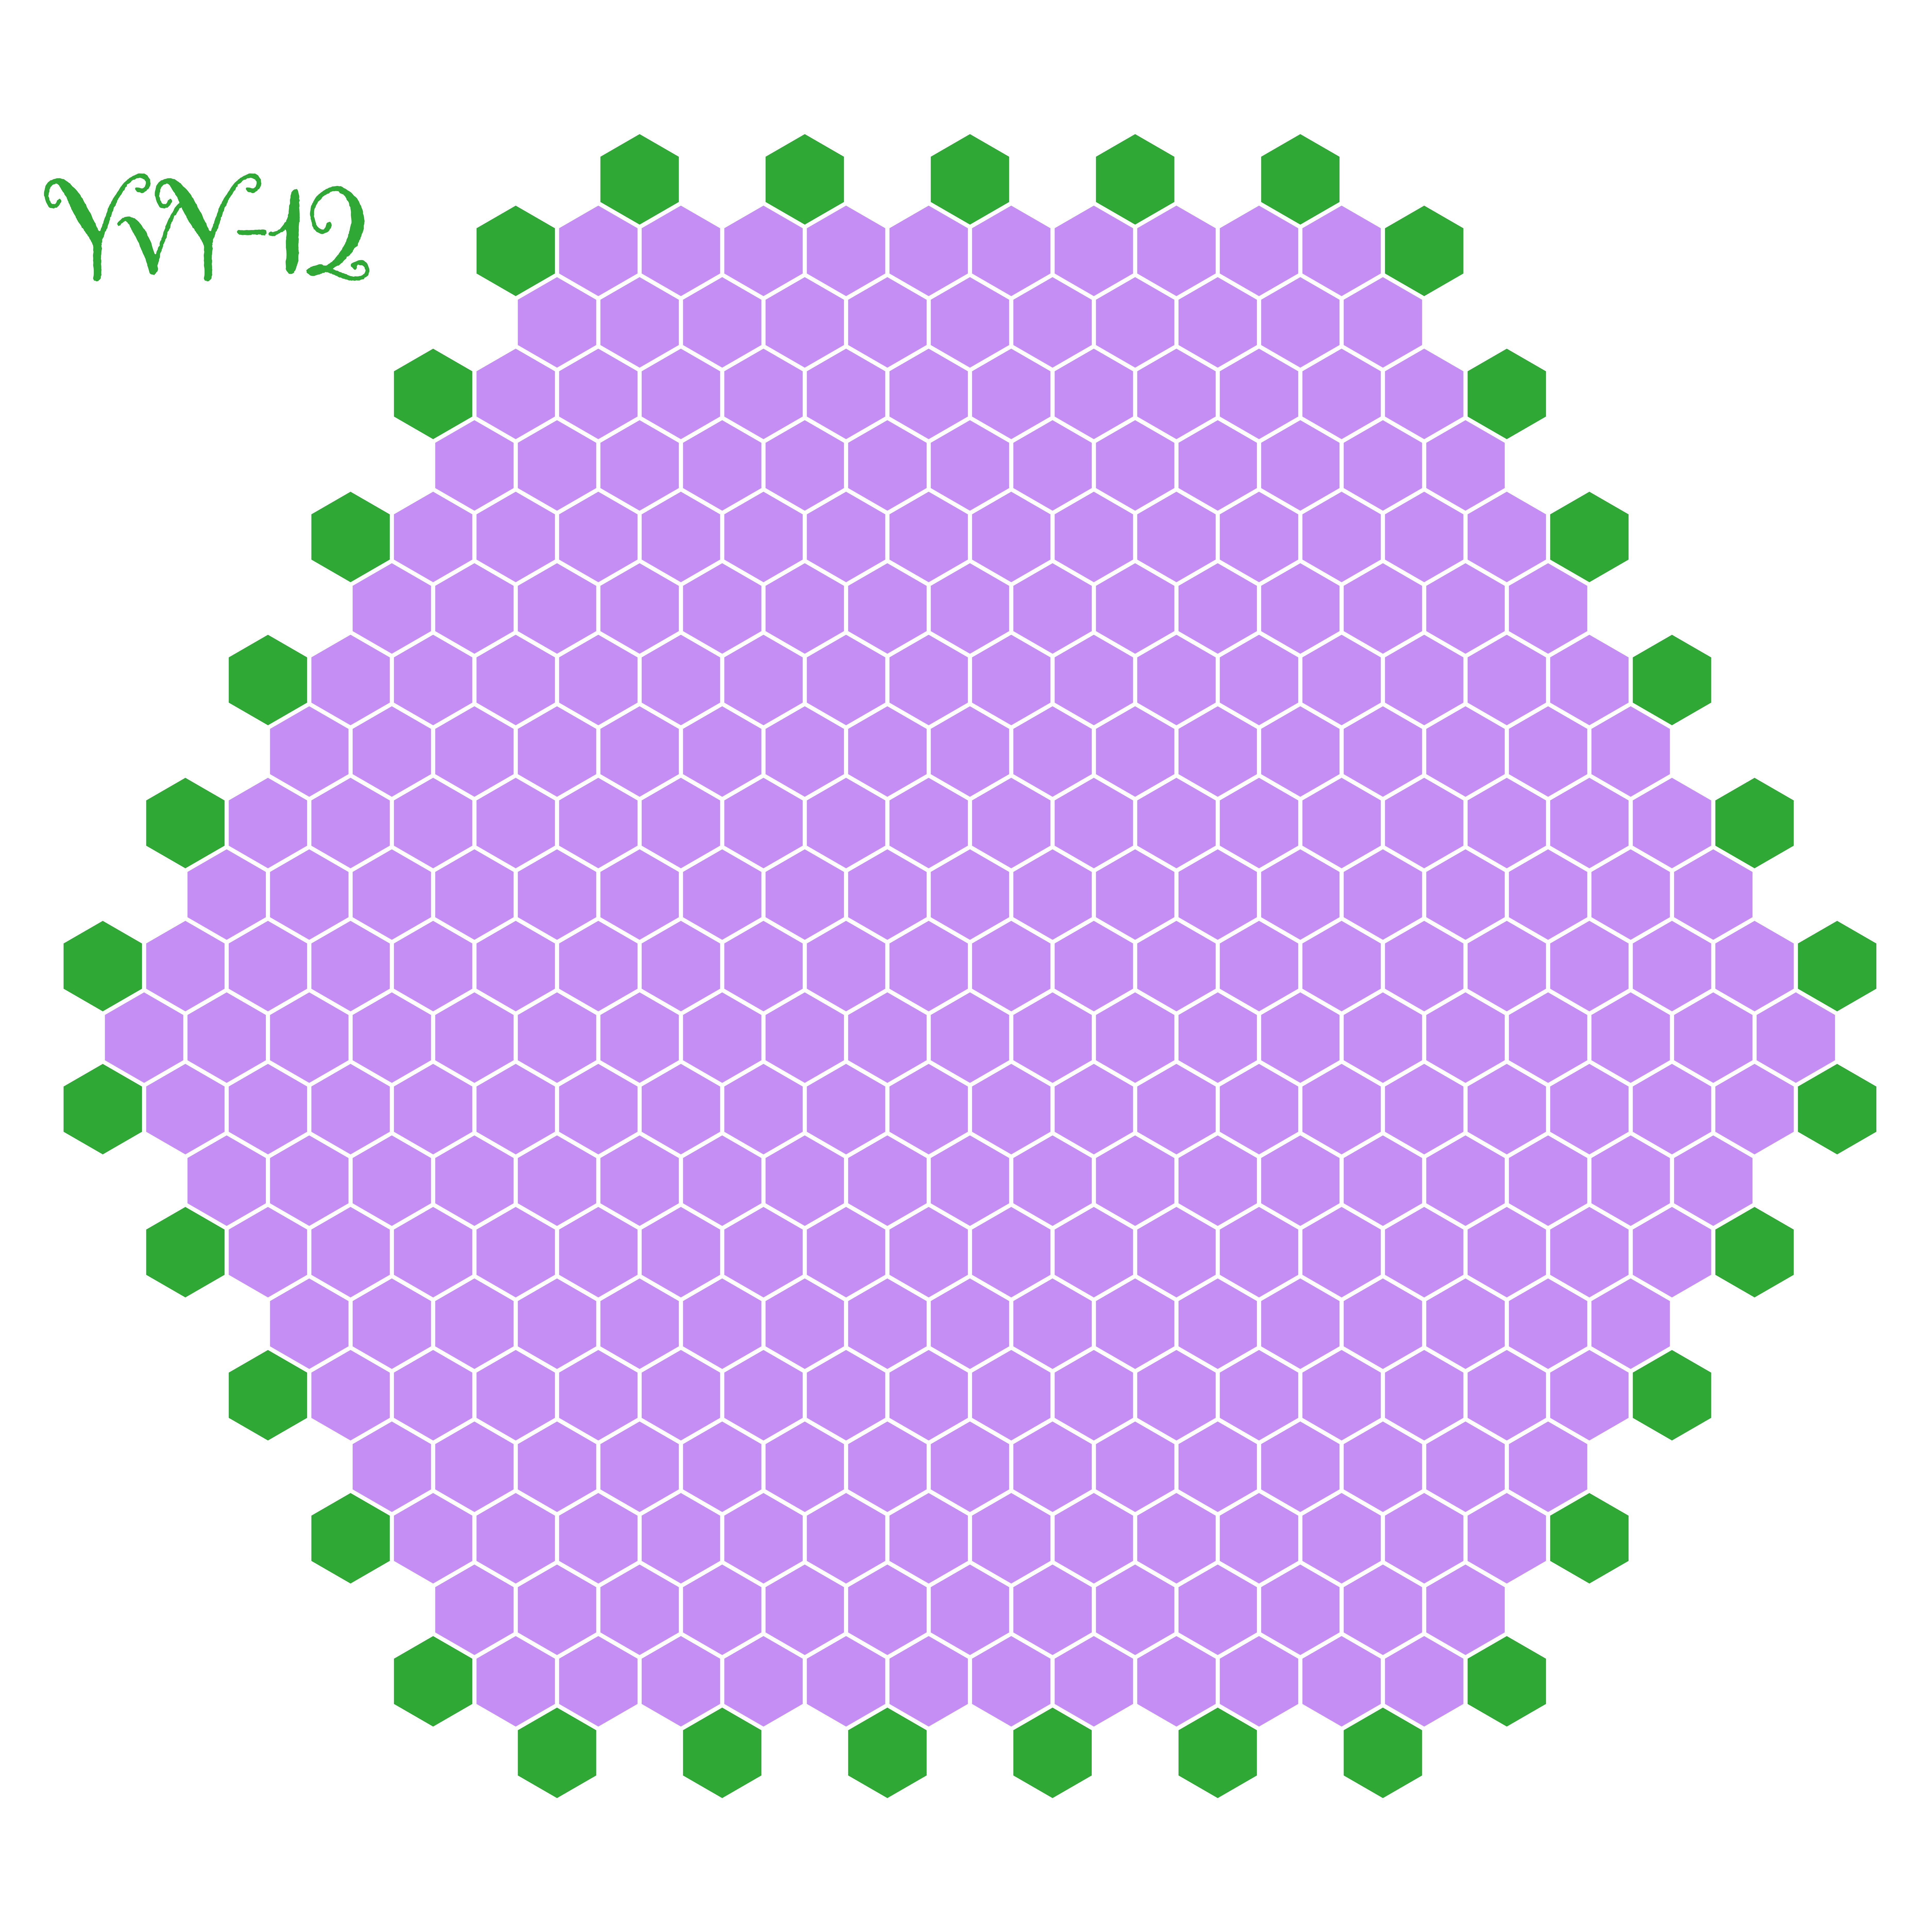
YvY is another forgotten connect-the-key-cells game from Christian Freeling, developed as a vision of a simplified Superstar, then refined into its final form in collaboration with David J Bush. In YvY, players take turns placing one stone of their colour onto the oddly-shaped hexagonal grid, and attempt to occupy and join together the green ‘sprouts’ sticking off the side of the board. At the end of the game, each player scores points equal to the number of sprouts they occupy, minus twice their total number of ‘live’ groups (live groups being those occupying at least one sprout). So, as with Star and *Star, the scoring system forces you to try to connect your occupied sprouts with as few groups as possible. Intriguingly, YvY also offers a ‘sudden-death’ victory condition: if either player forms a contiguous loop of stones of any size, they win immediately!
Why it’s great: I’m a sucker for a connection game with multiple objectives, and YvY fits squarely into that category. The need to connect groups across the board to score well gives the game a territorial feel, while the loop-formation win condition adds some tactical sharpness on top. In play the game bears a certain resemblance to Havannah, and the need to score points via multiple connections encourages board-spanning play with great subtlety. Christian views this game as obsolete, but I see it as another intriguing take on the connect-the-key-cells genre, alongside Star, *Star, Superstar, Starweb and Side Stitch. For my money this category of games offers a lot of depth and intrigue, so I recommend trying several of them and seeing which one best fits your style of play.
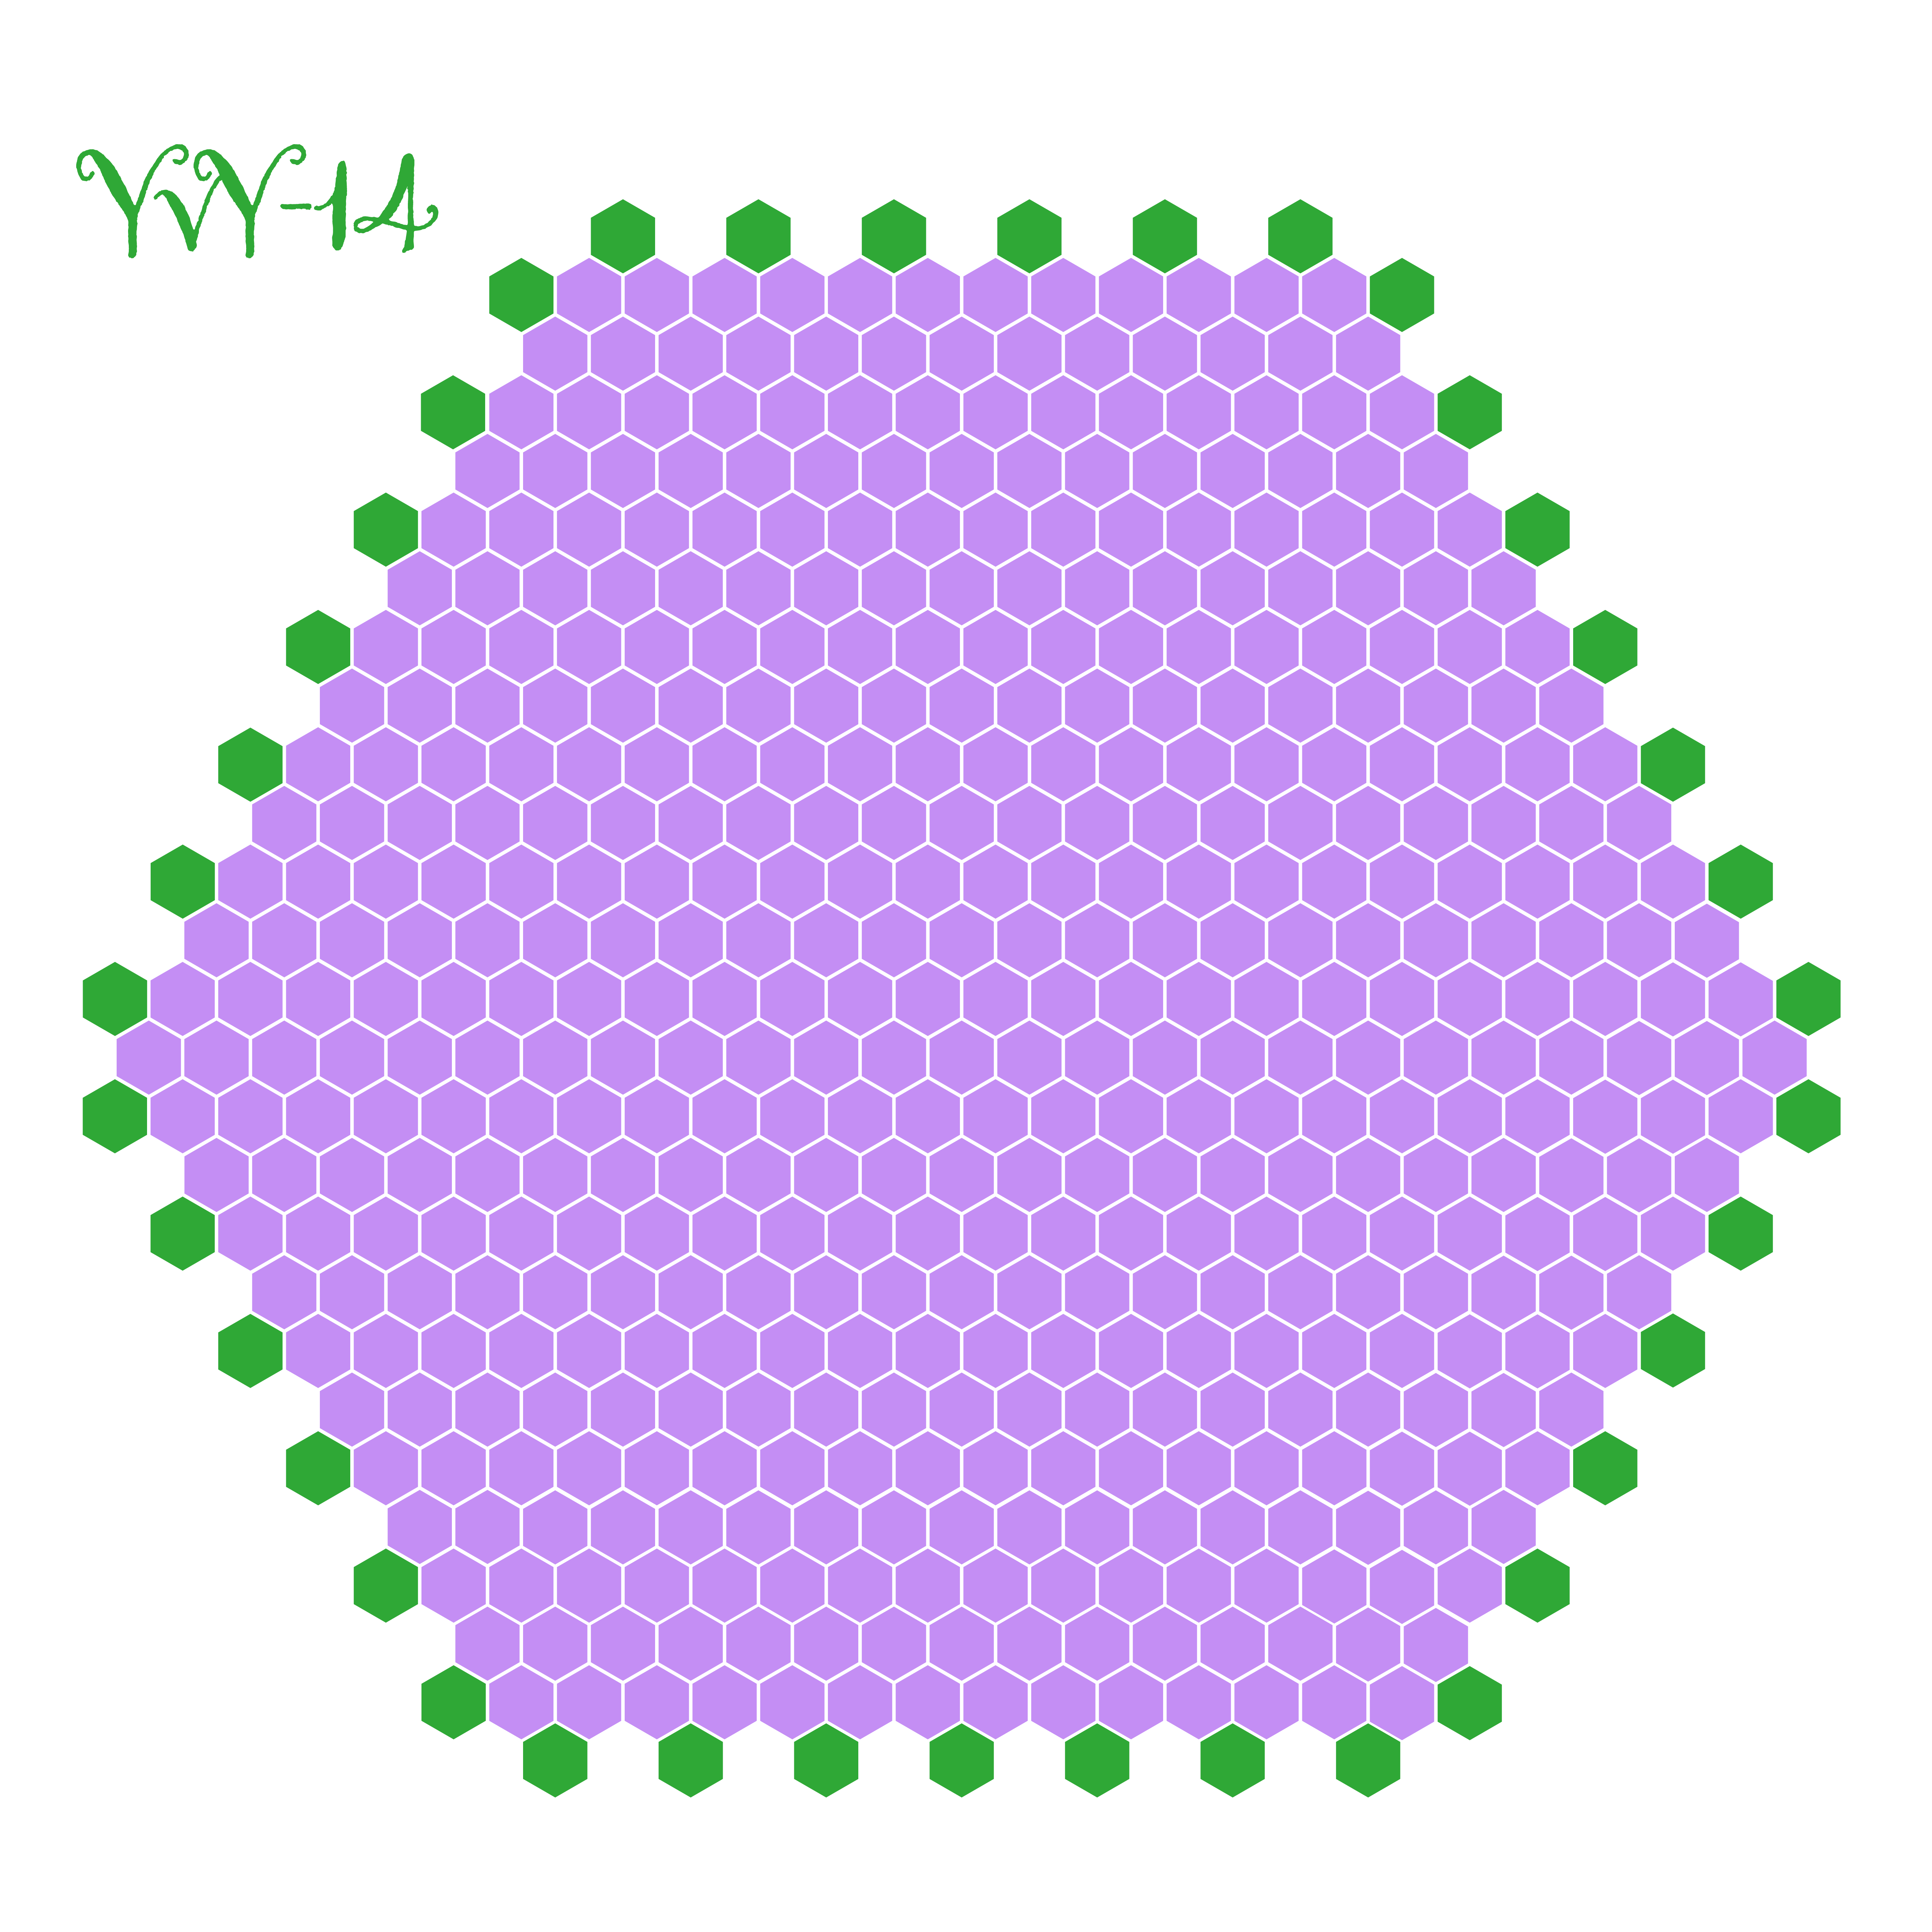
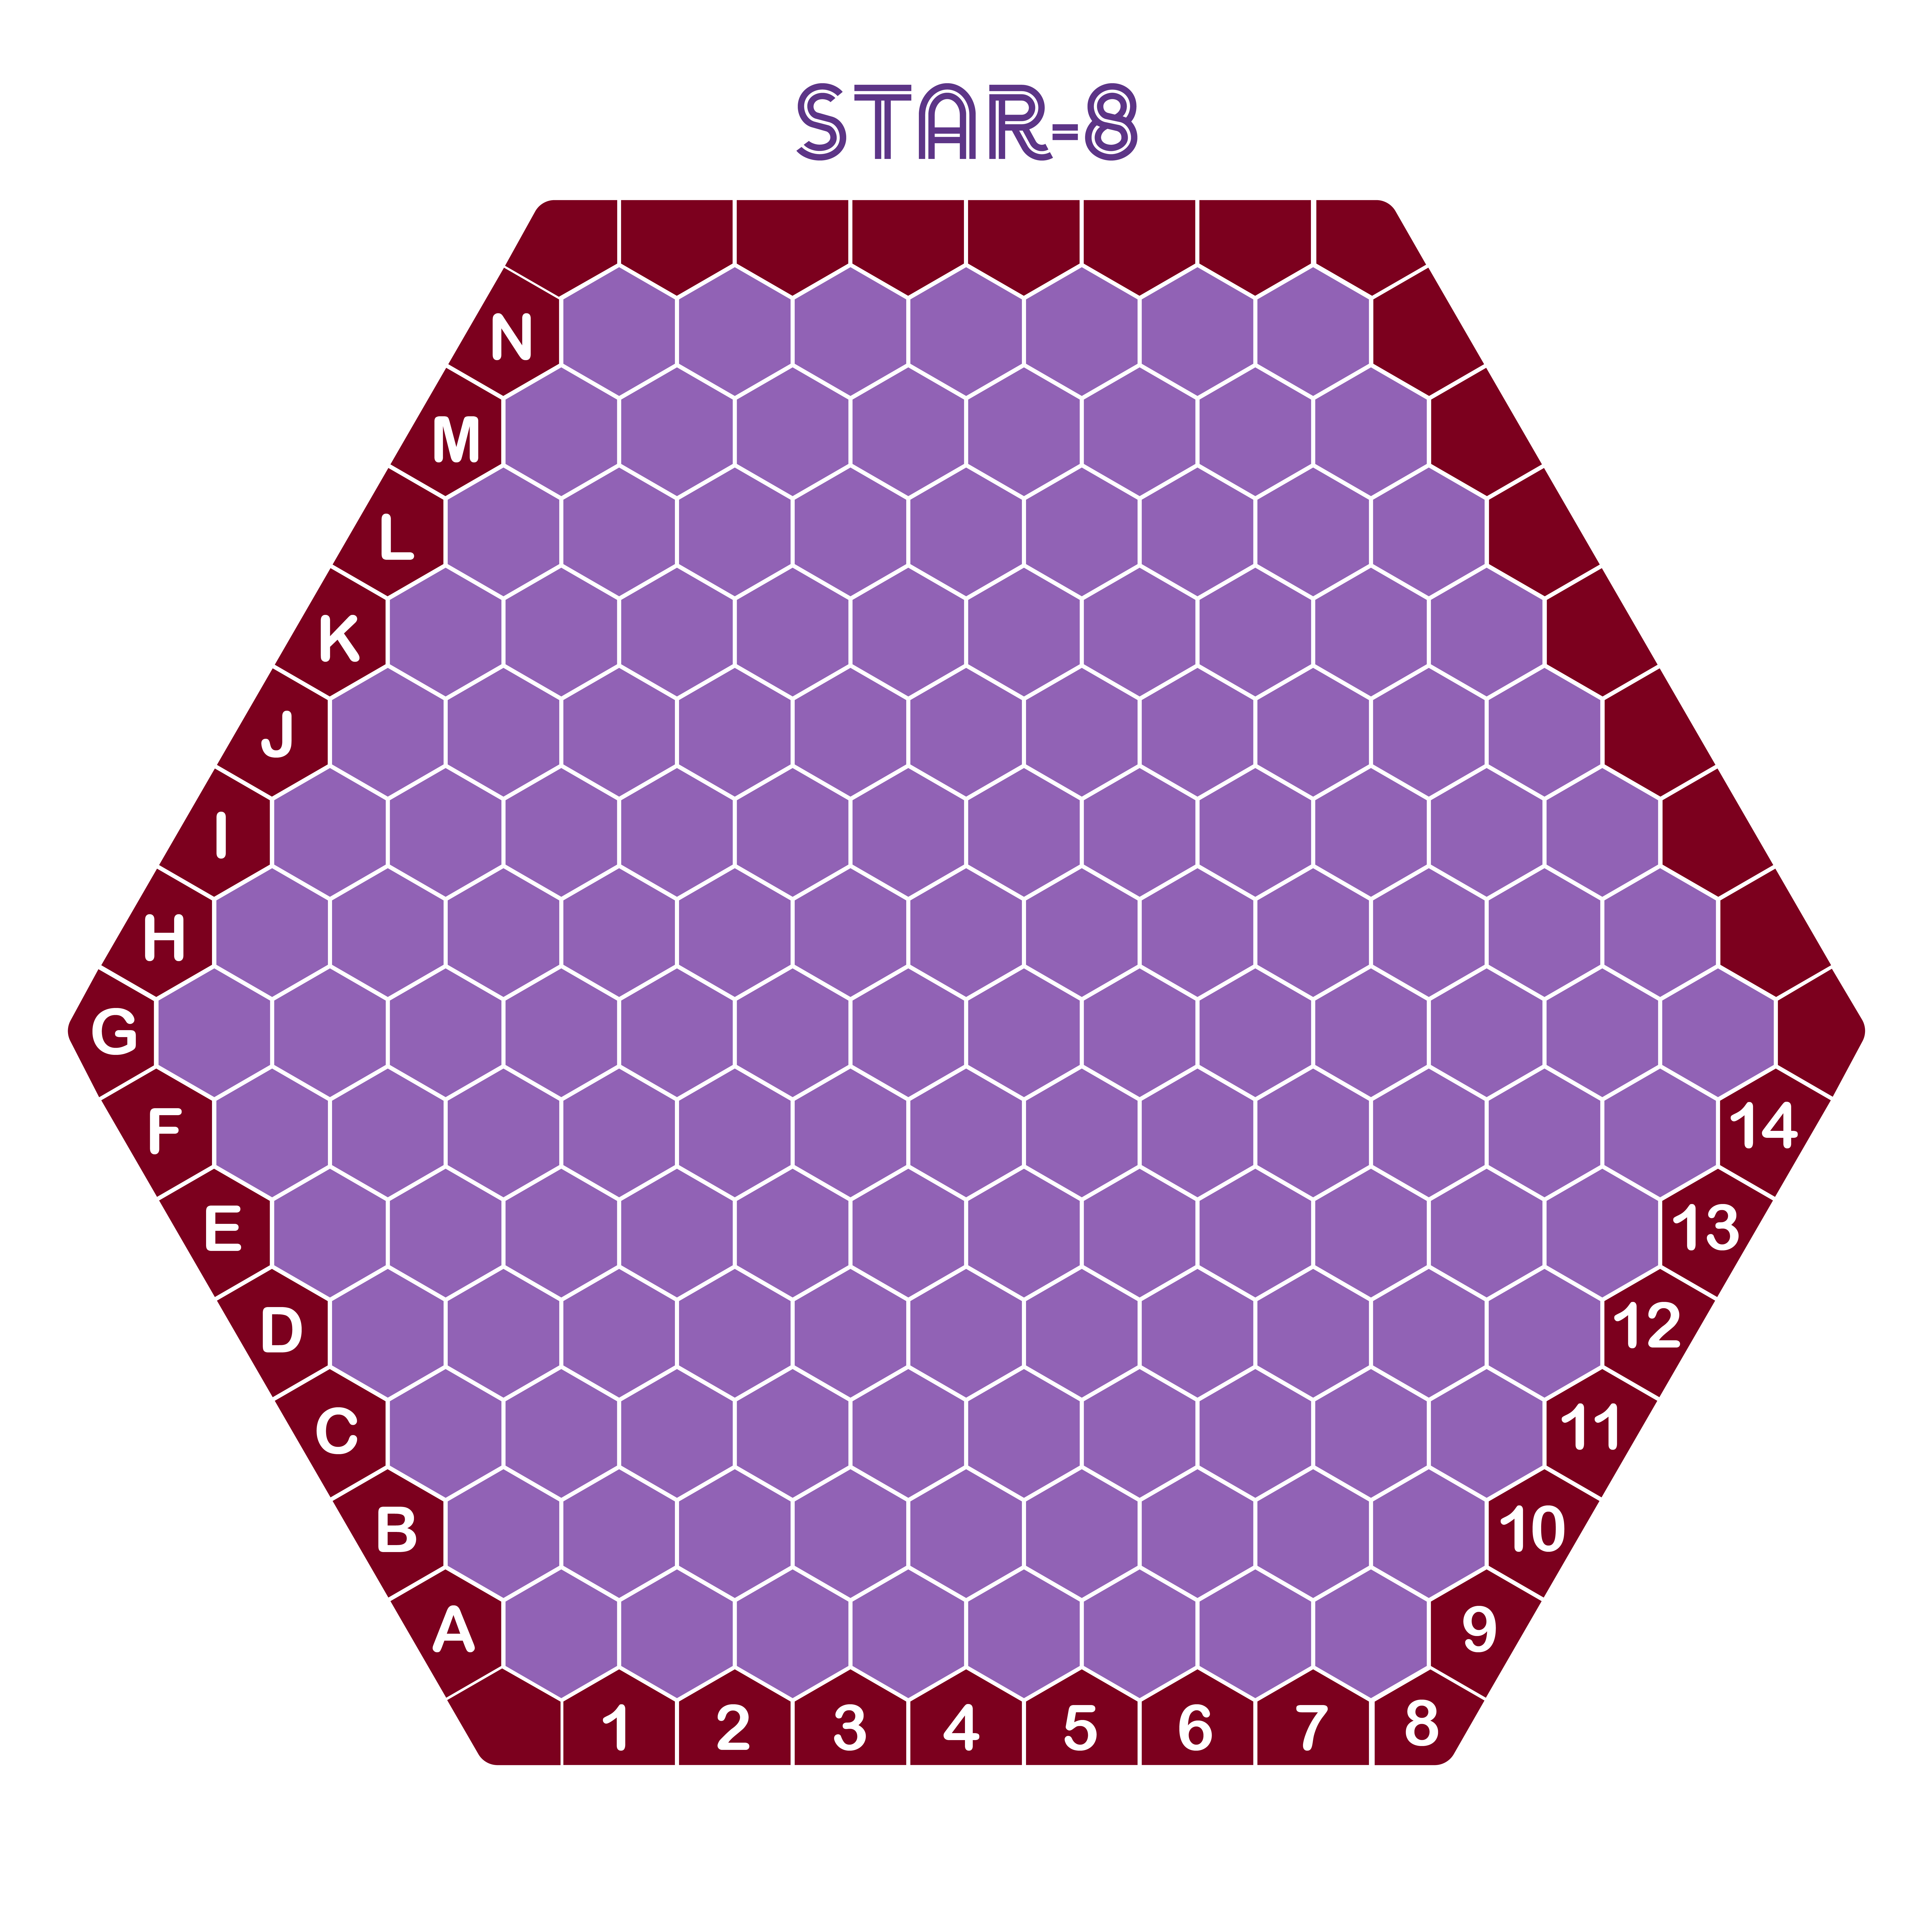
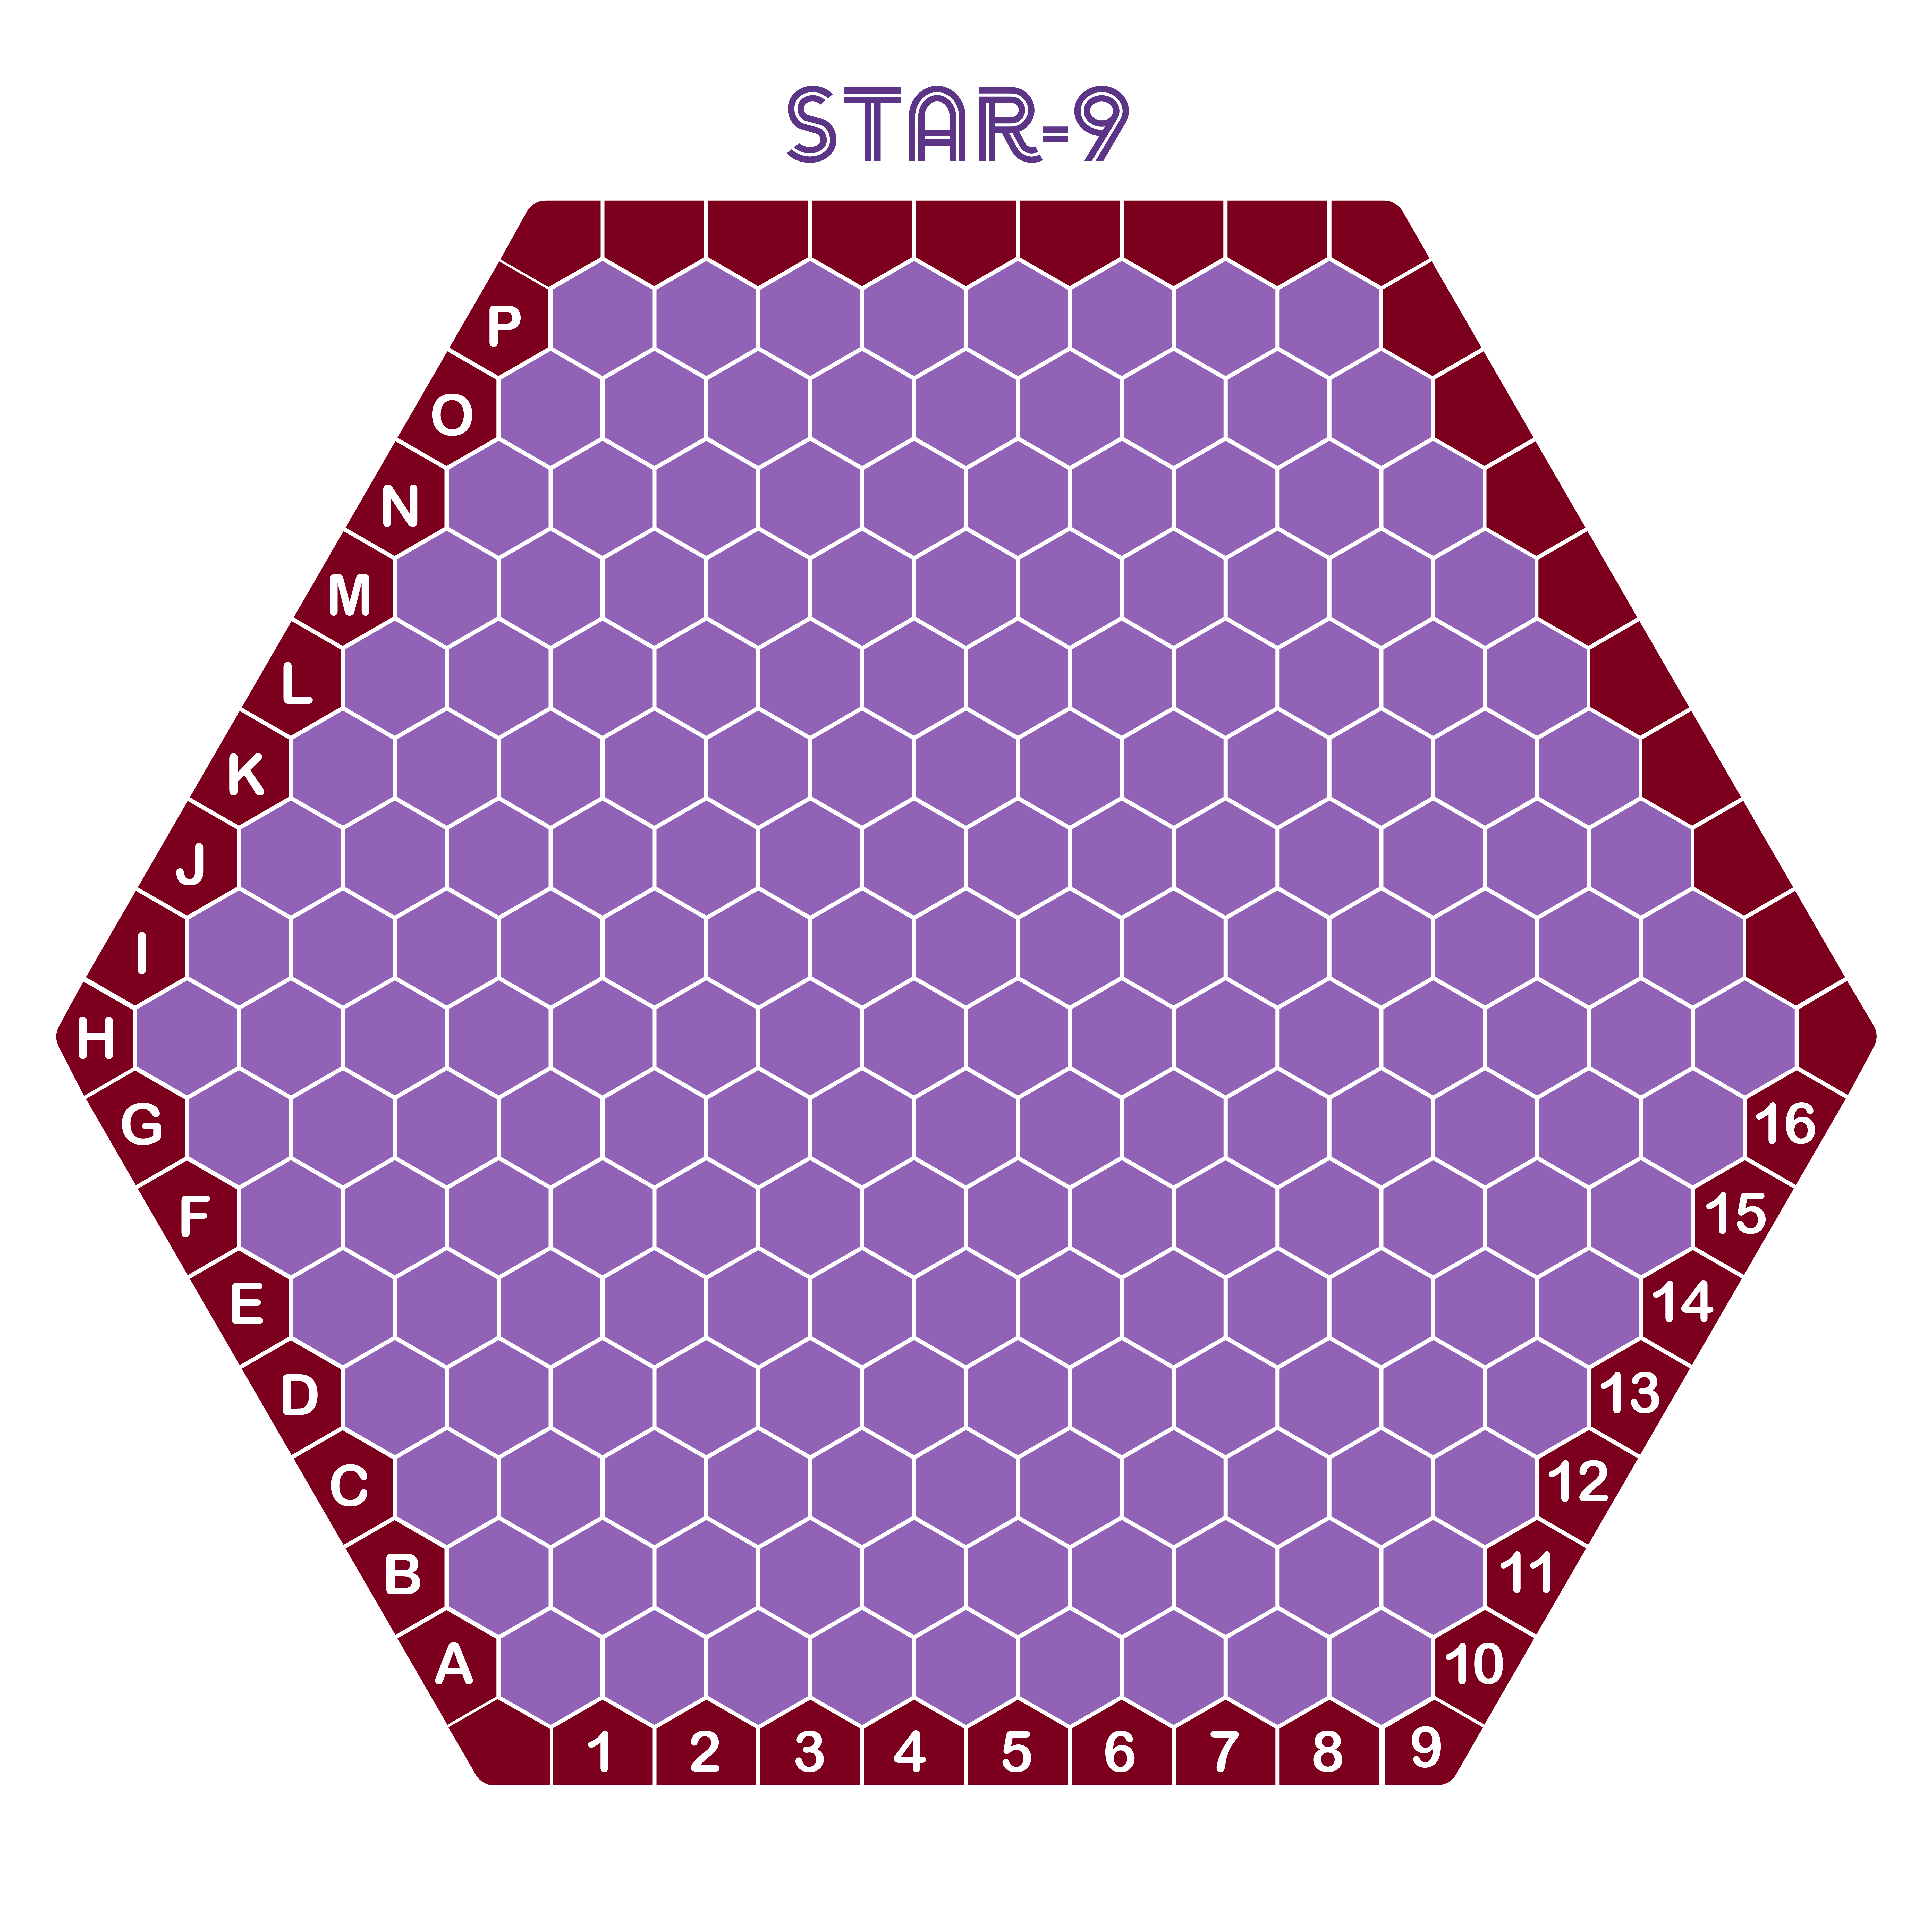
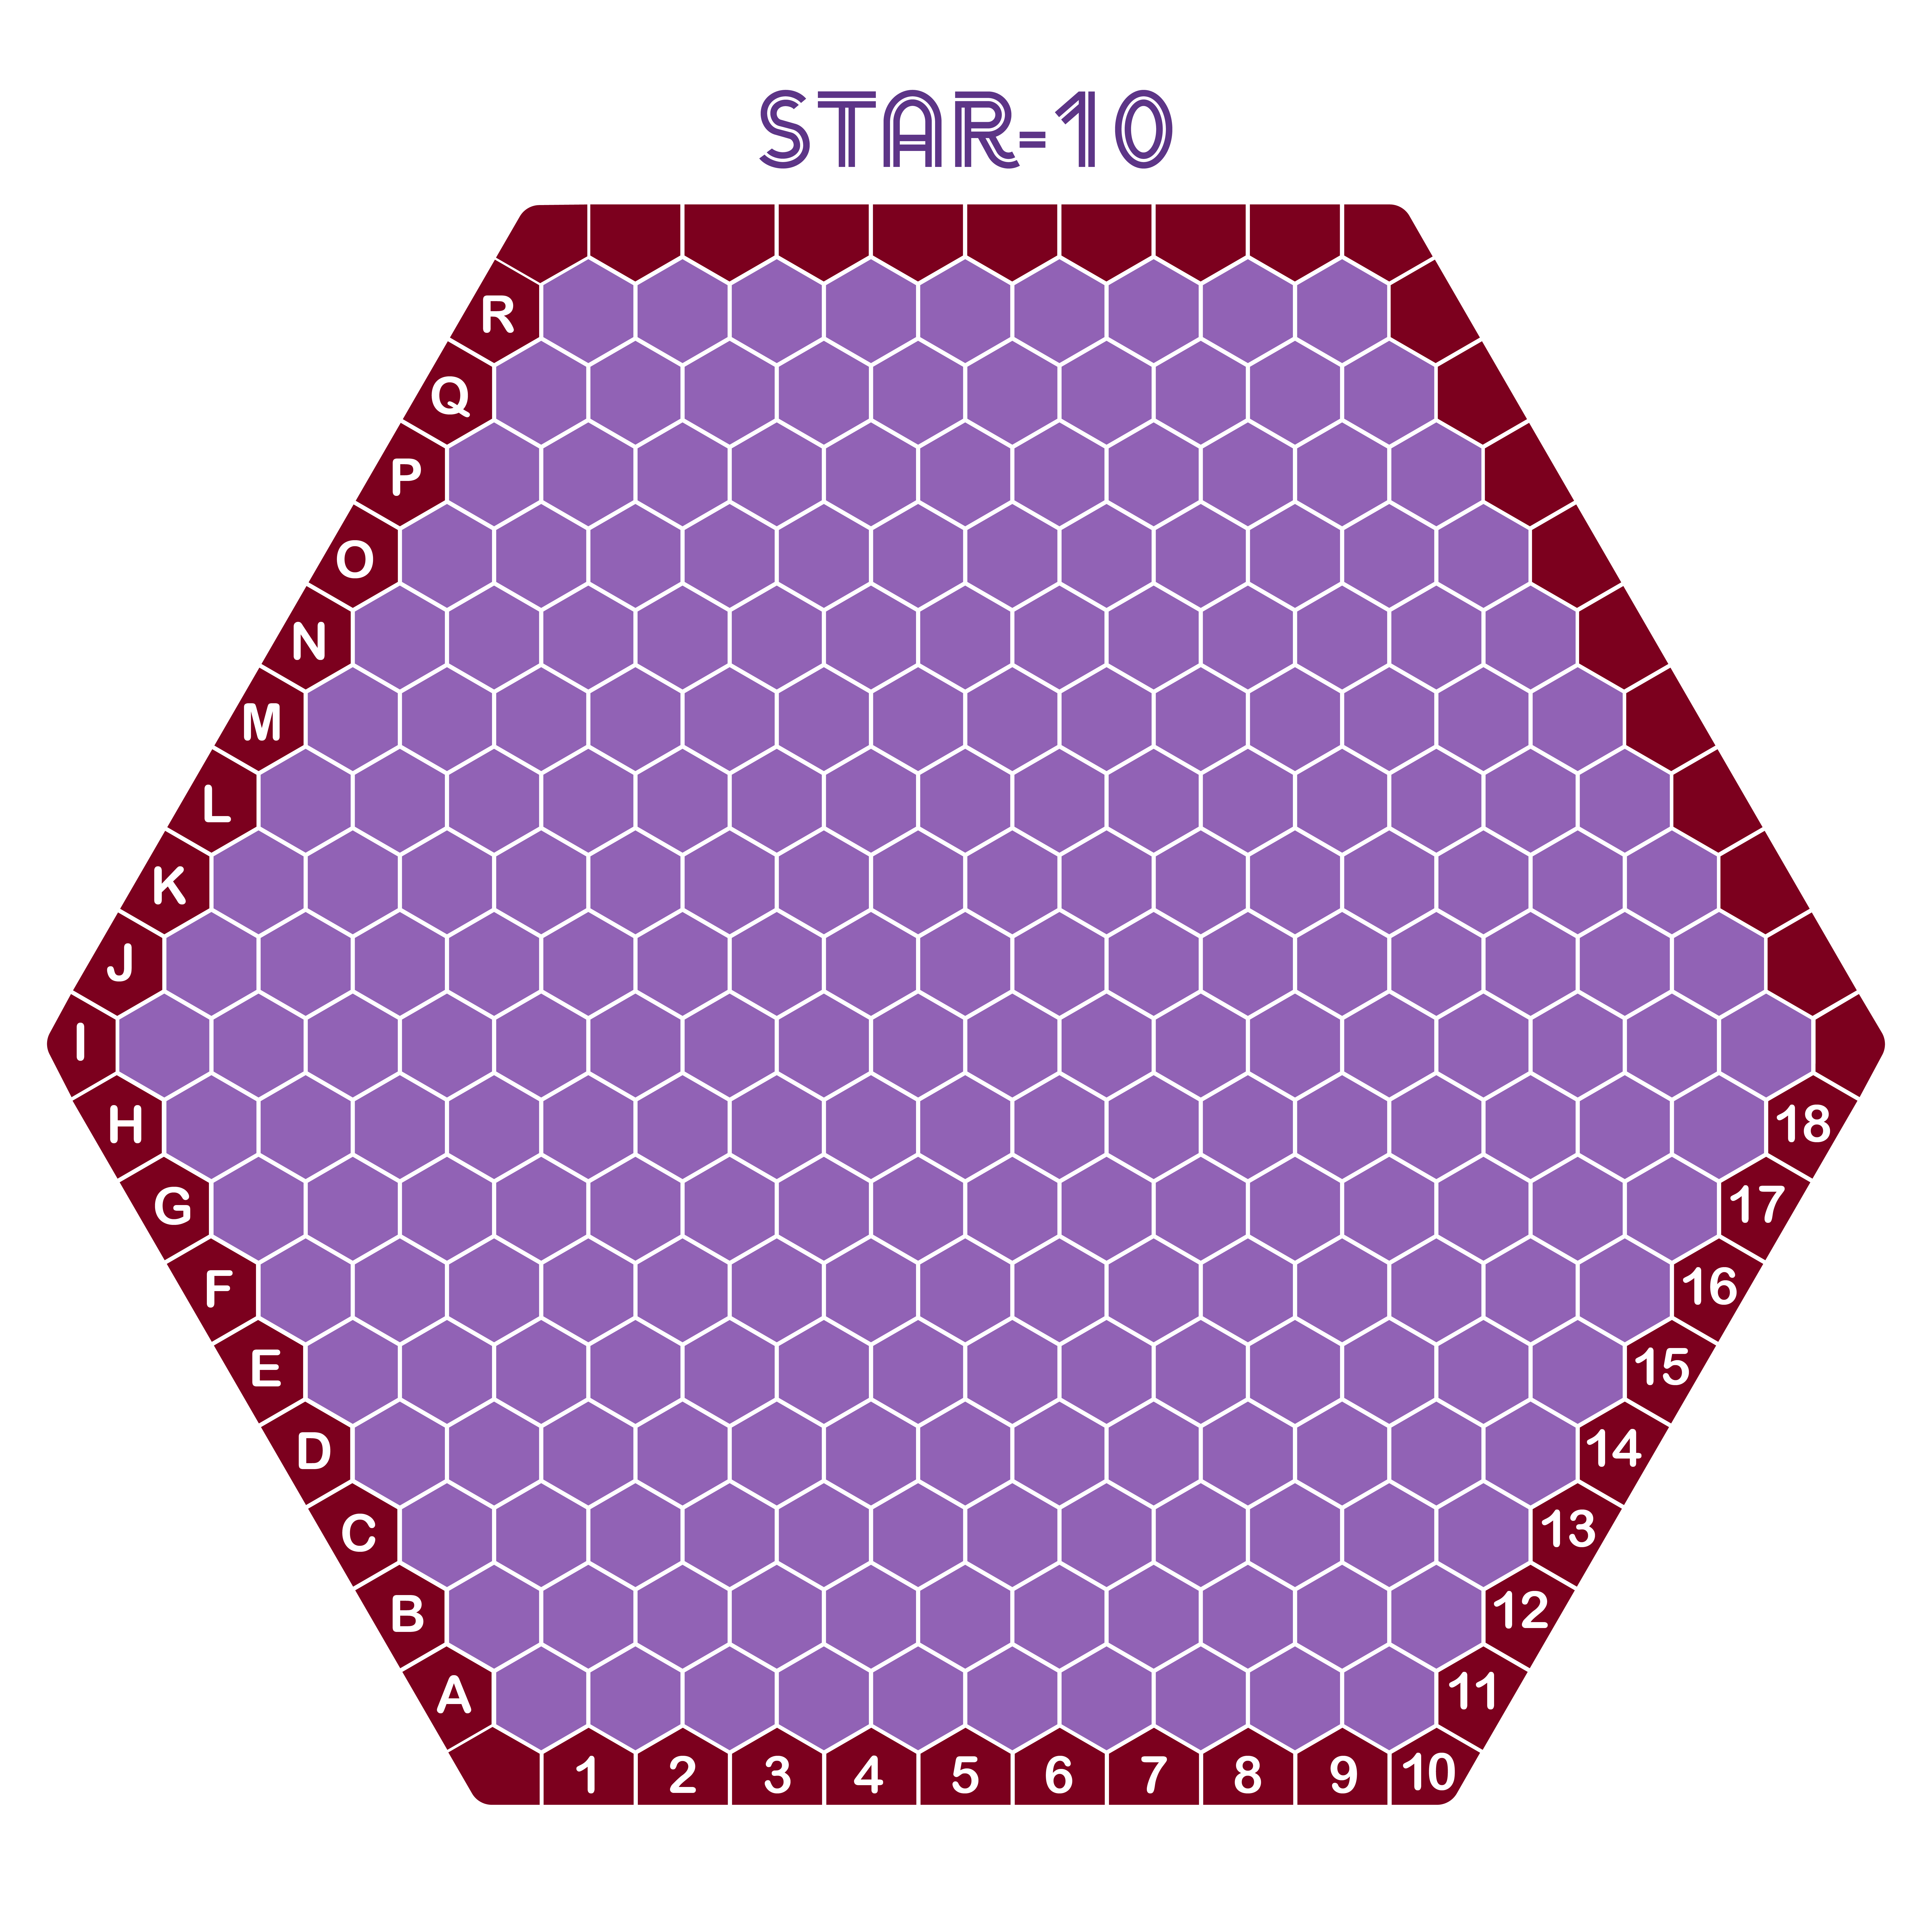
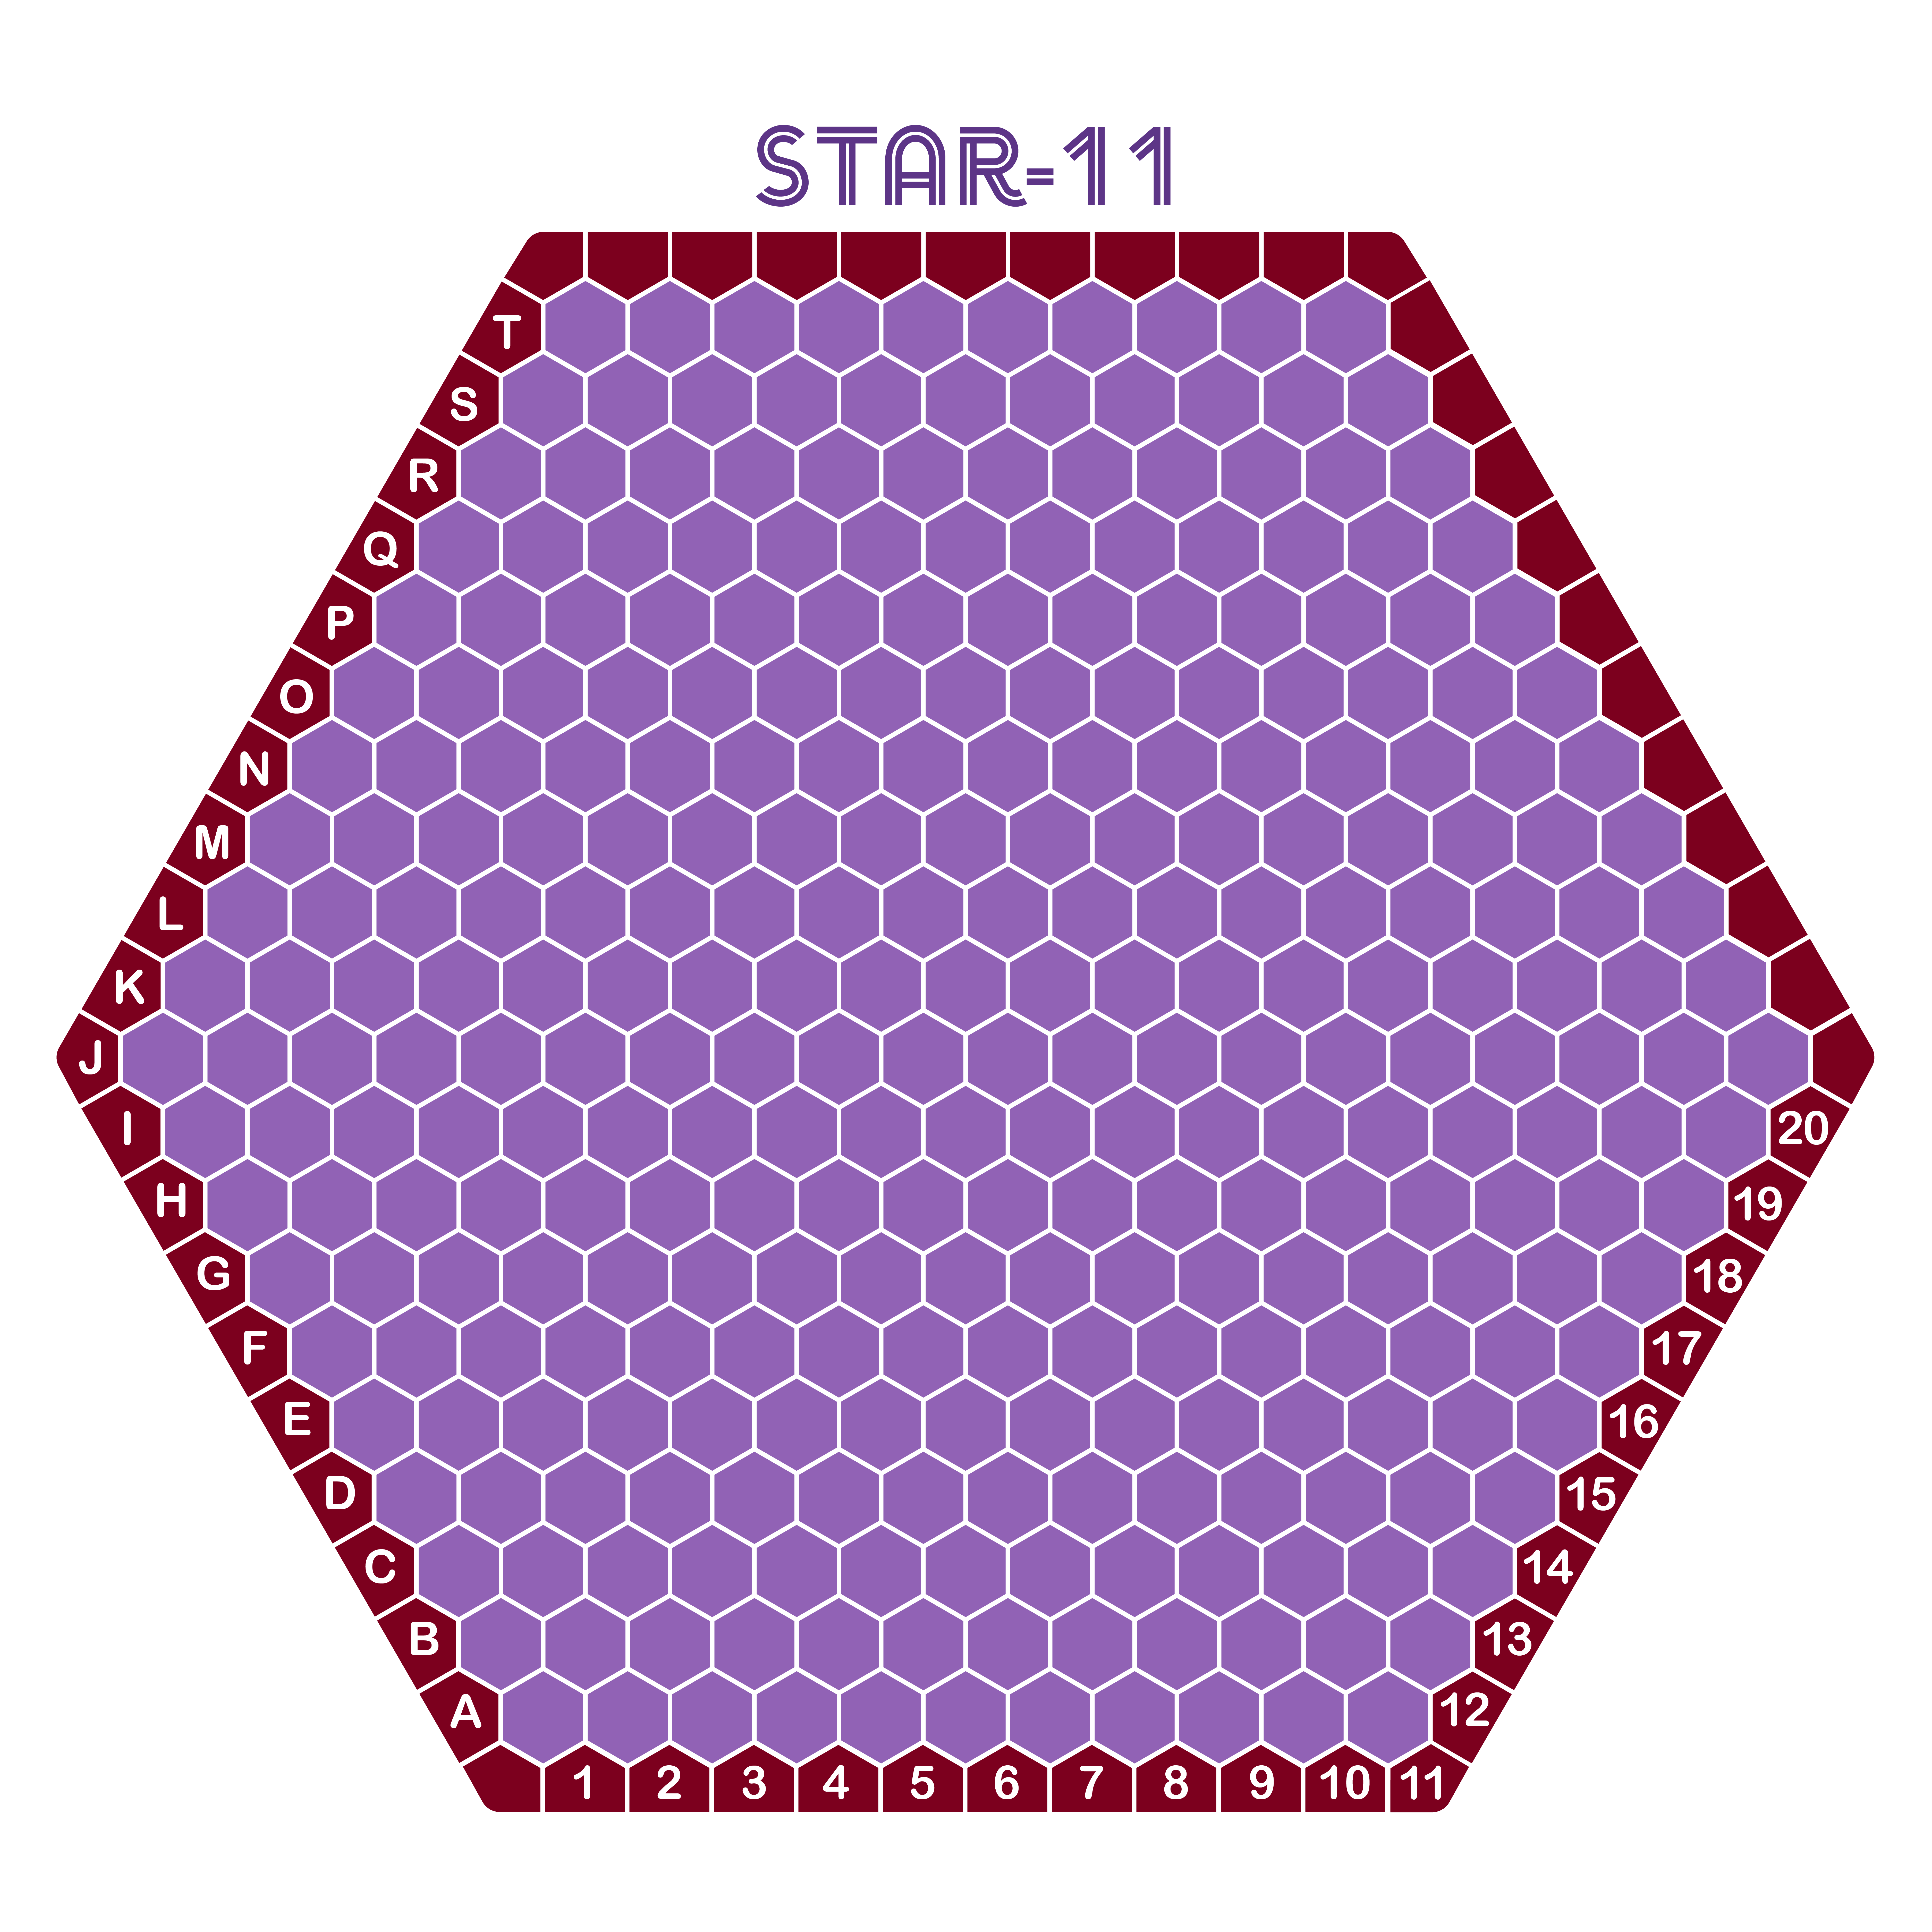
About the boards: As per usual, I made a few different sizes of boards for this game, to allow potential players to choose a game length that suits them. The YvY board is oddly shaped, with three of the sides being two hexes longer than the other three; as a consequence of this shape and the need to place sprouts evenly around the outside edges, the boards all have even-length sides. As is typical with games like this, the larger boards produce longer games of greater strategic complexity; the size-12 board above has 330 interior cells and 33 sprouts for a total of 363 cells, almost exactly the same as a Go board’s 361 points. The size-12 board is thus suited for intense strategic contests; the size-8 board is great for beginners and more casual games, while size-10 offers a nice balance between depth and brevity. If you’re feeling particularly adventurous, have a go on the size-14 board, with a whopping 468 interior cells and 39 sprouts.
New boards for old favourites
Side Stitch
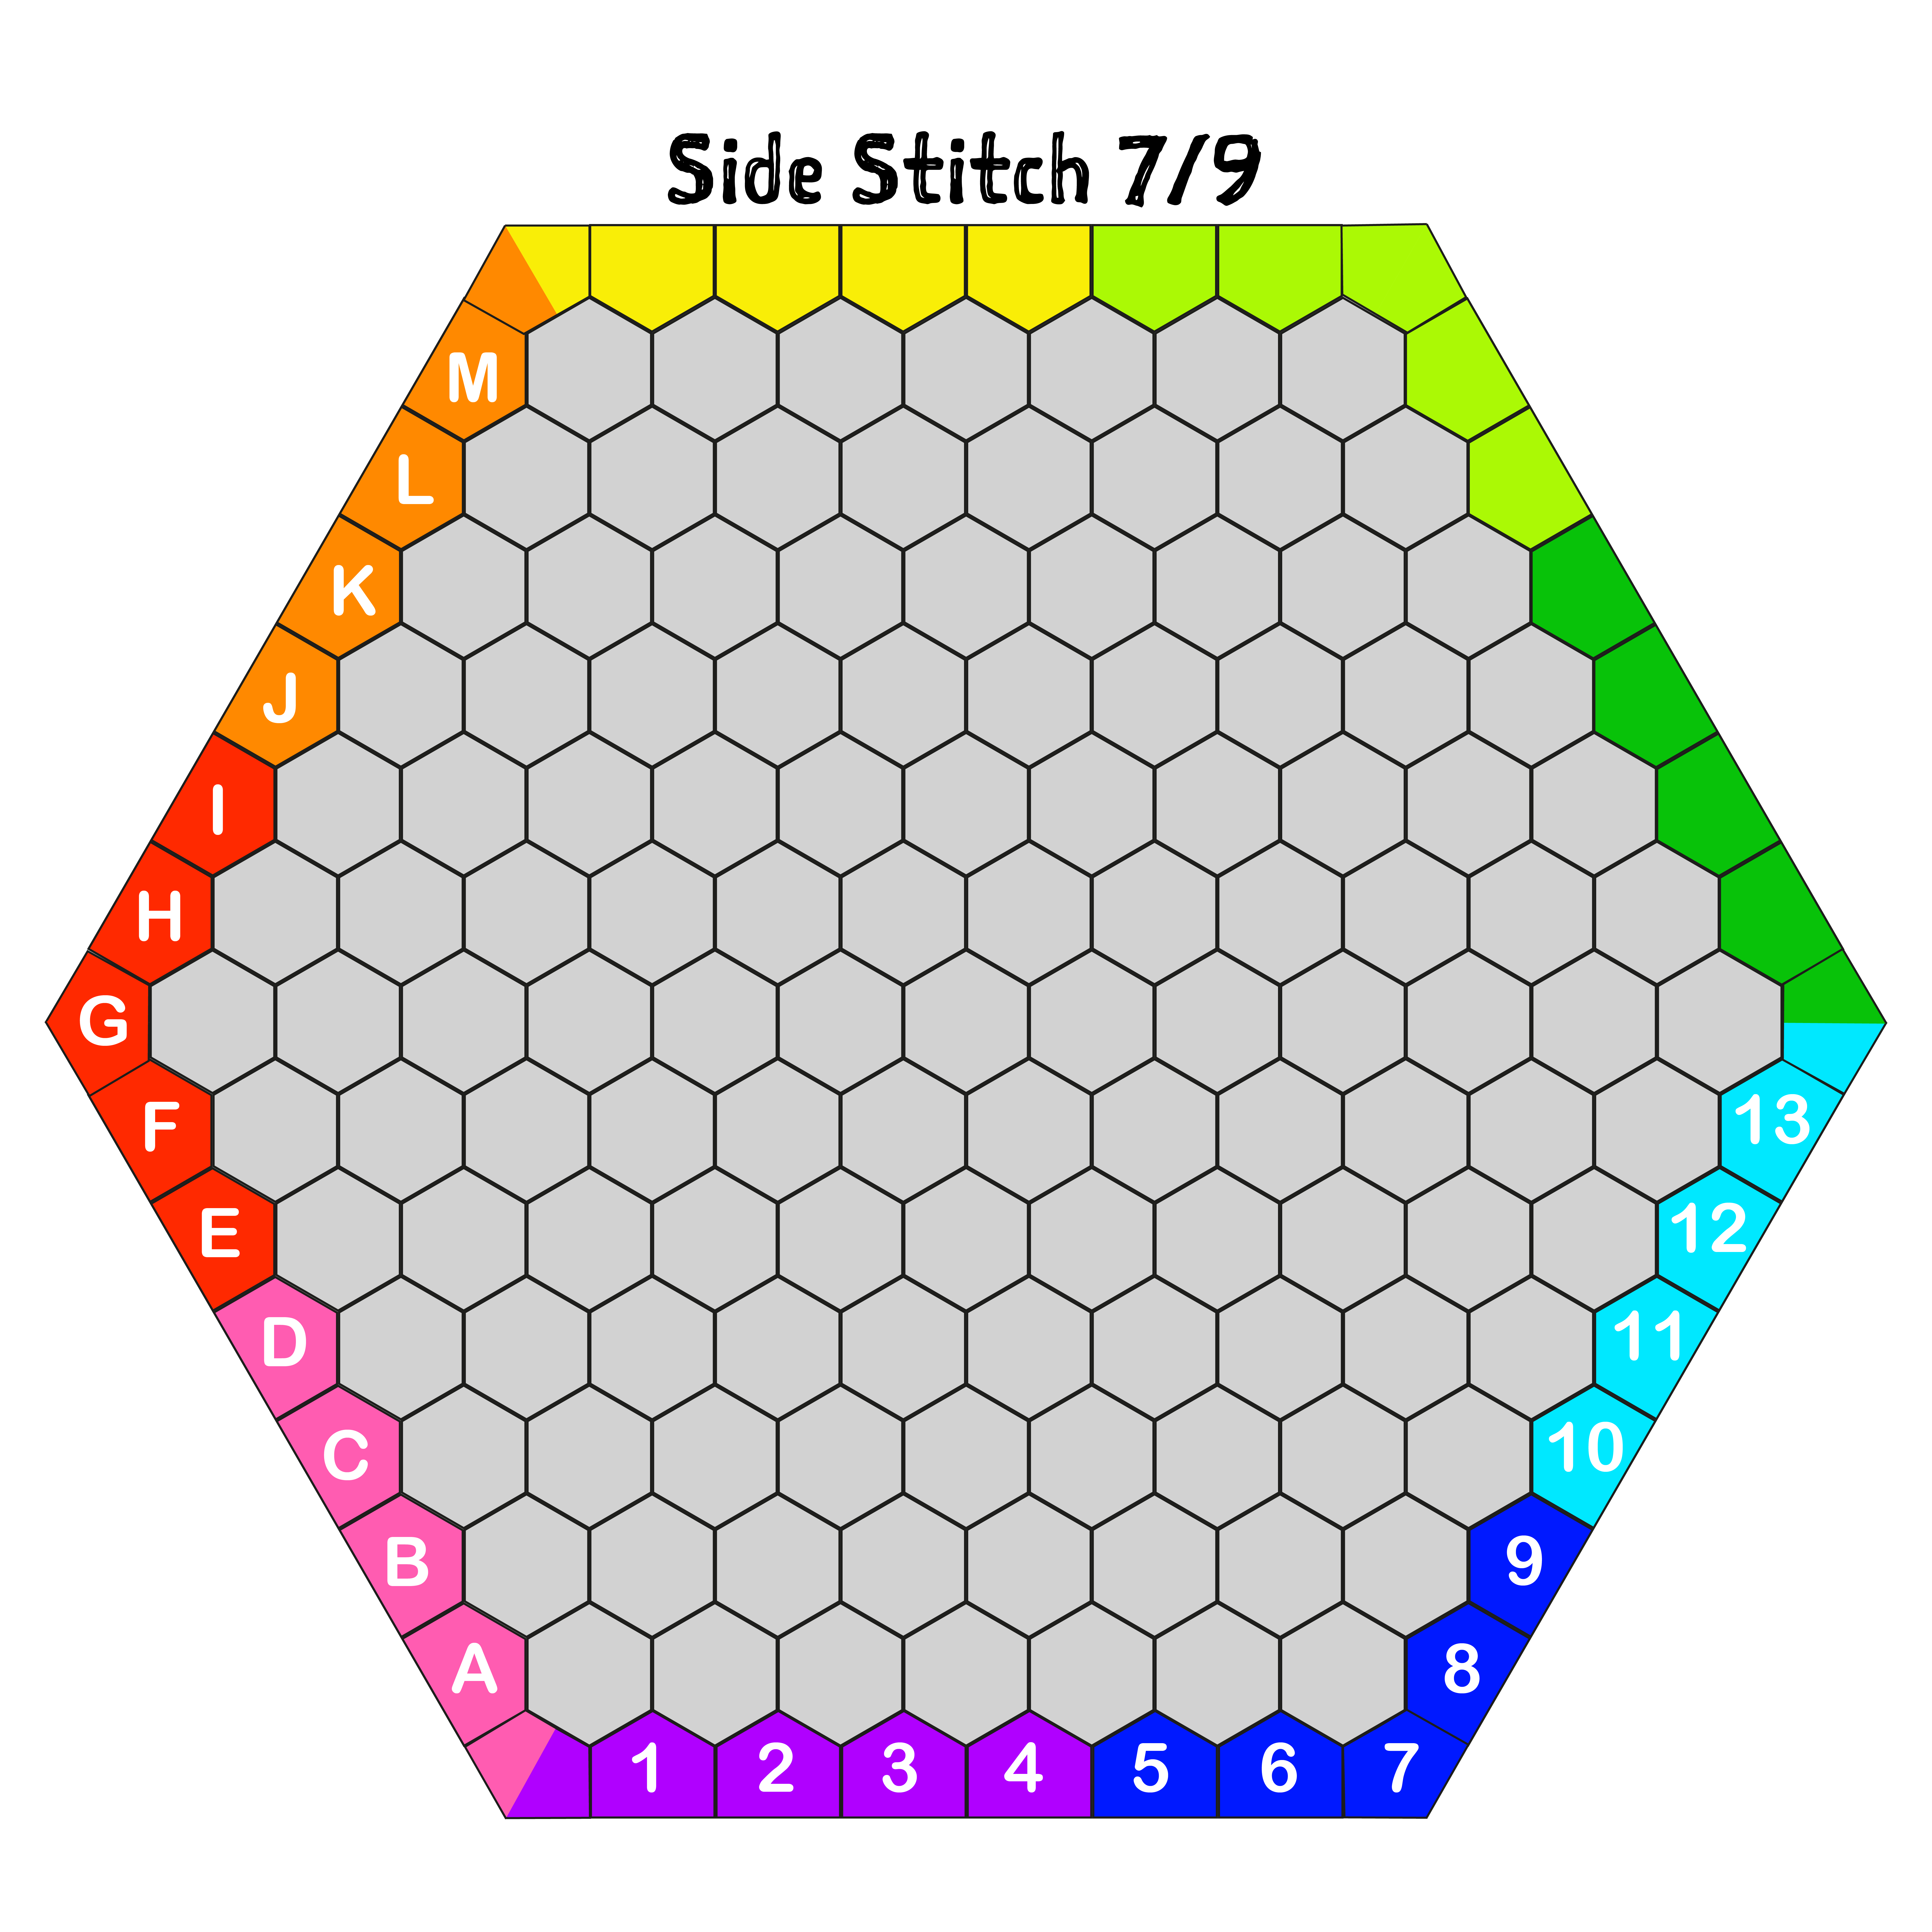

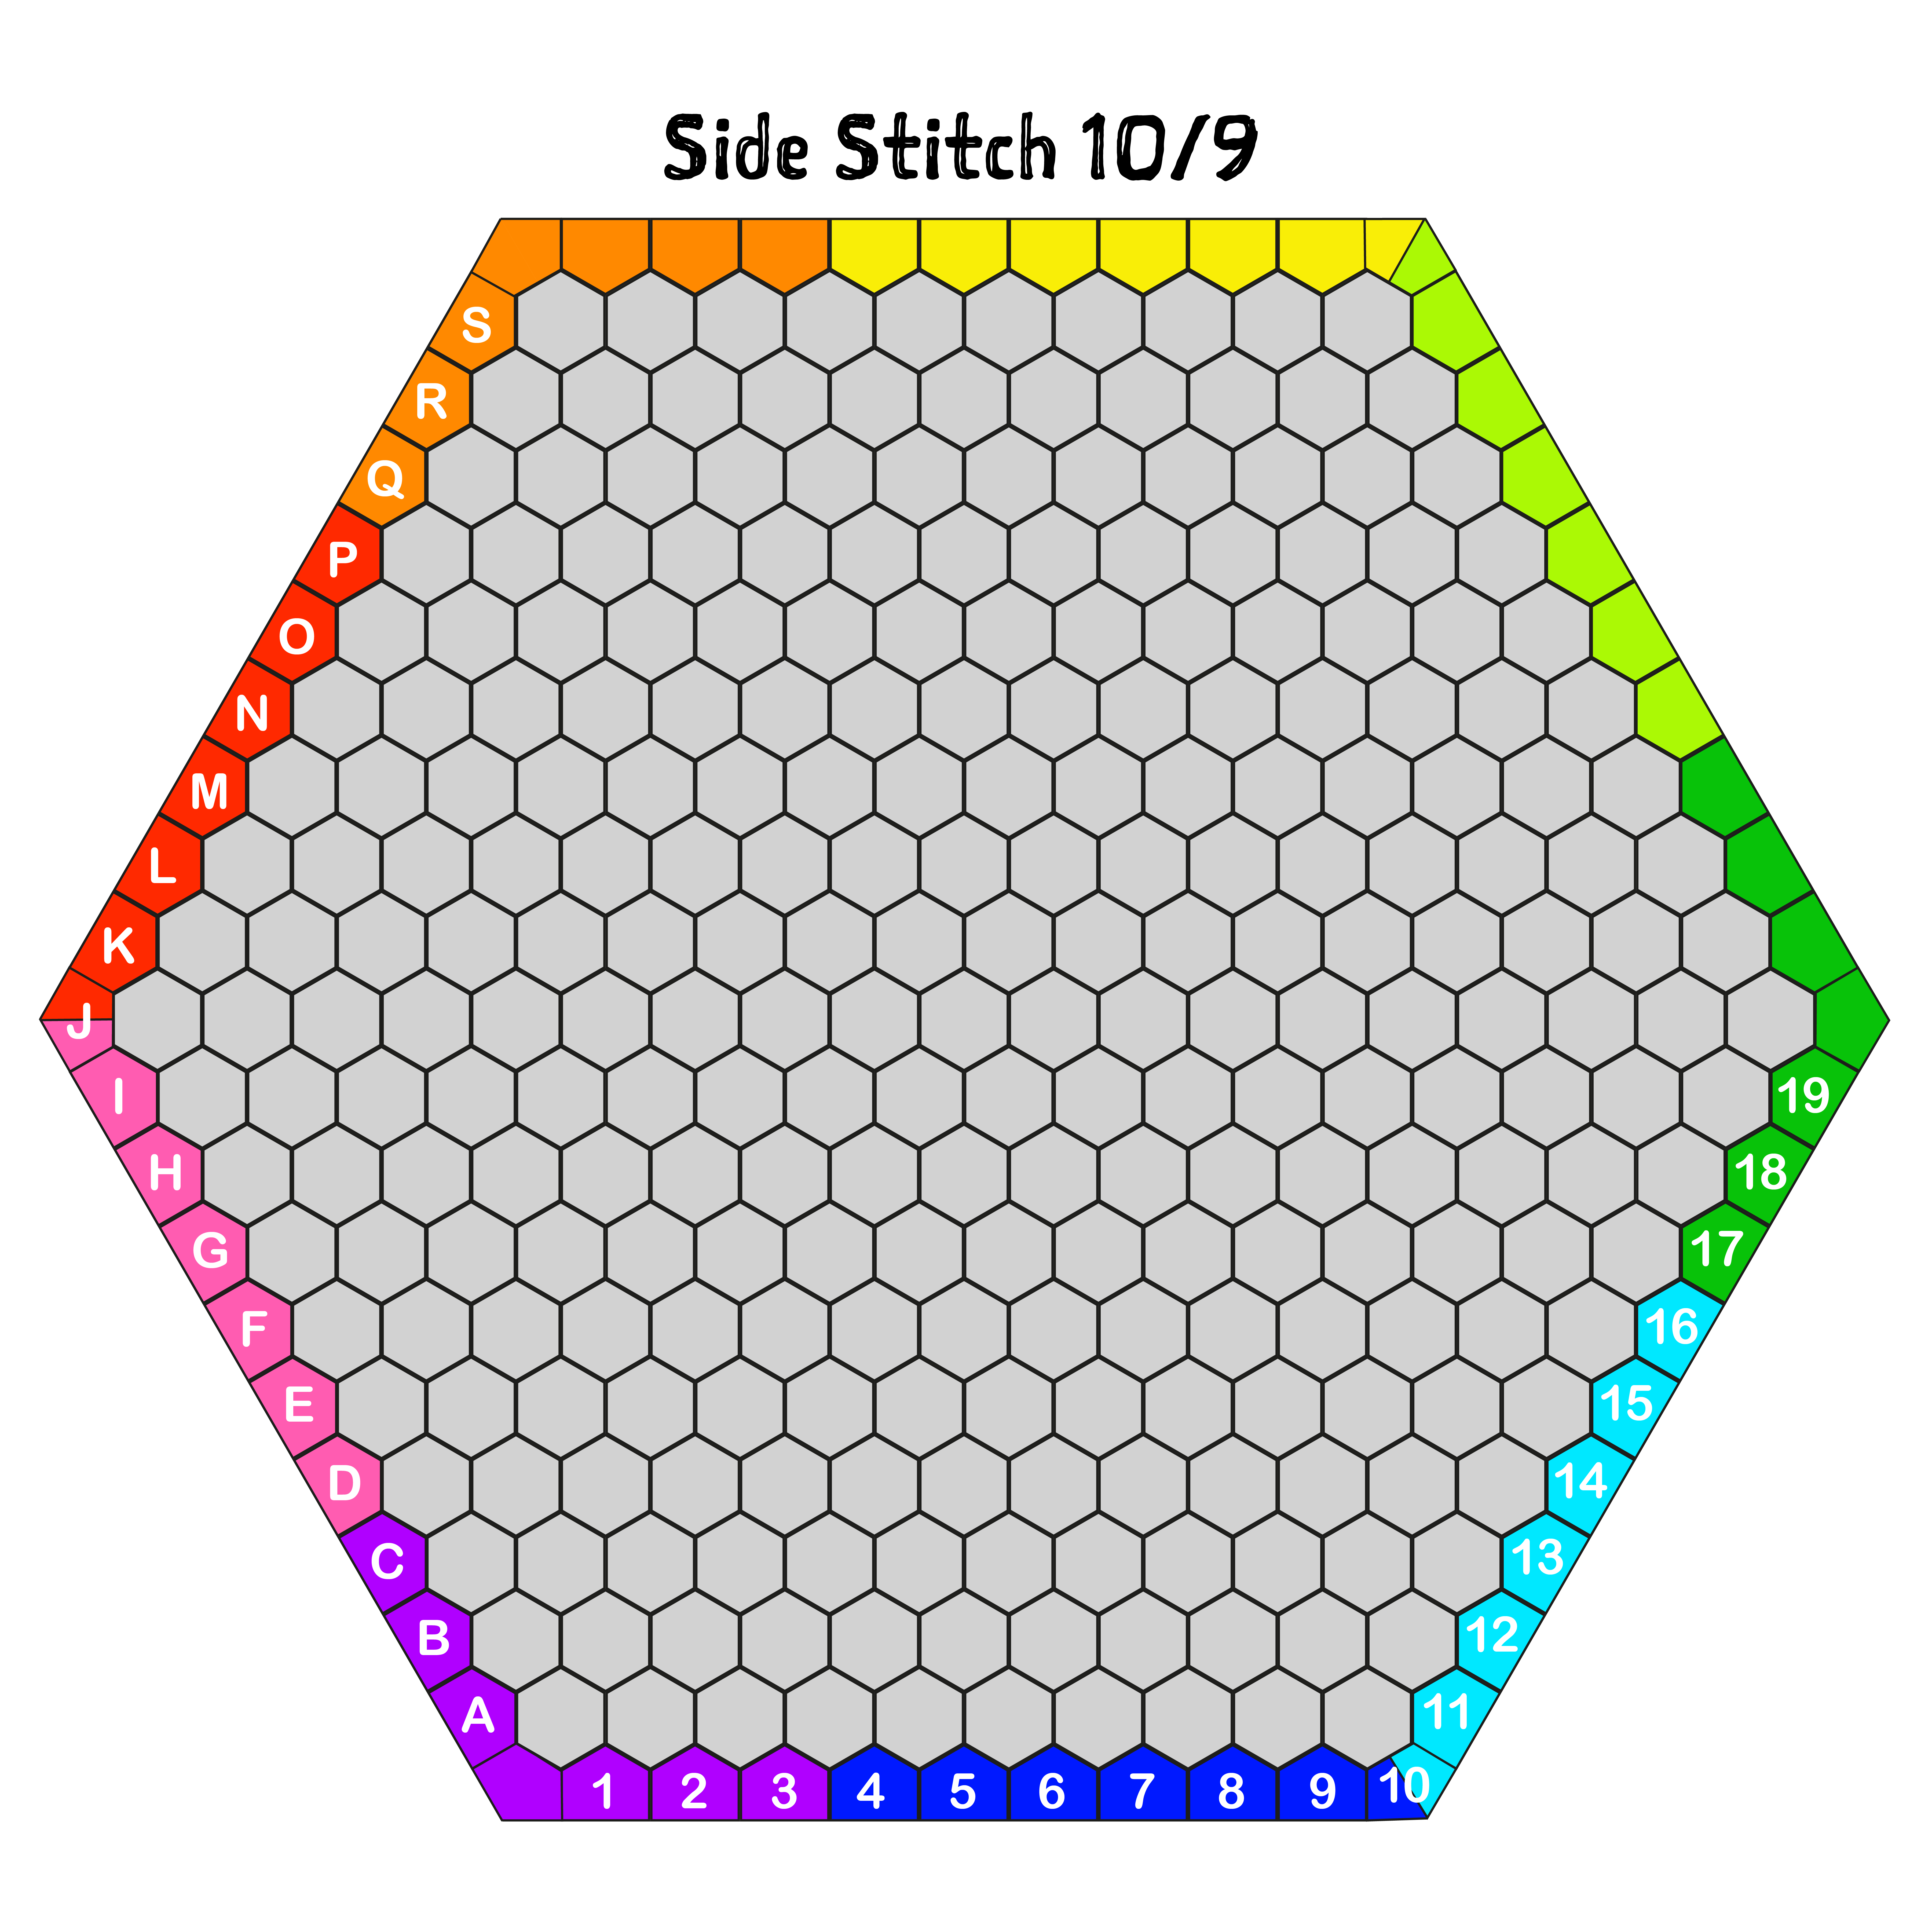
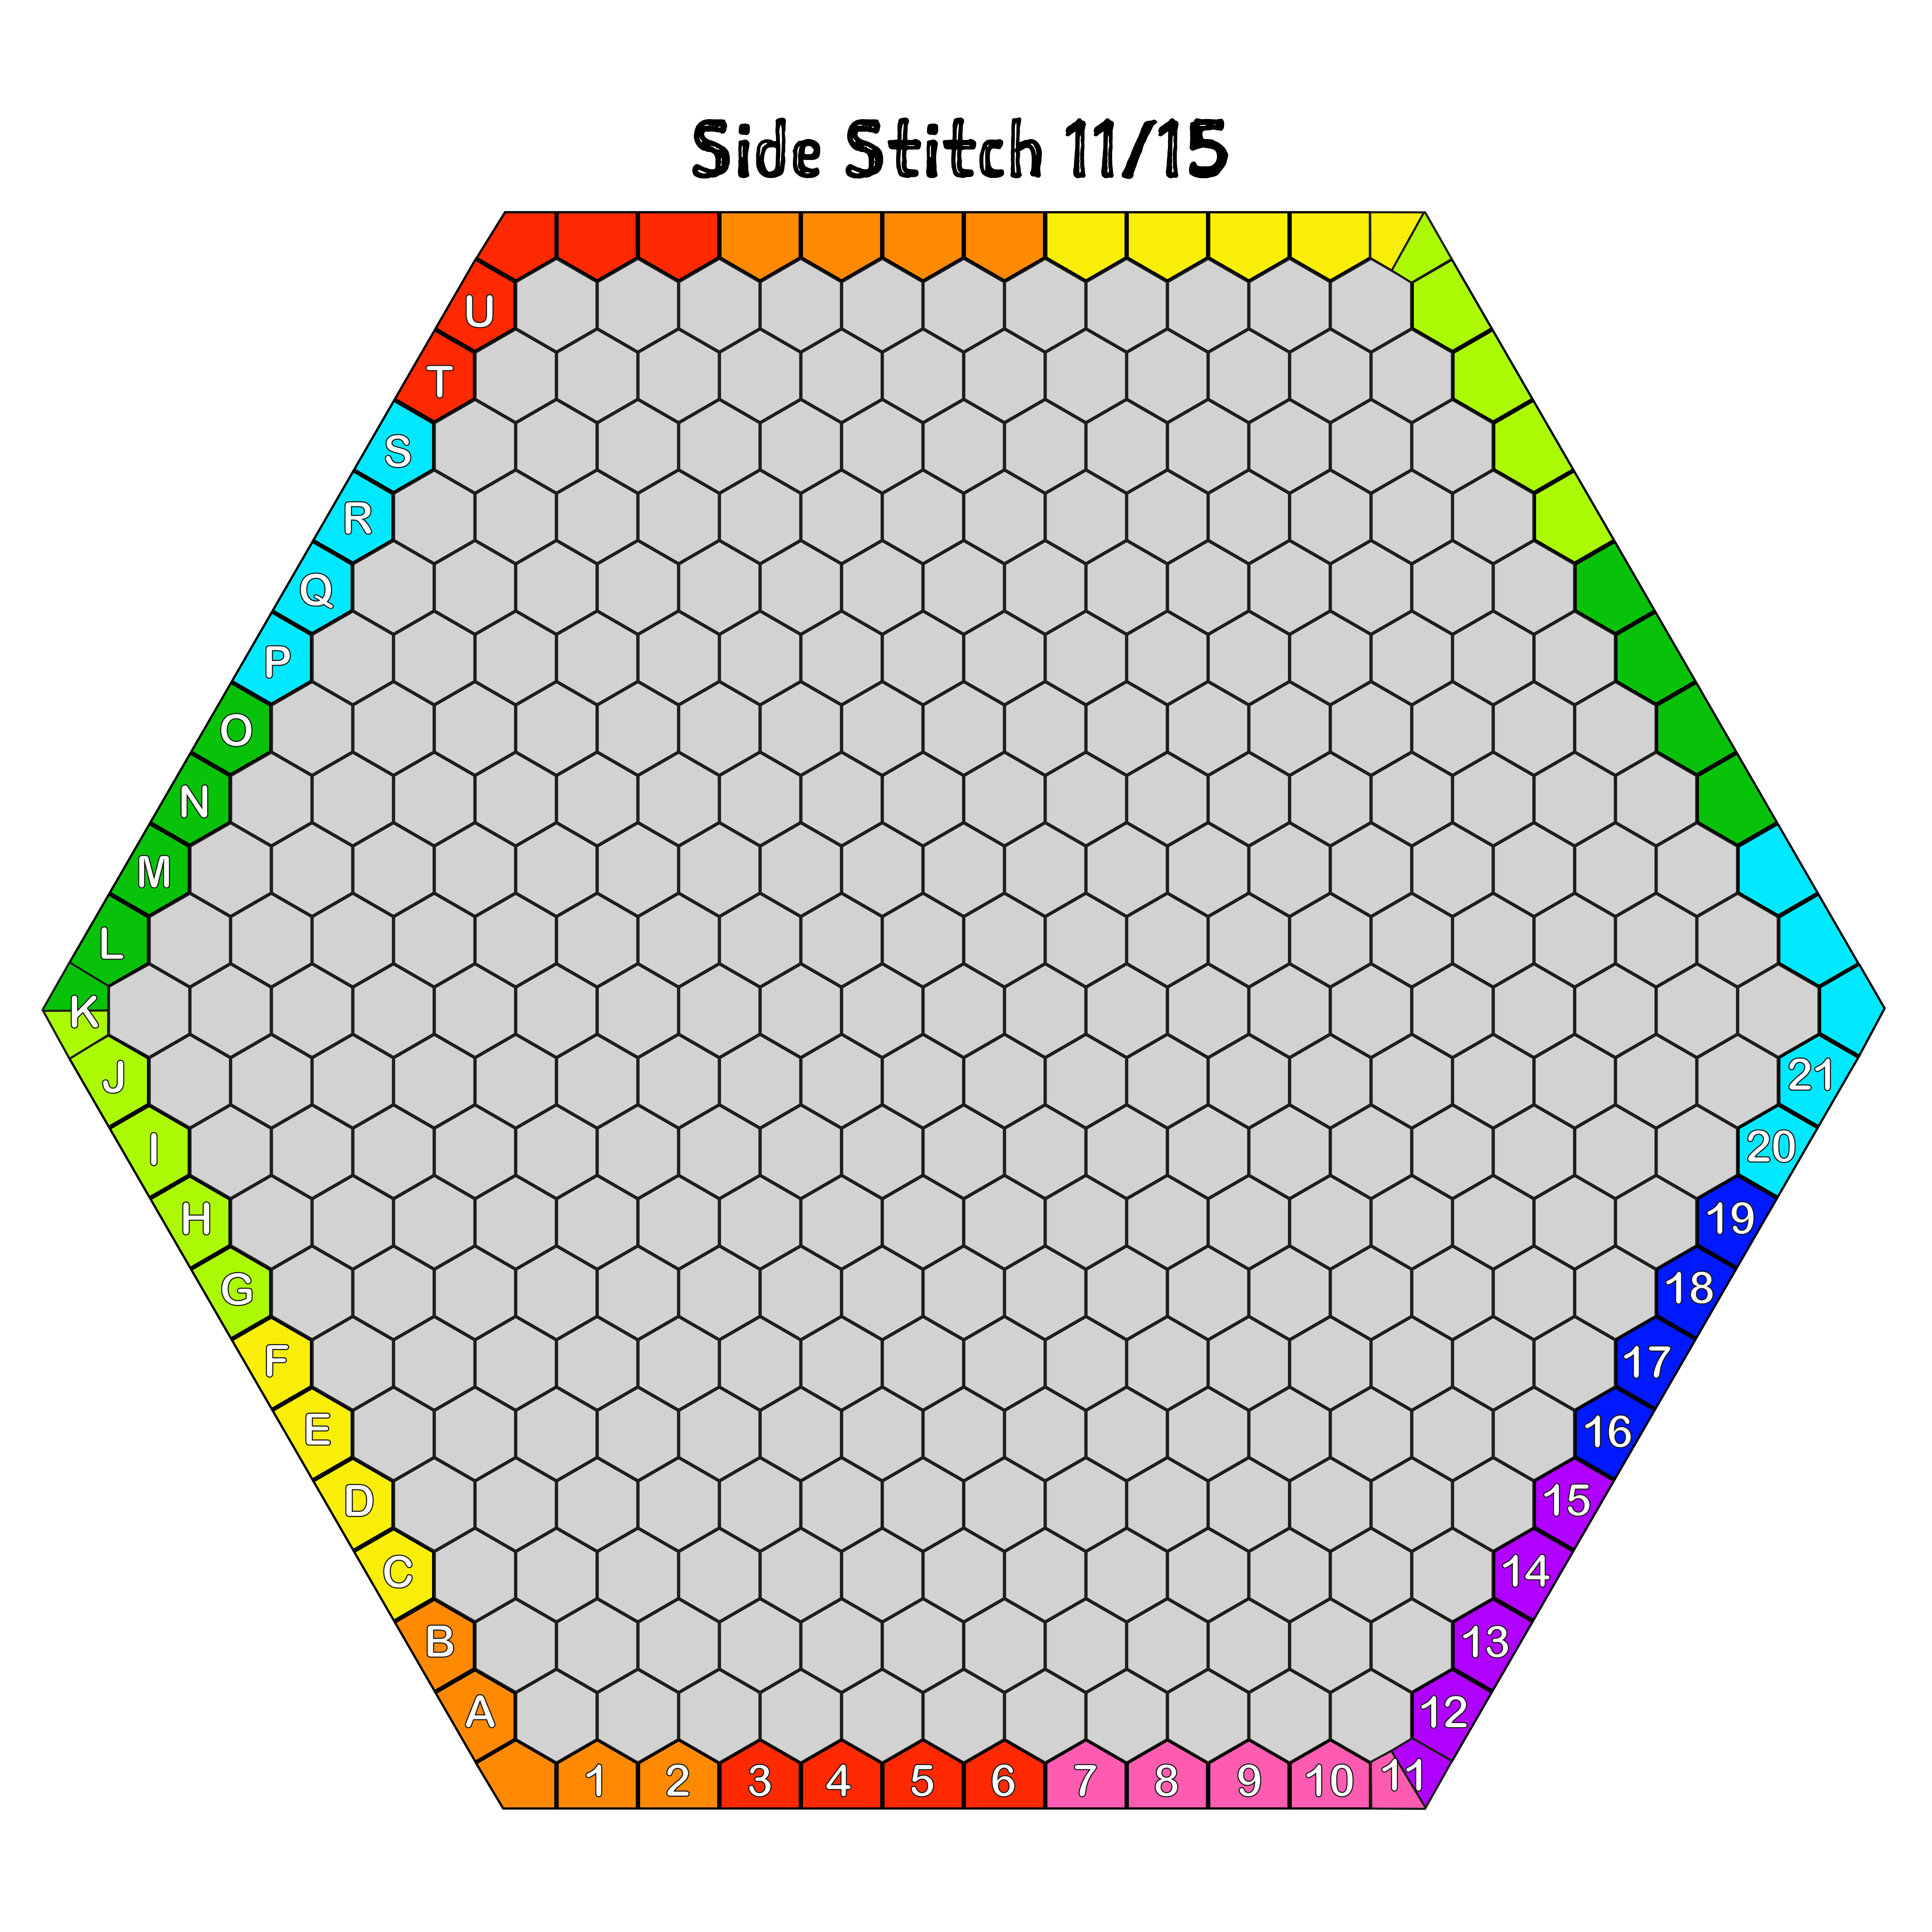
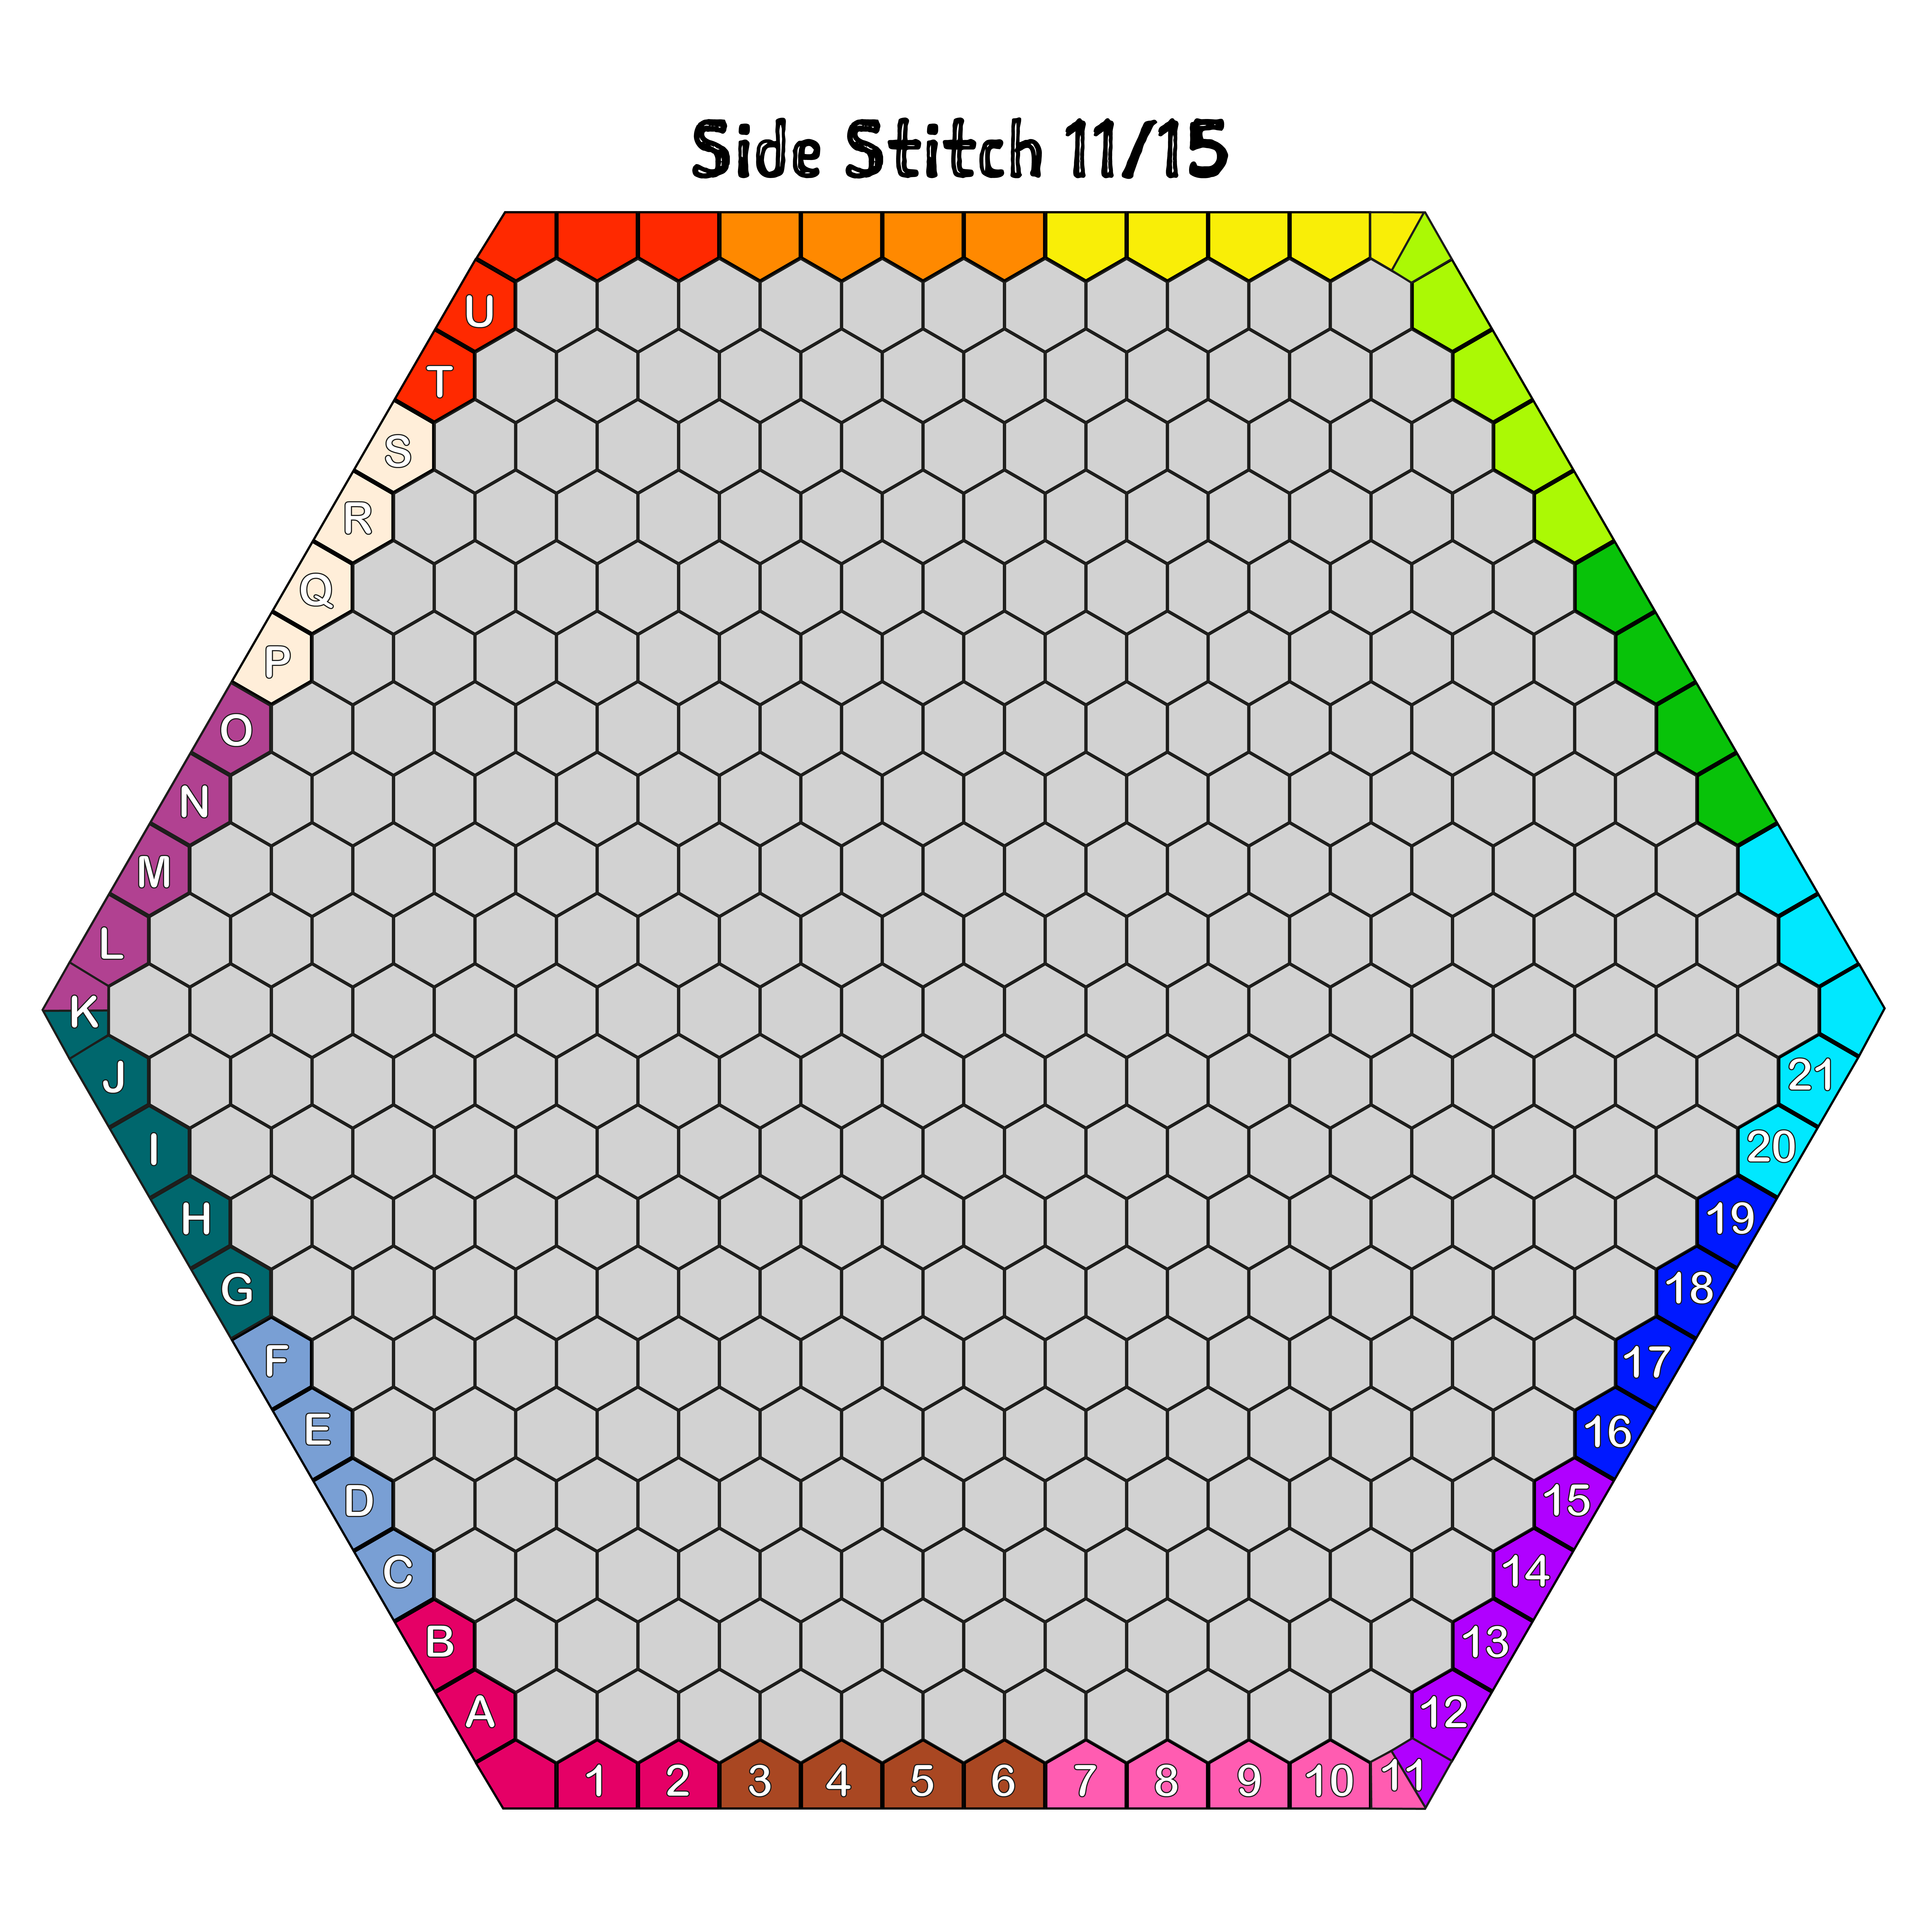
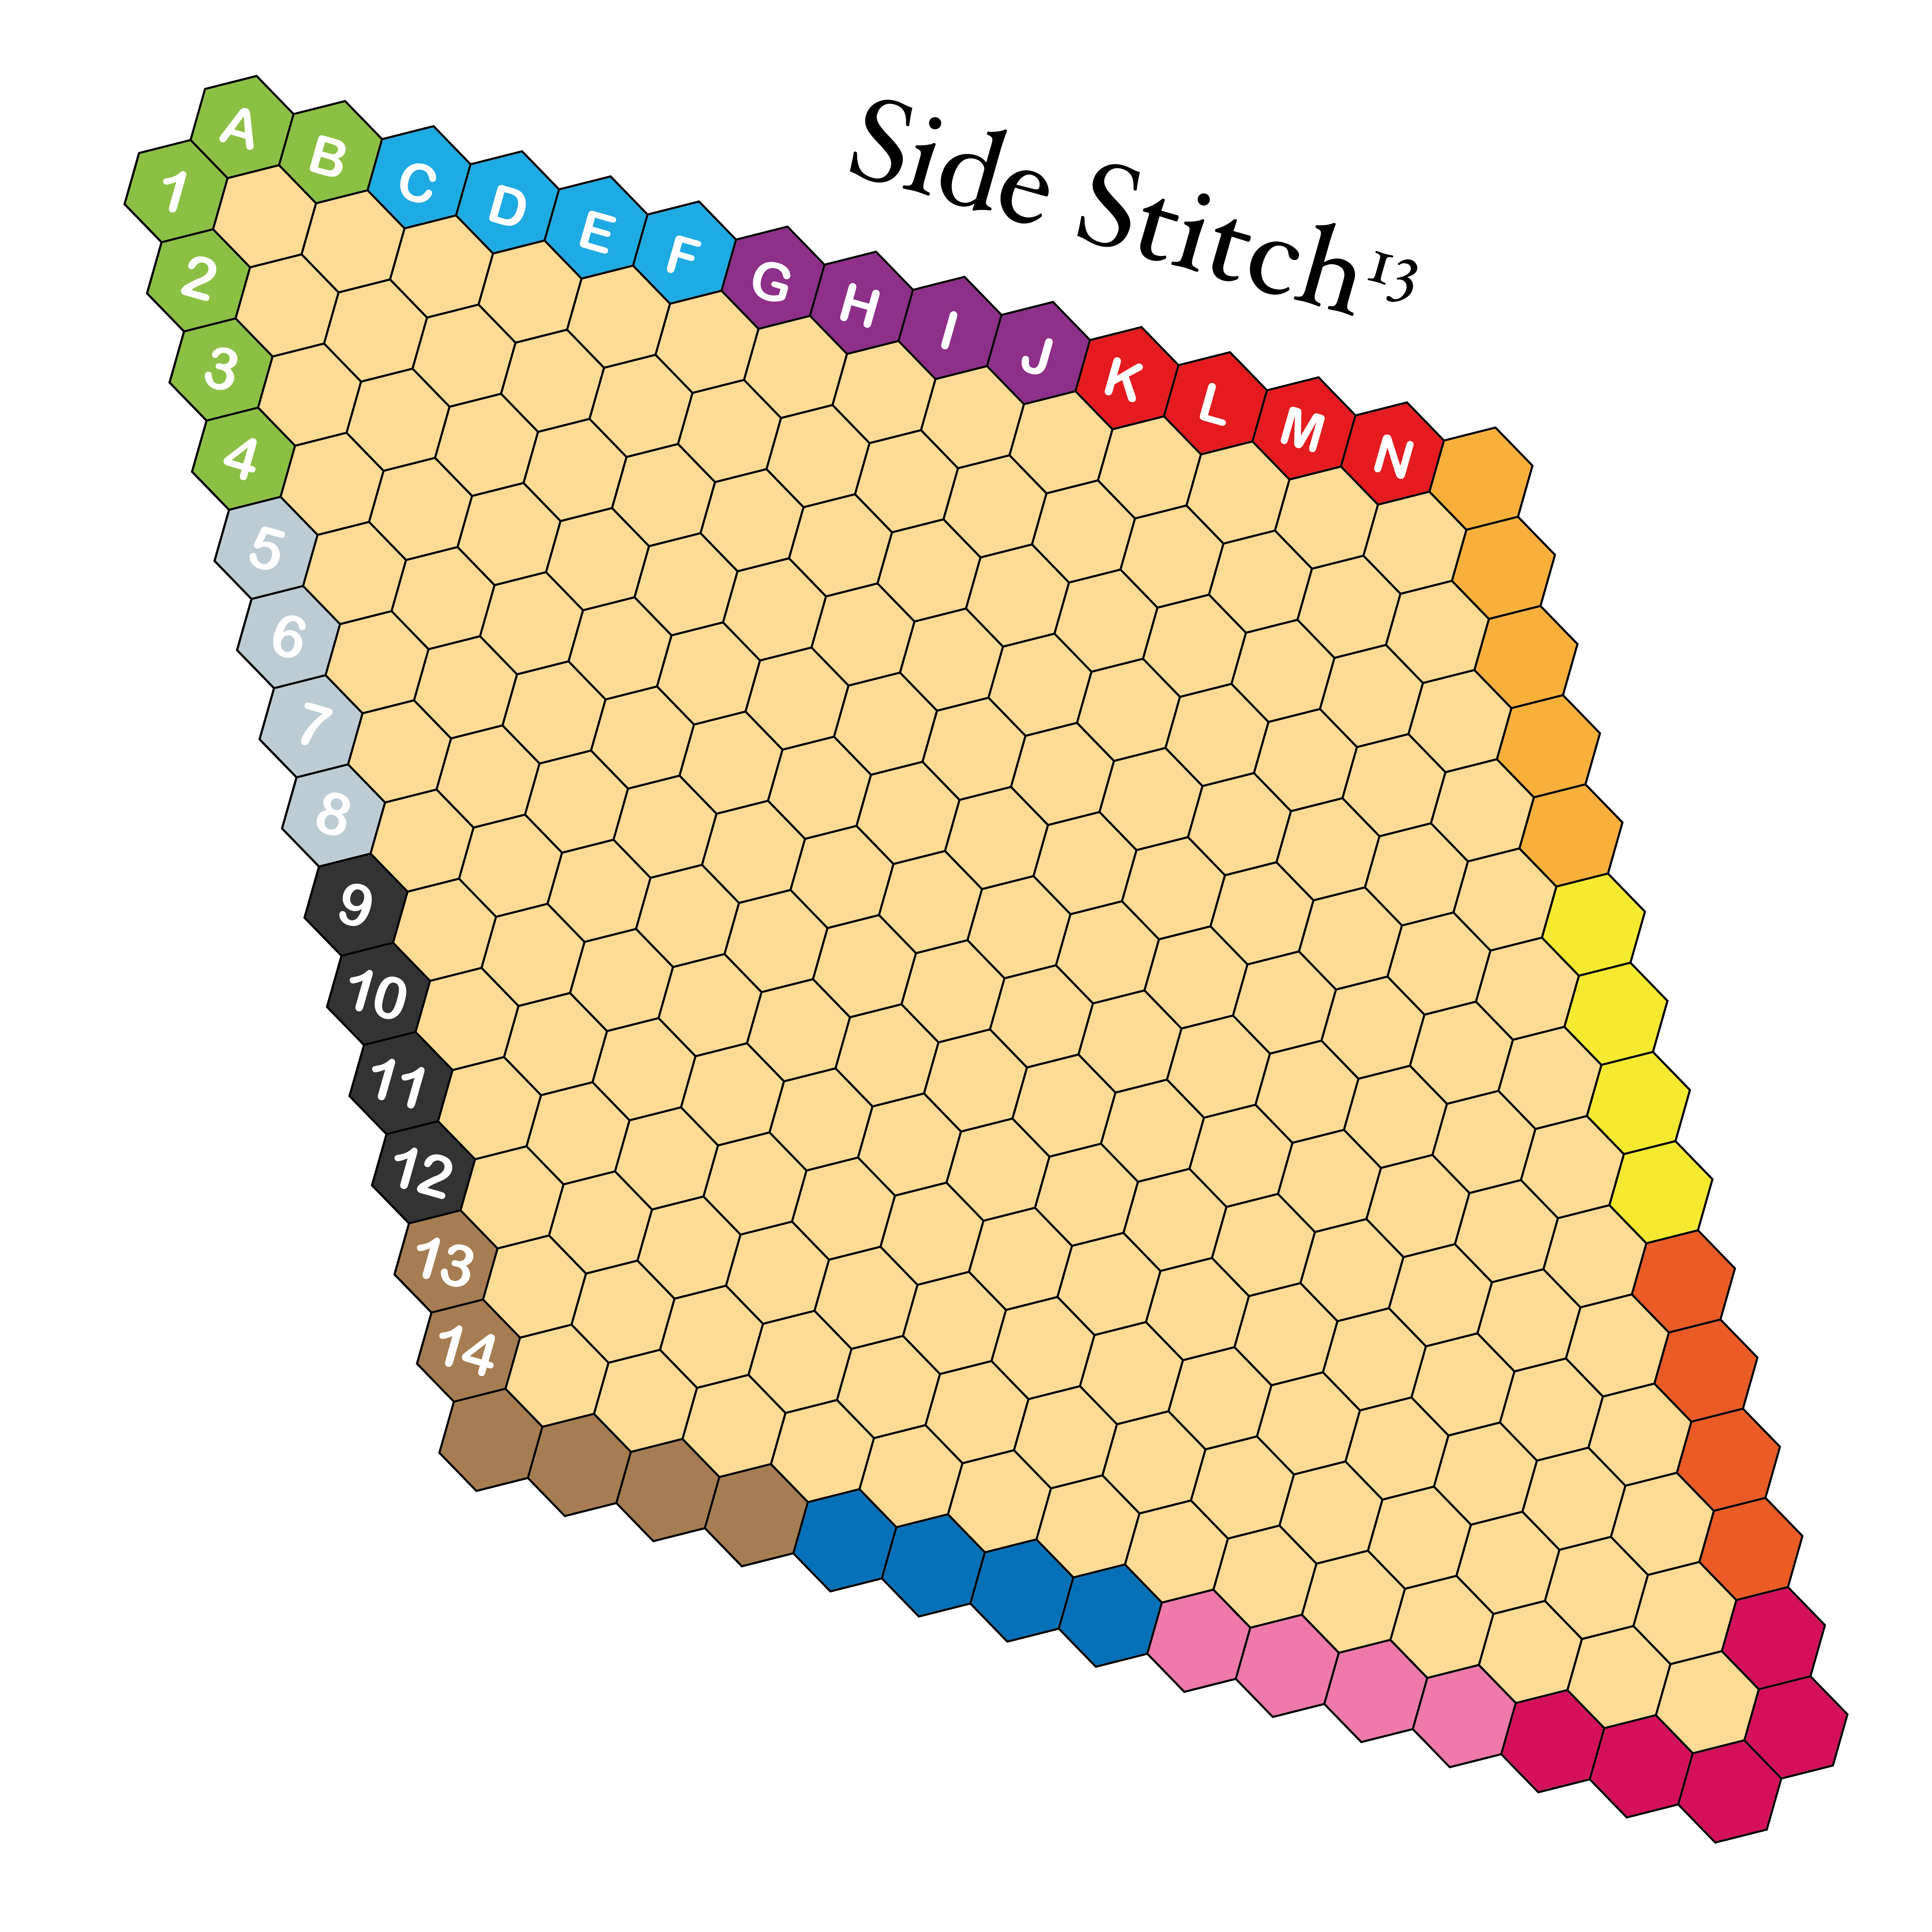
I’ve talked about Side Stitch before, of course, but in the last few months I’ve gone back and tidied up the boards I made previously, and added two new ones — the hexhex-11 with 15 colour-sides, and the 14×14 Hex board with 13 colour-sides. Side Stitch is a favourite of mine not just for the actual game, which is great, but also the aesthetic — making boards for this game is really fun.
Why it’s great: Side Stitch is a member of a class of connection games that I really enjoy — connective scoring games, where different types of connections have different values. These games spice up the connection-game formula by allowing for a wide variety of winning connections, and the need to stretch across the board to connect key areas and score points gives them a dynamic flavour. Side Stitch is even more dynamic than most, since players connect colours along the edges of the board which need not match up with the actual board’s sides, so there are a tonne of interesting board setups you can try. I just wish Side Stitch was playable on more game servers, so that more people would get acquainted with this excellent game.
About the boards: All of the boards above were based on designs originally uploaded to BoardGameGeek by the inventor of the game, Craig Duncan; I have simply replicated them in Illustrator and made them as clean and sharp as I can. The ‘standard’ Side Stitch board is the hexhex-8 with 7 colour-sides (top middle in the above array). The hexhex-7/9-colour board is great for quick games. My personal favourites are the hexhex-10 with 9 colour-sides and the hexhex-11 with 15 colour-sides; note that I have two variants of the 11/15 board available, one with some repeated colours and another with all unique colours. To my shame I have not tried the 14×14 Hex board version yet!
Star
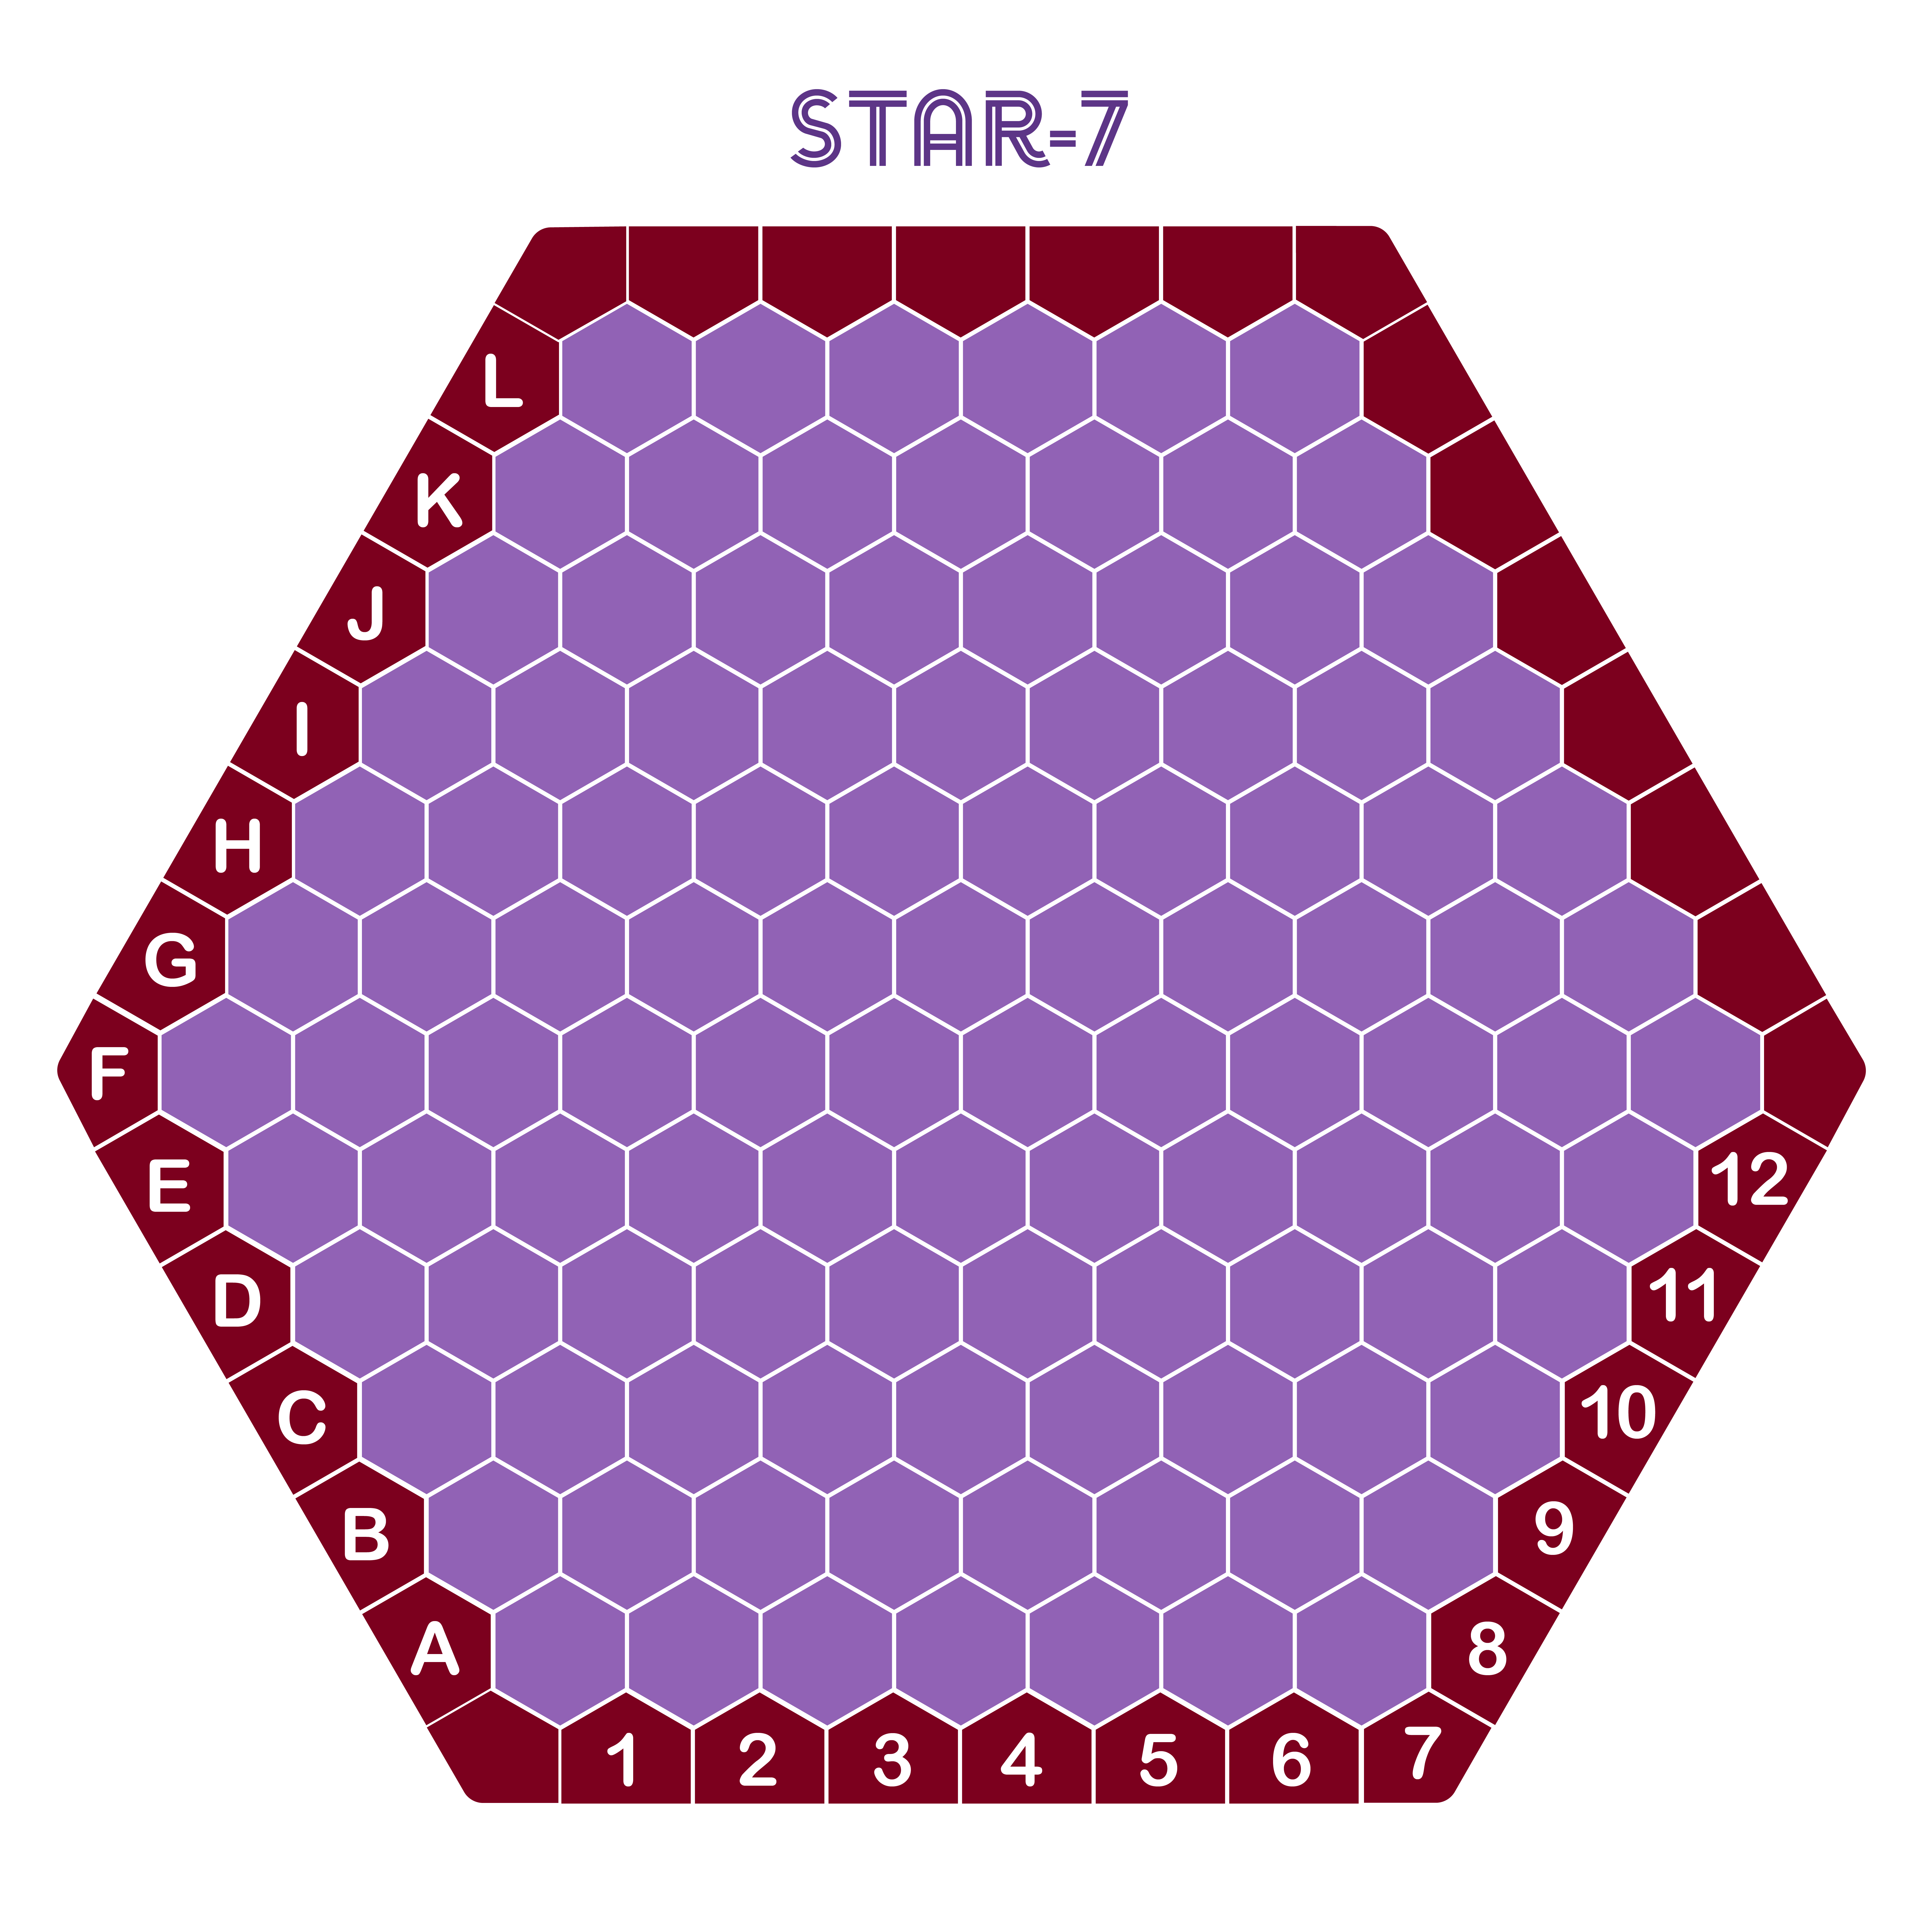
Star is a classic game of connecting edge cells by Craige Schensted/Ea Ea, which I’ve covered before on this blog, so I won’t spend too long explaining it. These boards are slight updates of previous ones that I have made, with slightly cleaned-up cell placement and updated fonts.
Why it’s great: Star is an unfortunately overlooked game, I think partially because the published version in Games Magazine years ago was on a too-small board that didn’t adequately showcase its marvellous depths, and also because it was followed by *Star, which seemed to overshadow it. I think Star deserves more recognition than it gets, as it an accessible game only slightly more complex than something like Hex or Y, but the introduction of scoring and a group penalty takes it into a more territorial, strategic realm. On larger boards like those you see above, Star becomes a deeply challenging contest, and often a game will see much of the board filled with complex, winding connections. I highly recommend it both on its own merits as a beautiful game, and as a first foray into the connect-the-key-cells genre.
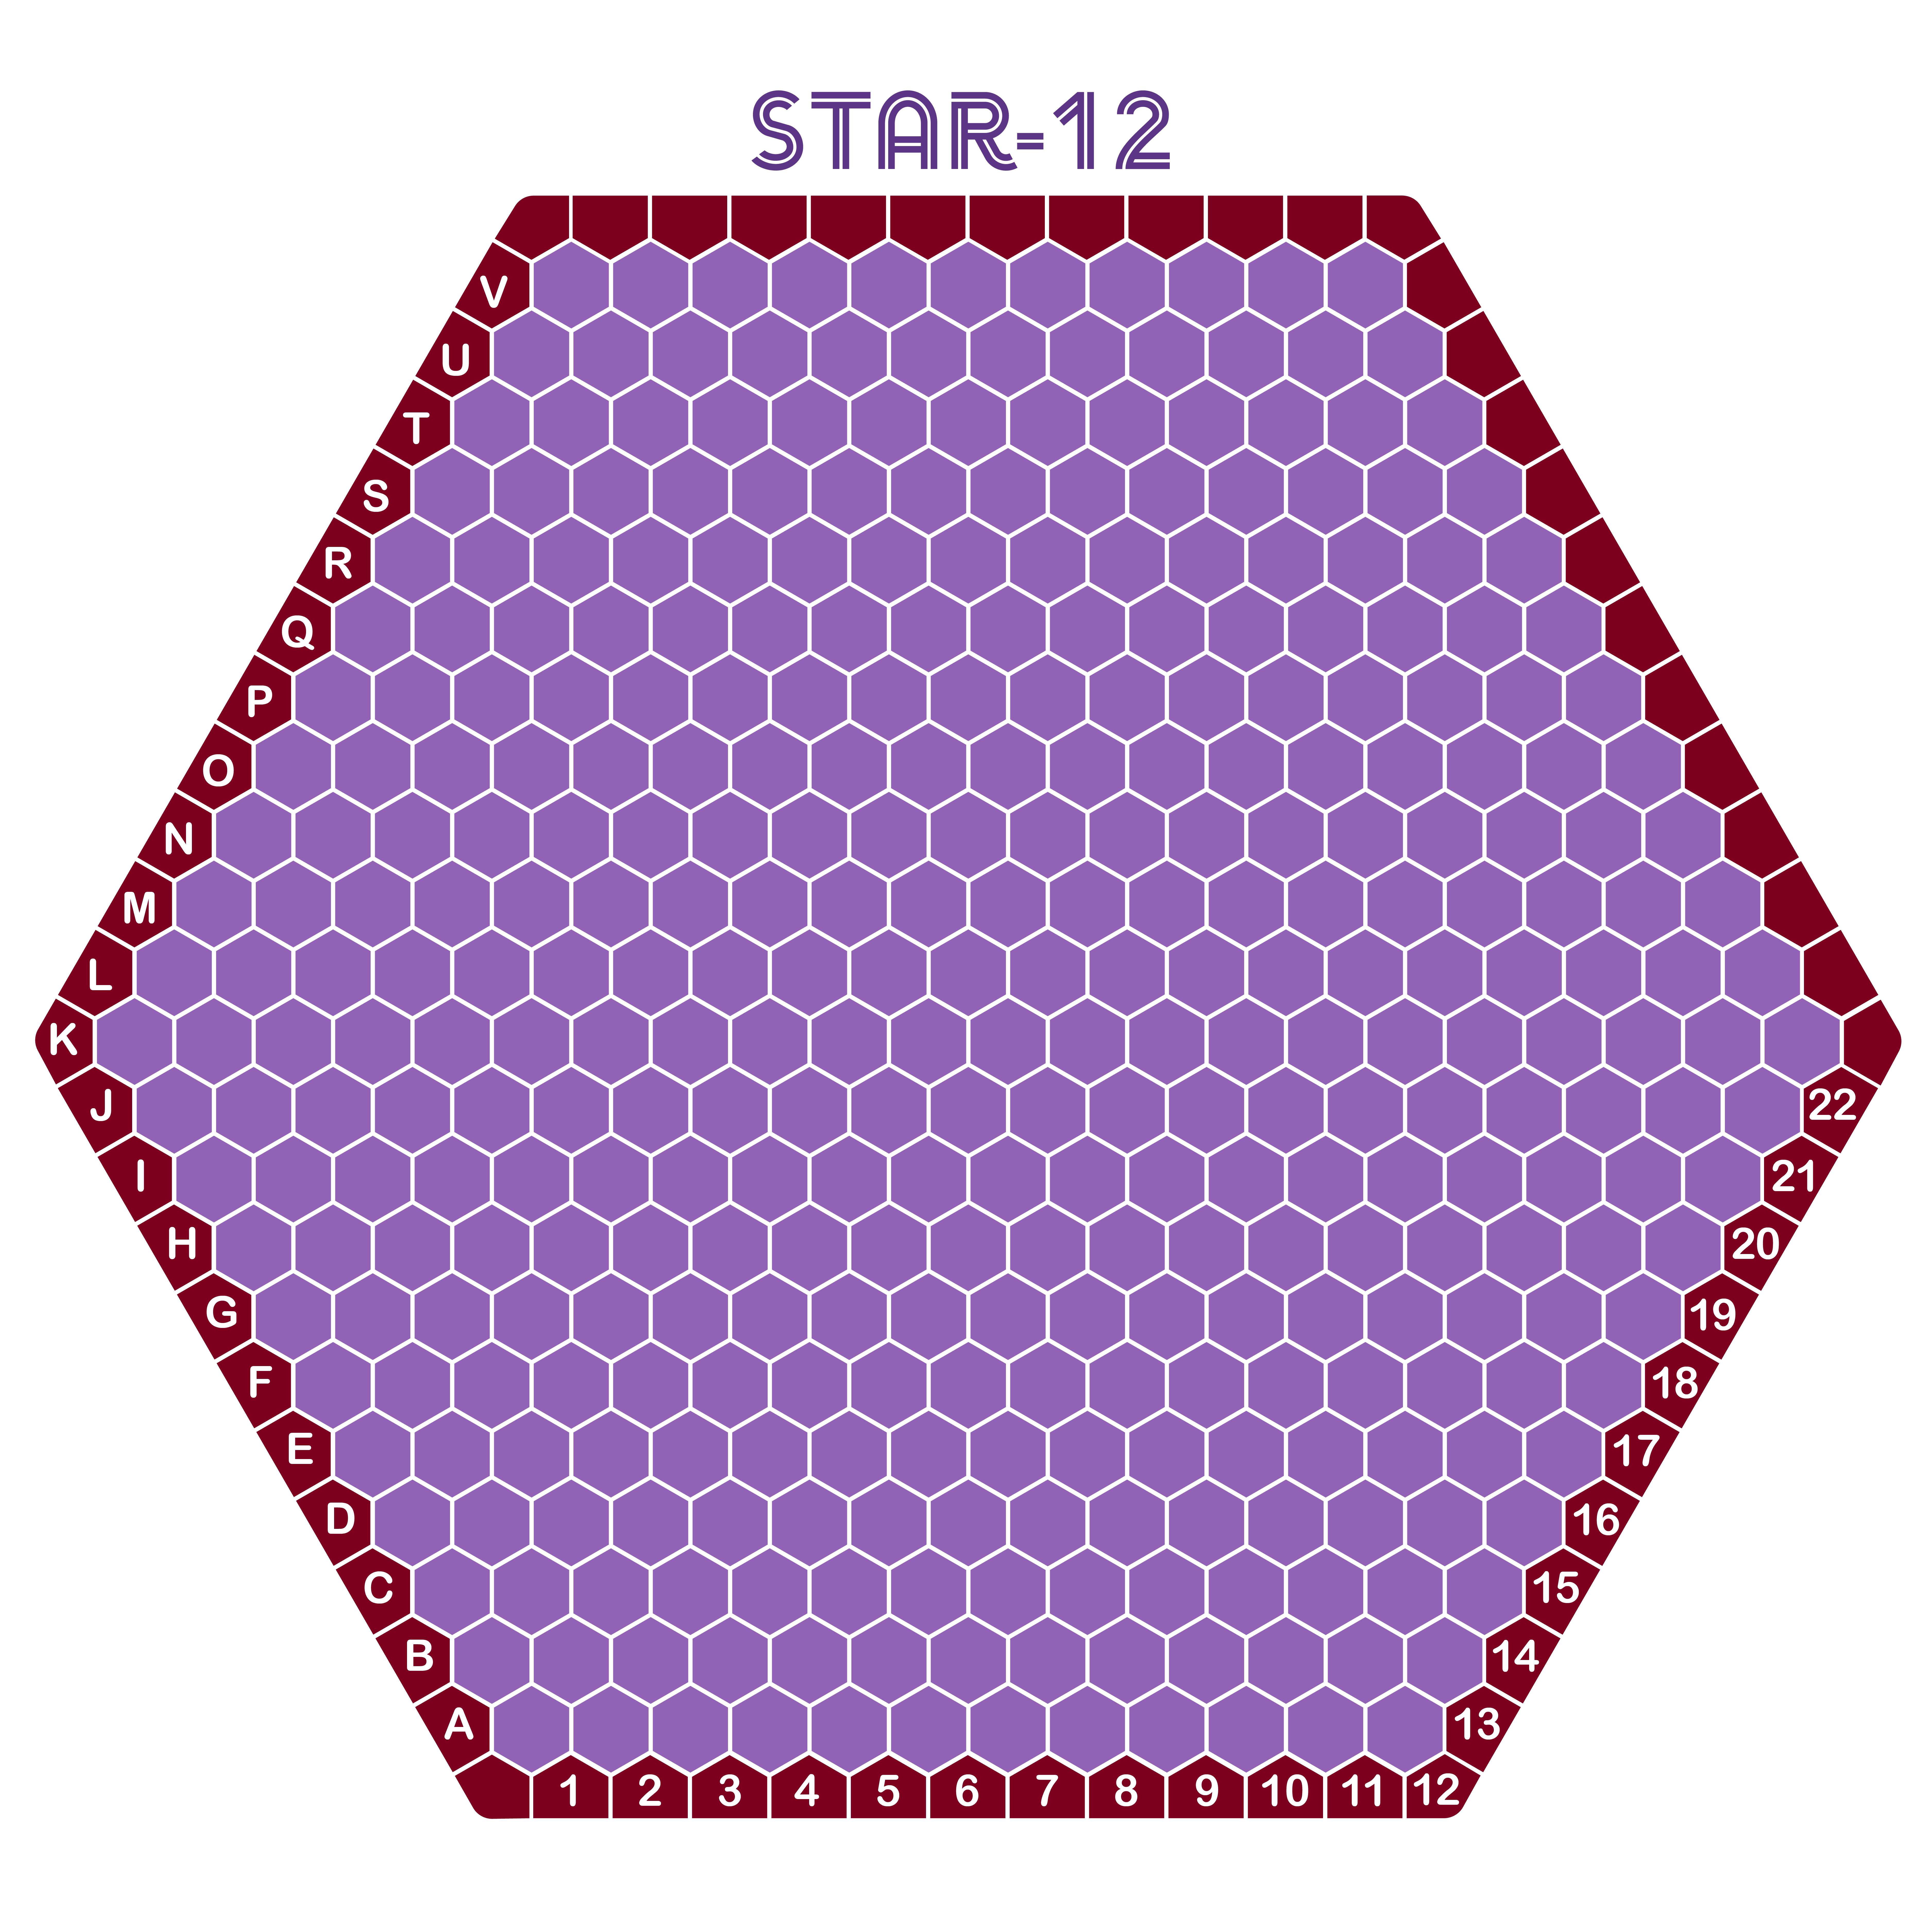
About the boards: My boards adopt the standard uneven hexagonal grid used by the original game, and simply extend that to larger sizes. I should note that the designer felt the corner cells, which on these boards would be worth three points due to being adjacent to three exterior edge cells, should be adjusted to only score two points; I don’t have particularly strong feelings about this, but in the future I do intend to make versions of these boards with corners altered in that way. Of course you can use these boards and simply adjust the scores accordingly when you play, but certainly having the scores clearly visible from the board geometry would be better. The largest board above, Star-12, contains 363 cells, similar to the Go board’s 361 points. Given that Star games often use most of the board, Star-12 is probably the largest size most players would be willing to use, and above that size the game is perhaps a bit too much of a marathon.
Poly-Y
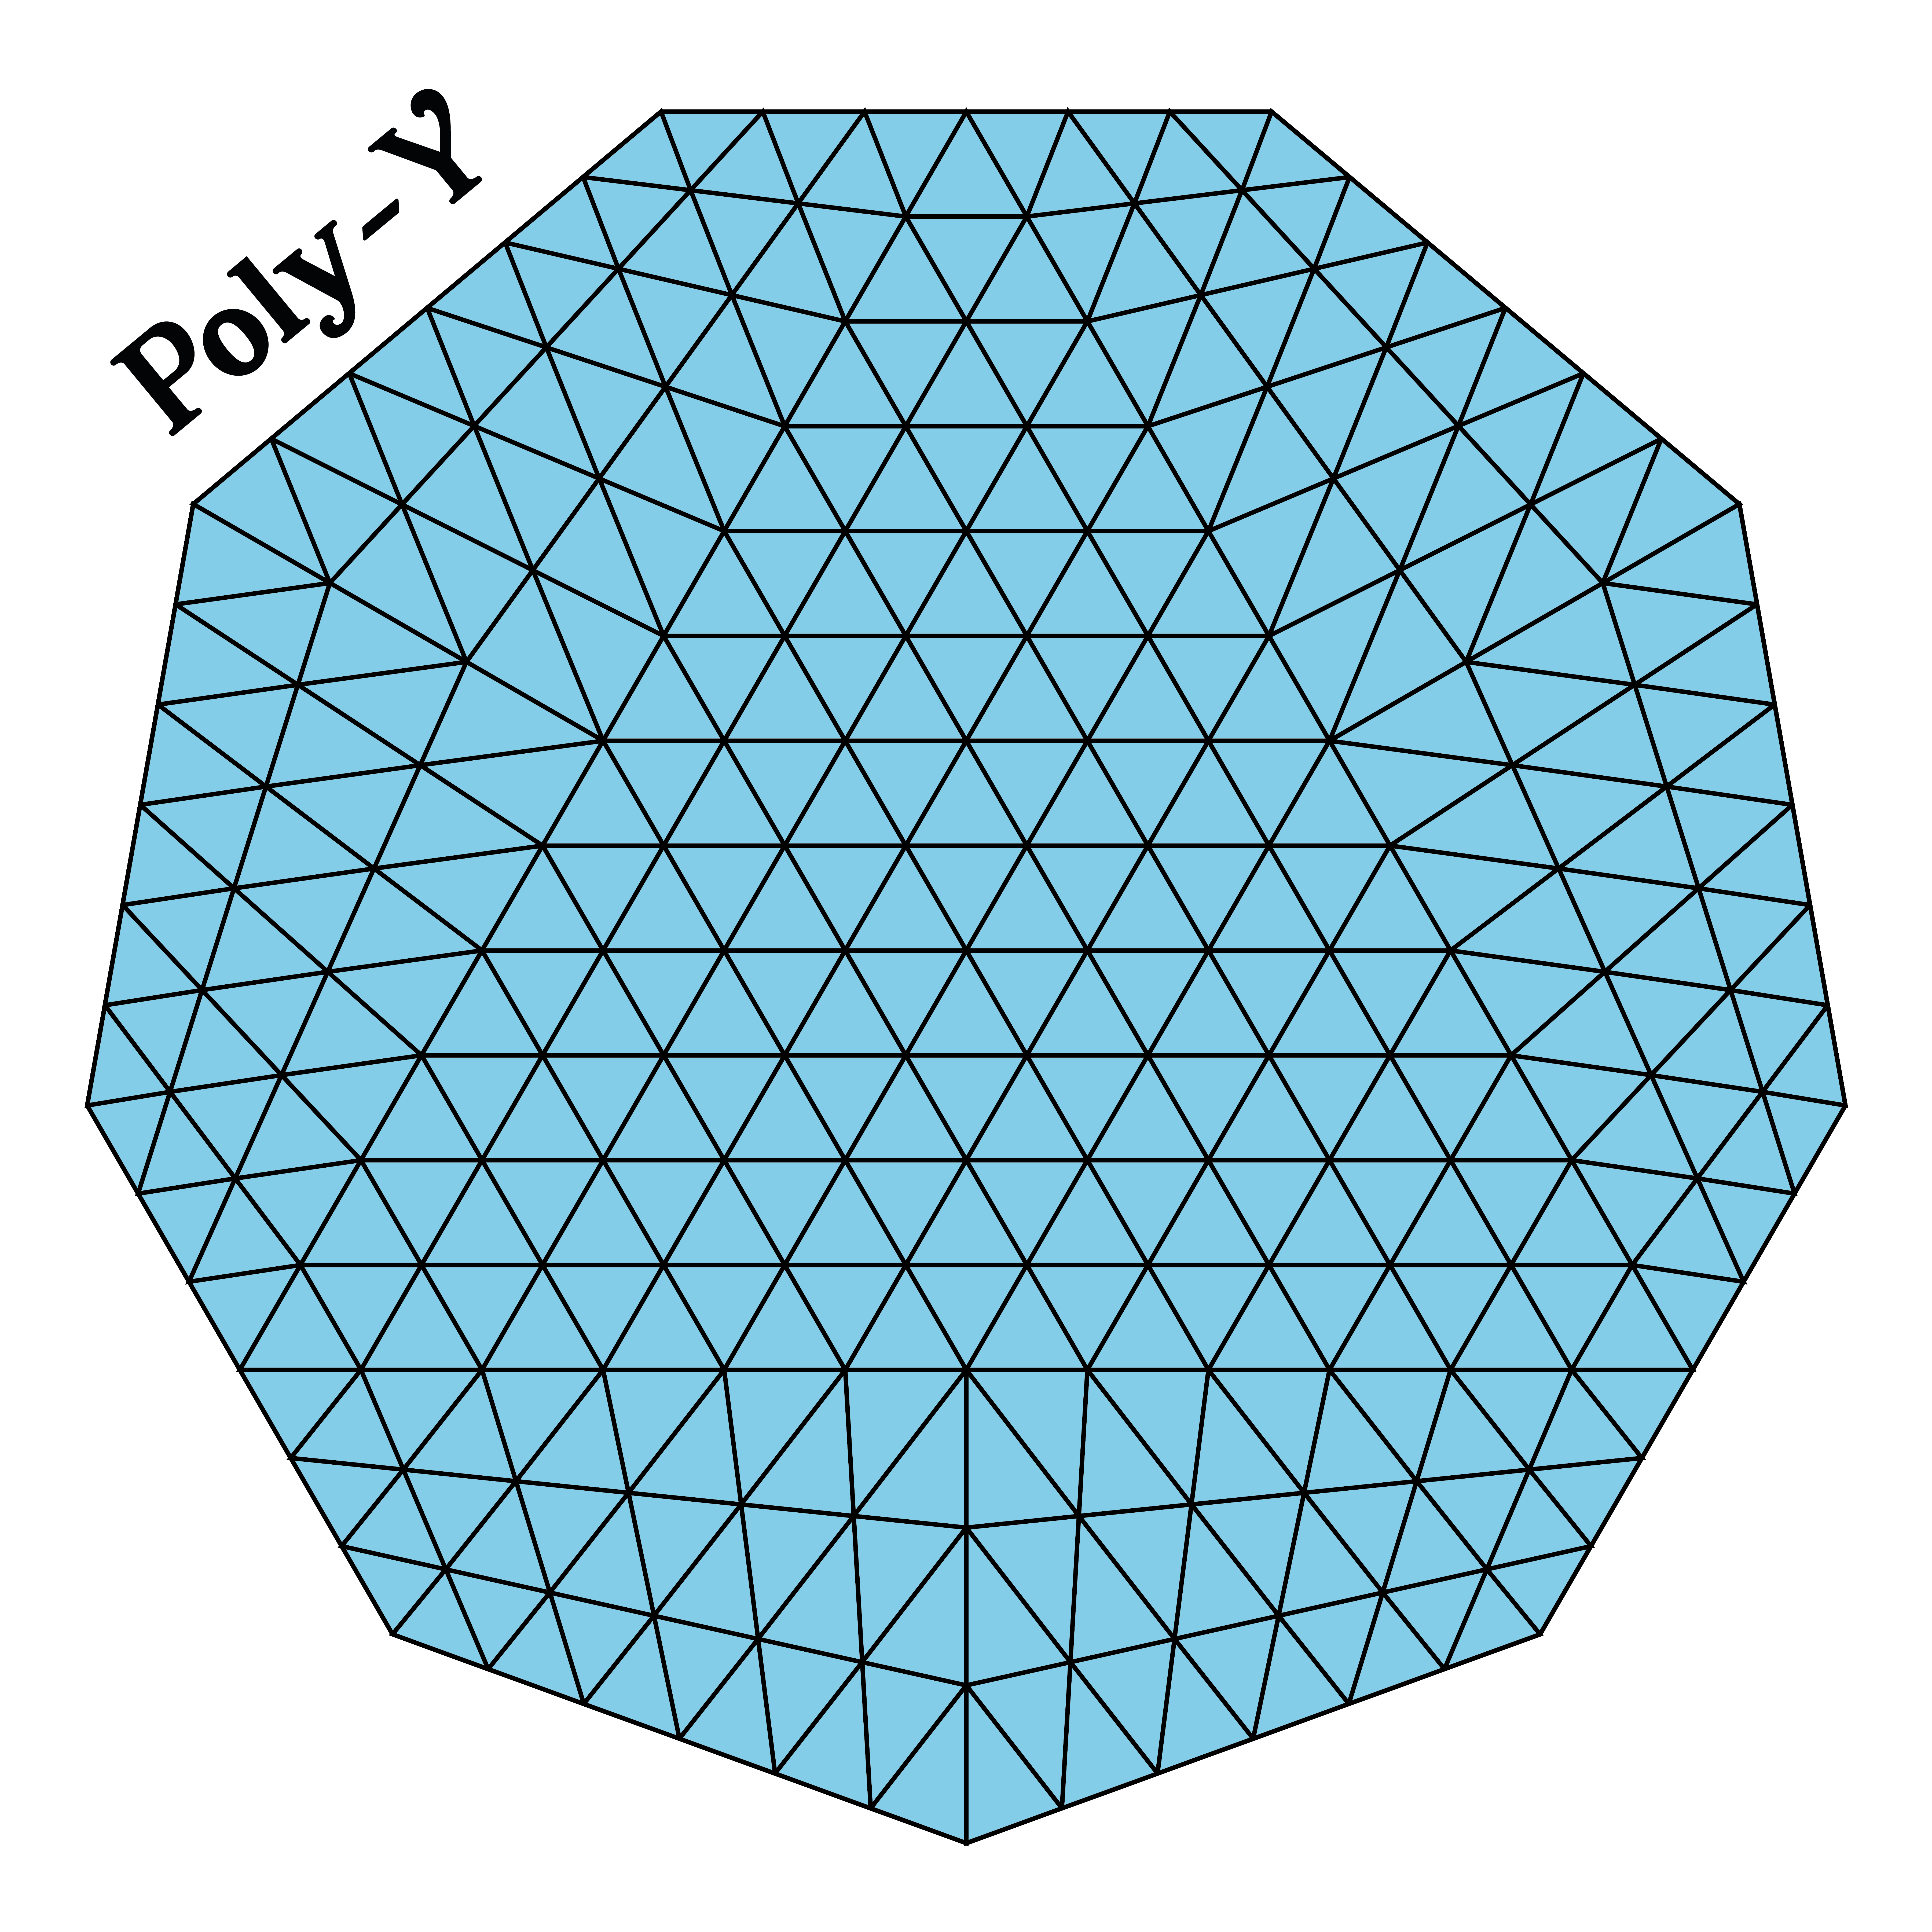
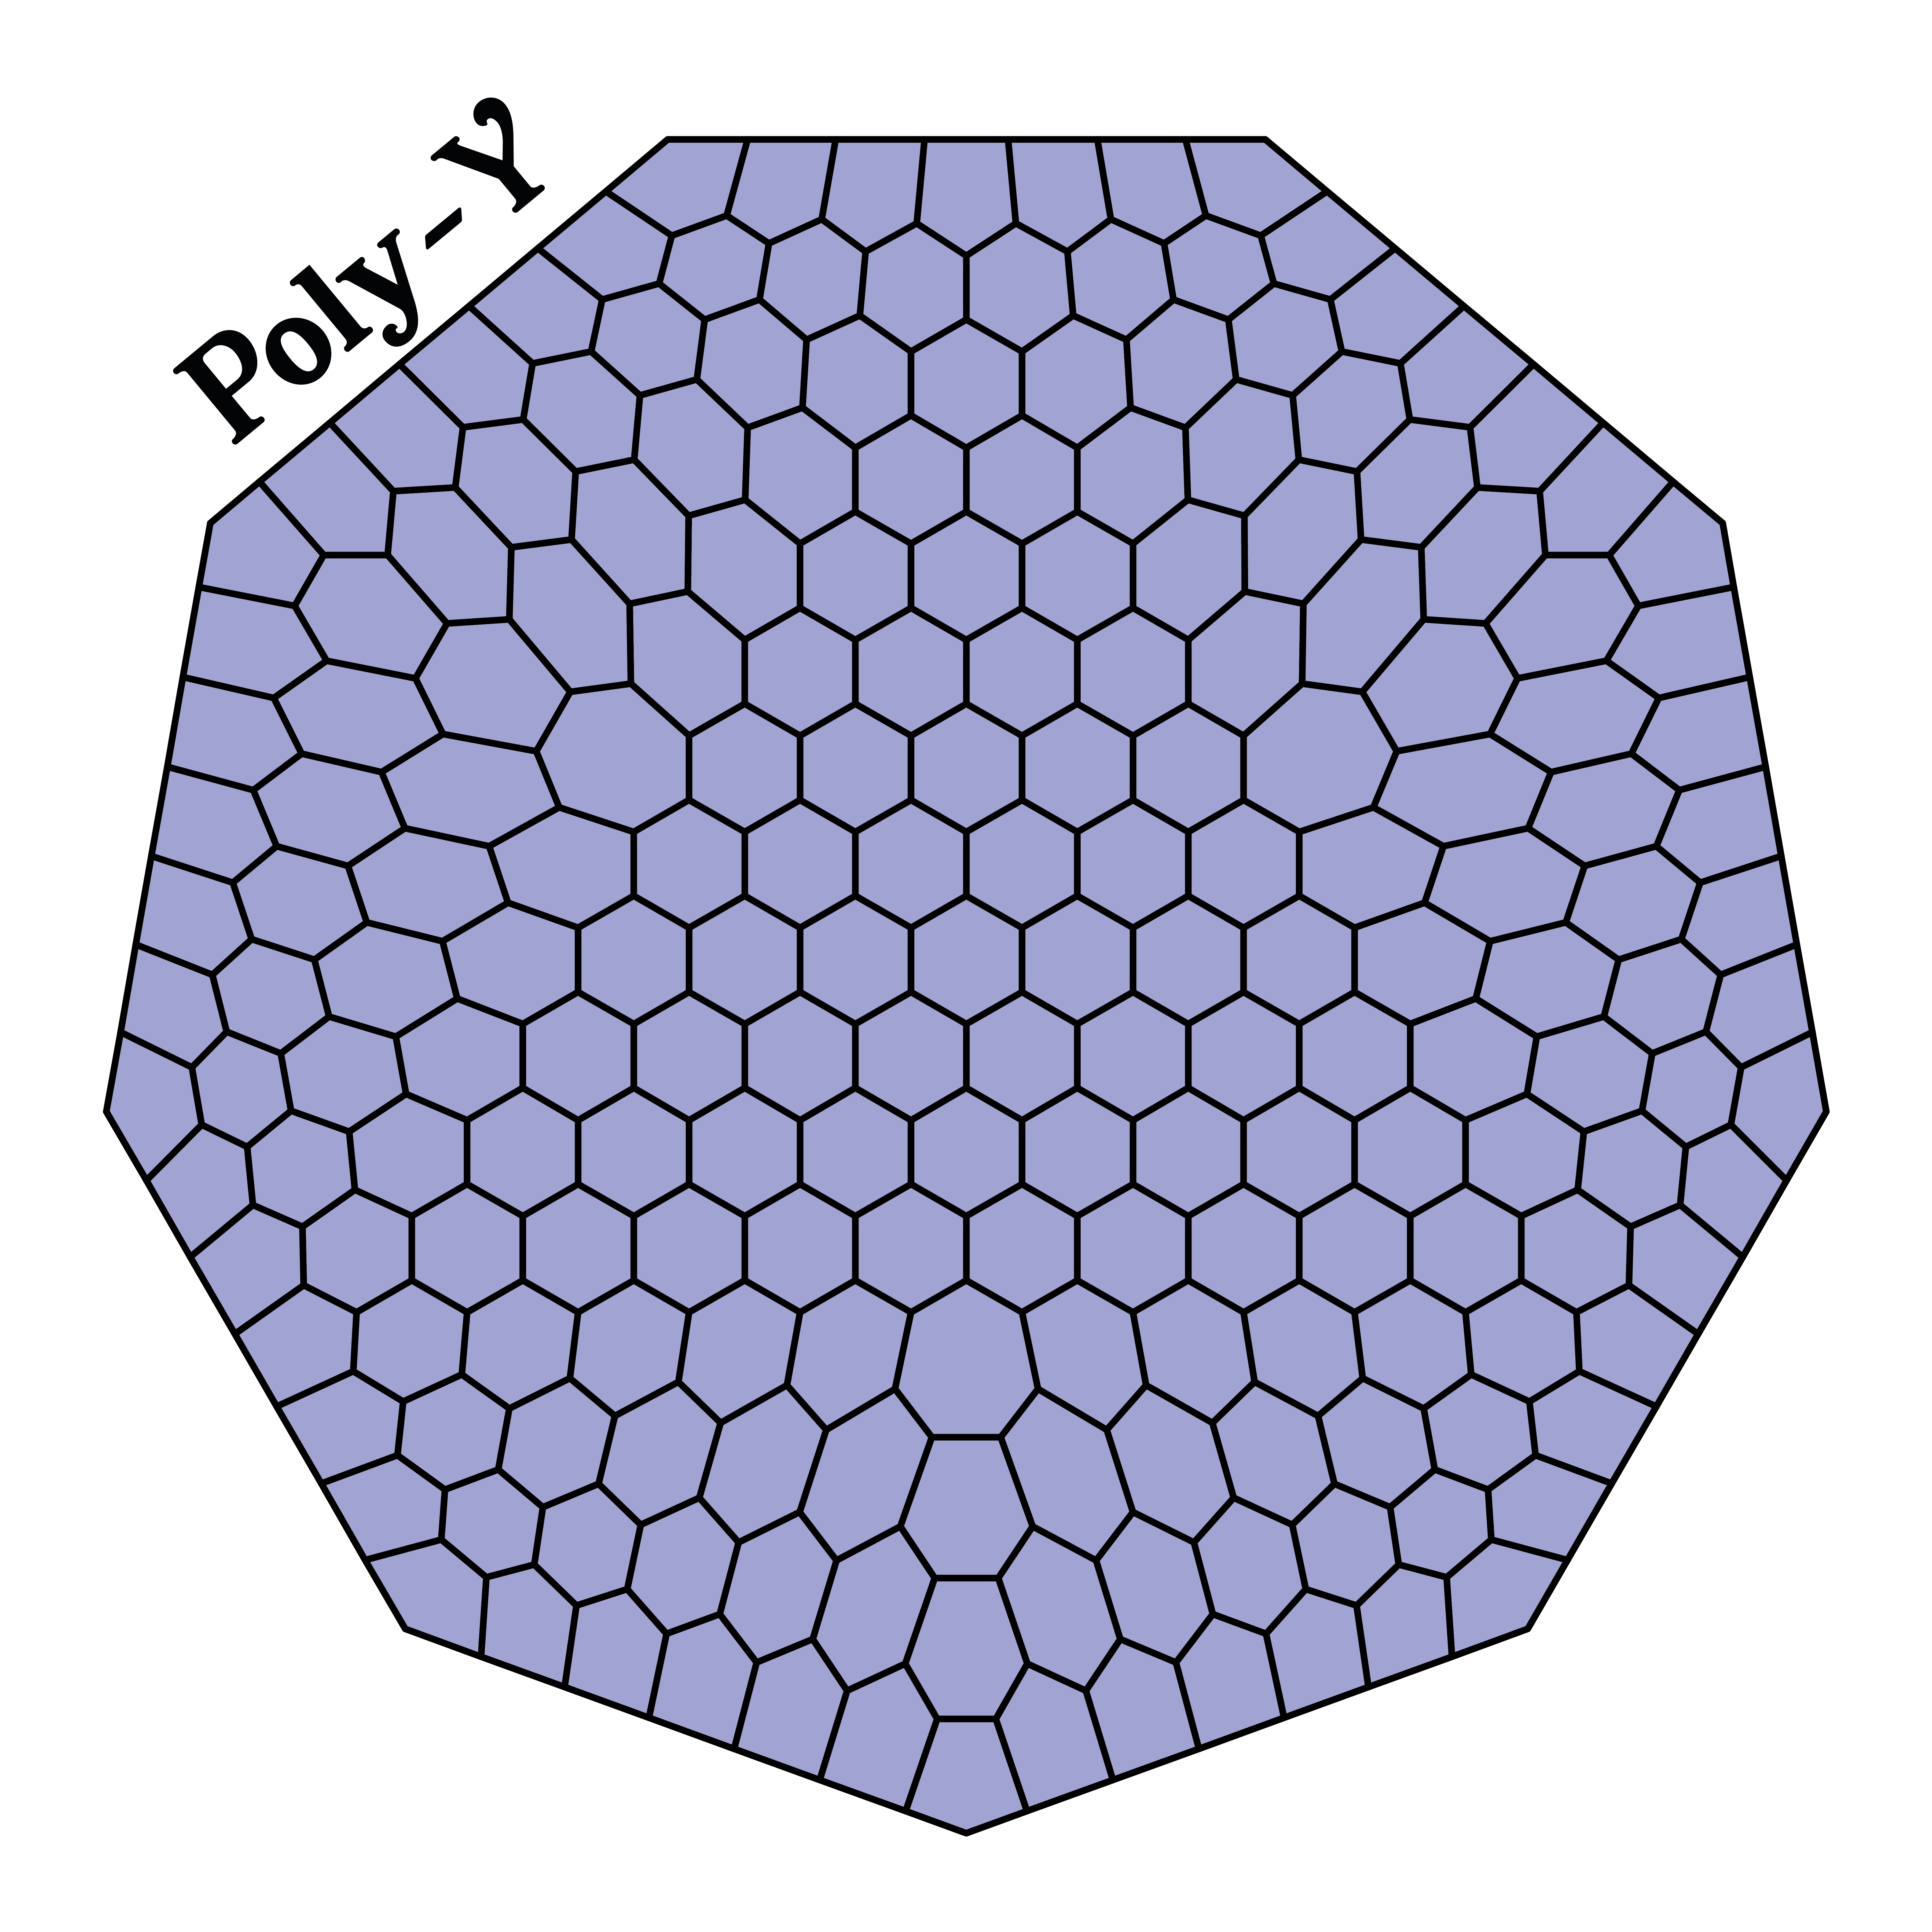
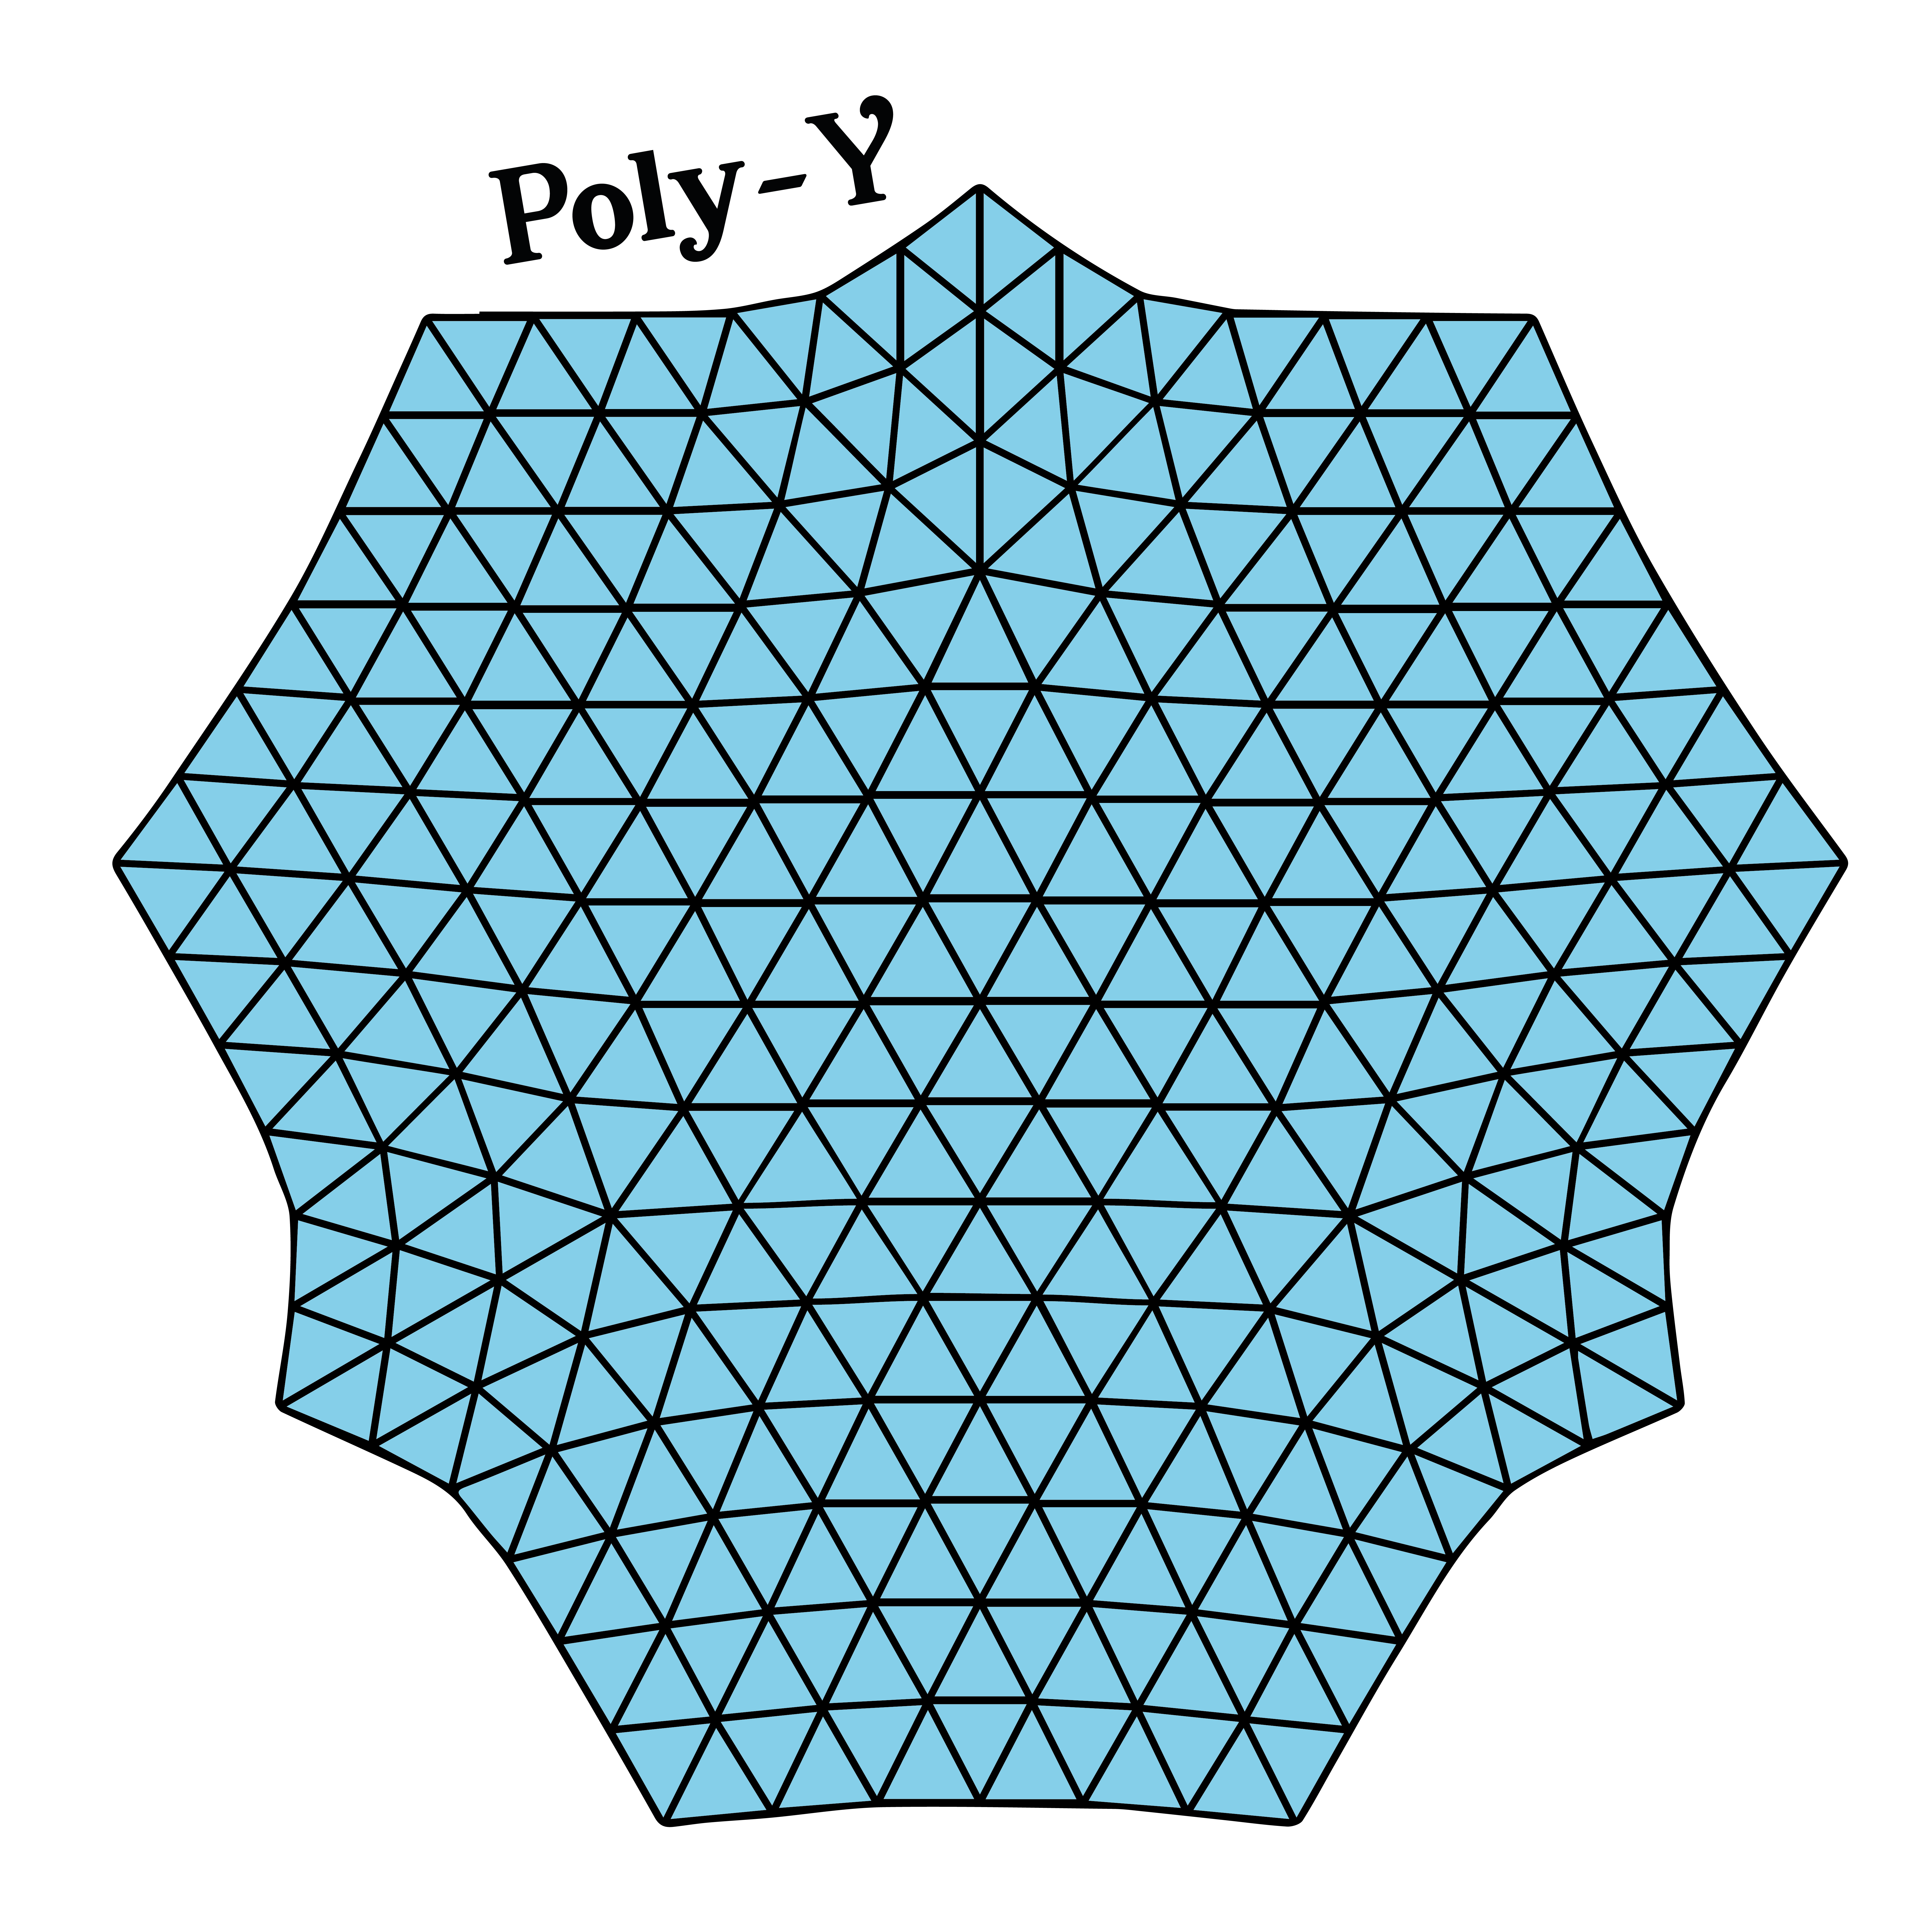
Poly-Y is the ancestor to Star and *Star, and marks the first attempt by designer Craig Schensted/Ea Ea to impart a connection game with a bit of territorial flavour. In Poly-Y, players strive to control more corners of the board than their opponent; in order to claim a corner, a player must form a Y-shaped connection, connecting the two sides adjacent to the corner with another non-adjacent side.
Why it’s great: Poly-Y takes the connection goal of the Game of Y and adds a territorial element, using that connection as a way to claim parts of the board and score points. The addition of the point-scoring element gives the game an appealing strategic flavour, while adding minimal rules complexity. The importance of corners in this game means that oddly-shaped boards with larger numbers of corners are particularly well-suited for Poly-Y play, which adds a certain quirky visual appeal. If you want the depth of something like Star or *Star with simpler score calculations, Poly-Y is a great option.
About the boards: Out of the three boards presented above, only the middle one is for playing stones within the cells; on the other two, you should place your stones on the intersections. Making these boards was a bit of a challenge due to the odd geometry, but the final result is quite visually pleasing. All three boards are nine-sided, which seems to be the most-recommended shape by the designer, so they will play similarly; just pick the one that most suits your aesthetics.
Game of Y (Kadon-shaped)
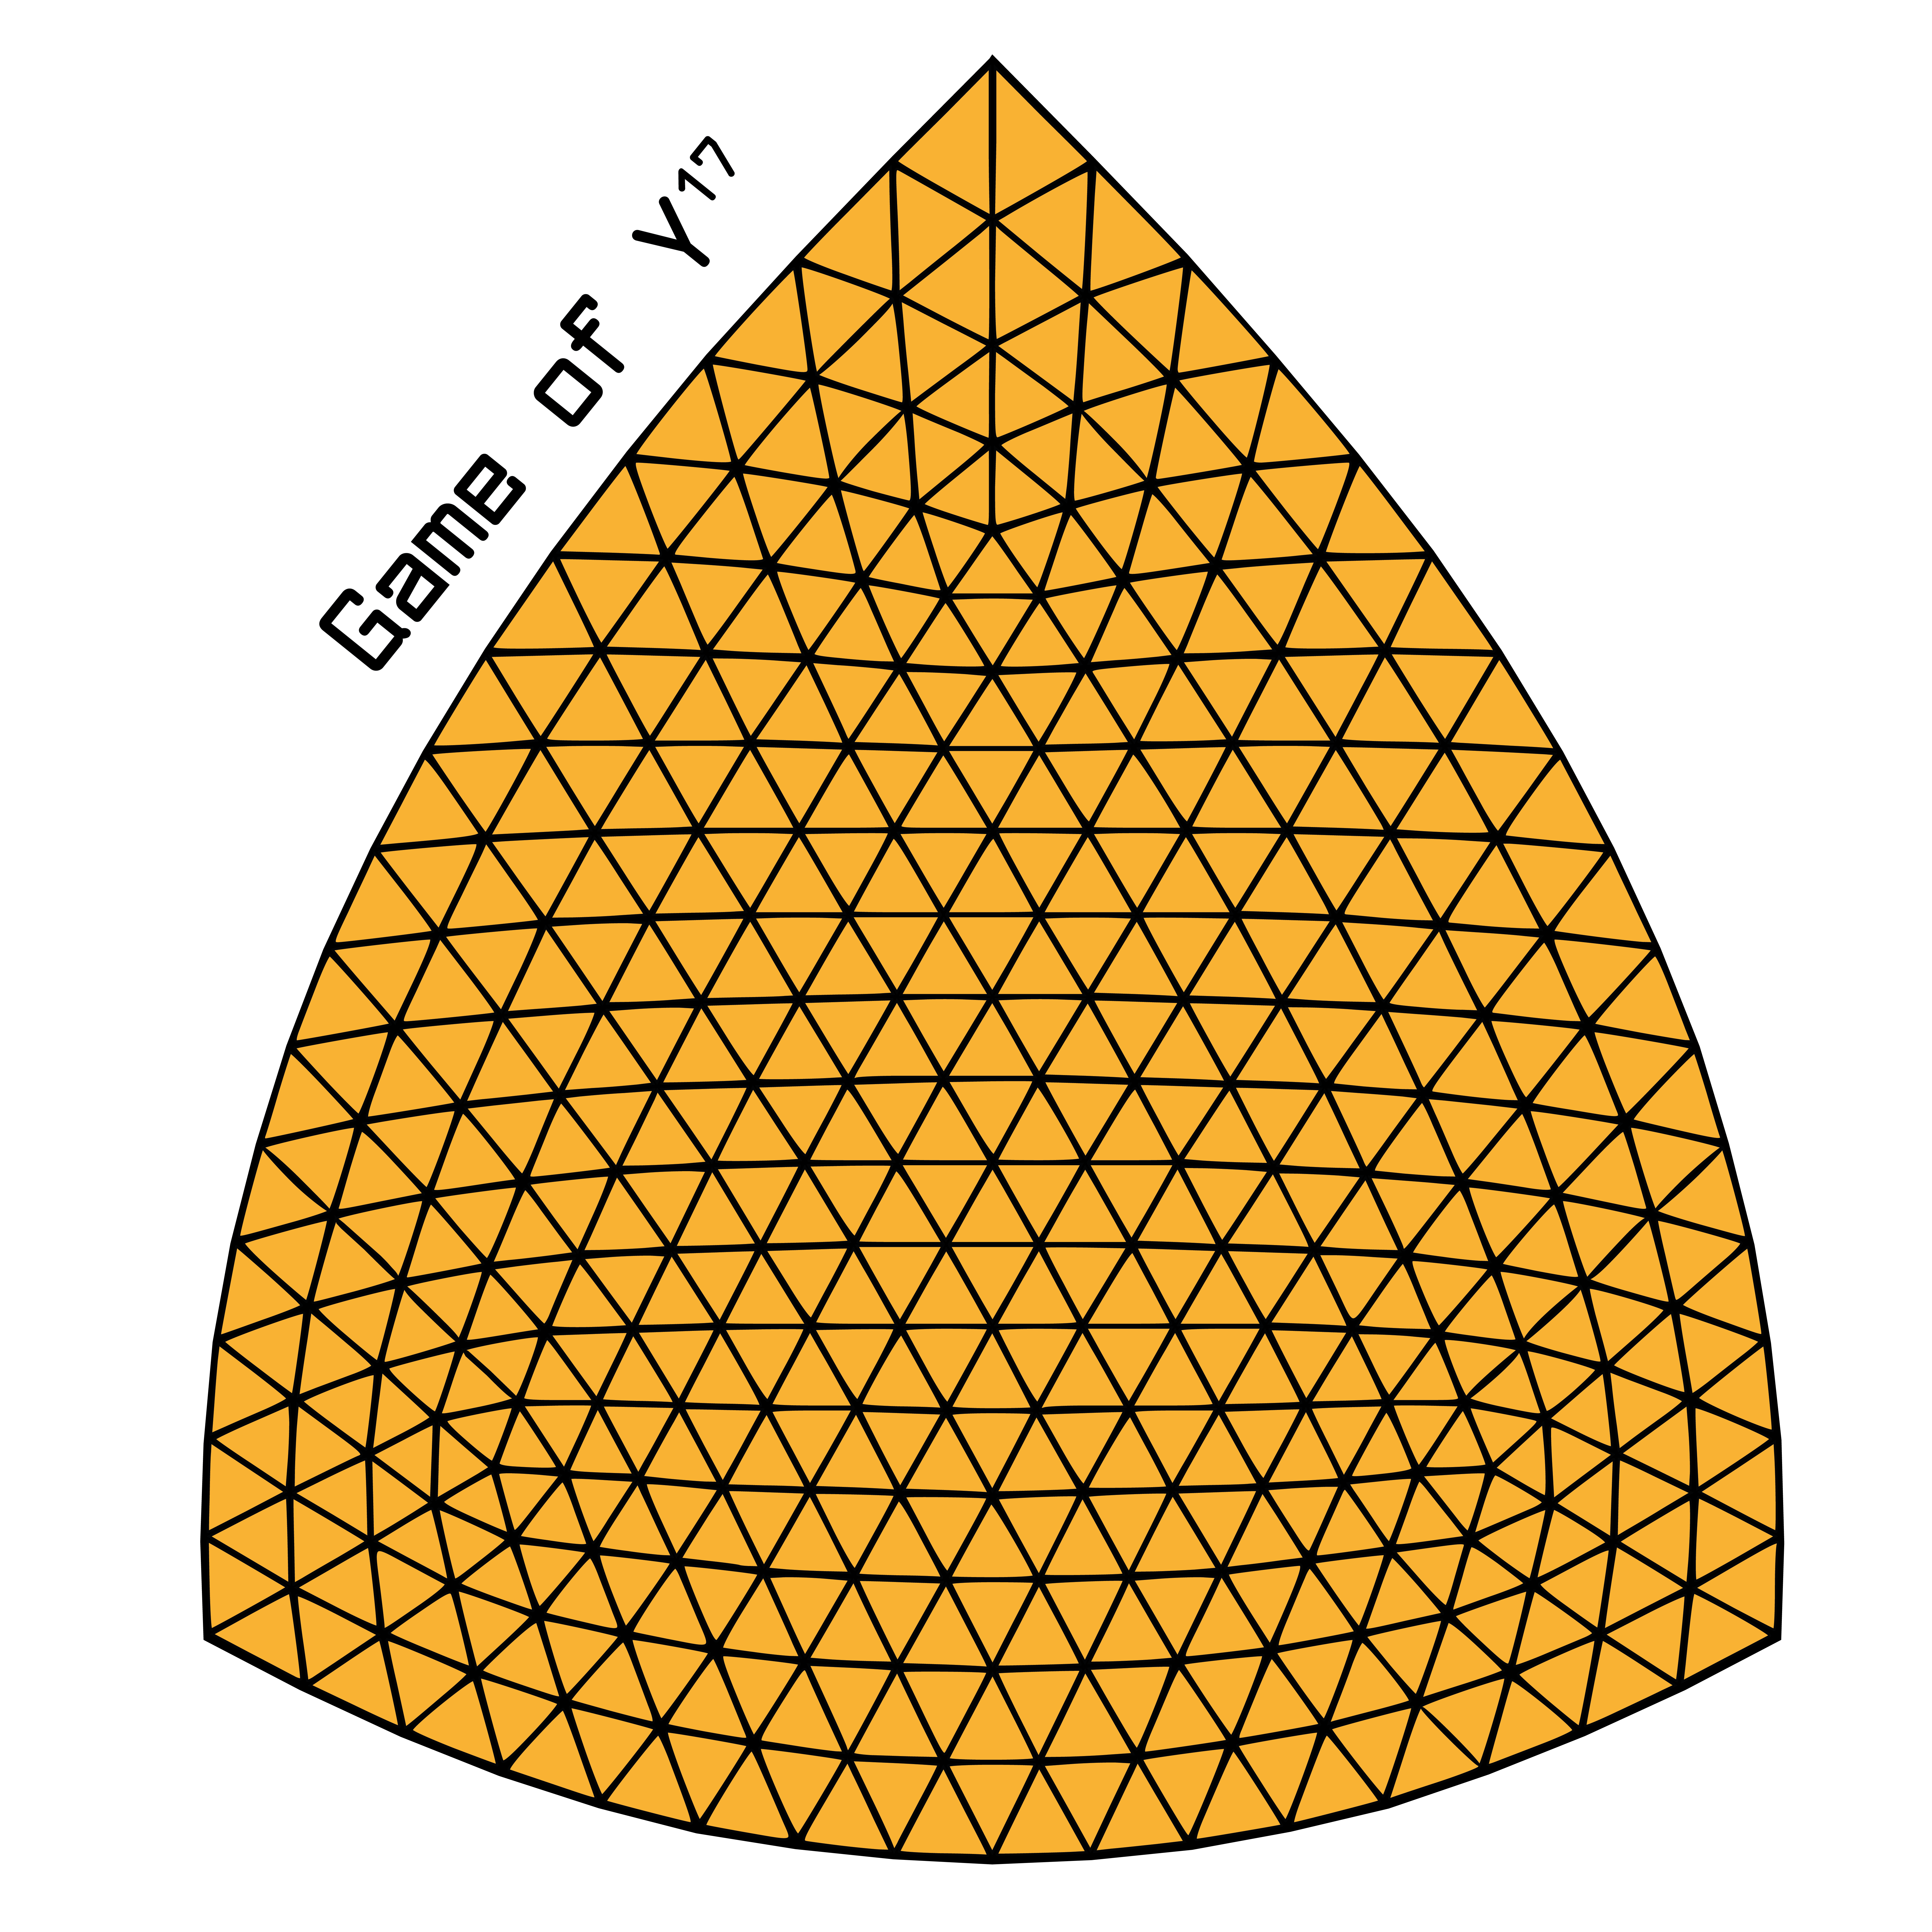
As I mentioned in the Game of Y/Poly-Y/Star/*Star article, the published version of the Game of Y uses a board of 91 points with a distorted triangular shape, designed to balance out the in-game value of the centre, edge and corner points. However, the board published by Kadon is simply too small, meaning that every opening move by the first player should be swapped. A better option is to use the same board geometry but substantially larger, and that is what I have attempted with this board.
Why it’s great: Y is the most elemental connection game, even more fundamental than Hex — in Hex the two players have asymmetric goals, and are attempting to connect different sides of the board, while in Y both players have precisely the same goal. The need to connect all three sides of the triangular board can produce some interesting tactics, and it has a bit of a different flavour from Hex as a result. For people new to connection games, or to abstract strategy games in general, Y is right up there with Hex as an instantly accessible gateway to the genre.
About the board: The board above is 17 points long on each side, meaning that games will be substantially longer and more balanced than on the 91-cell Kadon board. Besides being visually appealing, this board geometry helps balance the values of board cells. The downside is that I haven’t yet found a straightforward way to extend this board in Illustrator without reconstructing large portions of it, so for now this is the only large board of this type that I’ve made.
So, that was a whirlwind tour of some of the games I made boards for over the past 12 months or so. Over the coming months I’ll try to cover a few of these gems in more detail, but at least for now I hope this will give you some ideas if you’re looking to try out a new game.
Next up: more Courier Chess!


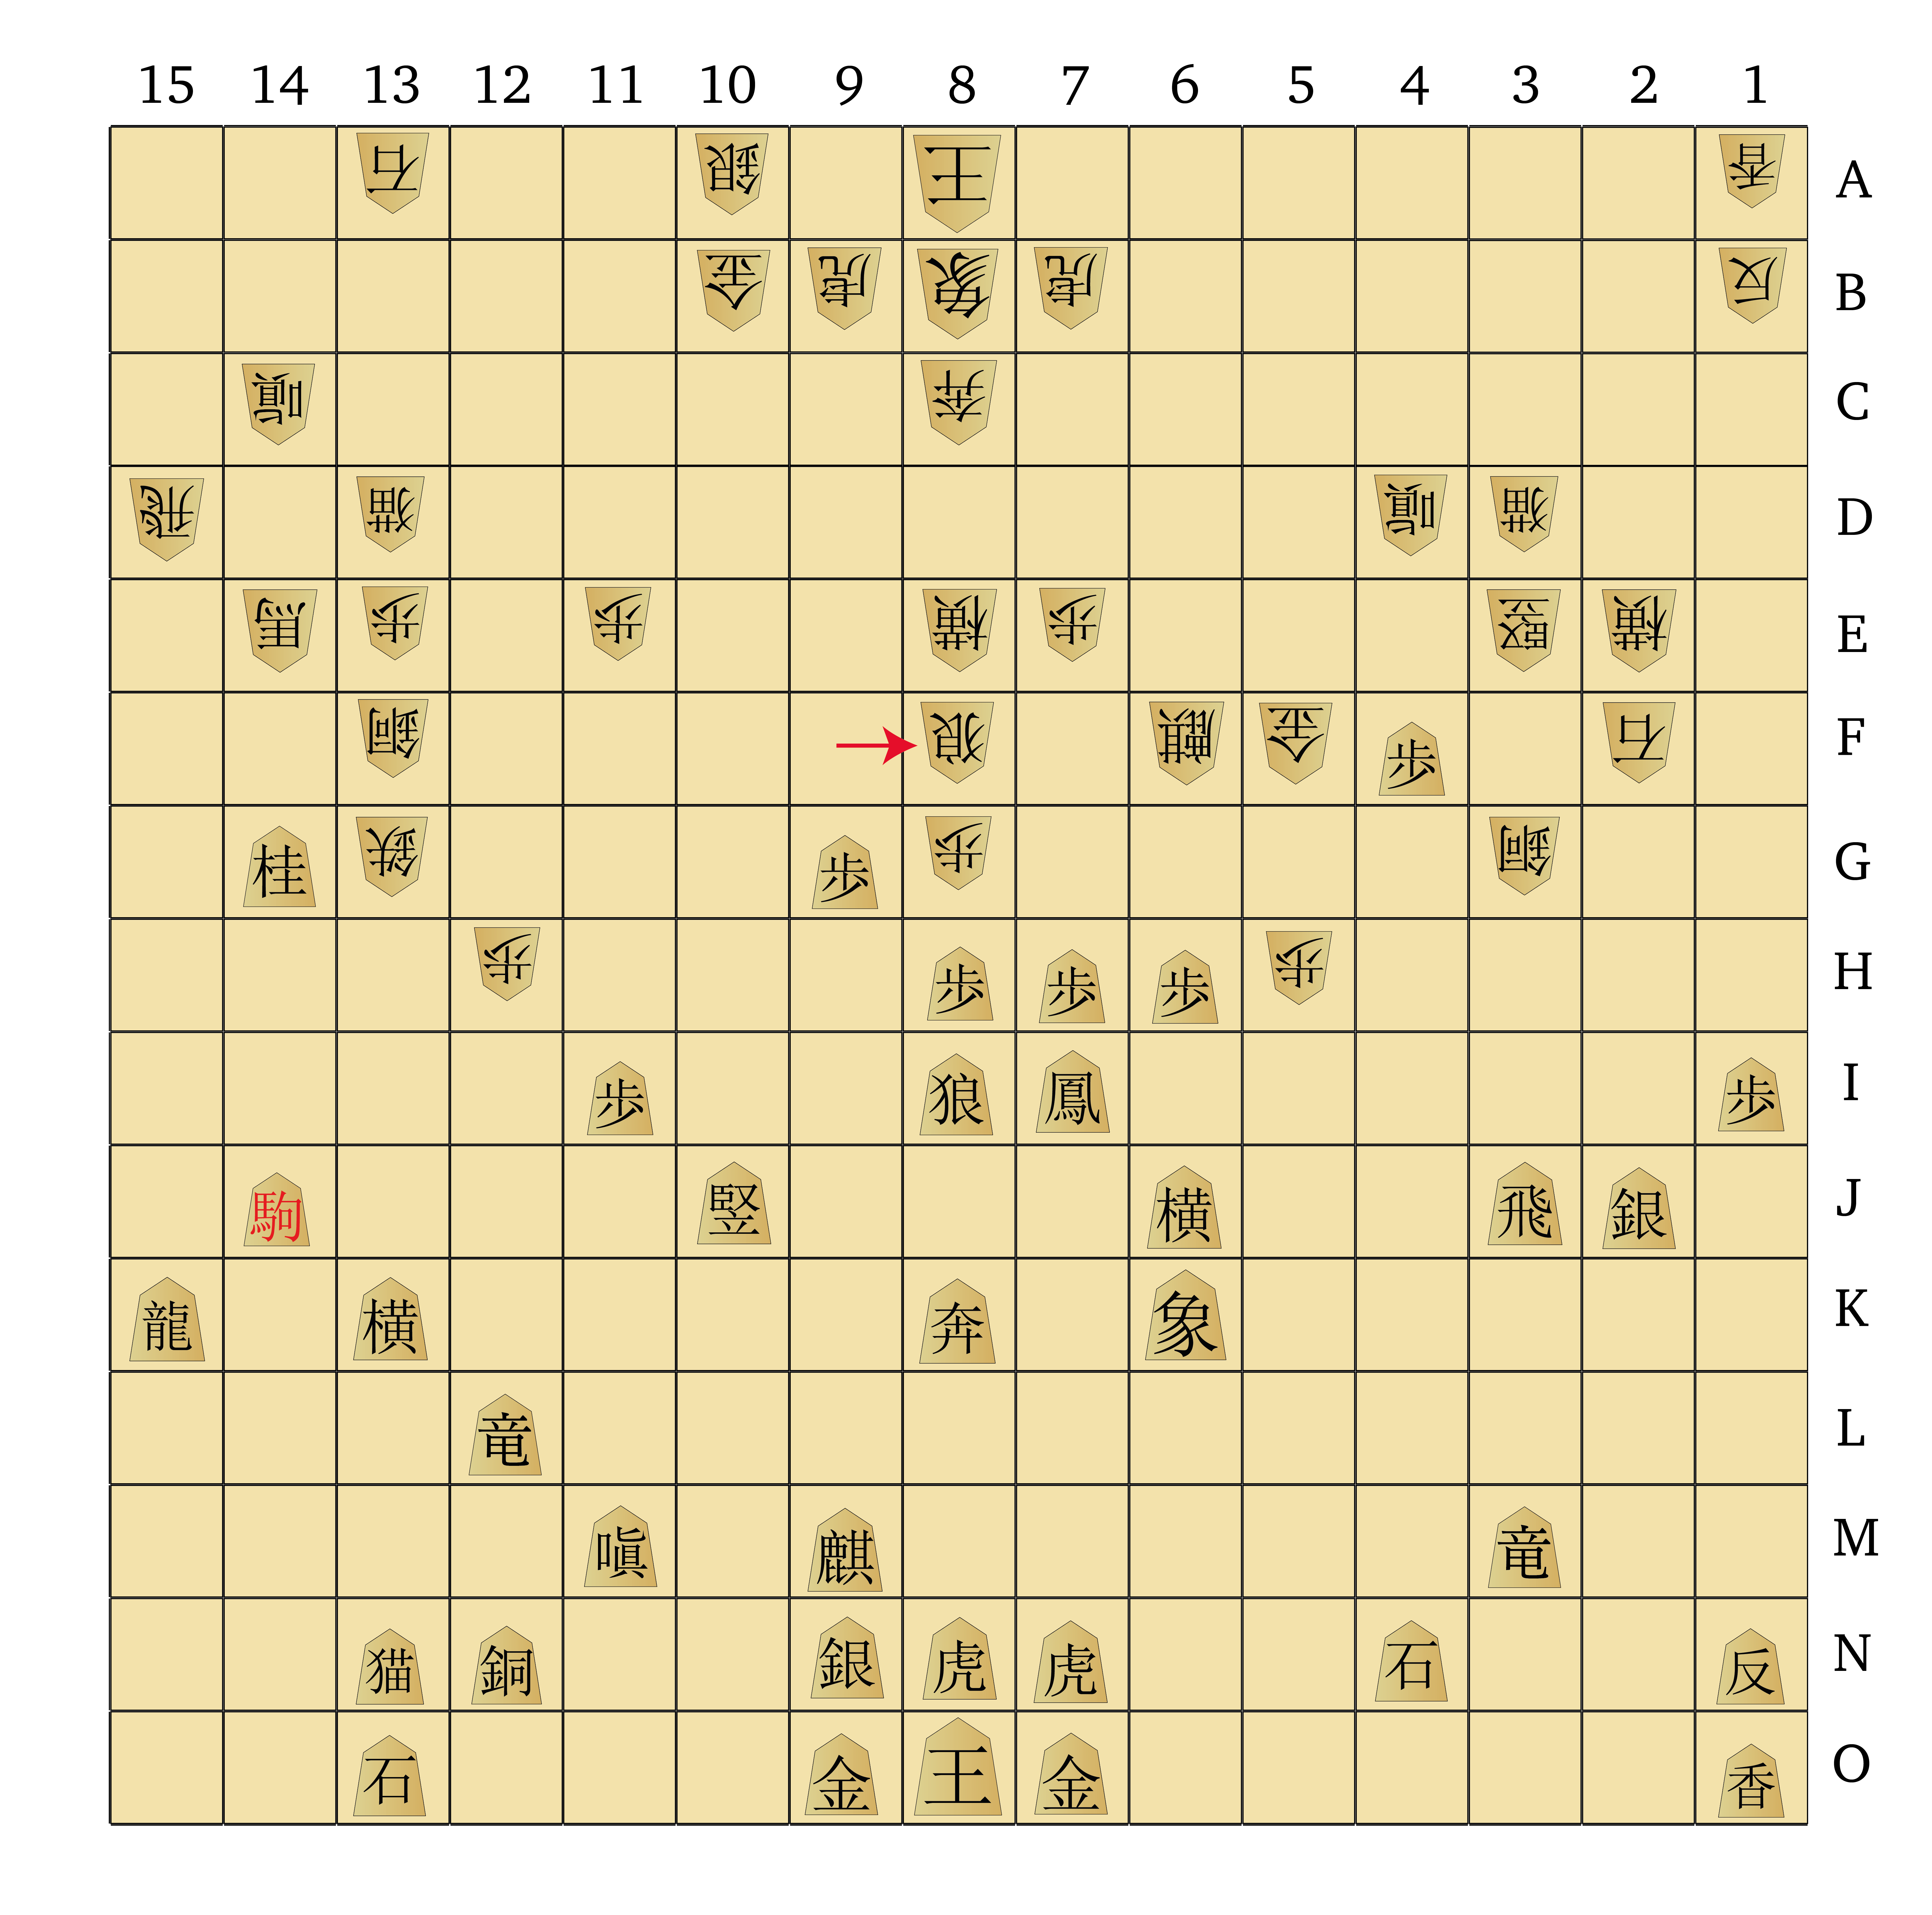
![Dai Shogi 420 -- Move 240 [Recovered]-01](https://drericsilverman.com/wp-content/uploads/2020/09/dai-shogi-420-move-240-recovered-01.png)