Tag Archives: Games

Courier Chess, Part II: Modern Variations

UPDATE 14 Feb 2022: Added Modern Courier Chess and Reformed Courier Chess, and updated my recommendations and some other text. Watch out for these games in the next Ai Ai release!


Modern Takes on Wider Chess

In my previous post on Courier Chess, we took a look at the classic 12th century game of extended 12×8 Chess, which maintained a player base for hundreds of years before finally being overcome by the modern game. Courier is perhaps a bit deliberately paced compared to the 8×8 game we’re all familiar with, but I maintain that it has a great deal of charm and definite strategic interest.

We also met Courier Spiel, a 19th-century revamp of the classic game that added modern touches like a full-power Queen and double-stepping Pawns:

Note that in the Ai Ai implementation, Courier-Spiel uses more standard promotion rules — Pawns must promote on the last rank to any previously-captured piece of the same colour — rather than the strange triple-backward-hopping rules associated with the historical game. If there is demand I can look into providing the old rules, but frankly I think it makes endgames much slower and more difficult to convert, so I find the modernised promotion rules more enjoyable.

Below I’ll introduce you to a few interesting modern Chess variants that take Courier as a jumping-off point. All of these games are playable in Ai Ai against humans or against the AI. Feel free to give them a try, and let me know in the comments which ones you prefer.

Courier Chess with Alibabas

We’ll start here with a very simple variant — this one is exactly how it sounds: Courier Chess, but with the Alfils swapped for Alibabas. The Alibaba is a compound piece that combines the moves of the Alfil — jumping two squares diagonally — with the Dabbabah, which jumps two squares orthogonally. That gives the piece significantly more power, while still restricting it to a subset of the squares on the board.

I have to say I quite enjoy this simple piece swap; the resulting game is still deliberate and strategic like the original, but the Alibabas are stronger and exert more influence on the game. In the sample game, you can see how they prove very useful in the endgame for Black! I’m a fan of Chess variants with intricate endgame play, and this certainly provides that.

ArchCourier Chess

ArchCourier, invented by Eric Greenwood, is a highly-playable modern take on the Courier experience. Eric went to great trouble to tweak and test the game to ensure the piece mix was suitable and that the initial setup was balanced, and I feel he did a very good job.

Rules-wise the game is easy to grasp — all the familiar pieces from Chess move as in the modern game, including the Queen and Pawns. No castling is allowed. Pawns that reach the far rank must promote to any previously-captured piece of the same colour.

However, four new piece types join the fray in this game that give it a very distinct personality from classic Courier:

  • Centaur: moves as a Knight or a Guard (non-royal King)
  • Squirrel: may jump as a Knight, or jump two squares in any diagonal or orthogonal direction — in other words, it can jump to any square two steps away from its starting point
  • Dragon Horse: moves as a Bishop or steps one square orthogonally
  • Dragon King: moves as a Rook or steps one square diagonally

The Guard parked in front of the King provides useful defensive cover, particularly since there is no castling.

The new pieces are well-suited to this game and to Courier’s distinctive 12×8 board. I’m particularly a fan of the Squirrel, a flexible and fun leaping piece that can crack open some surprising tactical opportunities when used well. The Dragon King and Dragon Horse, which will be familiar to Shogi fans, are helpful additions on this larger board.

Alas, ArchCourier does not seem to have received much attention since its creation, which is unfortunate. I highly recommend it for fans of Courier who want something with a bit more zip, but with no real additional rules overhead to worry about.

Modern Courier Chess

This game was developed by FIDE Master Paul Byway and revealed in the now-defunct magazine Variant Chess in 1992. Modern Courier Chess was an attempt to revitalise the ancient game by modernising the moves and changing up the arrangement of pieces, which Byway felt was awkward in the old game. Byway wrote extensively about the game in many issues of Variant Chess, including many analysed games, making it quite possibly the most well-analysed 12×8 variant of all time. All back issues of Variant Chess are available for free download in PDF format, so do go check out Byway’s excellent articles.

Modern Courier updates the ancient game firstly by upgrading the Pawns to the modern standard, and making the Queen a modern one as well. The Elephants are upgraded to Alibabas, and the Fool/Sage pairing of the original game is simplified down to two Ferzes, though each Ferz is granted the ability to make a non-capturing Alibaba leap on their first move only. Castling is not available; instead, an unmoved King that isn’t in check may make a double move in any direction as their first move.

The result is a very appealing variant with ample room for deliberate, strategic play, given that the pieces are kept at a relatively low level of power. If one already knows Courier Chess, then this version is very easy to pick up, as the rule changes are relatively small. Finally, the extensive analysis by Paul Byway ensured that this game is very well-balanced, and a huge variety of opening lines are playable.

Modern Courier Chess has just been added to Ai Ai (as of the time of writing in mid February 2022), so once the next release is available I urge you to give it a try. I personally prefer some of the other options a bit more, as I find the overabundance of diagonal pieces in MCC a bit off-putting, but the game is undeniably well-constructed and highly enjoyable.

Reformed Courier-Spiel

Reformed Courier-Spiel, invented by Clément Begnis in 2011, is a reaction of sorts to Modern Courier Chess. On this website Begnis recounts some of his objections to Byway’s approach to the 12×8 game, and outlines his reasoning for taking Albers’ 1821 formulation Courier-Spiel and modernising it. In essence, he keeps the general shape of Albers’ approach but revises the starting position, castling/promotion rules, and changes up the pieces:

In Begnis’ game, the Courier is renamed the Archer, and given the extended Elephant’s move: it may jump 1-2 squares diagonally. The Fool is renamed the Champion, and may move as a King or as a Dabbabah (leaping 2 squares orthogonally). Finally, the Sage is renamed the Paladin, and moves as a King or a Knight (this piece is known elsewhere as the Centaur). The resulting play is very appealing, in my view, providing a nice upgrade in mating power on the board while not turning the game into an overly hectic tactics-fest.

Reformed Courier-Spiel is perhaps best-suited to the player who has some familiarity with Chess variants, as the new moves will be fairly familiar in that context. The Champion’s move is a nice innovation, however, keeping the late-game mating power of the Man while allowing it to develop earlier with the Dabbabah move.

On the whole I find Reformed Courier-Spiel very enjoyable to play, and I highly recommend it to anyone interested in this elongated variants. I place it in roughly same category as ArchCourier Chess, in that it uses modern variant pieces to spice up the old game, but manages to keep the power level contained nonetheless. In fact, in testing I found that Reformed Courier-Spiel games tend to last roughly as long as Modern Courier Chess games, despite the increased power of the pieces. I’ve found that I tended to end up in some quite intricate and technical endgame positions while playing Reformed CS against the AI, which is a great thing for me given my fondness for the endgame in general.

In any case, at the time of writing (mid February 2022), Reformed CS has just been added to Ai Ai, so look out for it in the next release!

Courier de los Combinados

Courier de los Combinados, created by prolific Chess inventor Charles Gilman, is essentially a combination of ancient Courier with Wildebeest Chess, a popular modern variant on an unusual 10×11 board. Wildebeest Chess extended the Royal Game by incorporating new leaping pieces: the Camel, an extended Knight found in the ancient large variant Tamerlane Chess; and the Wildebeest (also known as the Gnu), a combination of Camel and Knight:

Wildebeest Chess (which I’ll cover in a future post) is known for a wide-open style of play, thanks to these long-distance leaping pieces and a fairly empty board compared to standard Chess. Courier de los Combinados goes the opposite direction, packing Courier’s 12×8 board with additional pieces:

Alongside these two Camels and a Wildebeest on each side, the Wazir and Ferz pieces have been doubled up and parked in front of the King, creating an advanced forward line of Pawns. The Alfils are gone entirely, and the Queen is upgraded to its modern power levels. The King may also castle with his Rooks, and Pawns must promote at the last rank to Queen, Wildebeest or Guard.

The play that results is quite interesting; while the initial setup is fairly dense, the long-distance leapers provide some lethal early threats, making the opening surprisingly sharp. In fact, be careful which Pawns you move in the opening, as very quick Wildebeest mates are possible if you open up the wrong squares! Note that in the sample game, an AI vs AI test game, both sides elected to allow the opponent to take a Rook early on; I suspect this is very much not an optimal opening! Clearly I need to do some tweaking to Ai Ai’s engine parameters for this game.

Charles Gilman produced a shocking number of variants during his time on the Chess Variant pages, and was at times criticised for not actually playtesting enough of his games. I can say however that this take on Courier has proven to be quite interesting, and may provide some intriguing challenges for opening theoreticians!

Northern Ecumenical Chess

Here we have another interesting Charles Gilman creation, this time extending Courier’s board to 16×8, or the equivalent of two standard Chess boards laid side-by-side. Northern Ecumenical Chess takes Courier de los Combinados to the next level by adding in compound pieces of the Knight and Camel:

  • Cardinal: moves as a Knight or a Bishop
  • Marshal: moves as a Knight or a Rook
  • Caliph: moves as a Camel or a Bishop
  • Canvasser: moves as a Camel or a Rook

Rules-wise, we have castling in this game (with the Rooks), Pawns may take an initial double step, and must promote to any non-Pawn piece upon reaching the last rank.

I believe this was one of the first games I added to Ai Ai once the Camel compound pieces were available, which tells you something about my opinion of the game. I have a certain fondness for oblong boards in Chess, and going all the way to 16×8 is even more entertaining in my opinion; such boards can be easily constructed by mashing together two standard boards, which is a practical benefit, and the odd shape creates a substantially different feel in play. As you might expect, pieces that can slide horizontally — Rooks, Marshals, Canvassers and Queens — are even more useful here, as they can reposition more easily than the diagonal pieces, which take multiple moves to cross the longer axis of this board. The Knight feels less powerful on a board like this one, given how long it takes to get it to a useful position, but in contrast the Wildebeest is a flexible and dangerous attacker.

All told, I enjoy this variant quite a bit and find it a nice balance between rough-and-tumble tactics and slow-burn positional play. If you fancy experimenting with a very long board and some unusual pieces, I can highly recommend giving this a try.

Other Oblong Oddities: Duke of Rutland’s Chess

As I got into Courier Chess and its variants, I soon discovered that Courier was not the only historical Northern European expanded Chess game on an oblong board. This game was invented by John Manners, the Third Duke of Rutland in 1747, and it managed to have a brief spell of popularity until his death in 1779. The game has languished in obscurity since then, but we still honour the Duke’s creative accomplishment by calling it Duke of Rutland’s Chess.

Rutland’s Chess is an odd game, not just for its unusual board size, but also due to the selection of pieces:

Click on the image of the starting position and you’ll see the strangeness for yourself (note I use the starting setup provided in Jean-Louis Cazaux’s book A World of Chess, rather than the setup on the Chess Variant Pages which is the mirror image of this one). First, we have four Bishops instead of two, and three Knights instead of two, which introduces an unusual imbalance between the minor pieces. Second, we have Dragon Kings present — moving as Rook or King — yet we have no Dragon Horses (Bishop or King). Third, we have a Marshal (Rook + Knight), but no Cardinal (Bishop + Knight).

This strange starting army raises a number of questions. Why are two of the Bishops not Dragon Horses instead? Did the Duke not know about them? If he didn’t, one would expect he would have easily extended the Dragon King’s move to the Bishop and reached the same conclusion anyway, but it seems he didn’t. Why the third Knight? We know that the Cardinal and Marshal (Bishop + Knight and Rook + Knight) were known at least since 1617 in Carrera’s Chess, and a Marshal is present here, so why no Cardinal? I find those oddities a bit fascinating; perhaps we may never know why the Duke made these particular design choices.

All that aside, the resulting game is nevertheless quite entertaining. The extended board is deeper than that of Courier Chess, providing more room for manoeuvre. The Pawns in this game have the option of an initial double- or triple-step as their first move, meaning that the deeper board doesn’t particularly bog down the opening. The presence of the modern Queen, Marshal and Dragon King further open things up, providing opportunities for sharp tactical play. After a few plays one can see why the game found a certain following, at least for a brief time; apparently the legendary Philidor was quite the fan of this game.

Modern Manners

As one might expect, Duke John Manners’ unusual game has provoked some interest in the Chess variant community, and various inventors have tried to resolve the imbalances in the original game’s starting position. A simple and effective example is Modern Manners, coming to us from the ever-prolific Charles Gilman.

Modern Manners uses the same board as Rutland’s Chess (though the image in the linked CVP entry shows a 14×8 board instead, for some reason), but alters the starting setup in the most logical way:

Modern Manners replaces the odd third Knight with a Cardinal (Bishop + Knight), and swaps out two Bishops for two Dragon Kings, giving us a logically complete setup and a slightly increased overall power level. As in Rutland’s Chess, Pawns have the option of an initial triple-step forward, and they may promote to any non-Pawn piece upon reaching the last rank.

I highly recommend this game as a modern alternative to Rutland’s Chess; the new setup is easier to understand and use, and the addition of the Cardinal in particular livens up the tactics even further. Of course you should try Rutland’s innovation first, as you may well find its quirkiness to your liking! Personally I feel these simple changes transform the game into a more engaging and more logical game, and yet it retains the wide-open, fast-paced feel of the original, so I prefer this to Rutland’s effort.

Manners Kamil

Charles Gilman didn’t stop there — on the very same CVP entry you can find Manners Kamil, a 16×8 game that adds two Camels and swaps the Cardinal and Marshal for two Wildebeests:

The lengthened board and altered pieces substantially change the feel of this game. The powerful long-distance attacks of the Cardinal and Marshal are replaced with the airborne threat of the Wildebeests, leading to some tricky tactics in the early stages of the game. In fact I’m slightly uncertain as to whether the game is meant to be played on a 16×10 board; the CVP entry is ambiguous, given that the Modern Manners board is shown as 14×8 despite the clear statement in the text that it uses the Rutland Chess board. The Manners Kamil description states that 2 files are added but does not explicitly mention the board’s depth, so perhaps 16×10 should be used instead of 16×8.

In any case, I will experiment more with Manners Kamil on 16×10 and provide the .mgl file in a future release of Ai Ai. For now I do recommend giving this game a try on 16×8 and seeing how you feel about it. The compressed vertical dimension is somewhat compensated by the reduction in long-range pieces, and on the whole the game still feels fairly open. However, I sense that the player best able to develop their Rooks and Dragon Kings may enjoy a good advantage; without them in play, only the Queen can hold sway over the board’s longer axis.

In my admittedly limited test plays thus far, I sense that the 16×10 version may be slightly better. The open playing area is more reminiscent of Modern Manners and its historical predecessor, and the additional two rows give the opening a bit more room to breathe, while also reducing the early mate threats of the Camels and Wildebeests.

Sneak Preview: Giga Rutland Chess

Here’s a quick sneak peek at one of my own creations — Giga Rutland Chess, a huge expansion of the original’s rather sparse starting position:

An entire extra row of pieces is added to each side, which includes types of pieces completely new to Rutland’s Chess:

  • The Phoenix and Kirin, adopted from Chu Shogi
  • Knights and Camels enhanced with additional short-range moves
  • The Hunter (moves forward as a Rook, backward as a Bishop), and the Hawker (moves forward as a Bishop, backward as a Rook)
  • And more besides!

I won’t go into much detail here because the game is still being tested, but my intent has been to provide a denser, more hectic game on the 14×10 board, and while it may be rather too much for some, I find it enjoyable so far. More to come on this game once it’s finalised. I’m currently in the third major revision of this game; the most significant change from the previous version was to remove the Cannon pieces, which I find difficult to manage on large, dense boards, as their tactical threats are hard to spot in that context. More changes may come in the future, but so far this version seems promising!

Alekhine Chess

This game is a bit of a mystery in some ways — despite the name being Alekhine Chess it has nothing to do with the famous Chess player Alekhine. Why is it called Alekhine Chess then, you ask? I have no idea. But that aside, it’s an intense and dramatic variant on a 14×8 board, and a good choice for fans of brutal tactics.

As large variants go, the setup here is pretty simple: all the standard Chess pieces are here, plus an extra Queen, two Marshals, two Cardinals, and an Amazon (Queen + Knight). The presence of all these powerful pieces generates a game of intense tactics; most of the pieces on the board are incredibly mobile, and the Amazon can actually checkmate the enemy King completely on its own, without the help of any other piece!

I must say I was a bit sceptical of this game initially, as the Cardinal, Marshal and Amazon are very common pieces in Chess variants and not that fascinating, and the sheer power density on the board seemed like it might reduce the game to a simplistic slugfest. But in practice, it’s anything but simplistic. The entire game will balance on a knife edge, certainly, and a single blunder could result in a horrendous slaughter, but there’s absolutely room for positional thinking thanks to the large dimensions of the board. As you can see in the GIF, each game of Alekhine is high intensity, and when playing you must get comfortable with being under constant threat at all times! I enjoy this variant a lot, and would be happy to see it gain more traction.

Double Chess

Here we have a game that doesn’t quite fit the mould we’ve established here so far. Double Chess is exactly what it says on the tin: Chess, except doubled! We use a double-length 16×8 board, give each player two full Chess sets for their side (but replace the extra King with a Queen), and off we go:

Now, some may quite rightly take issue with me including this game in a list of Courier-inspired games. Courier, Rutland’s Chess, and the others in this article are full-on extensions of Chess, expanding both the board and the pieces available to each army. Double Chess extends only the board, using only standard pieces. However, in my mind the use of the double board places it in a similar category, if only because of the distinctive feel of playing on these elongated boards. The use of only standard pieces also makes the game extremely easy to play in real life — just buy two cheap tournament Chess sets with those roll-up plastic boards, trim the edges so you can fit the board edges snugly together, plonk your two sets of pieces down, and off you go!

The resulting game is surprisingly different from normal Chess, and of course can run substantially longer. I usually prefer games with new pieces, but this game is one of the few using only the standard army that I find just about as good as the more adventurous designs. Creator David Short also provides some sample games and a fully-commented game to help the beginner, which is fantastic for those looking to give this game a try.

On the whole it’s an excellent game, and well worth your time.

Full Double Chess

Full Double Chess takes the basic idea of Double Chess and extends it, so that the board now includes the compounds of the Knight with the Bishop, Rook and Queen:

Full Double Chess has one immediately obvious deviation from Double Chess — each side has two Kings! Each King can also castle with either the Marshal or Rook on either side, meaning that when implementing this game I had to allow for a huge assortment of possible castling options. Both Kings must be eliminated to win, which is a nice counterbalance to the huge power of the additional Cardinals, Marshals and Amazons on the board. Thanks to the double Kings, the game won’t end immediately after a single blunder — though of course the Amazon could easily checkmate both Kings at once if you’re not careful!

Full Double Chess is quite a fun variation on the oblong Chess theme; the double Kings are an unusual feature that works really well in this context. The additional Knight compound pieces are again not the most exciting pieces, but fit perfectly in this game, and make it easy to introduce this game to someone who may be new to the concept of Chess variants as a whole. I think this game co-exists quite nicely with Double Chess; they play entirely differently and present really divergent takes on the double-board theme. David Short, creator of Double Chess, was rather disparaging of Full Double Chess on the basis of its ‘new fangled’ pieces; however, the added pieces in this game were in fact invented centuries ago, so the only way they could really be ‘new fangled’ is if David is several hundred years old!

My only issue is the name, really. The creator insists the game includes all the compounds of the basic Chess pieces, but we are actually missing Rook + Knight + King and Bishop + Knight + King, which can be seen in Jean-Louis Cazaux’s Very Heavy Chess (more in this game in a future article). In my opinion, a truly ‘Full’ Double Chess perhaps should include those pieces and widen the board even further. Besides that very pedantic gripe, I strongly recommend giving this game a try!

Final Thoughts

I hope you’ve enjoyed these brief introductions to a few games that build on the oblong foundations of the ancient game of Courier Chess. There are more games in this category that I haven’t covered, of course, but I’ve tried to include a good variety of options within Ai Ai that give players some interesting and distinct games of this type.

If you’re new to these types of variants, I’d recommend that you start with the historical games first — Courier Chess, Courier-Spiel and Duke of Rutland’s Chess. These games are very distinct from modern Chess but are easy to pick up and play as a newbie, and they’ll be a nice introduction to the feel of playing on a widened board. From there, you can progress to modern takes on each, with the natural next step from Courier being Reformed Courier-Spiel due to its relationship to Courier-Spiel, and of course Modern Manners is the natural follow-up to Rutland’s Chess. From there, Modern Courier Chess and ArchCourier would be excellent choices.

If you want a modern take that diverges further from the Courier model, Double Chess is an enjoyable and highly accessible double-board game to try out. Alekhine Chess is a good one to try as well, particularly for the tacticians out there. Finally, if you hunger for some new pieces on the longer boards, I can recommend Northern Ecumenical Chess as an enjoyable and balanced double-board game with interesting yet intuitive new pieces.

From here I will move on to some other approaches to large board Chess and give some more comments and reviews on games in these categories. First I plan to cover games that extend the Chess army through compounds of classical pieces, like we saw in Alekhine and Full Double Chess; there are a LOT of games like this however, so I’ll be quite selective in my coverage. I’ll also include some games of mine in this category, which take the compound-piece approach to its logical extreme.

I should mention that in the previous Courier article, I’d promised to provide some detailed commentary on sample games of Courier and Courier-Spiel; unfortunately I have to put this to one side for now, as I did a tonne of work for that post and managed to lose nearly all of it! I do plan to get back to that, but I’ll need to start my analysis again, so it will take some time.

Tagged , , , , , , , , , , , ,

Reviewing (almost) all the games on MindSports

UPDATE 6 Feb 2022 — Altered the last section to cover a more general list of games that aren’t on MindSports but could be, and added reviews of Gomoku and Renju.  I’ve become fond of the n-in-a-row genre of games, so often maligned on the BGG forums, and these are the most classical games of that type.  Also made a minor update to the Russian Checkers review.

UPDATE 6 Nov 2021 — Oust review updated, thanks to finally having a breakthrough!


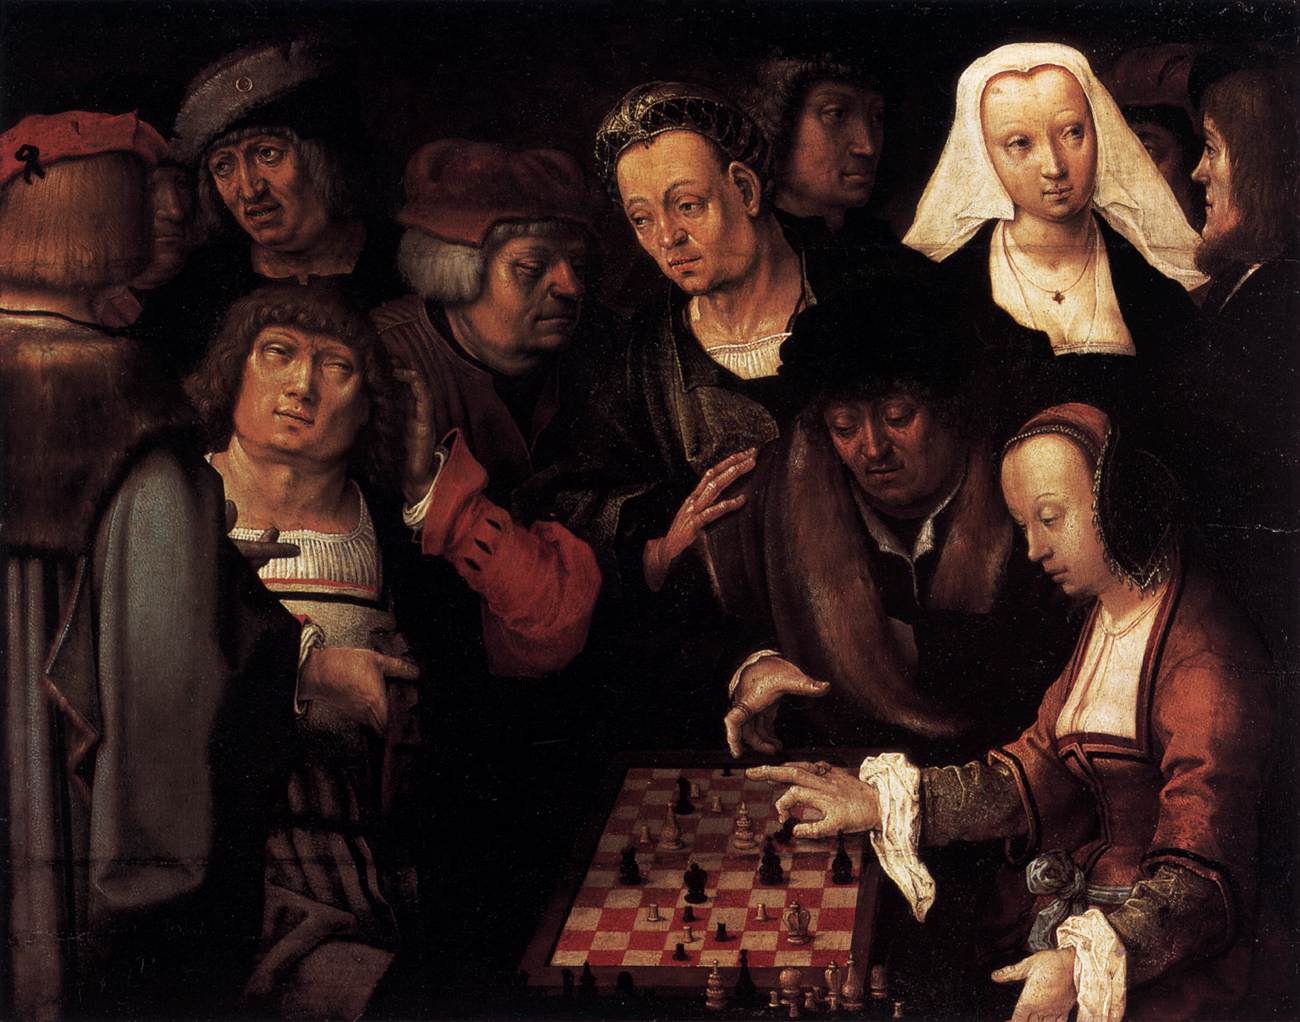
Christian Freeling’s MindSports site is an essential destination if you want to play some good abstract strategy games.  Christian’s own games take centre stage, of course, but numerous other games, both traditional and modern, are also featured.

During the pandemic I’ve taken the time to try out most of the games on MindSports, either against AI or using my collection of various printed boards.  I was keeping my impressions in a little text file, mainly as a reminder of what to focus on in future blog posts, but have decided to put them up here in case they might help anyone looking for something to play but perhaps lacking the time to try everything until they find a hit.

Before I start I’m going to do something I wish other reviewers did, which is provide a summary of my general perspectives on games.  Hopefully this will give you an idea of where I’m coming from, and will help you interpret my mini-reviews in that light.

  1. I value games with tradition, that have survived centuries of scrutiny, and that have a culture that has grown around them.  However, I also love experimenting with new rules, and with variants of existing games.  So in that sense I probably would annoy both the traditionalists and the cult-of-the-new types.
  2. Simple rules are nice, but as a regular player of very complex board games,  I tend not to consider rules simplicity a particularly important factor in my evaluations of games.  A good game is good regardless of how long the rules document happens to be.
  3. I have dabbled in game design but above all I’m a player.  With that in mind I’m trying to avoid terms like ‘arbitrariness’ or ‘inelegance’, which are ill-defined terms that relate to mostly to rulesets and not gameplay.

And my scoring system, which uses the entire 0-10 scale:

  • 0-2/10: I do not like this.
  • 3-4/10: There are other similar, and better options available.
  • 5-6/10: Good but not earth-shattering.  Worth a try if you like that sort of thing.
  • 7-8/10: Very good games that deserve your attention, even if you’re not normally into the genre.
  • 9-10/10: Games that are either modern classics or traditional classics.  Potential lifestyle games.

While I’m here, a disclaimer: these opinions are intentionally brief, to-the-point, and somewhat flippant.  I don’t claim any particular authority here, so do yourself a favour and don’t take these overly seriously!

With that out of the way, let’s start with the games in The Arena.

The Arena

Christian’s six essential games
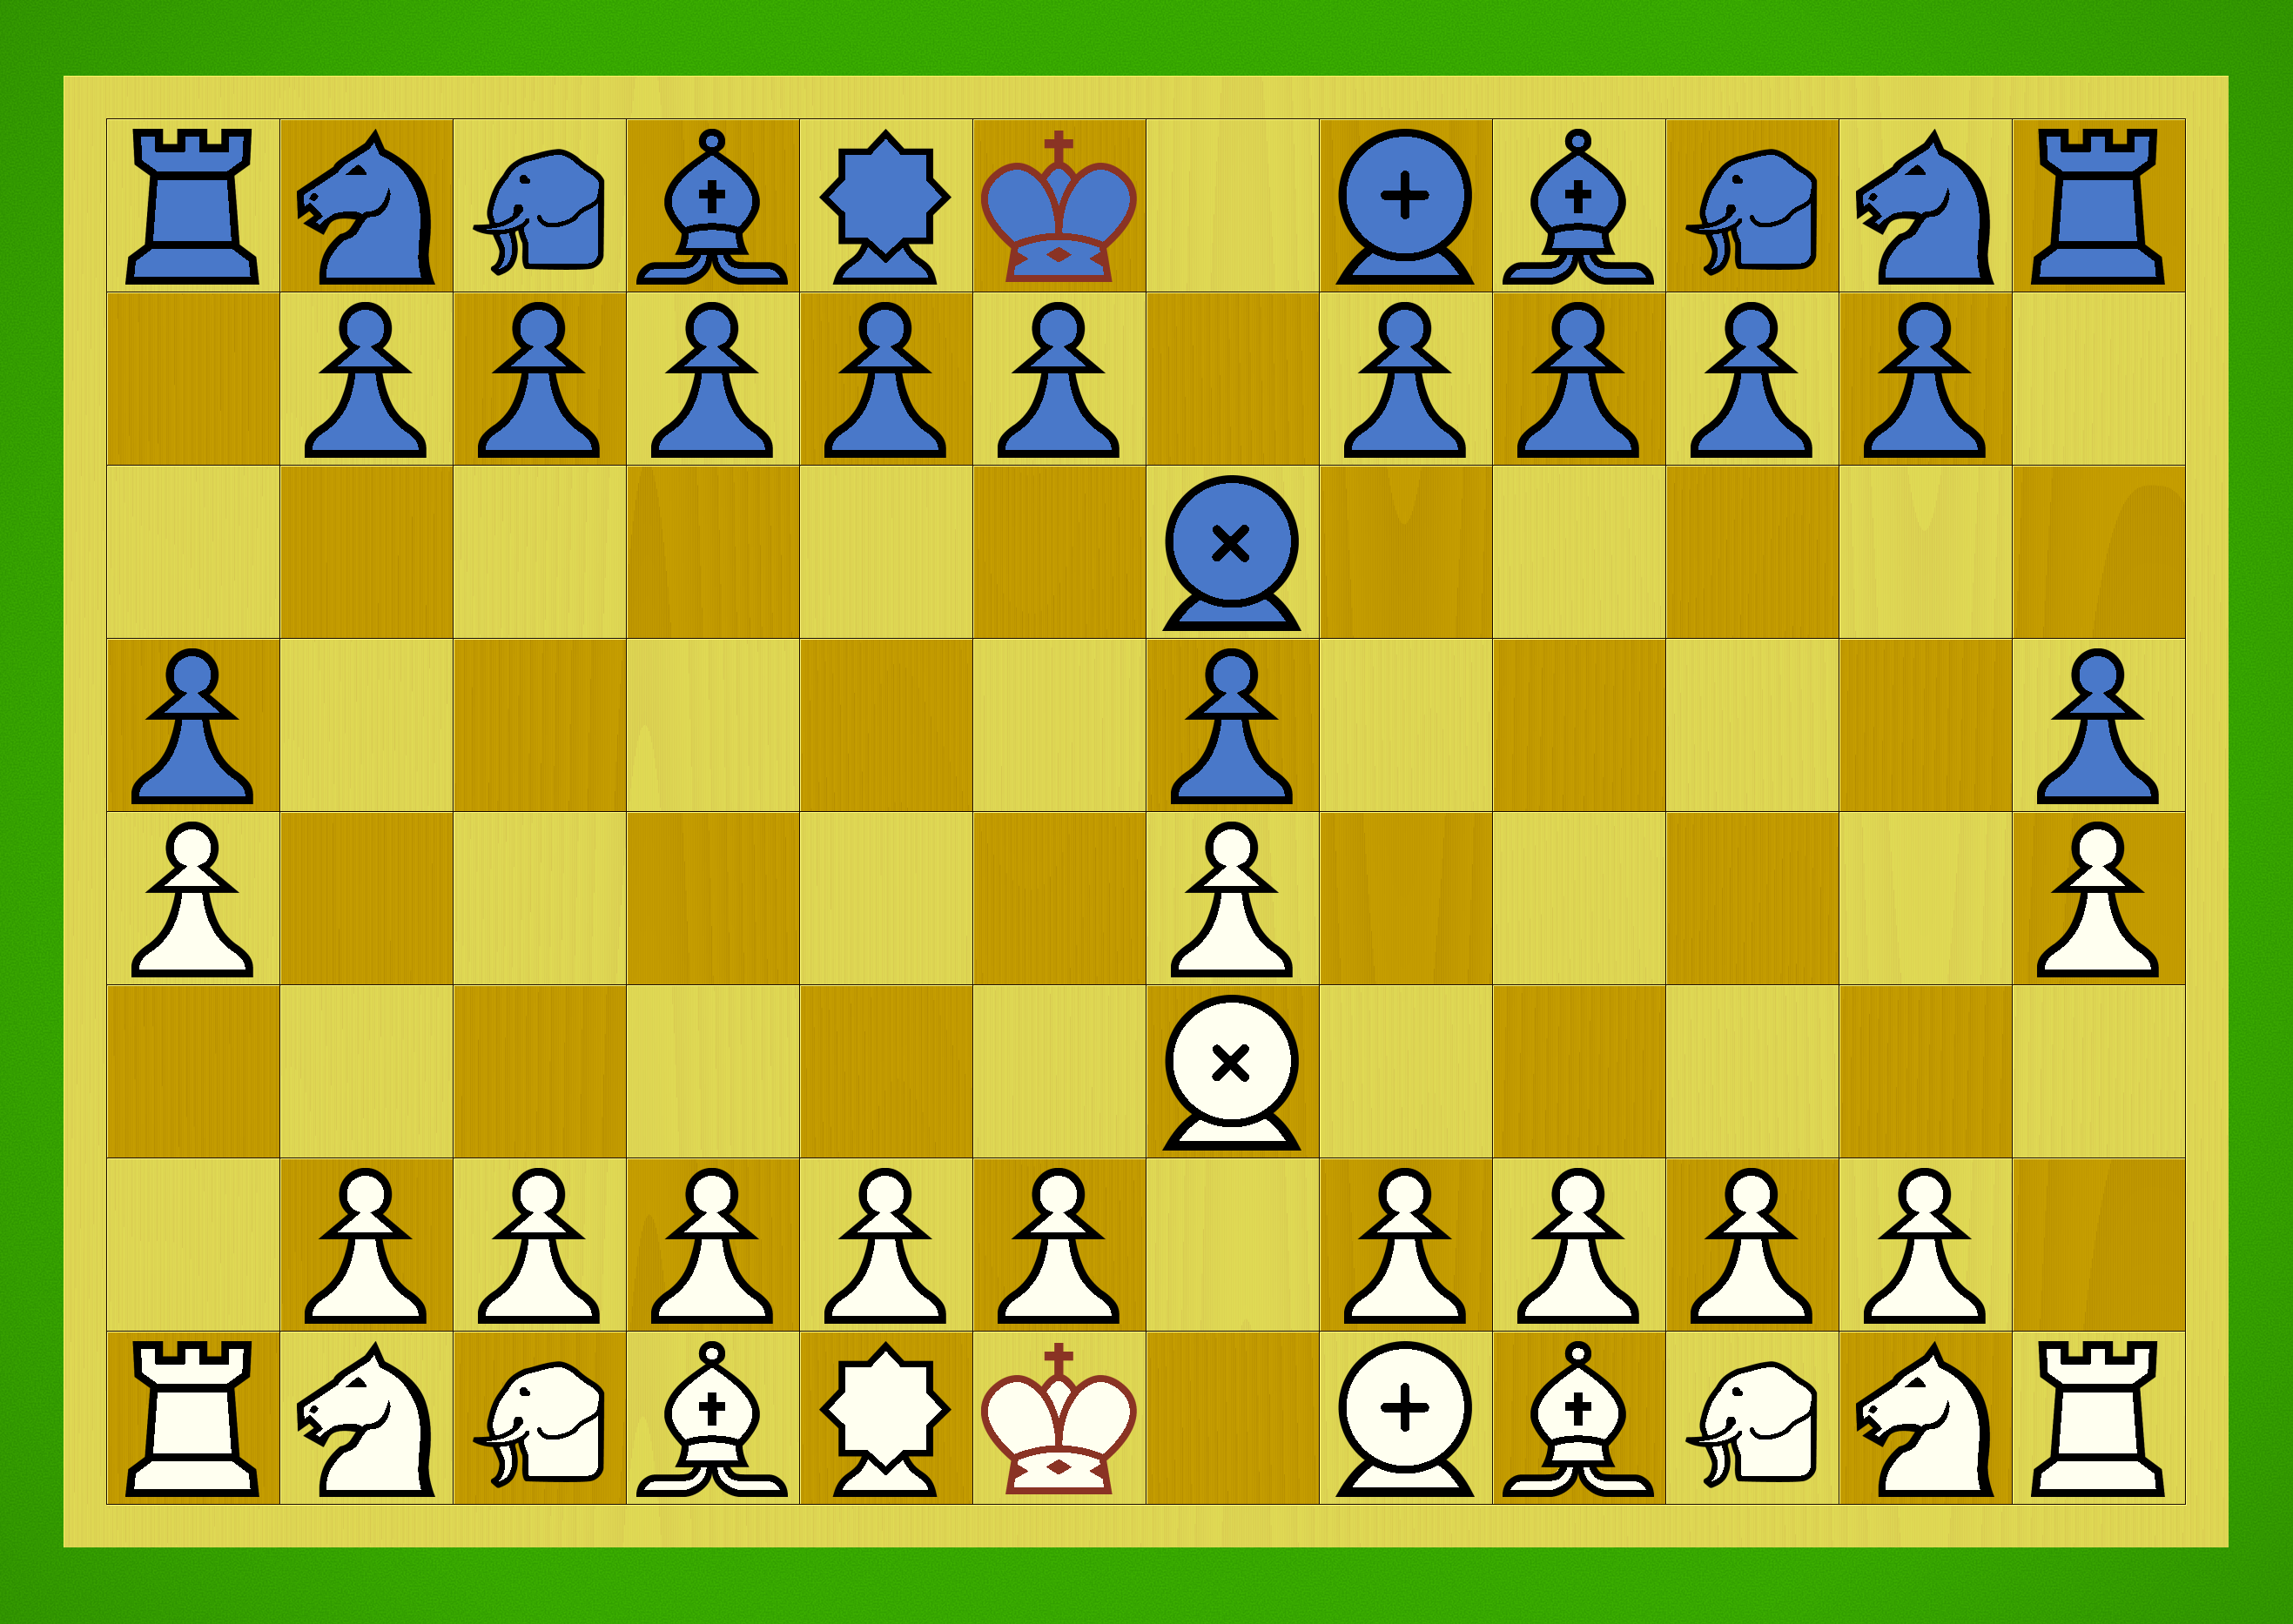
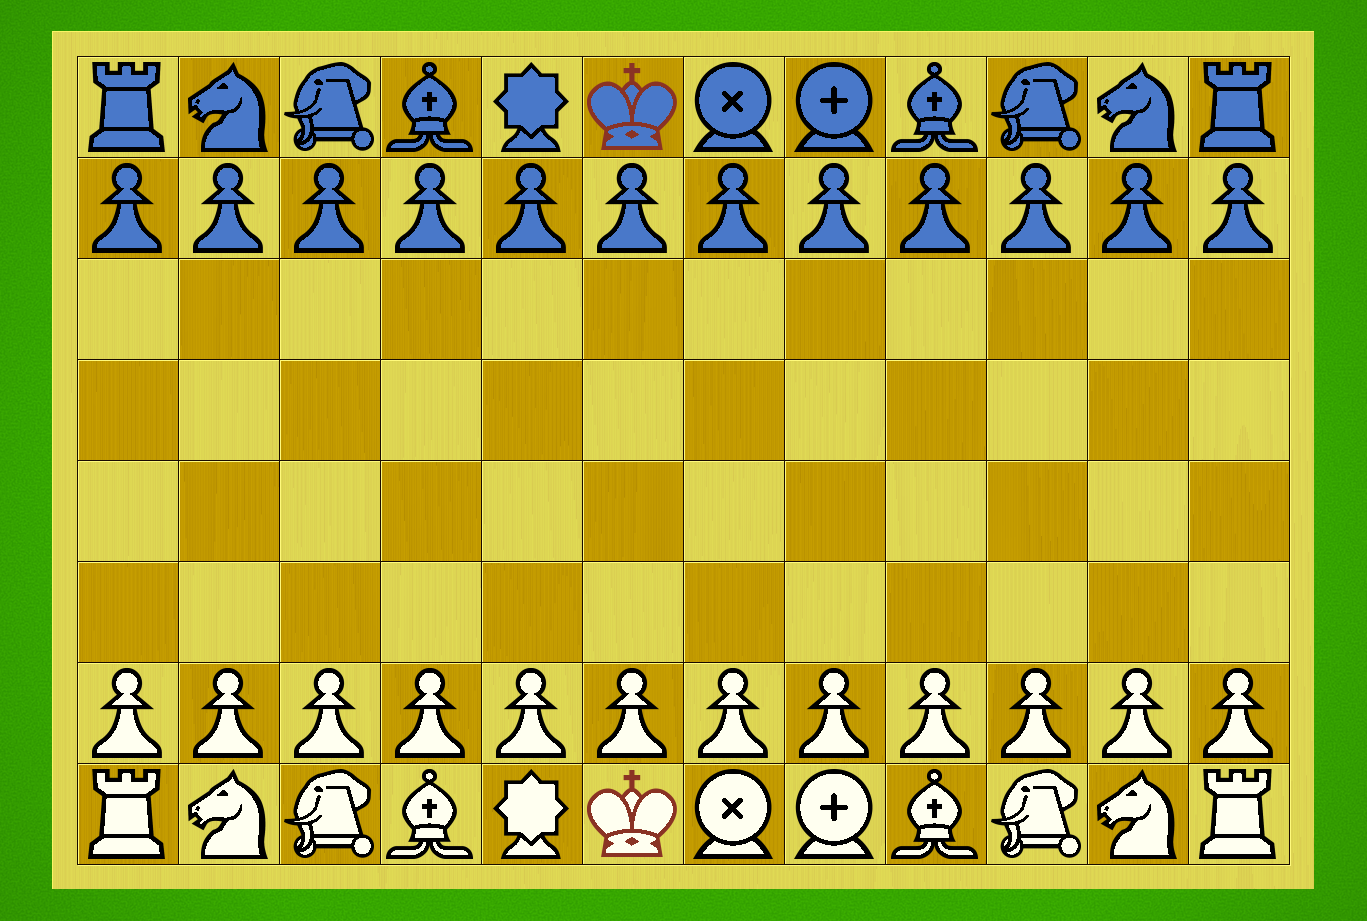
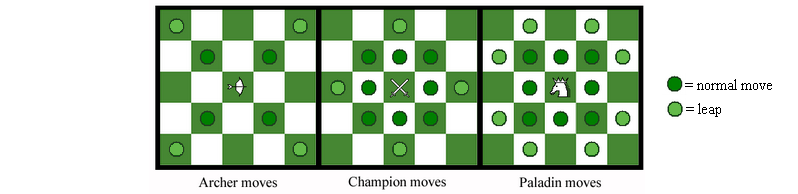
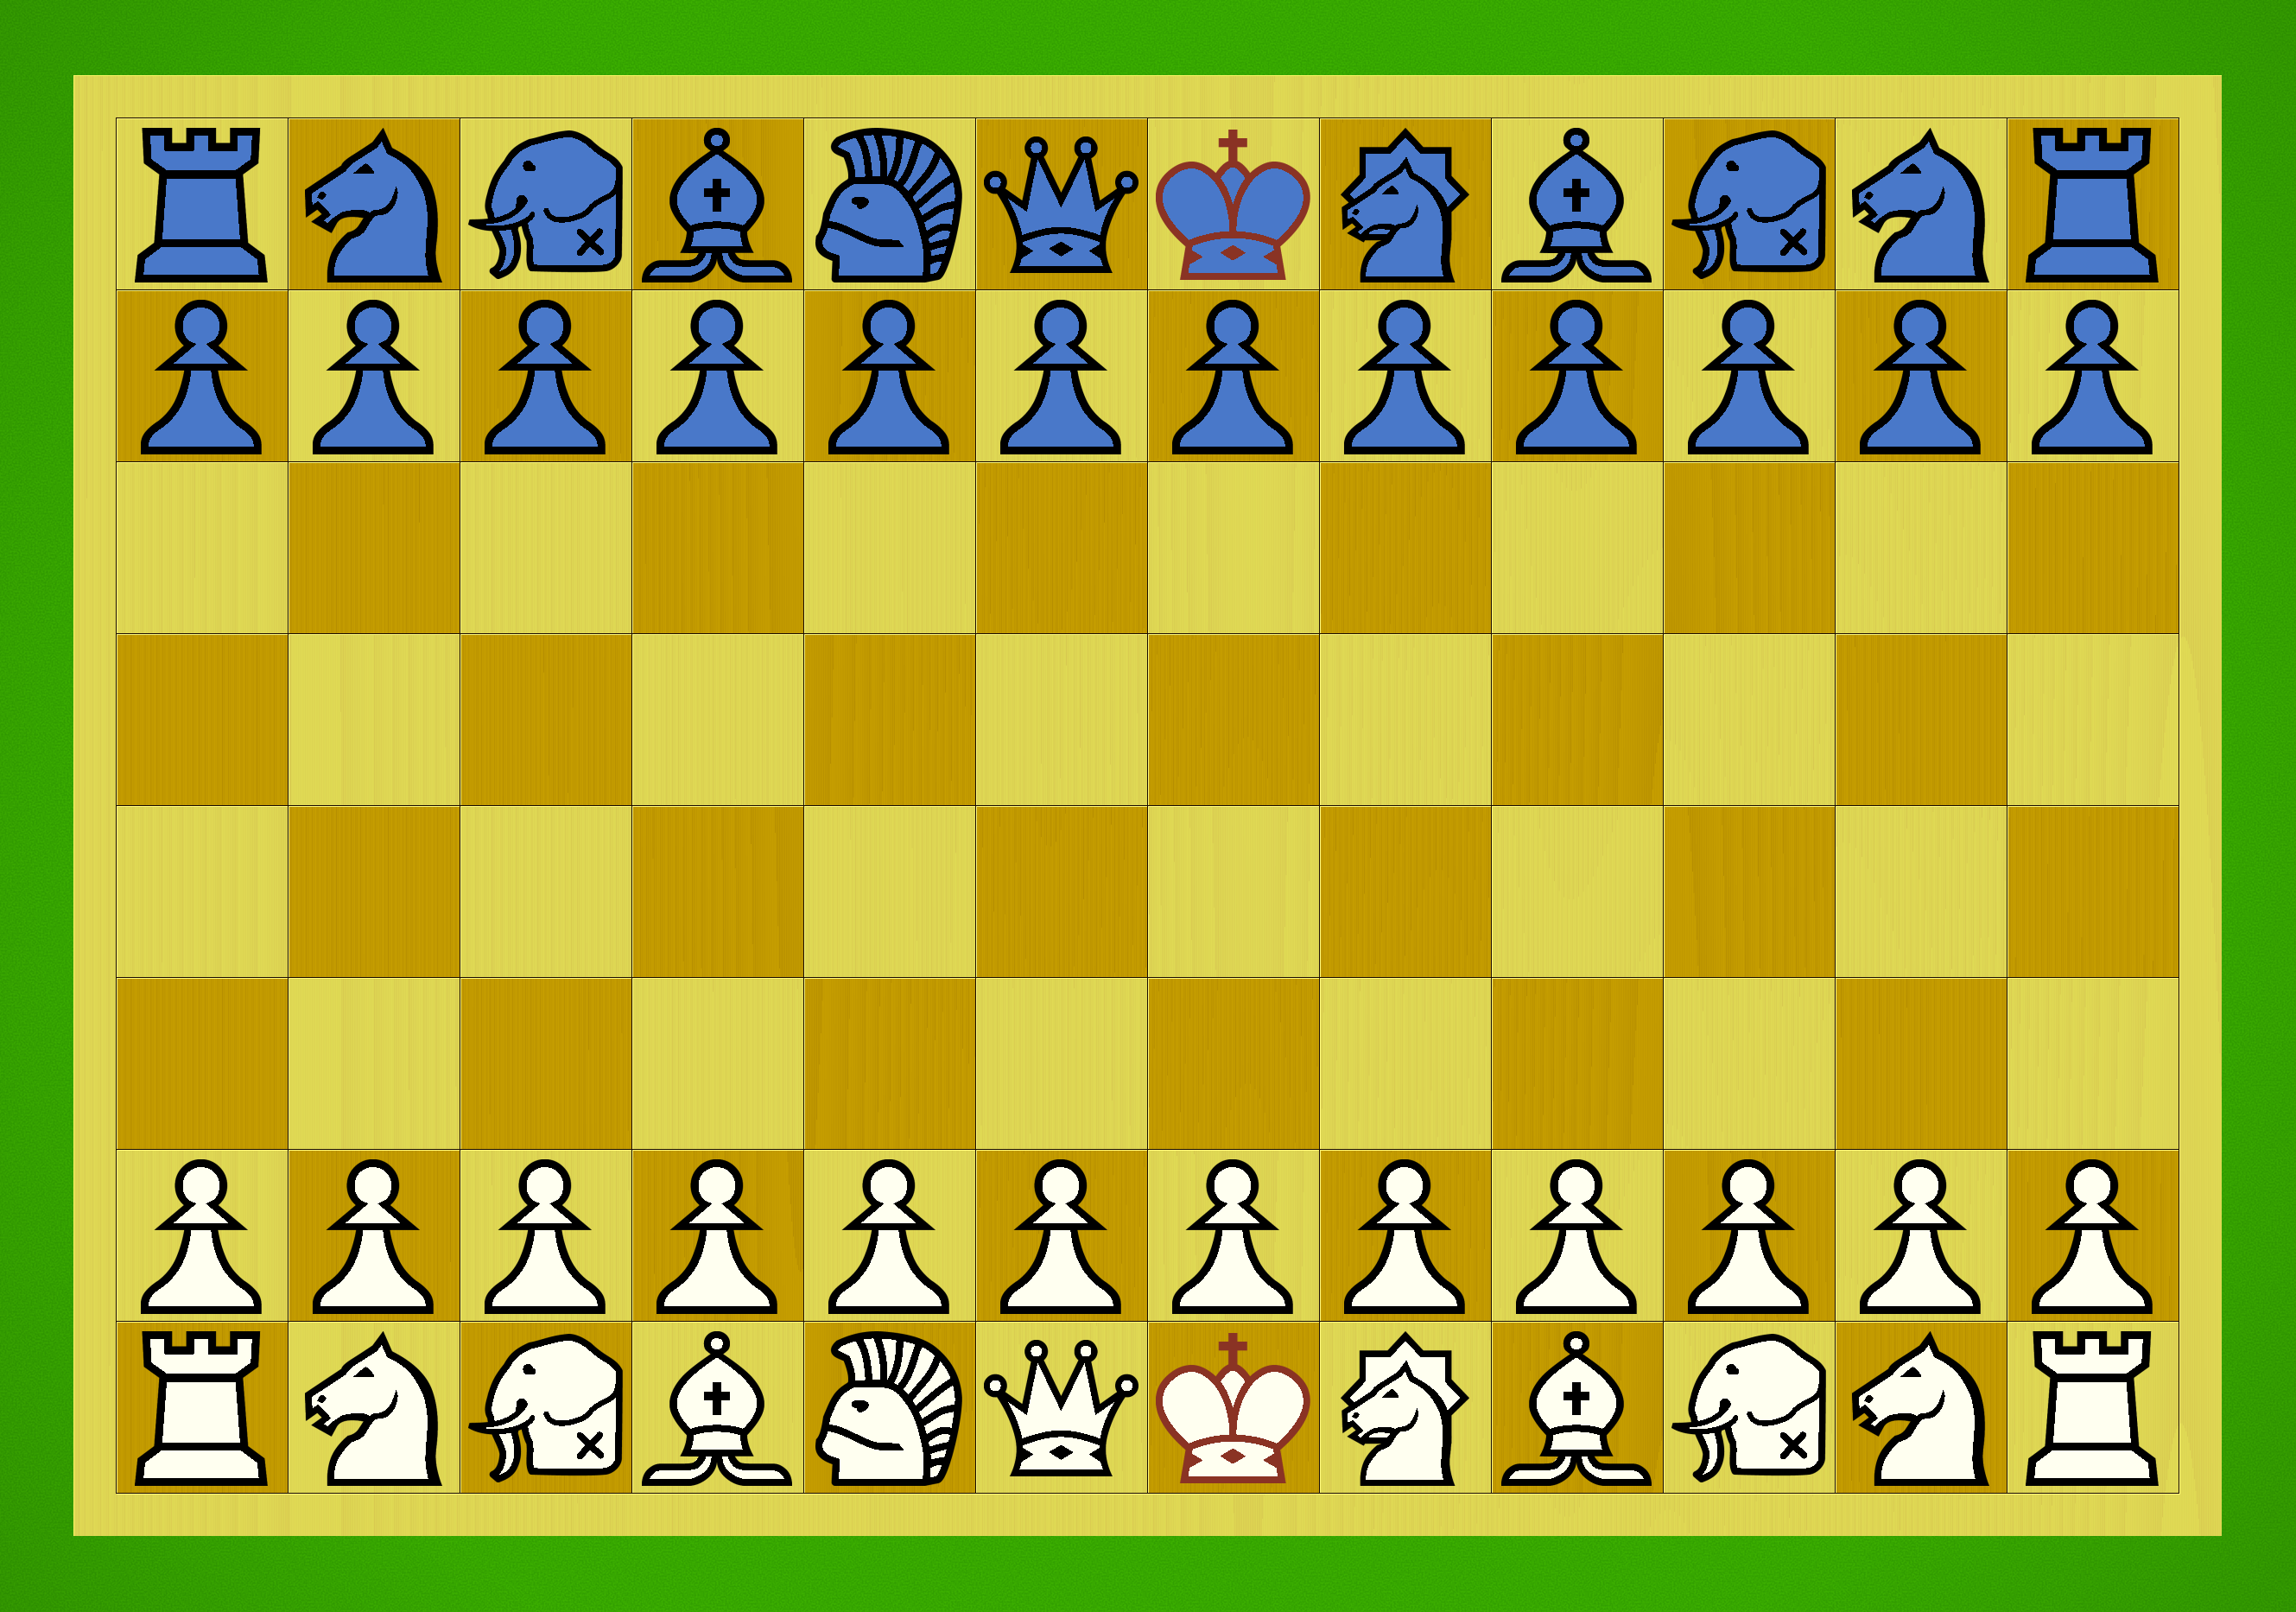
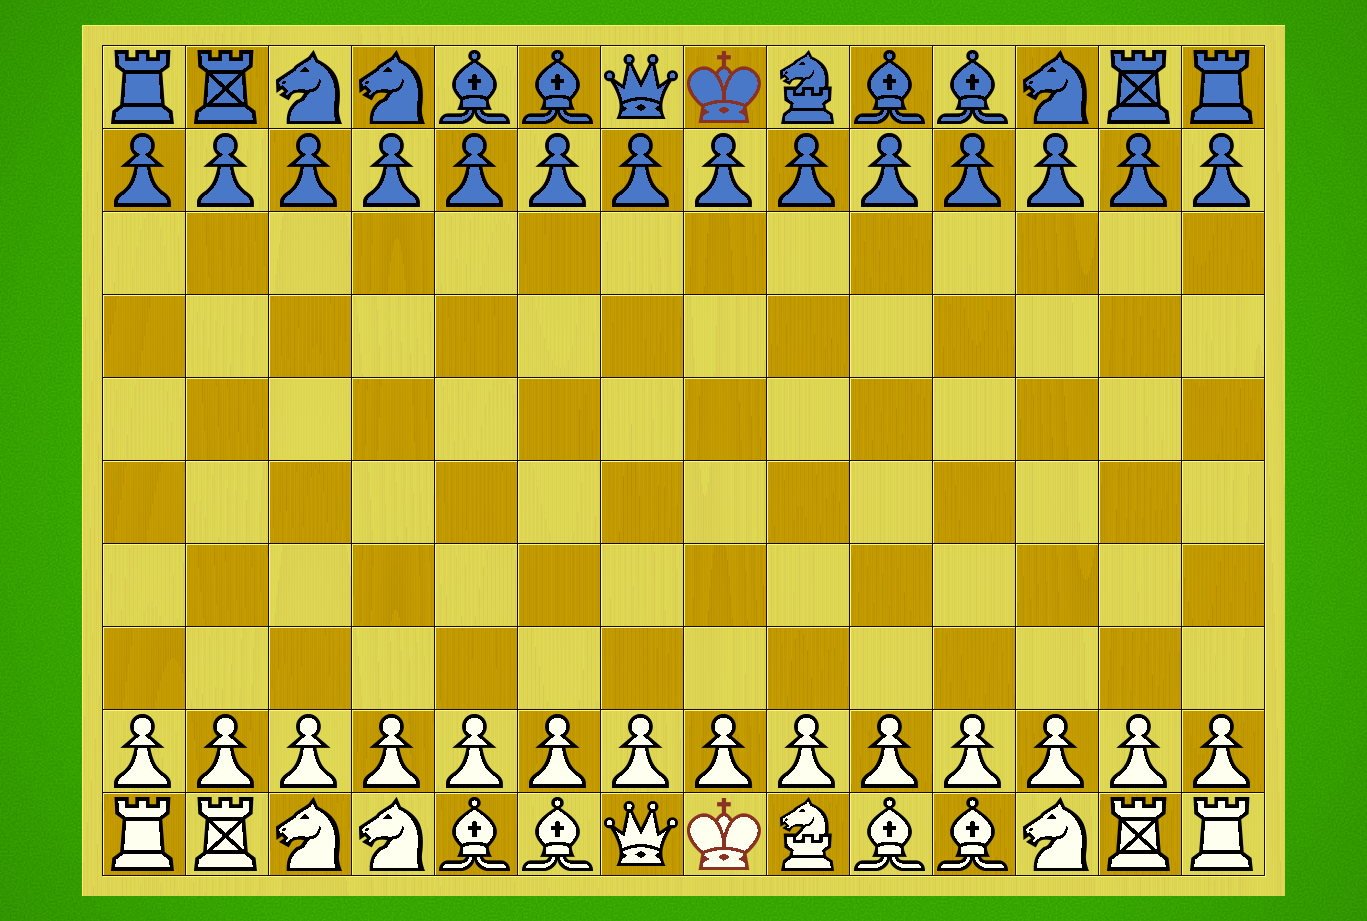
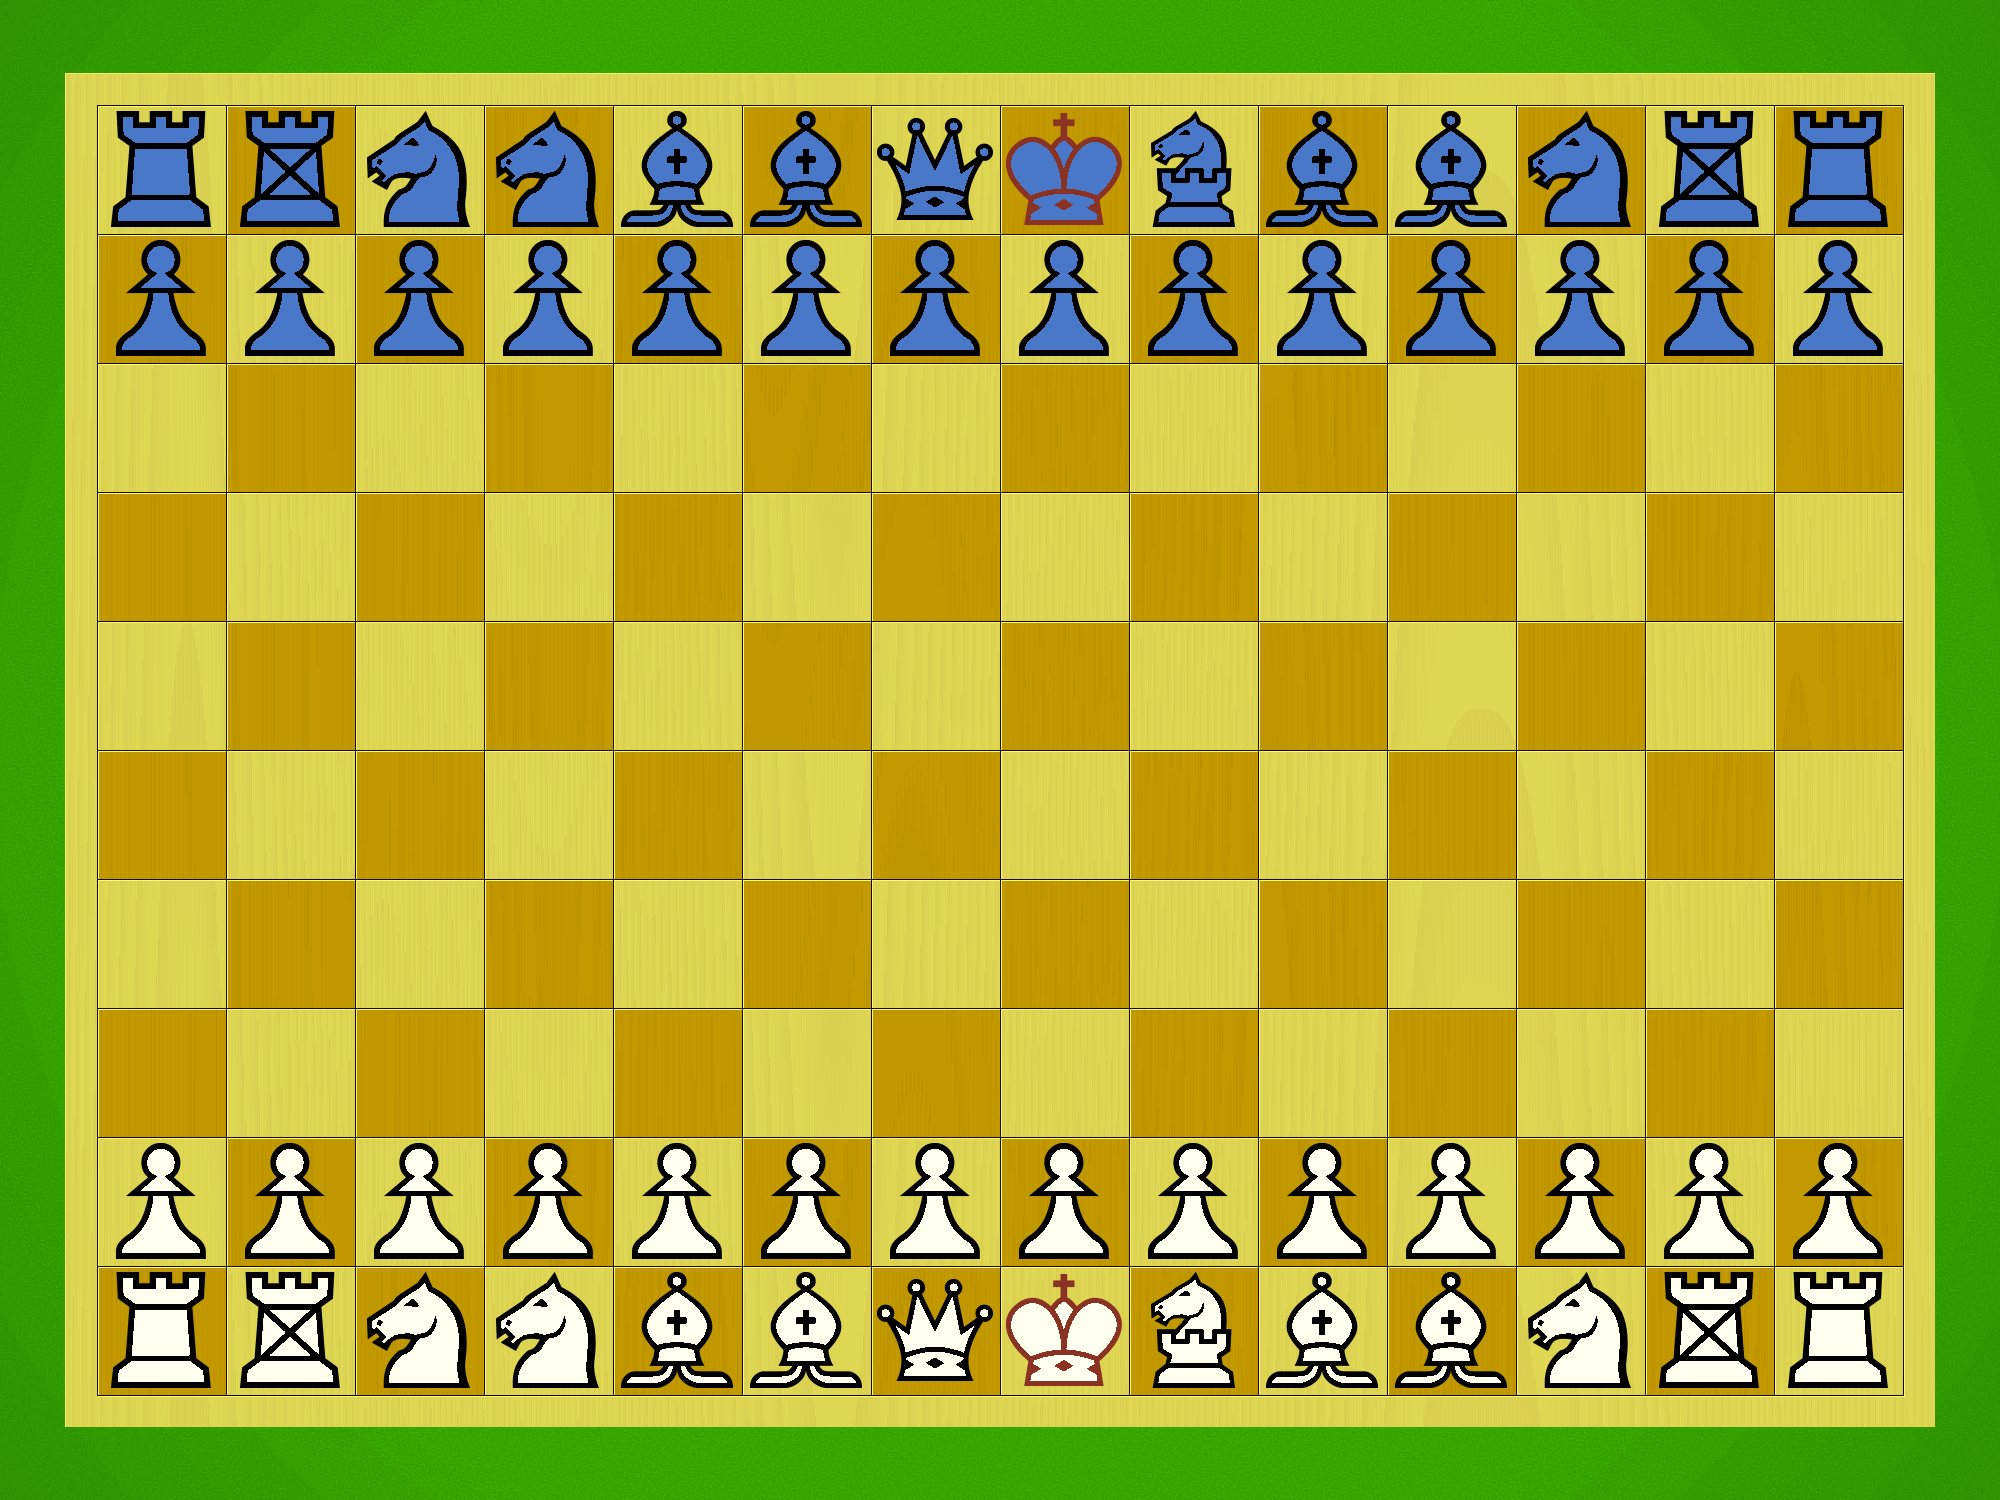
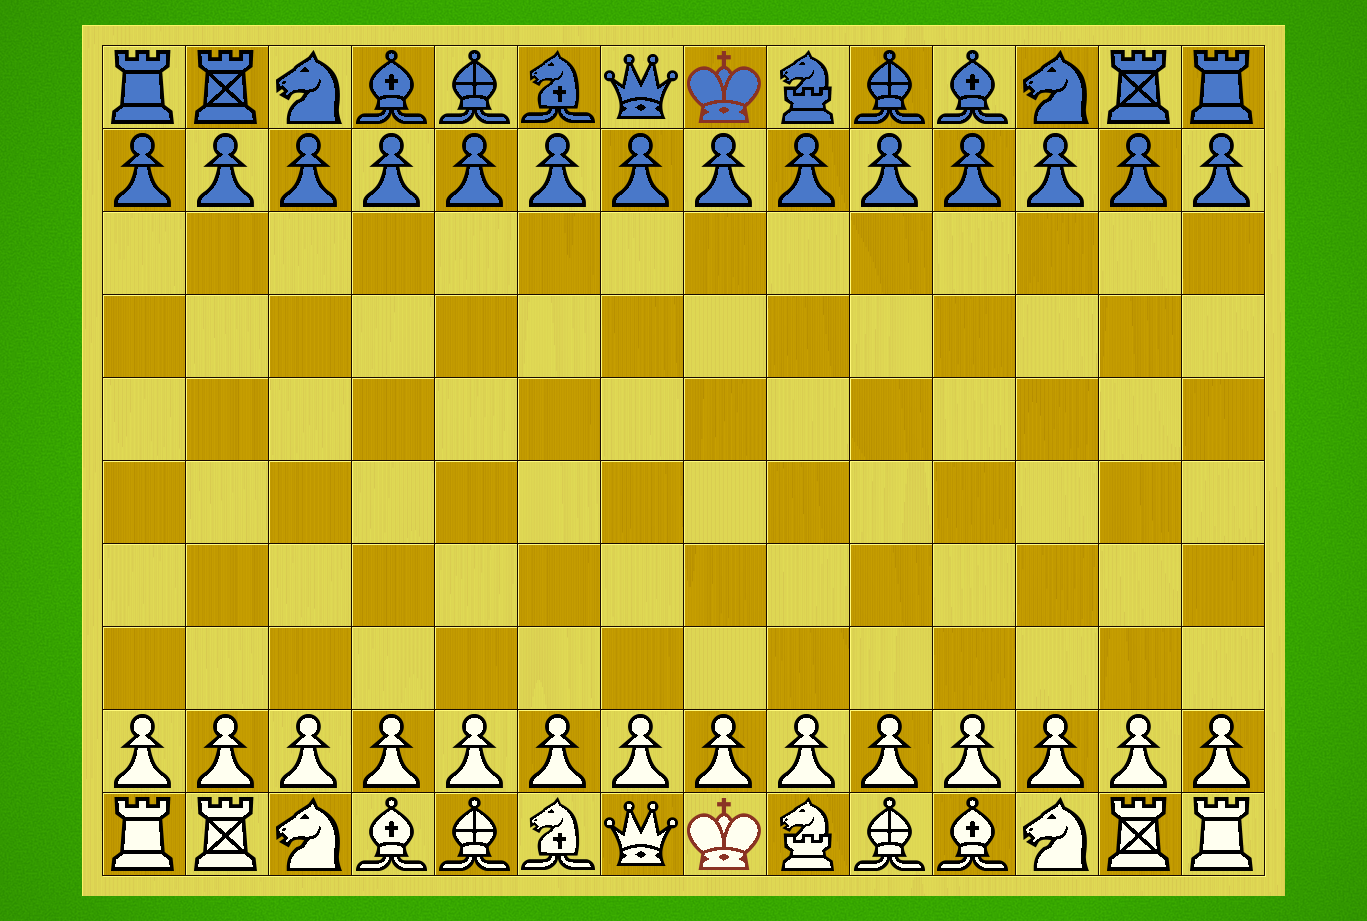
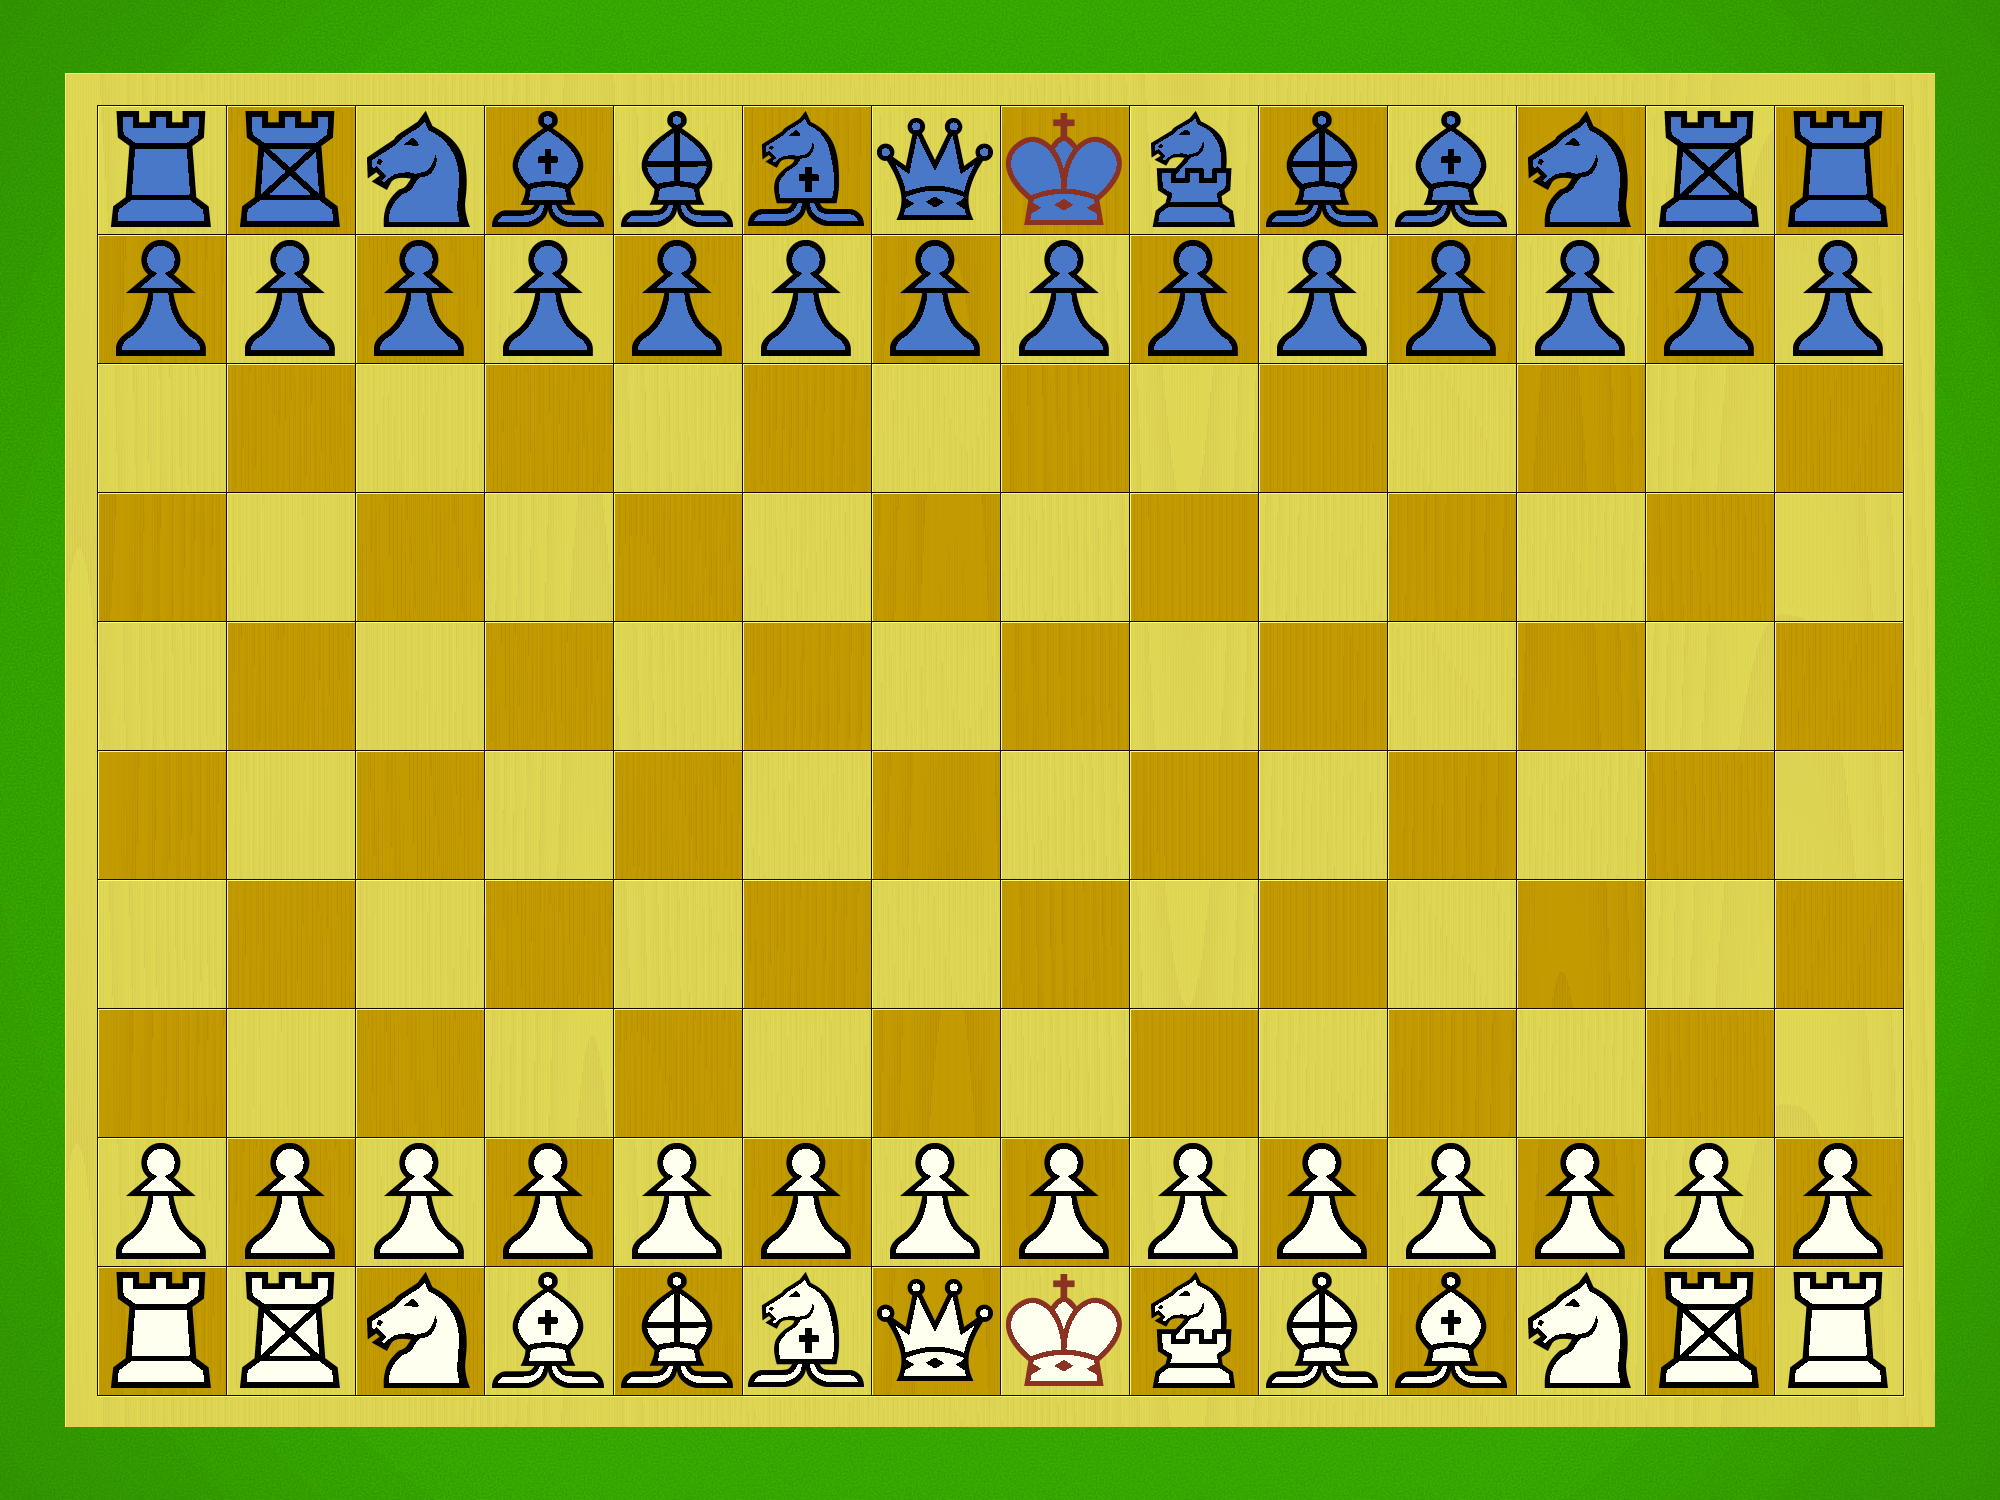
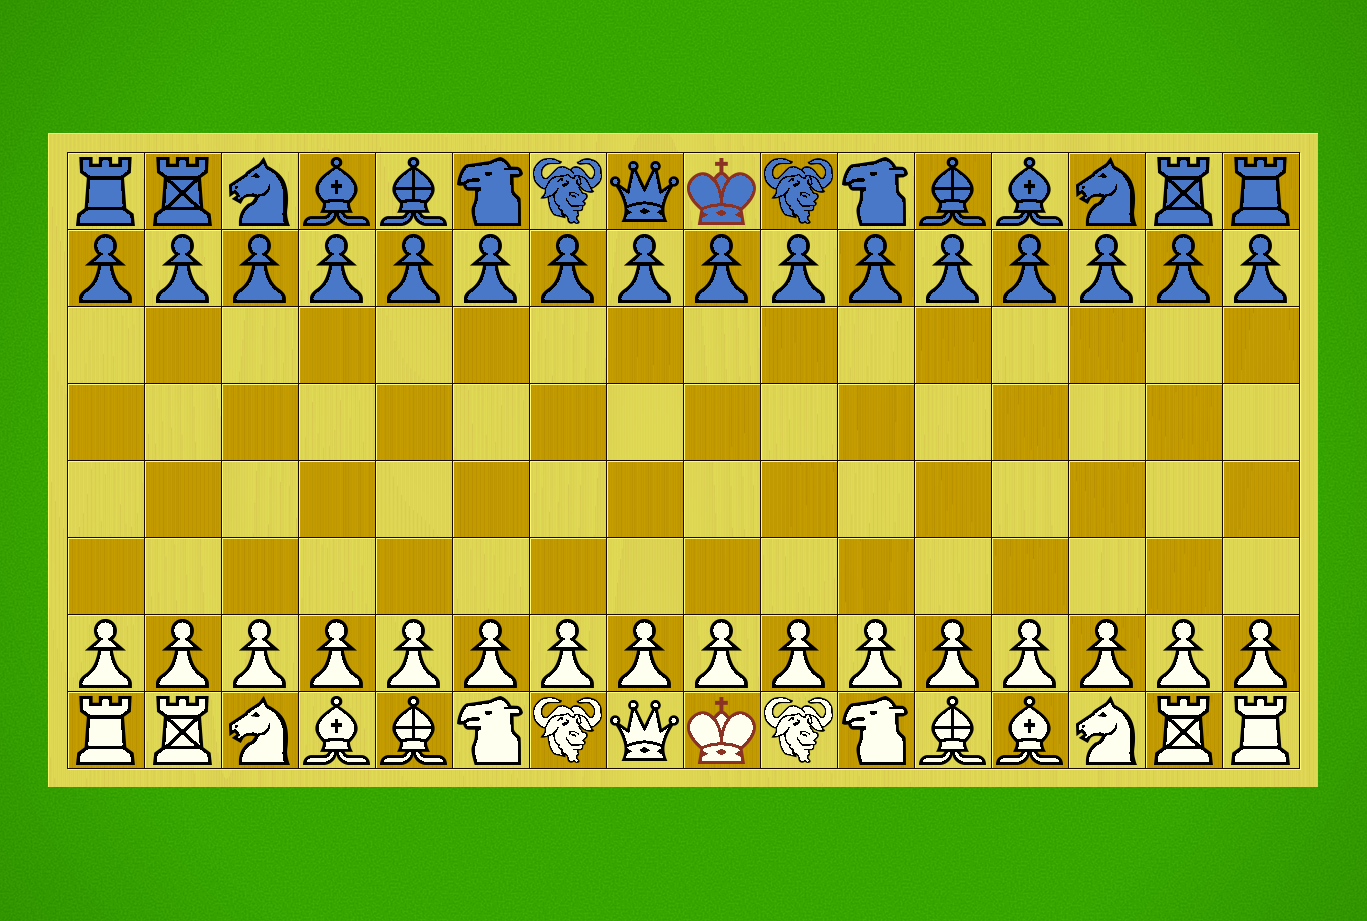
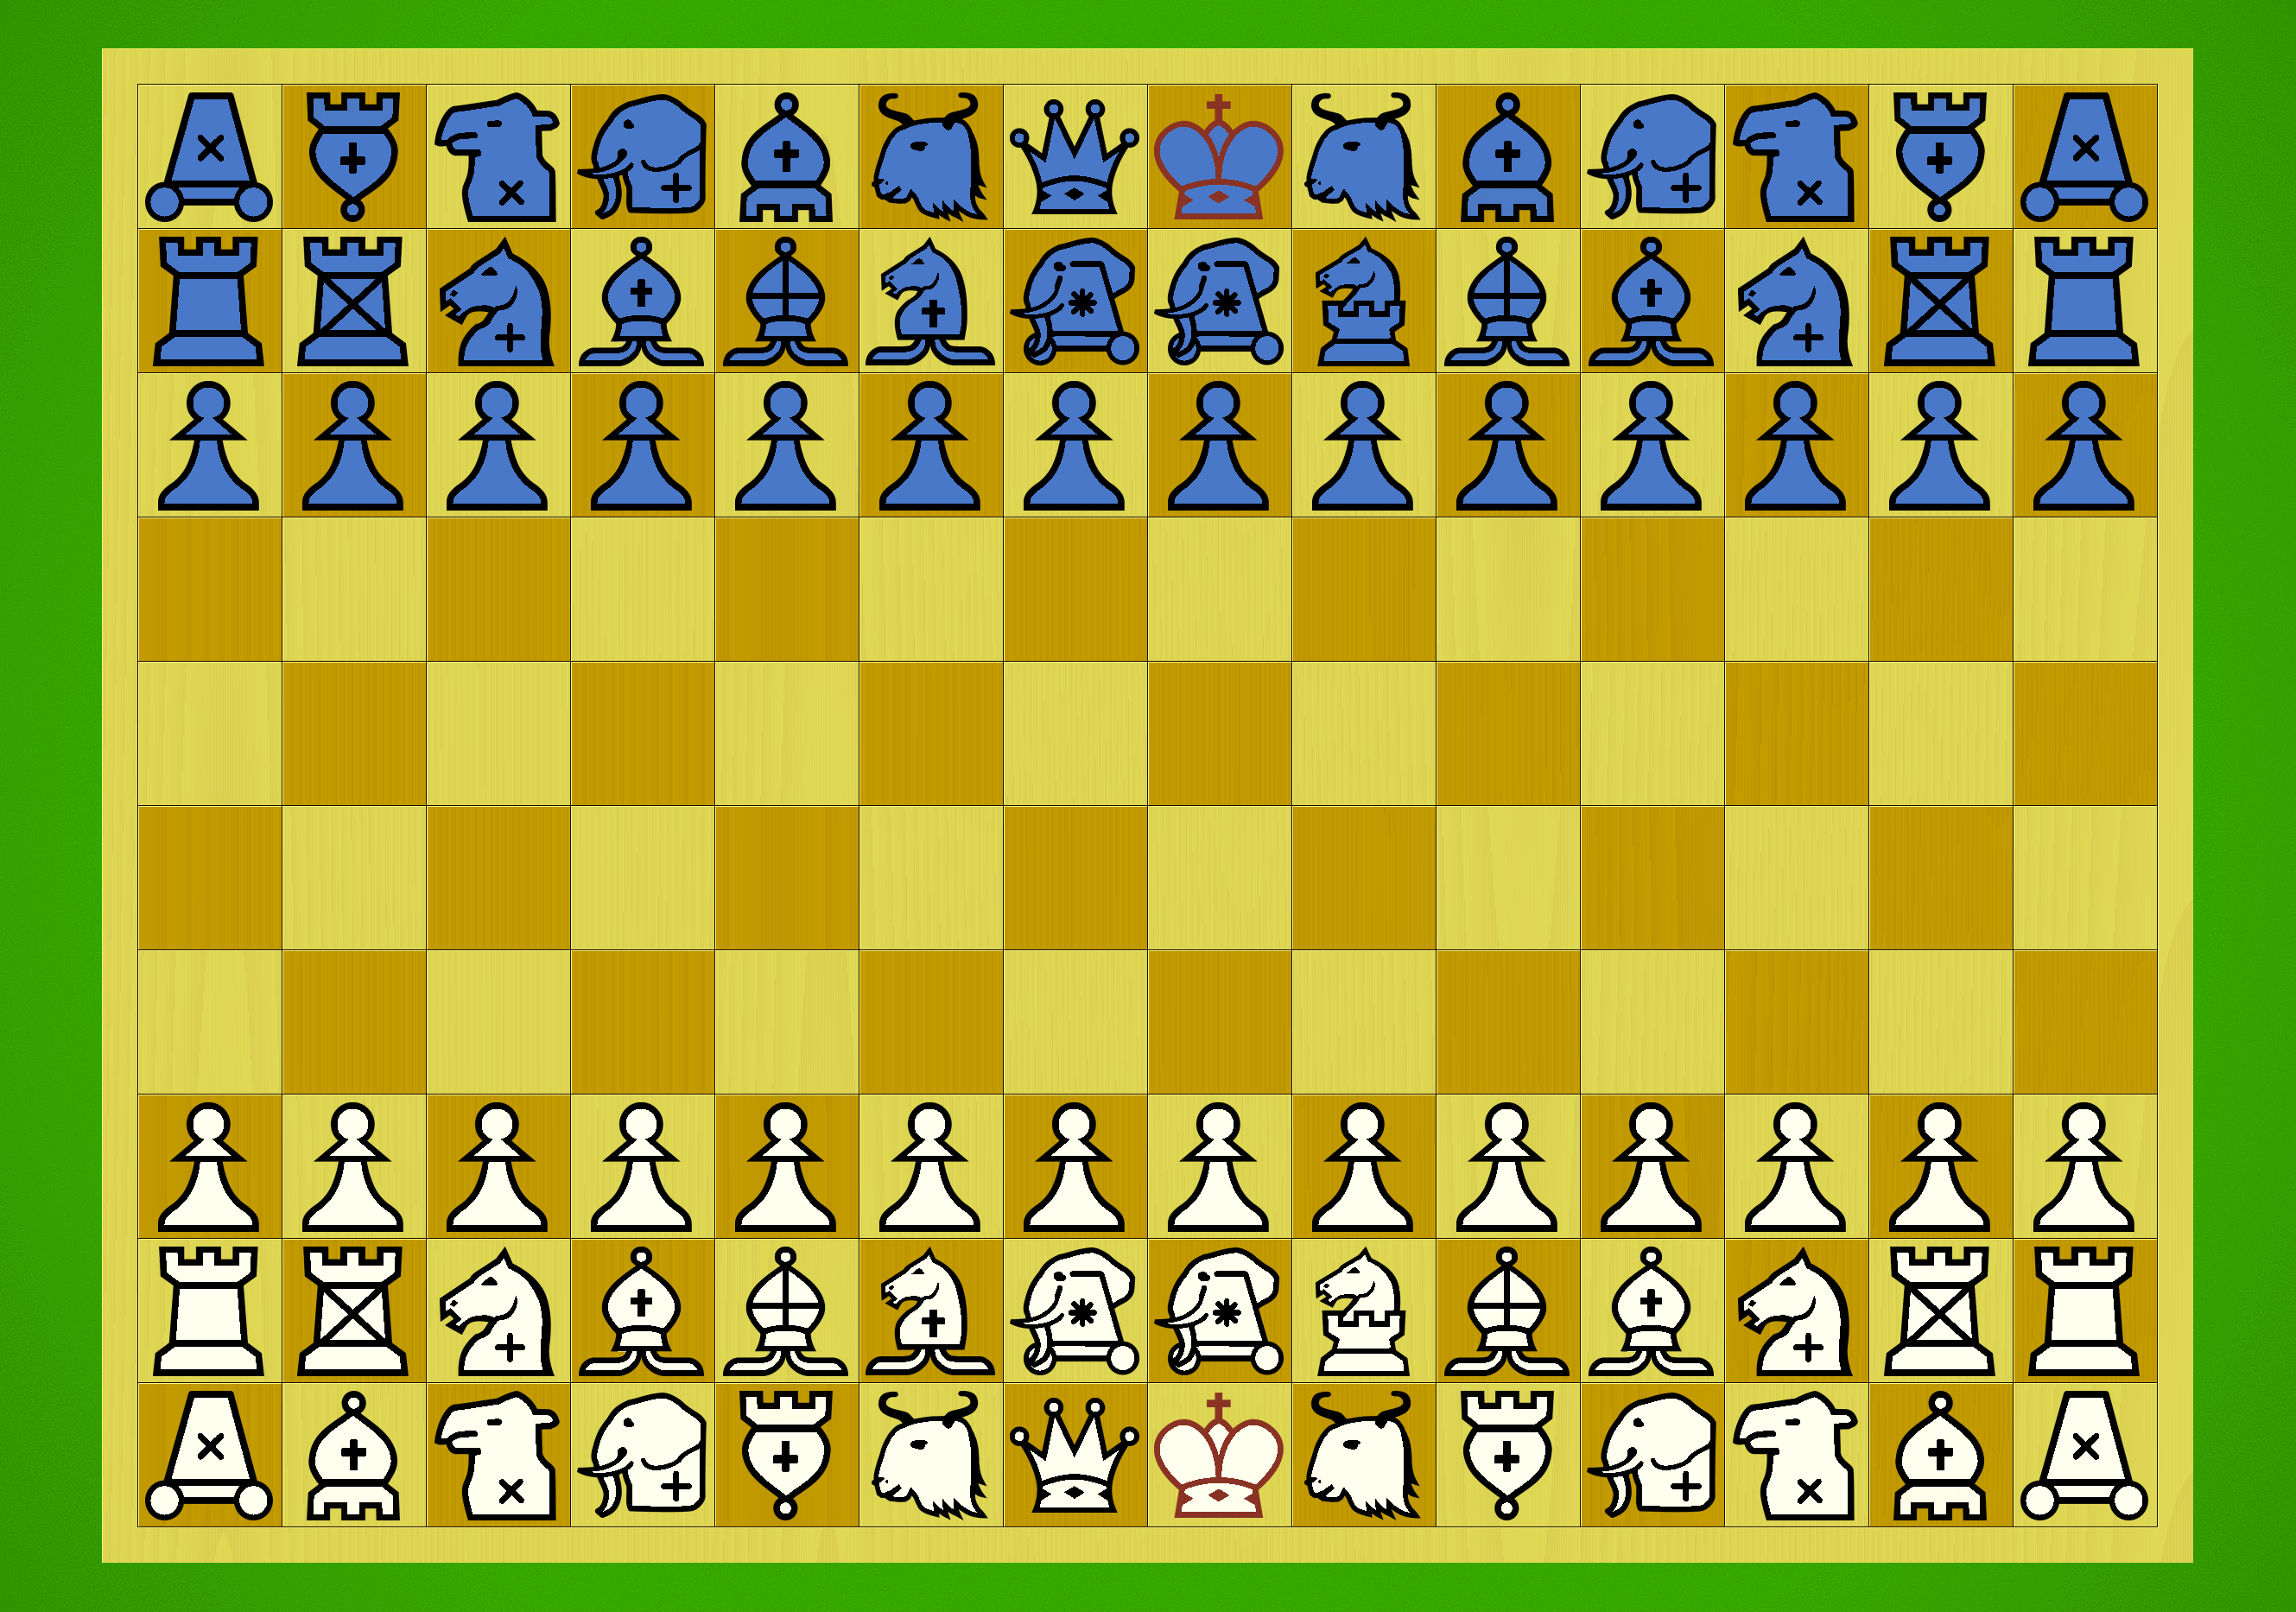
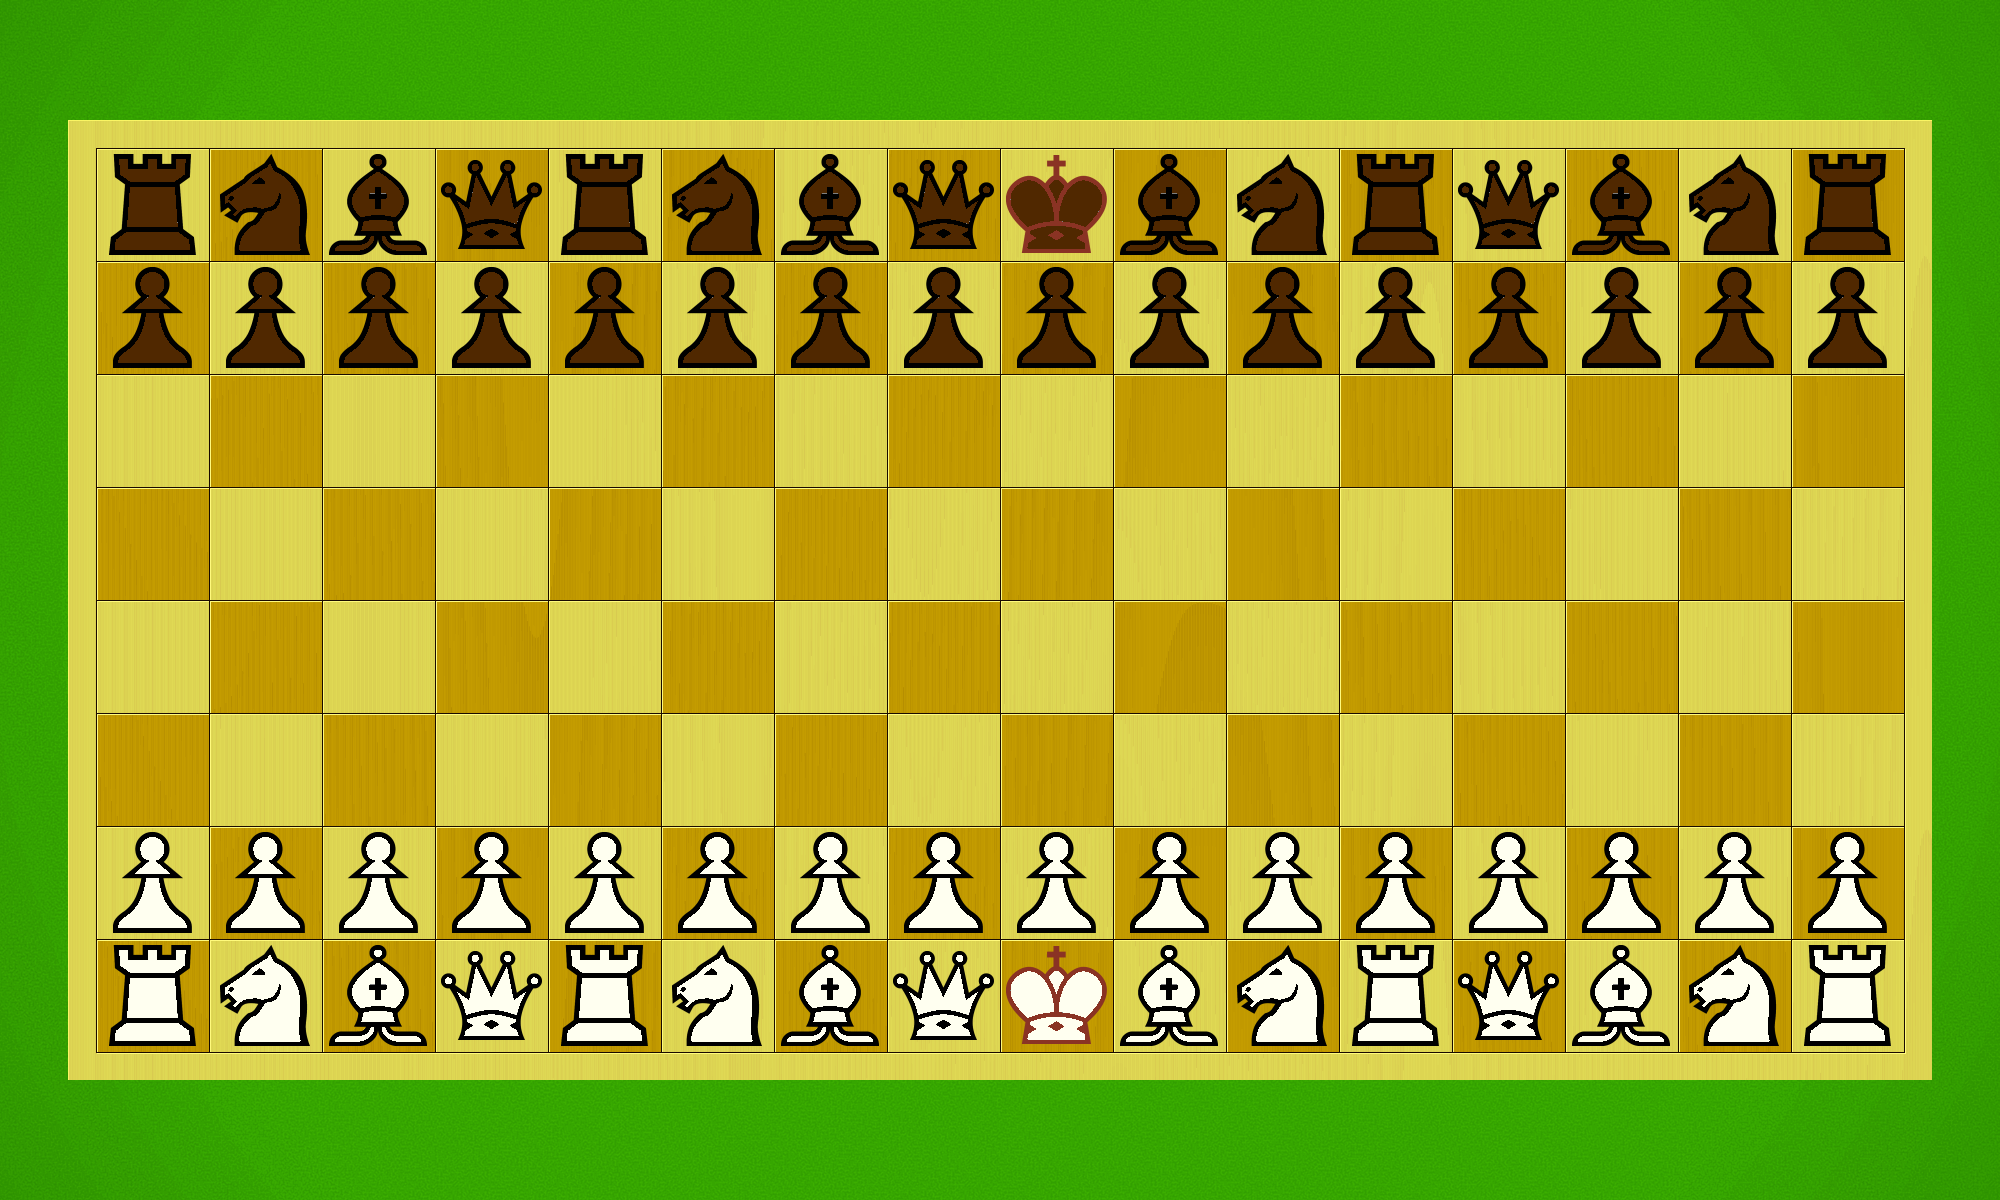
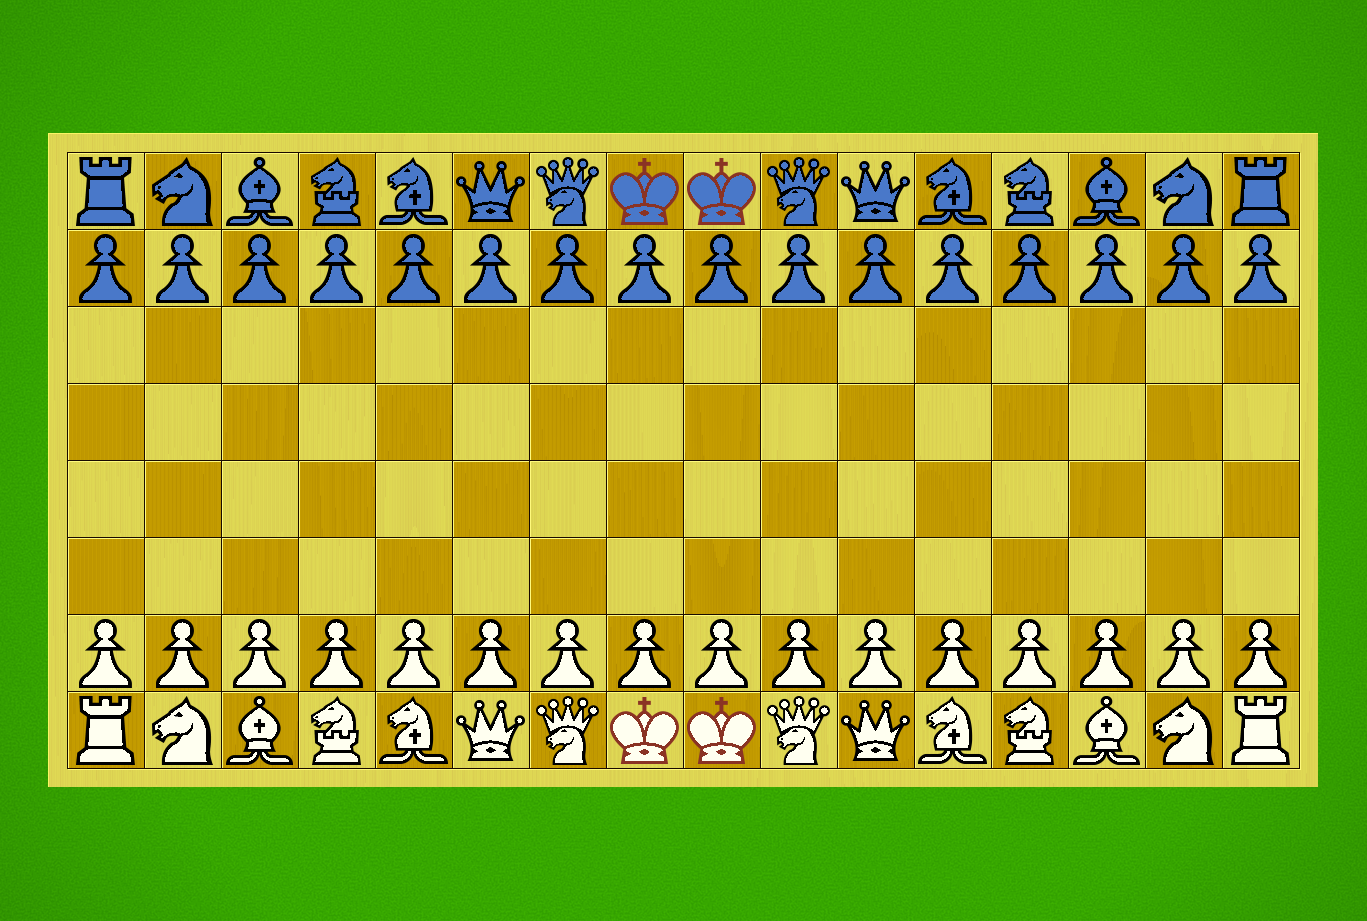
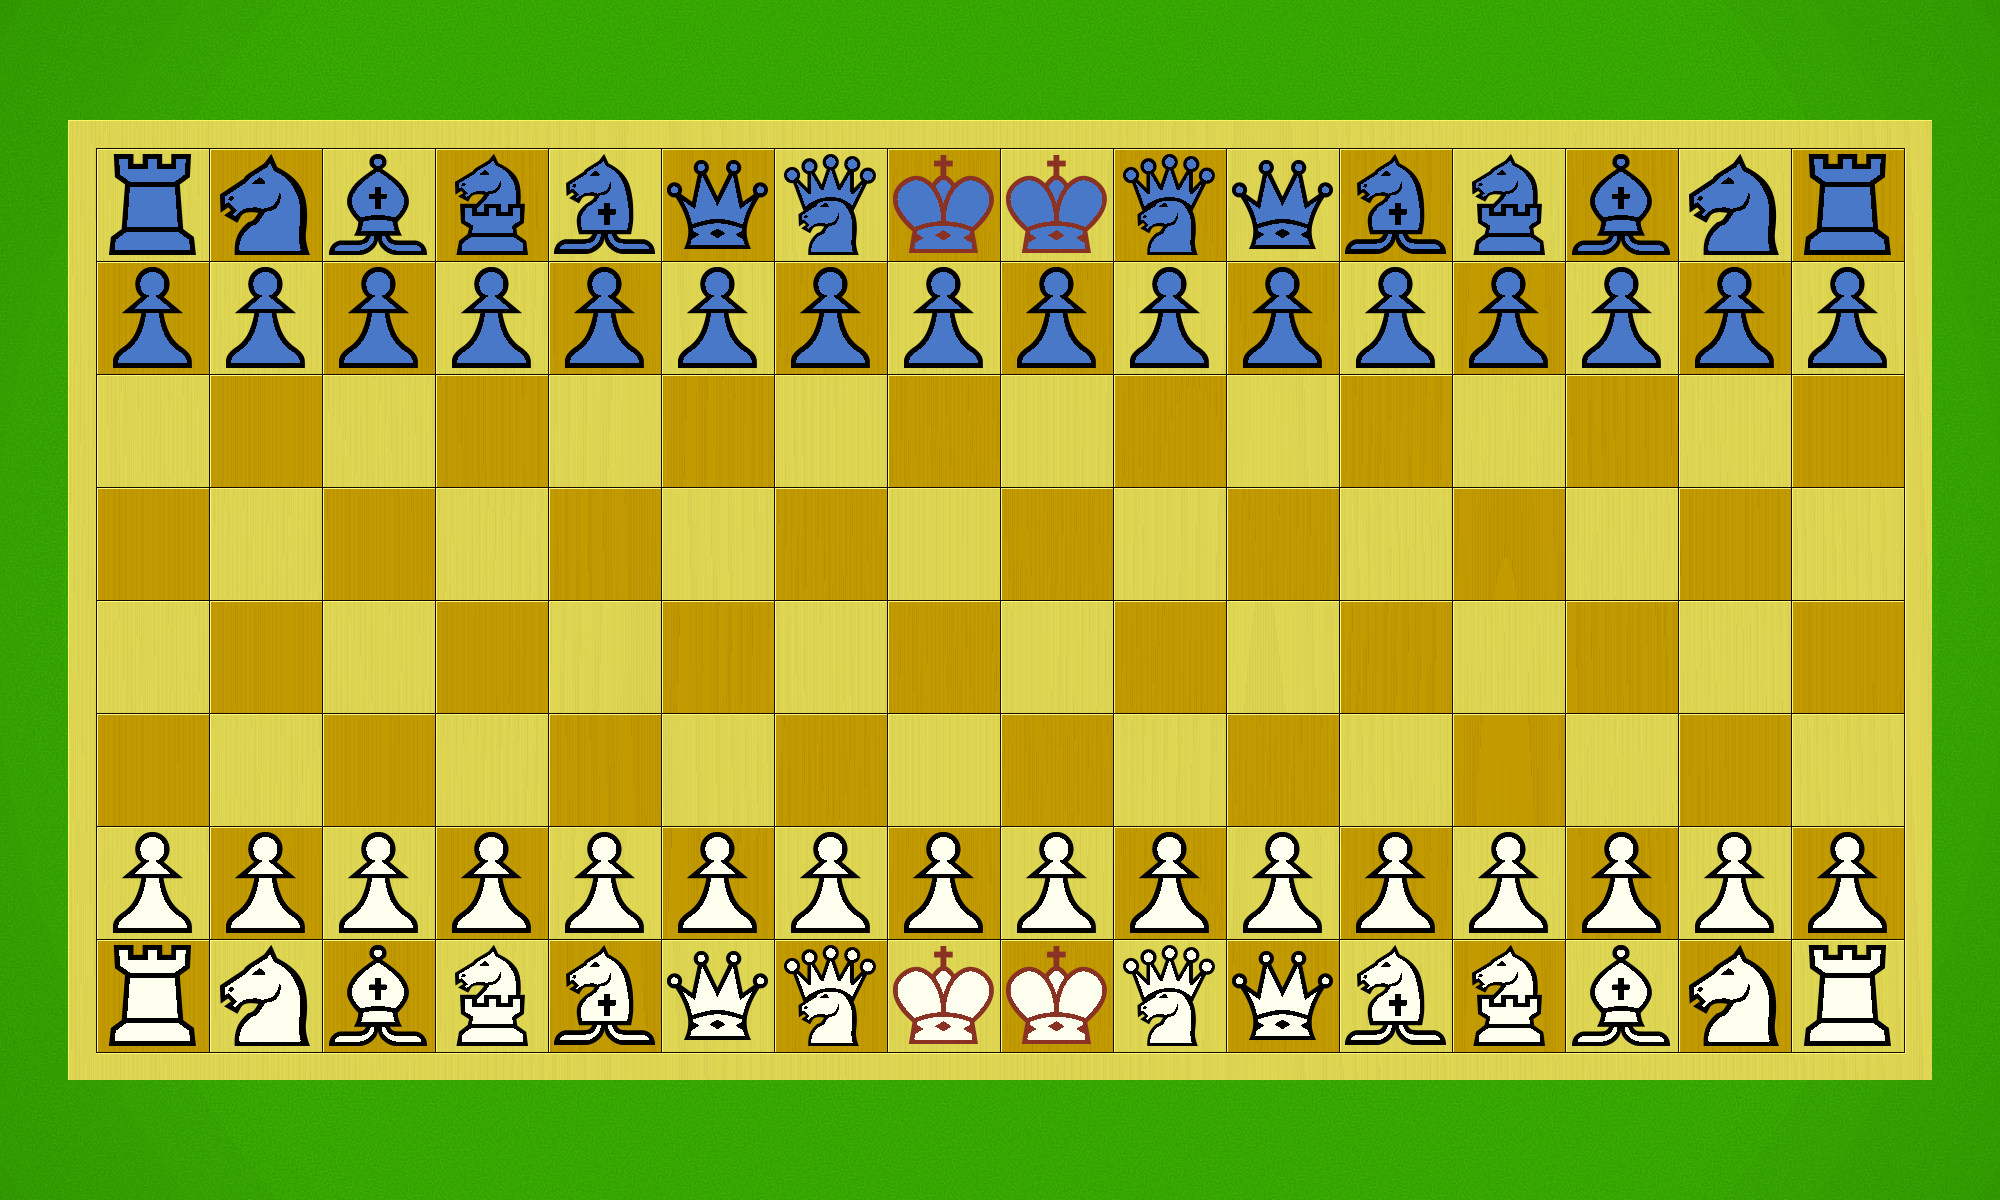
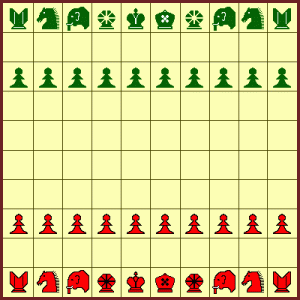
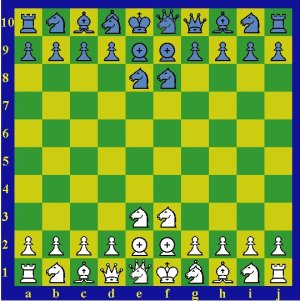
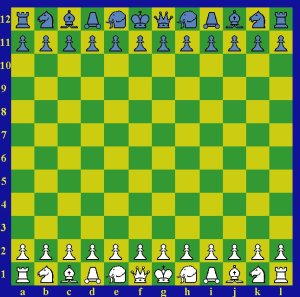
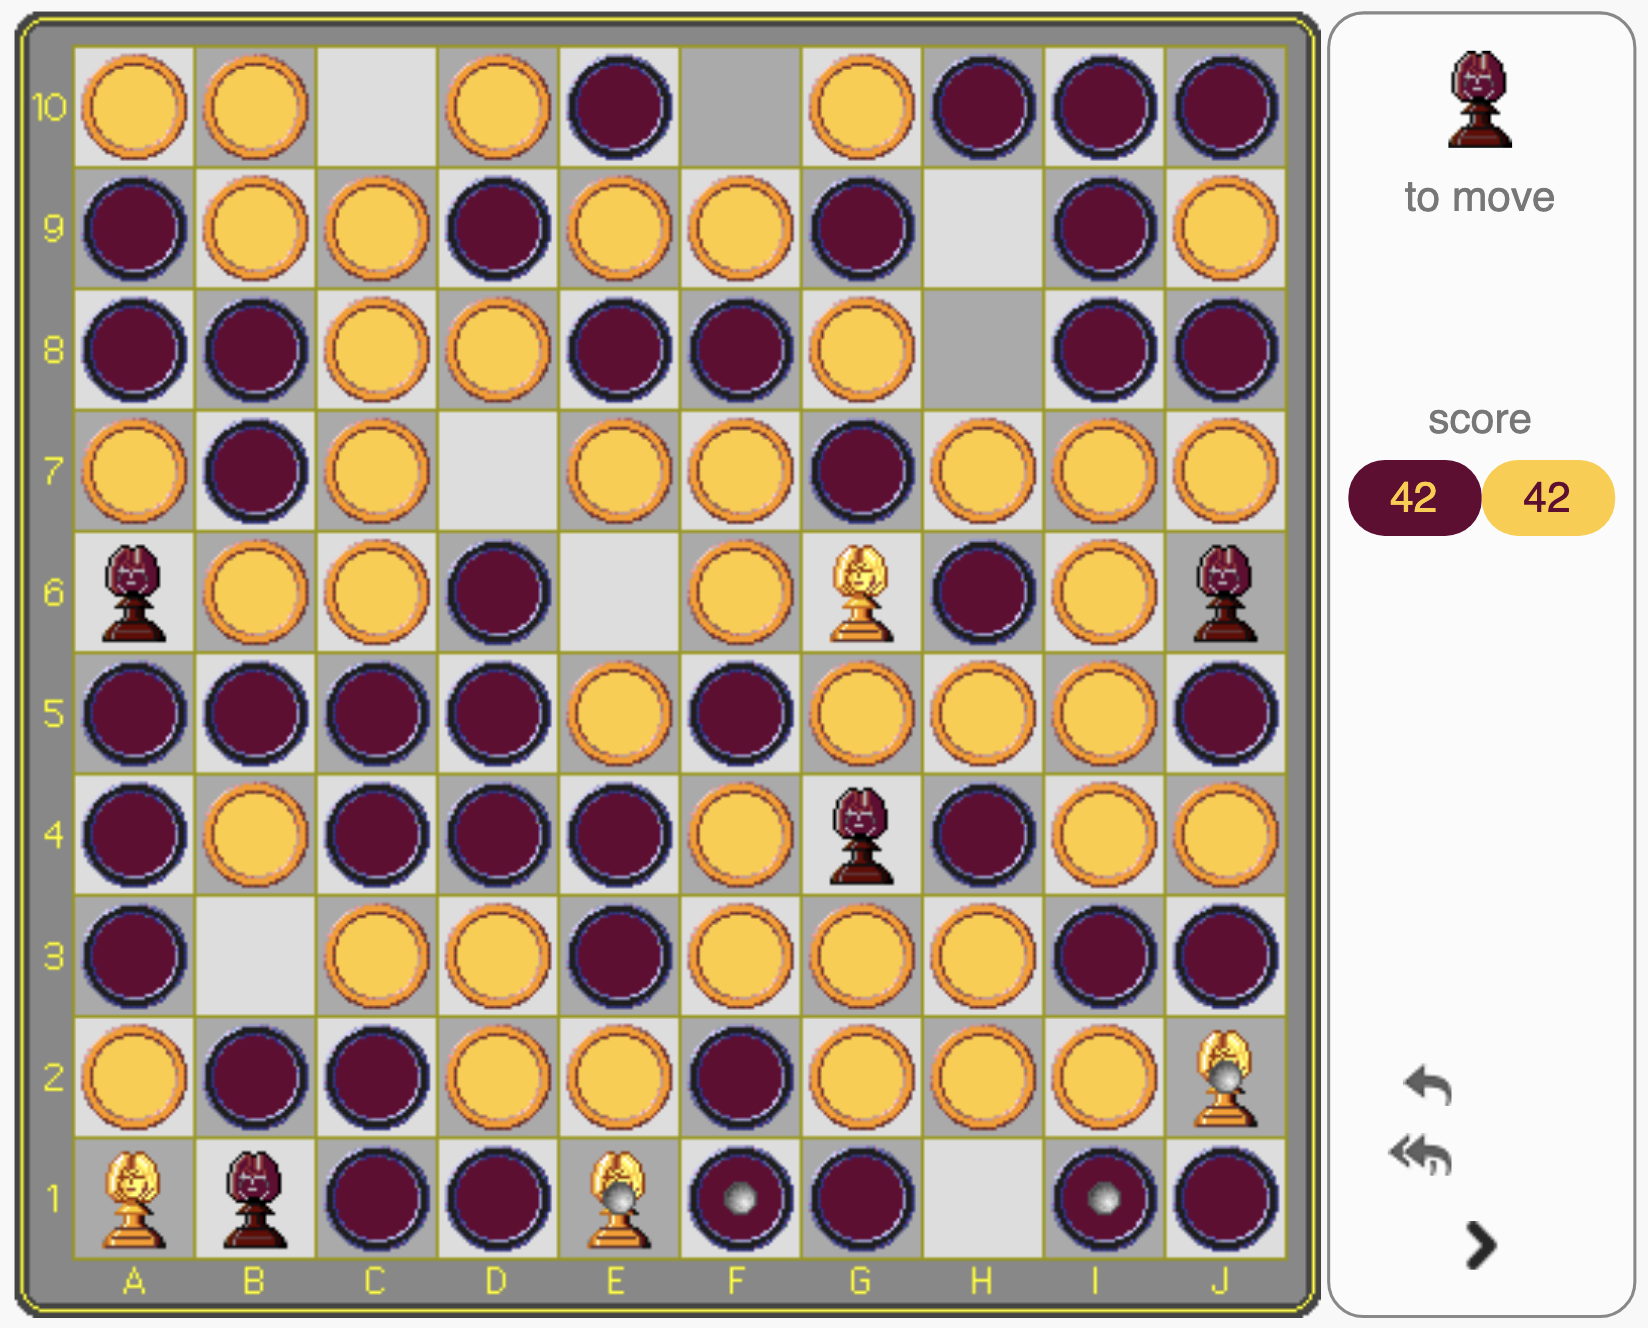
grand-chess-initpos

Grand Chess Christian’s 10×10 Chess variant adding the Cardinal (Bishop + Knight) and Marshal (Rook + Knight) to the traditional lineup.  On the whole this is a decent variant, but I have some issues with this game — the Cardinal/Marshal were first used by Pietro Carrera in 1617 and at this point are not very exciting; the initial position allows Marshals to be traded off too easily; the removal of castling is unnecessary in my opinion; the presence of three power-pieces of similar value dilutes the excitement of the game somewhat; and the piece density is too low for my taste, making for a big game that doesn’t actually expand Chess’ strategic/tactical landscape as much as I would like.  What really bugs me is the promotion rule, which needlessly punishes early promotions and leads to the awkward rule forcing Pawns to remain in suspended animation if no captured pieces are available.  I don’t like that rule in the historical variants that include it, and I don’t like it here either; just let me promote stuff, promoting stuff is fun!  Honestly I would probably score this game higher, except that in its wake this promotion rule appears to have become more popular, which is a problem for me.  In any case, Grand Chess is fun but there are other 10×10 variants I prefer over this one, and I still plan to feature some of these in a future post eventually (a recent favourite of mine is Expanded Chess).  4/10.
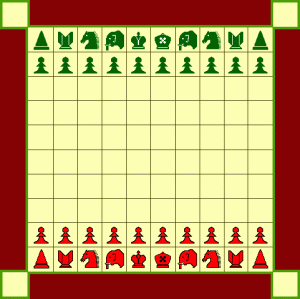
dameo-10s-mv121

Dameo Christian’s highly-regarded Draughts variant, often touted as a replacement for 10×10 International Draughts.  Unfortunately, this game doesn’t quite work for me.  The linear movement aspect feels out of place in a Draughts game, and the kings are a bit too strong for my taste.  Various people have told me I’m wrong about this, but I can’t shake the impression that breakthrough is the critical factor in this game, and that getting a king first is a very strong indication that player will win.  I can, however, see why people like this game, so I give it a good score on that basis; certainly opening play will be varied, and the draw rate is low.  Personally I’d rather play Croda or Turkish Draughts though.  6/10.  

emergo-5s-1

Emergo Here Christian boils down column checkers variants like Bashni and Stappeldammen to their essentials.  The result is a frantic tactical game characterised by a somewhat confusing placement phase, followed by a violent explosion of captures in all different directions.  The game is most definitely unique and at times feels brilliant, but I’m not much for placement phases in Draughts (or Chess, for that matter), and I do find myself missing the incessant forward motion inherent in Bashni and Stappeldammen.  Definitely worth a go if you haven’t tried it.  If I can ever get past the placement aspect, I feel this game could become a favourite of mine.  7/10.

Sygo A Go variant that uses the Symple move protocol combined with Othello-style toggle-capture.  I started out a bit skeptical of this game, given my love for Go itself; most Go variants are a fun distraction at best.  Sygo however does have a distinct personality, and the Symple protocol is a slice of genius.  As Go variants go, it’s better than most, but given the choice I’ll take Symple every time.  7/10.

Symple — Formidable.  Once I sunk my teeth into this game I was blown away by how singularly unique it feels.  In Symple one can either place a single stone on its own to start a new group, or grow every group of yours on the board by one stone; the goal incentivises building small numbers of large groups of stones.  The game creates a feeling of constant tension that builds until the endgame, where precise calculation is required to squeeze out the last few points, or to force your opponent into bad placements.  Symple is one of the most remarkable and exciting discoveries to be found in modern abstract gaming, in my opinion.  10/10. (read more here)

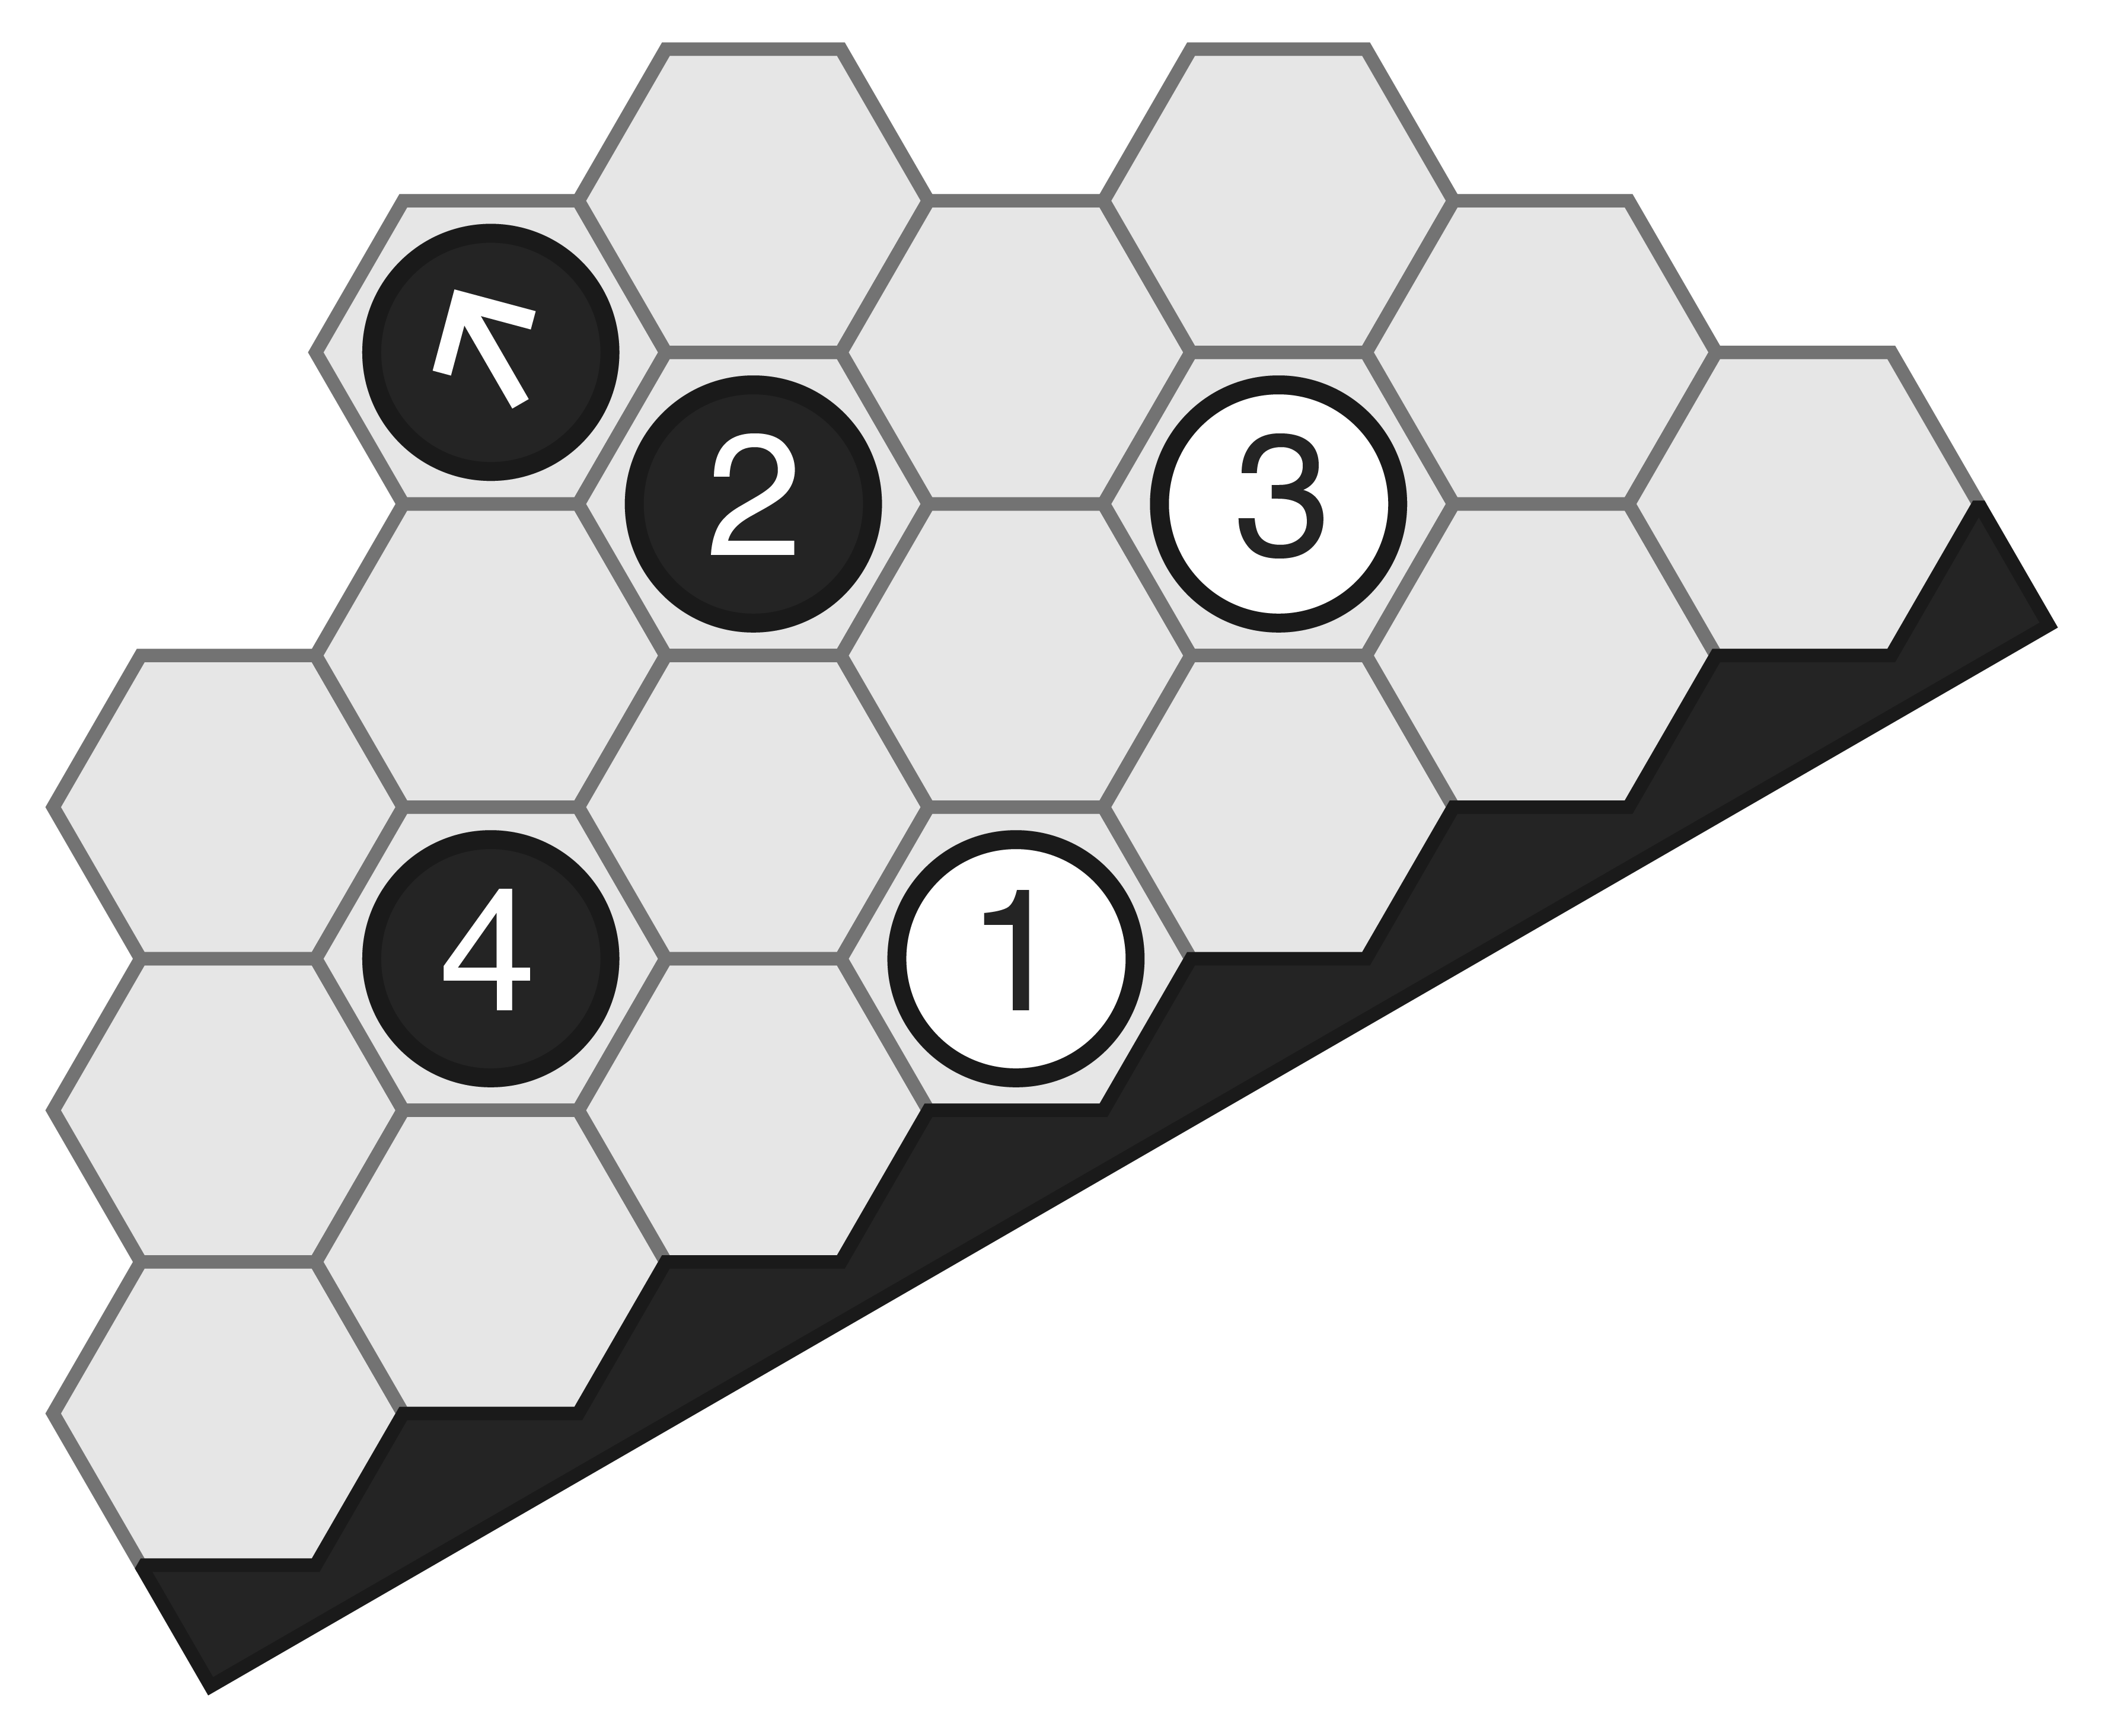
Storisende — An extremely unusual game of territory, featuring pieces that move and split, and walls that form, and there’s just a lot going on here.  I’m not sure I can really rate this game properly, as I simply don’t understand it.  Christian has made various valiant efforts to explain this game, but I still find it confusing.  I trust his judgment, generally speaking, so I believe something interesting must be happening here, but I just can’t find it yet.  Note that Christian has written quite a lot about this game and its strategic complexities, with another article forthcoming soon; I plan to study these articles and revisit the game again in the future.   5/10.

The Arena: The Other Seventeen Freeling Games

yari_shogi_inpos

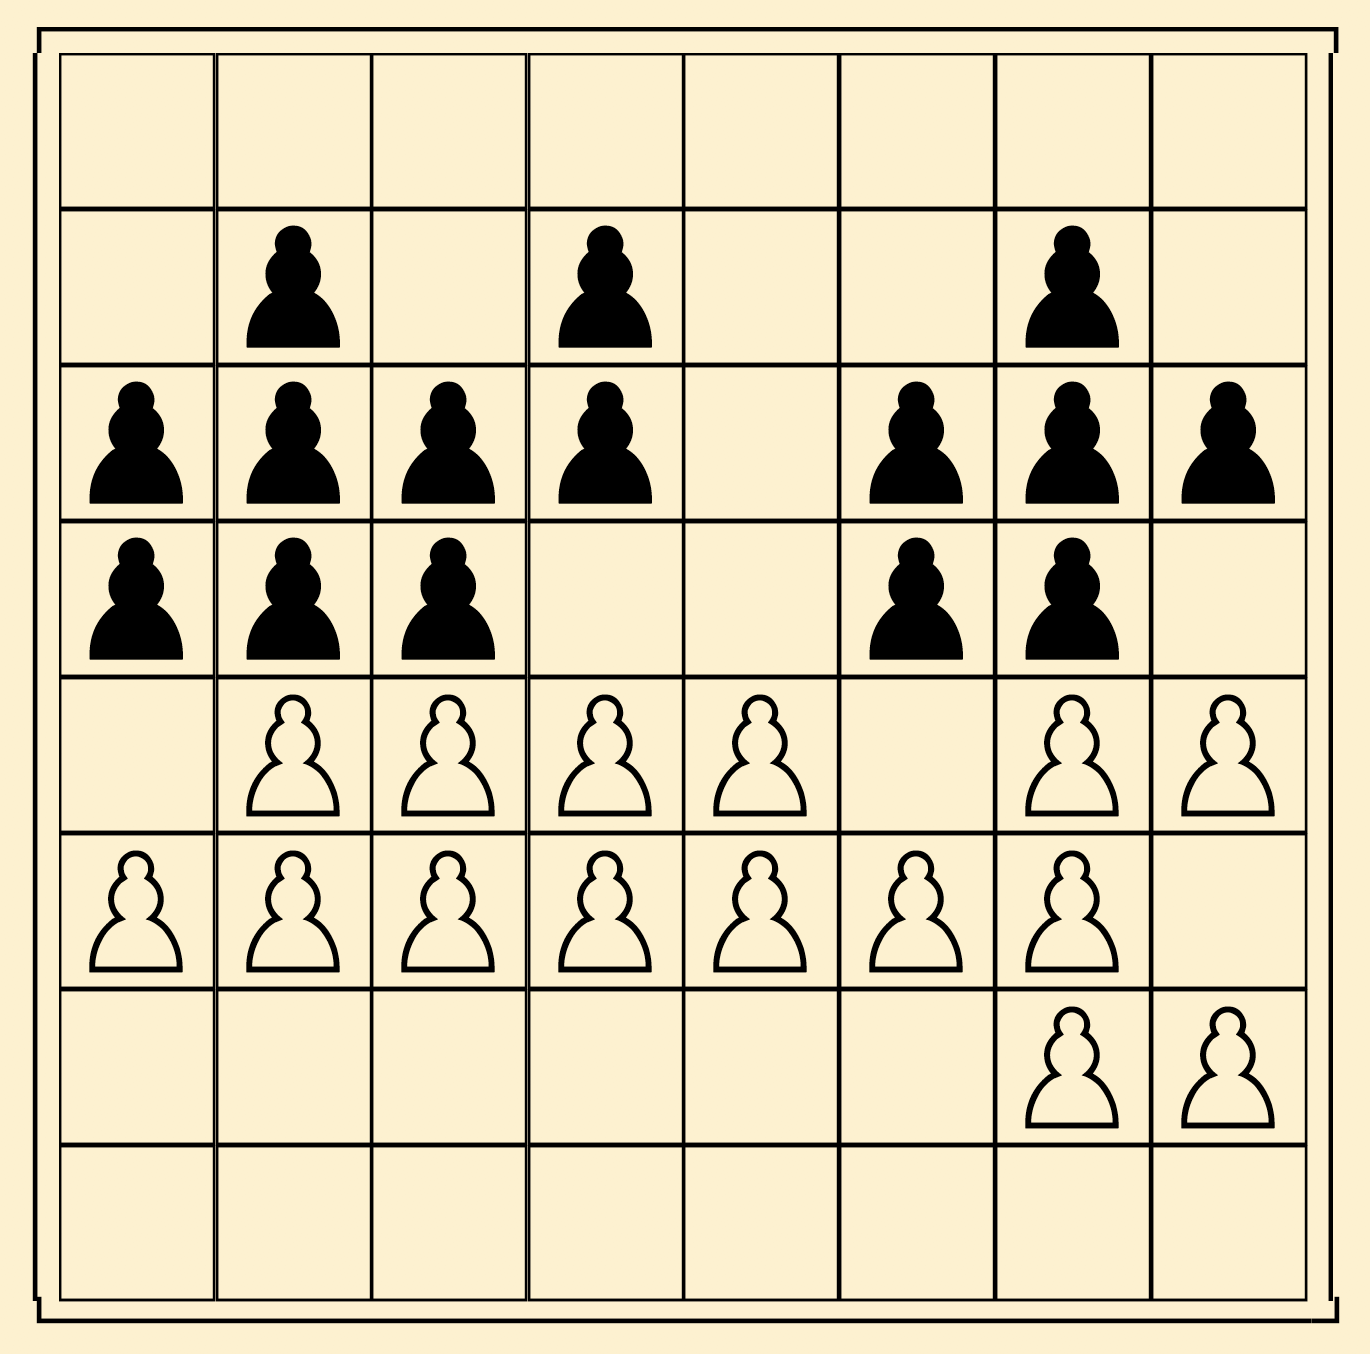
Yari Shogi — A 7×9 Shogi variant that uses pieces with lots of Lance-like forward movement.  Any Shogi variant is a tough sell for me, because the historical variants are so incredibly interesting.  In contrast to something like Tori Shogi or Wa Shogi, Yari feels a bit pedestrian.  Also, only one piece type can move backward at all, meaning many more games of Yari will end in an impasse as compared to standard Shogi, as the King will be very safe from attack if it enters the opponent’s camp.  I also admit to a certain dislike for attempts to ‘Westernise’ Shogi; Shogi is a Japanese game made by Japanese people, and it bothers me that we so often try to strip its Japanese-ness away, rather than meet the game on its own terms.  4/10.

Dragonfly — This game is reasonably fun, but if I’m going to play a 7×7 game with drops I’ll stick with Tori Shogi.  Dragonfly also has a hovering unpromotable Pawn thing that’s similar to the promotion rule I dislike in Grand Chess, and the Pawns can’t be dropped, which diminishes the excitement somewhat.  I understand why that rule exists in this particular game, but Christian’s claim that Chess Pawns aren’t suitable for drops is odd to me — they work perfectly well in Crazyhouse, Bughouse, Chessgi, etc.  3/10.

Chess+ I appreciate the design goal of this game, which was to create a version of Chess which eliminated opening theory without requiring some external list of starting positions like Chess960.  Unfortunately it doesn’t work that well, in my opinion.  The opening protocol adds significant cognitive load for the new player.  Messing up is very easy, and early losses can happen because the long-range power of the Chess army makes it relatively easy to punish bad placements quickly.  If you want to play Chess with placement, I recommend the traditional Burmese variant Sittuyin; this game works better, in my opinion, as the pieces are weaker and bad placements are less immediately dangerous thanks to the fixed Pawn structure.   4/10.

Chad, Rotary — I haven’t played these.
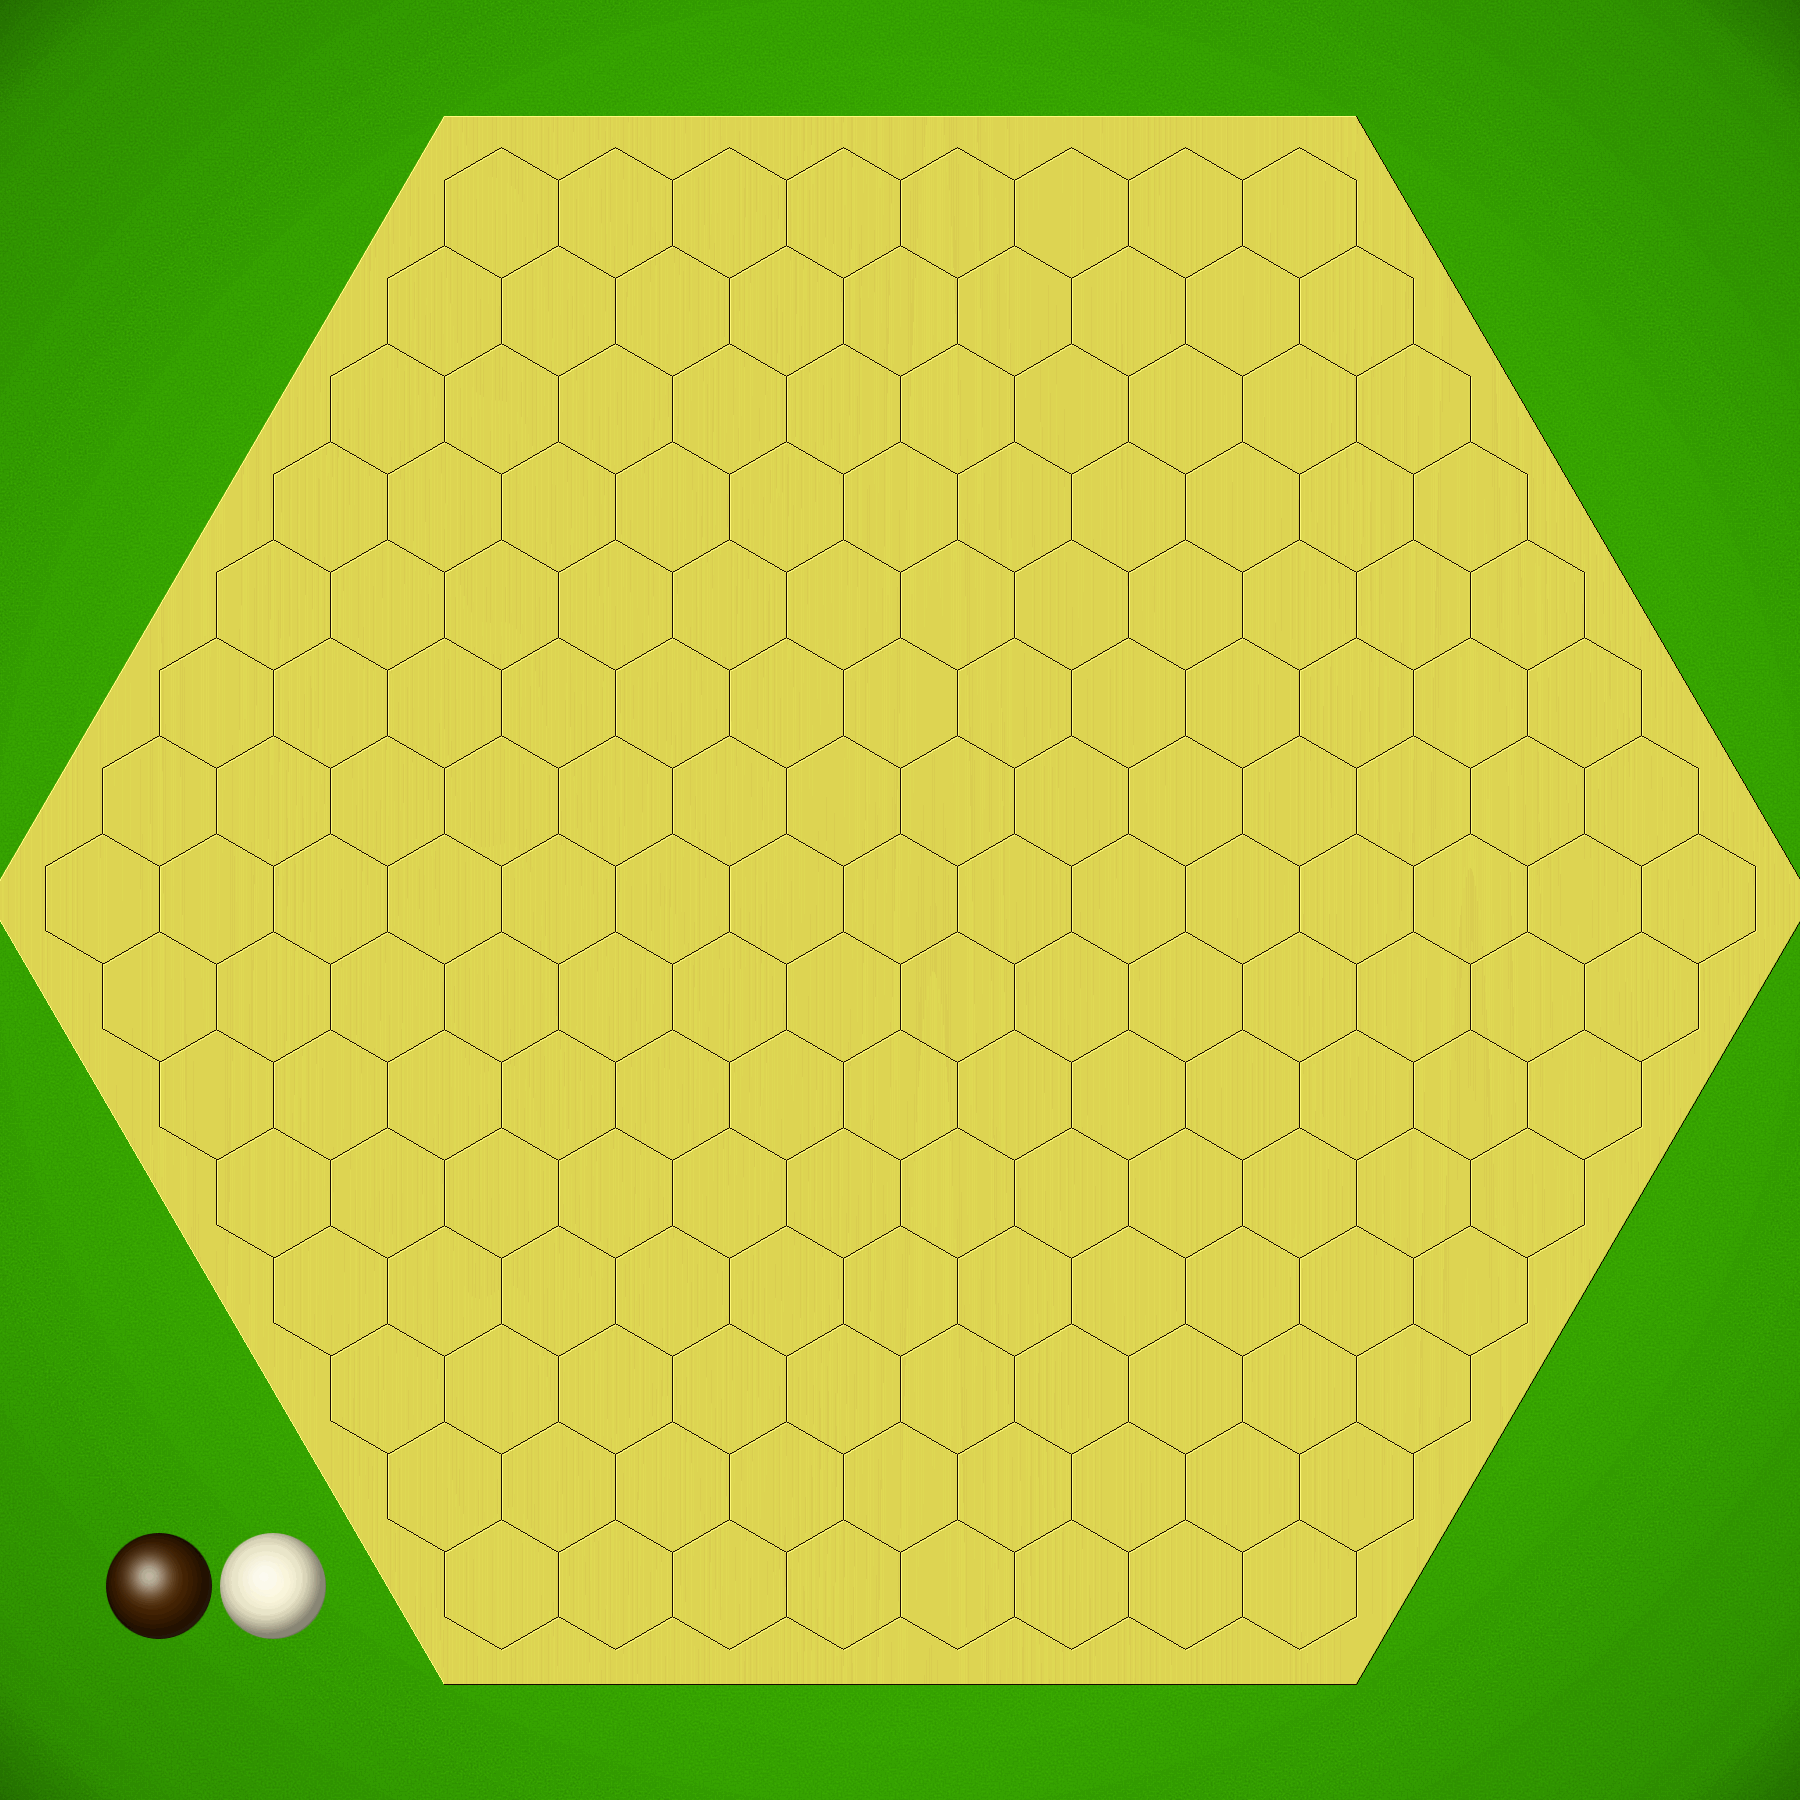
Hexdame A direct translation of International Draughts to the hex board.  Quite enjoyable, although a lot of the play seems to bunch up around the edges; granted, that happens in other Draughts variants too, but I notice it more here for some reason.  The tactics are enjoyable, and I wouldn’t turn down a game of this, but it’s perhaps a bit *too* tactical.  6/10.

Bushka — A Draughts-adjacent game inspired by the classic Fanorona.  Here pieces capture by approach rather than by leaping.  This game also originated the linear movement mechanic which made its way into Dameo.  The idea is intriguing, but in actual play I find it a bit confusing.  The games I’ve played also ended surprisingly quickly, which was a bit disconcerting given the size of the board and the number of pieces.  Colour me skeptical, but interested to learn more.  6/10.

Pit of Pillars — haven’t played this yet.

Io — An excellent showcase for the under-appreciated one-bound, one-free opening protocol.  Io is an Othello variant that starts with a placement phase, but the innovative one-bound, one-free procedure ensures that the pieces of both sides are placed in interesting ways and tends to create balanced positions for the subsequent capture-fest.  A very good game that deserves more attention.  8/10.

PhalanxThis game has several elements not usually seen in combination, bringing together placement, movement, capture, movement of whole groups, all in service of a territorial goal.  The result is complex and intriguing.  I’m intrigued by the capture mechanic, which ends up creating impassible walls around the board that gradually constrict and focus play until the inevitable conclusion.  I can’t pretend to have a good grasp on this game yet, but so far I like what I see.  8/10.

Mu VeloxThis game scares me, so I haven’t tried it yet.

InertiaThis game is a rare example of the unification genre, in which players strive to be the first to bring all their pieces together into a single connected group.  While reminiscent of the venerable Lines of Action, Inertia feels quite different due to the variable opening position produced by the one-bound, one-free opening protocol, and the movement mechanics which are easier to grasp than in LoA.  Enjoyable.  7/10.
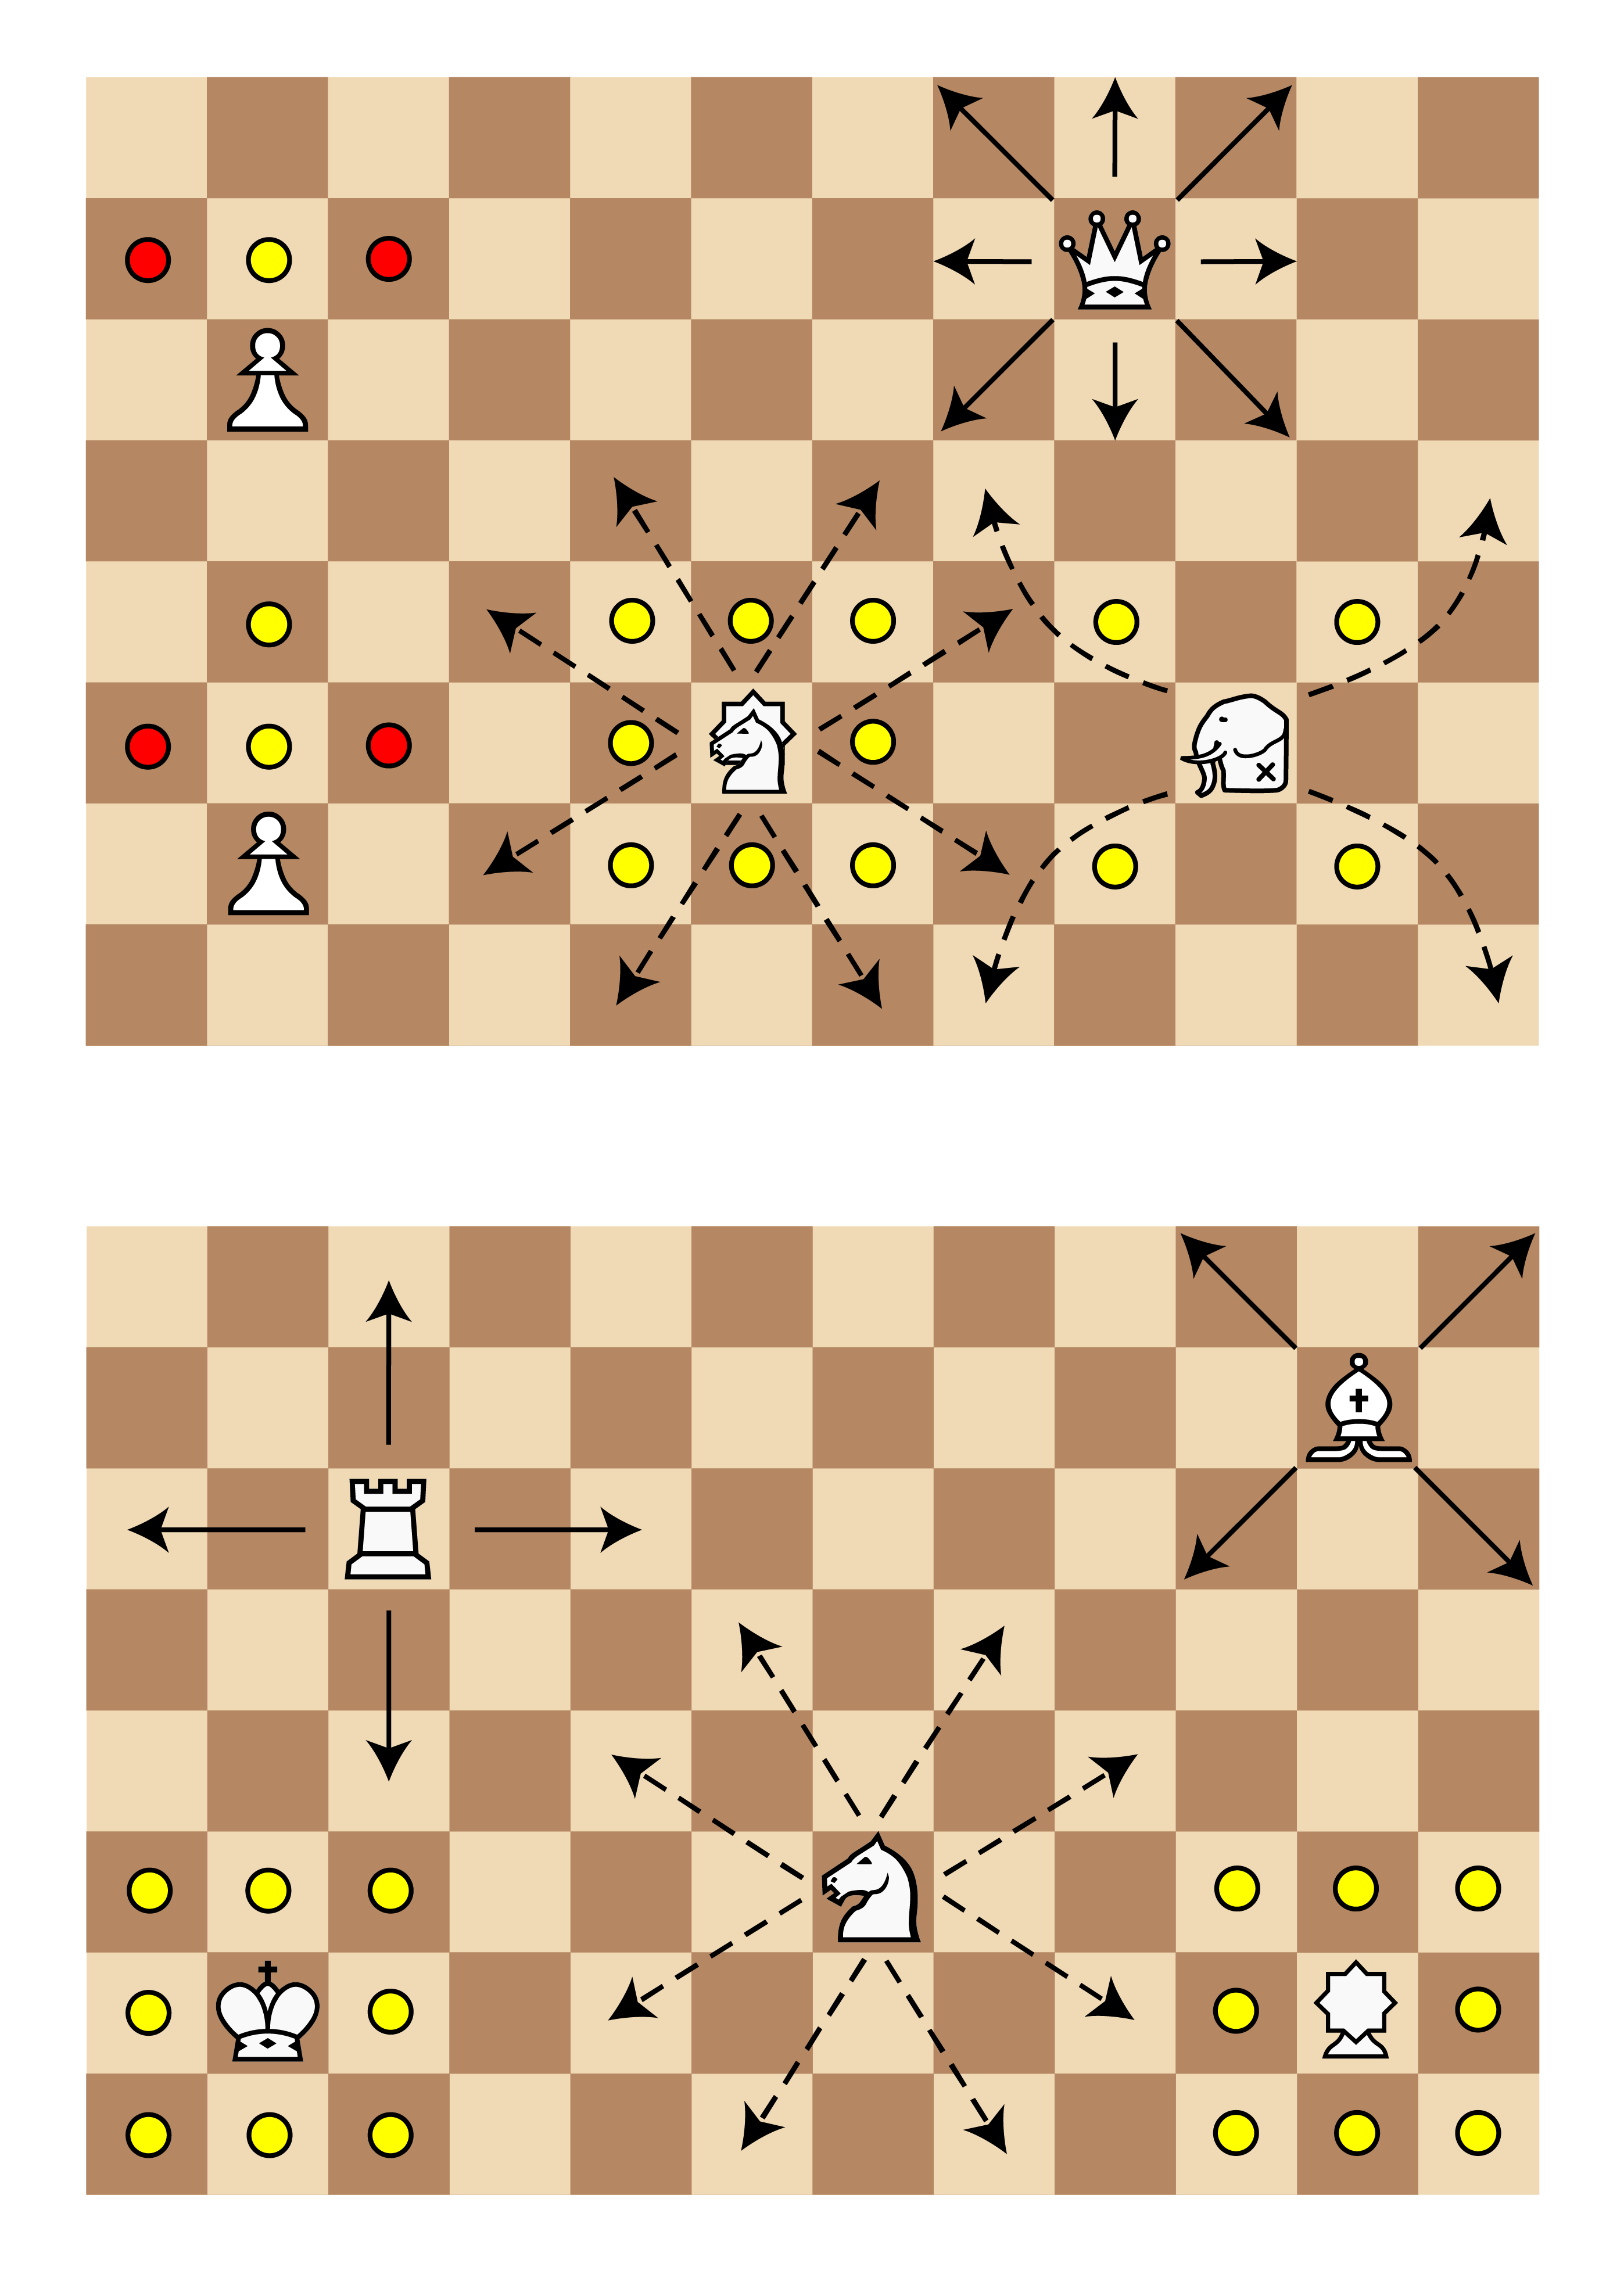
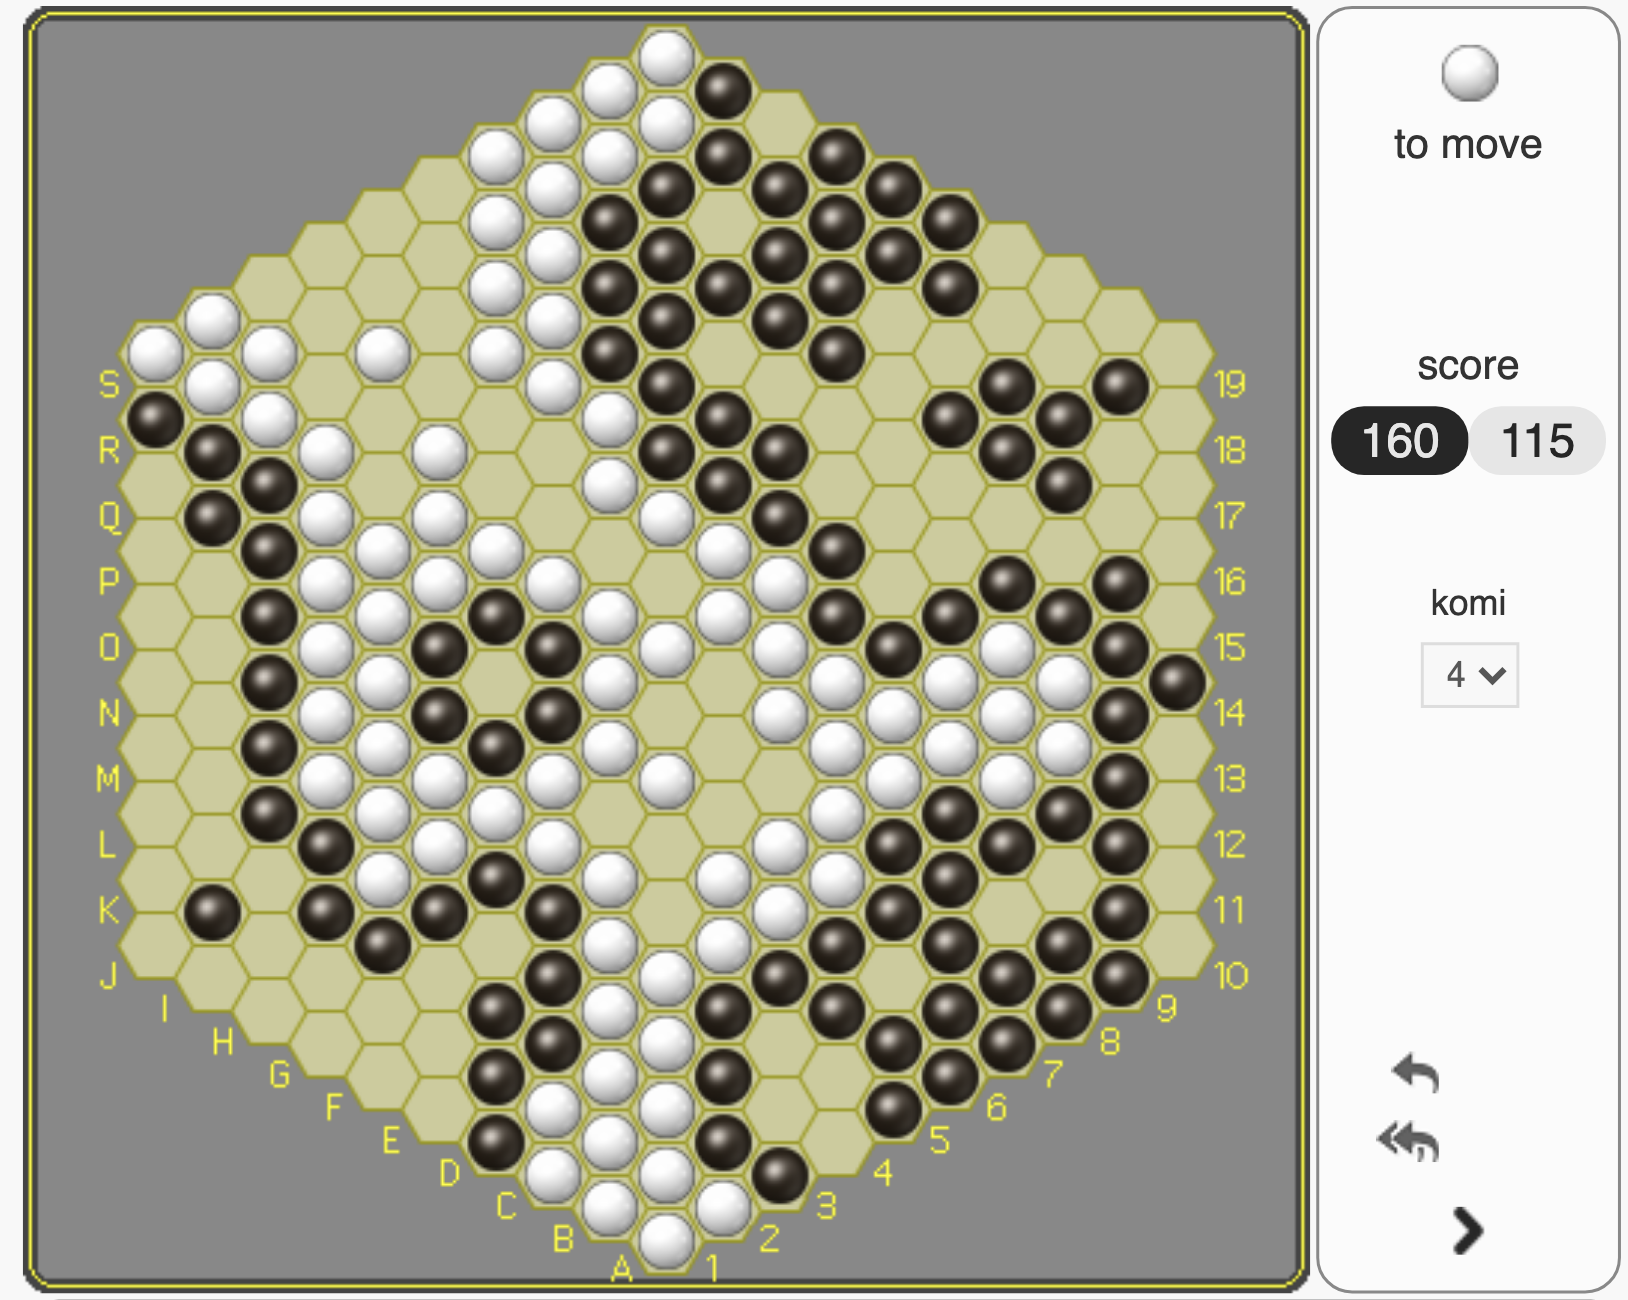
KnightVision This very recent creation melds the classic goal and rhombic board of Hex with a focus on a hexagonal version of the Knight’s leap.  Christian’s pitch says ‘it adds drama to an incredibly deep game without affecting its depth’, but I slightly disagree; the Knight’s-move placement pushes more locality on a game that thrives on global strategy.  Having said that, the chucking of axes is very fun, and the game overall is a good experience.  But if someone breaks out a Hex board I’m going to play Hex on it over this every time.  7/10.

havannah-elaboratefork

Havannah — I respect Christian enormously, but his decision to exclude Havannah from his ‘games that matter’ list is forever baffling to me.  A classic by any measure, Havannah is easy to understand yet blessed with bottomless depth.  The multiple goals create a sense of limitlessness that few games can muster.  I can understand the impulse to push his fans toward his later games, and certainly he’s produced many great games after Havannah.  But equally, there’s nothing wrong with getting it right the first time.  Brilliant.  10/10. (read more here)

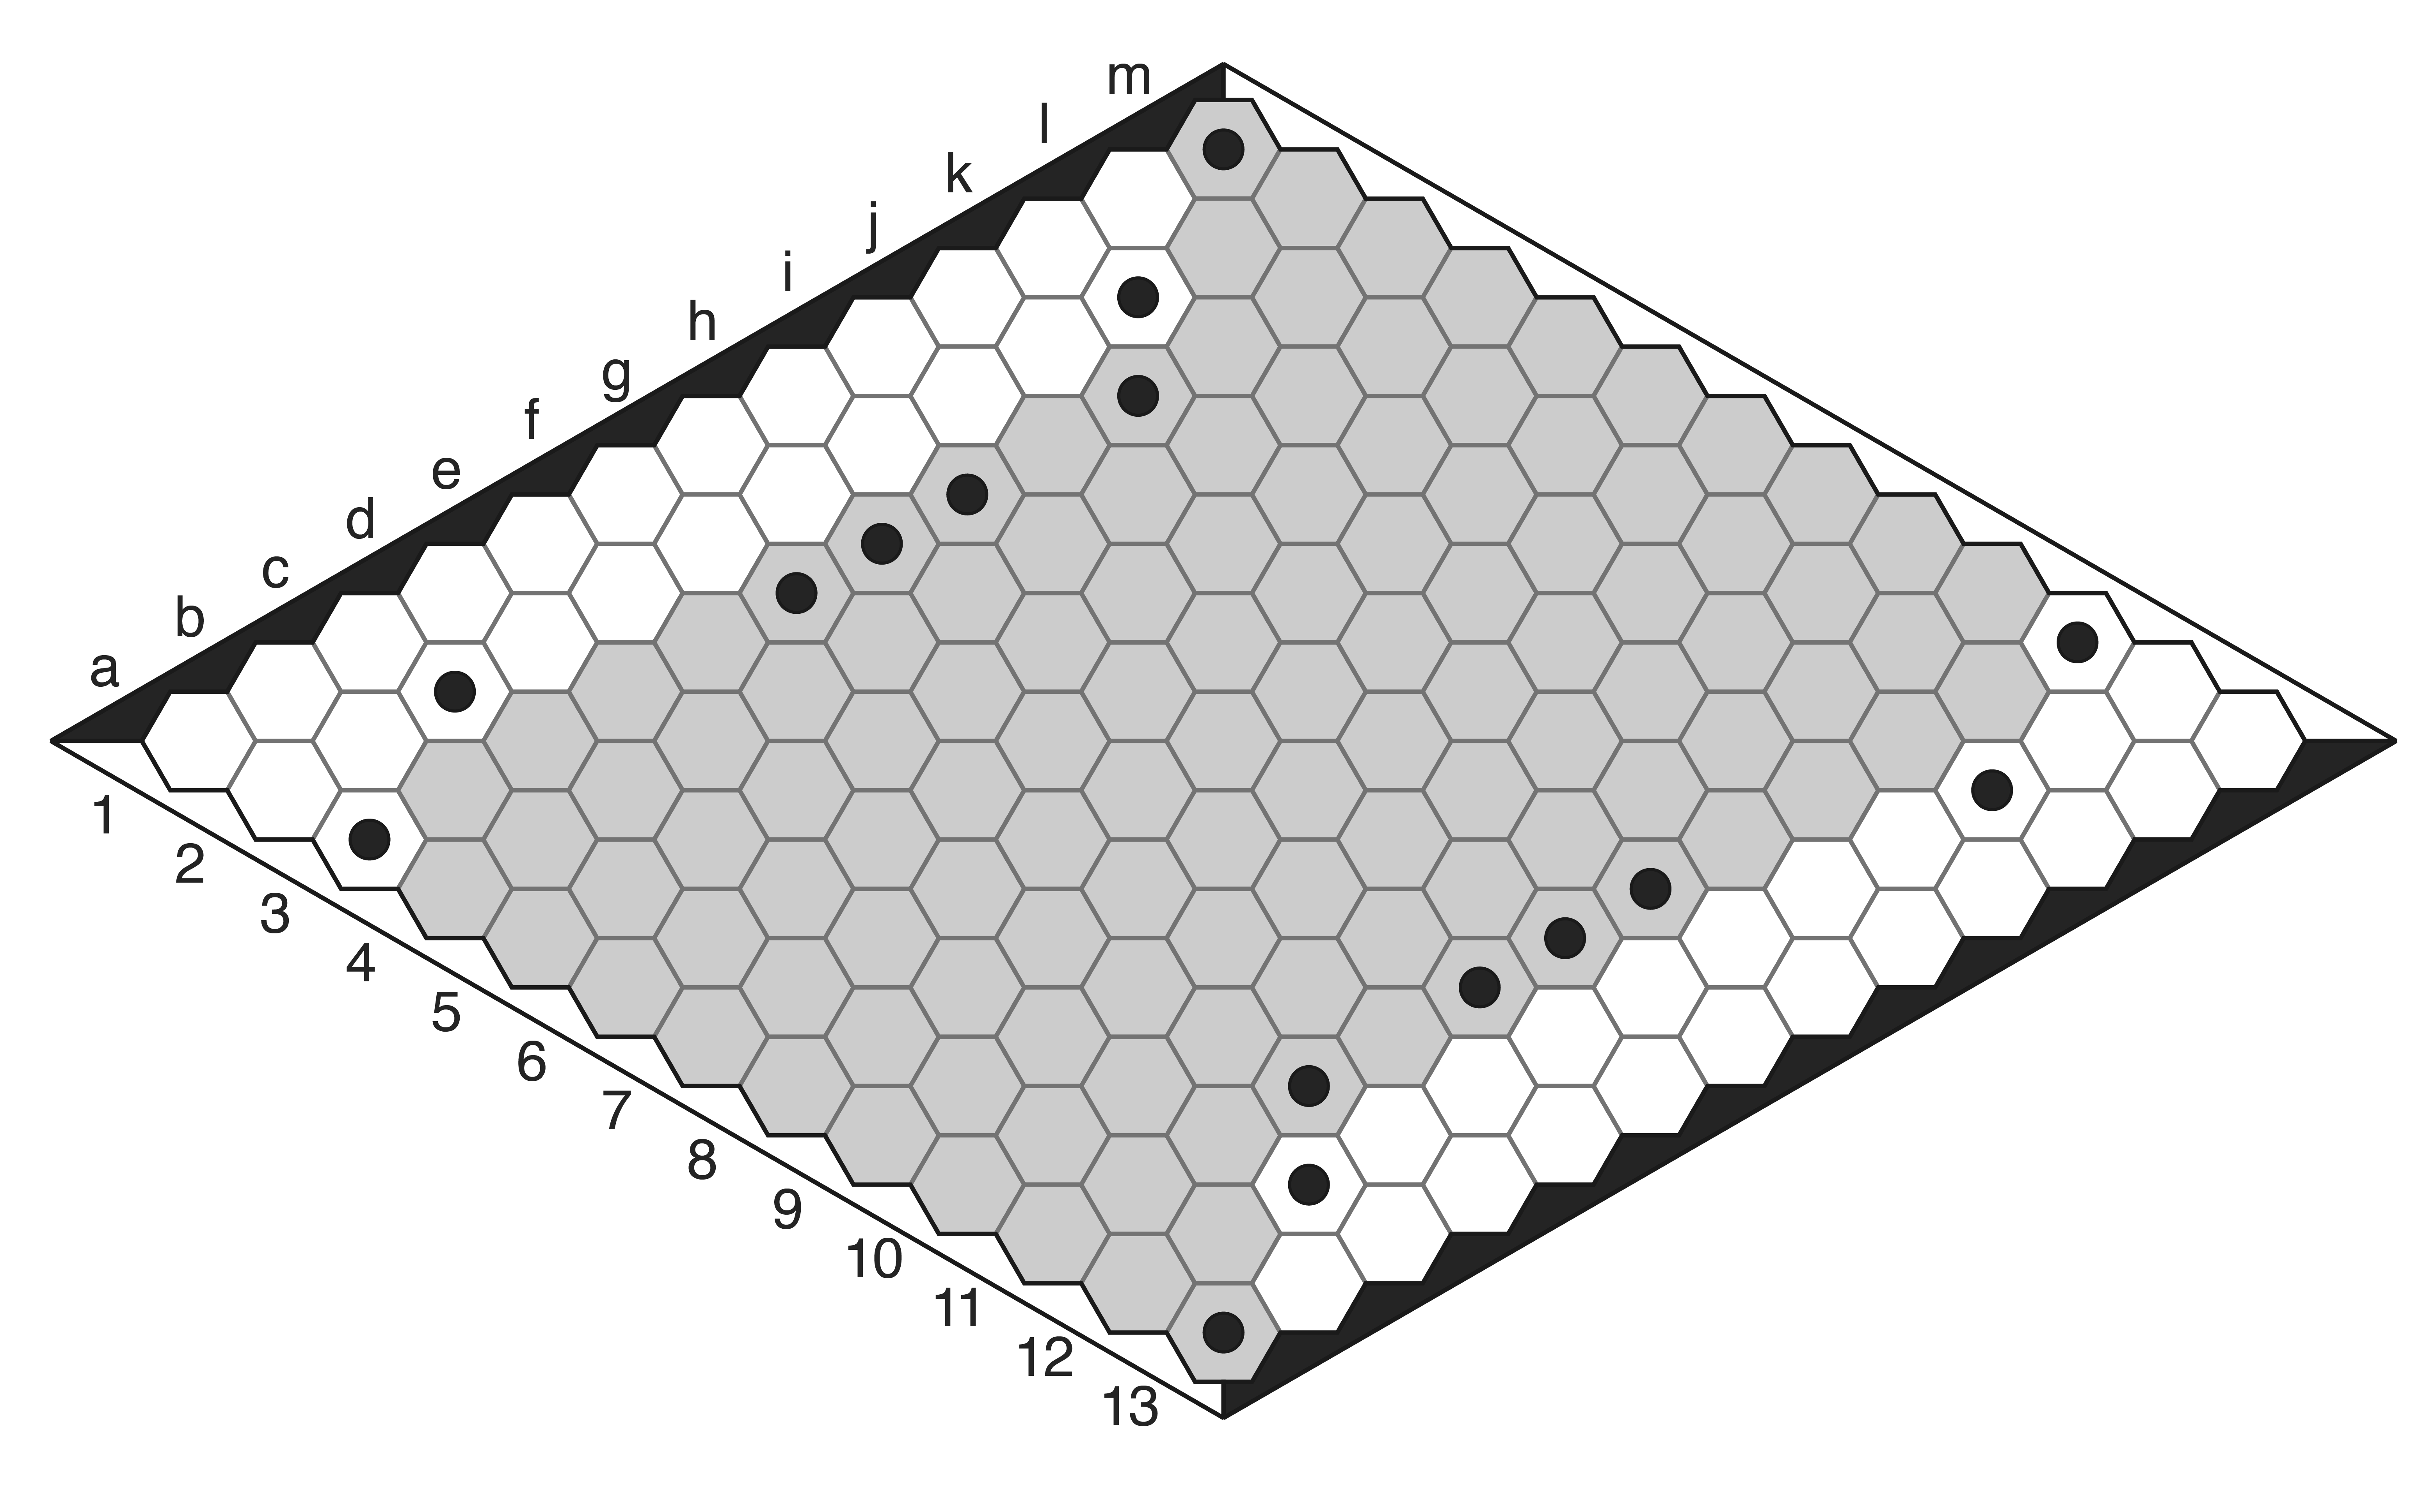
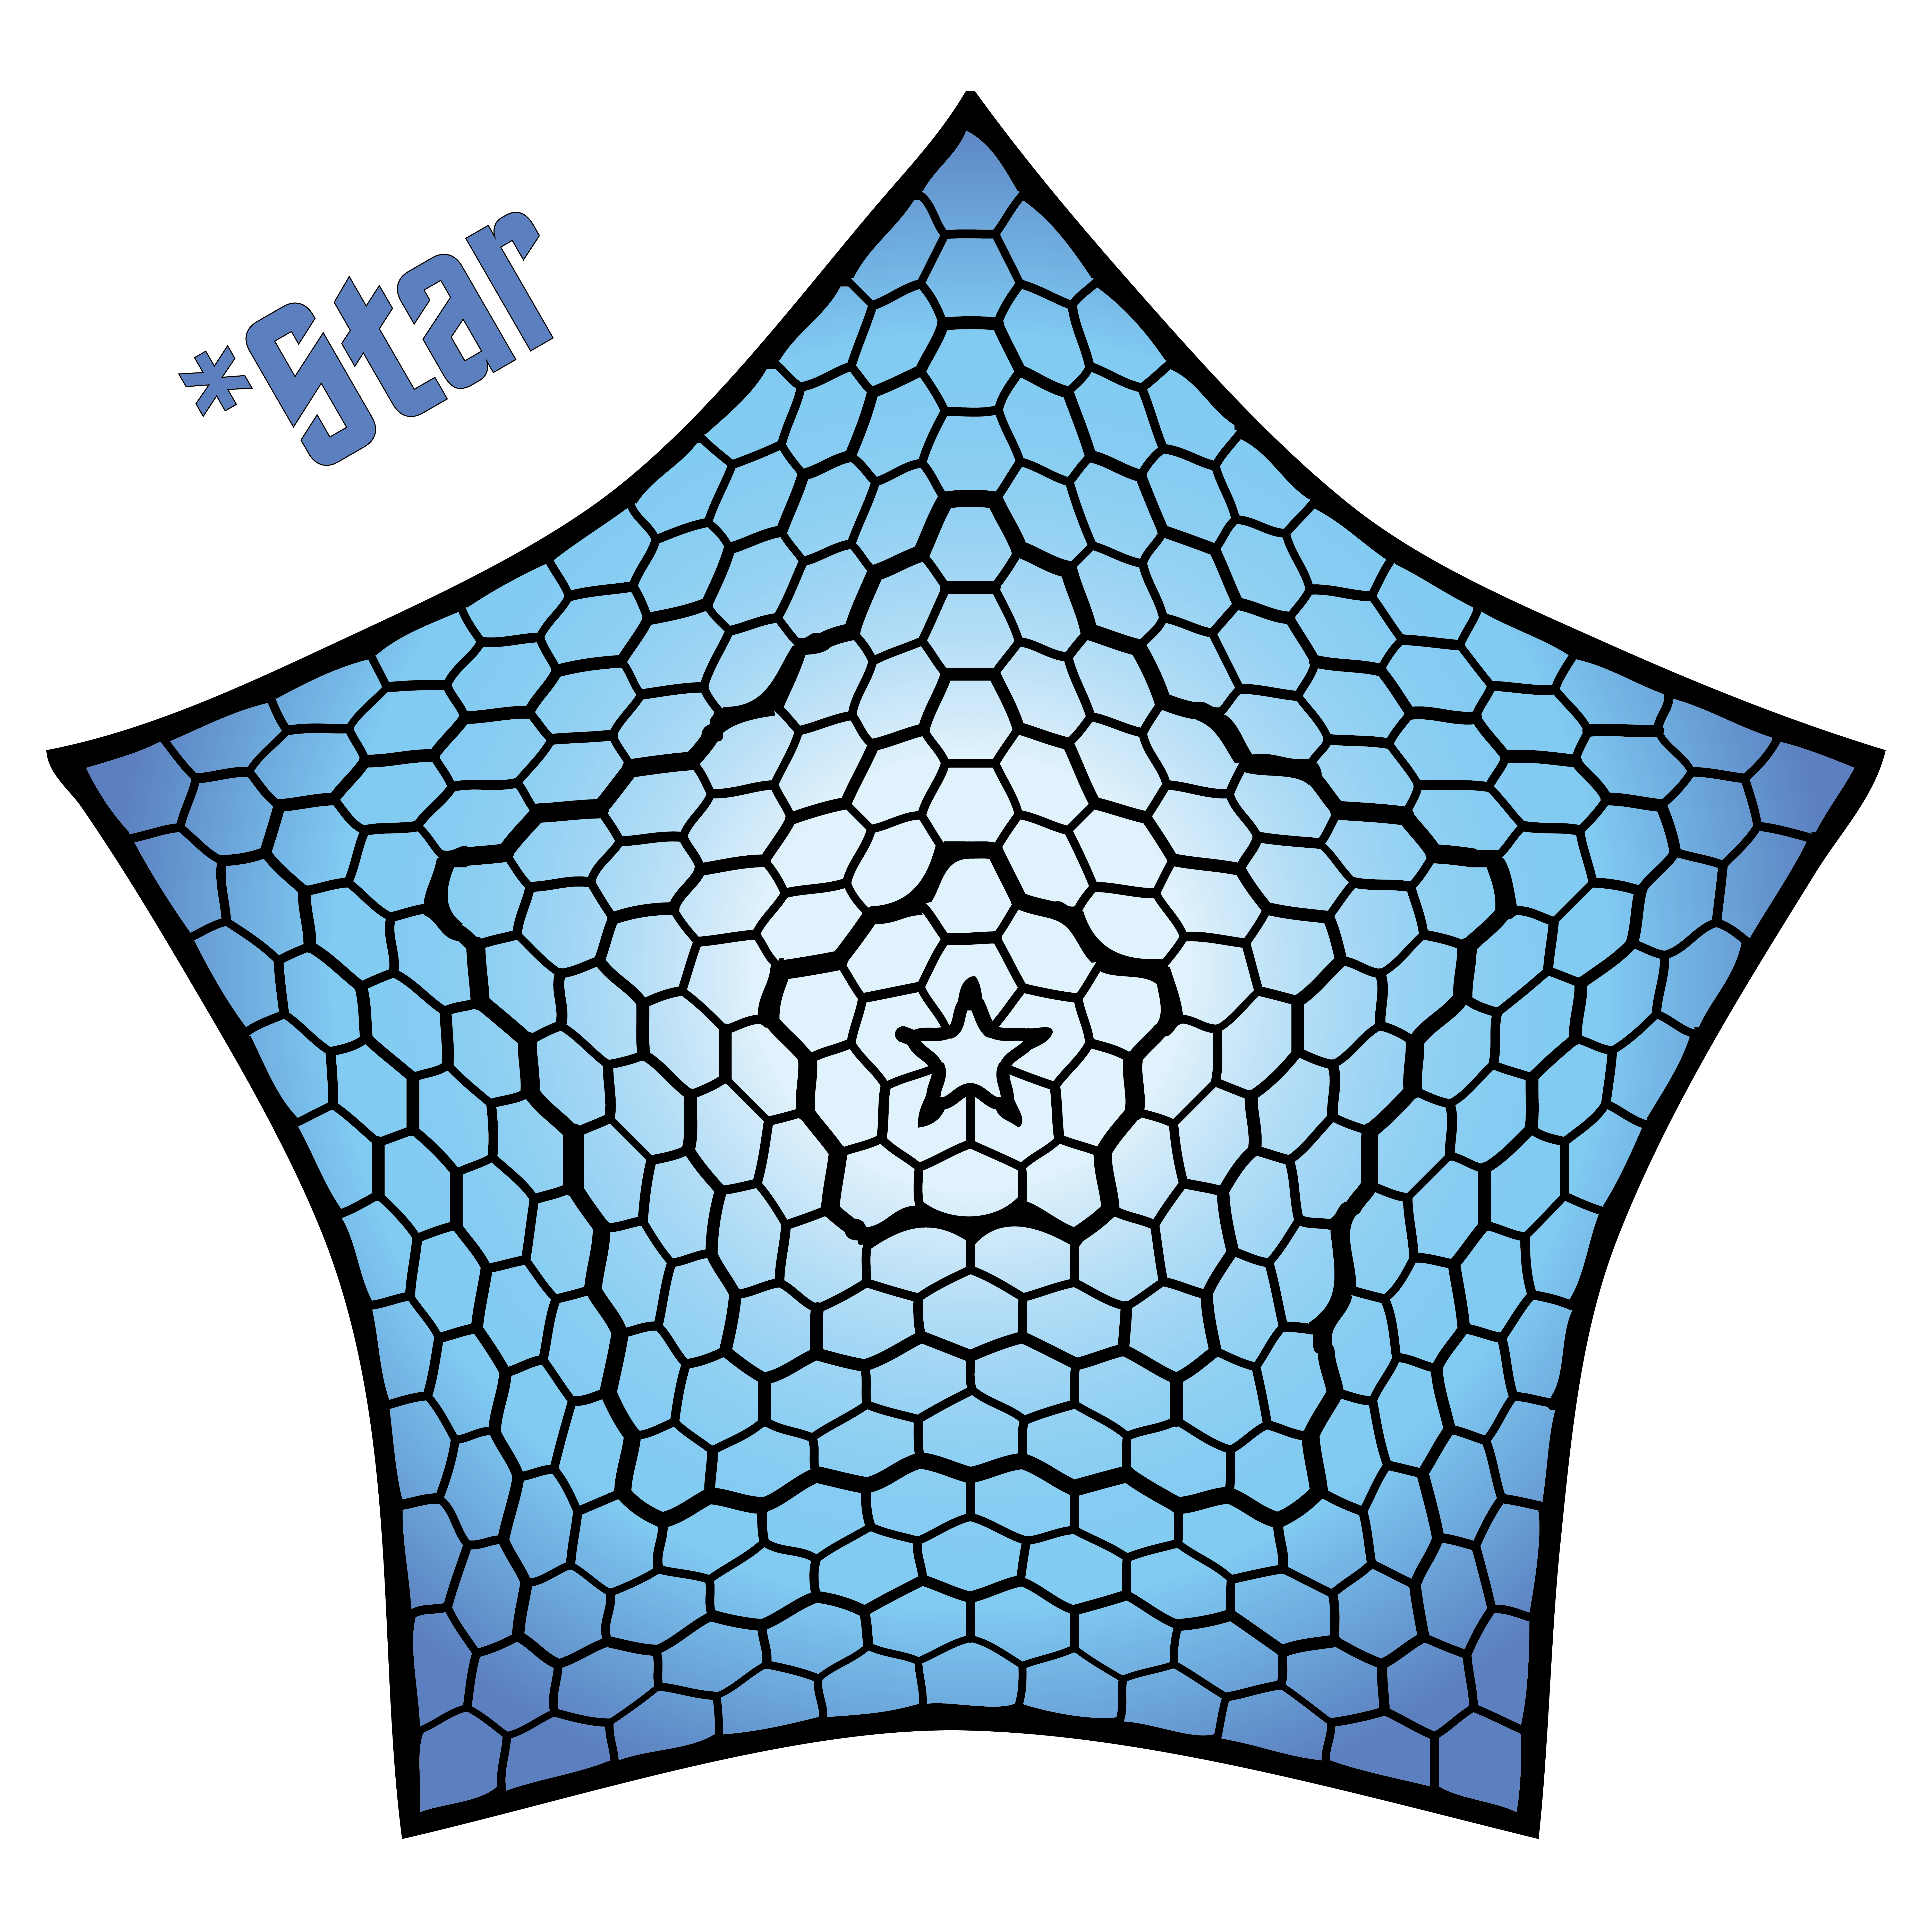
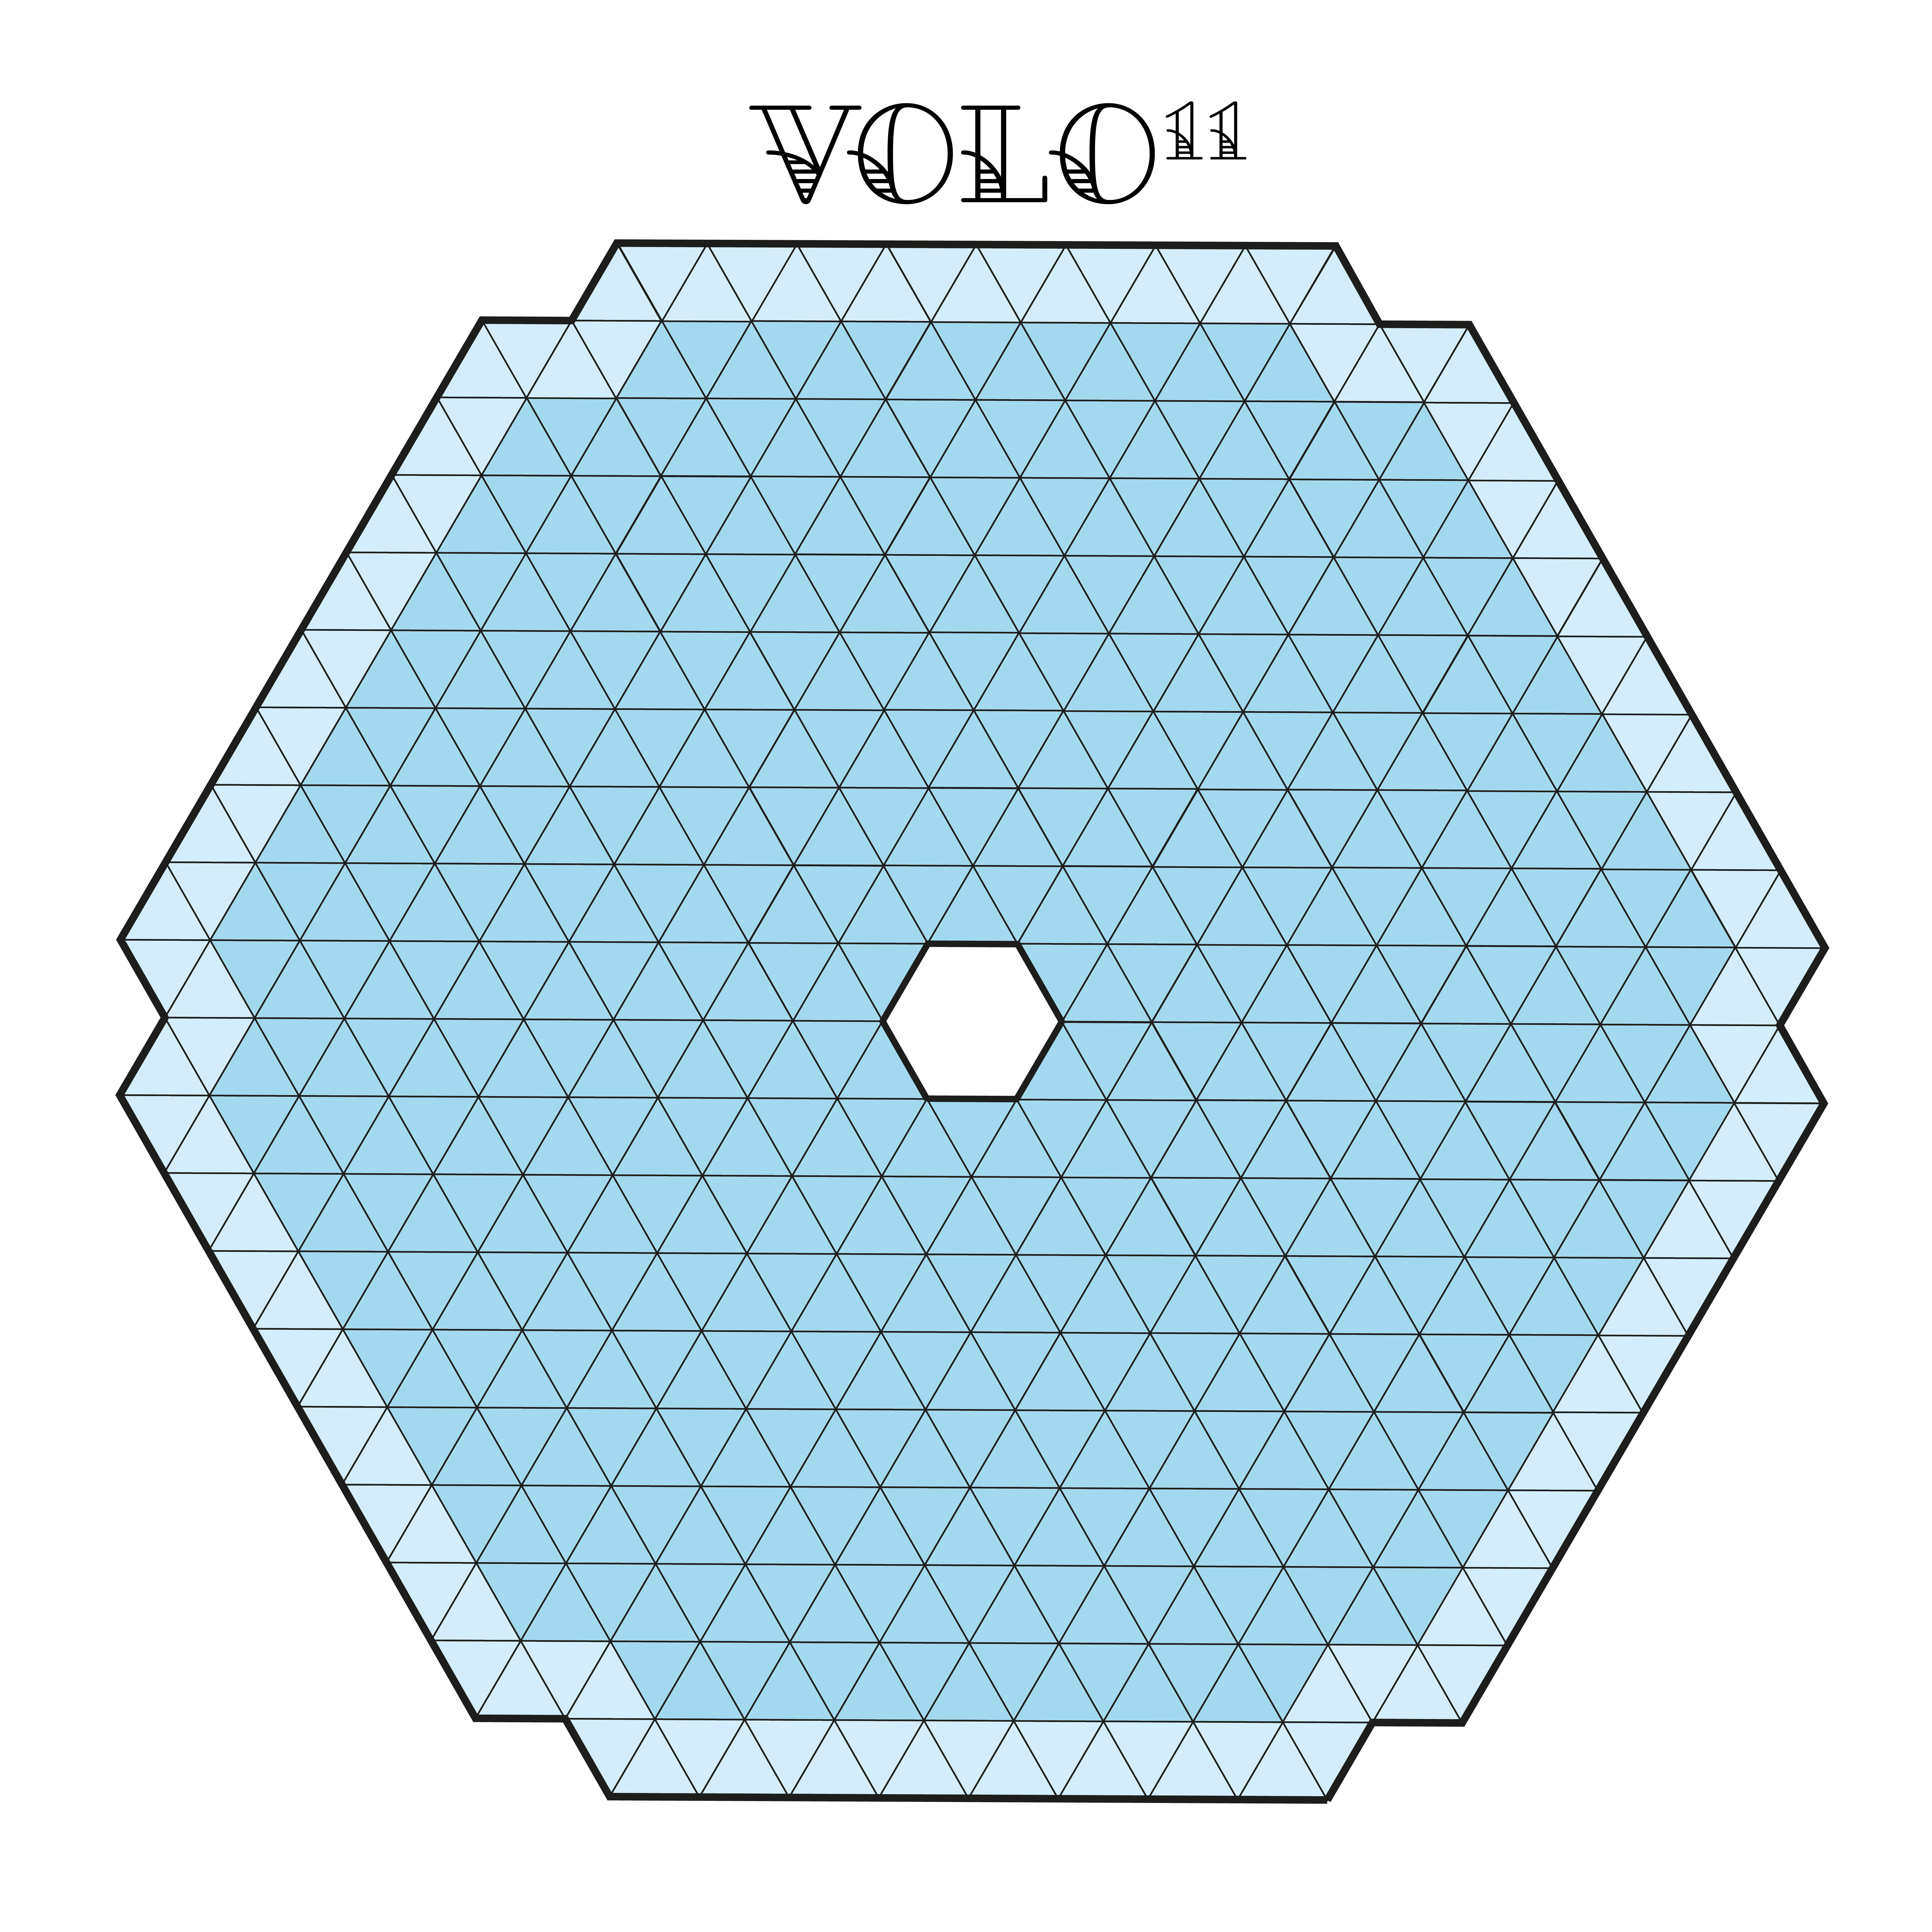
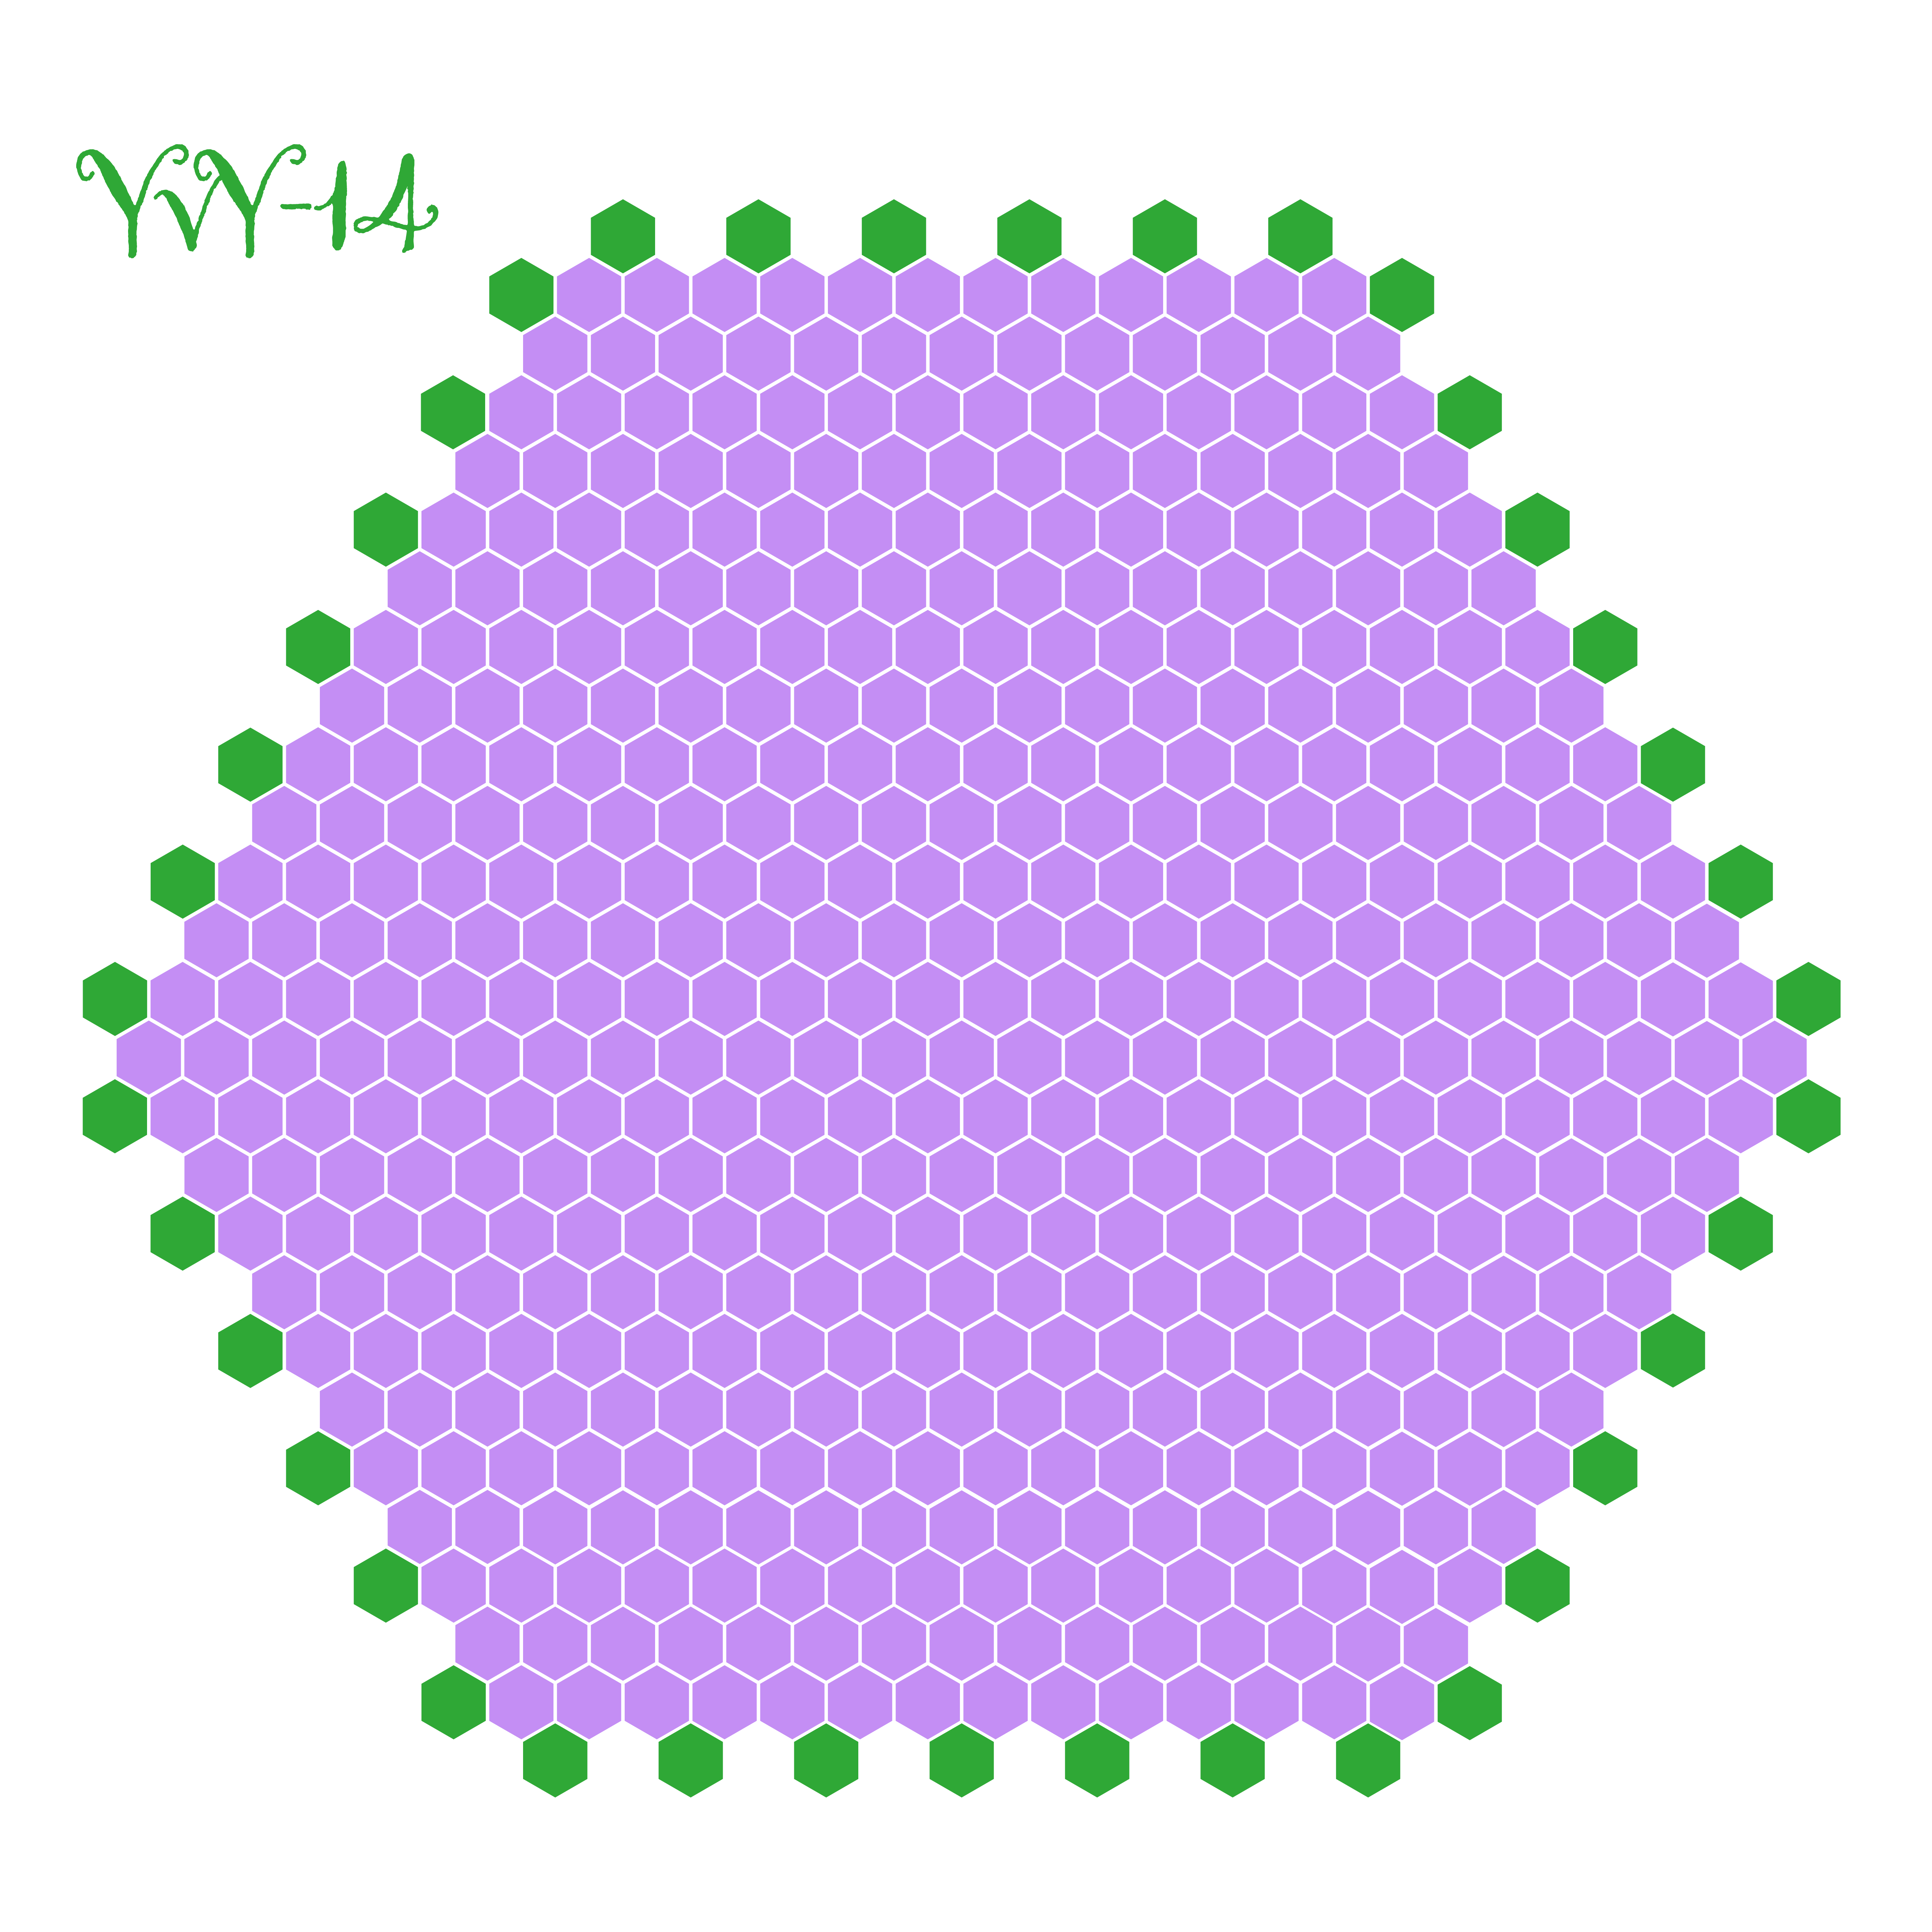
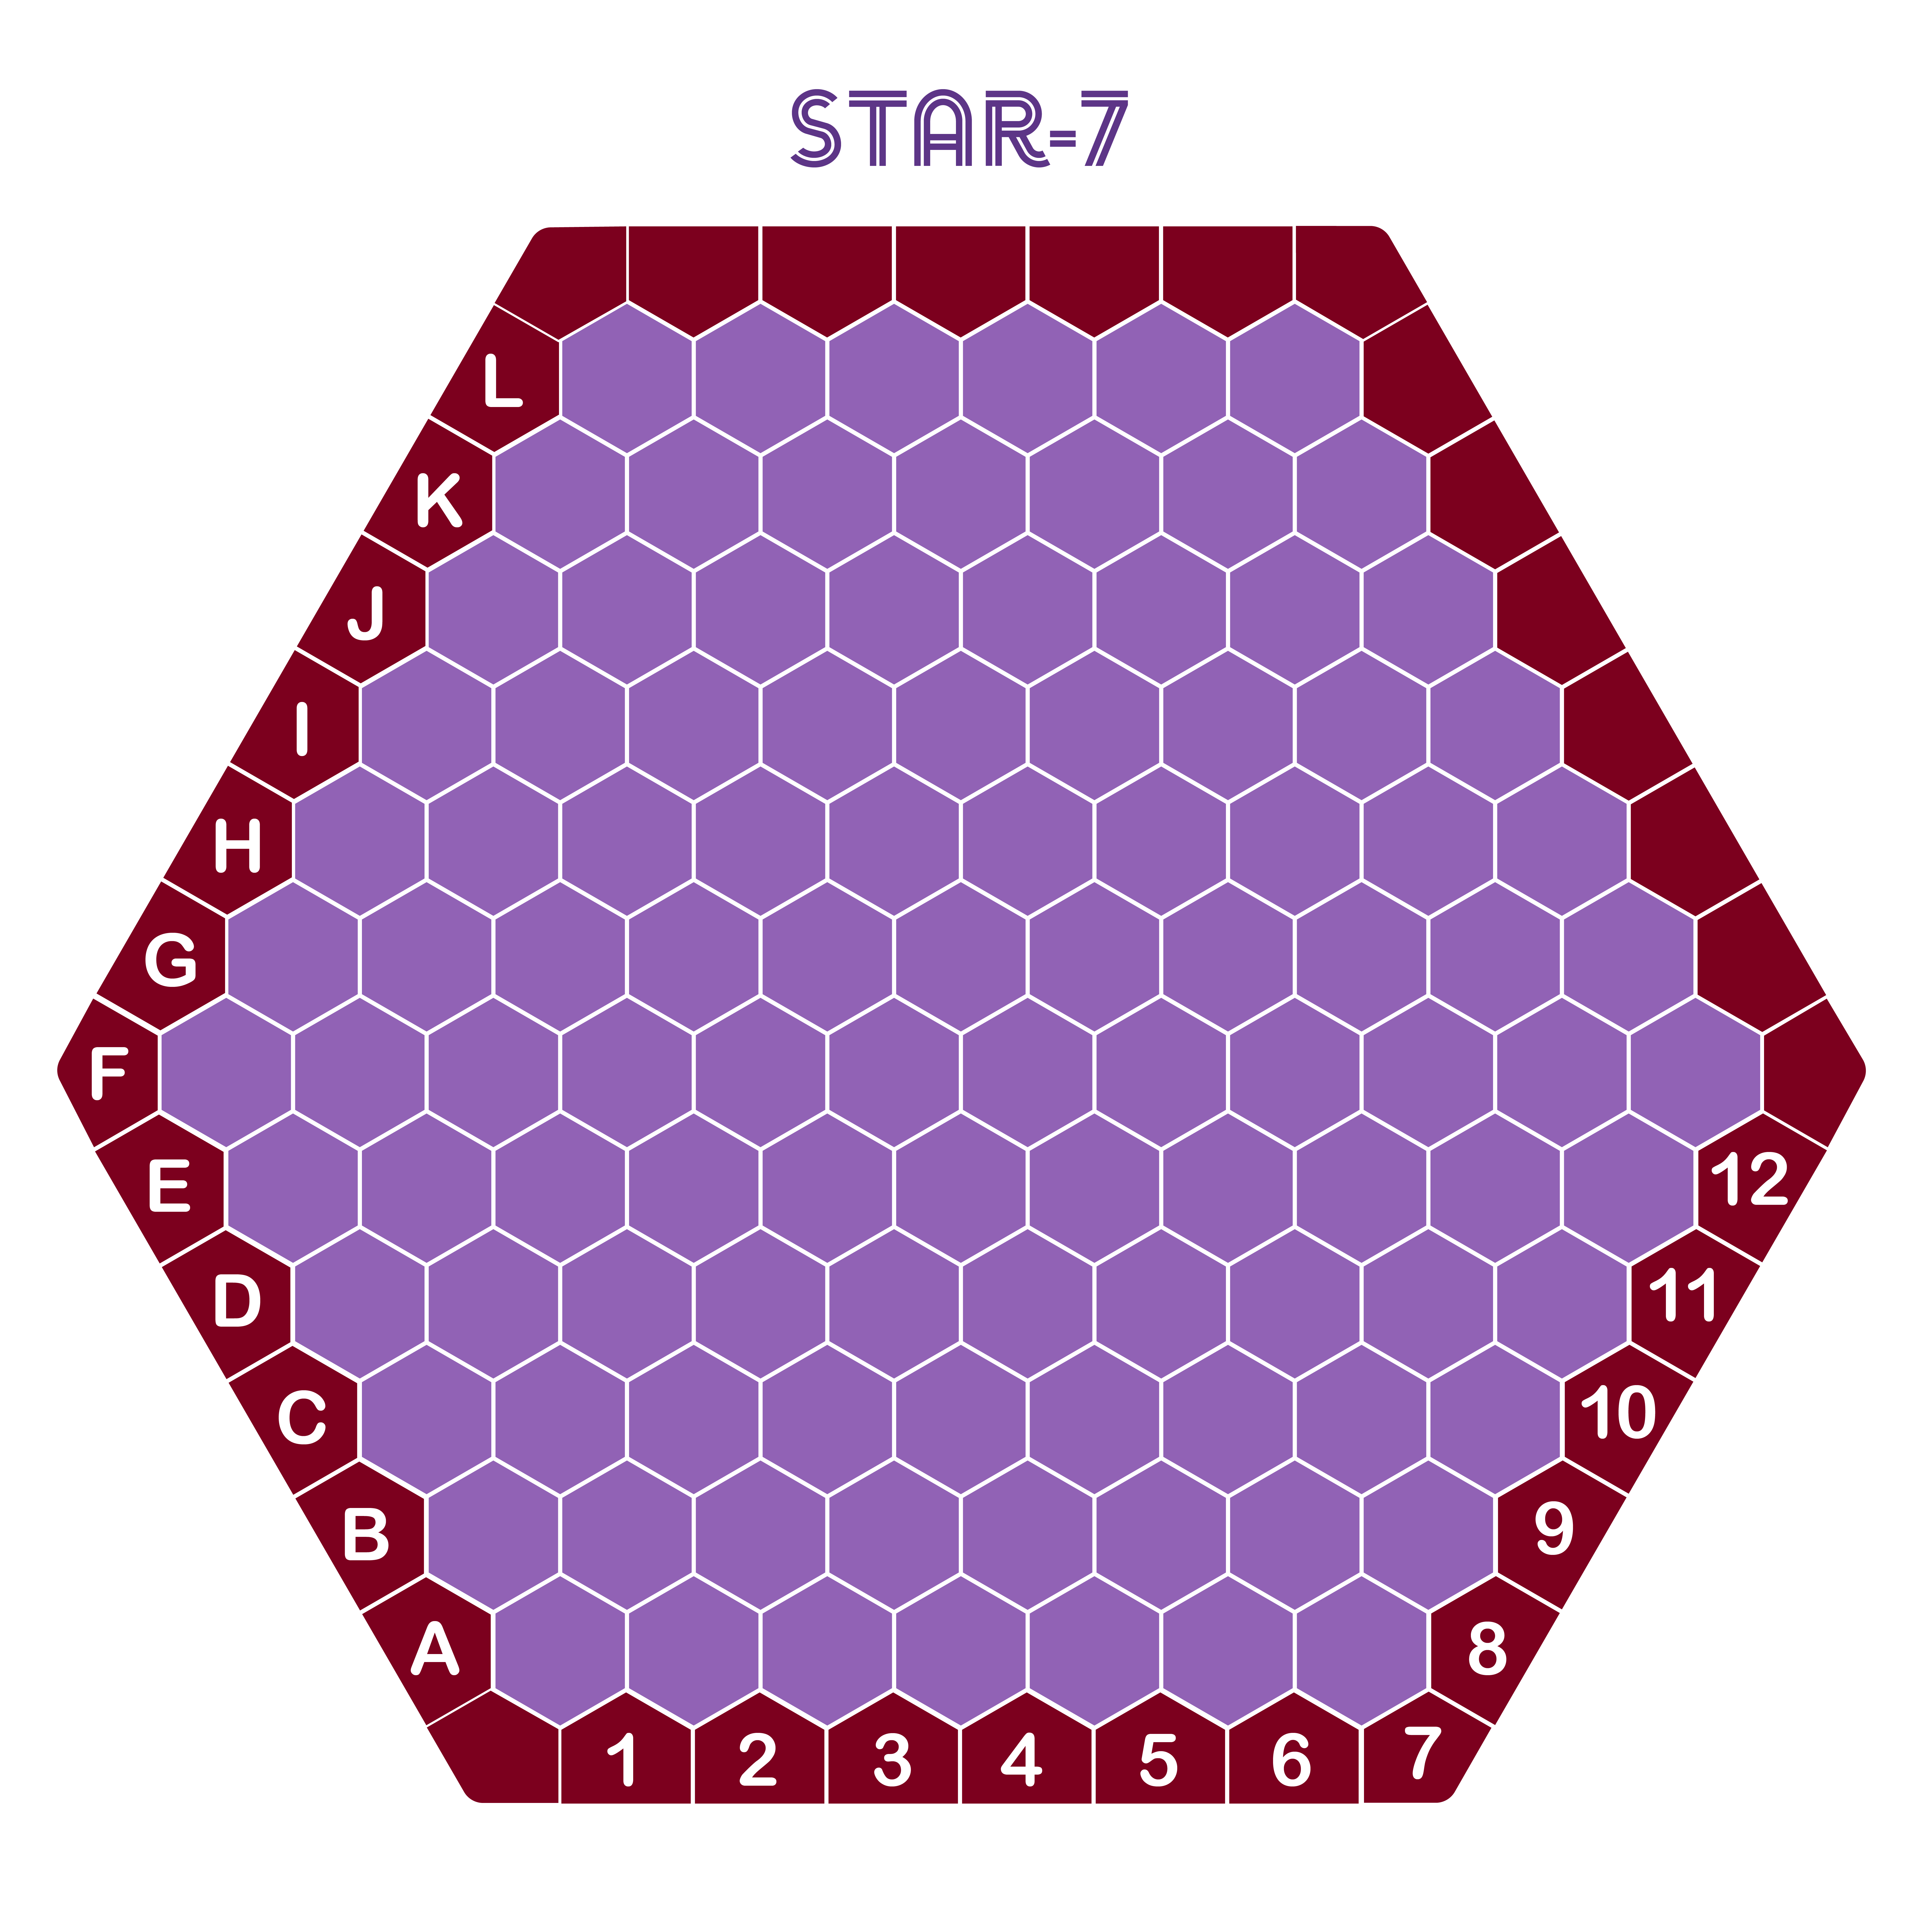
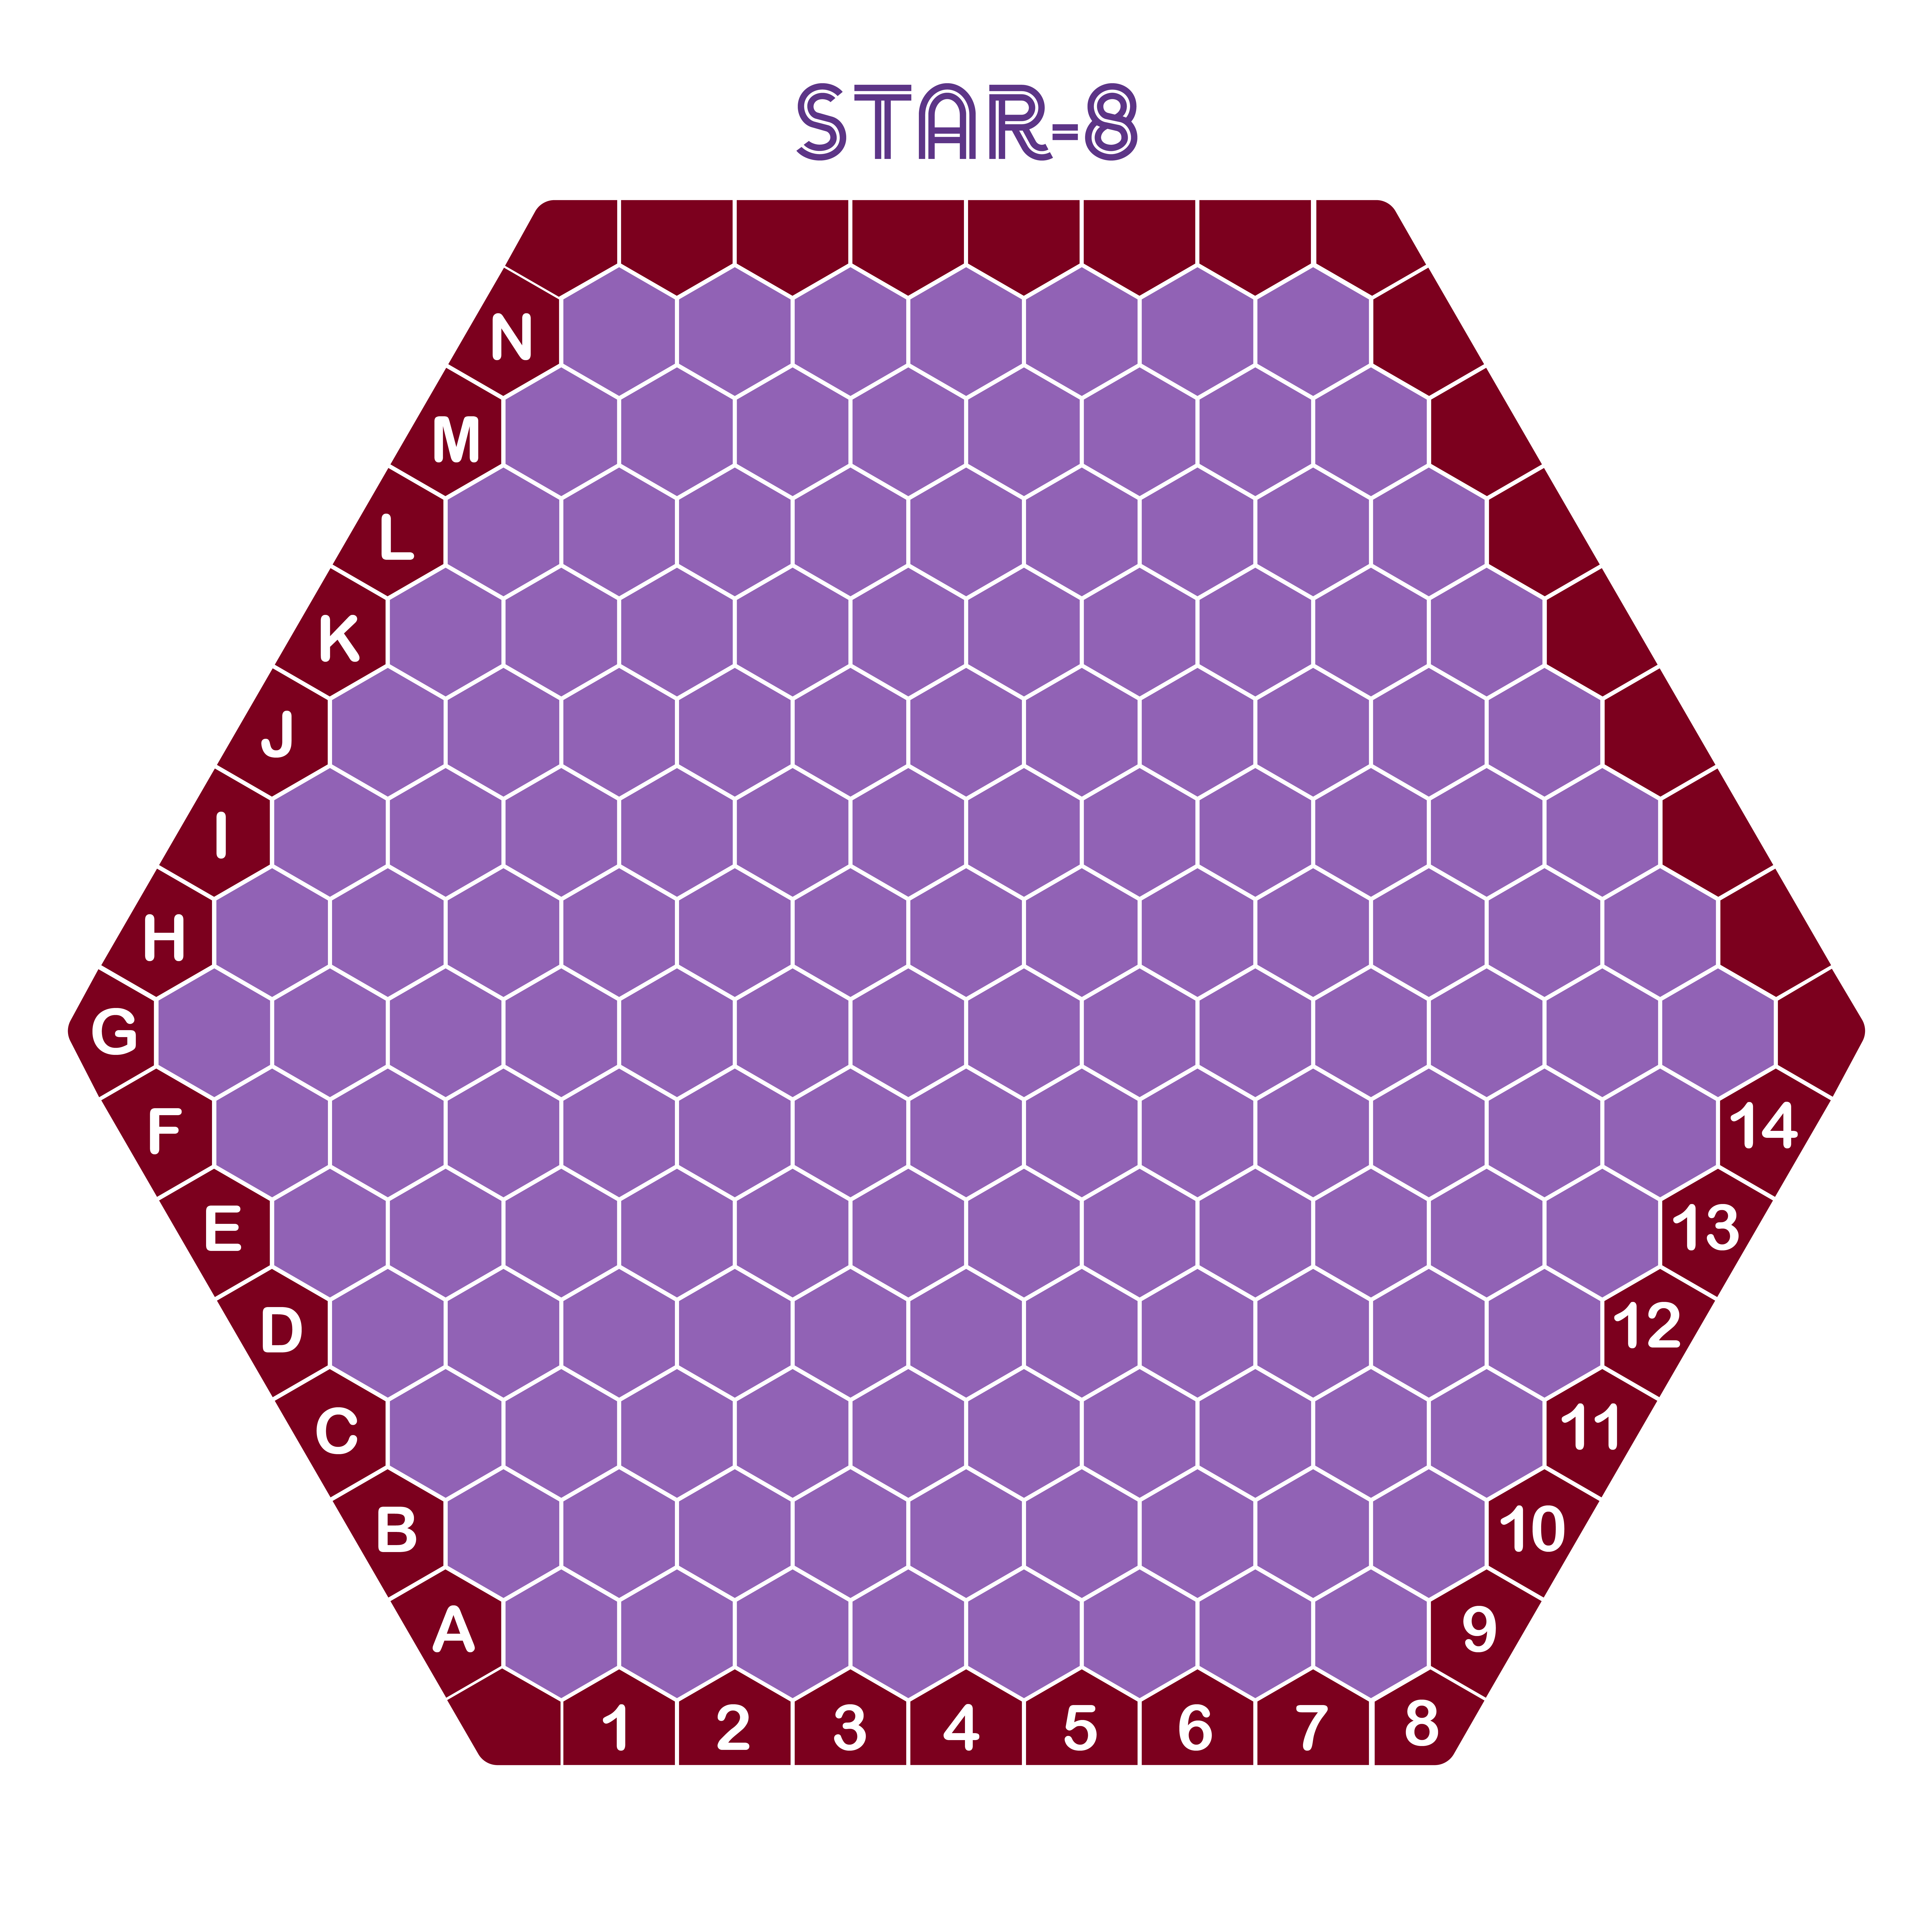
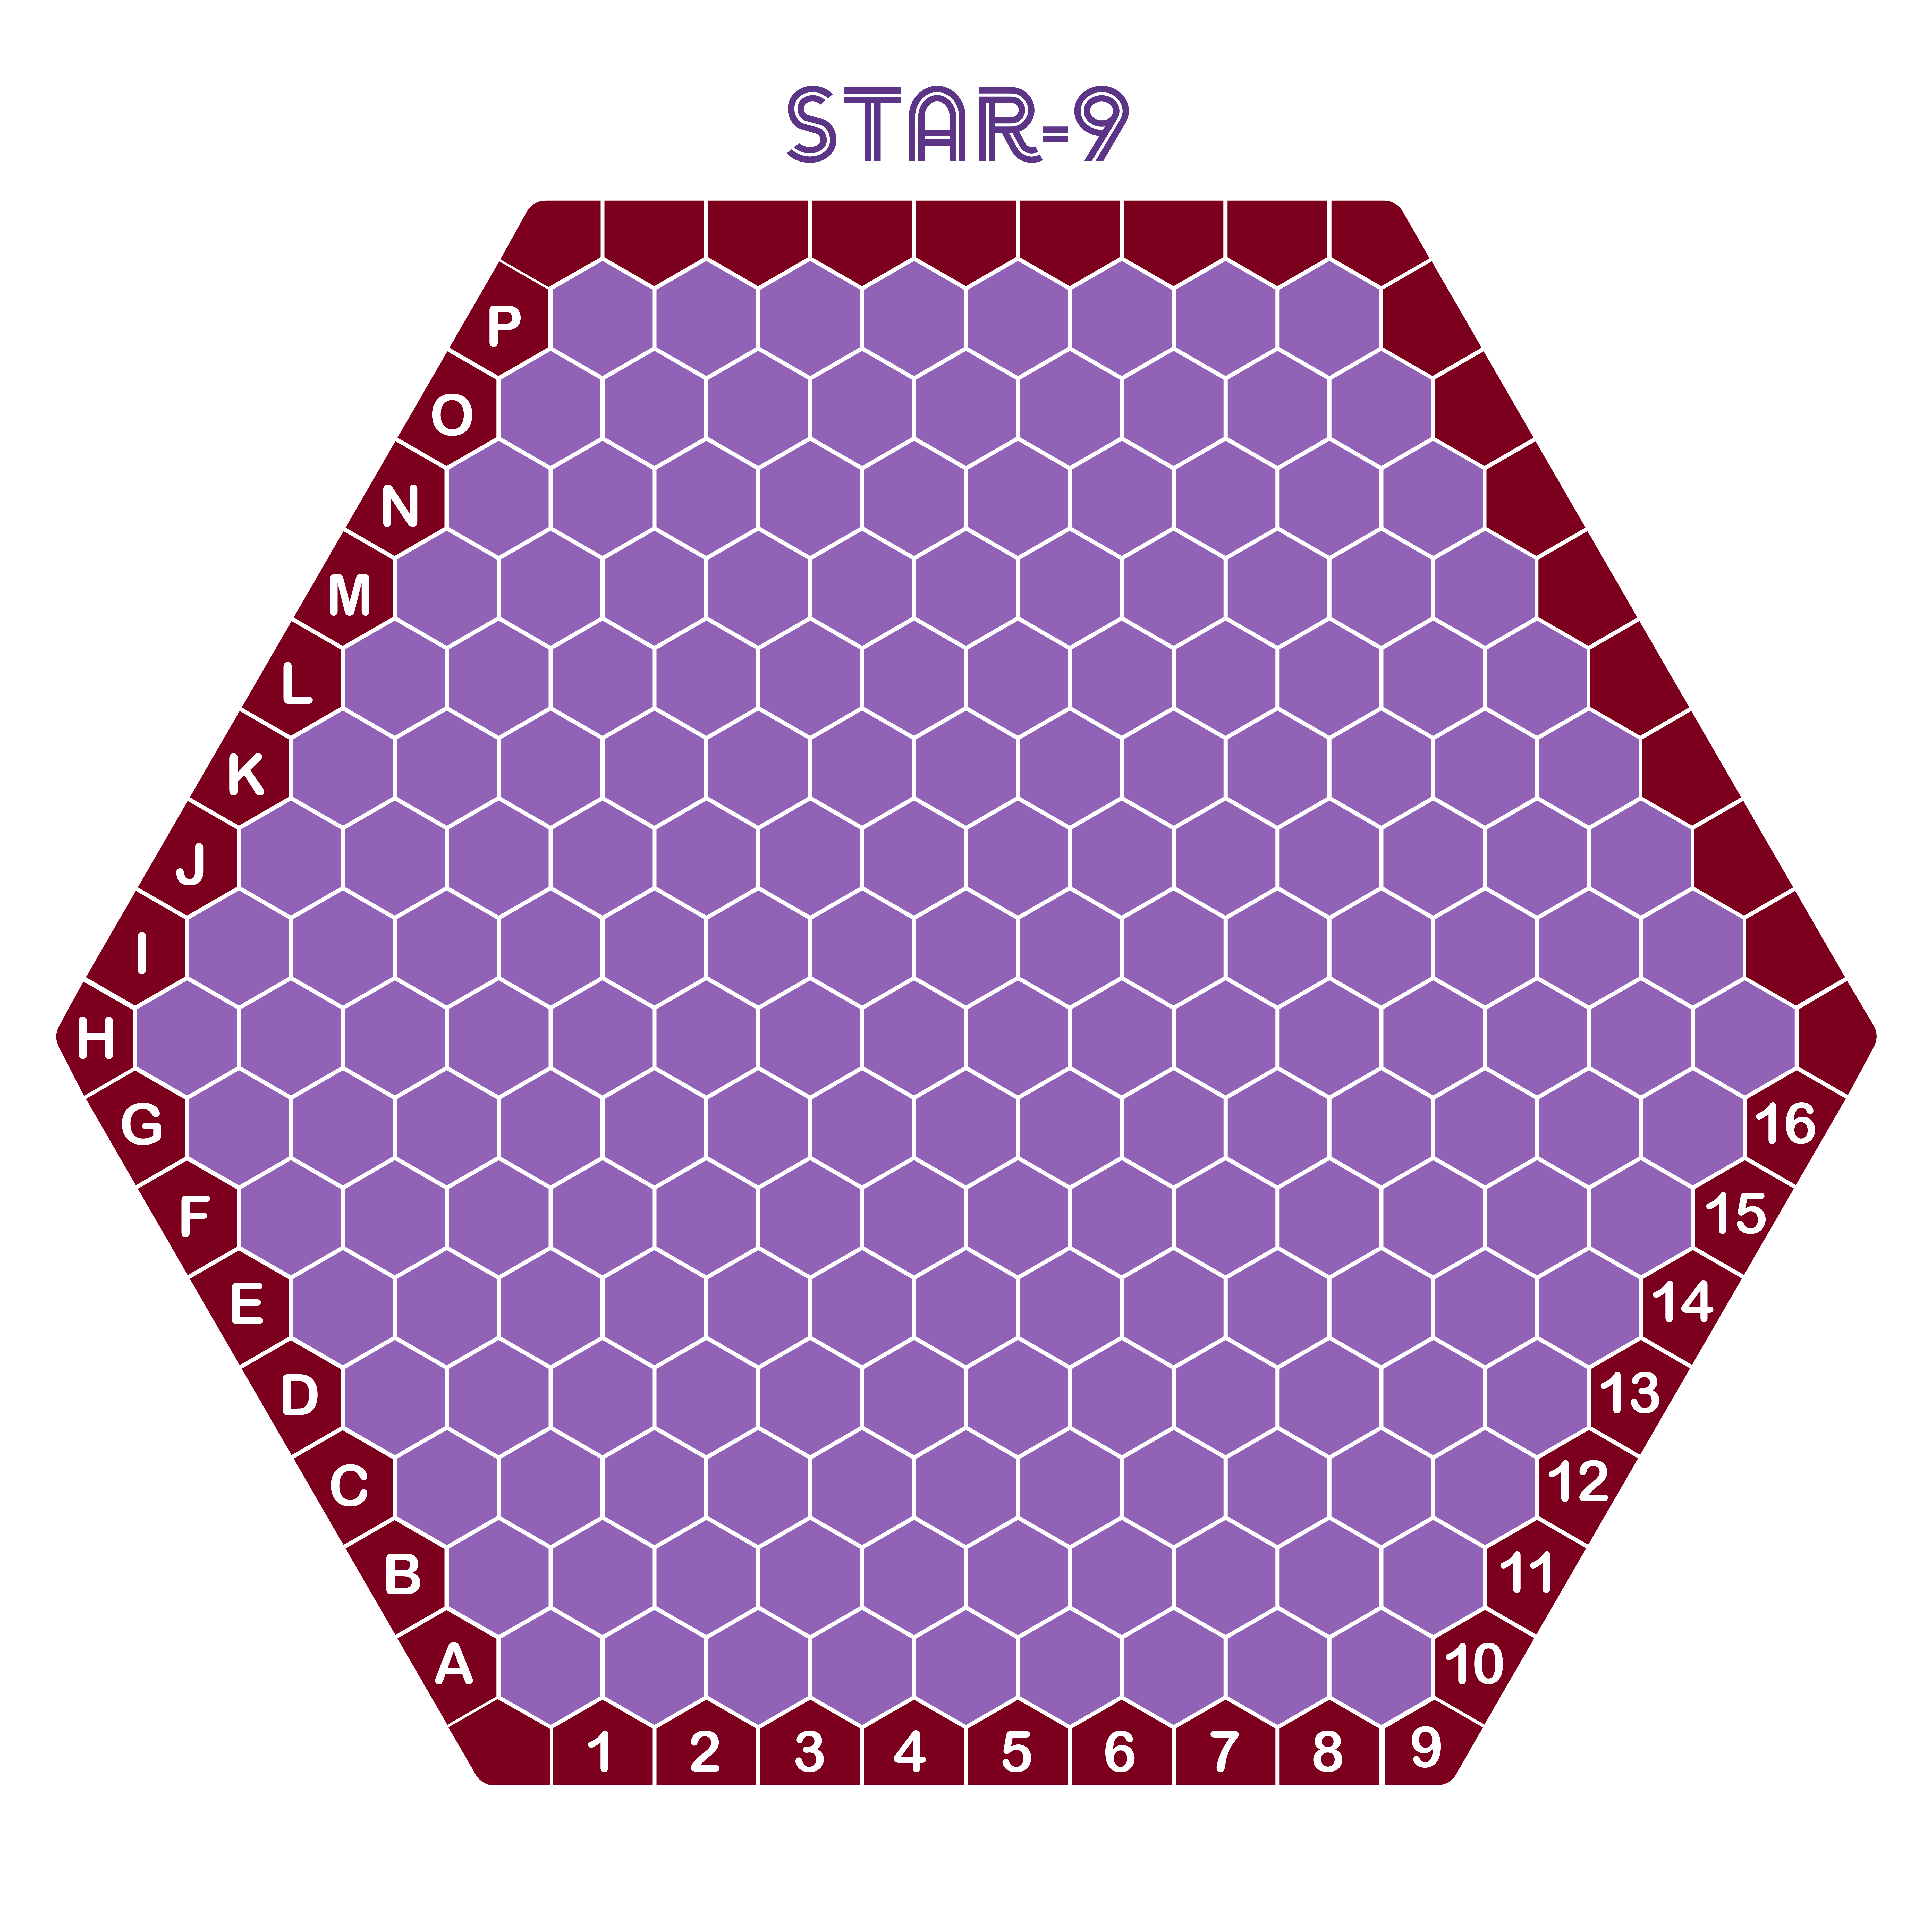
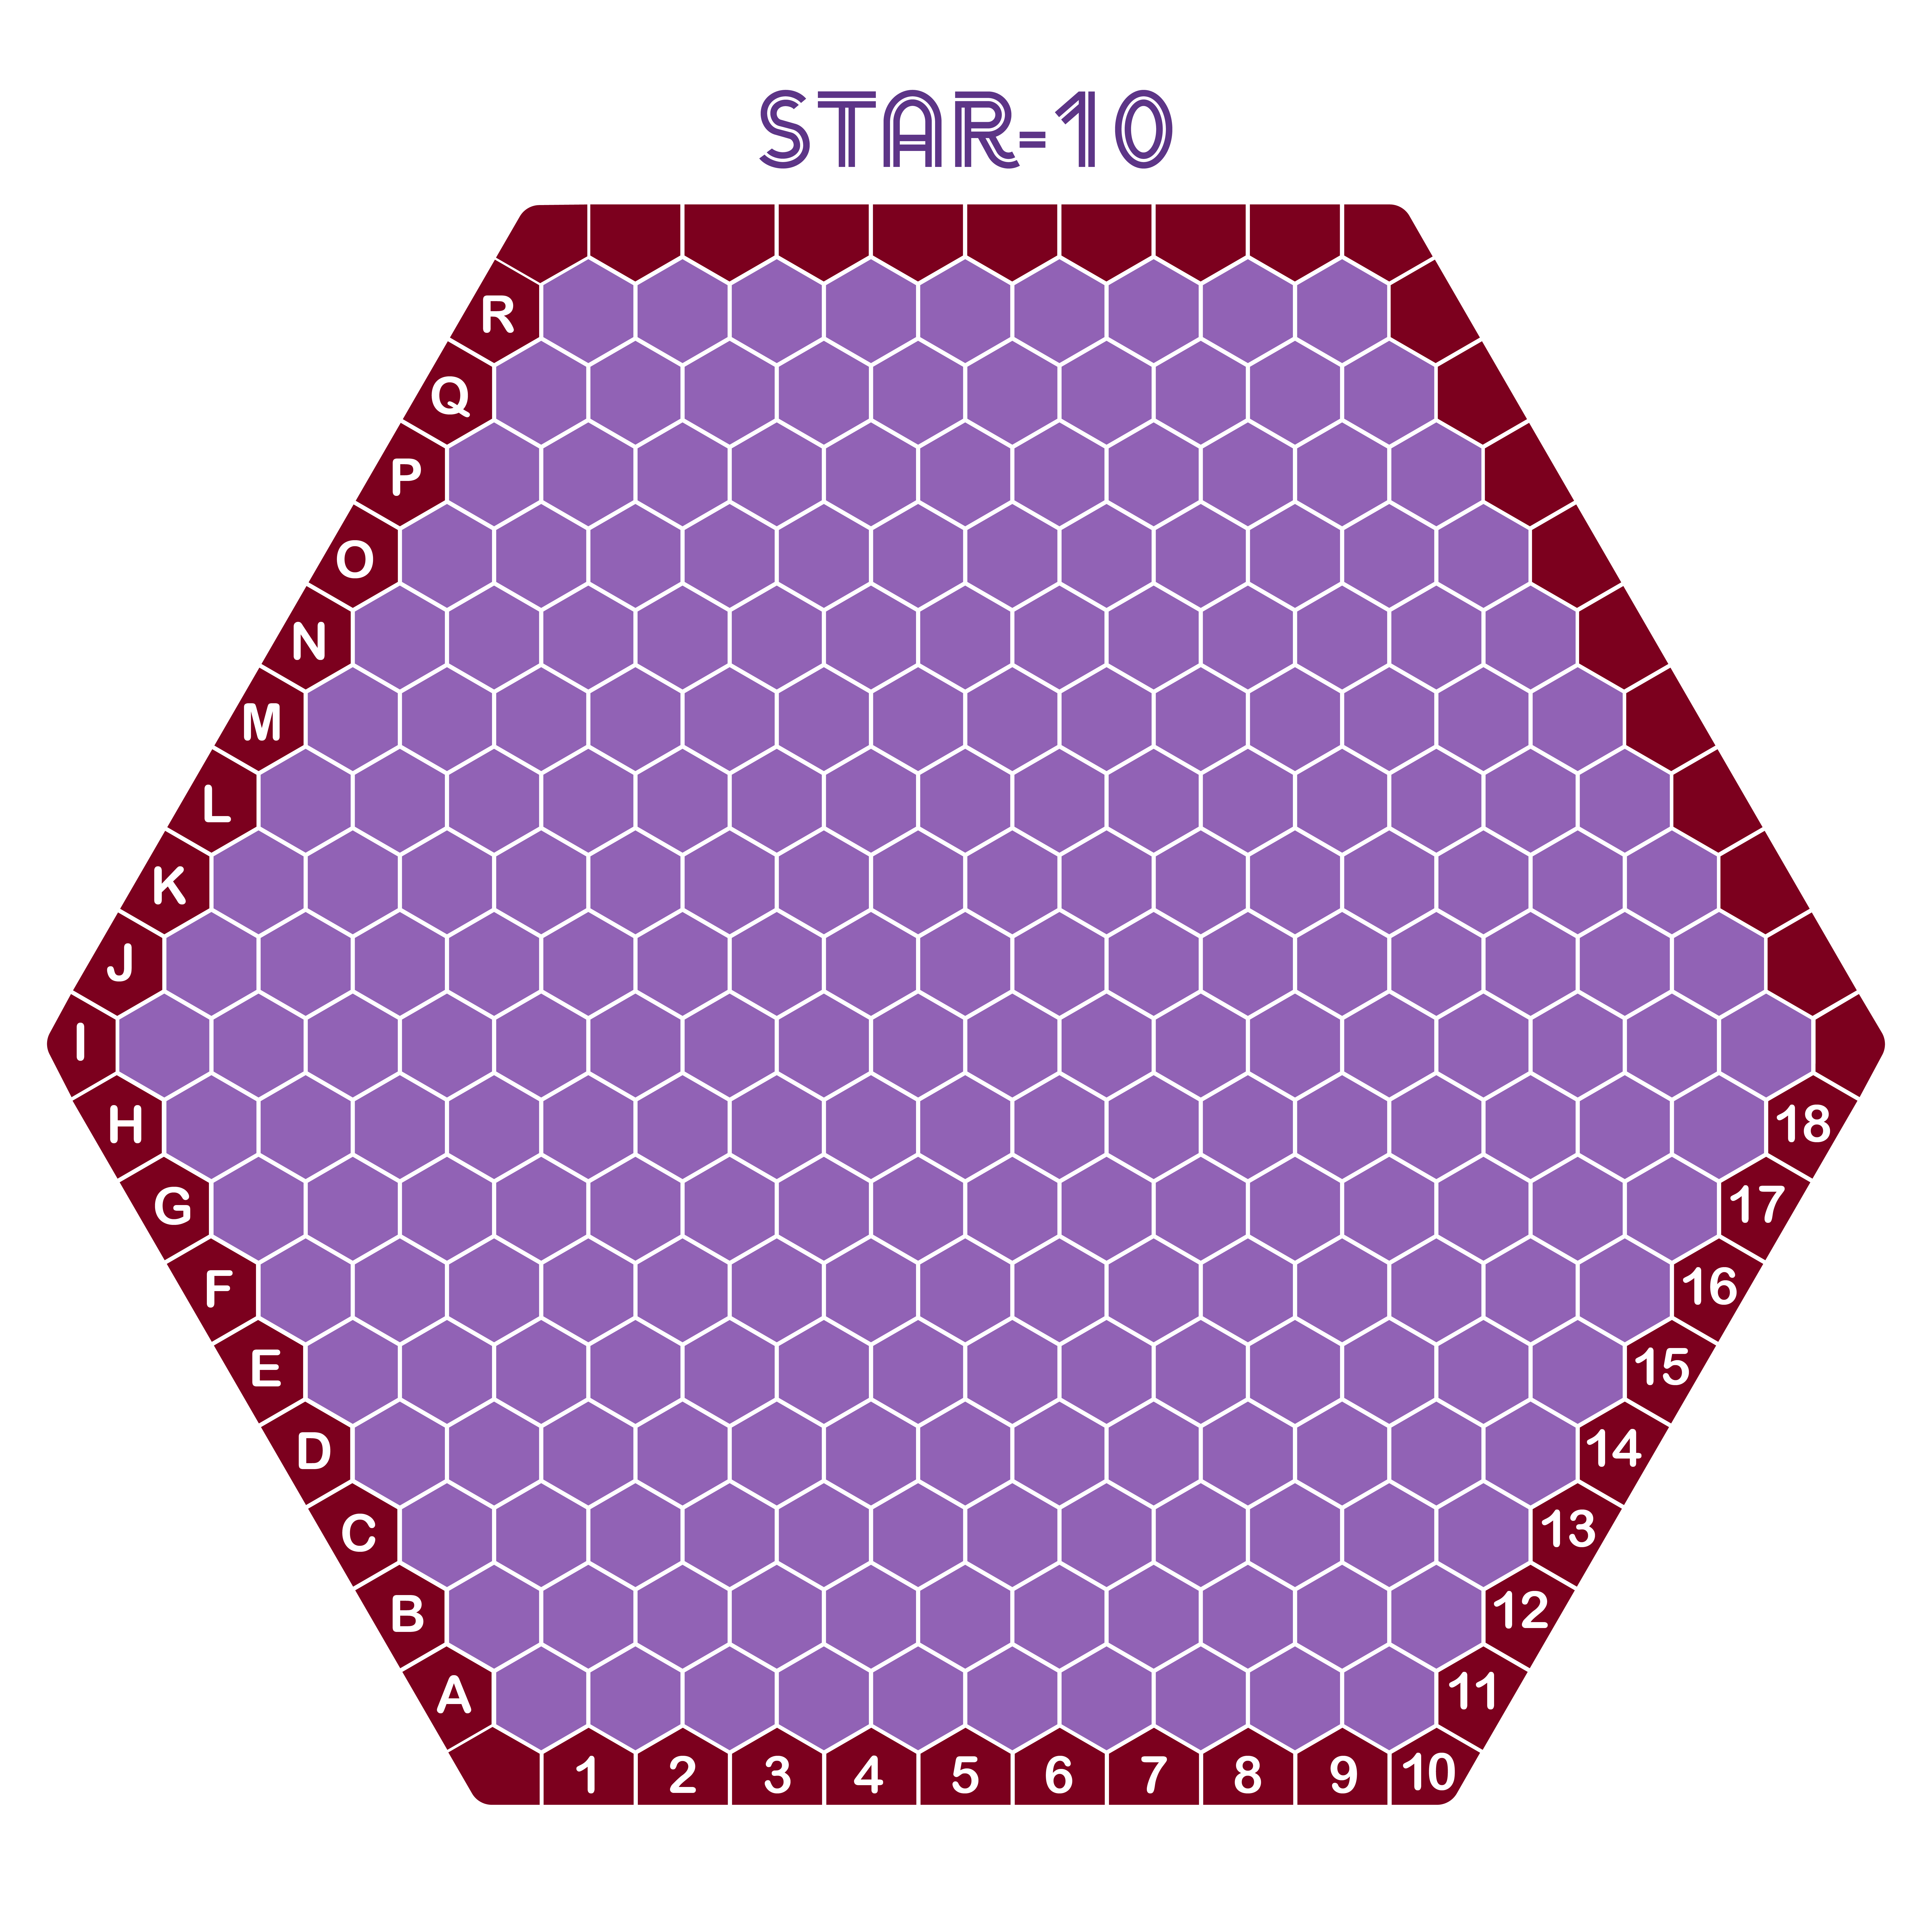
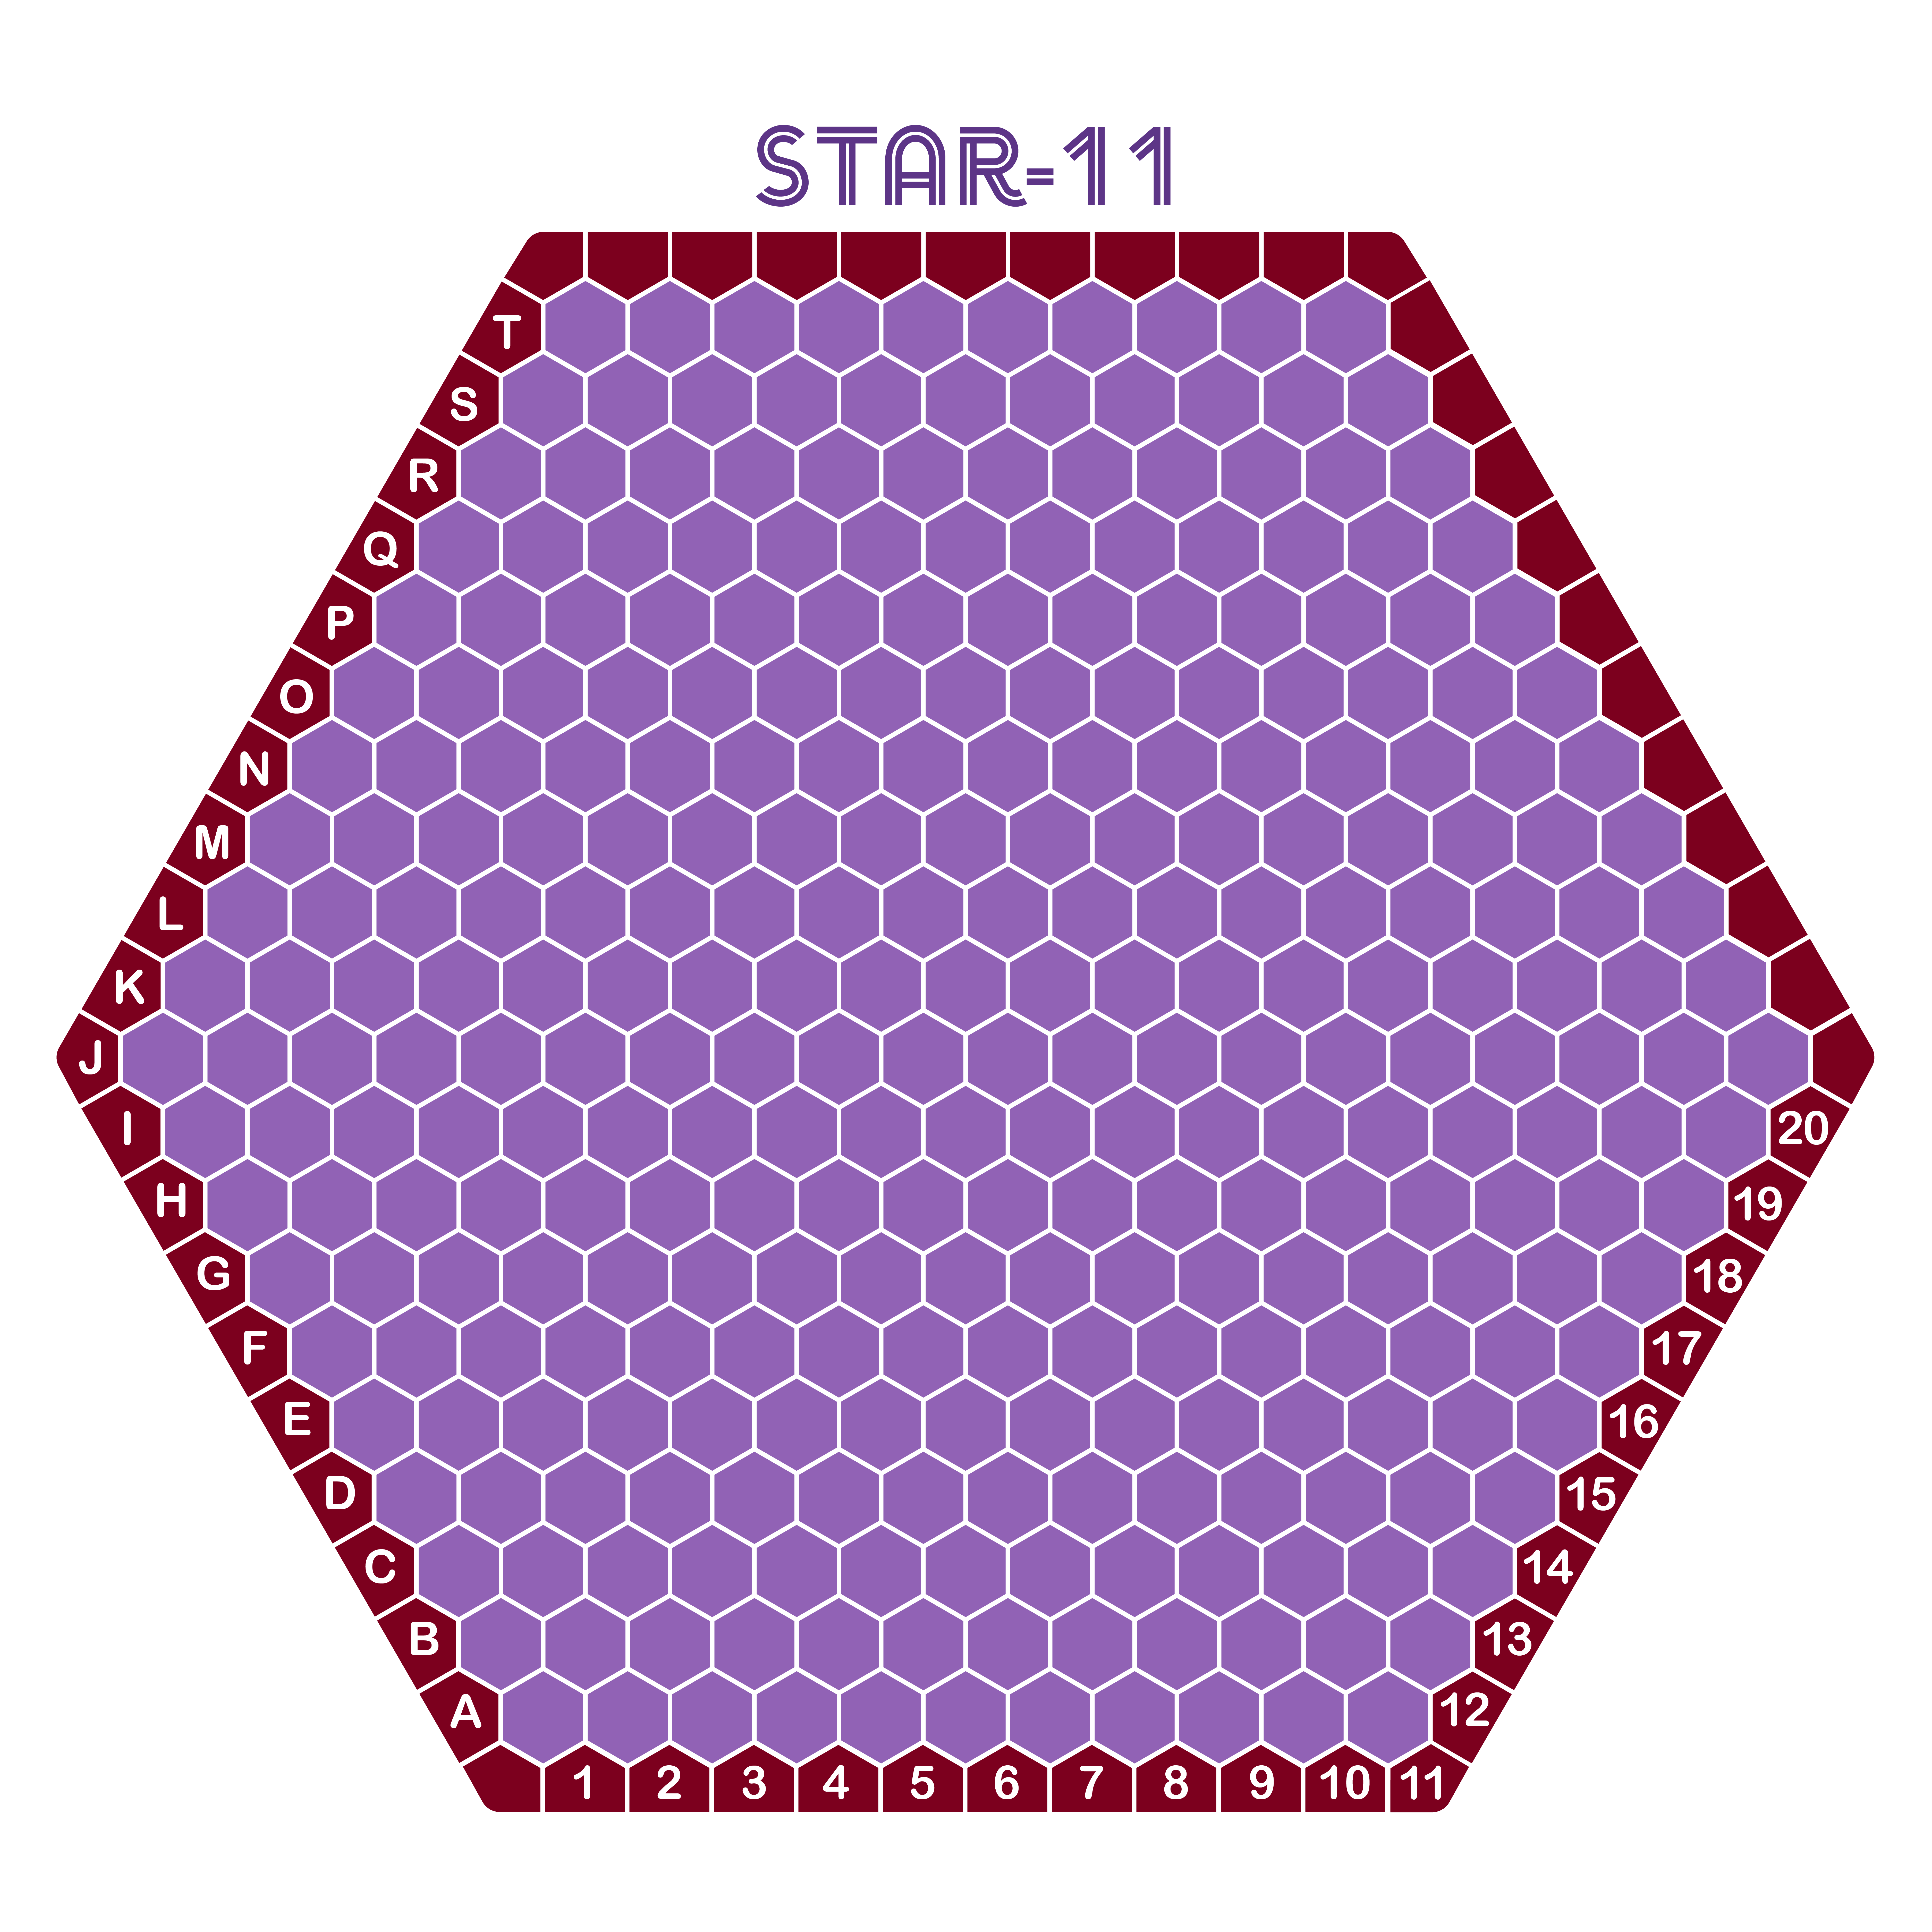
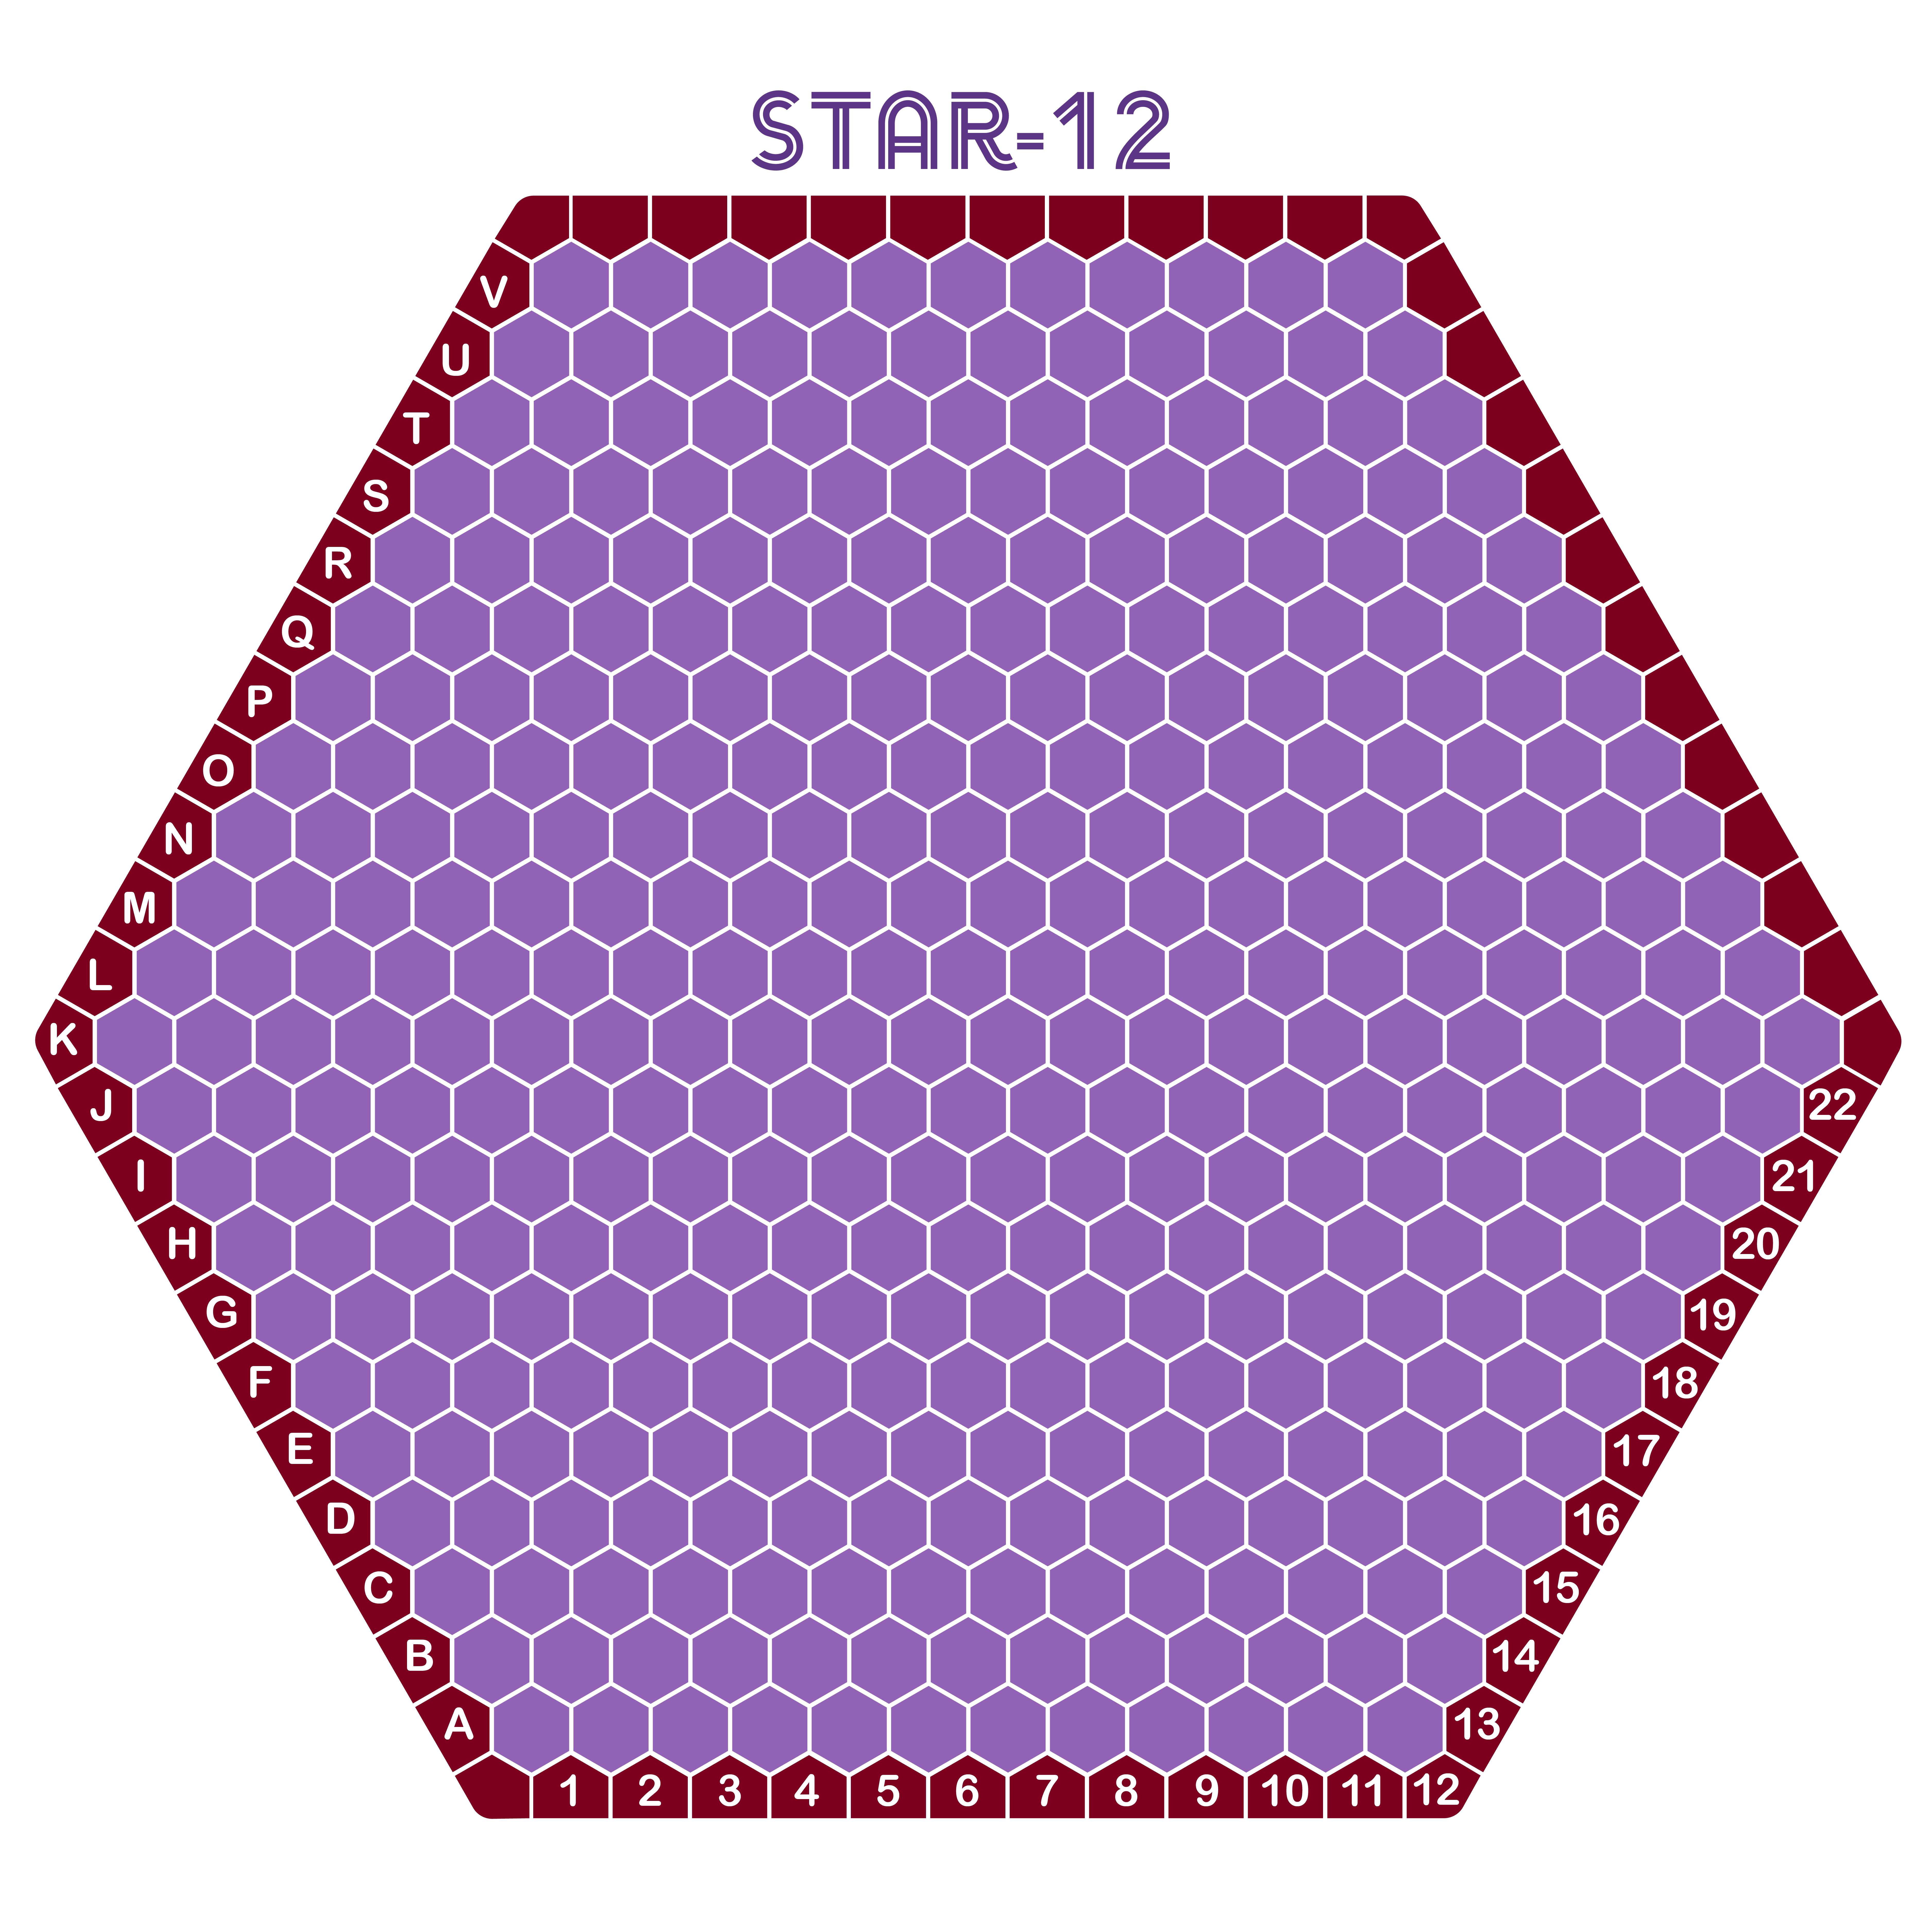
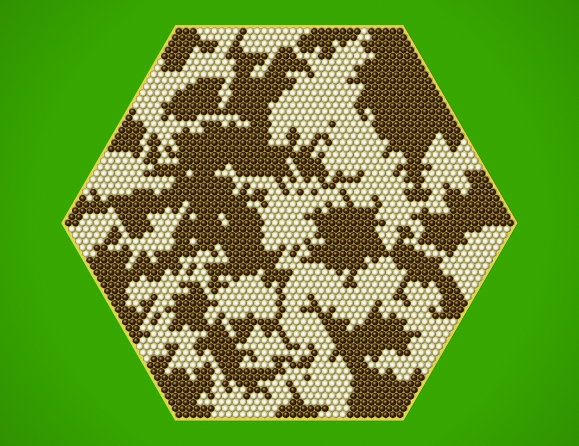
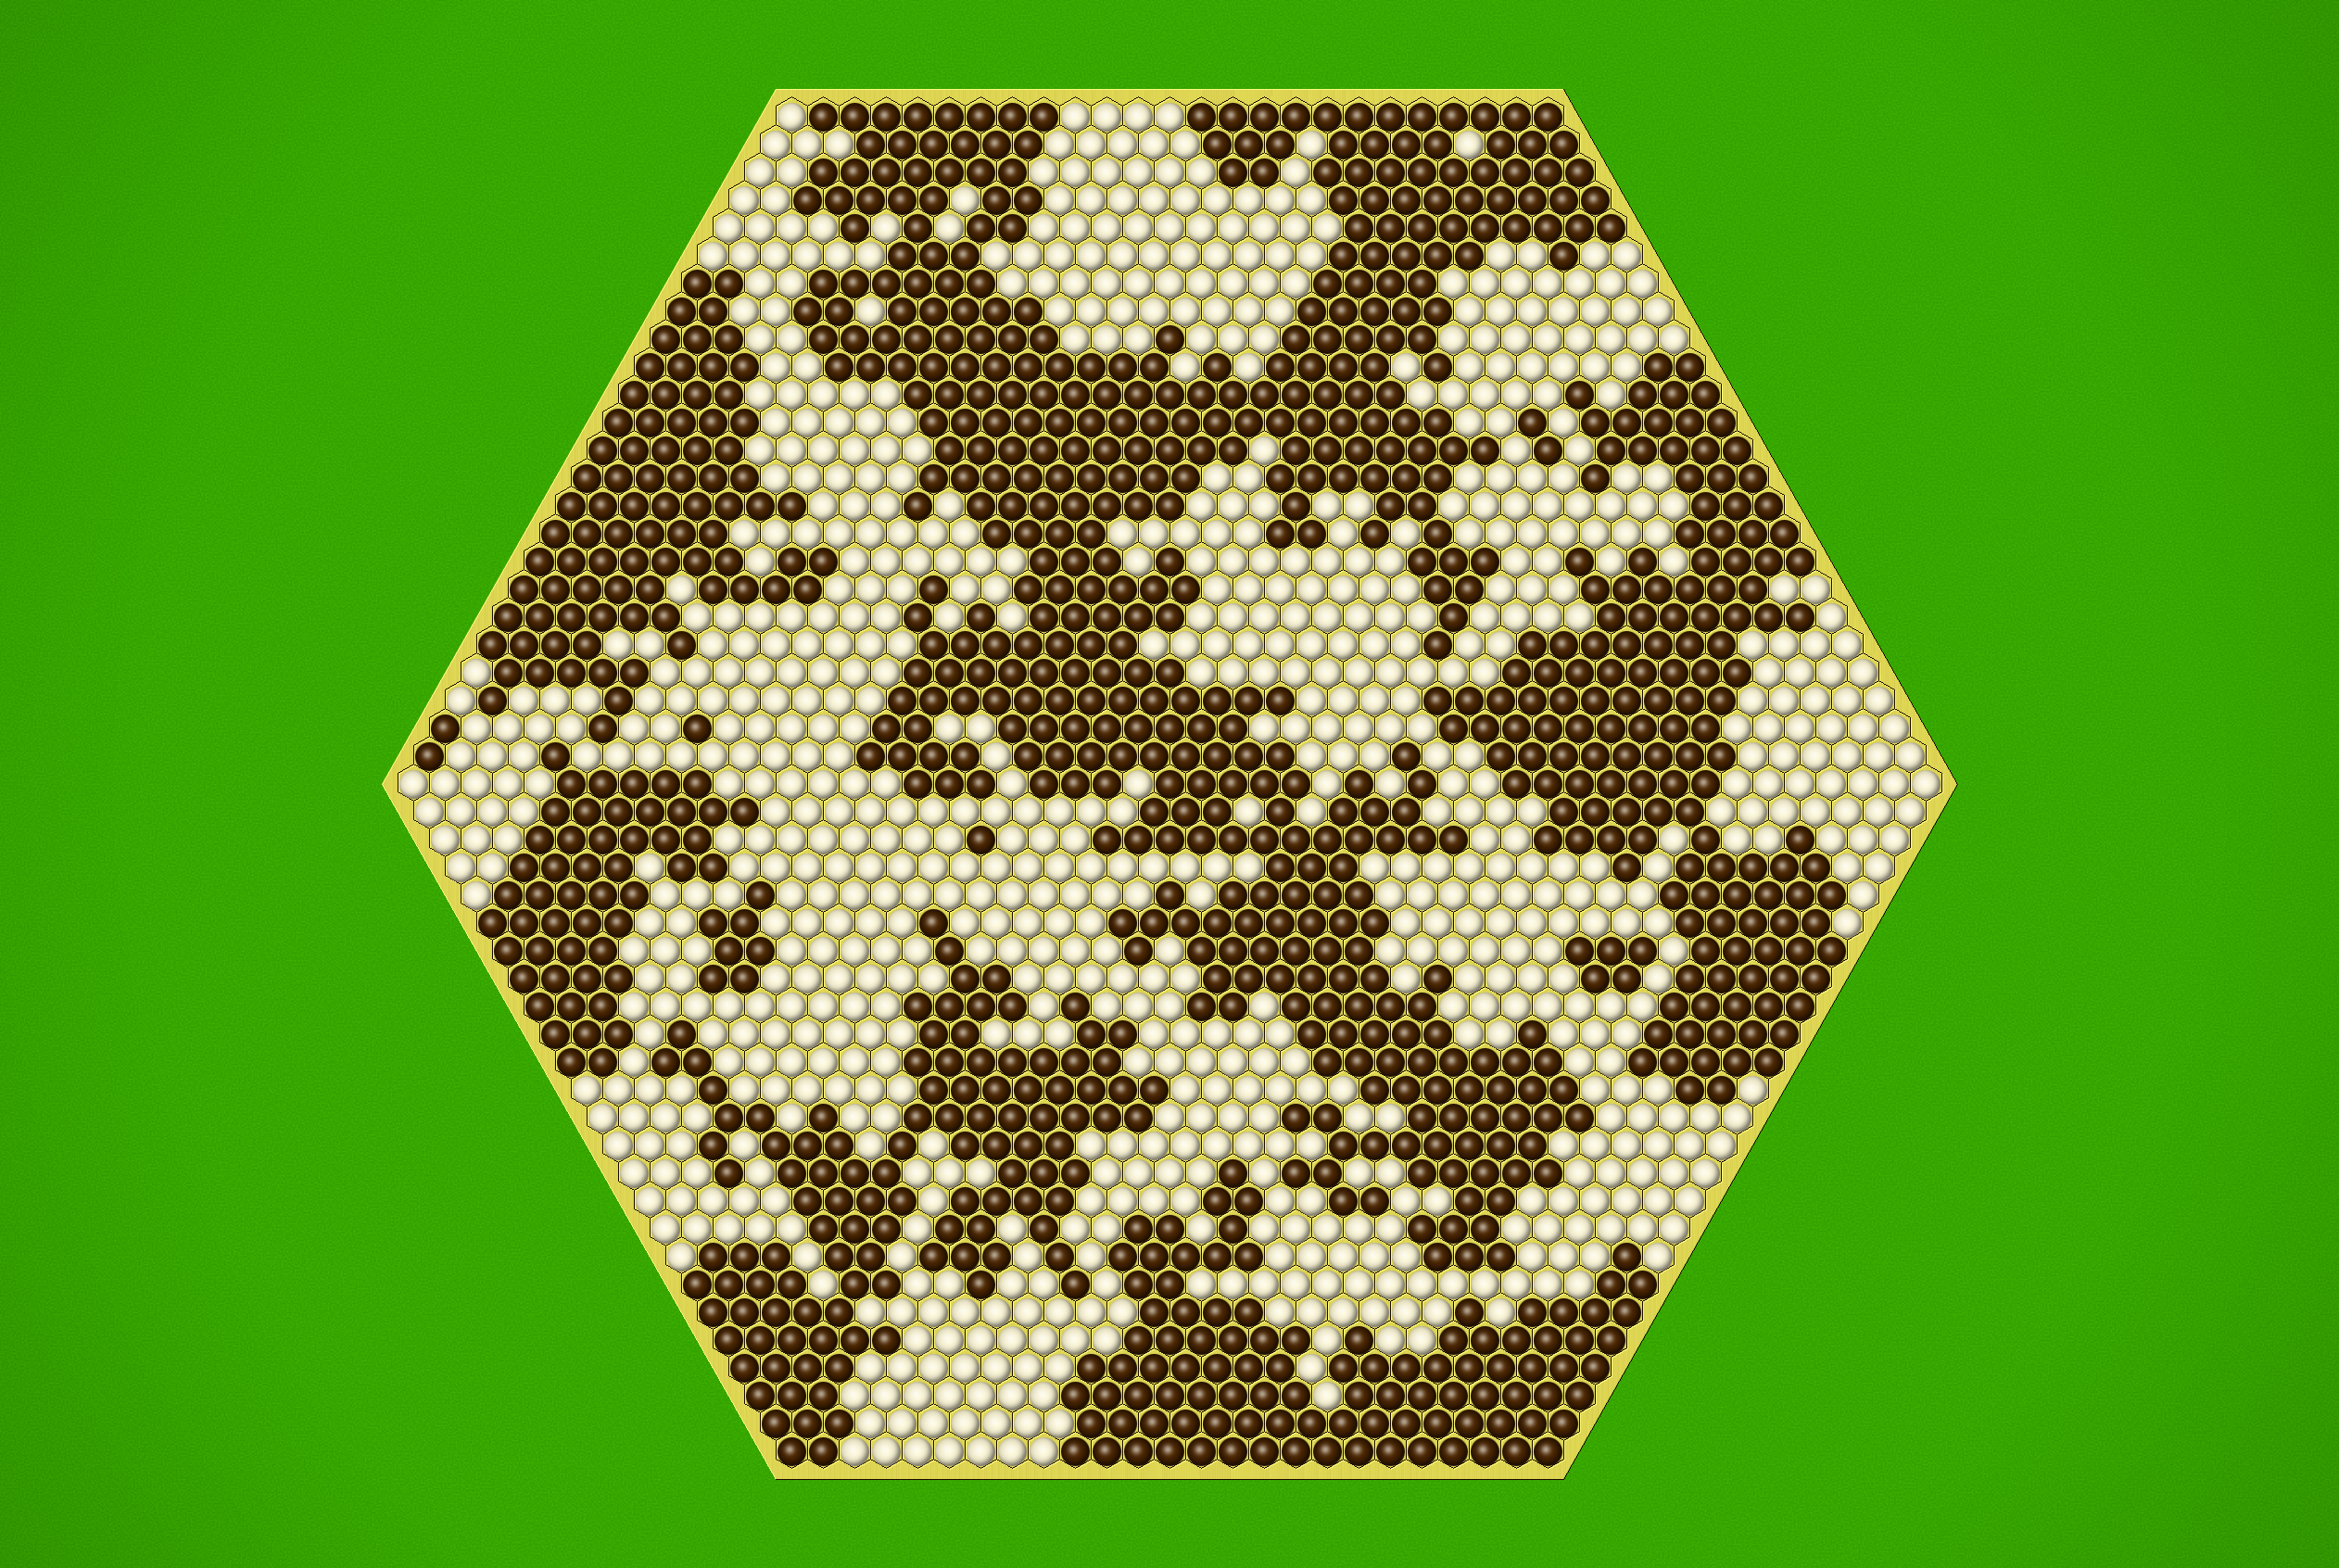
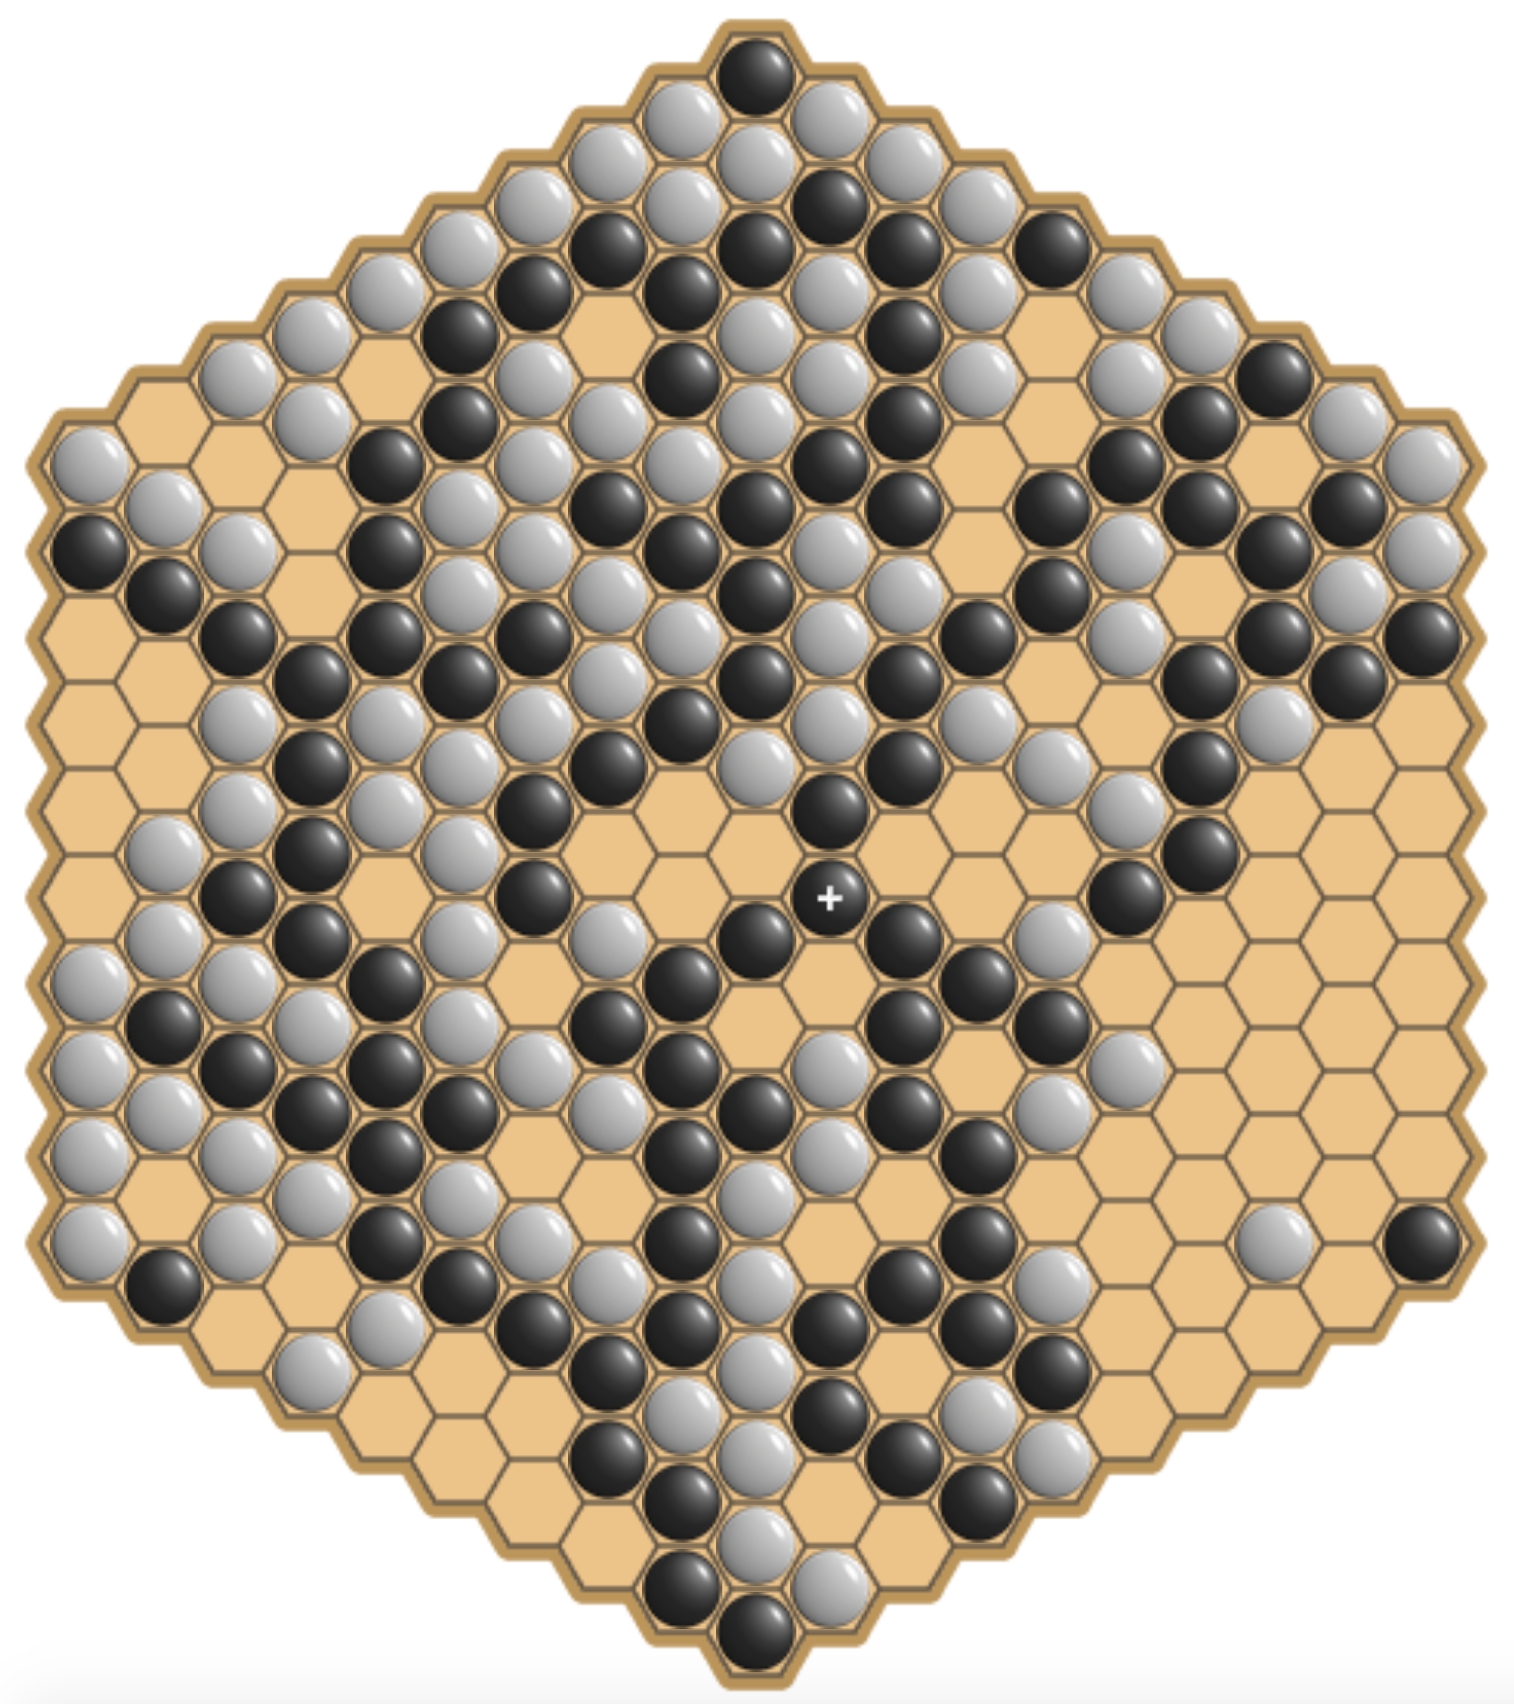
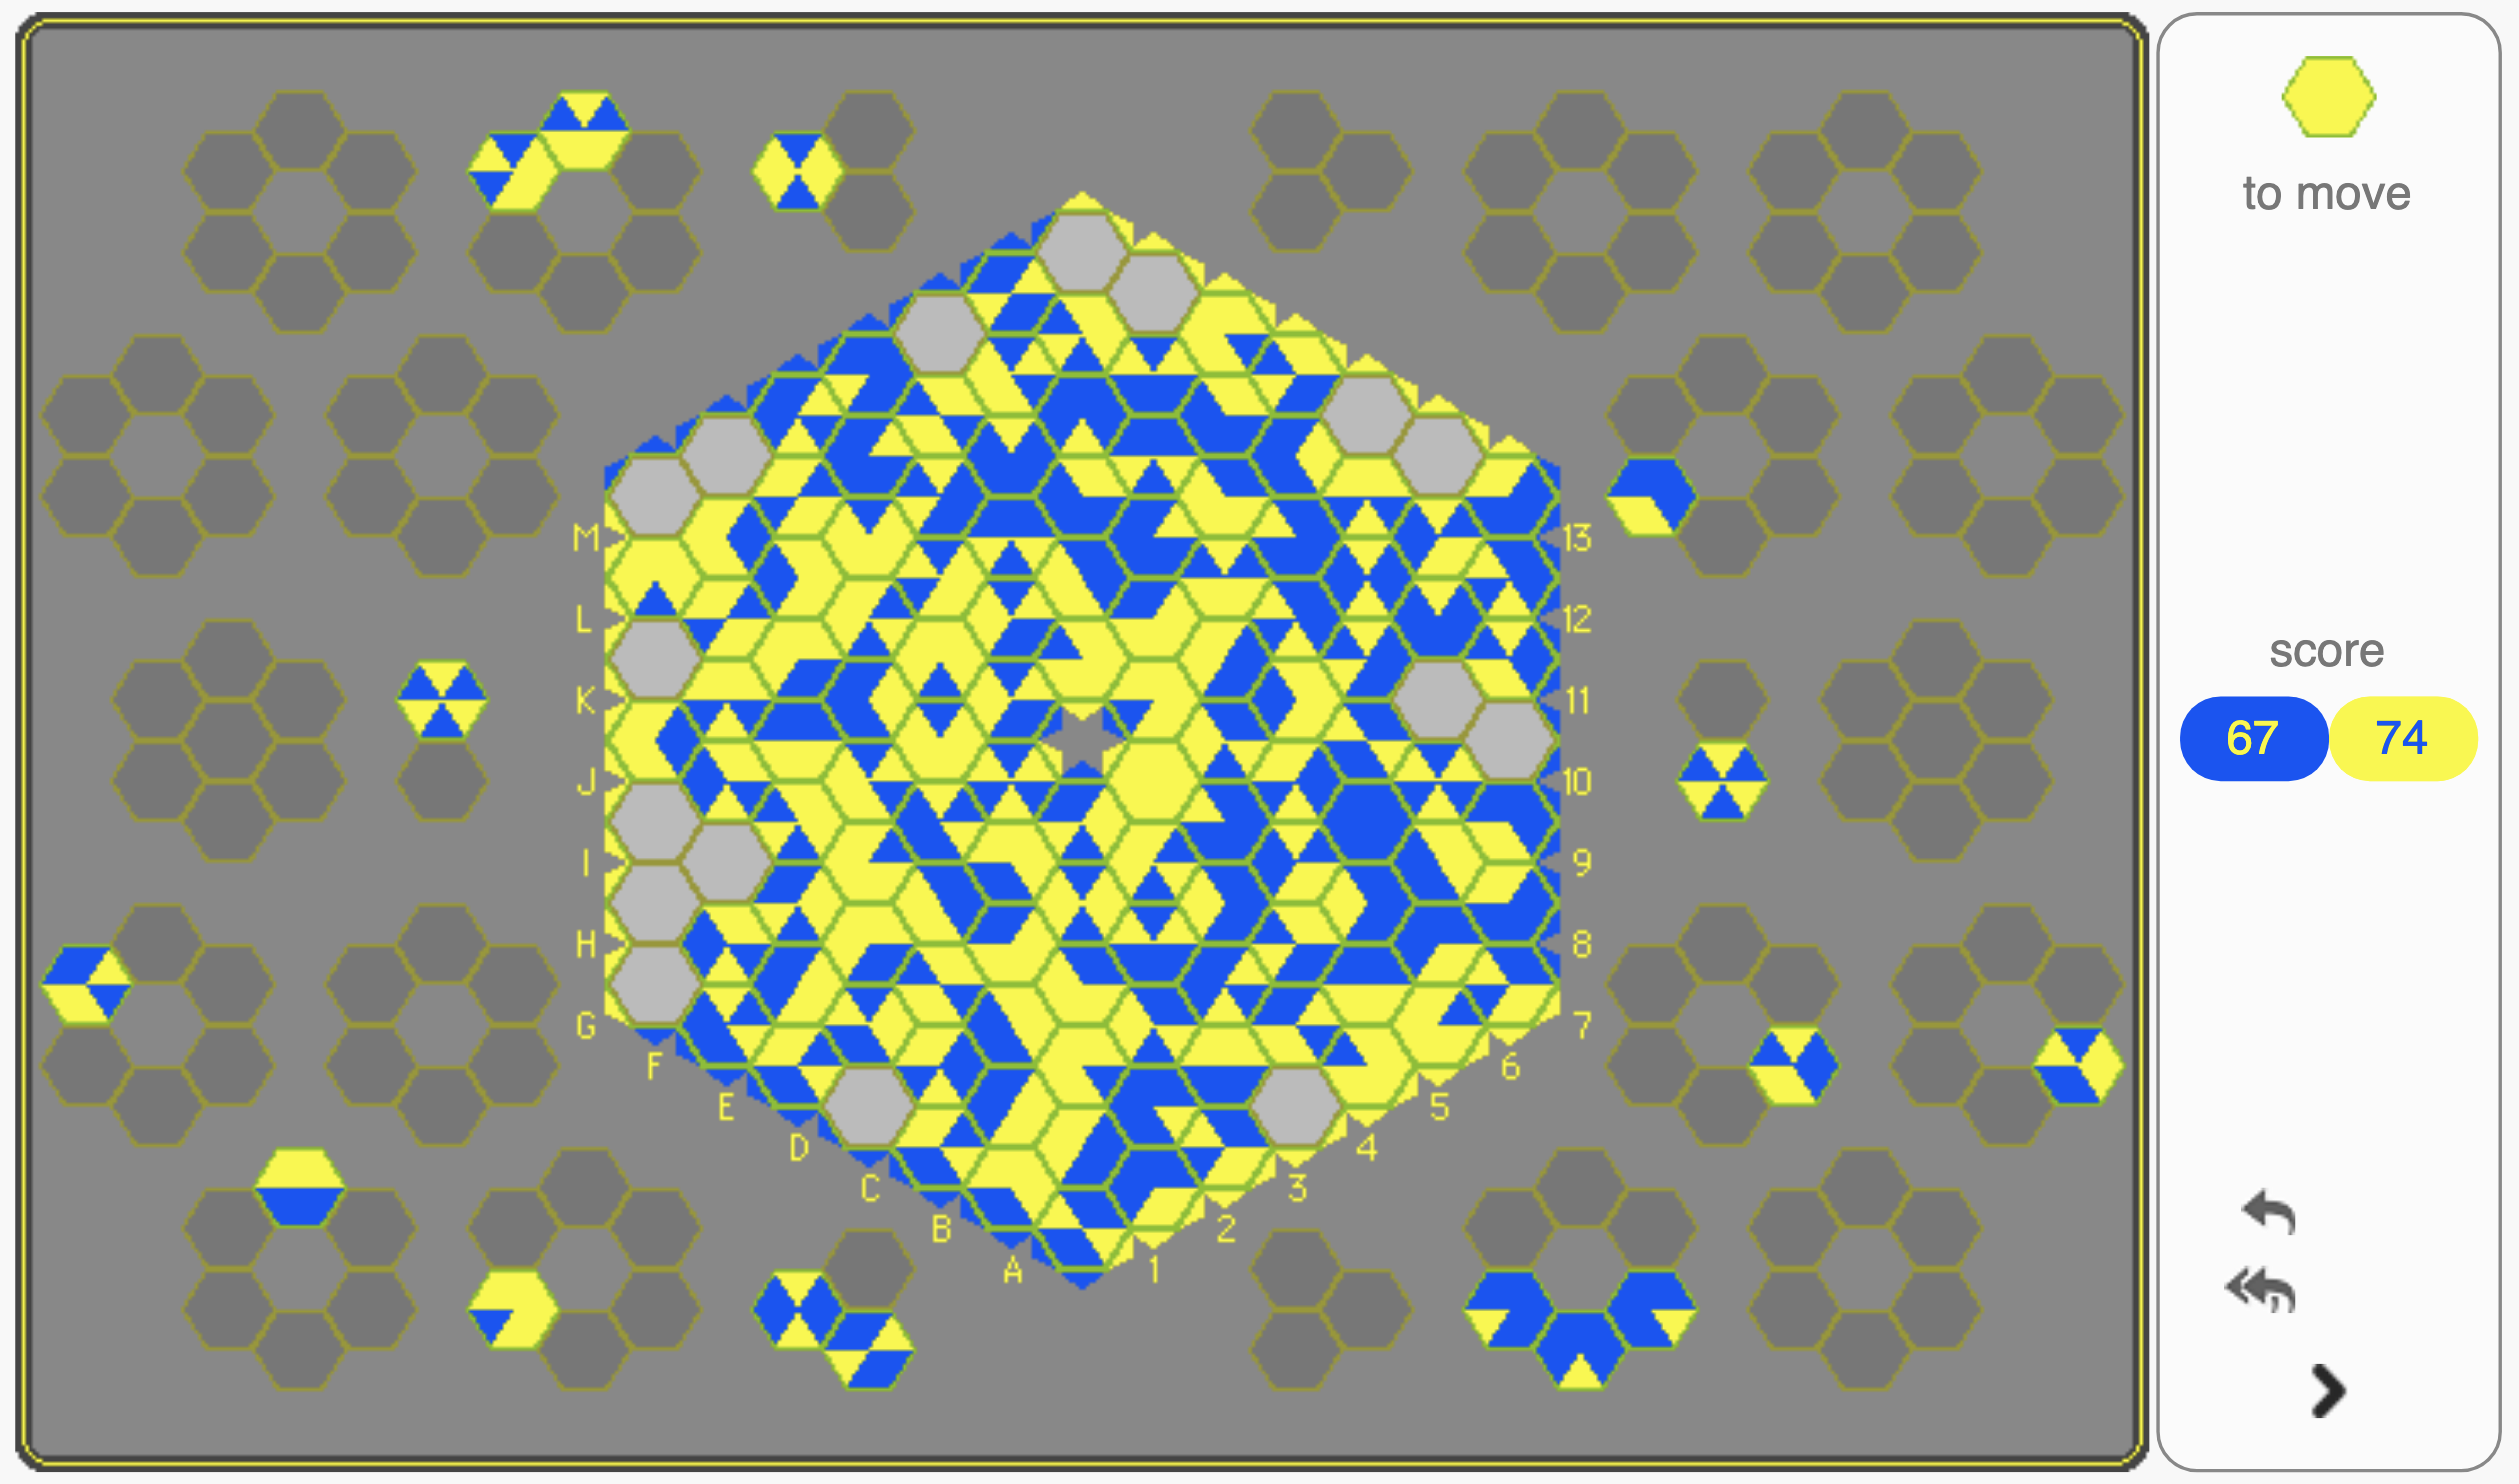
Starweb — A game of connecting corner cells together, with point scores growing rapidly as groups encompass more and more corners.  A beautiful melding of connective and territorial impulses, this game has been a favourite of mine since I first heard of it.  I continue to hope more players will discover the strategic delicacy that emerges on this unique star-shaped board.  I like this game so much that I asked Stephen to add even bigger boards to Ai Ai, so that I could immerse myself in the game for even longer sessions (in the collage of sample games above, the top left one is playing on the standard size-10 board, the others are on the bigger size-11, 12 and 13 boards).  Essential.  10/10. (read more here)

Scware — Here we find a noble attempt to combine the Symple protocol with a connective goal.  There’s fun to be had here; however, the restrictions in place feel rather *too* restrictive to me in the context of a connection goal.  In the sub-genre of connective Symplistic games, I think SympleHex just squeaks past this one.  6/10.

The Glass Bead Game — I’m not much of a mancala player, so I haven’t played this one yet.

The Arena: Other Contributions

mitrofanov-5

Chess — Still the greatest source of drama available on an 8×8 square grid.  This game has captured the gaming world’s imagination to such an extent that it has birthed an entire global genre of checkmate-based games and variants.  I learned this game in my youth, like many people, but only truly learned to appreciate it in my old age.  Now it’s a fixture of my daily life.  10/10.

shogi-set-cropped

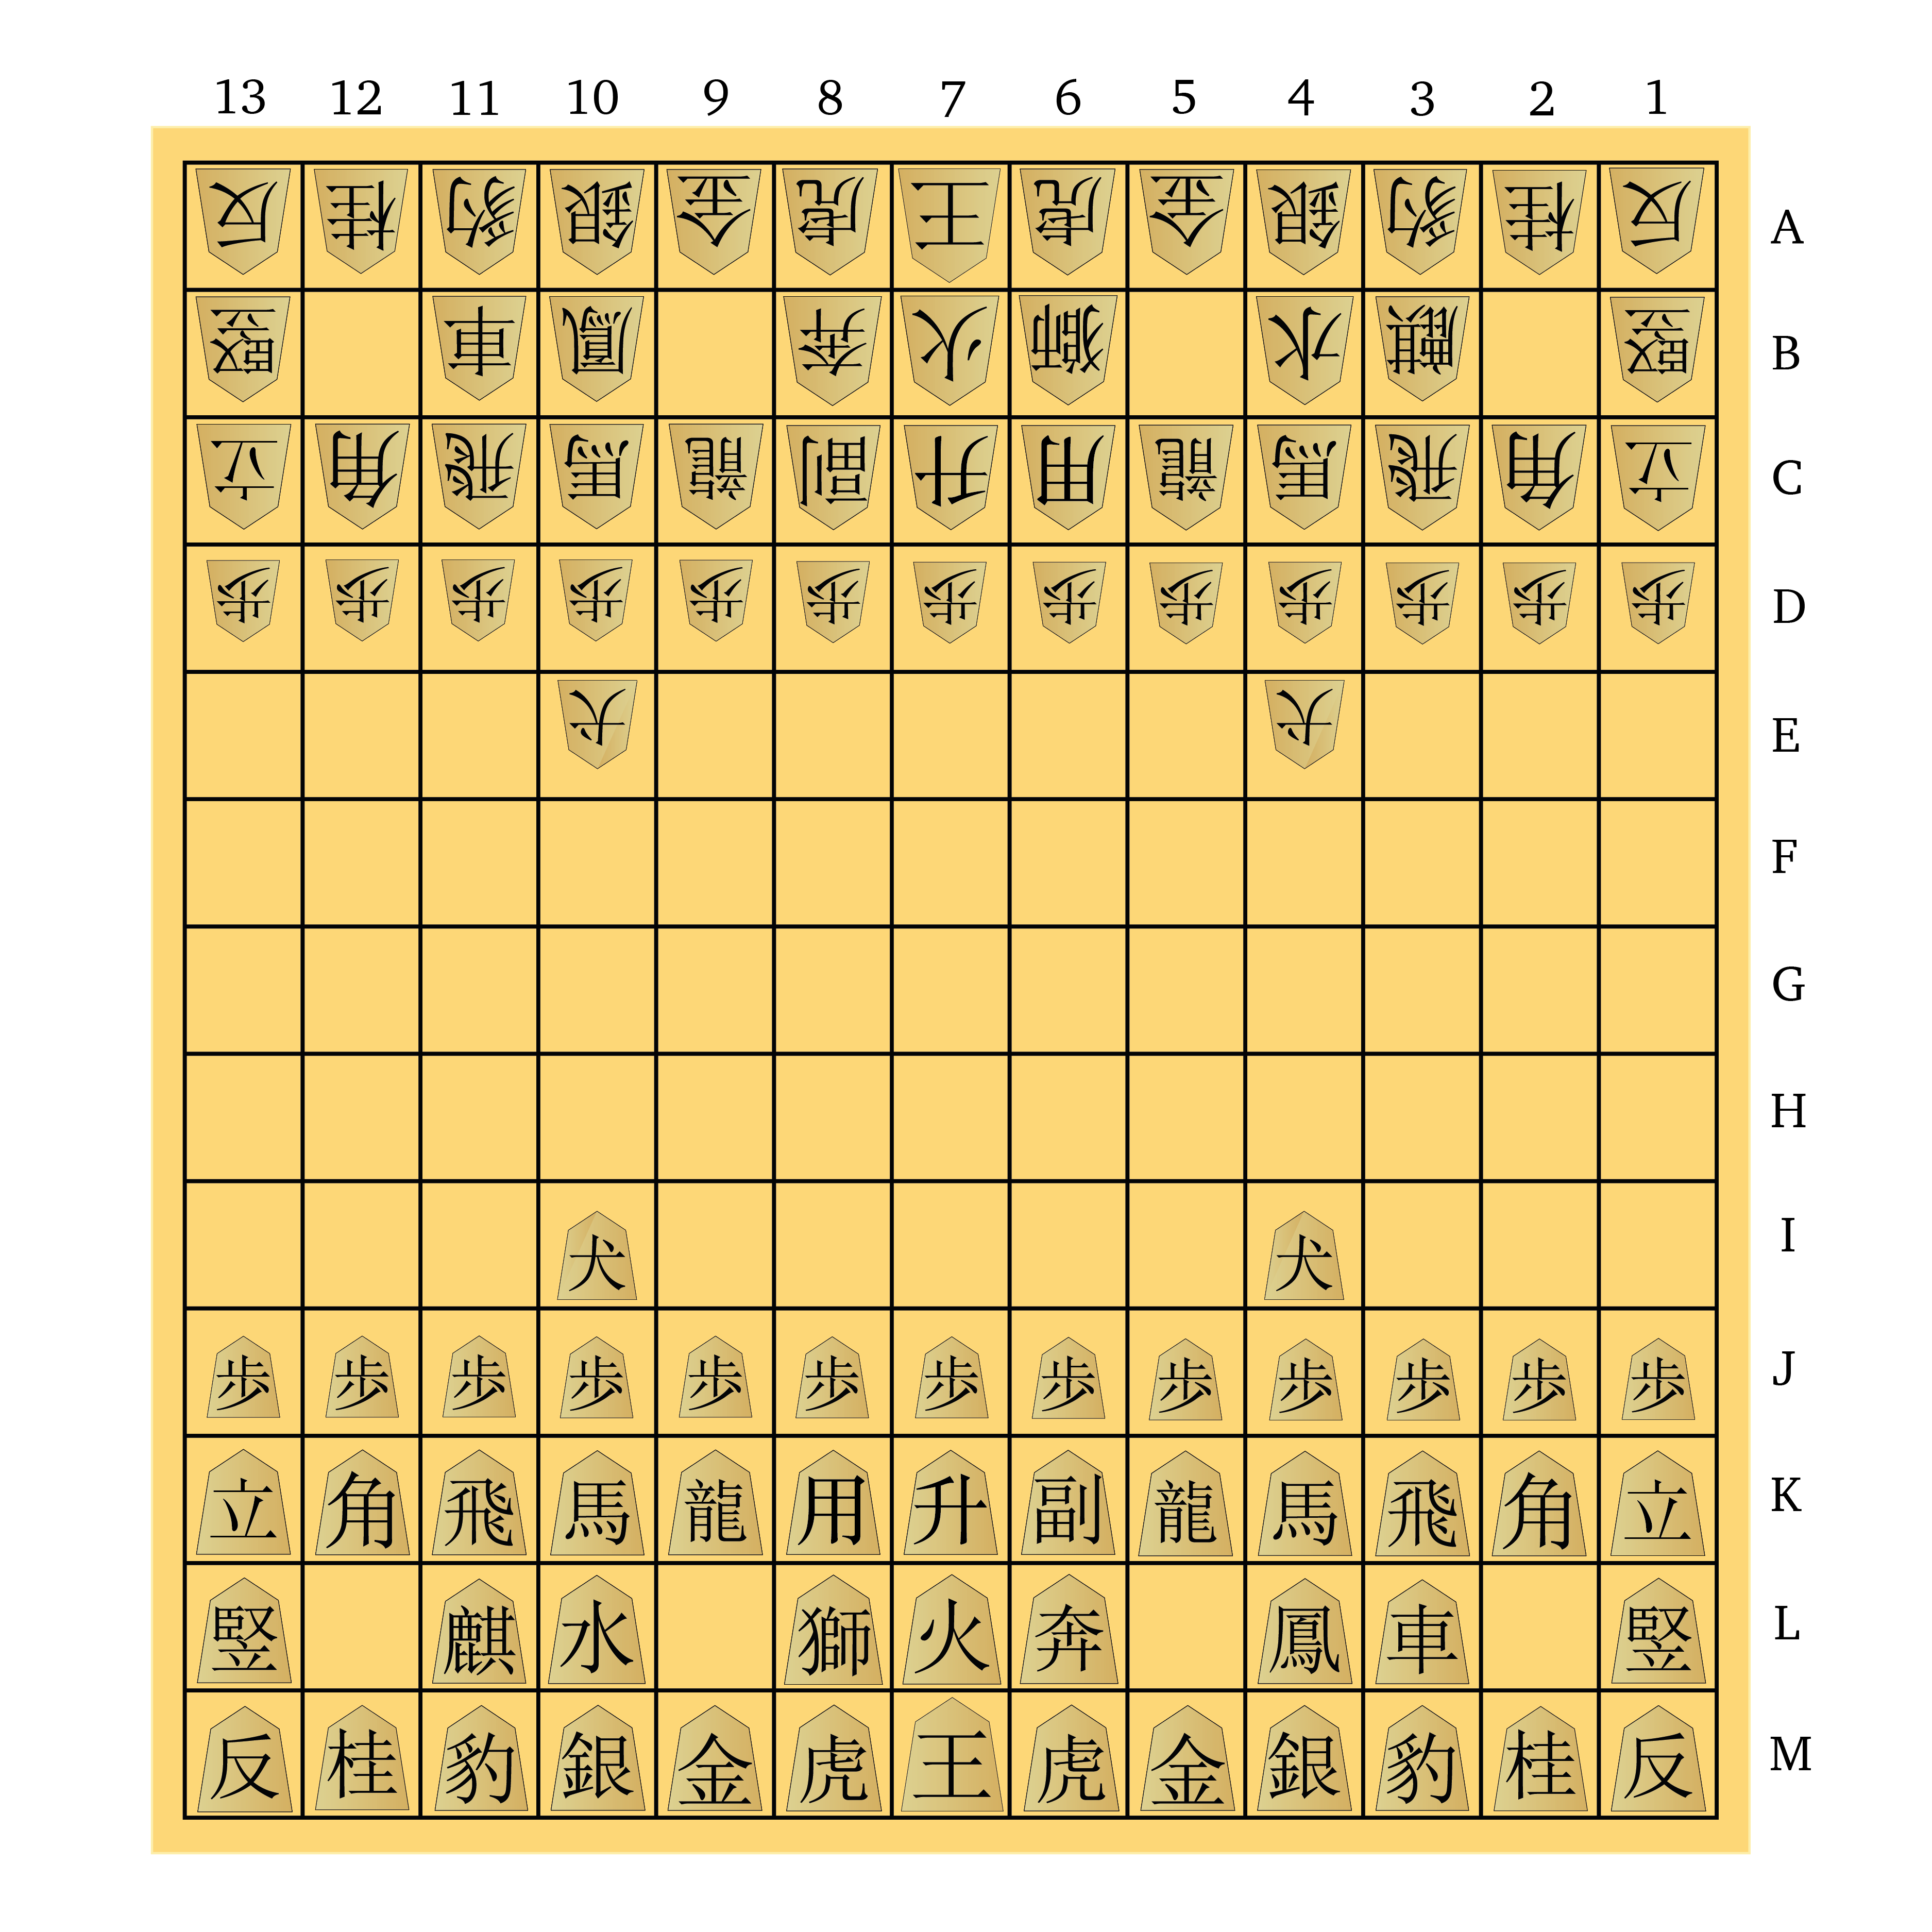
Shogi — Possibly the greatest game ever invented by humans.  The rules, piece movements, and aesthetics marry perfectly to create a glorious experience — a game of delicate beauty and intricate manoeuvre, combined with vicious tactics and constant aggression.  I love everything about this game, and my Shogi board and traditional pieces with Minase calligraphy (pictured above) are perhaps my favourite gaming item in my home.  If I could give this 11/10, I would.  You know what, I’m going to, this is my blog, dammit!  11/10. (read more here)

int-draughts-2s-mv123

10×10 Draughts As a kid I played Checkers, Anglo-American style, and like many other kids I played it incorrectly (with optional captures instead of mandatory).  Years later I found out that A) Checkers is unbelievably better when you play it properly, and B) a 10×10 version exists with long-range kings and backwards captures!  Boy did I feel silly once I realised I’d been playing Checkers fundamentally wrong all that time.

Incidentally, since that embarrassing realisation I’ve been somewhat relieved to find that apparently a huge number of other people also never played Checkers correctly.  Here are a few reviews of the app All-in-One Checkers on Android:

checkers-morons-1

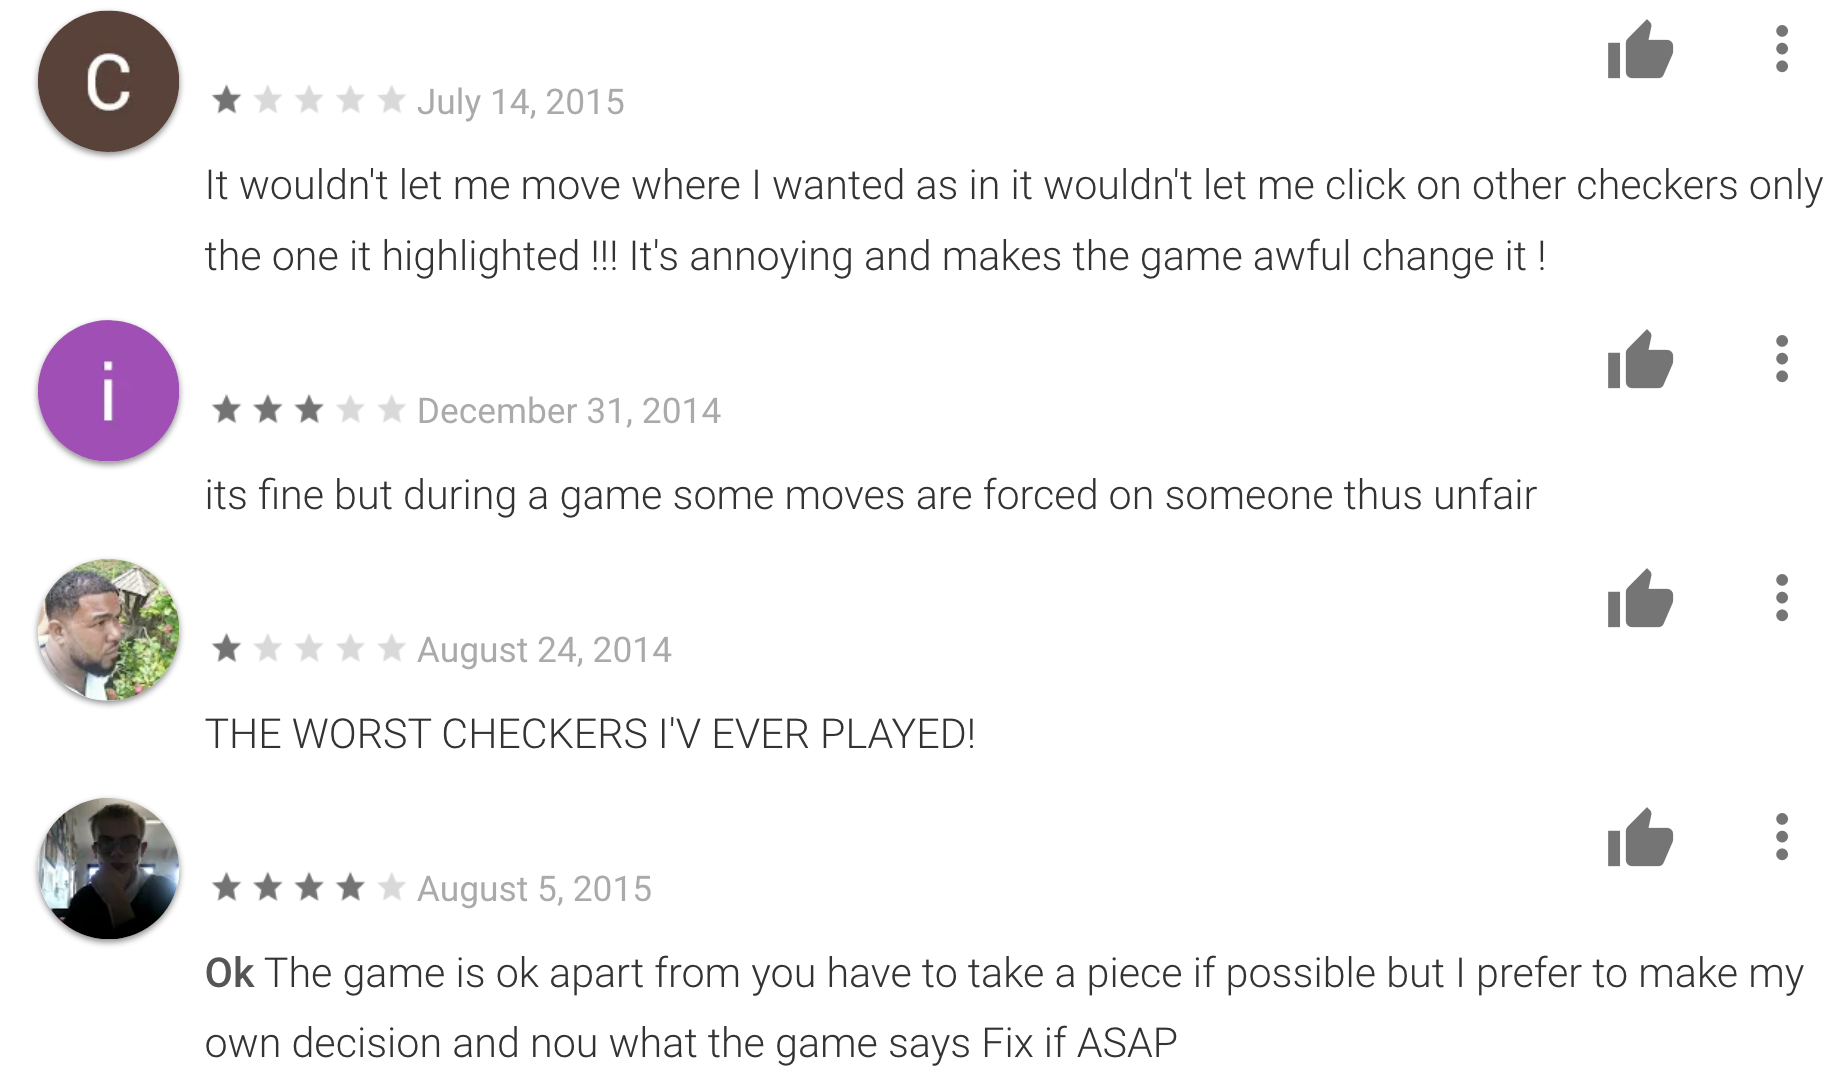
So, on the plus side, at least I figured out my mistake eventually!  I feel for all these people who never had that moment, though.  So far as I’m aware there’s not any established Checkers/Draughts variants out there with optional capture, and thank goodness for that, because from that rule comes all kinds of tactical excitement.

Anyway, the discovery of 10×10 International Draughts was quite a moment in my gaming life.  I fell in love with this glorious game of spectacular combinations.  Christian often criticises the game for being drawish at the high levels of play, and while that’s completely true, I’m not good enough for that to be a major problem.  10/10.

Constitutional Draughts This variant of 10×10 Draughts reduces drawishness by restricting kings, forcing them to avoid crossing squares where they could be captured.  For me this substantially screws up my endgame tactical vision, and feels more awkward than Killer Draughts’ simple restriction, which also has predecessors in historical Draughts variants.  The constitutional restriction reminds me of Caissa Britannia, a Chess variant invented in 2003, which is where I first saw this concept; perhaps unfairly, Constitutional Draughts feels weirdly un-Draughts-like to me as a result.  6/10.

frisian1

Frisian Draughts — Frisian Draughts massively expands the tactical craziness of 10×10 Draughts by allowing pieces and kings to capture orthogonally as well as diagonally.  The result is very hectic, with spectacular combos appearing frequently, and often in surprising ways.  Initially I found this game too confusing, but recently it finally clicked; I played a game against a strong AI (on Lidraughts), and suddenly I found myself seeing patterns and creating robust structures that I had never thought of before.  I’m now convinced this is an excellent take on Draughts, and the tiny 5% draw rate in competitive play is a great bonus as well.  Download this 59 page guide for a great intro to the game.  9/10.

stappeldammen-end

Stappeldammen — 10×10 Draughts extended into verticality.  Like Bashni or Emergo, here pieces build stacks as they capture, and subsequent captures can re-expose stacks, leading to frequent changes in ownership.  A unique element here as that there is no promotion, meaning stacks can get stuck on the last rank until freed by the appearance of an adjacent capture target.  This seems weird at first, but I agree with Christian that it adds an interesting strategic wrinkle.  Bashni is more fun though.  7/10.
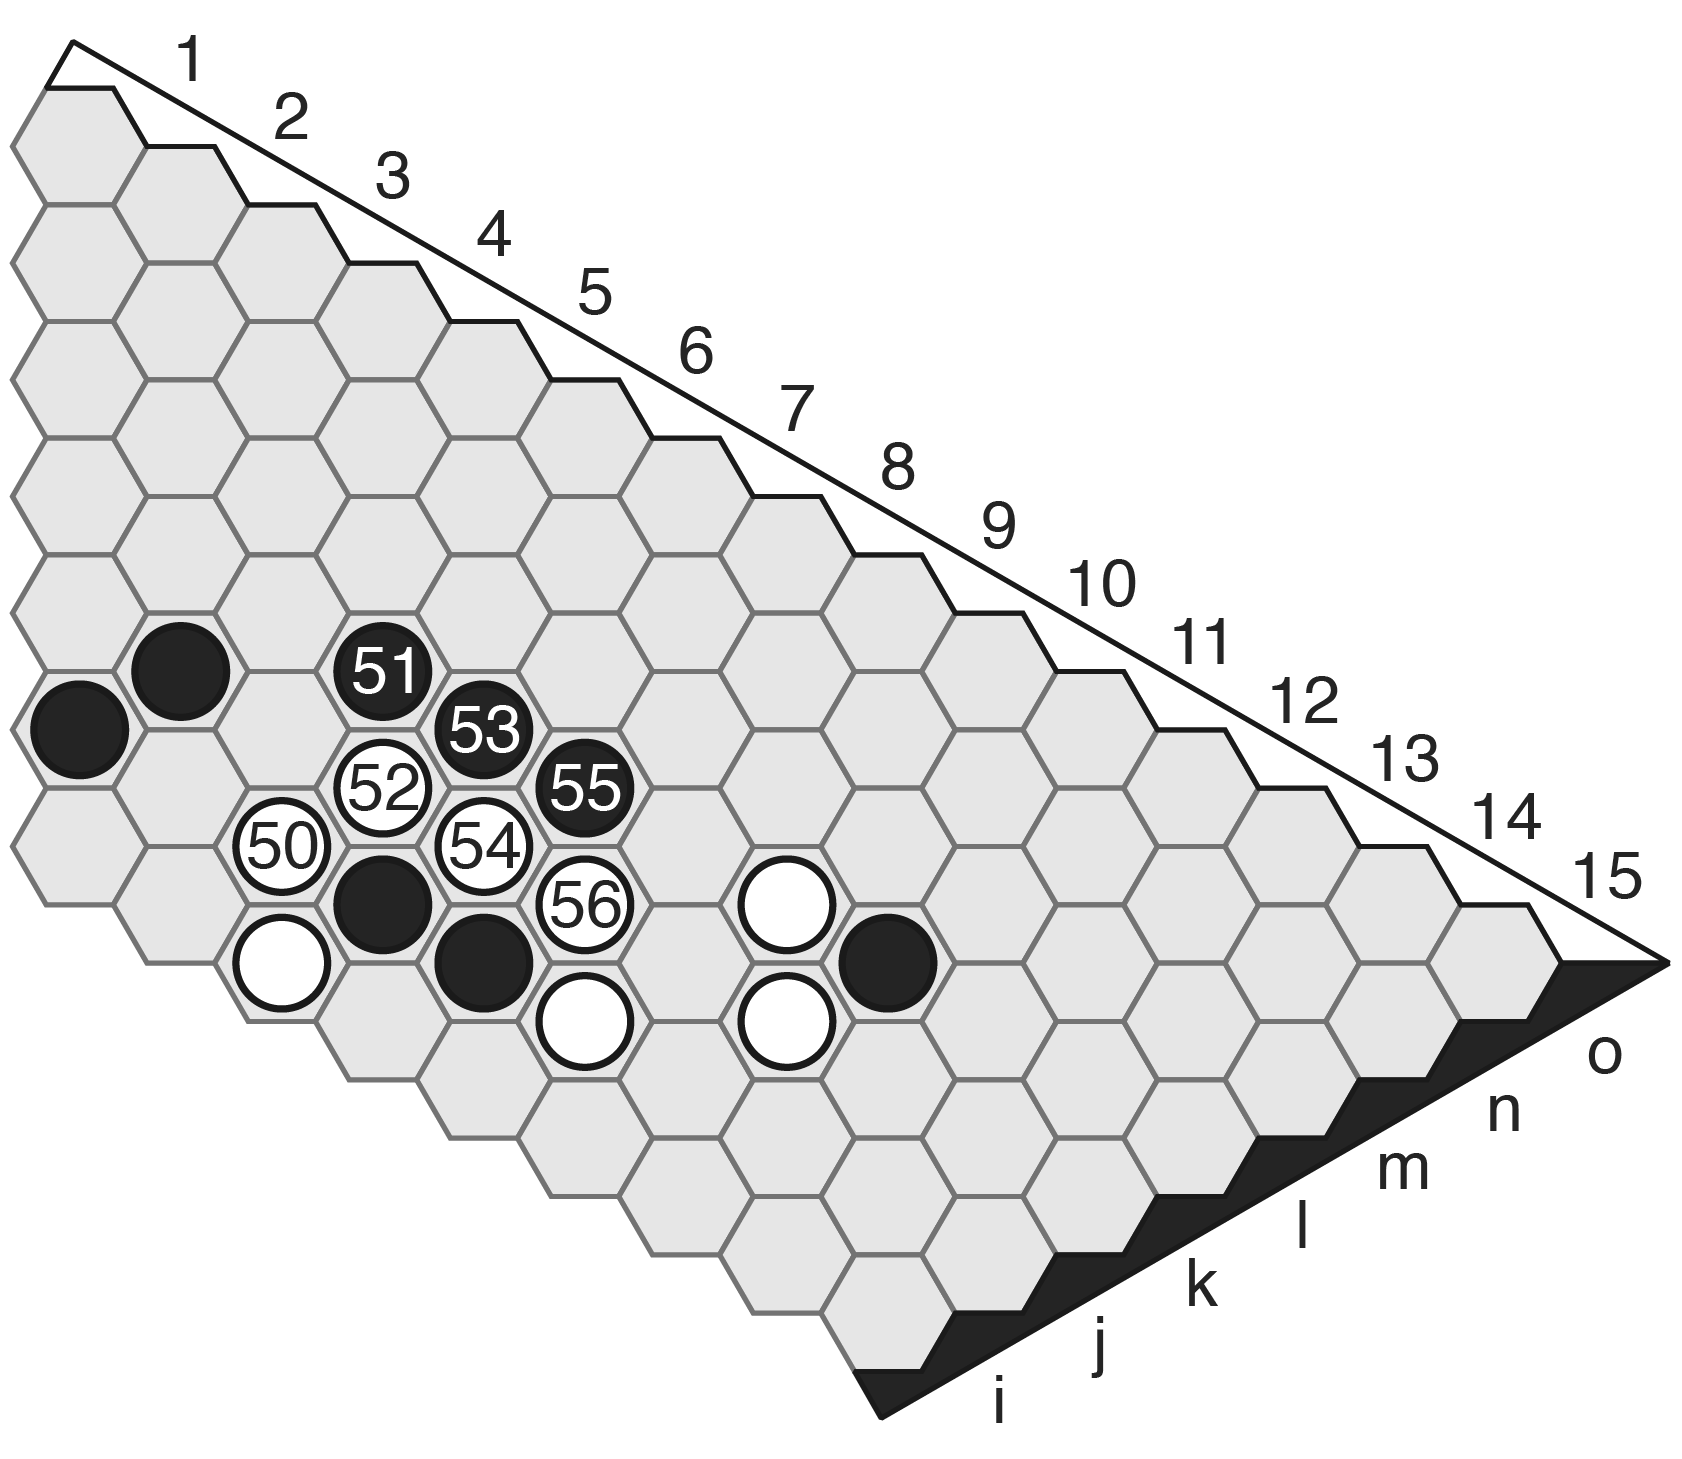
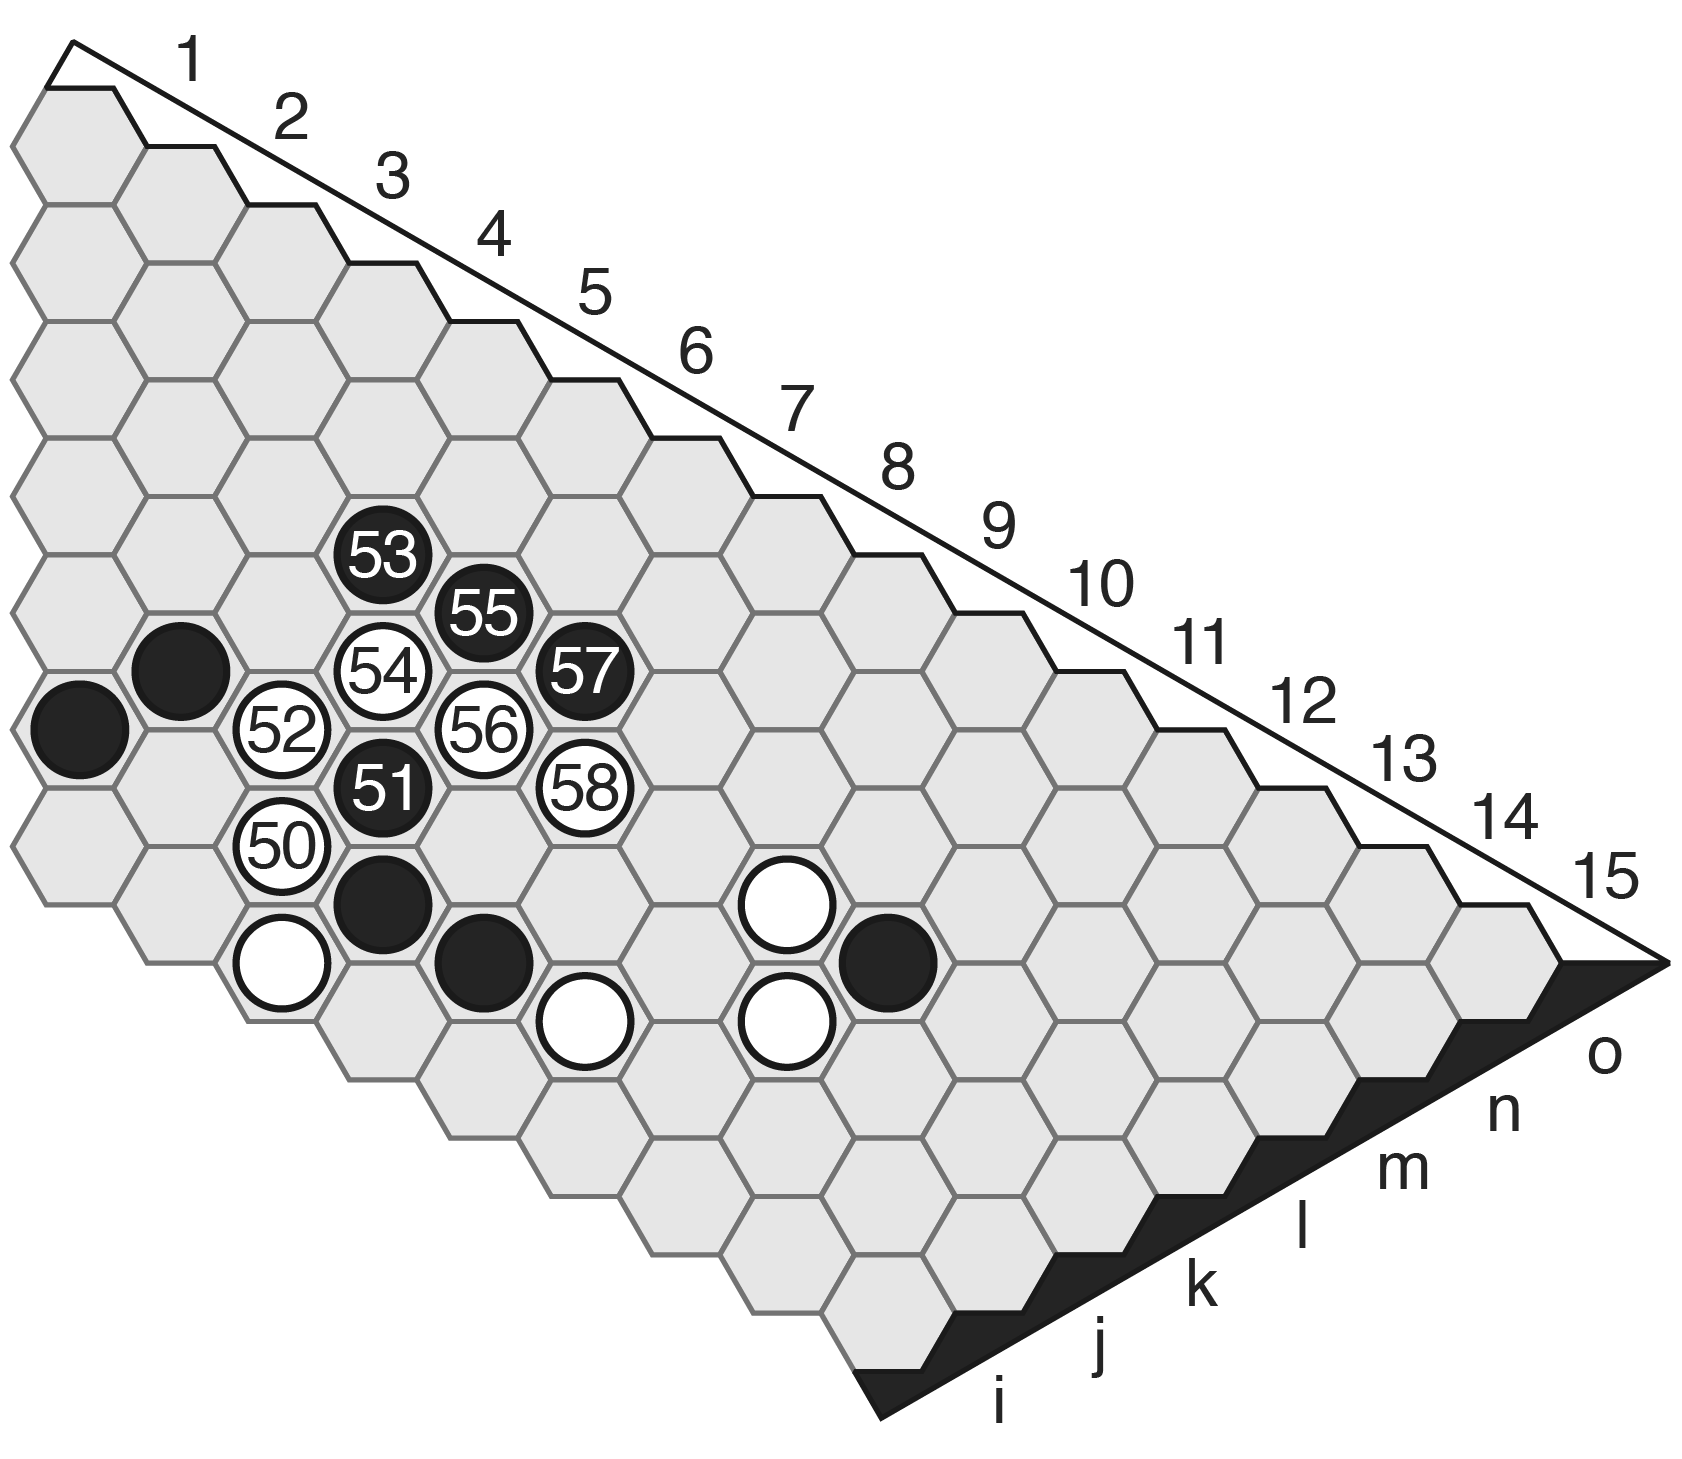
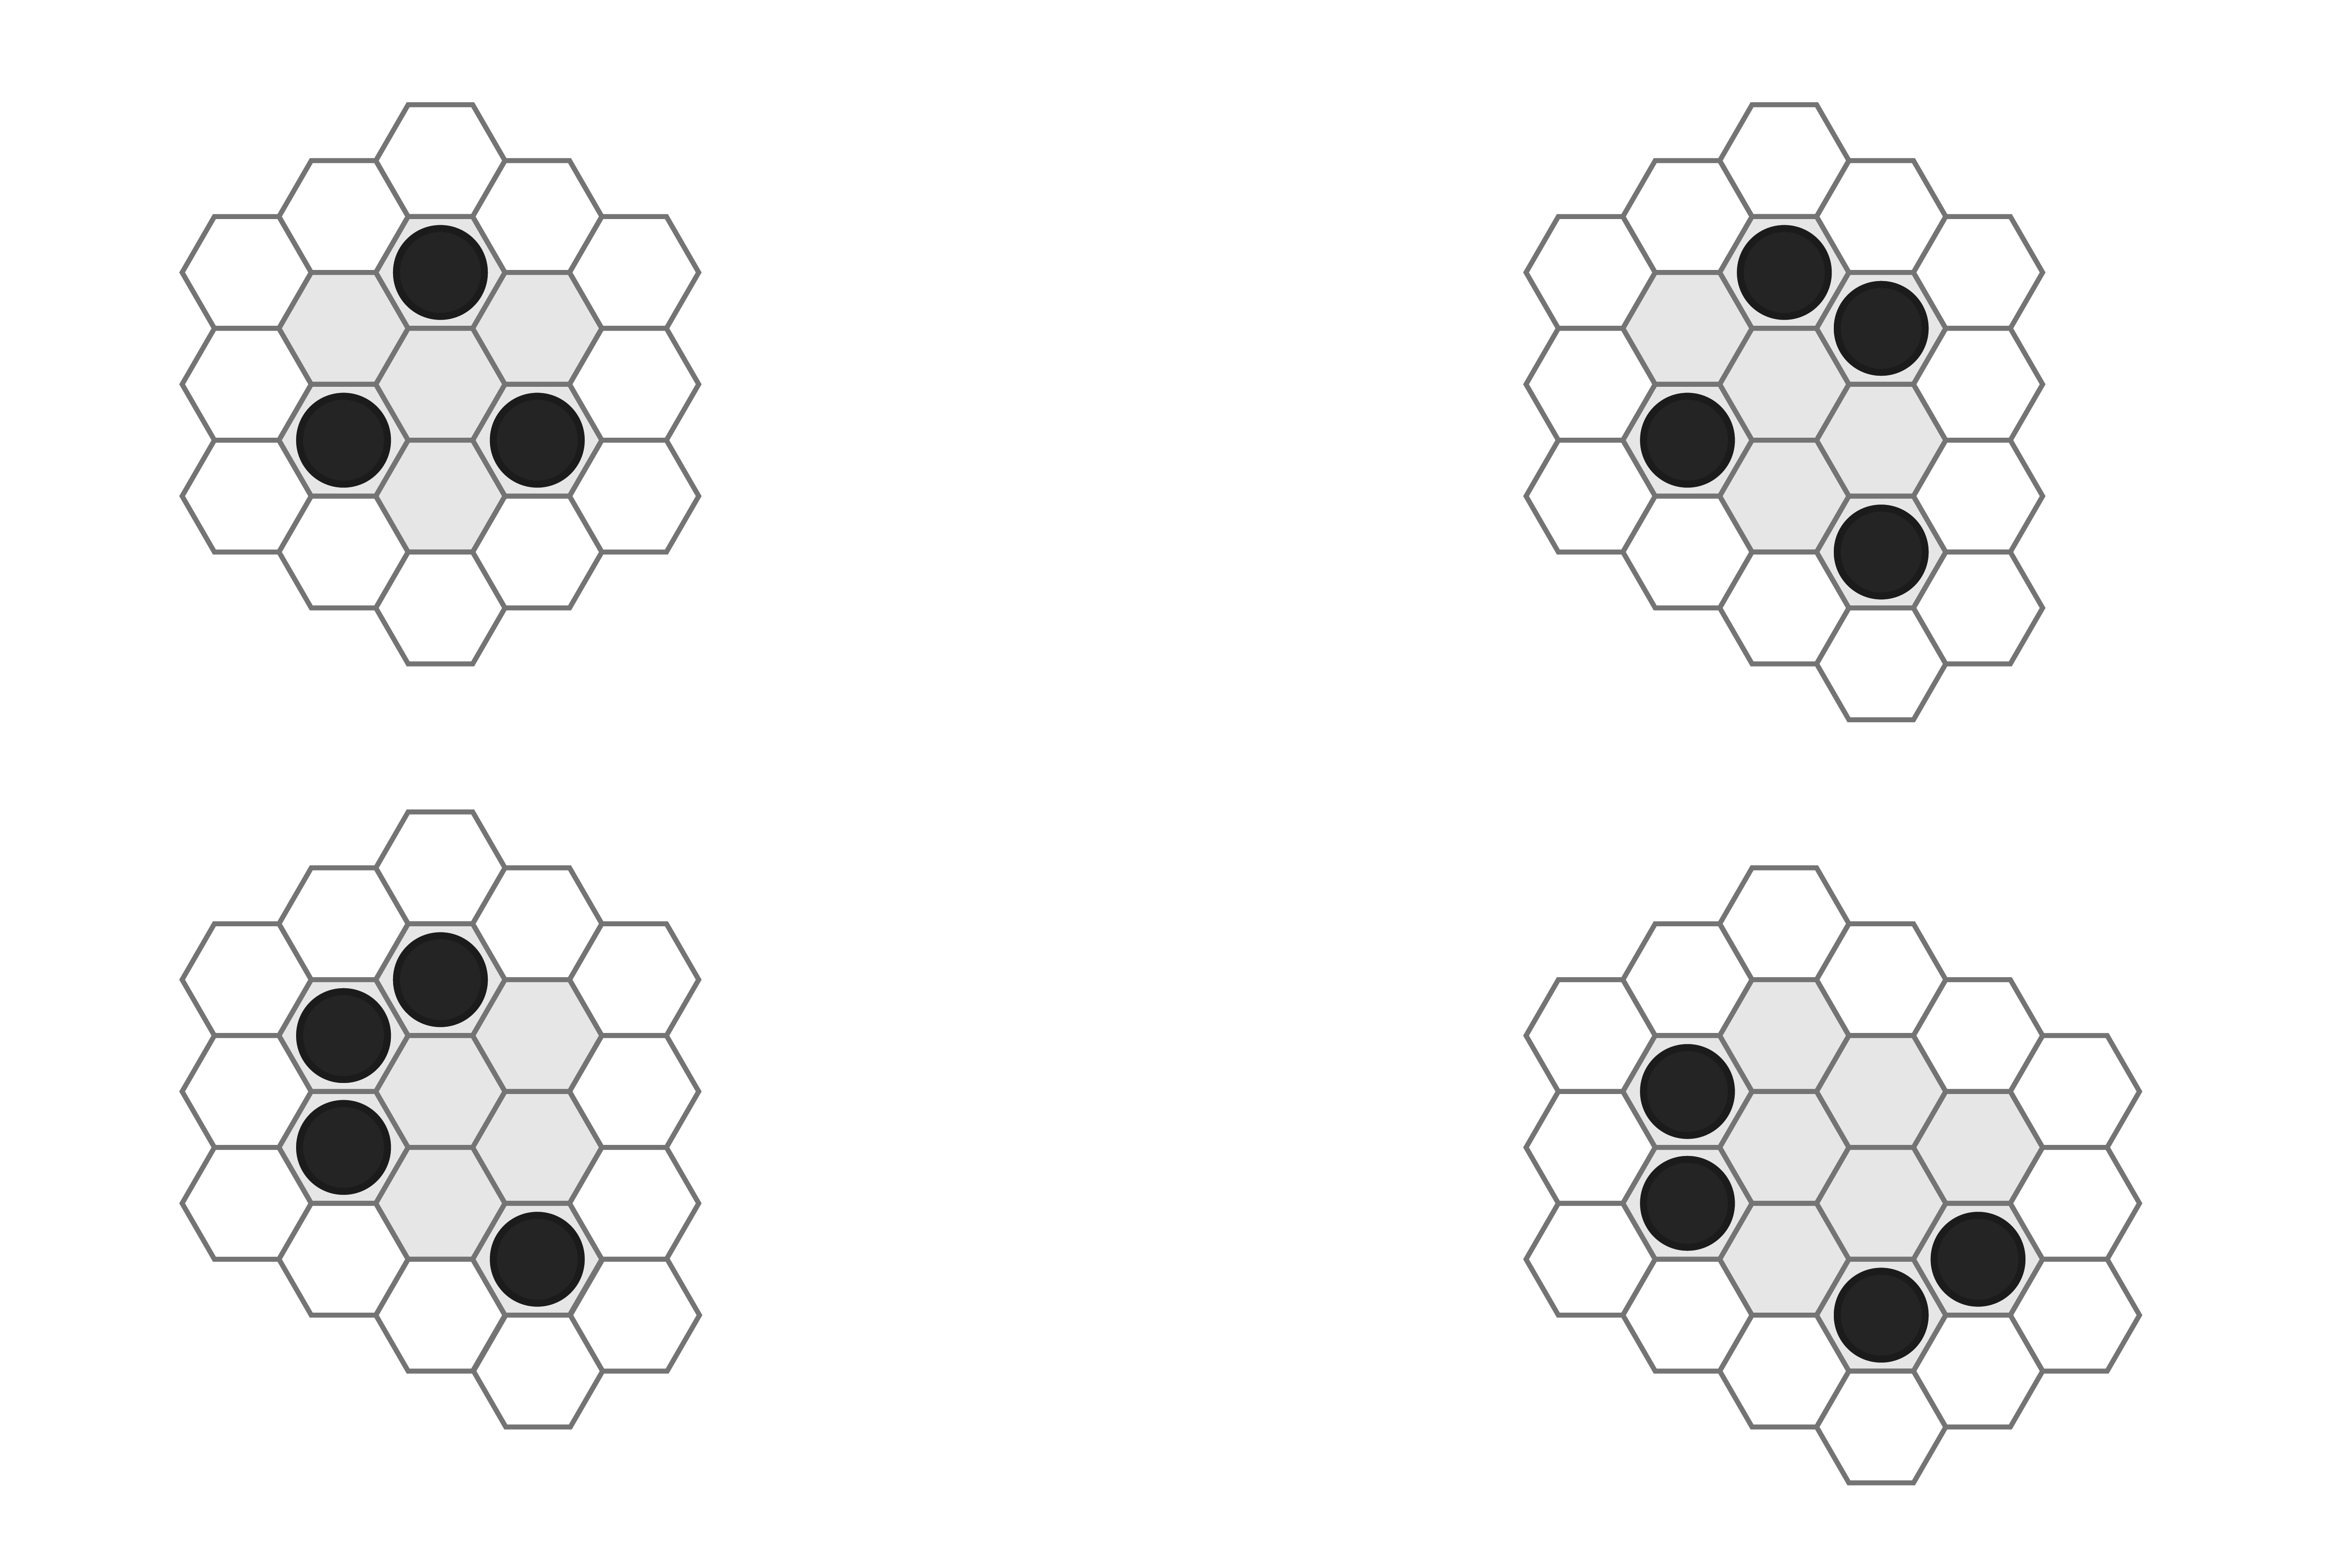
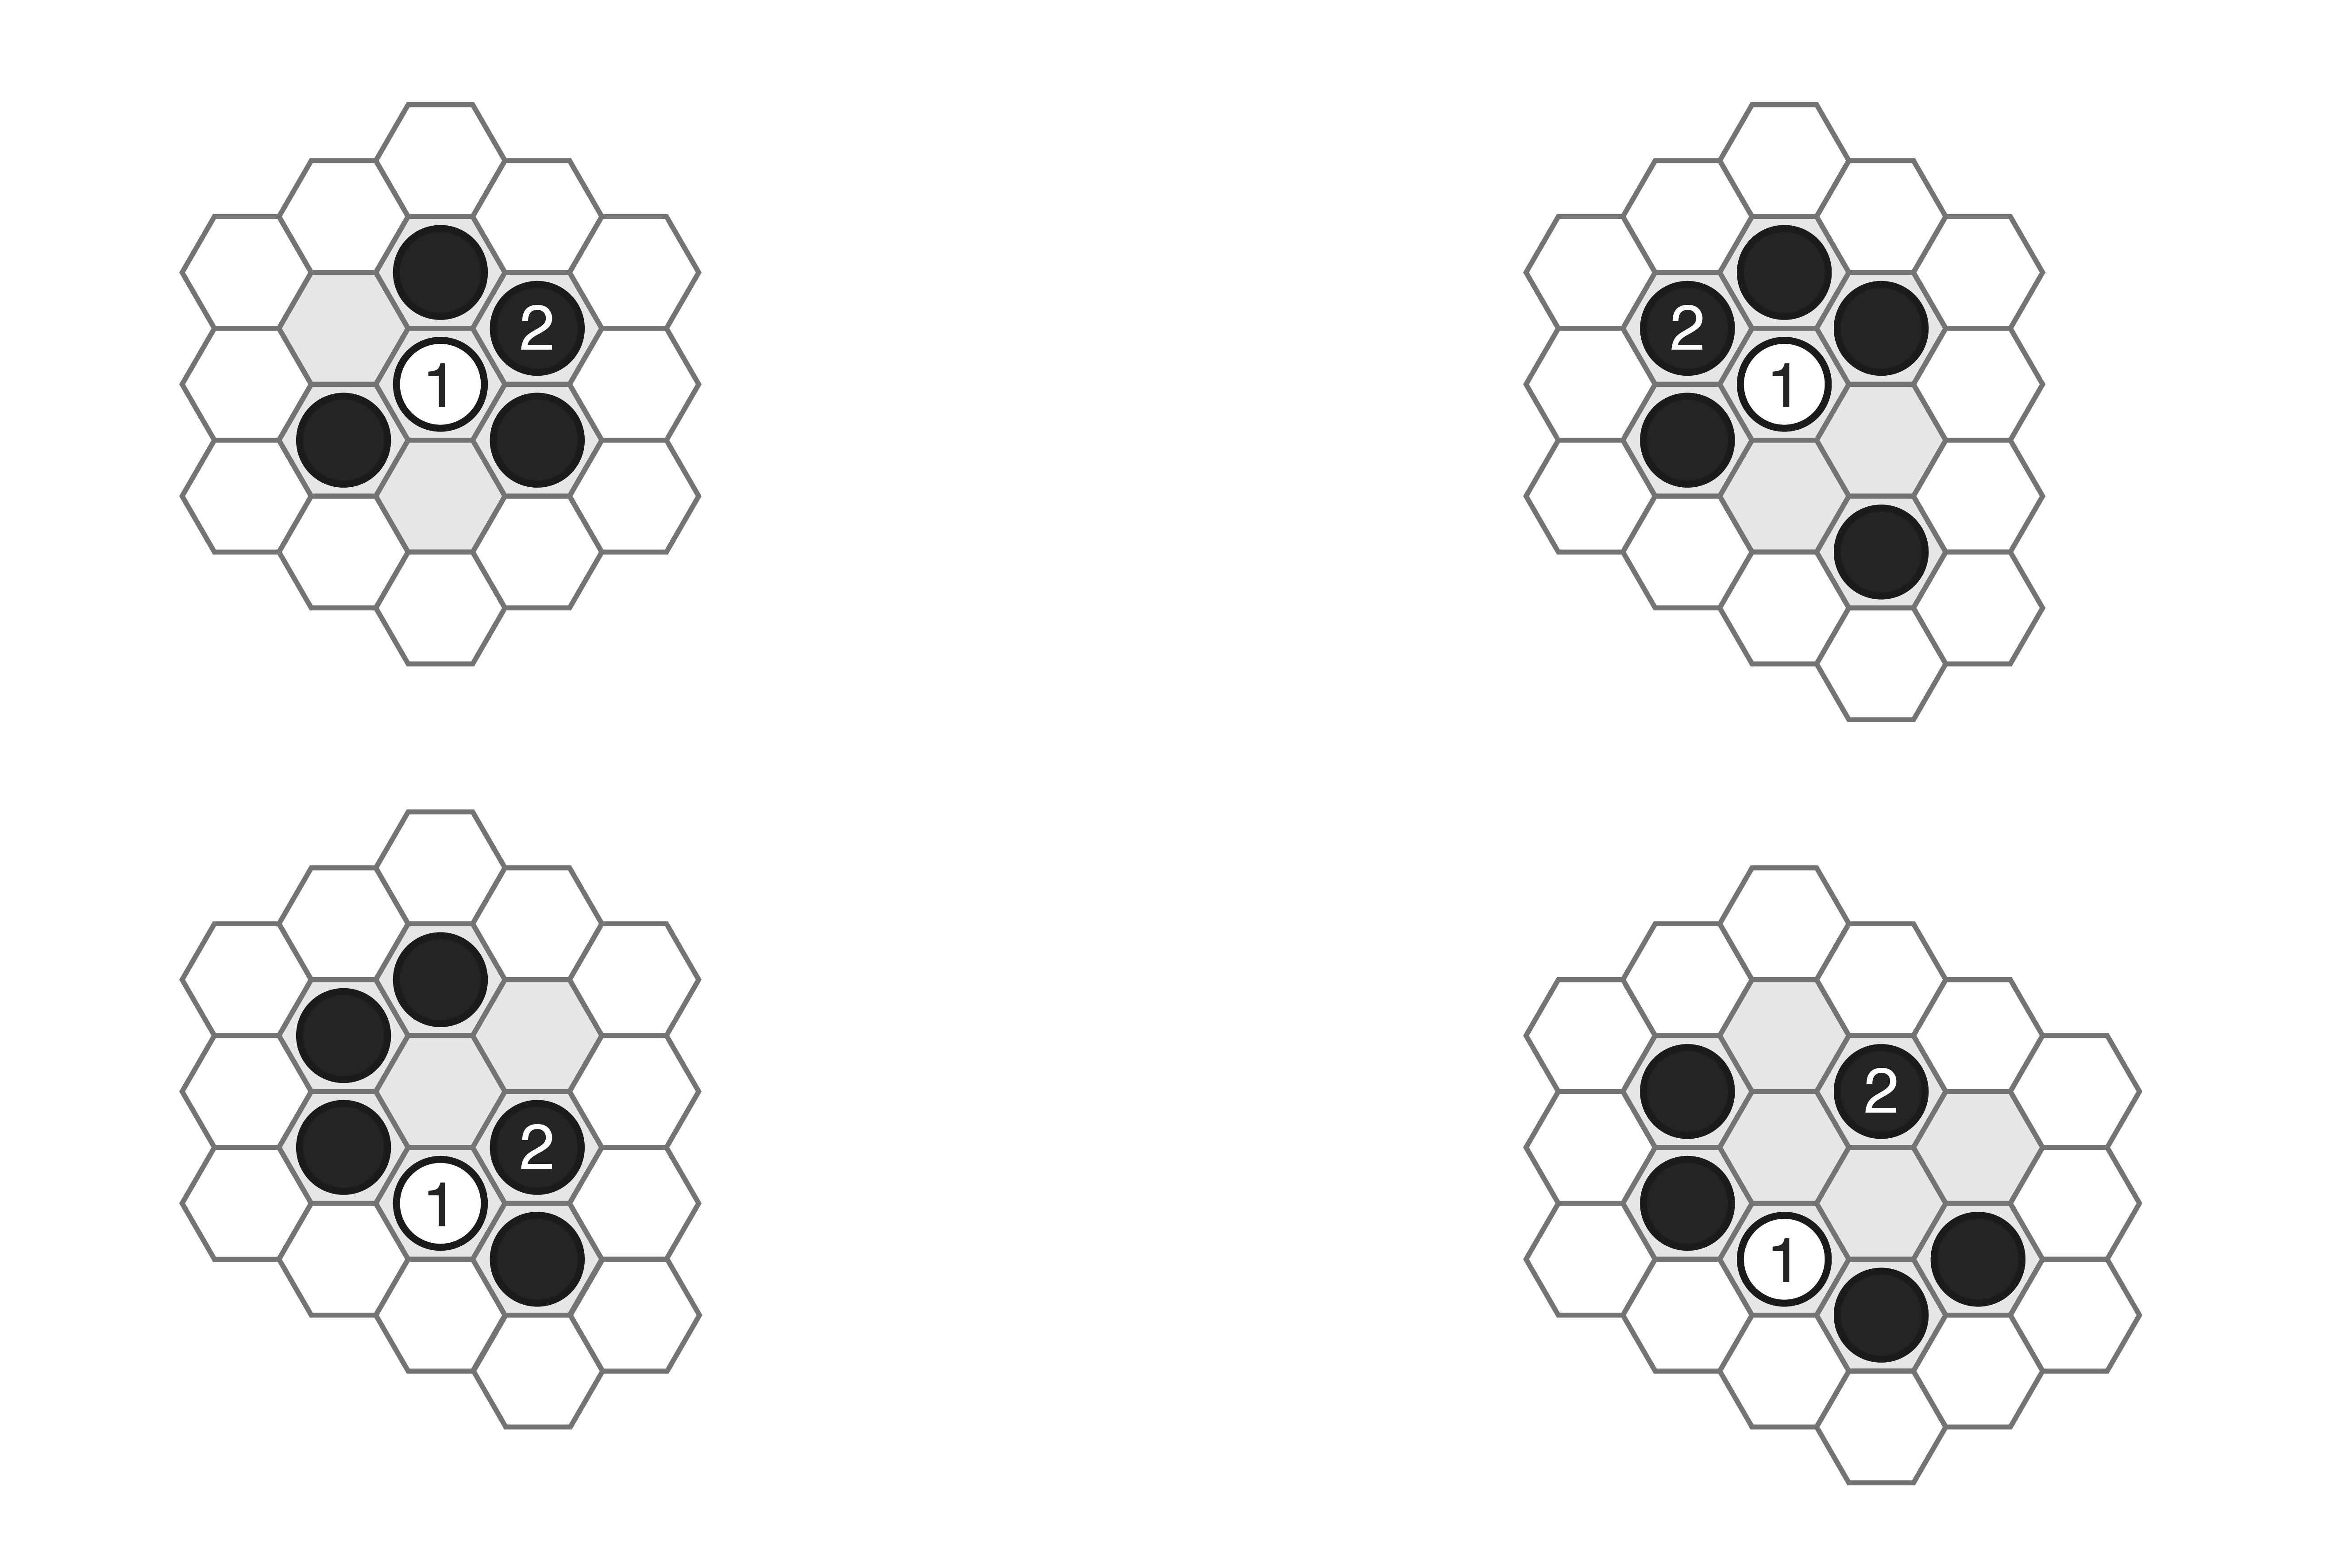
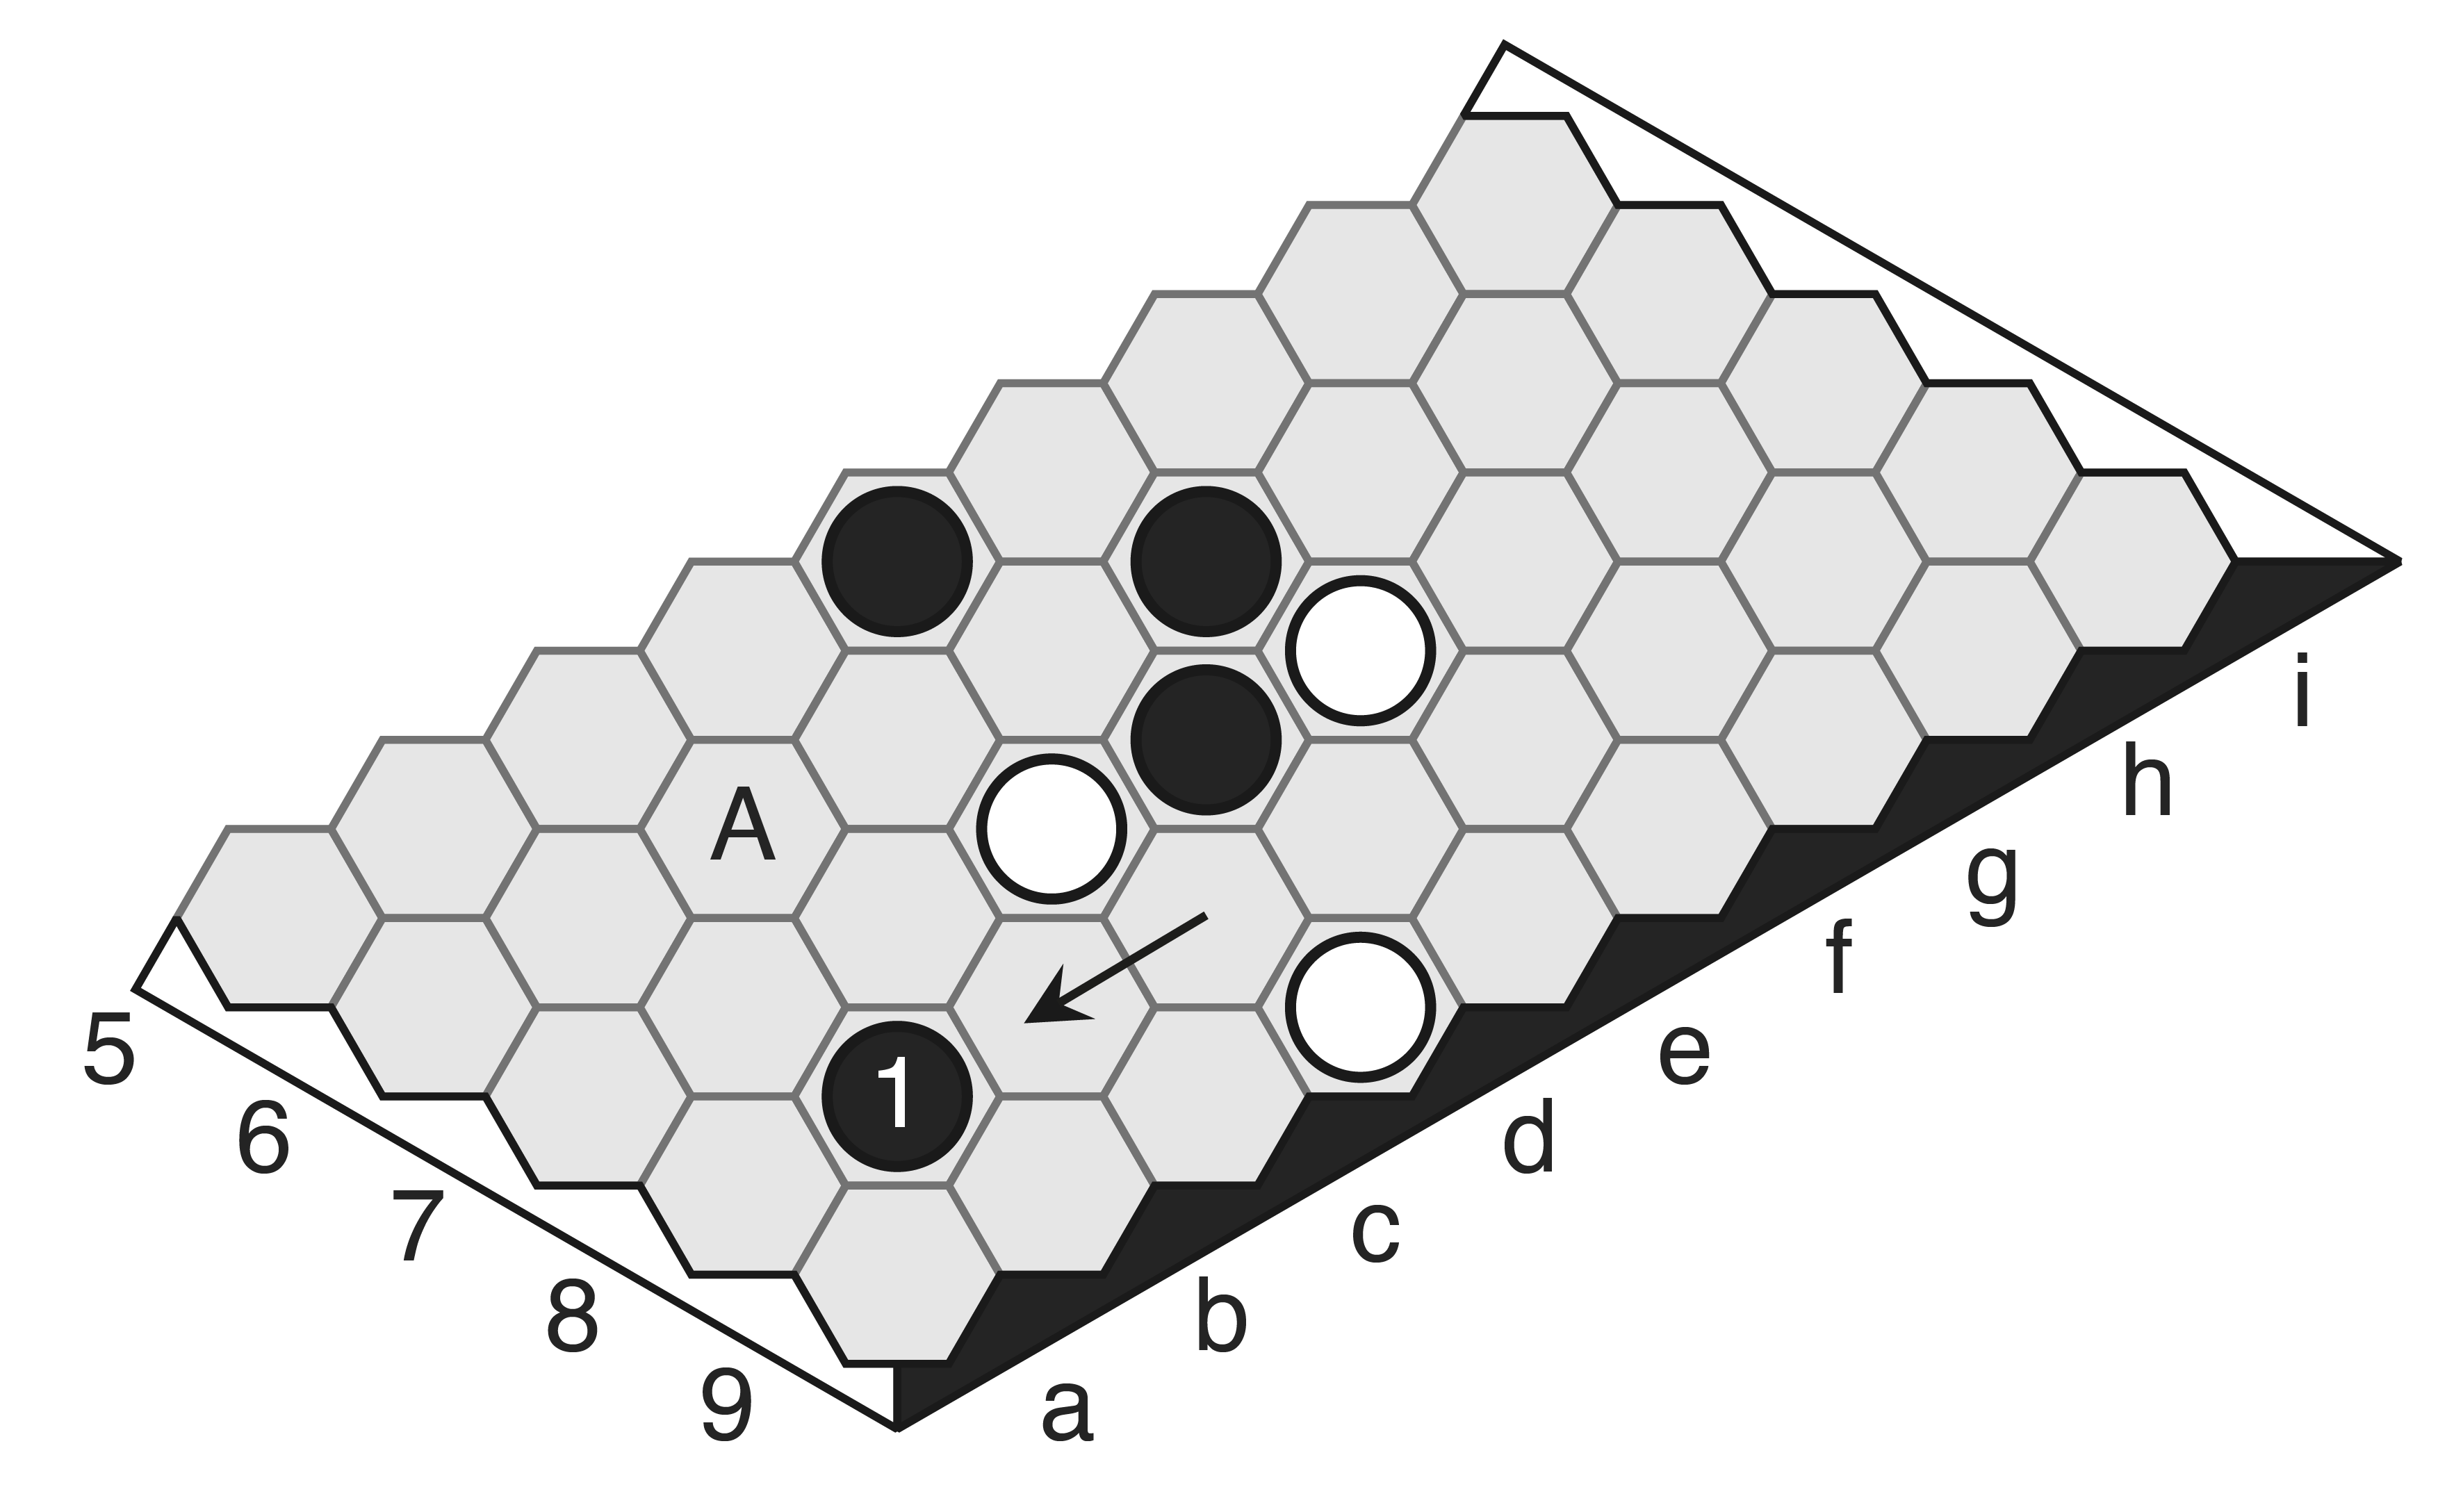
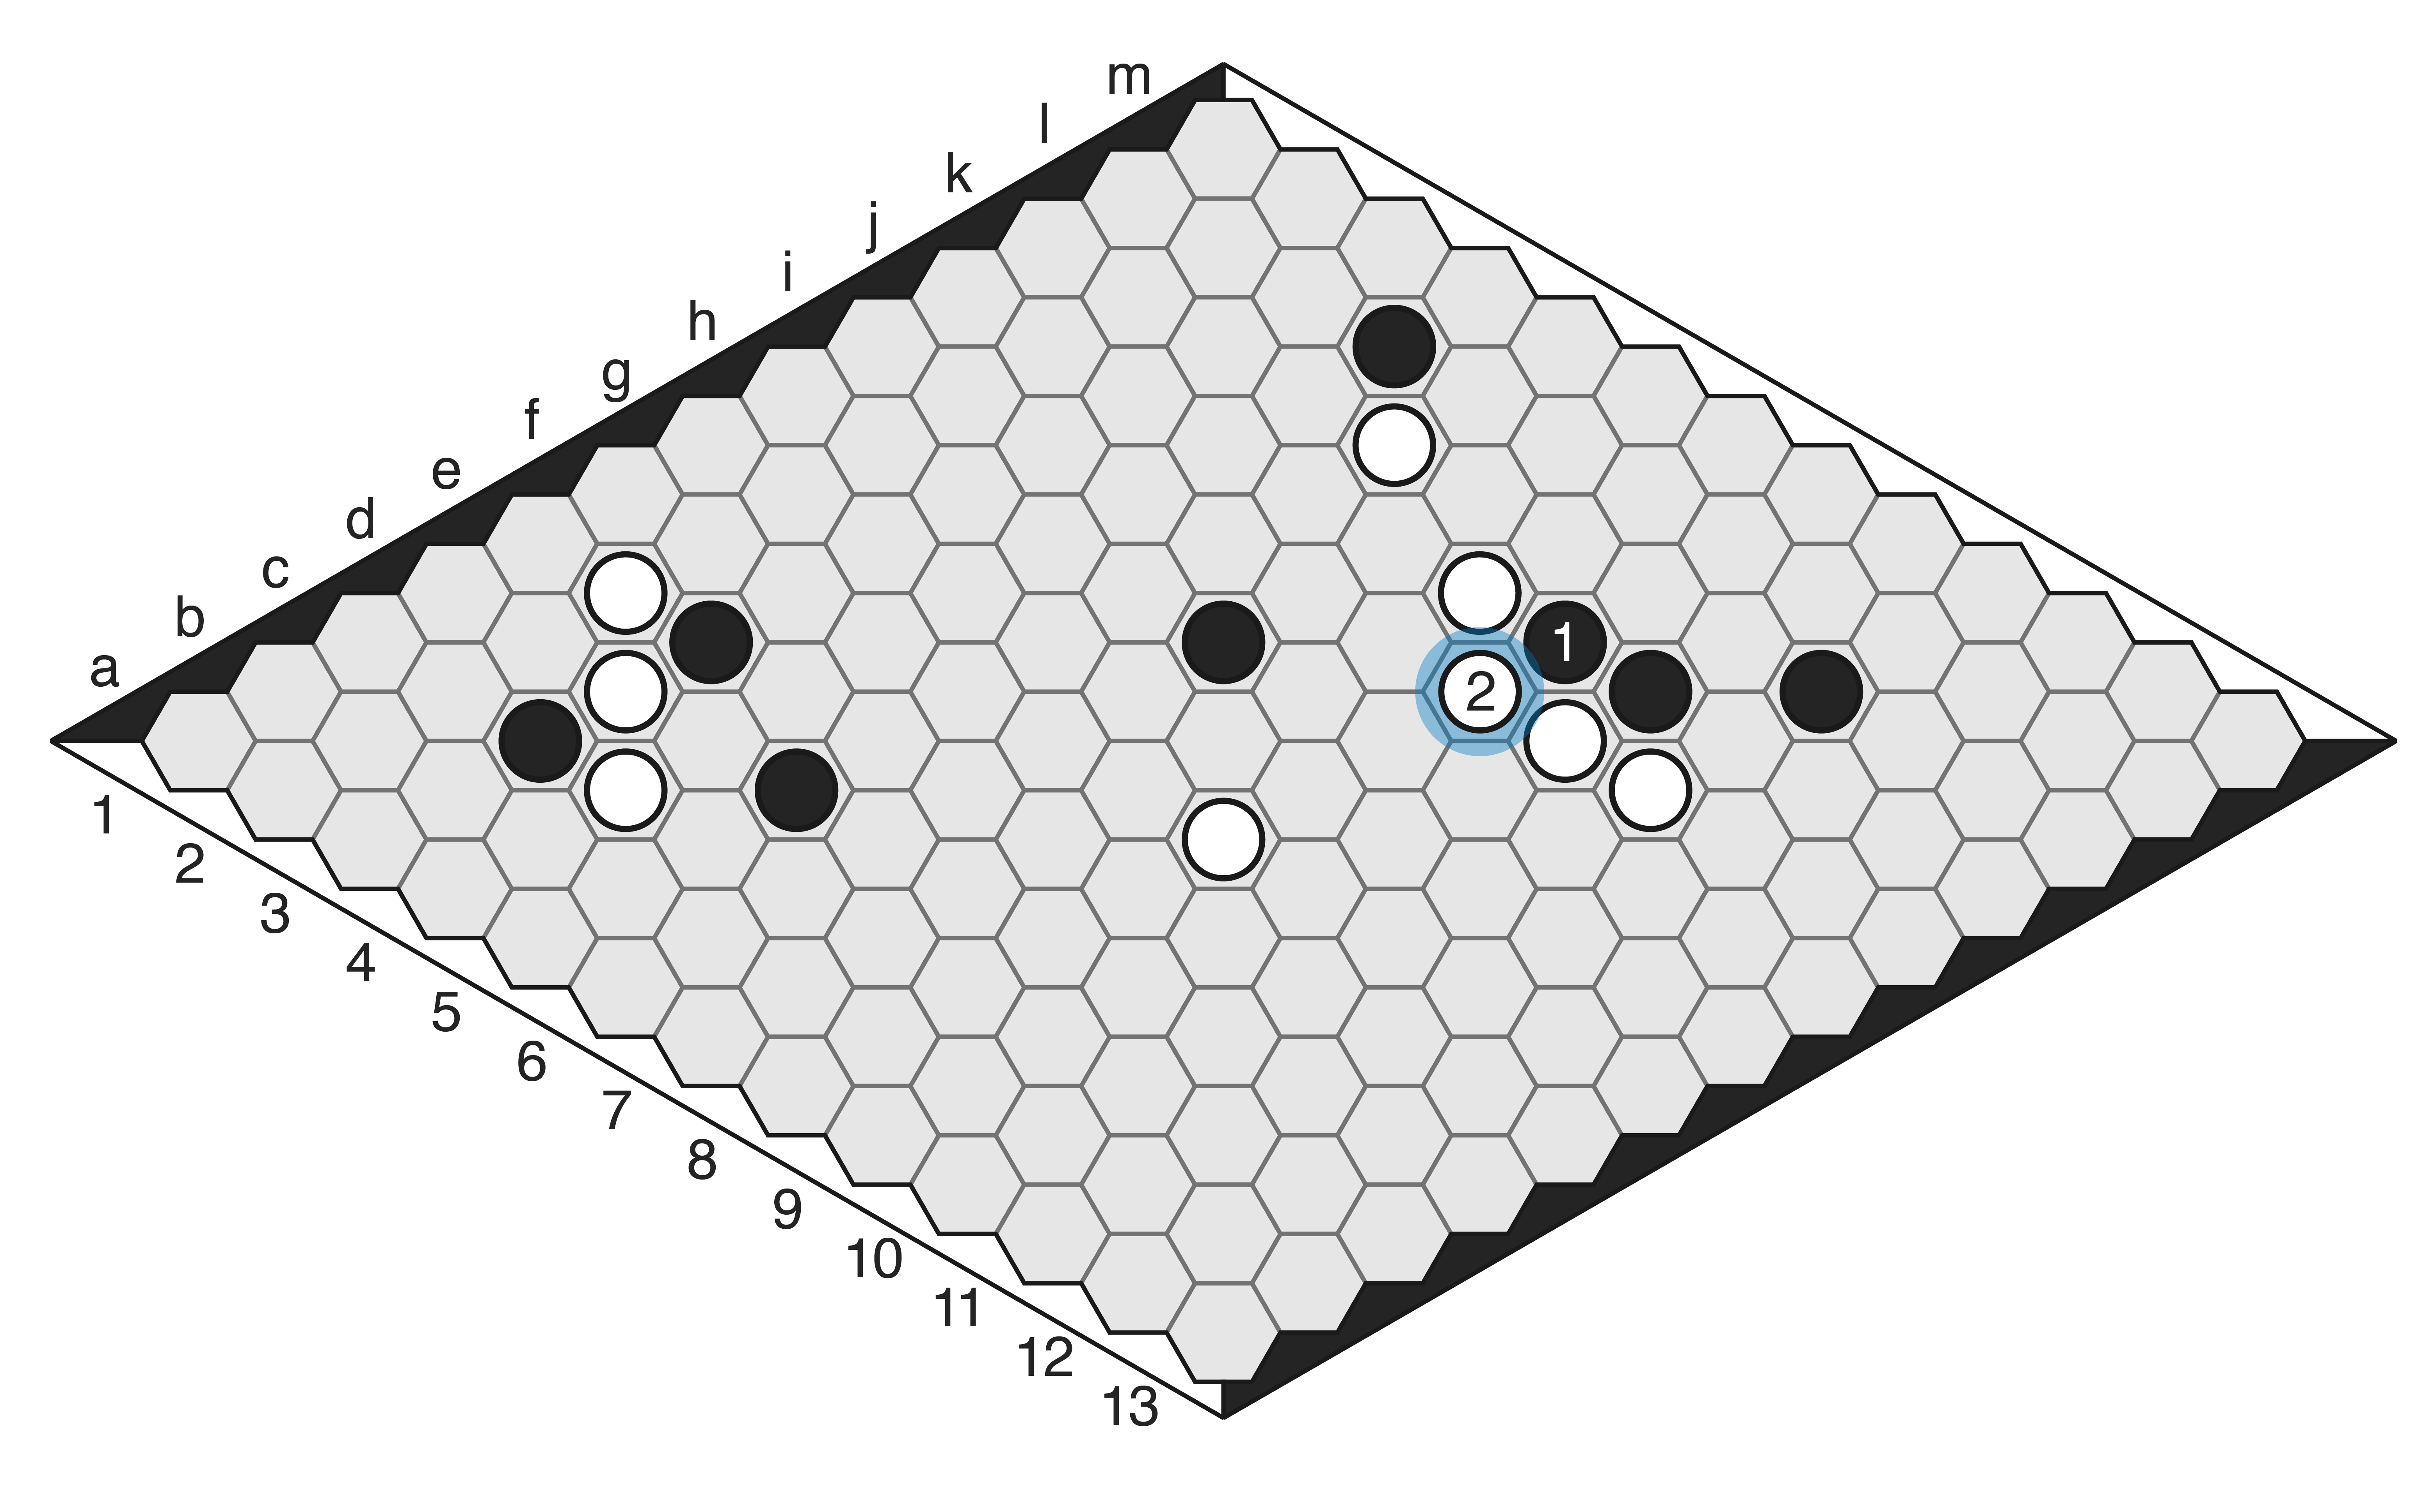
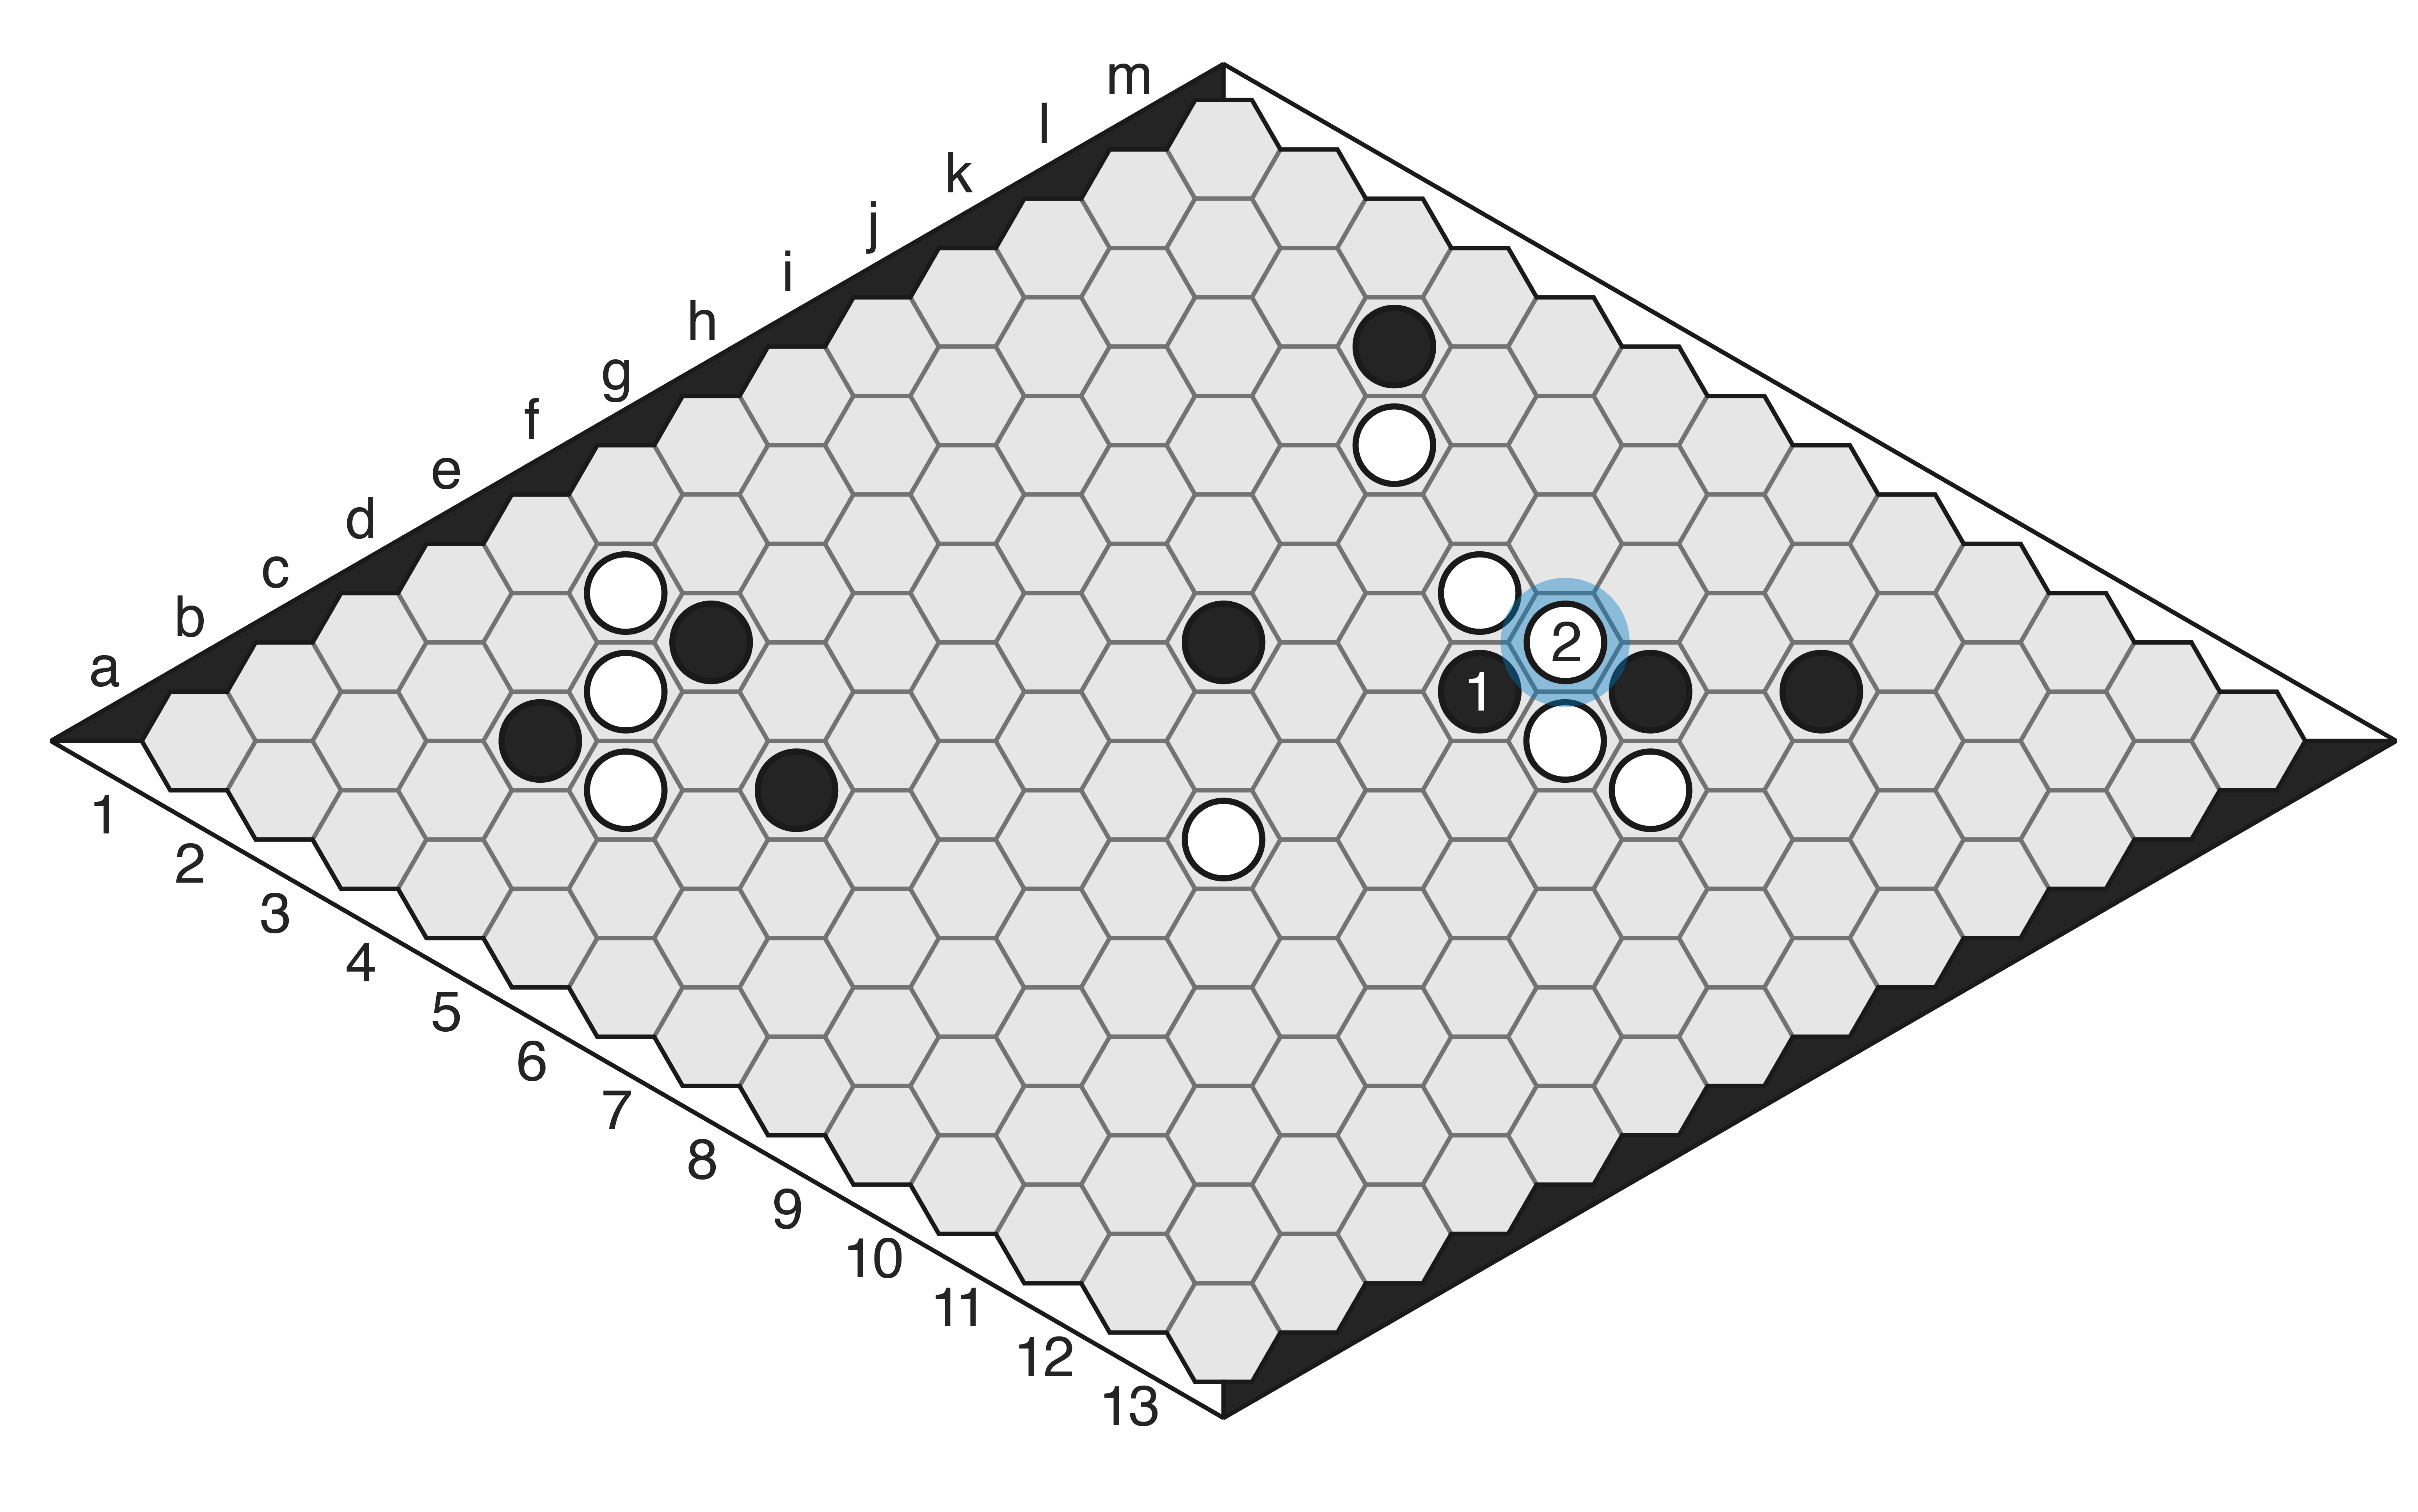
oust7-win-10s-mv43

Oust After numerous attempts, I finally had a breakthrough moment with this game.  Oust is a game with the unusual property that each game both starts and ends with an empty board.  Players may either place a stone anywhere, so long as it’s not adjacent to their own stones, or grow one of their groups on the board in order to capture an adjacent opposing group of lesser size.  The winner is the player who completely annihilates his opponent’s pieces.  Critically, each capturing move must be followed by another placement, which means that wins can appear in sudden and shocking fashion as one capture chains into another.  I found the game utterly impenetrable at first, but at last I figured out some basic strategic principles and could begin to place my pieces on the board in some sort of structured way.  Now I find the game innovative and surprising, rather than confusing and opaque.  However, I probably played about 30 games to reach this point, so be aware that you may not ‘get it’ right away.  Whether it’s worth it to you to face that learning curve is another question; in any case I would say the game deserves a few tries so you can judge that for yourself.  7/10.

Many people praise this odd game of placement and elimination, but I find it utterly baffling.  Some other games have boggled me in the past, but something kept me motivated to try again until a lightbulb eventually went off.  Here, for whatever reason, that didn’t happen for me.  I’ve no doubt this will be intriguing for others, and the uniqueness is obvious, but for me it’s an alienating, confusing experience.  Nick Bentley’s Bug is similar to Oust, and that game confuses the heck out of me too!  I played both games a bunch of times and never got the sense I was unlocking any additional understanding or improving my play in any meaningful way.  3/10.

IMG_20200930_180728

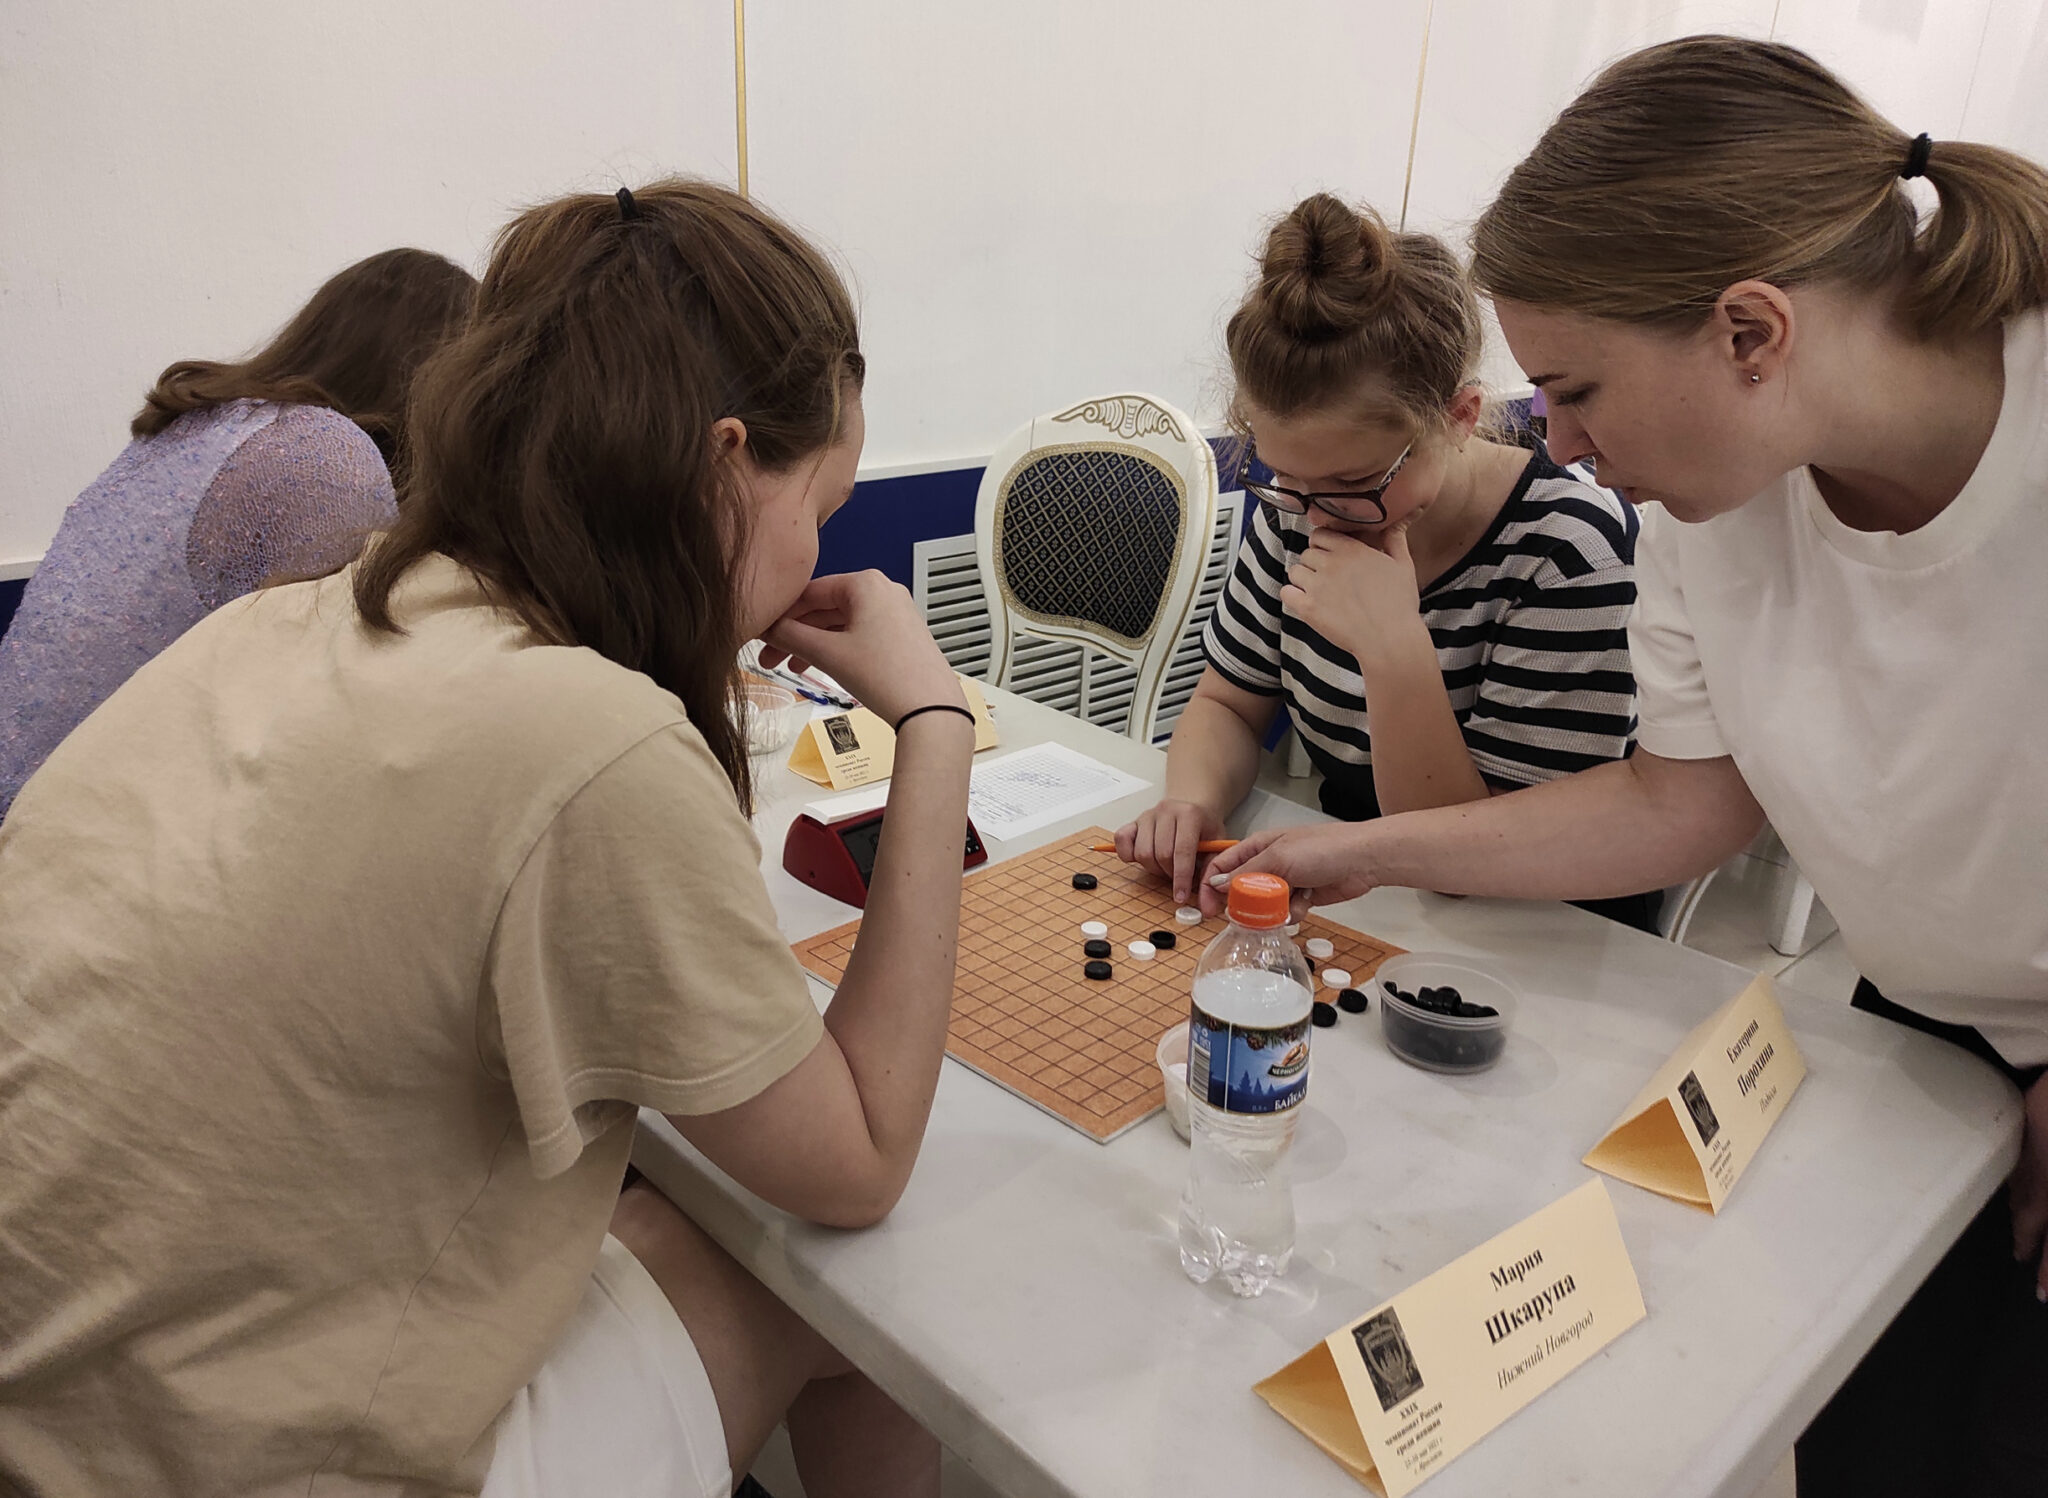
A treasured part of my gaming collection — a Go board made from Japanese Kaya, with the lines drawn via a sword dipped in black laquer (yes, really). The stones are the traditional slate and clamshell.

Go — The quintessential game of territory, one of the oldest games on the planet, and perhaps the most revered.  What can I say about this game that hasn’t already been said?  Go is staggeringly deep, tactically complex and strategically varied, and capable of making hours fly by as you end up completely absorbed in the infinite possibilities in front of you on that 19×19 grid.  Many people praise it for its simple rules, but I tend to stay away from that characterisation; in theory, the rules are simple, but the learning curve is steep, so it feels anything but simple as a beginner.  Go can take a while to reveal its character and richness to the newbie; beginners are often urged to dive in and lose 100 games as quickly as possible, as it takes a lot of bitter experience to grasp the basic concepts.  But if Go does end up hitting the mark for you, you may well find it takes over your gaming life.  10/10. (read more here)

rosette-sample

Rosette Go on a hex board has been a goal for many a designer, and Rosette makes it work through a wonderfully simple mechanism: if a player occupies all six points of a single hexagon, that group of stones cannot be captured, ever.  In a single stroke this rule compensates for the reduced number of liberties on the hex board, and allows a Go-like intricacy to flourish on the hexagonal grid.  Yes, I know it’s played on the intersections so it’s actually the dual of the hex board, but it’s hexagonal enough for me, and a great game besides!  8/10.

stigmergy-sample

Stigmergy This game started life as a Tumbleweed variant, and has subsequently branched off into its own thing.  I actually came up with the name, which apparently everyone hates, but as yet no one has come up with a better one.  Anyway, Stigmergy is a good game, substantially easier to play OTB than Tumbleweed, but also feels a bit more sterile.  I’ve yet to play the Stigmergised connection game that recently appeared on MindSports, but I suspect that might suit me a little better.  7/10.

IMG_20200321_190157

Ready to play a quick game of Ayu on my 9×9 Go board.

Ayu Another example of the underserved unification genre, Ayu (‘attach your units’) forces the game toward inevitable unification via an easy-to-understand movement restriction.  I’m very bad at this game but I still love it, which in my view is a clear indication that a game has something special about it.  Strongly recommended.  9/10.

IMG_20200312_113228

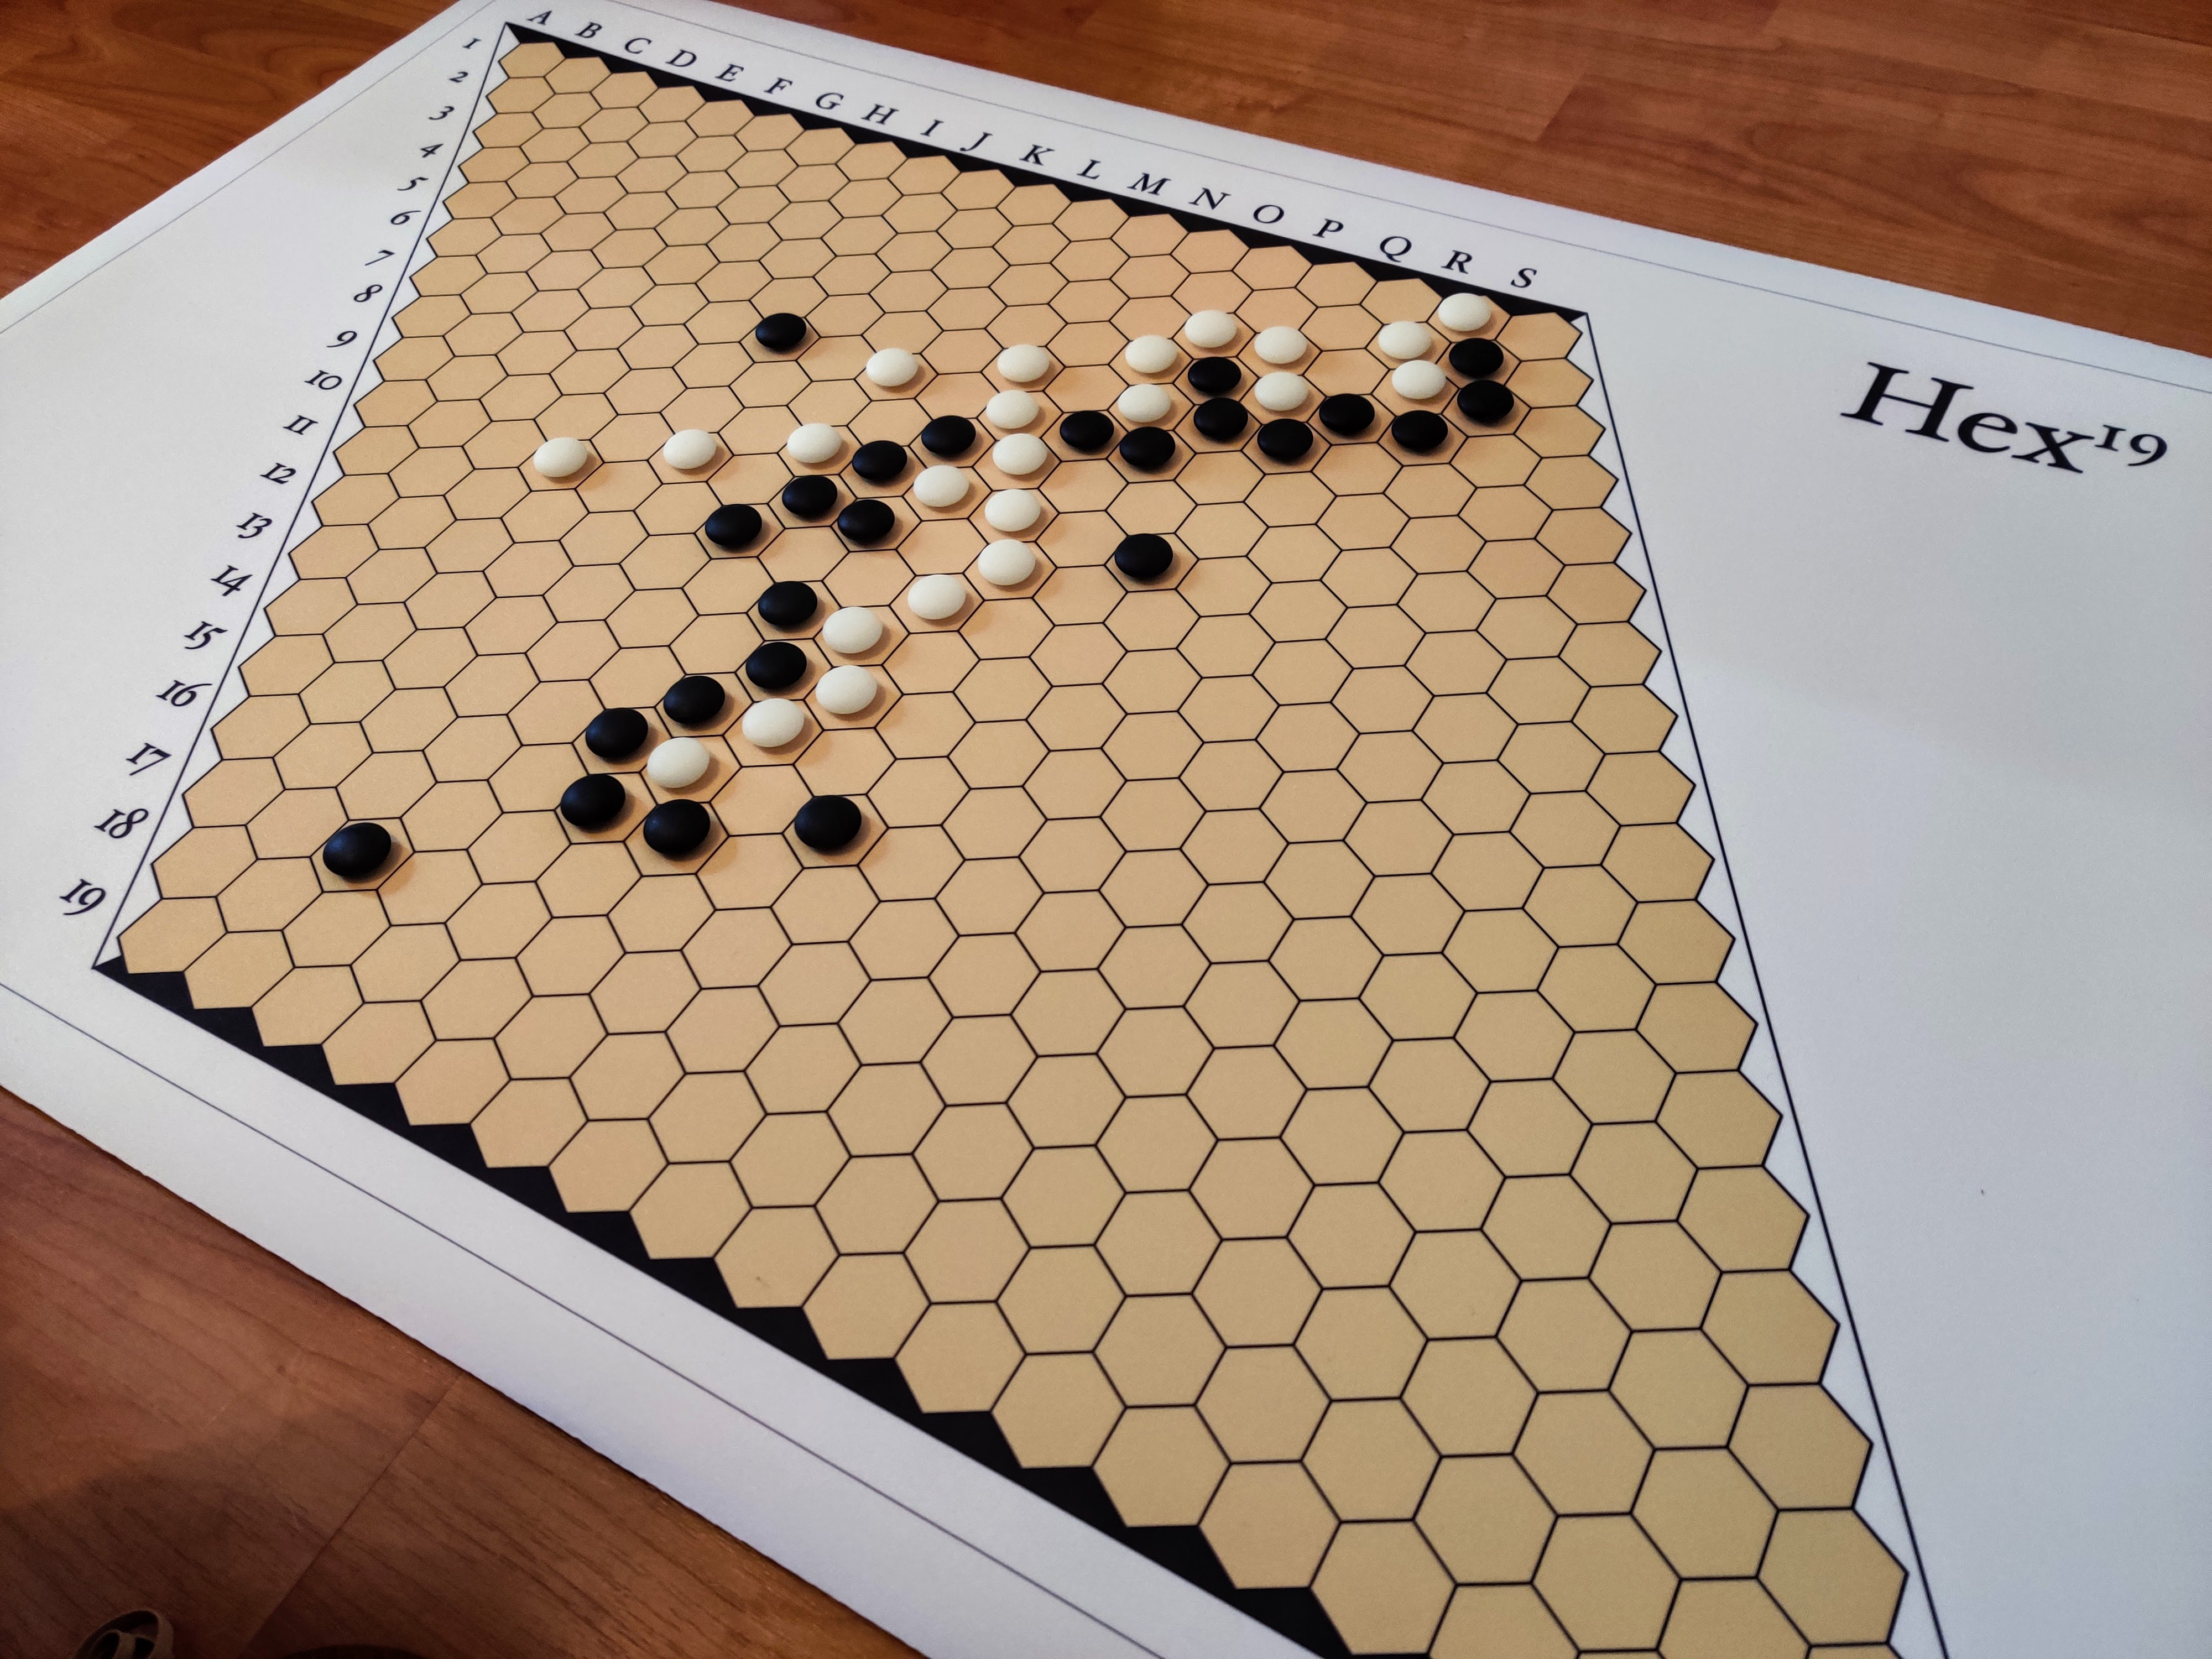
Playing 19×19 Hex on a board of my own design.

Hex — The game which looms so large in the world of modern abstract games that any connection game is inevitably compared to it.  Hex is incredibly simple to explain — take turns placing a single stone of your colour, win by being the first to connect your coloured sides with a continuous line of stones — but in play one finds endless intricacy and an innate focus on global strategy.  The more I play Hex, the more I admire it, and unlike some other games I admire, I actually thoroughly *enjoy* it as well.  I strongly recommend starting on 13×13 boards, then progress to 15×15 and 19×19, where the territorial aspects become significantly more important.  A must play.  10/10. (read more here)

The Pit

There are many games on this page, so I’m going to simply skip over those I haven’t played, to save some space!

Chess Variants

I like my Chess variants expansive and with unusual pieces, and most of these games don’t hit that mark for me.  Loonybird is fun, but divergent pieces are pretty common in Chess variants, so I didn’t stick with it for long.

Chess960 — Christian hates this game, and his complaints about it from a design perspective are reasonable, but as a player I don’t find them to be a problem.  FischerRandom/Chess960 had as its goal the elimination of opening theory, and it succeeds admirably at this without much in the way of rules changes, and now with official FIDE backing it’s easily the most important Chess variant on the planet (not the best, but the most impactful).  I’d quite like to ditch castling from FRC/960, which is awkwardly implemented in my opinion, but otherwise it’s a simple variant that allows interesting Chess to happen without 20 moves of opening prep needing to happen first.  8/10.

xiangqi-initpos

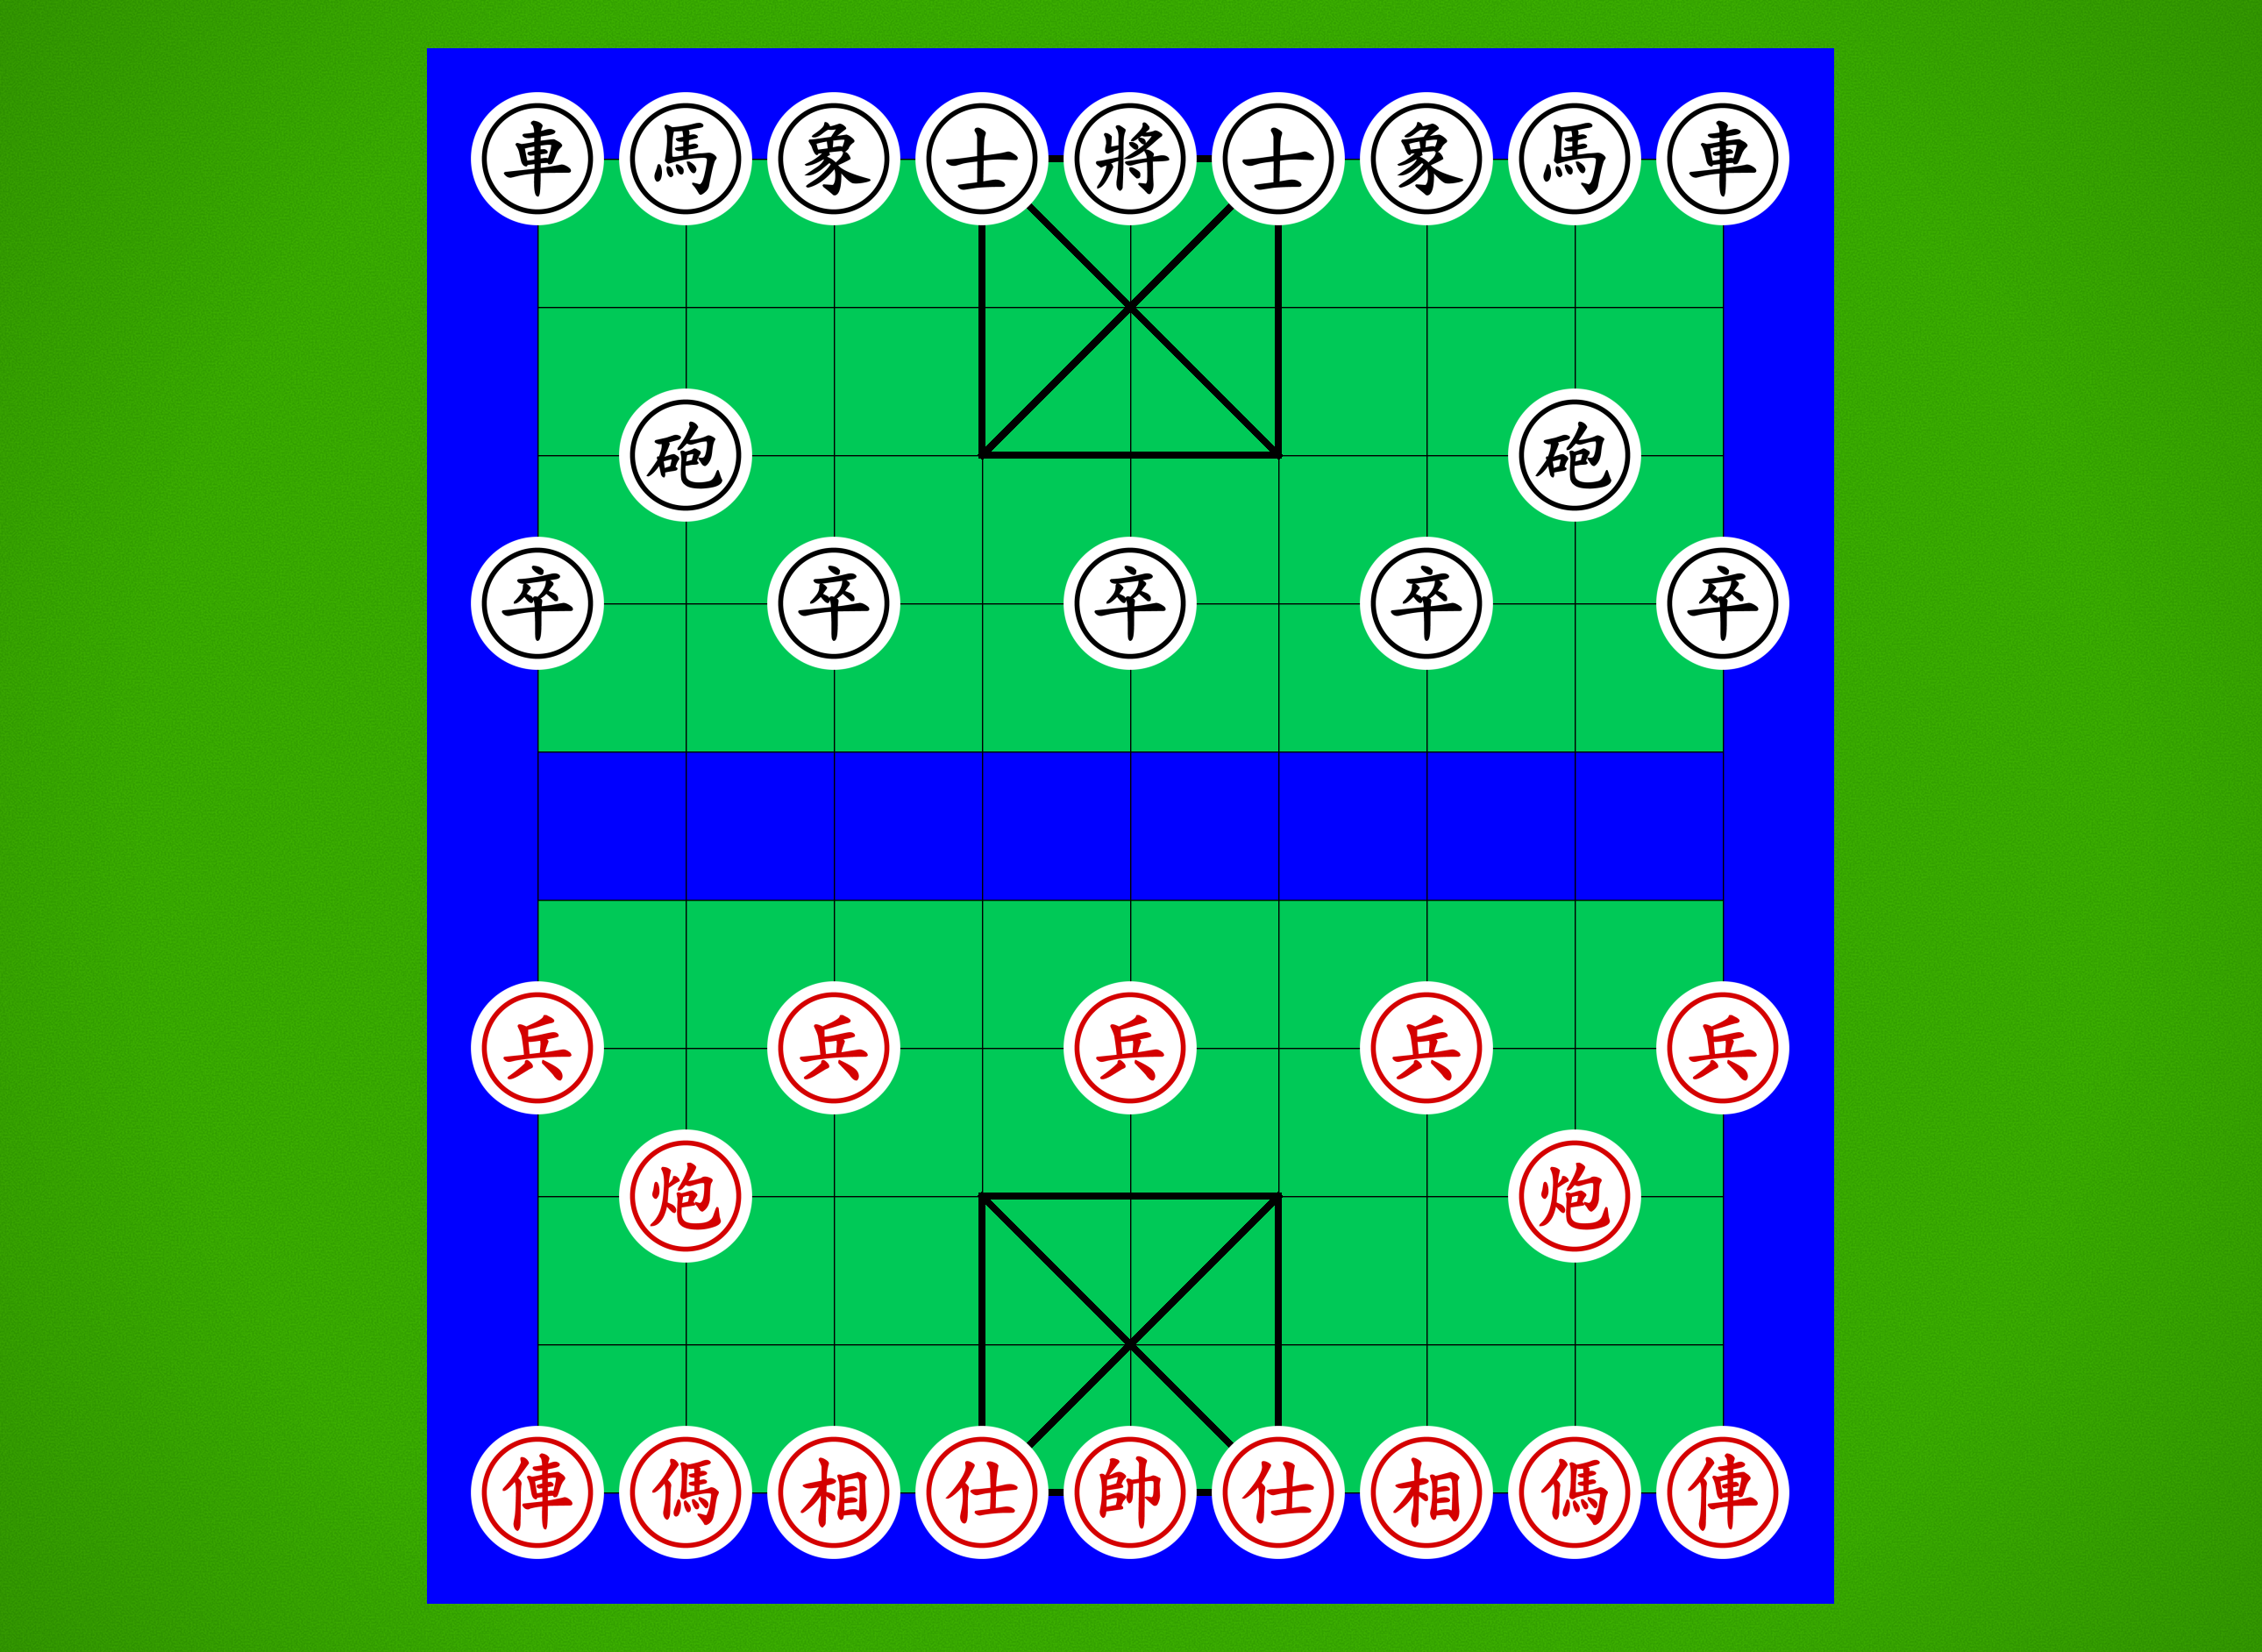
Xiangqi — China’s traditional form of Chess, virtually unchanged over the last 900 years.  Played on a larger 9×10 board, yet is more tactical rather than strategic.  The feel is substantially different from FIDE Chess, in part because the concept of material value here is much less important than positional advantage.  I very much enjoy playing Xiangqi, but I prefer Janggi, which removes the river and allows the Elephants to roam free (plus they have a more interesting move).  Xiangqi deserves additional credit for gifting us the wonderful Cannon piece, which is extremely interesting to use and is an excellent addition to numerous large Chess variants (like the superb Shako and its larger relatives Zanzibar, Maasai, Gigachess, and Terachess).  The downside for me is the relative lack of Pawn structure and promotion (except for slightly stronger Pawns); however, I must admit the game works fine without these, thanks to the confinement of the King in the palace, which allows checkmate to occur even when little attacking power is left on the board.  If you want to learn more about Xiangqi, Jim Png’s excellent XQ in English site has everything you need; do check out his excellent introductory books and translations of ancient Xiangqi texts as well.  8/10.

Games of Annihilation

turkish-draughts-prob1

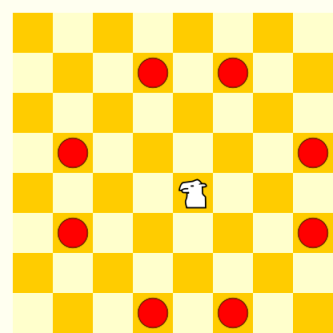
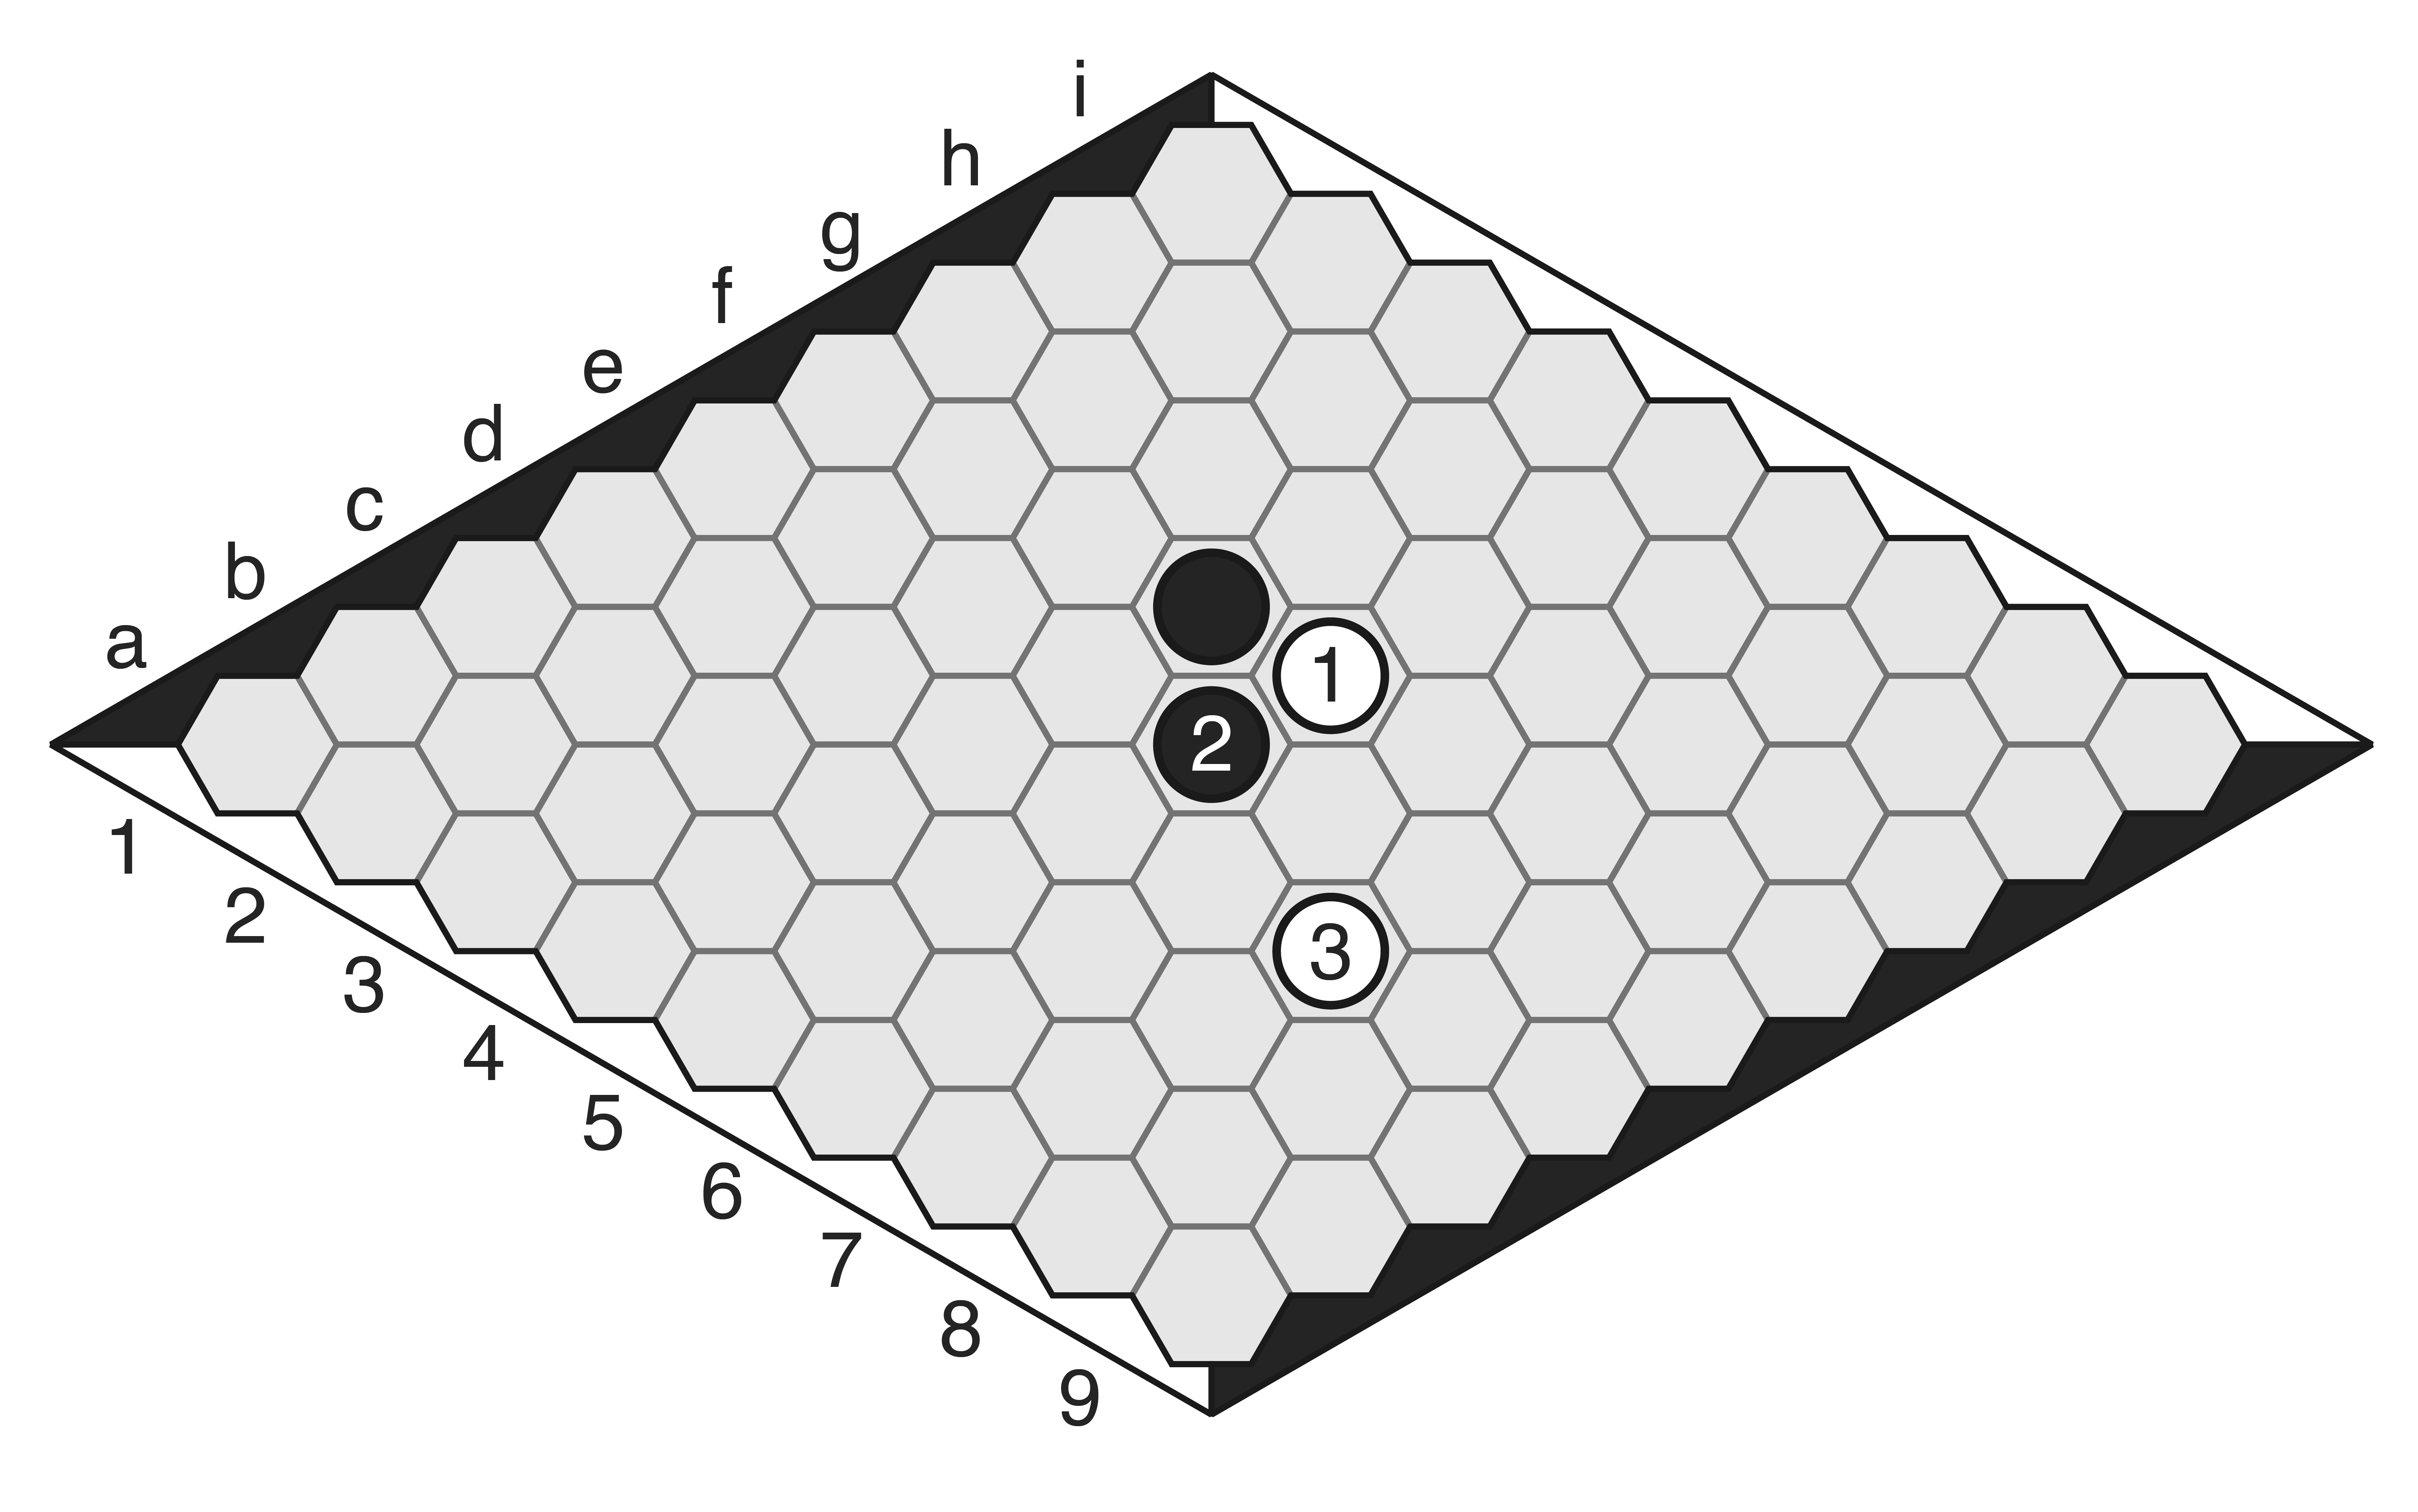
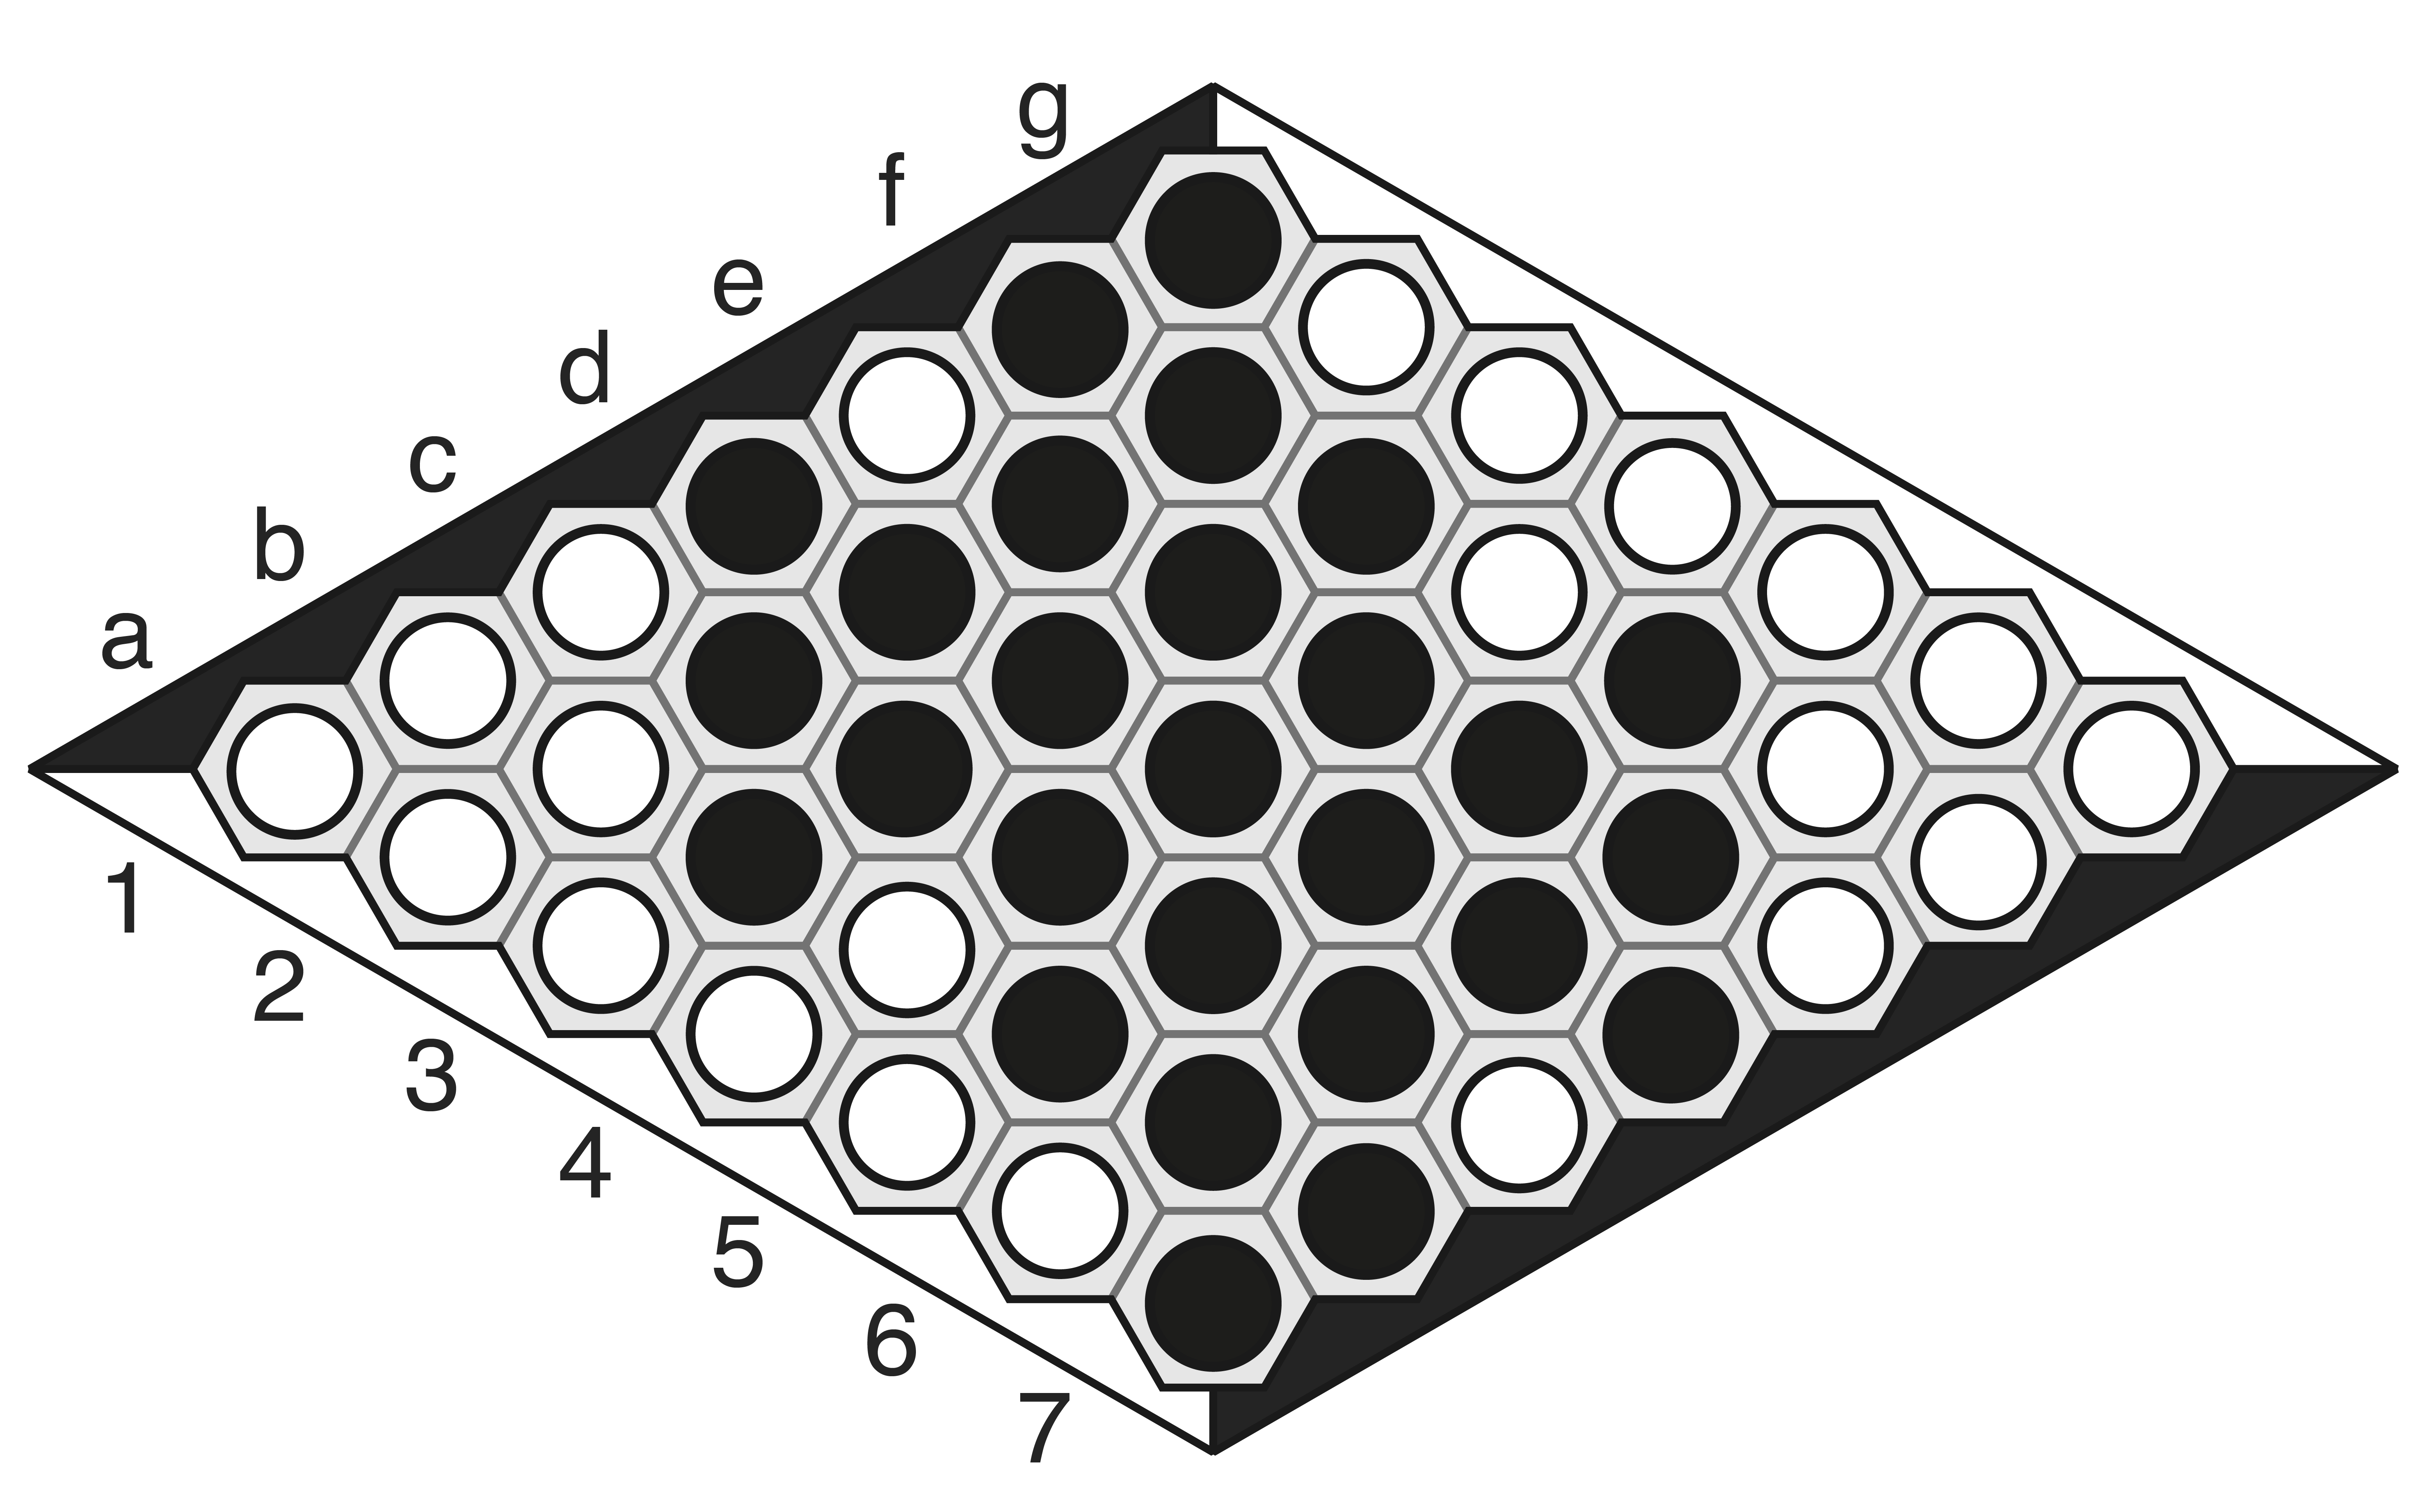
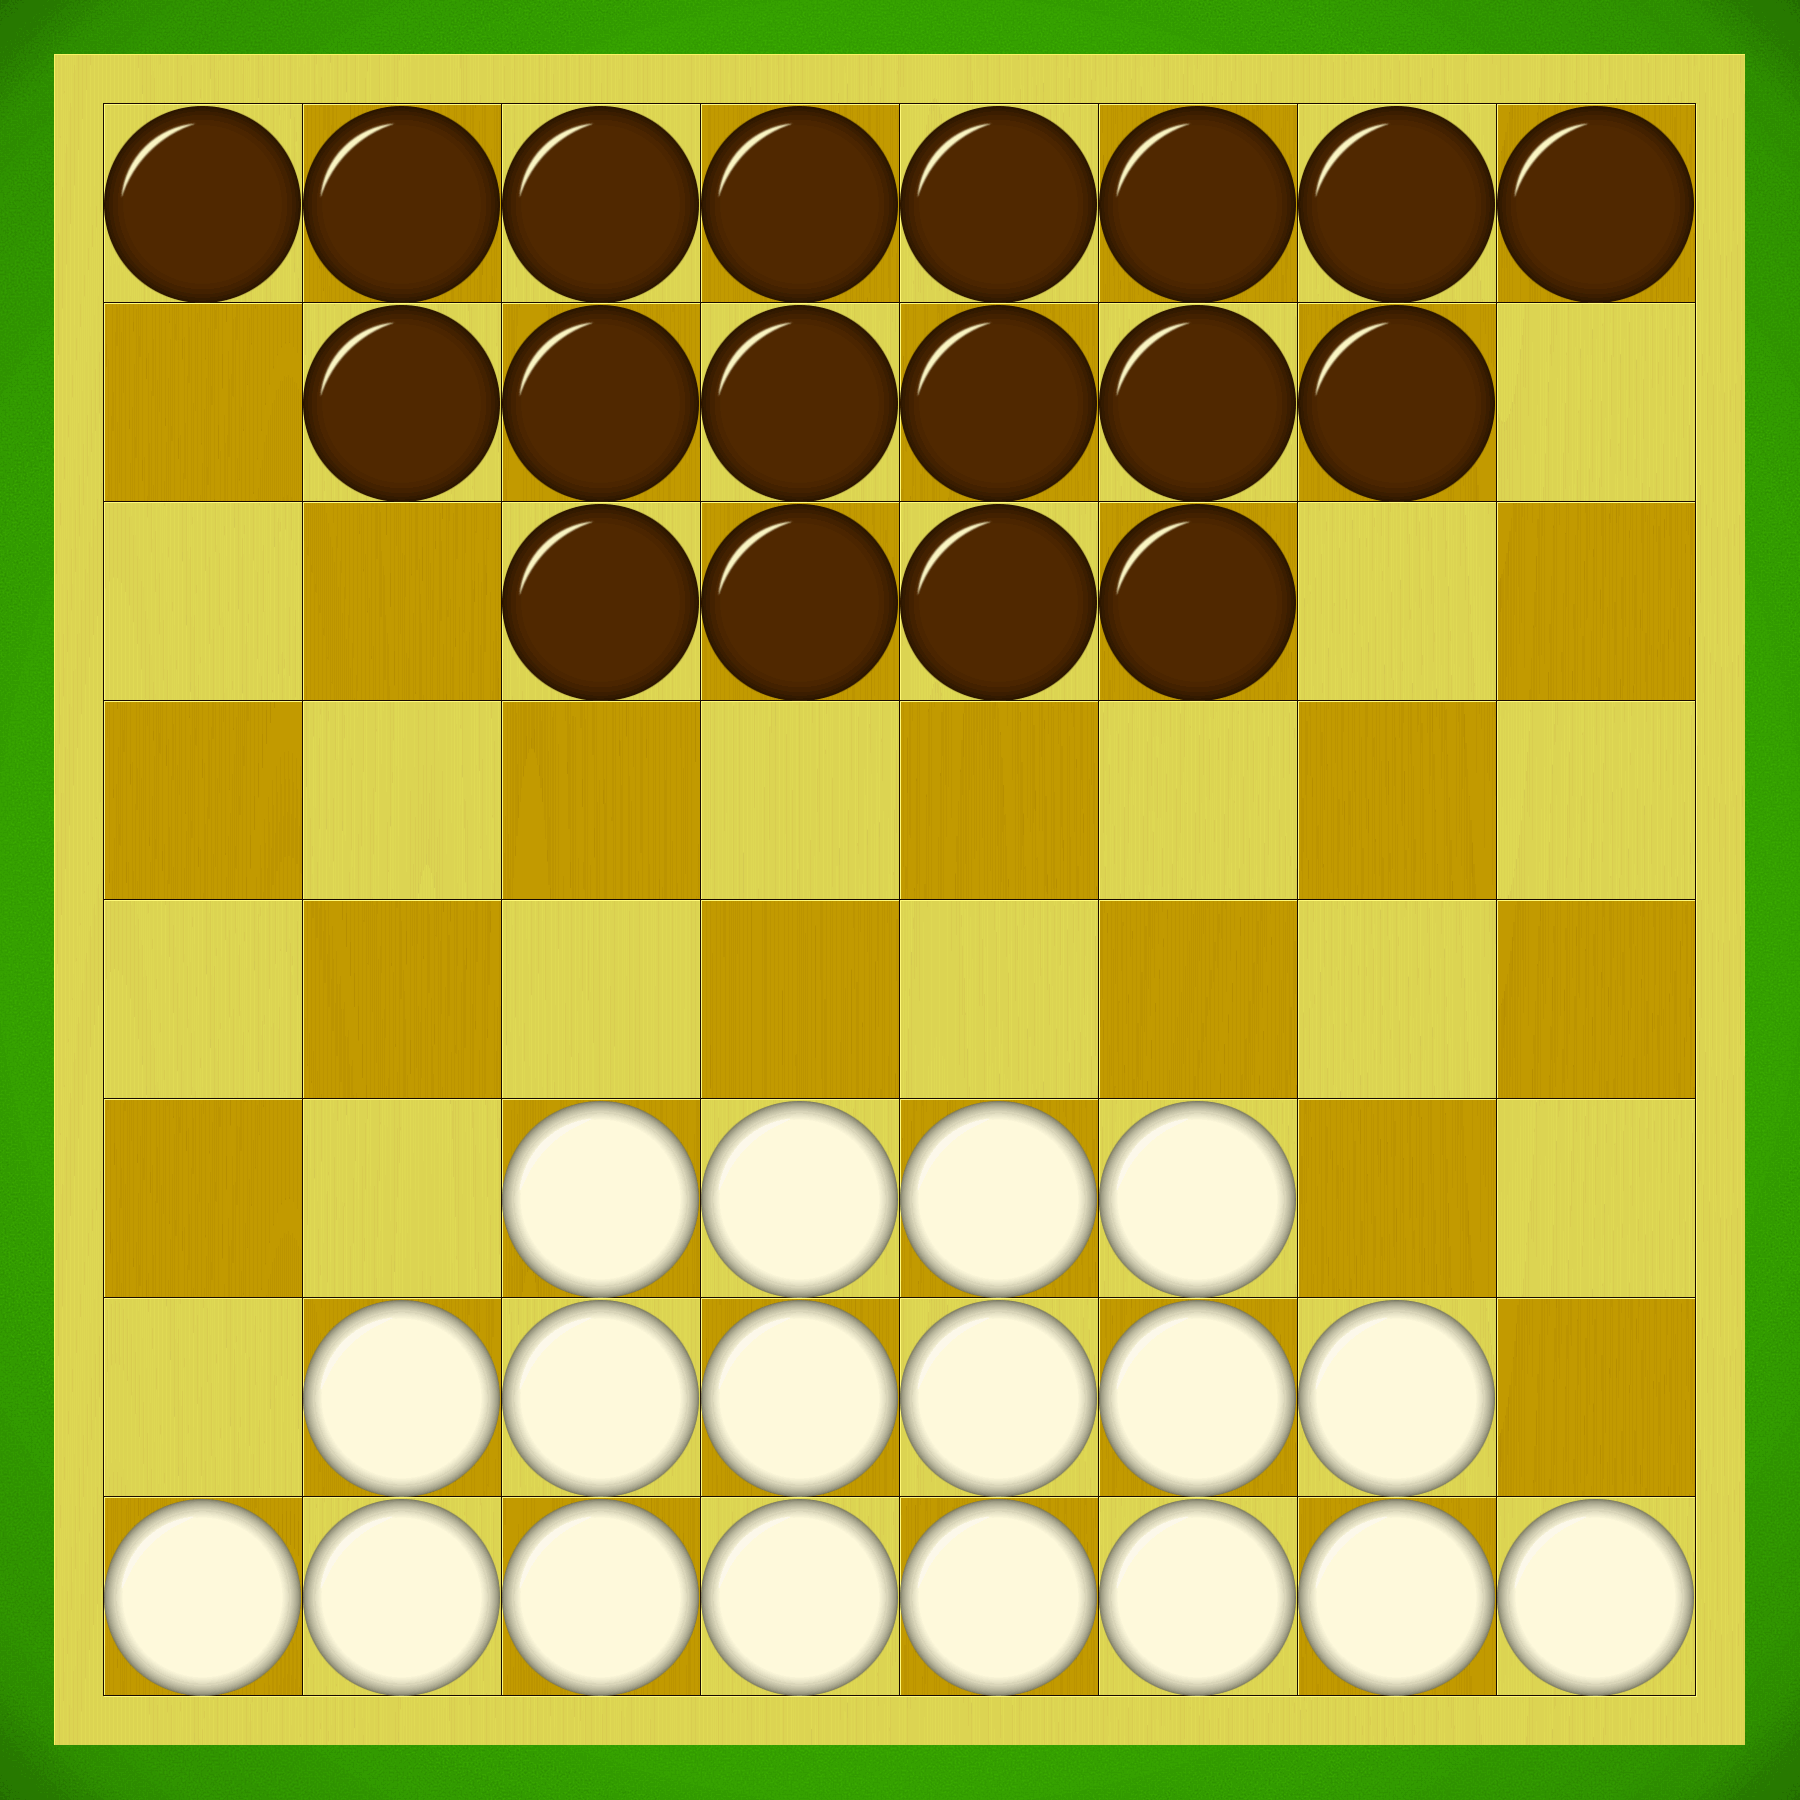
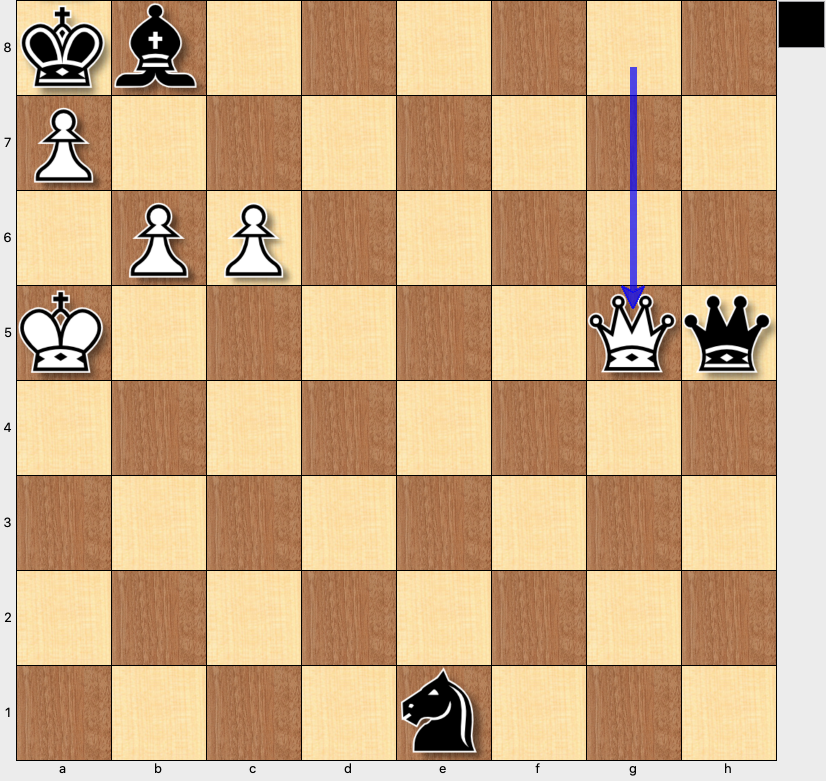
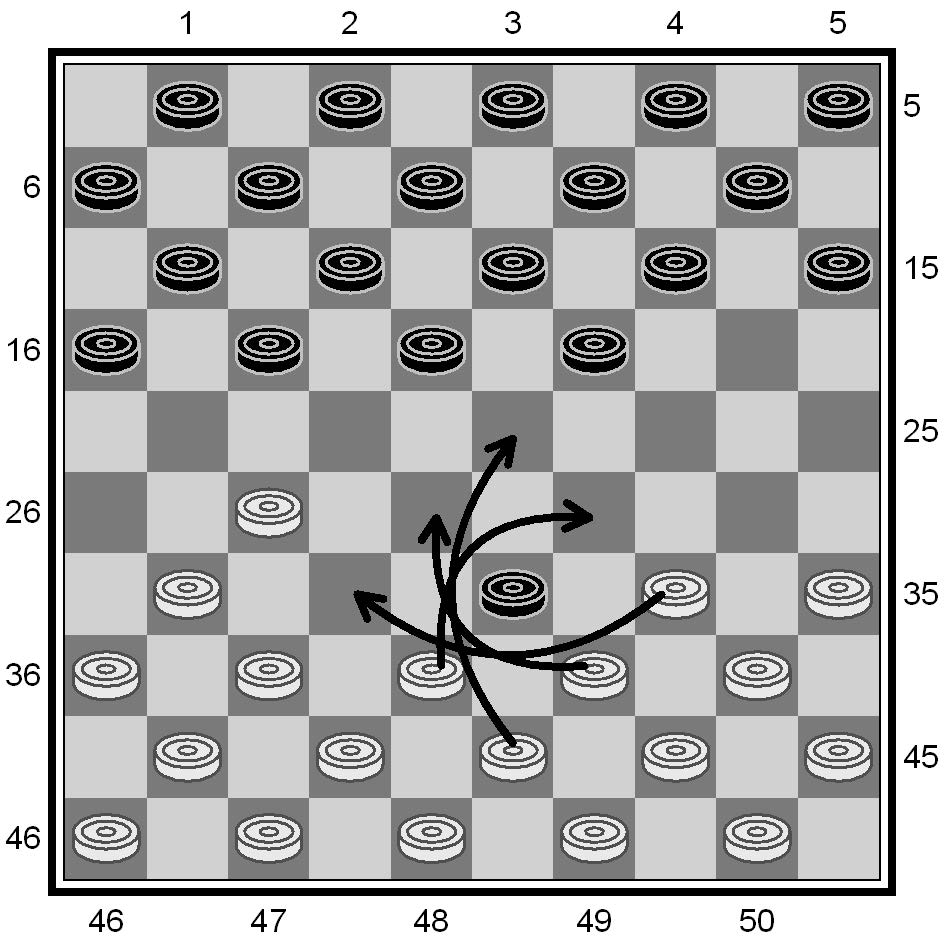
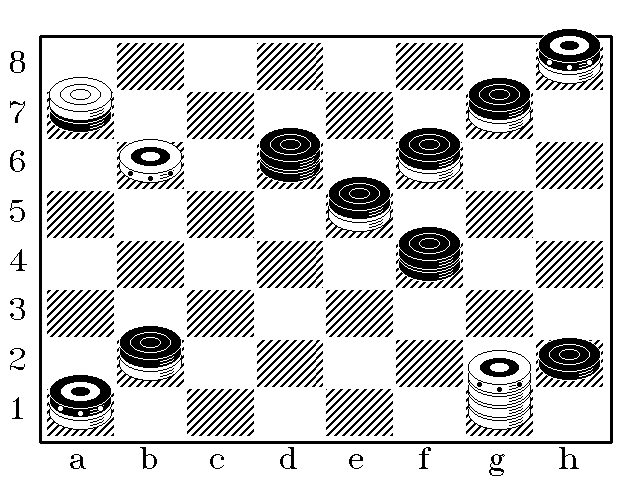
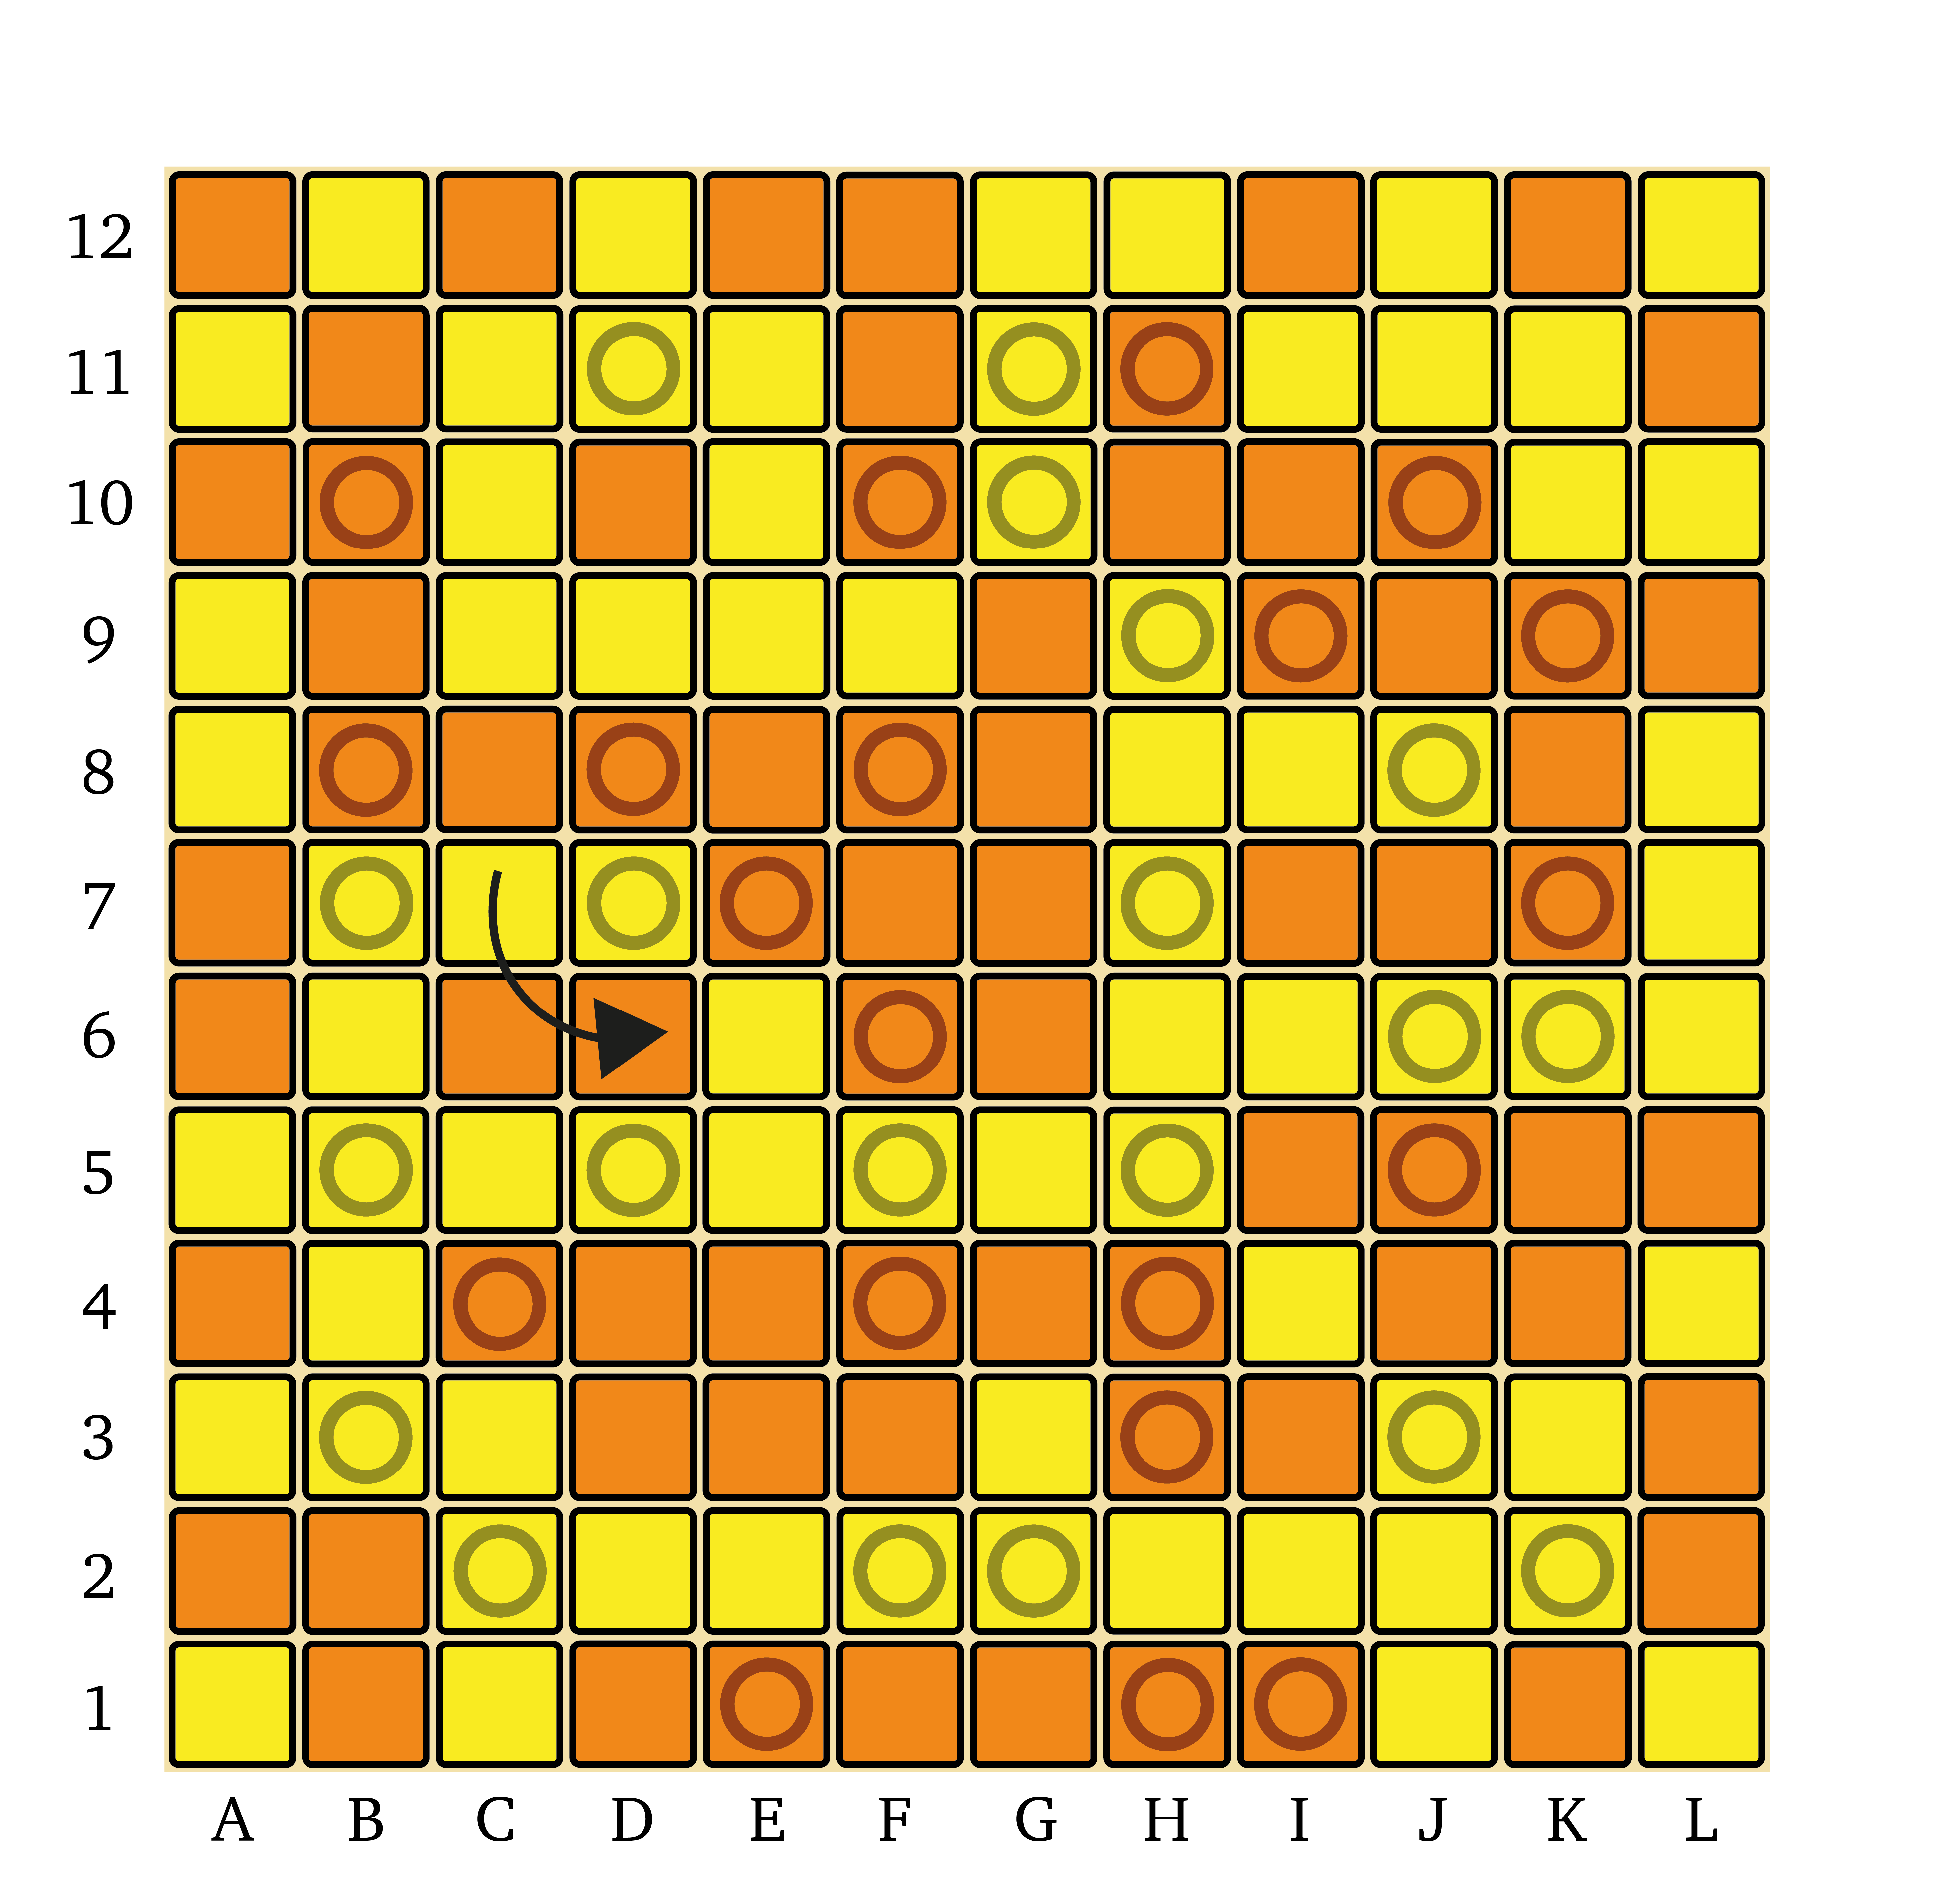
Turkish Draughts — For some reason, despite having played Checkers in my youth I never considered the idea of an orthogonal version, so seeing this game for the first time was a real eureka moment.  In Turkish Draughts, players start with 16 pieces each on the 8×8 board, and men may move one square straight ahead or in either sideways direction; kings move like Rooks in Chess and capture via the long leap.  Unlike Draughts, pieces are removed as soon as they are jumped rather than at the end of the sequence, which can allow some spectacularly long capturing sequences.  The tactical problem above (White to move and win) is a great example; the final move captures 12 checkers at once!  I love this game and play it constantly on my phone, and I feel it should be just as revered as Draughts and Checkers. 10/10.

Armenian Draughts This variant of Turkish Draughts spices things up by allowing men to move diagonally.  This seemingly small change actually completely alters the gameplay, removing the concept of opposition.  For fans of Draughts this is worth a try.  Kings are strong as in Dameo, but men here are also more mobile, which feels a bit better in my opinion.  However, I’m a little unsure about the rules reported in the English-speaking world; in Russian sources, it is said that pieces are removed at the end of a capture sequence, rather than immediately.  I’m trying to find Armenian sources to get a definitive answer, but as yet have been unsuccessful.  Most of the Russian-language information seems to come from the book Checkers: 60 Unusual Games on a Classic Board by Alexander Pavlovich, so I’m working on obtaining this book.  8/10.

bashni-problem-1

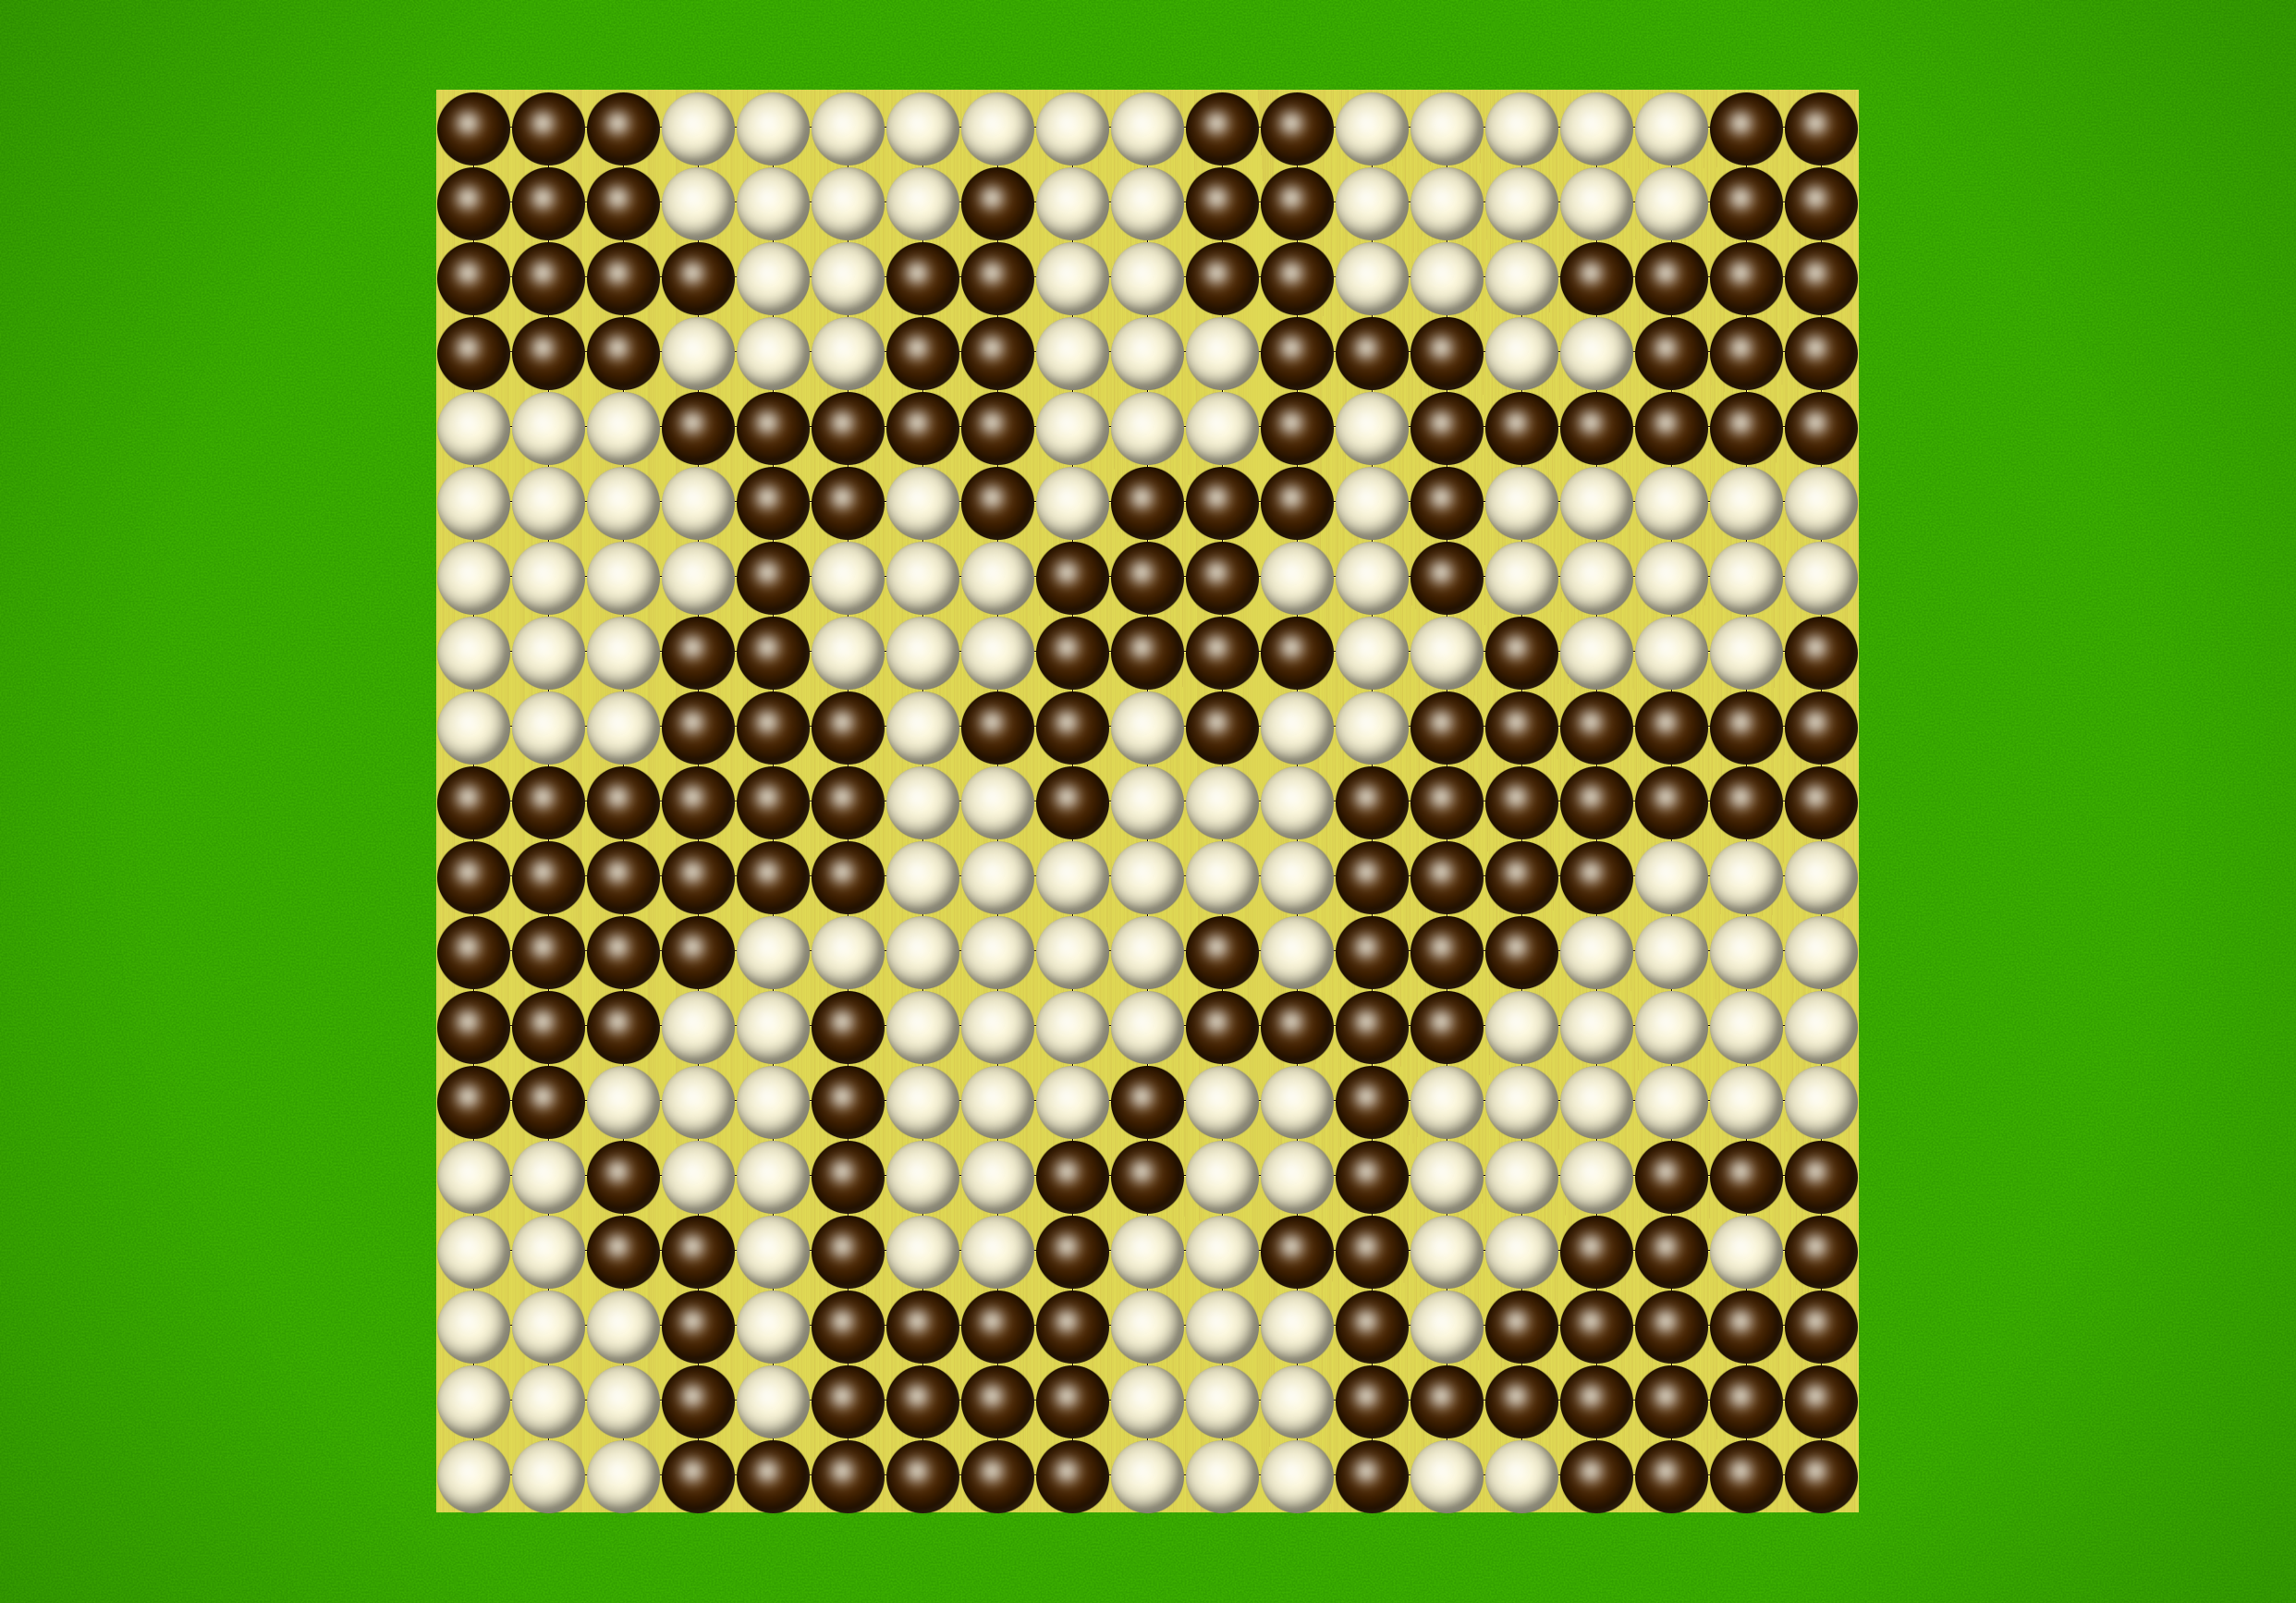
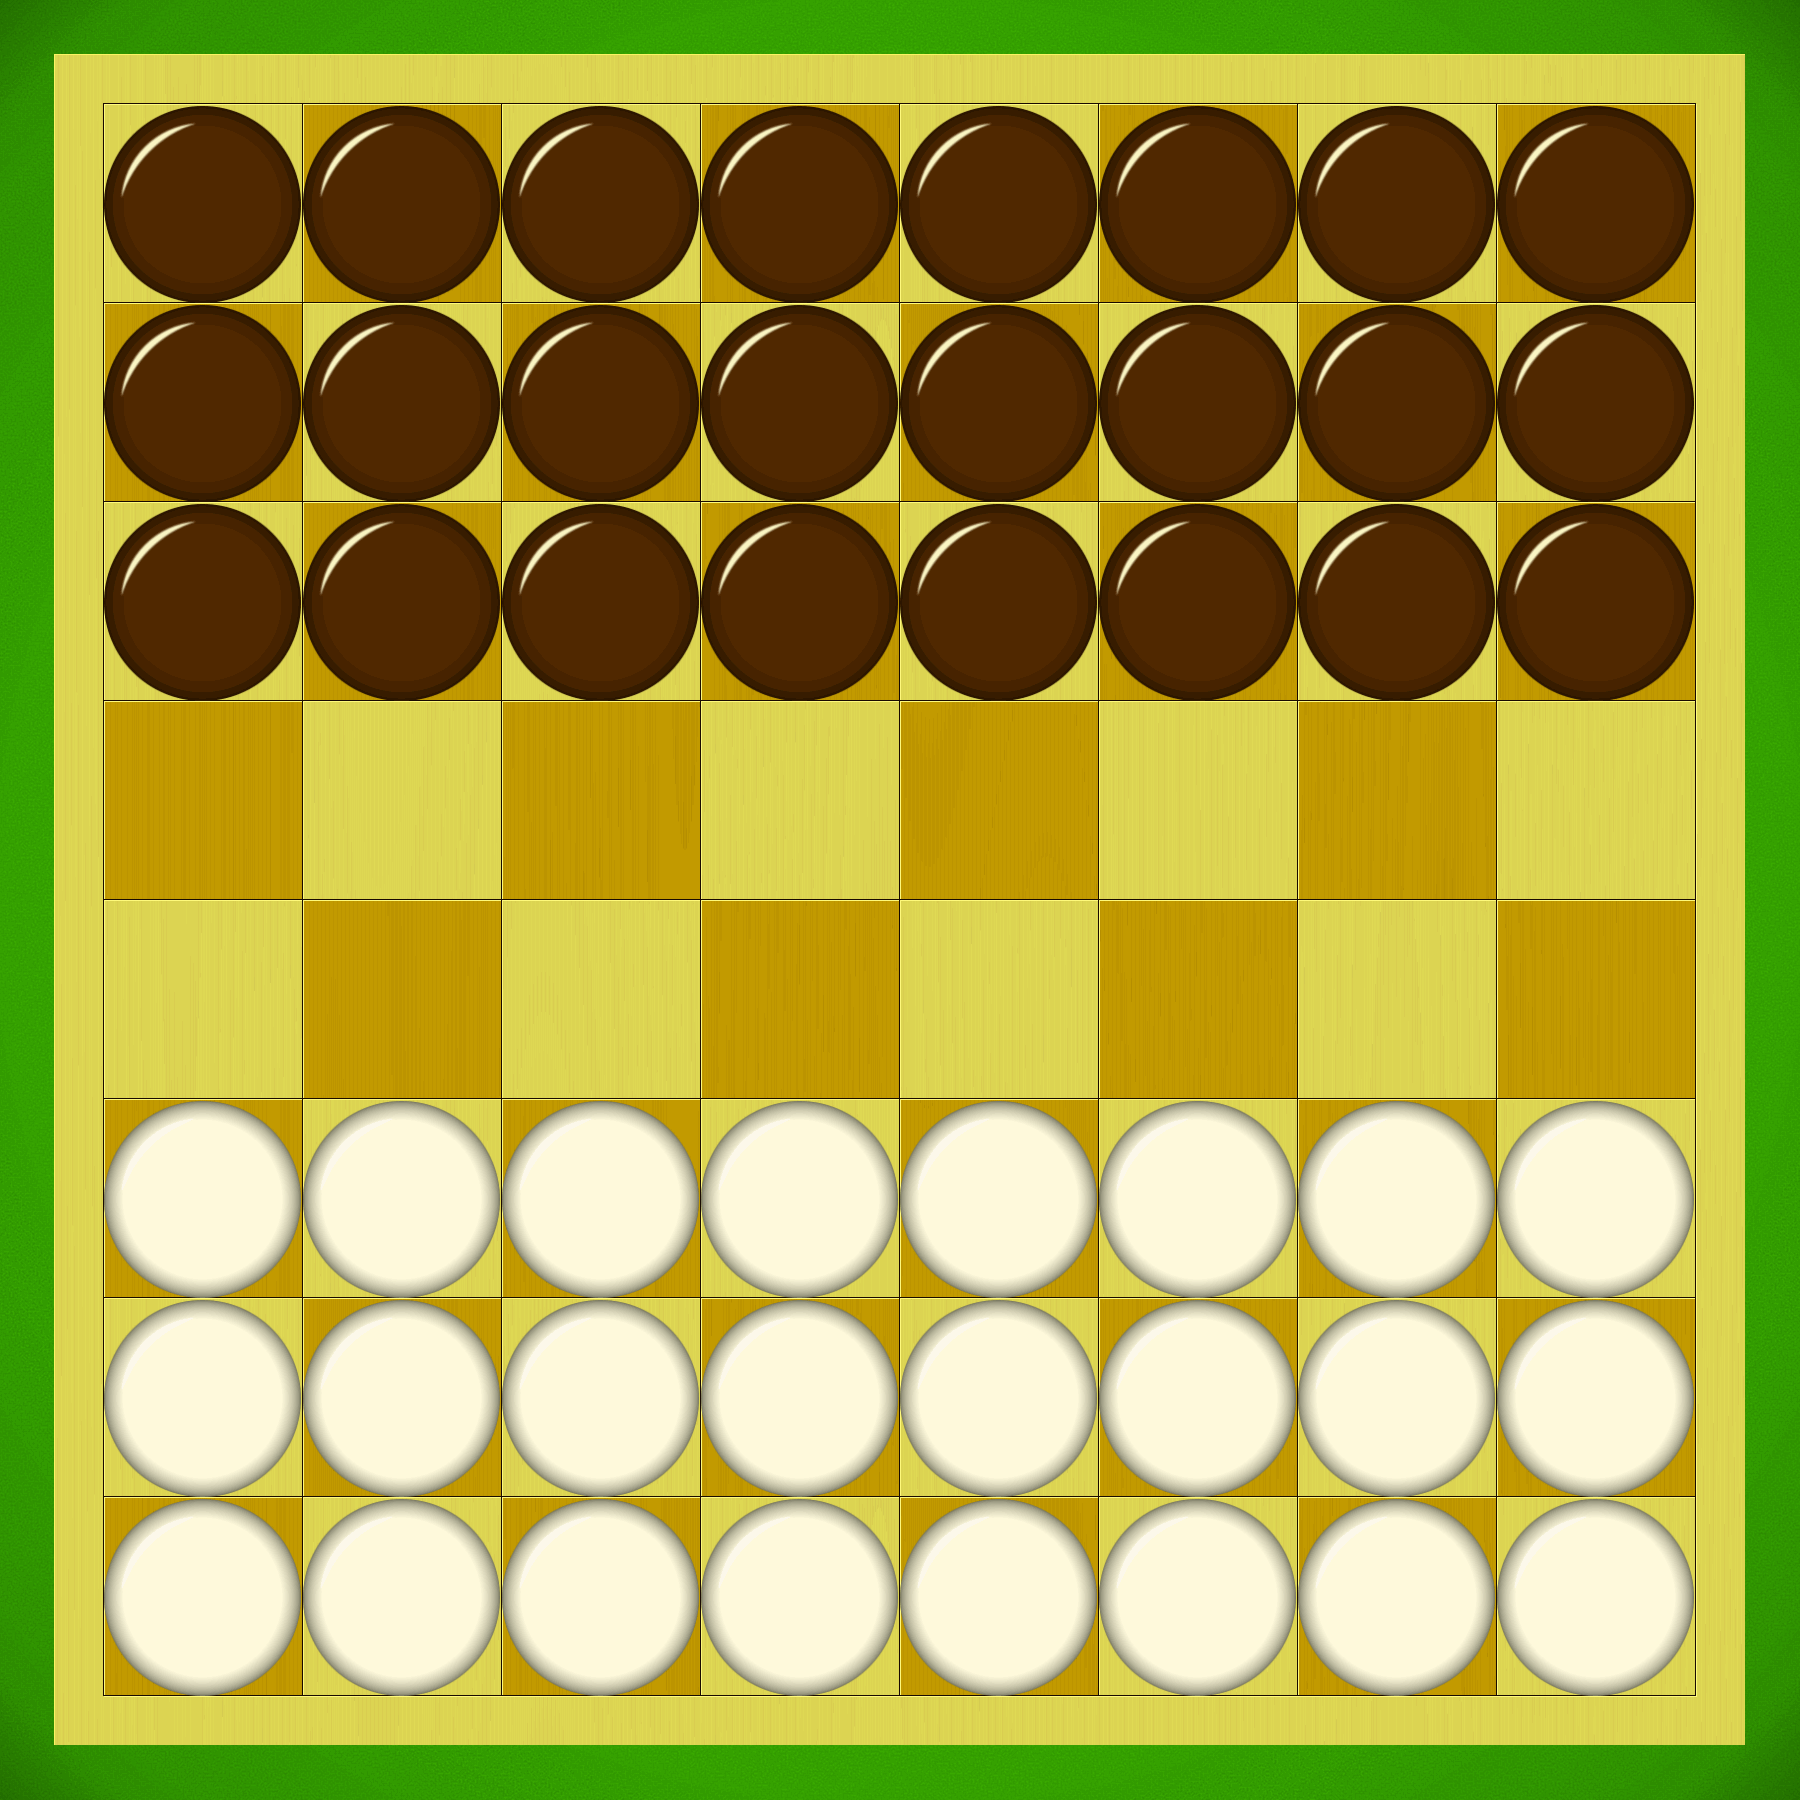
Bashni — The columnar version of Russian Draughts, where captured pieces are continually stacked under the capturer.  Stacks can be unveiled again by re-capturing the top piece off a stack, leading to amazingly complex combinations and exciting back-and-forth action.  Promoted stacks capture with the long leap, too, adding to the hectic nature of the game.  An absolute blast.  Abstract Games Magazine featured this game in a number of articles, and included numerous useful tactical and strategic tips, as well as some nice problems like the above (White to move and win).  10/10.

croda-30s-mv148

Croda — This ingenious Draughts variant takes Turkish Draughts, replaces the sideways moves of the men with diagonal ones, but keeps capture orthogonal only… then stuffs the 8×8 board with 48 pieces.  The result is an action-packed game with lots of opportunities for exciting combinations.  Dameo was inspired by this game, but I actually prefer Croda; the lack of linear movement and the weaker kings produces a simpler game that feels more balanced to me.  Admittedly the average Croda game will be much longer than a typical Dameo game, but all other things being equal I usually prefer longer games to shorter ones.  A viable alternative to 10×10 Draughts, if you’re worried about drawishness.  9/10.

Fanorona A traditional elimination game that uses contact capture, and that later inspired Freeling’s Bushka (see above).  Very fun to play casually, as the action starts immediately, but as with Bushka I find it quite confusing.  I like a more subtle opening phase, and as any reader of this blog will know, I always like larger boards.  Still, well worth a try!  There’s no denying it’s a unique game that’s packed with excitement.  7/10.

Killer Draughts — An attempt to alleviate the drawishness of Draughts, Killer forces kings to stop immediately on the square just beyond the piece it captures at the end of a capturing sequence, but only if that piece was also a king.  This simple change, derived from a similar rule in Thai Draughts, allows two kings to win against one in the endgame (as compared to four kings being required in the standard game).  The rule is simple to understand, and large endgame tablebases have already been calculated for this variant, making it possible to adjust one’s endgame knowledge through study.  In my view, a straightforward and effective option for tightening up the Draughts endgame.  9/10.

Lasca — The famous Chess player Emanuel Lasker invented this game, which is the columnar adaptation of English Draughts (or Straight Checkers, for my American compatriots).  Sadly the result is too constrained and dull, lacking all the verve and vitality of Bashni.  Still better than a kick in the head, and I imagine this game could be substantially improved if someone with design chops spent some time with it.  5/10.

Loca This tricky little number flips one’s Draughts expectations around, allowing men to capture like kings.  The result is a weird experience, with carnage starting very quickly.  I’ve only played this twice, and I don’t think I could possibly take this game seriously, but it was pretty fun.  7/10.

Territory Games

Amazons — This is one of those games that I admire, but don’t actually like playing that much.  Players move their Amazons around the board like Chess Queens, blocking off an adjacent square after each move; the last player to move wins.  In play the game becomes a territorial battle, and there is ample scope for delicate strategic play.  I just find it a bit dull in practice; the interaction between the Amazons is indirect, and slightly unsatisfying for me.  An amazing invention and clearly a great game, just not one that suits my temperament.  7/10.

cannons-bullets-1

Cannons and Bullets — This clever game allows players to place pieces on vacant hexes, but only if that hex is directly visible to a friendly piece; if a piece is visible to three or more friendlies, you may place a double-stack, which then can be fired as a cannon to capture enemy pieces.  I find this game easy to get into and remarkably fun in play; games are quick, generally speaking, but there is scope for some cute tactics.  Recommended.  8/10.

desdemona-1

Desdemona — This odd combination of Amazons and Othello is actually more fun for me than Amazons itself.  The addition of toggle-capture adds some much-needed interactivity to the game that I find enjoyable.  Desdemona has been through a few revisions to avoid degenerate play, but the final version works well and is recommended if, like me, you find Amazons just a little bit sterile.  8/10.

HexSygo — One of the few, elite members of the hexagonal-Go-games-that-actually-work club.  A straight-up translation of the Sygo rules to the hexagonal board results in a game with Go-like territorial vibes but a very unique tactical feel.  I haven’t played this game all that much but it’s on my list to study more deeply.  8/10.

Keil — I don’t like to be this negative, but I really, really dislike Keil.  Keil takes Go, known for its minimalistic visuals and high clarity, and transforms it into a game that makes no visual sense, where links between cells and stones are obscure and hard to follow.  In essence, in my opinion it takes Go and removes virtually all of the clarity and aesthetic beauty.  This is perhaps the only abstract game I’ve tried so far that actually upset me when I attempted to play it.  0/10.
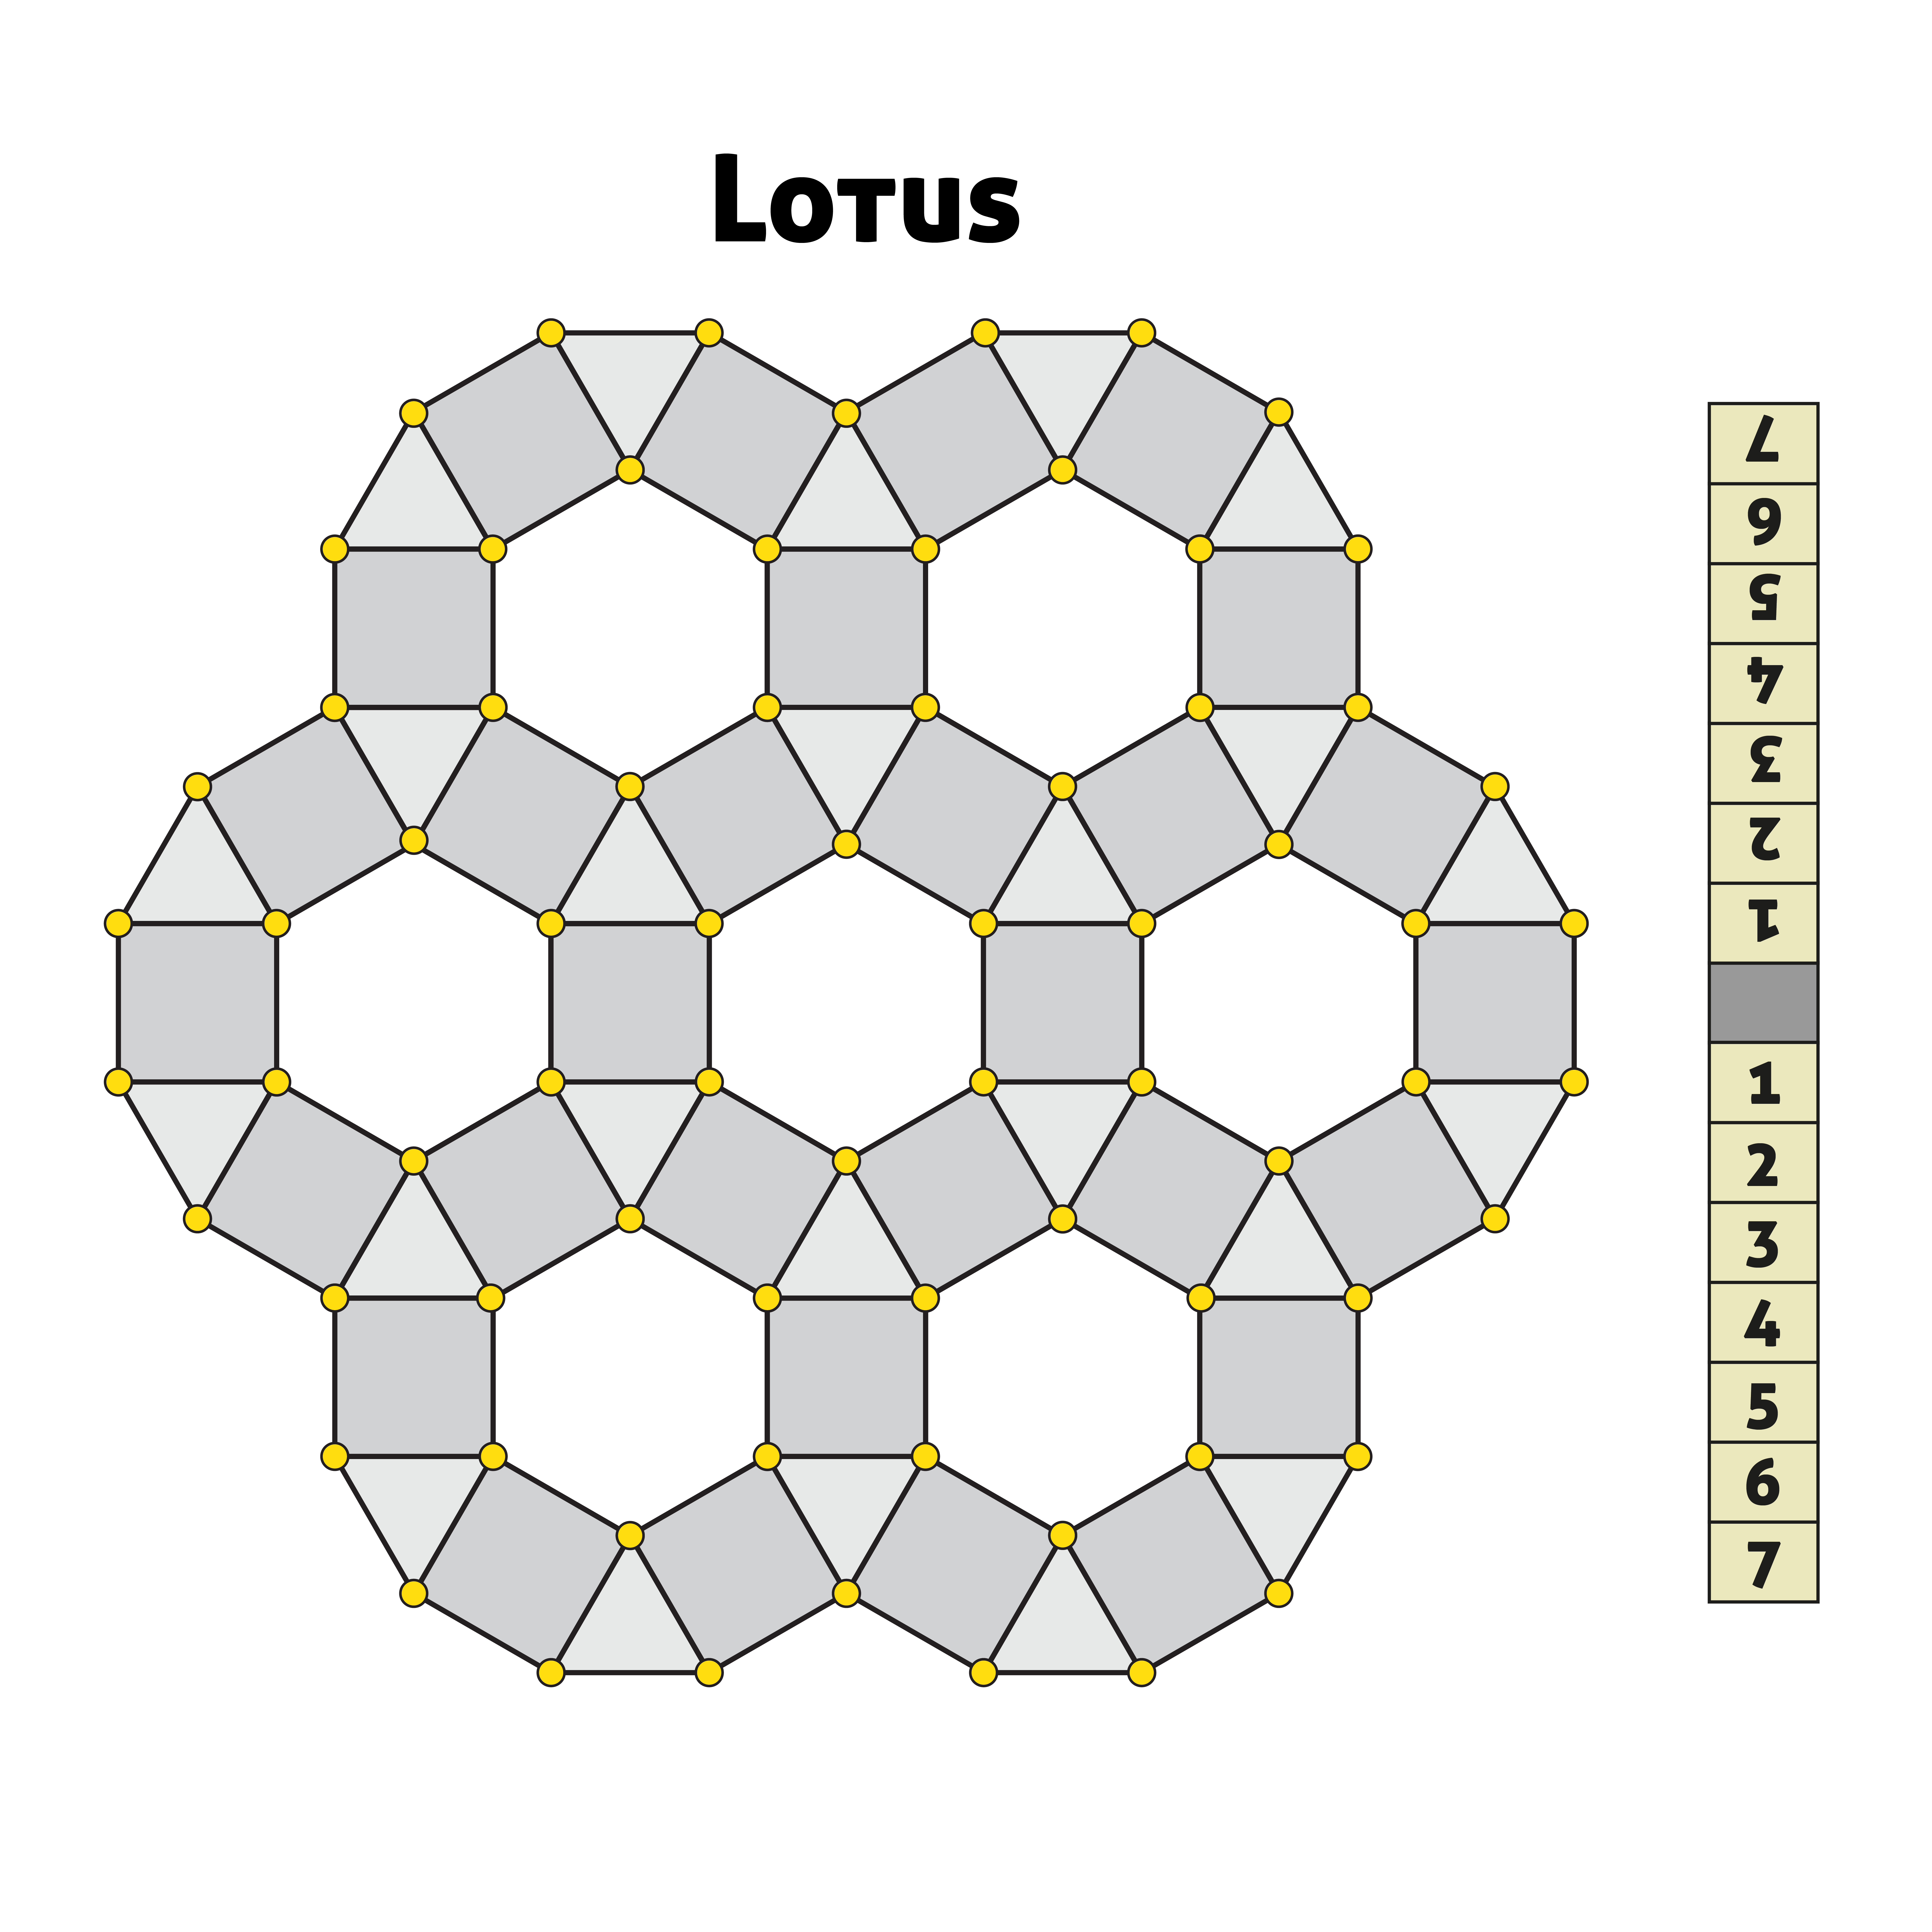
Lotus-01

Lotus I mentioned this game in a previous post as an under-appreciated gem, and I stand by that assessment.  The odd board and Othello-style capture give this game a unique impression, and it’s certainly a better use of the Kensington board.  Check out the other post for more.  8/10.

MacBeth — Not much to say about this game other than the fact that it’s a translation of Othello to a hexagonal grid, and it works great.  I’ve had a few games of this, one of which ended in a last-second victory for me that had all the thrills of a close scrape in its parent game.  I liked this enough to program it for Ludii, so clearly I like it a lot.  9/10.

Medusa-10-01

Medusa — Another unusual territory game with an unusual board, Medusa again features in my other post with brief reviews of cool abstracts.  Medusa is like Lotus’ big brother, with a more deliberate, strategic feel.  Both games make fine use of Rosette’s clever conceit of granting eternal life to hexagonal formations of a single colour.  Give it a whirl!  8/10. (read more here)

othello1

Othello This game is of course a classic, present in millions of homes throughout the world, and is particularly popular in Japan.  Othello is one of the rare modern-ish abstracts to actually have a robust tournament scene, with regular world championships and ample high-level online opponents available.  The flip-flopping capture mechanism can be a bit opaque at first, but Othello is so instantly accessible and fun that it’s easy to break this out with non-gamers and have a good time.  My only lament is that the 10×10 version is so hard to find anywhere; I still occasionally trawl Japanese auction sites looking for a copy, and someday I hope to grab one at last.  This game often gets denigrated in the abstract community for some reason, but there’s a lot of depth here and it’s absolutely possible to take up Othello as a lifestyle game.  9/10.

tumbleweed-sample

Tumbleweed A rare example of a game birthed on the BGG forums that has gained some kind of community around itself, thanks to the herculean promotional efforts of the creator Mike Zapawa and superfan Alek Erickson.  Tumbleweed is a territorial game centred on a line-of-sight placement mechanic and the use of stacks of counters.  I initially was excited about this game, as it felt novel while still being comprehensible, but in subsequent play something bugs me about it.  I haven’t quite worked out what that is, but I suspect a few factors play into it: it’s hard to justify expending lots of effort on another territory game when I’ve invested so much in Go; OTB play is tough to organise due to the need for hundreds upon hundreds of counters; and large board sizes produce a much more interesting game, IMO, but most players prefer smaller sizes.  However, it’s definitely a significant and enjoyable game and I would recommend trying it; plus it has a tournament scene, which is a rare and precious thing.  8/10. (read more here)

Largest Group Cascading

Catchup-new-attempt-hex9-01

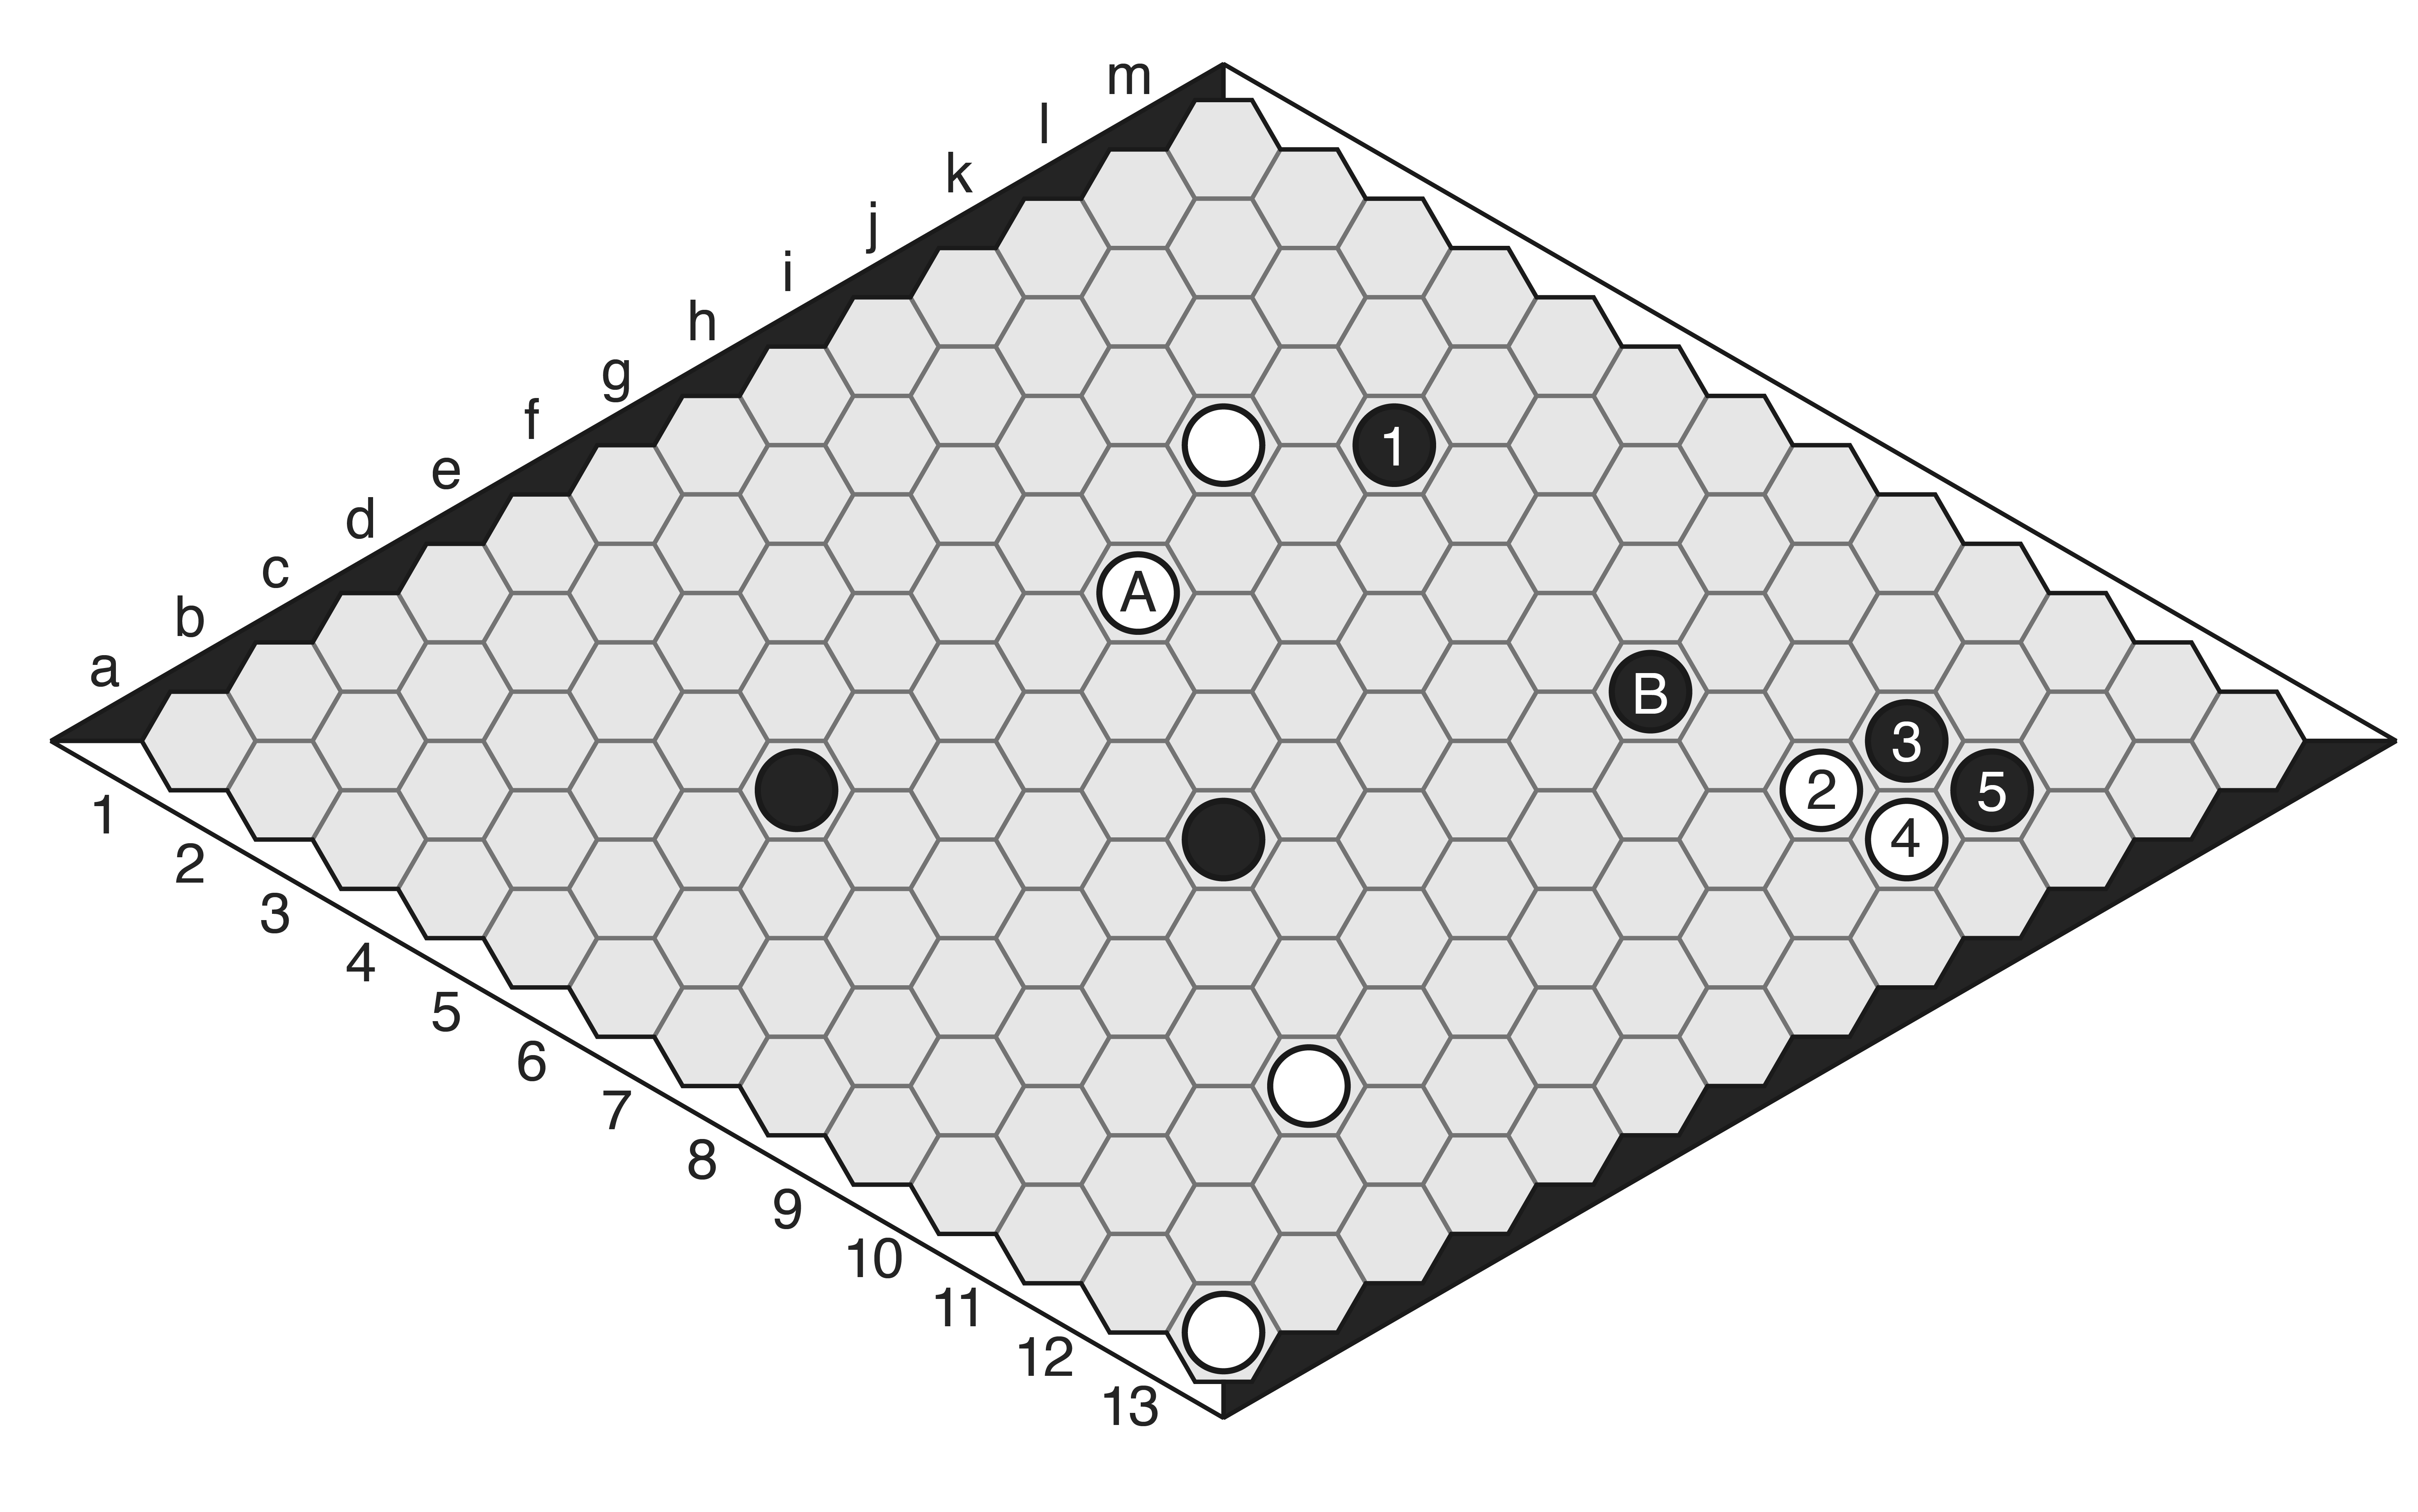
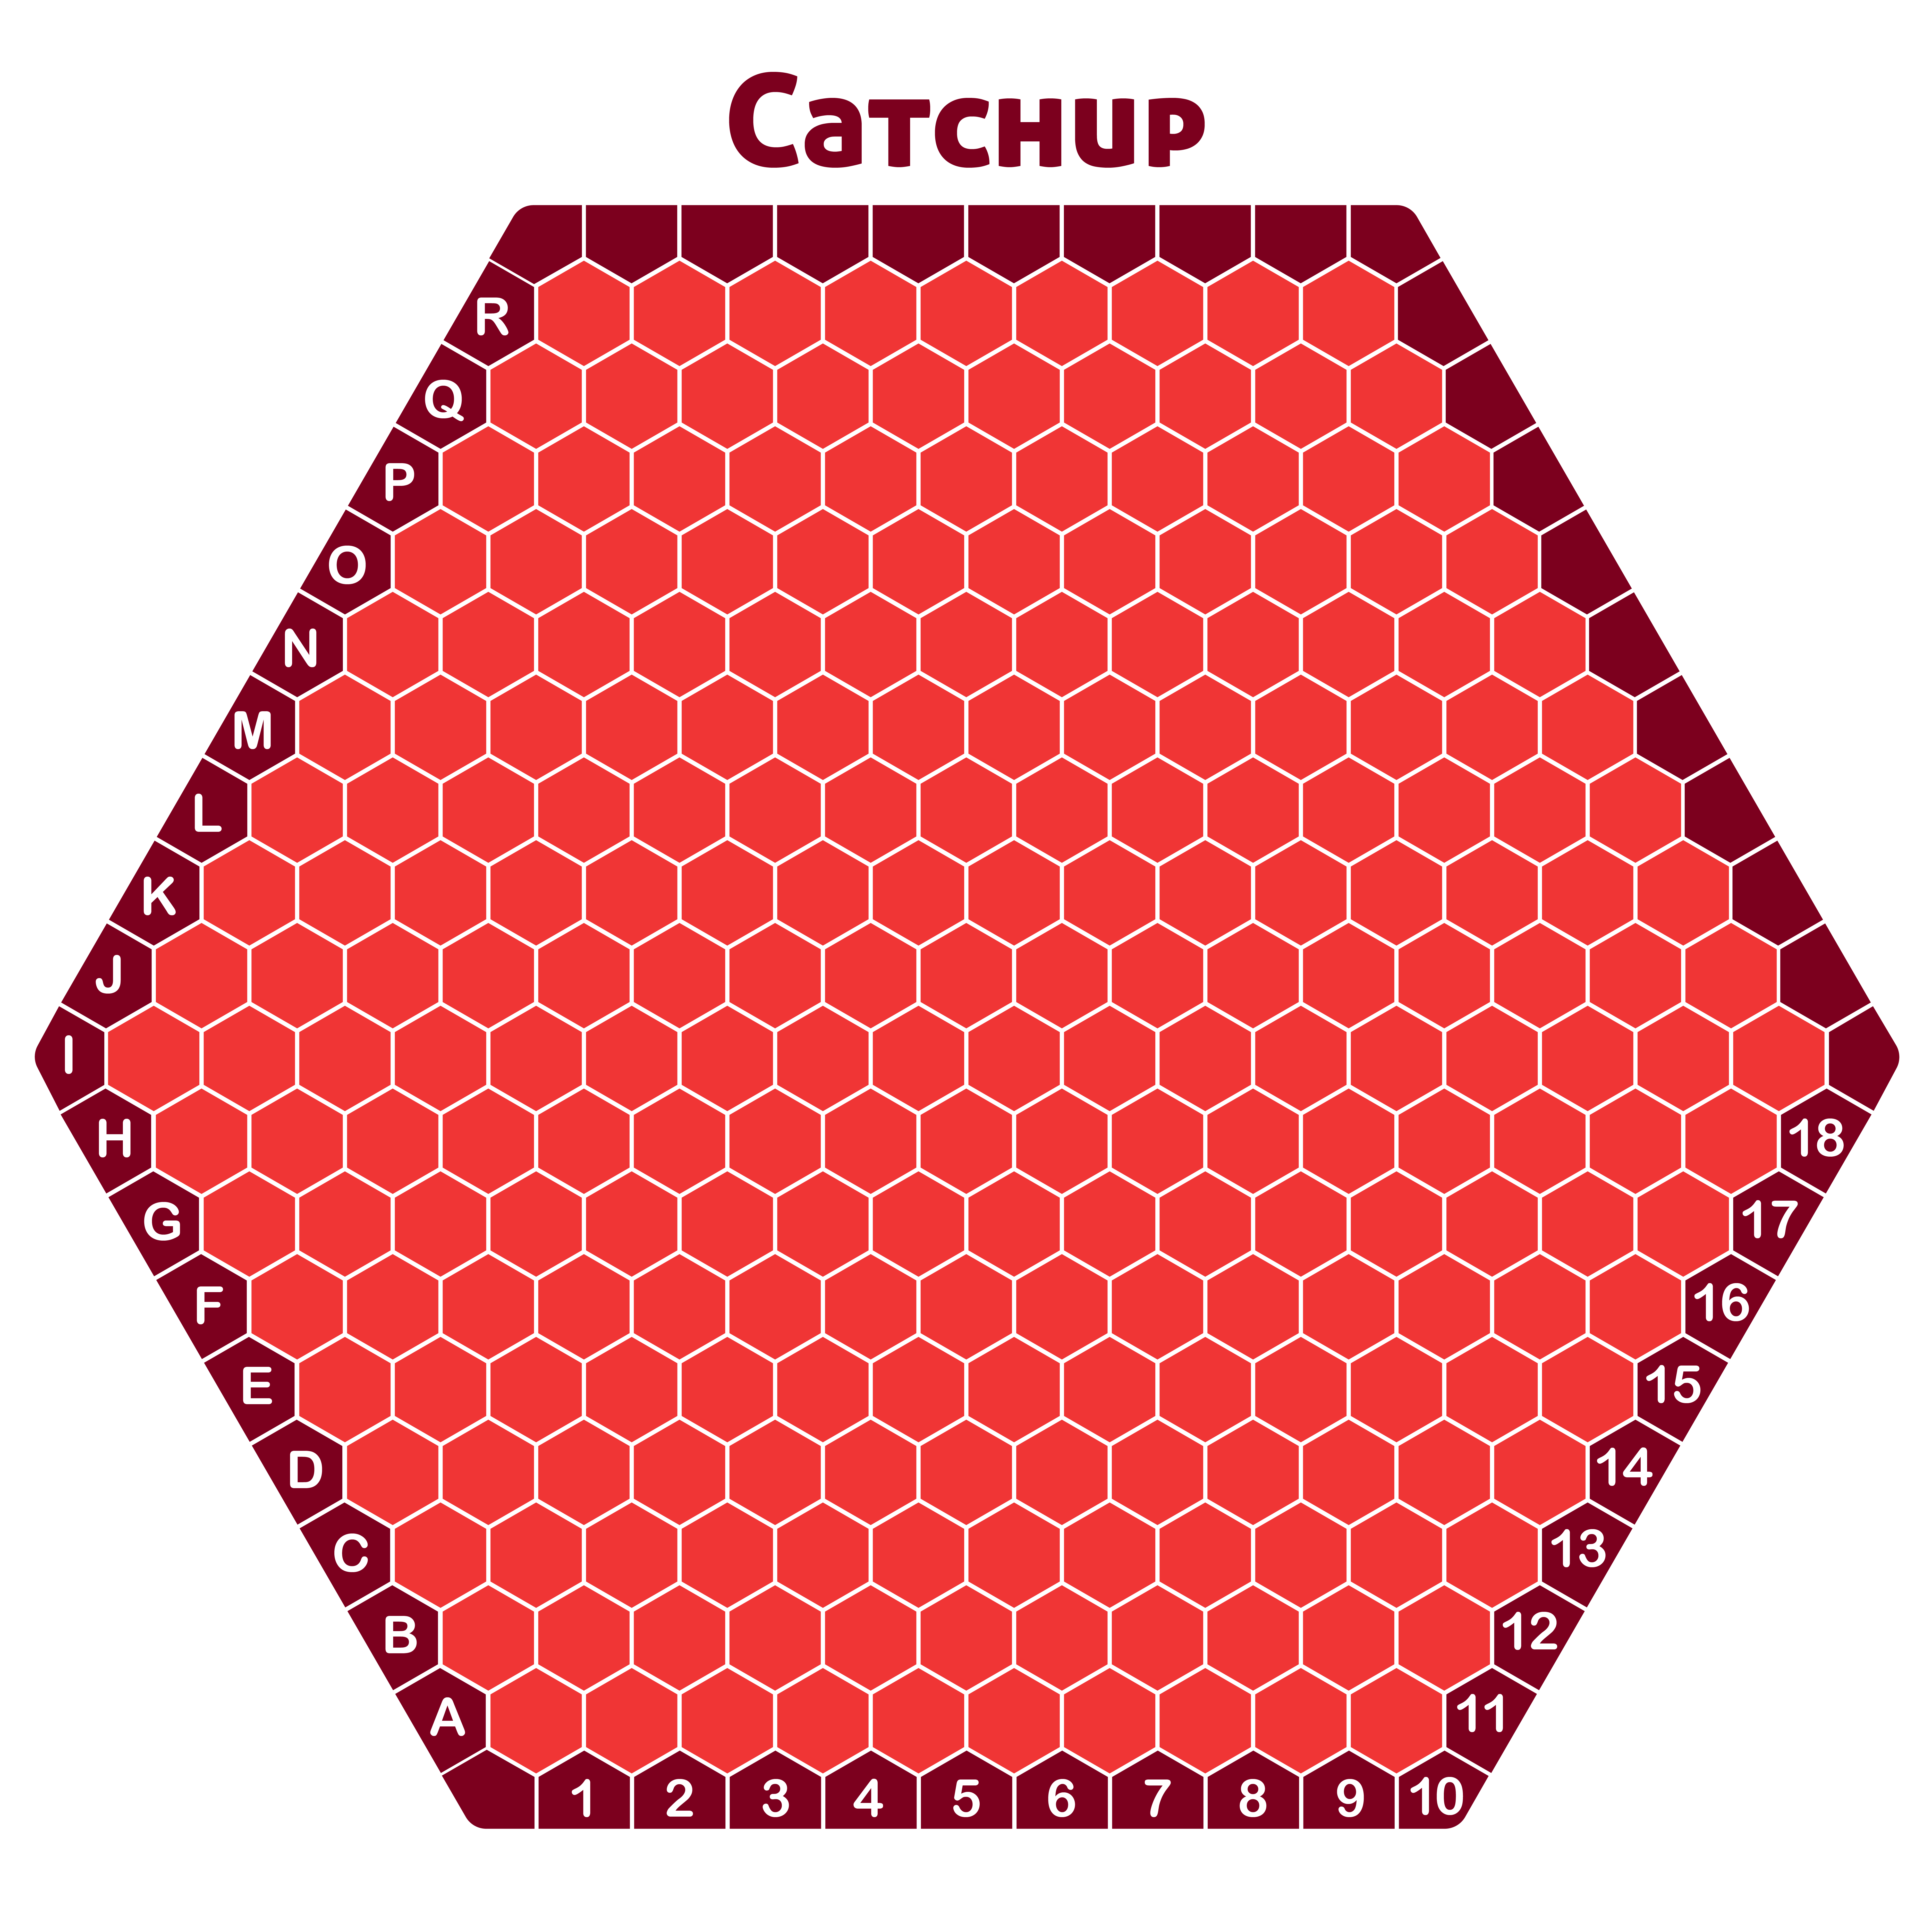
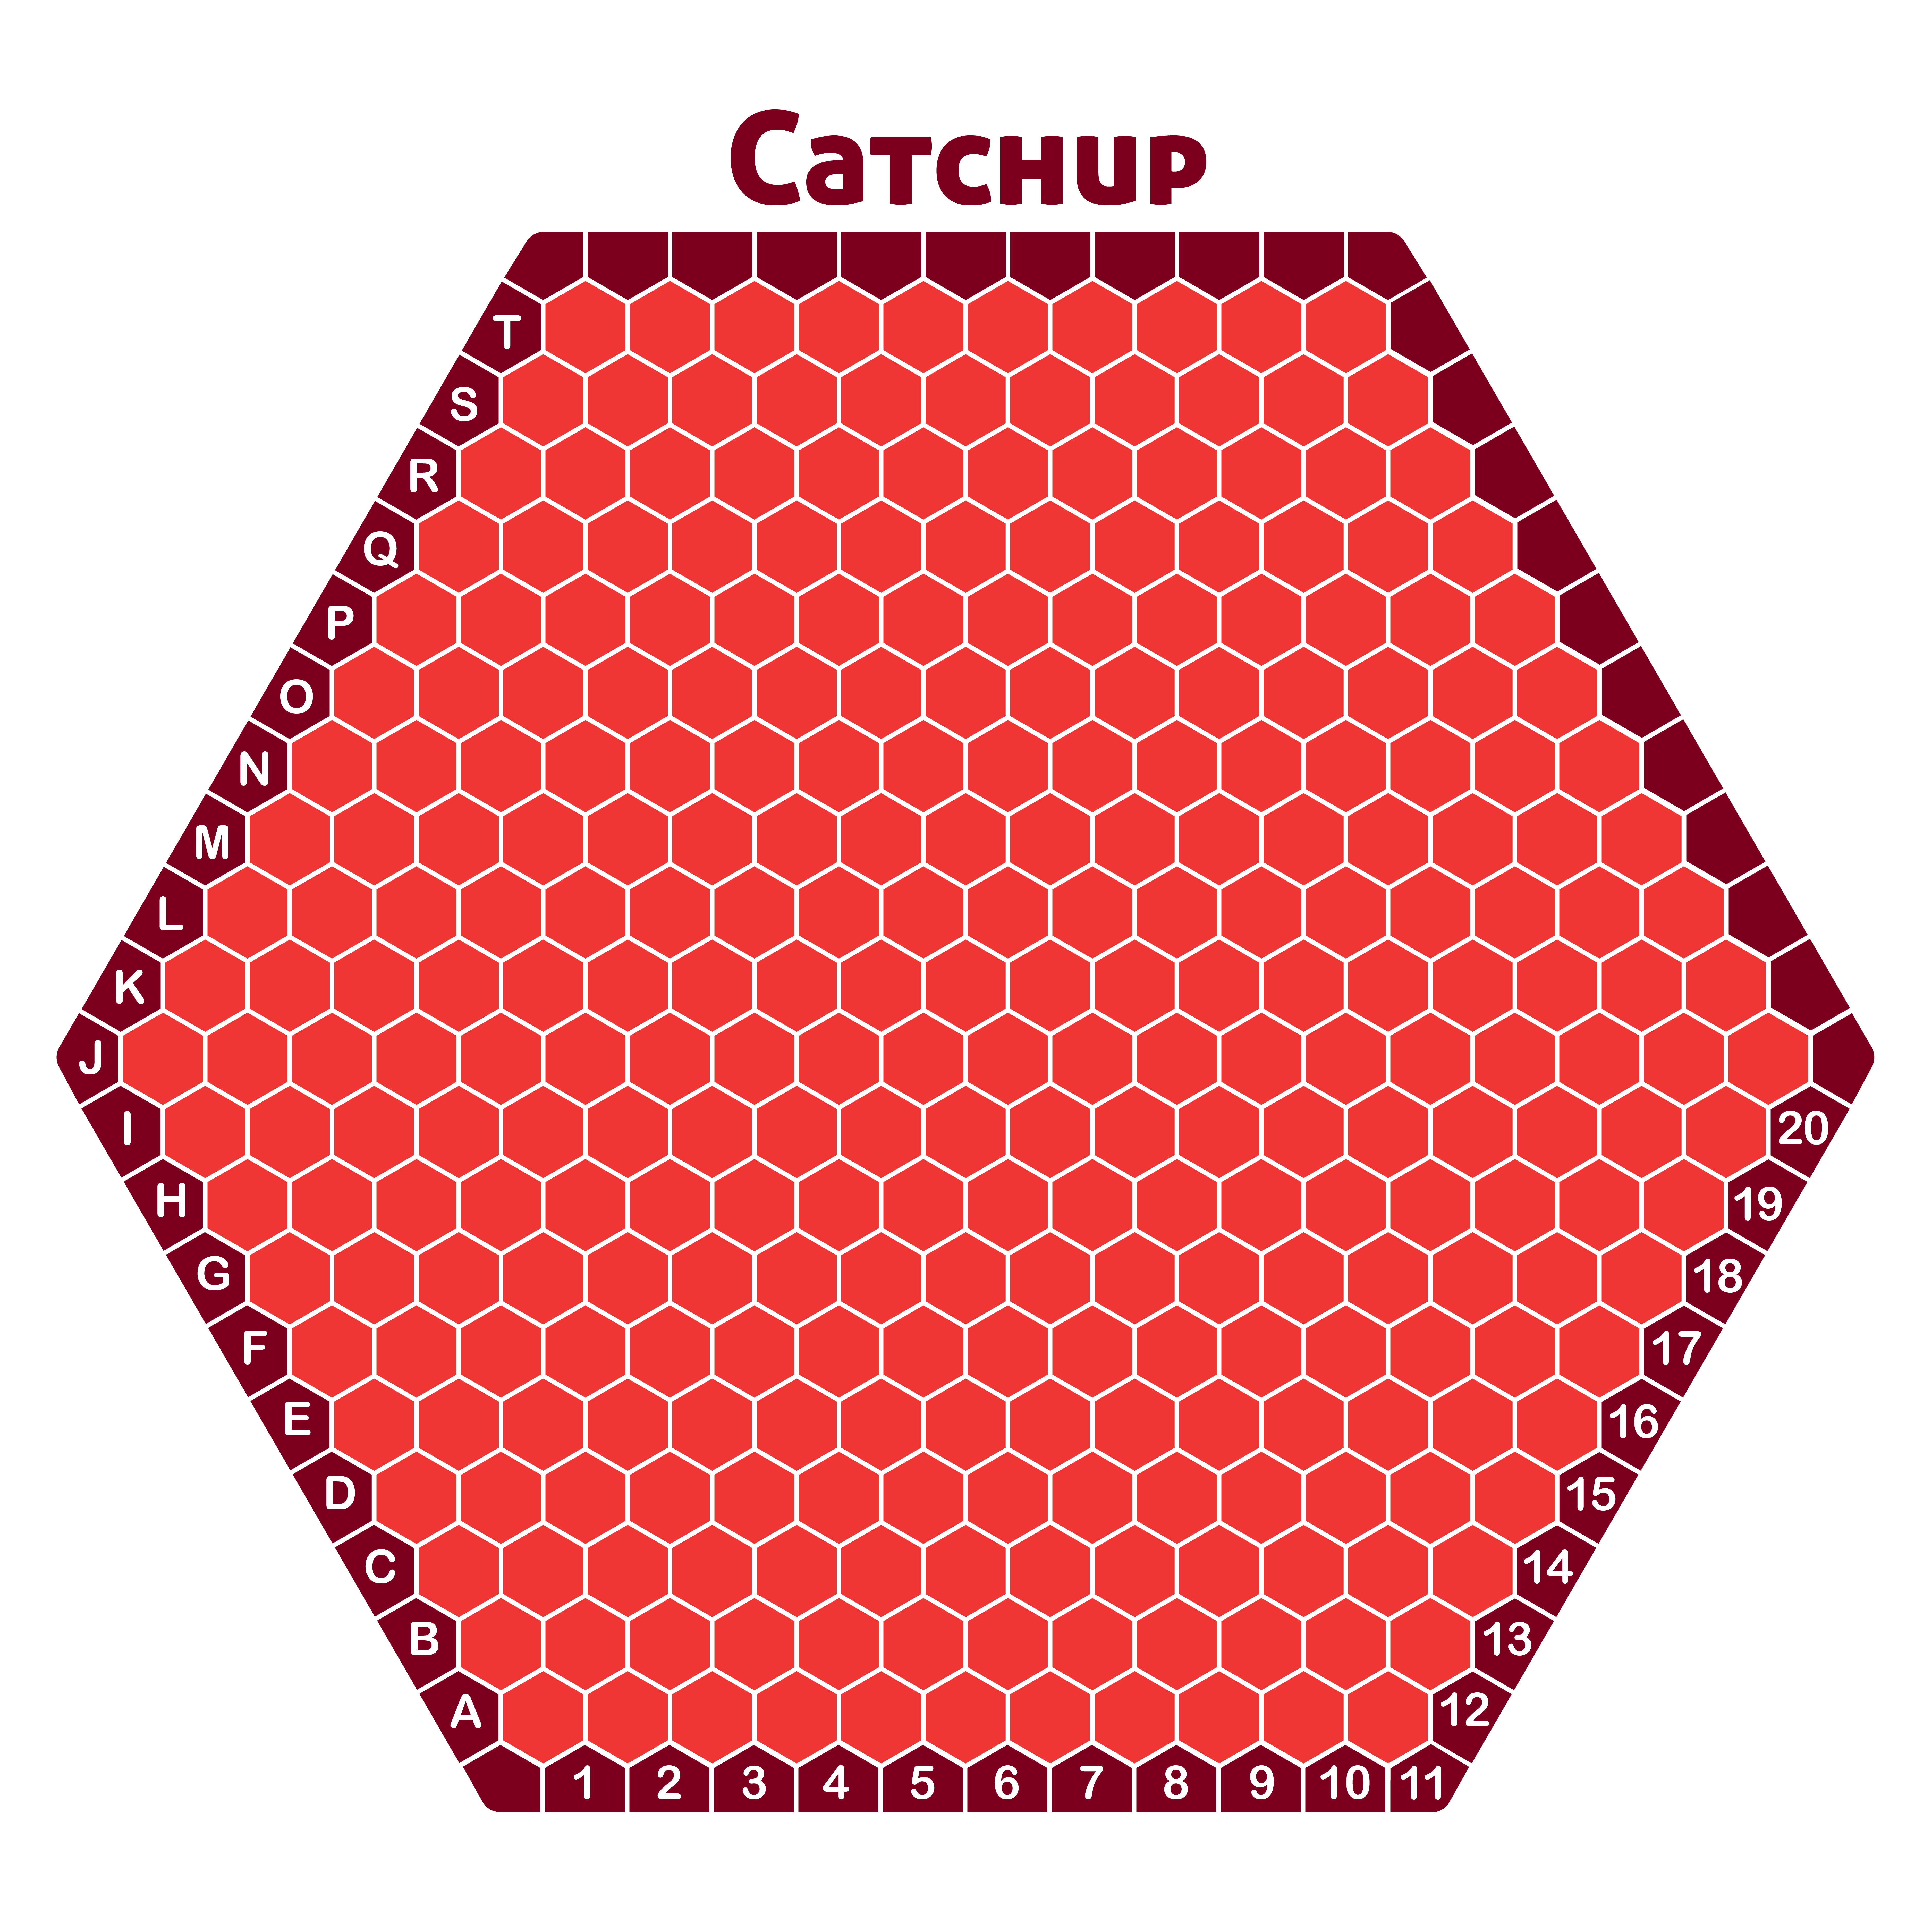
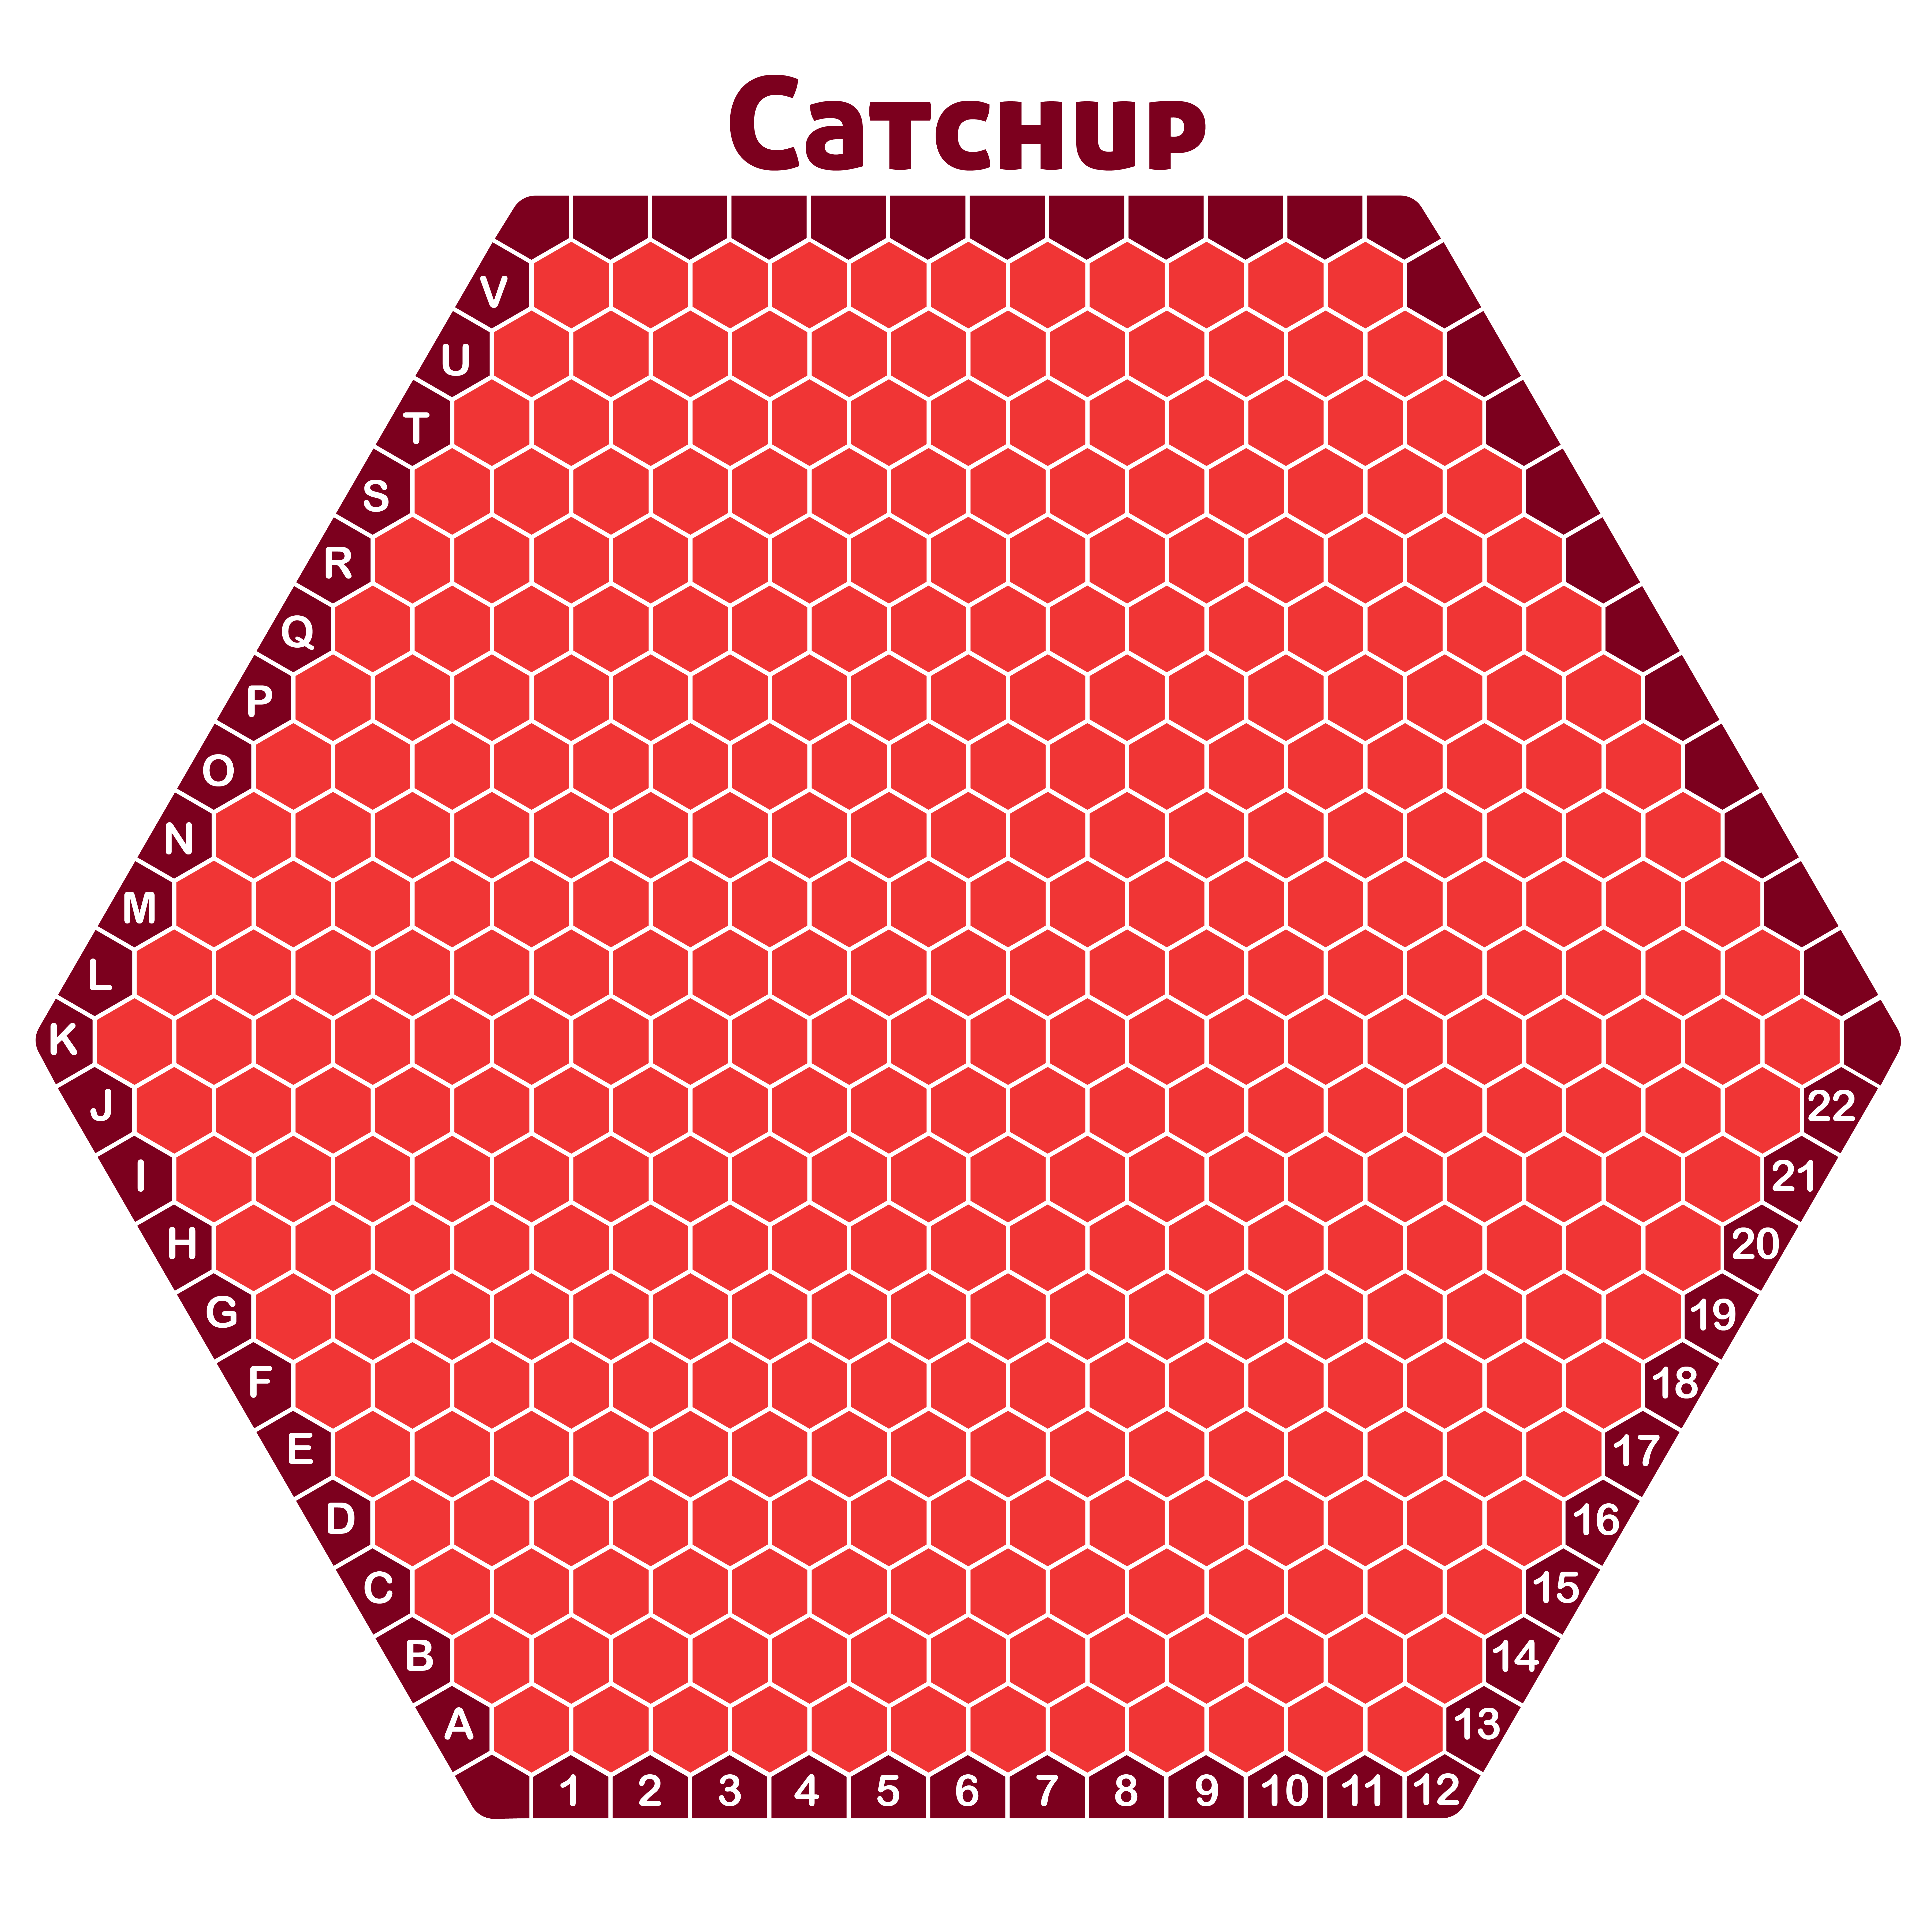
My order-9 Catchup board design.

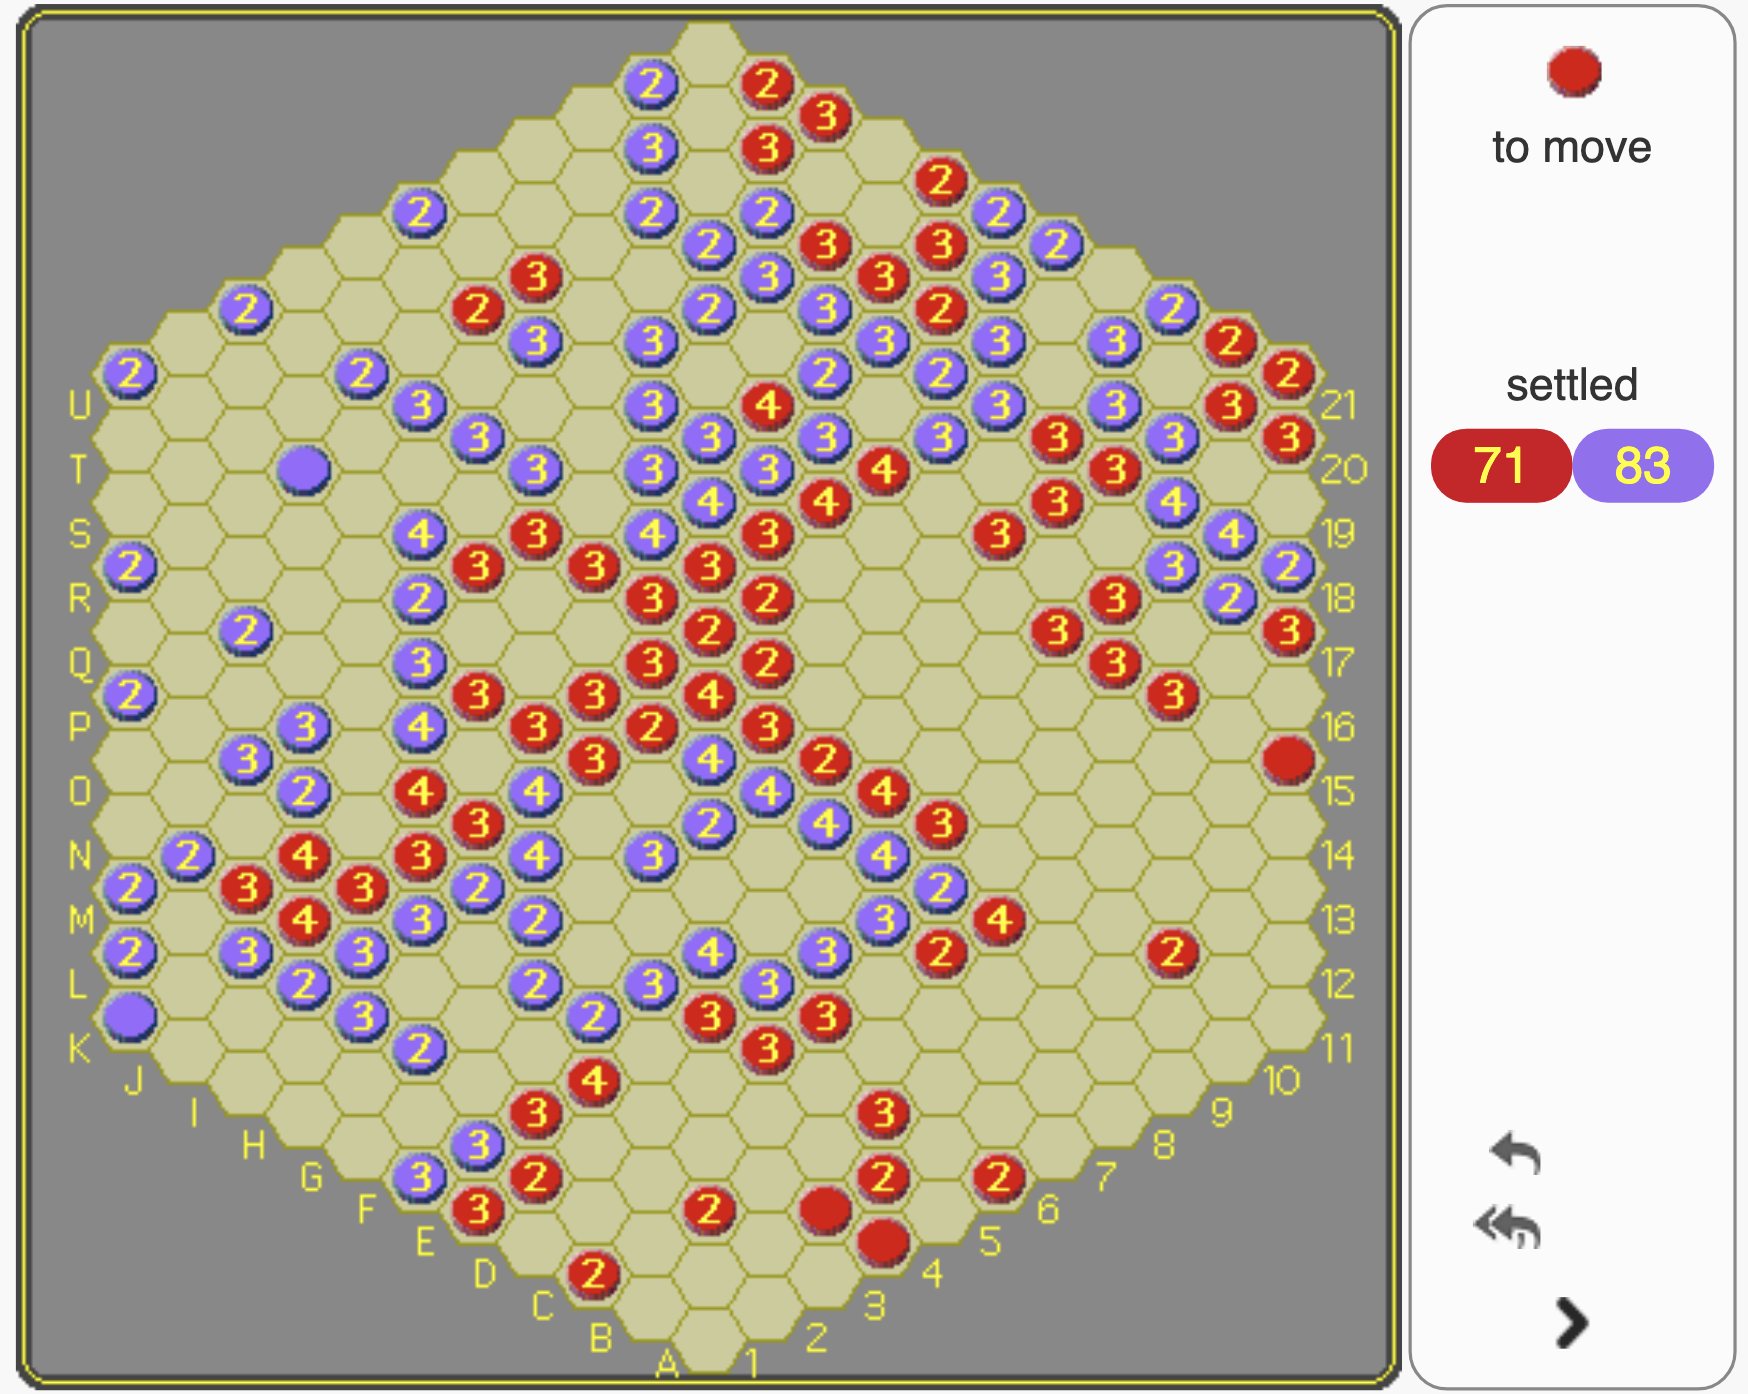
Catchup — Easily the best game made by Nick Bentley, which regularly gets criticised by the BGG abstracts community, and Nick himself, because of the need to keep score.  This is unjust in my view, as the Catchup mechanism, in which players may place 3 stones in a turn instead of 2 if the opponent matches or exceeds their current score, is a brilliant innovation that gives this game an immediately apparent uniqueness and flair.  For a very long time it was only played on order-5 hex boards, which means games were so short that there was not much room for strategy.  Despite my love for this game I don’t enjoy playing it on the order-5 board.  Thankfully, now people seem to be playing on order-7 boards more often, which is a significant improvement.  I printed an order-9 board for myself, and I sometimes play at even larger sizes using Ai Ai.  In any case, I consider this one of the finest modern abstracts, and in a more sensible world it would have been published and would be getting played by millions of adoring fans.  10/10. (read more here)

Migong-test1

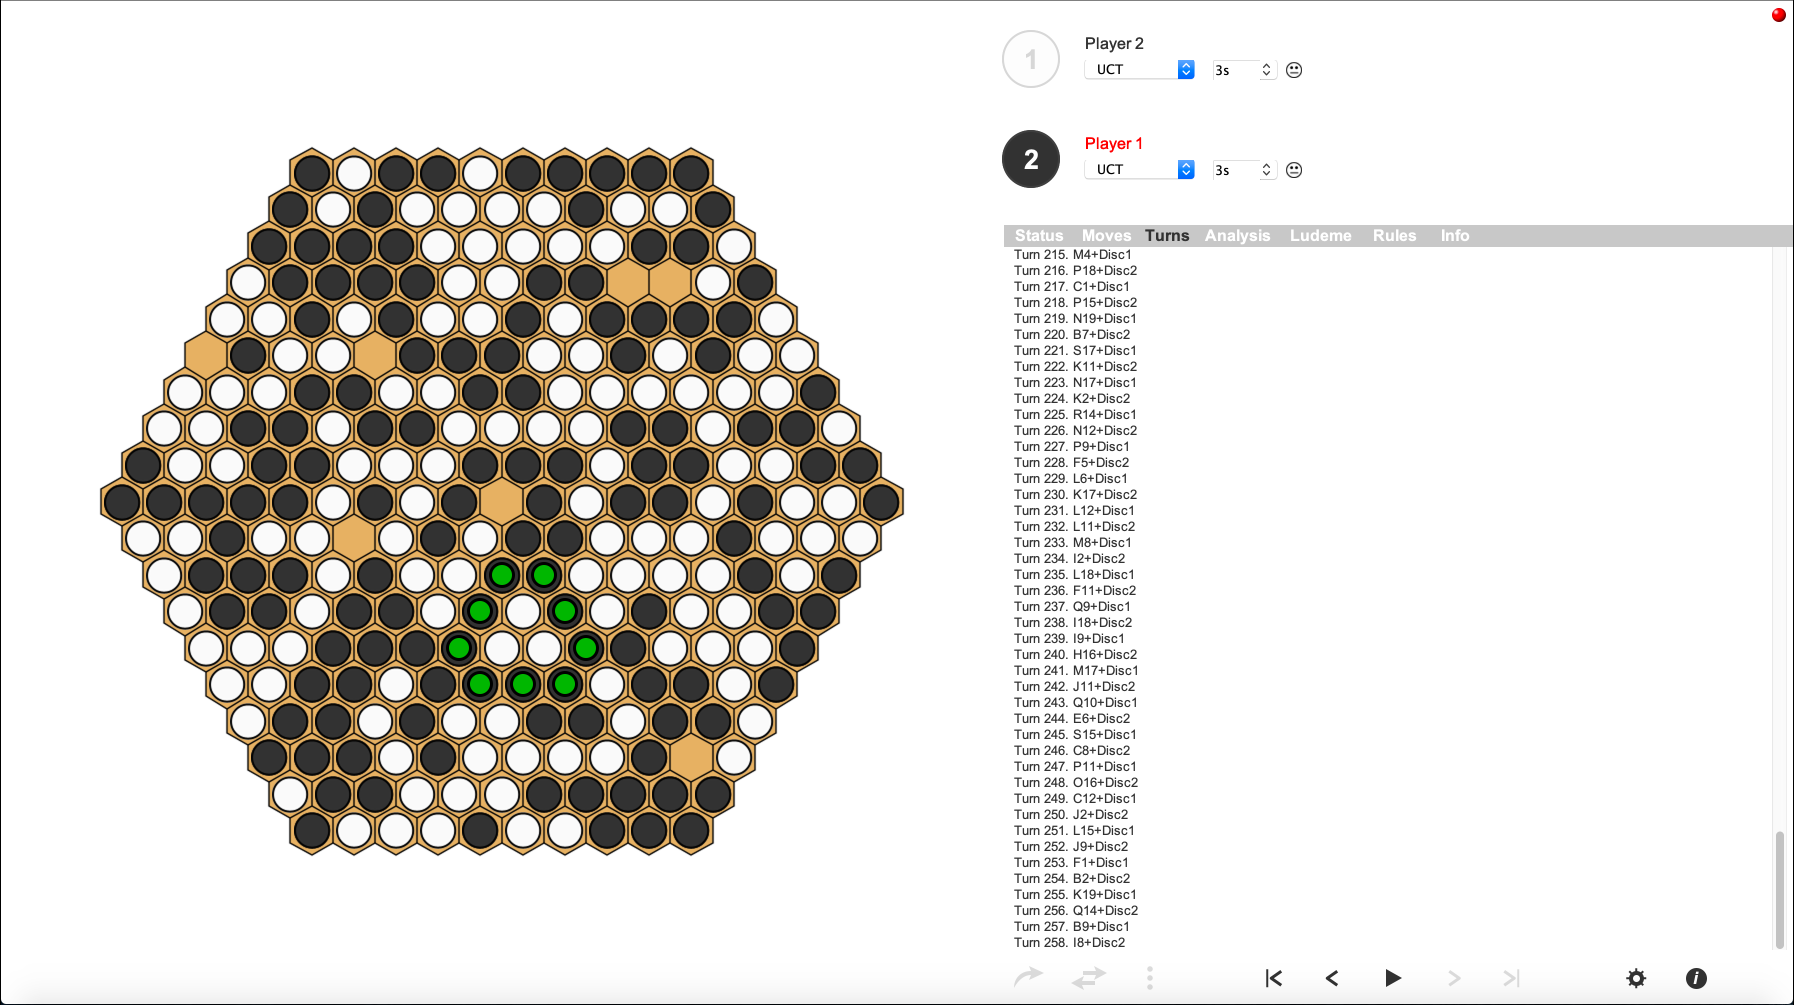
Migong — Here’s part of a post I wrote on this game in the BGG abstracts forum, in relation to the game captured in the screenshot above: “That was pretty fun. Shutting down opposing groups is enjoyable and there’s a lot of back-and-forth fights. I’m curious what high-level Migong would look like, and what sort of strategic play might develop.  Weirdly, I think I’d enjoy this much more as a physical game than as a MindSports app. It’d be visually satisfying on a clean board with acrylic pieces, and it’d be appealing to people who might not normally engage in a combinatorial territory game. There’s a satisfying ’embed the rules’ thing going on here that I think makes for a good candidate for a physical product.”    To add to that, I’m not normally a big fan of tile-laying games, but this one I enjoyed, not least because the patterns produced during play are visually attractive.  Digging up that post made me want to play again, which is a good sign.  Let’s call that a solid 7/10.
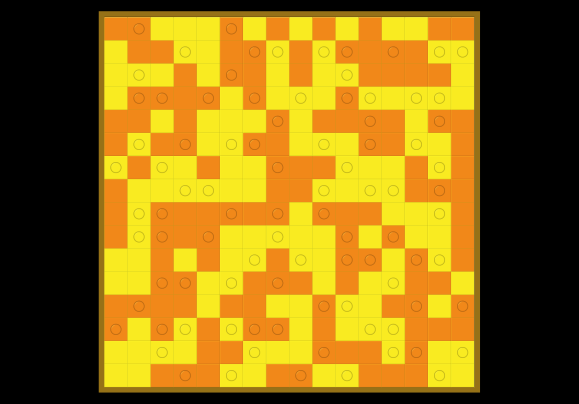
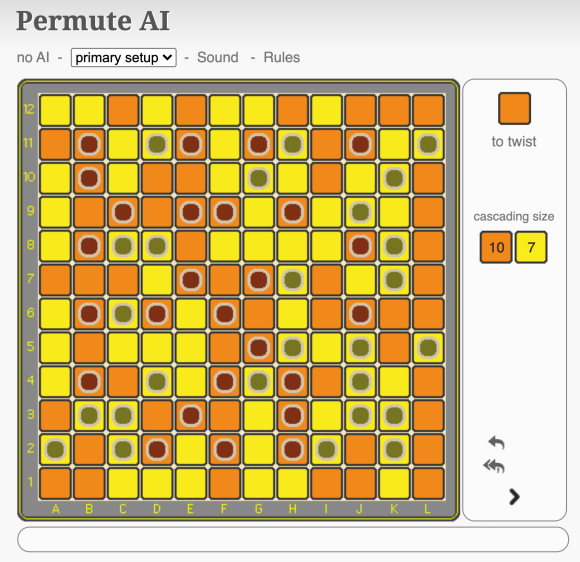
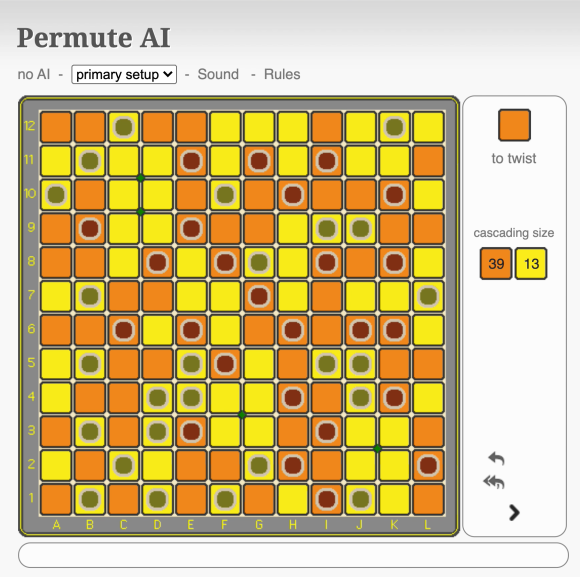
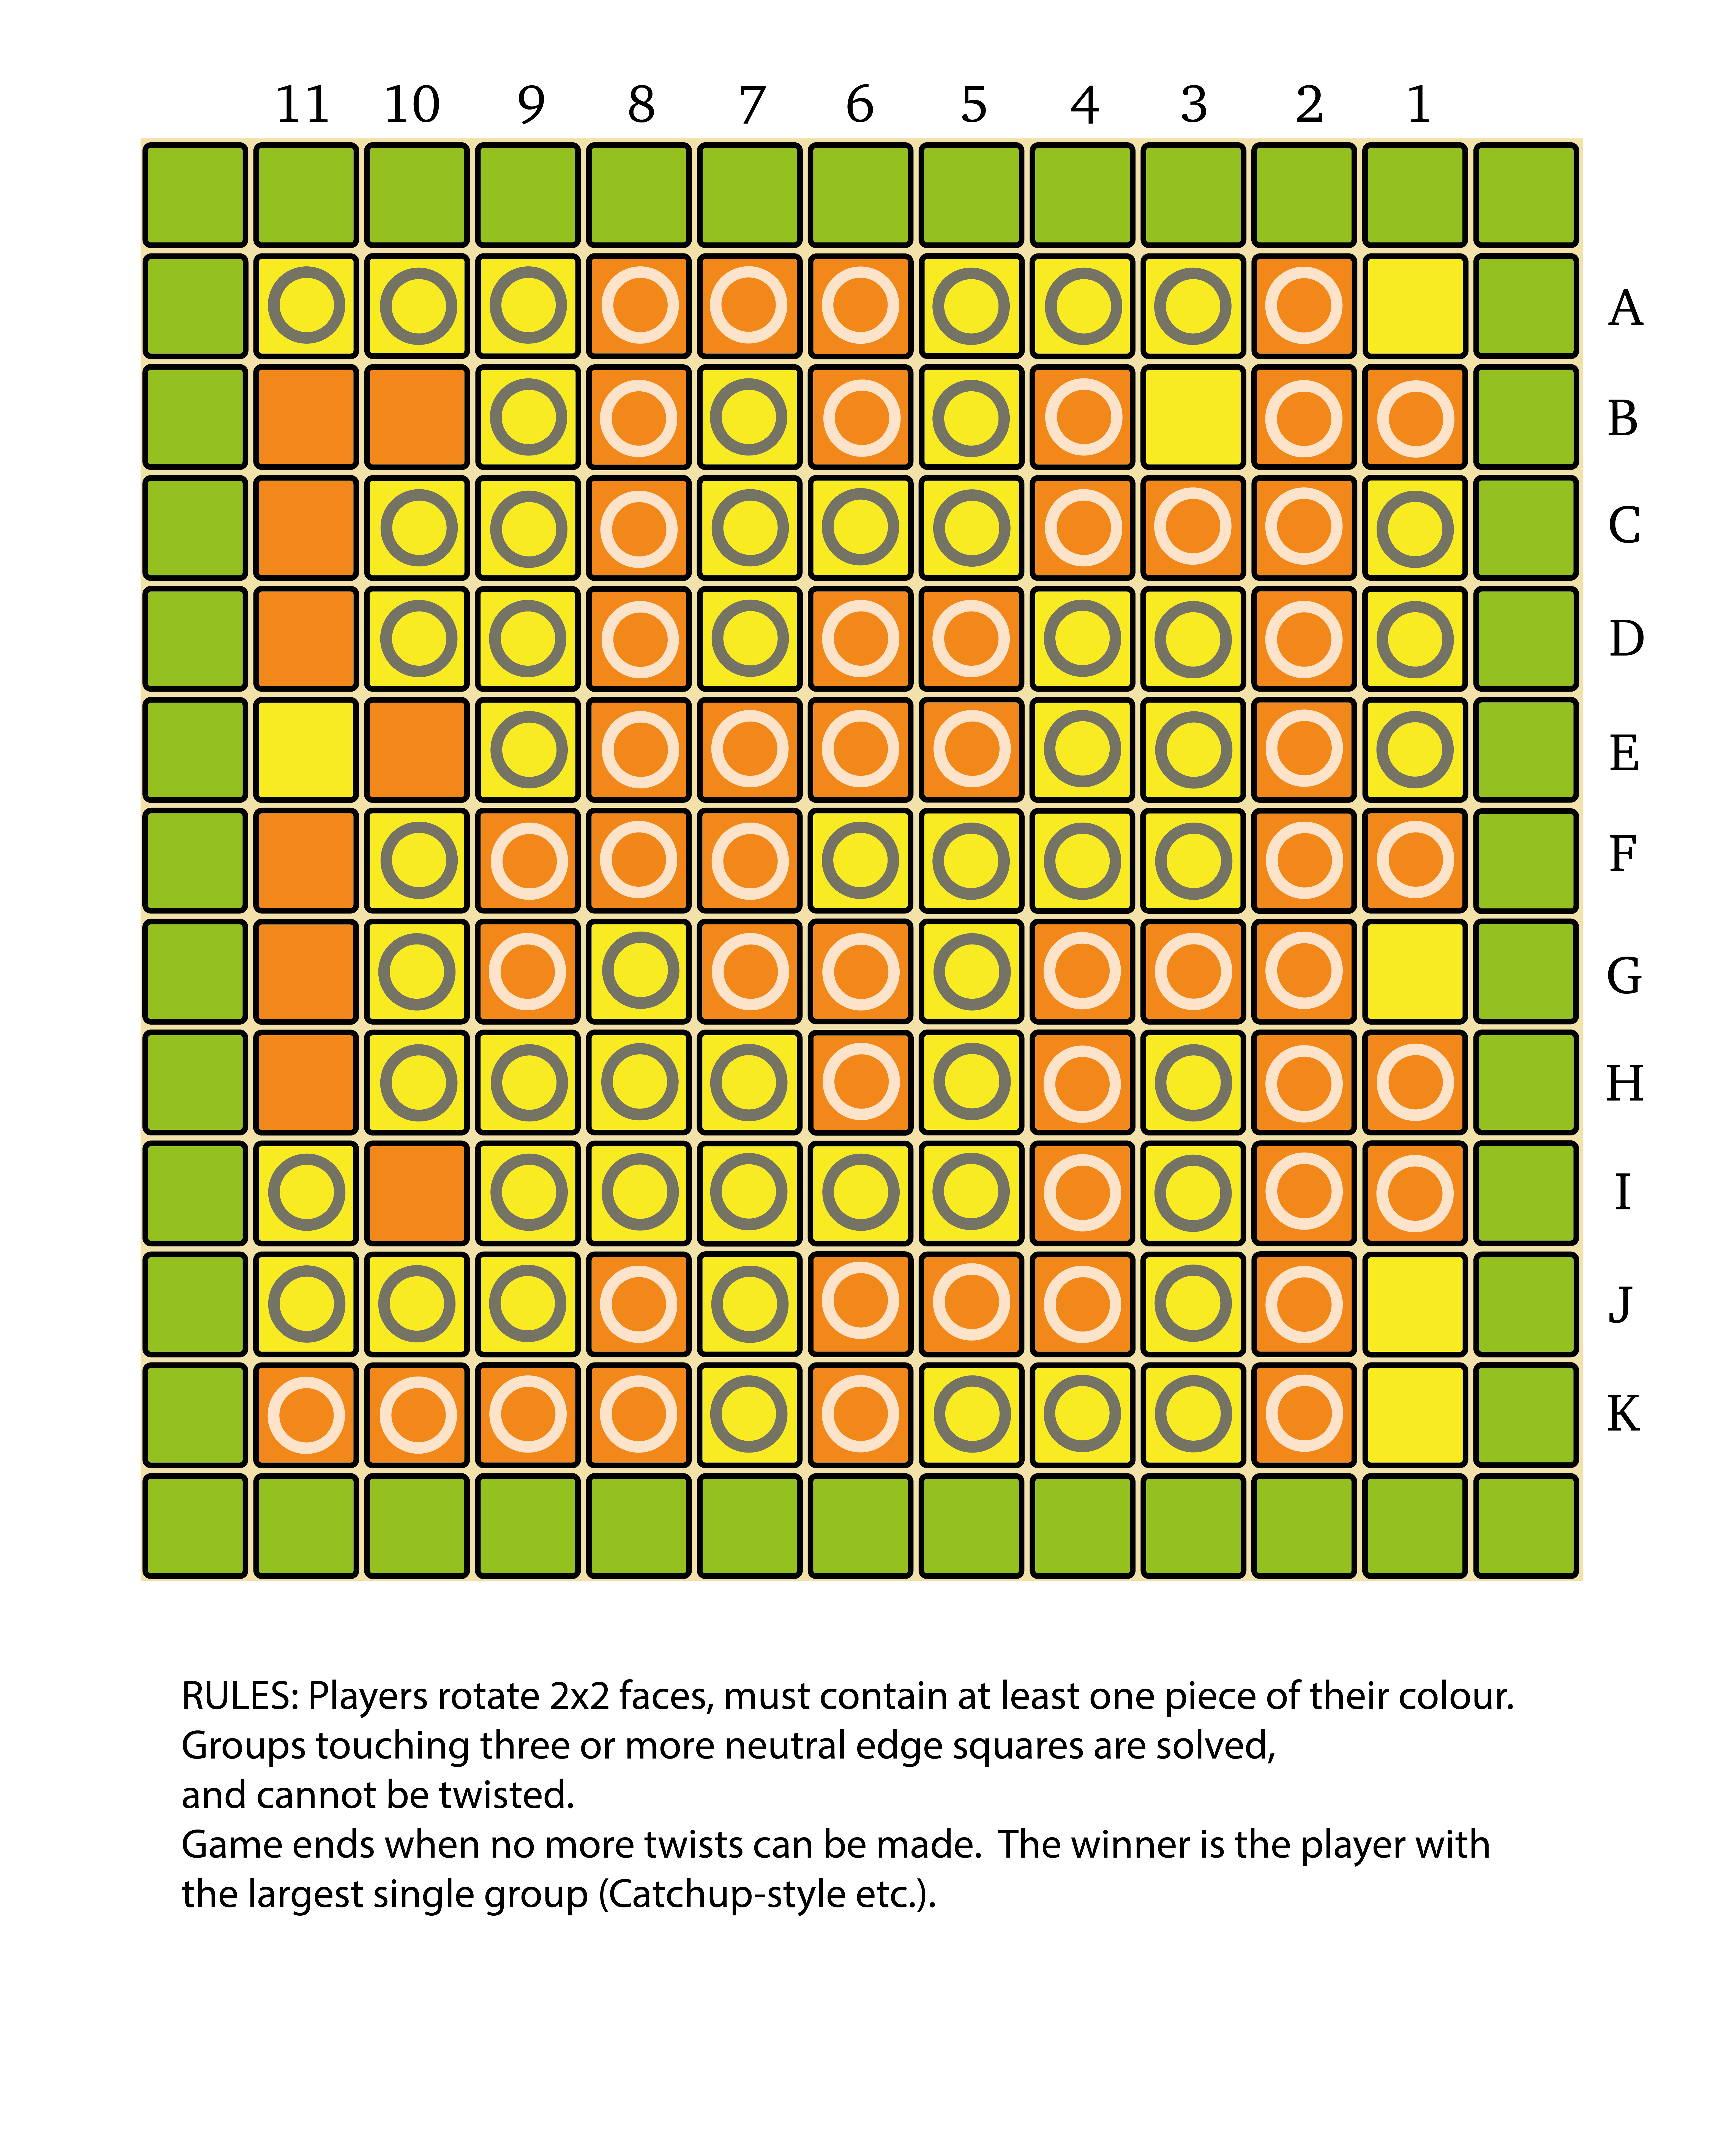
Permute 12x12 -- move40 -- Ac6d7-d7-01

Permute This is my game, and I like it, and I’m good at it.  But I’m not going to give it a numerical rating on my own blog post, because people do that on BGG sometimes and give themselves 10/10 and say their game is better than Go, and every time I see that I roll my eyes so hard I need to go see an ophthalmologist.  So instead I’ll just say it’s a fun game, inspired by the Rubik’s Cube, in which players build up groups of pieces by rotating them like the face of a twisty puzzle.  I’ve written a long post about this game which took a huge amount of effort, so please go take a look.  12×12 is the ‘beginner’ size, I recommend the 16×16 game for a deeper strategic battle.

Qascade — The sole member of the exclusive games-inspired-by-Permute club, Qascade adds the twisting mechanic to a placement game on the hex grid.  Combined with Christian’s one-bound, one-free opening protocol, we get a nice game of group-building with some tactical surprises due to the twisting element.  Fun to play, but in my extremely objective, not-biased-at-all opinion, Permute is more purely about twisting and therefore has a stronger identity.  7/10.

slyde16-10s-1

Slyde — One of the inspirations for Permute, this game tasks players with building up groups of pieces on the square grid by swapping them.  Each swap locks a piece in place, which was the mechanic I later used in Permute to ensure termination.  The game seemed to be doing relatively well at attracting players, until the creator stopped promoting it in favour of Tumbleweed.  8/10.

Connection Games

Gonnect A fine game that results from a very simple idea: what if we kept most of the rules of Go (except passing) and just changed the goal to a connective one?  The result is an interesting experience, and a nice example of how connection games can incorporate capture successfully.  Some players dislike how close games enter a ‘cold war’ phase where the game essentially becomes No-Pass Go, but I guess as a Go fan this doesn’t bother me too much.  Trying this is a no-brainer if you have a Go set lying around (and you should, you can play about a billion different games using a Go set).  8/10.

slither19-10s-1

Slither — Conceptually this game has great appeal; stones are placed and then slide around each other as players attempt to connect opposite sides of the board.  In practice however, I find it hard to get a grip on this game.  I made a bit of an effort to understand it with the help of David Ploog’s excellent guide, but still it didn’t quite click.  Ultimately I gave up, because there are many connection games out there that I can comprehend much better than this one.  There is a nice community of players on Little Golem, which is a big point in its favour.  I suspect I’d do better with this game if I could stare at it over a Go board with a real human opponent, somehow.  6/10.

Symple Hex — Combining Symple and Hex gives us this game, which applies Symple’s remarkable move protocol to the connection genre.  The result is enjoyable, but somehow not as compelling as the other connection games I like.  I think it may be that the growth mechanic of Symple feels a bit strange in a connective context, as my brain wants to make big groups but that’s not necessarily the right thing to do to actually win the game!  In any case, I’m glad this game was made, and I hope another Symplistic connection game might iterate on this idea in the future.  7/10.

Unification Games

loa-10s-1

Lines of Action This bonafide modern classic birthed a genre, and for many remains the best example of it.  Here players try to unite their checkers into a single group, using a strange movement mechanic in which pieces may slide according to the number of pieces present in the direction they wish to move along.  The game is simple to learn but getting one’s head around the basics can be challenging initially.  I intend to spend more time with this game, having learned a lot about it from David Ploog’s guide.  As usual I’d love to see this expanded to a larger board with more pieces too; the original is easily playable with a Checkers set, so I want one playable with a Draughts set!  8/10.

Looping Games

coil1

I’ll save you some more time here too — honestly, just play Havannah or Coil instead!  Granted they have other win conditions besides loop-building, but they’re excellent games so who cares.  Coil (above) is such a cool game to me that I even programmed it for Ludii… only for the BGG abstracts forum to start exploding shortly afterward with endless loop-based game designs which explicitly aim to replace it.  That’s some bad timing.

Race Games

Ordo — I’m not generally a huge fan of race/traversal games, but Ordo is a good one.  Designed by Dieter Stein, creator of a number of interesting games, this one features movement of whole groups, which is always satisfying.  I recommend it, but again I’m no expert on this genre.  7/10.

Blockade Games

Stalemate games.

Monkey Trap A cute Amazons variant themed around monkeys flitting around the board dropping coconuts on the board behind them.  Christian presents this as a game for kids, but I think it’s fun enough for adults, too.  The reduction of the decision space relative to Amazons makes it more accessible, but there are still enough options on a typical turn to allow for surprising tactics to happen.  A good game, and maybe a commercially viable one — a jungle-themed board with cute plastic monkeys and big chunky coconut pieces would go down a treat amongst younger players.  6/10.

pilare-initpos-MS

Pilare Eventually tried this thanks to encouragement from David Ploog.  An ingenious 2D Mancala-like game designed by Jorge Gomez Arrausi, creator of the also-ingenious Unlur.  In Pilare, players pick up stacks topped with pieces of their colour, and sow their contents over the board, until someone is left without any stacks they can sow and thus loses.  Each move is potentially long and filled with possibilities, so the game ends up feeling tactically rich and loaded with mysteries.  Someday I hope to play more of this.  9/10.

Configuration Games

A hugely underrepresented category on MindSports, and in the abstracts community in general.  The n-in-a-row genre is ripe for some innovation, but the abstracts community seems to have largely abandoned it as a lost cause in recent years, which is a shame.

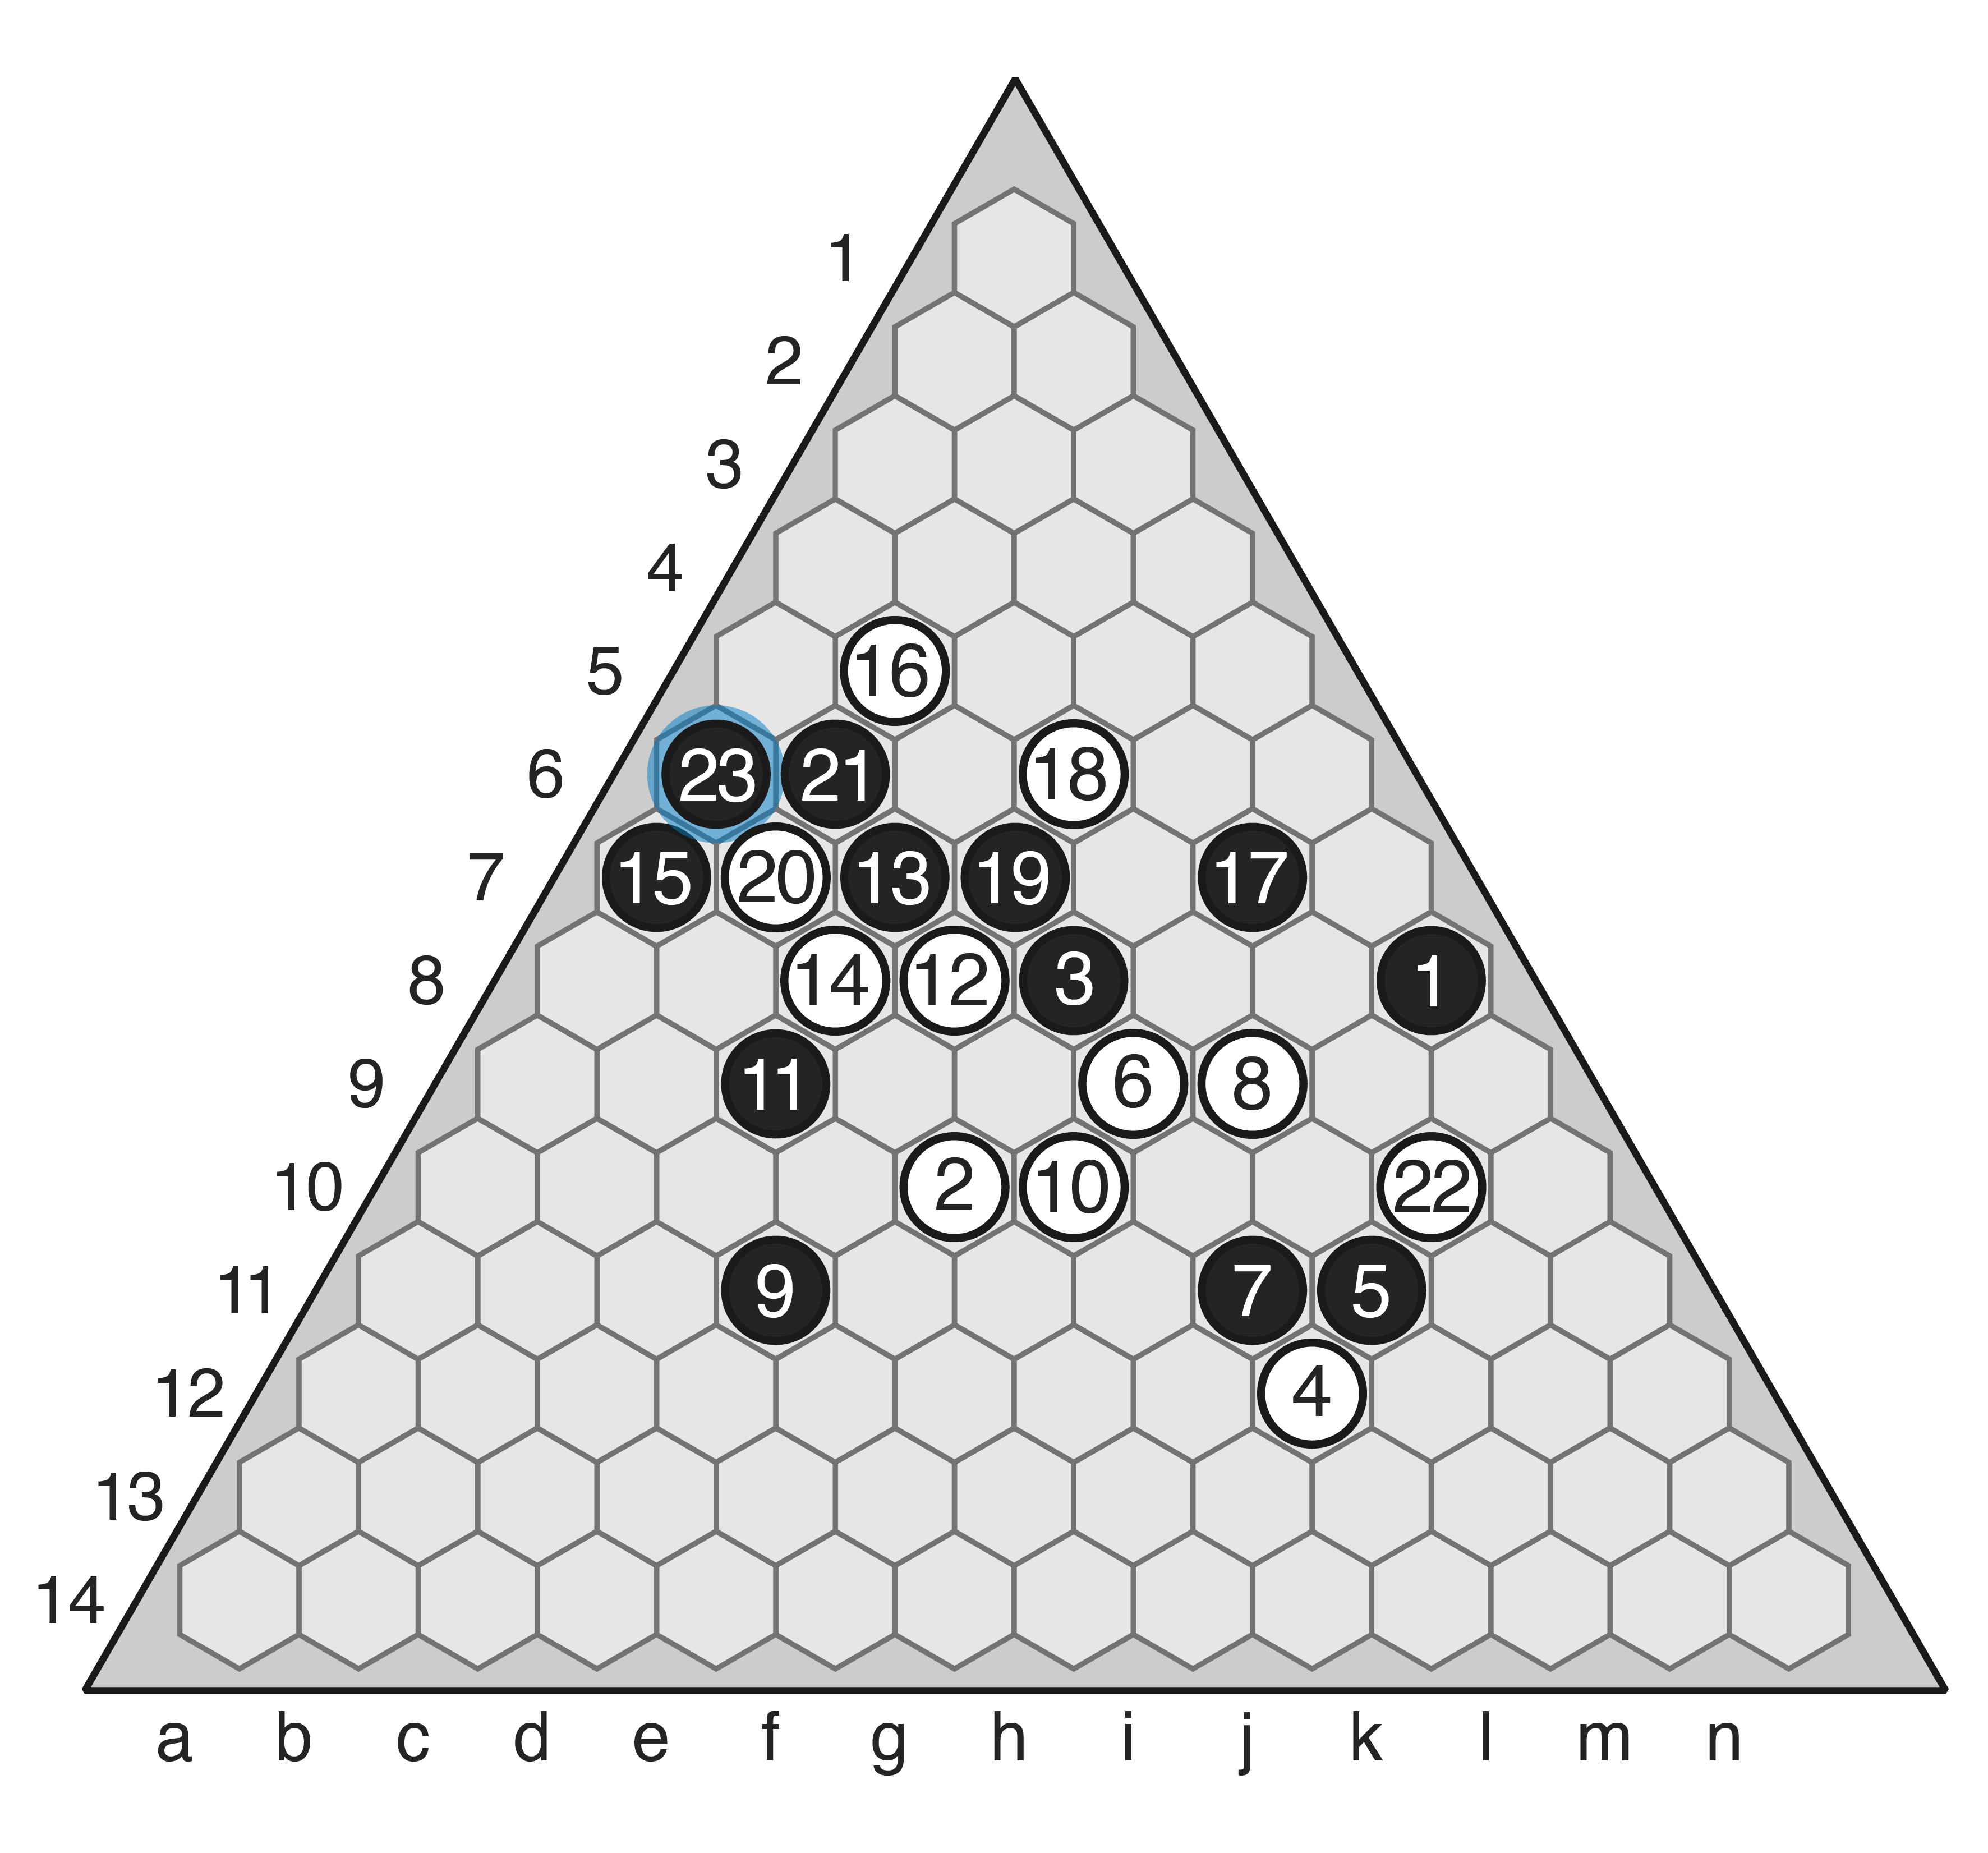
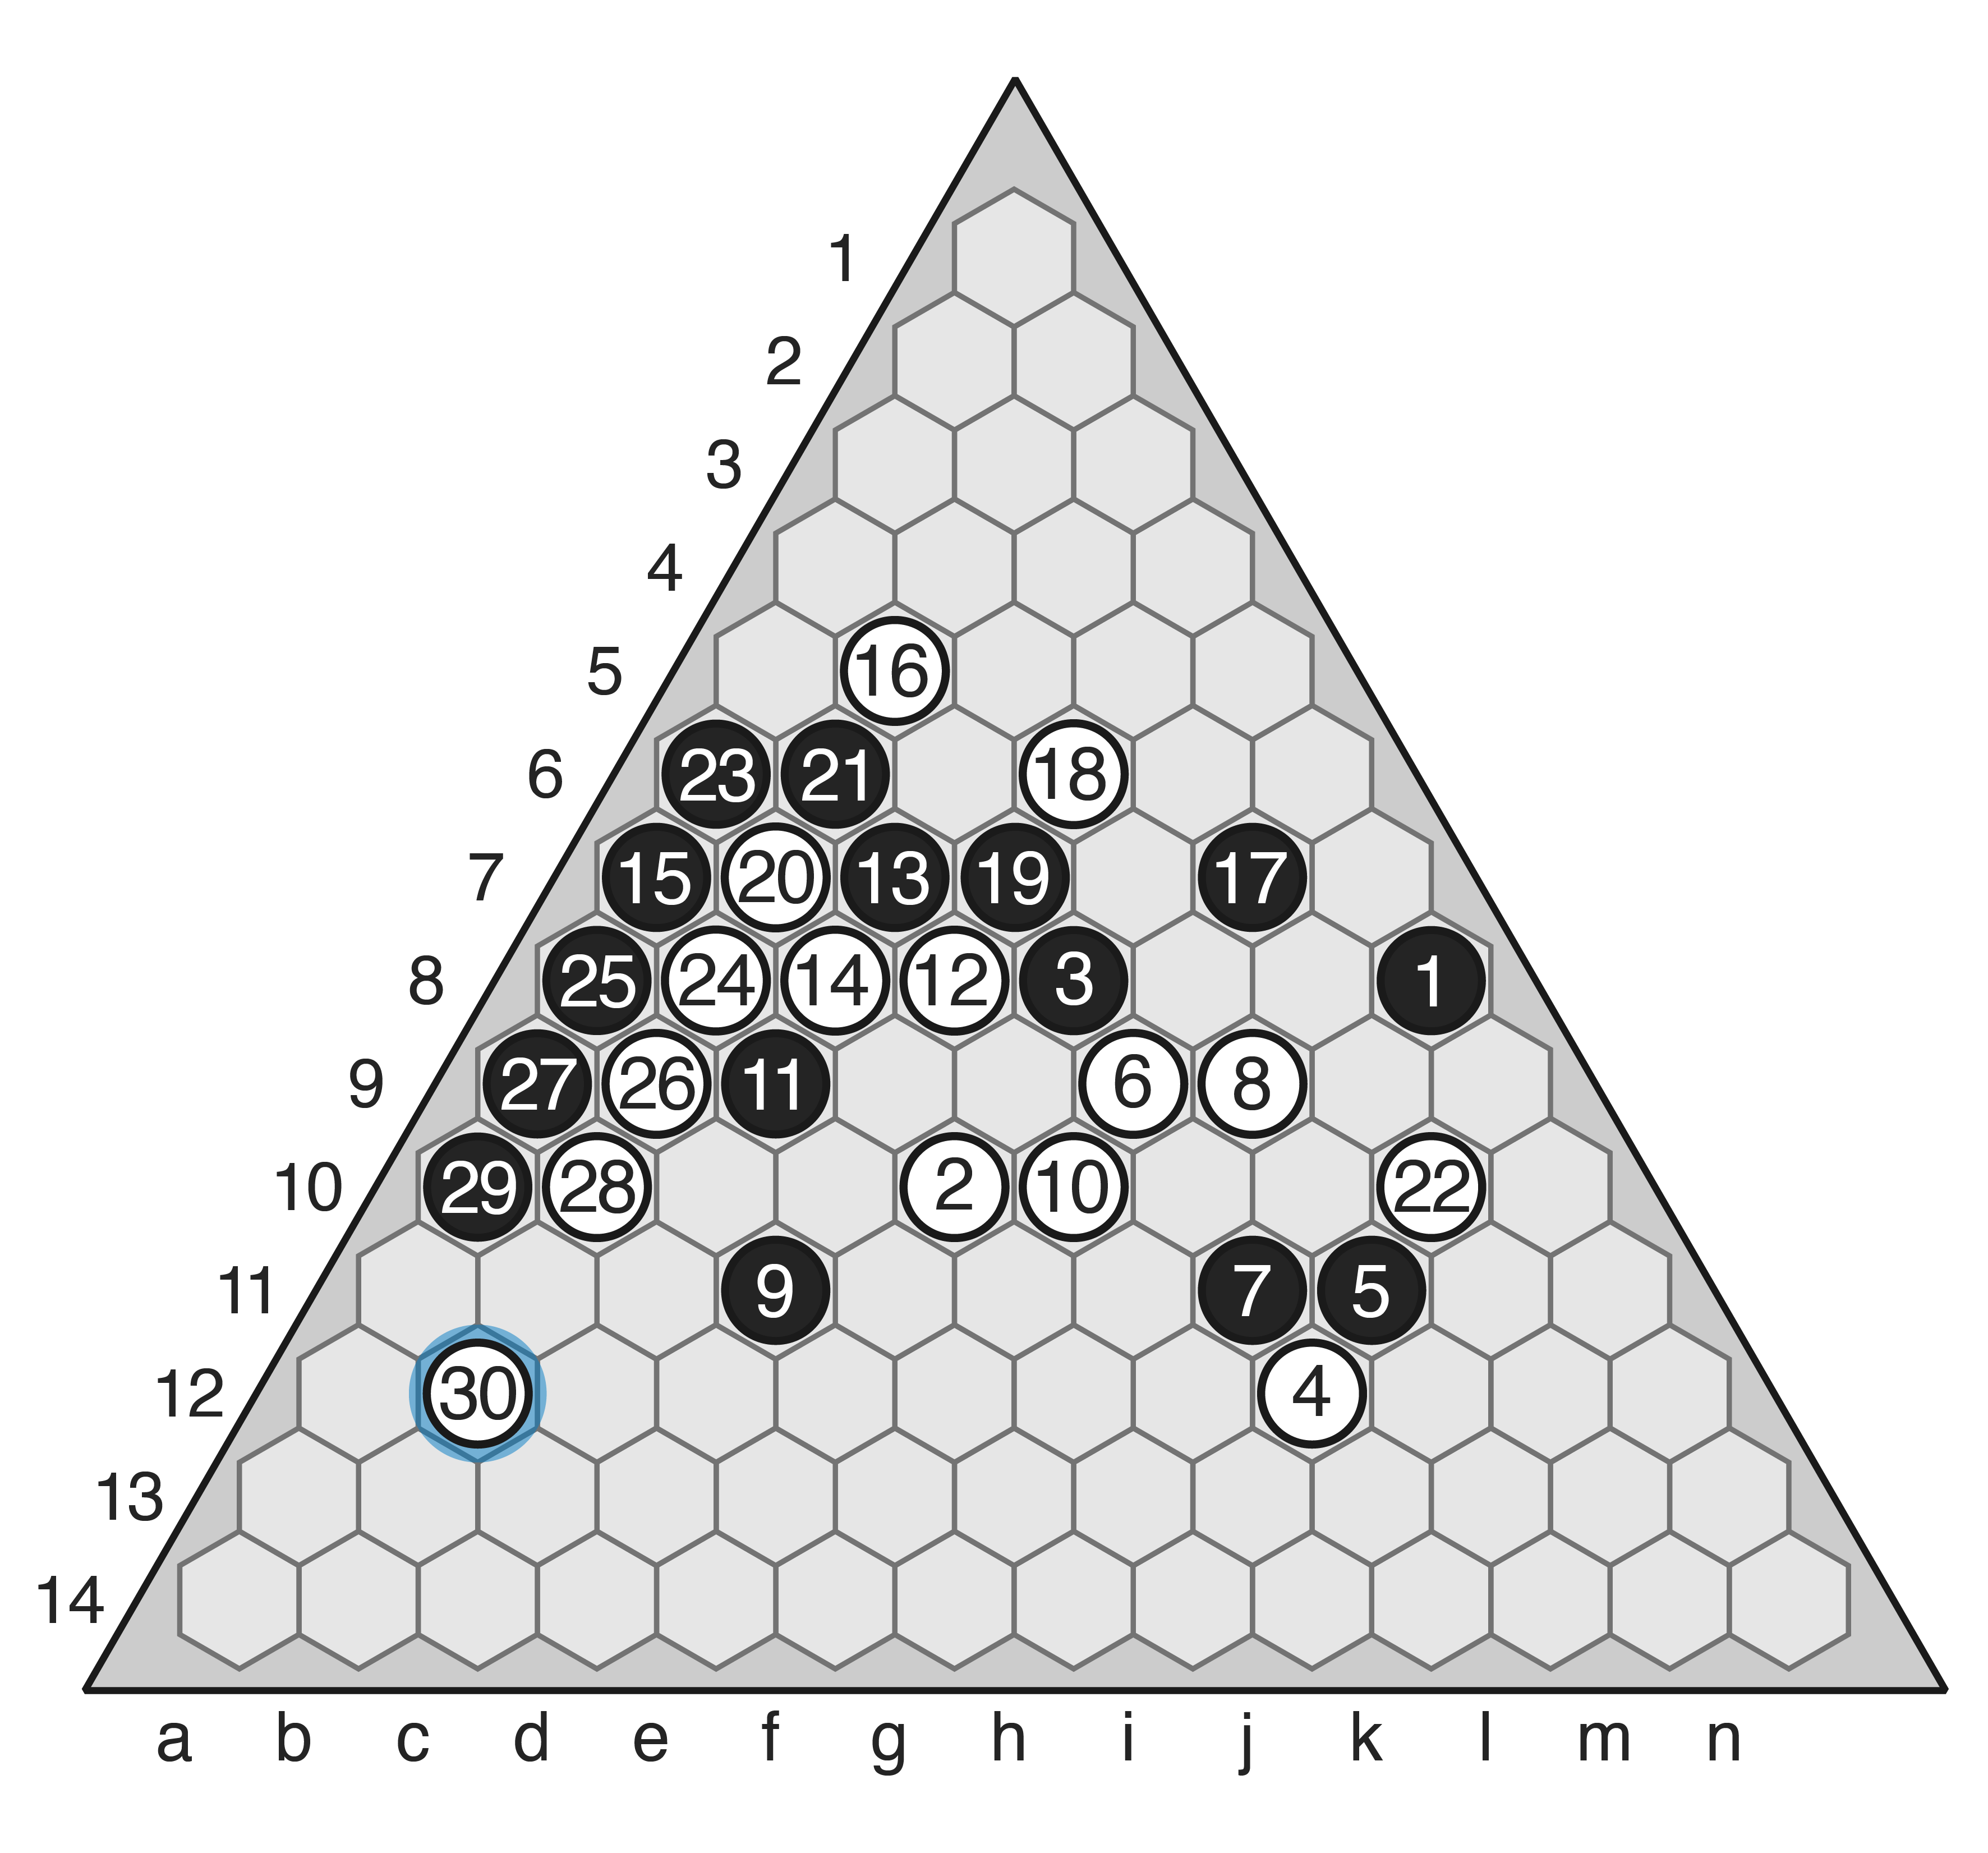
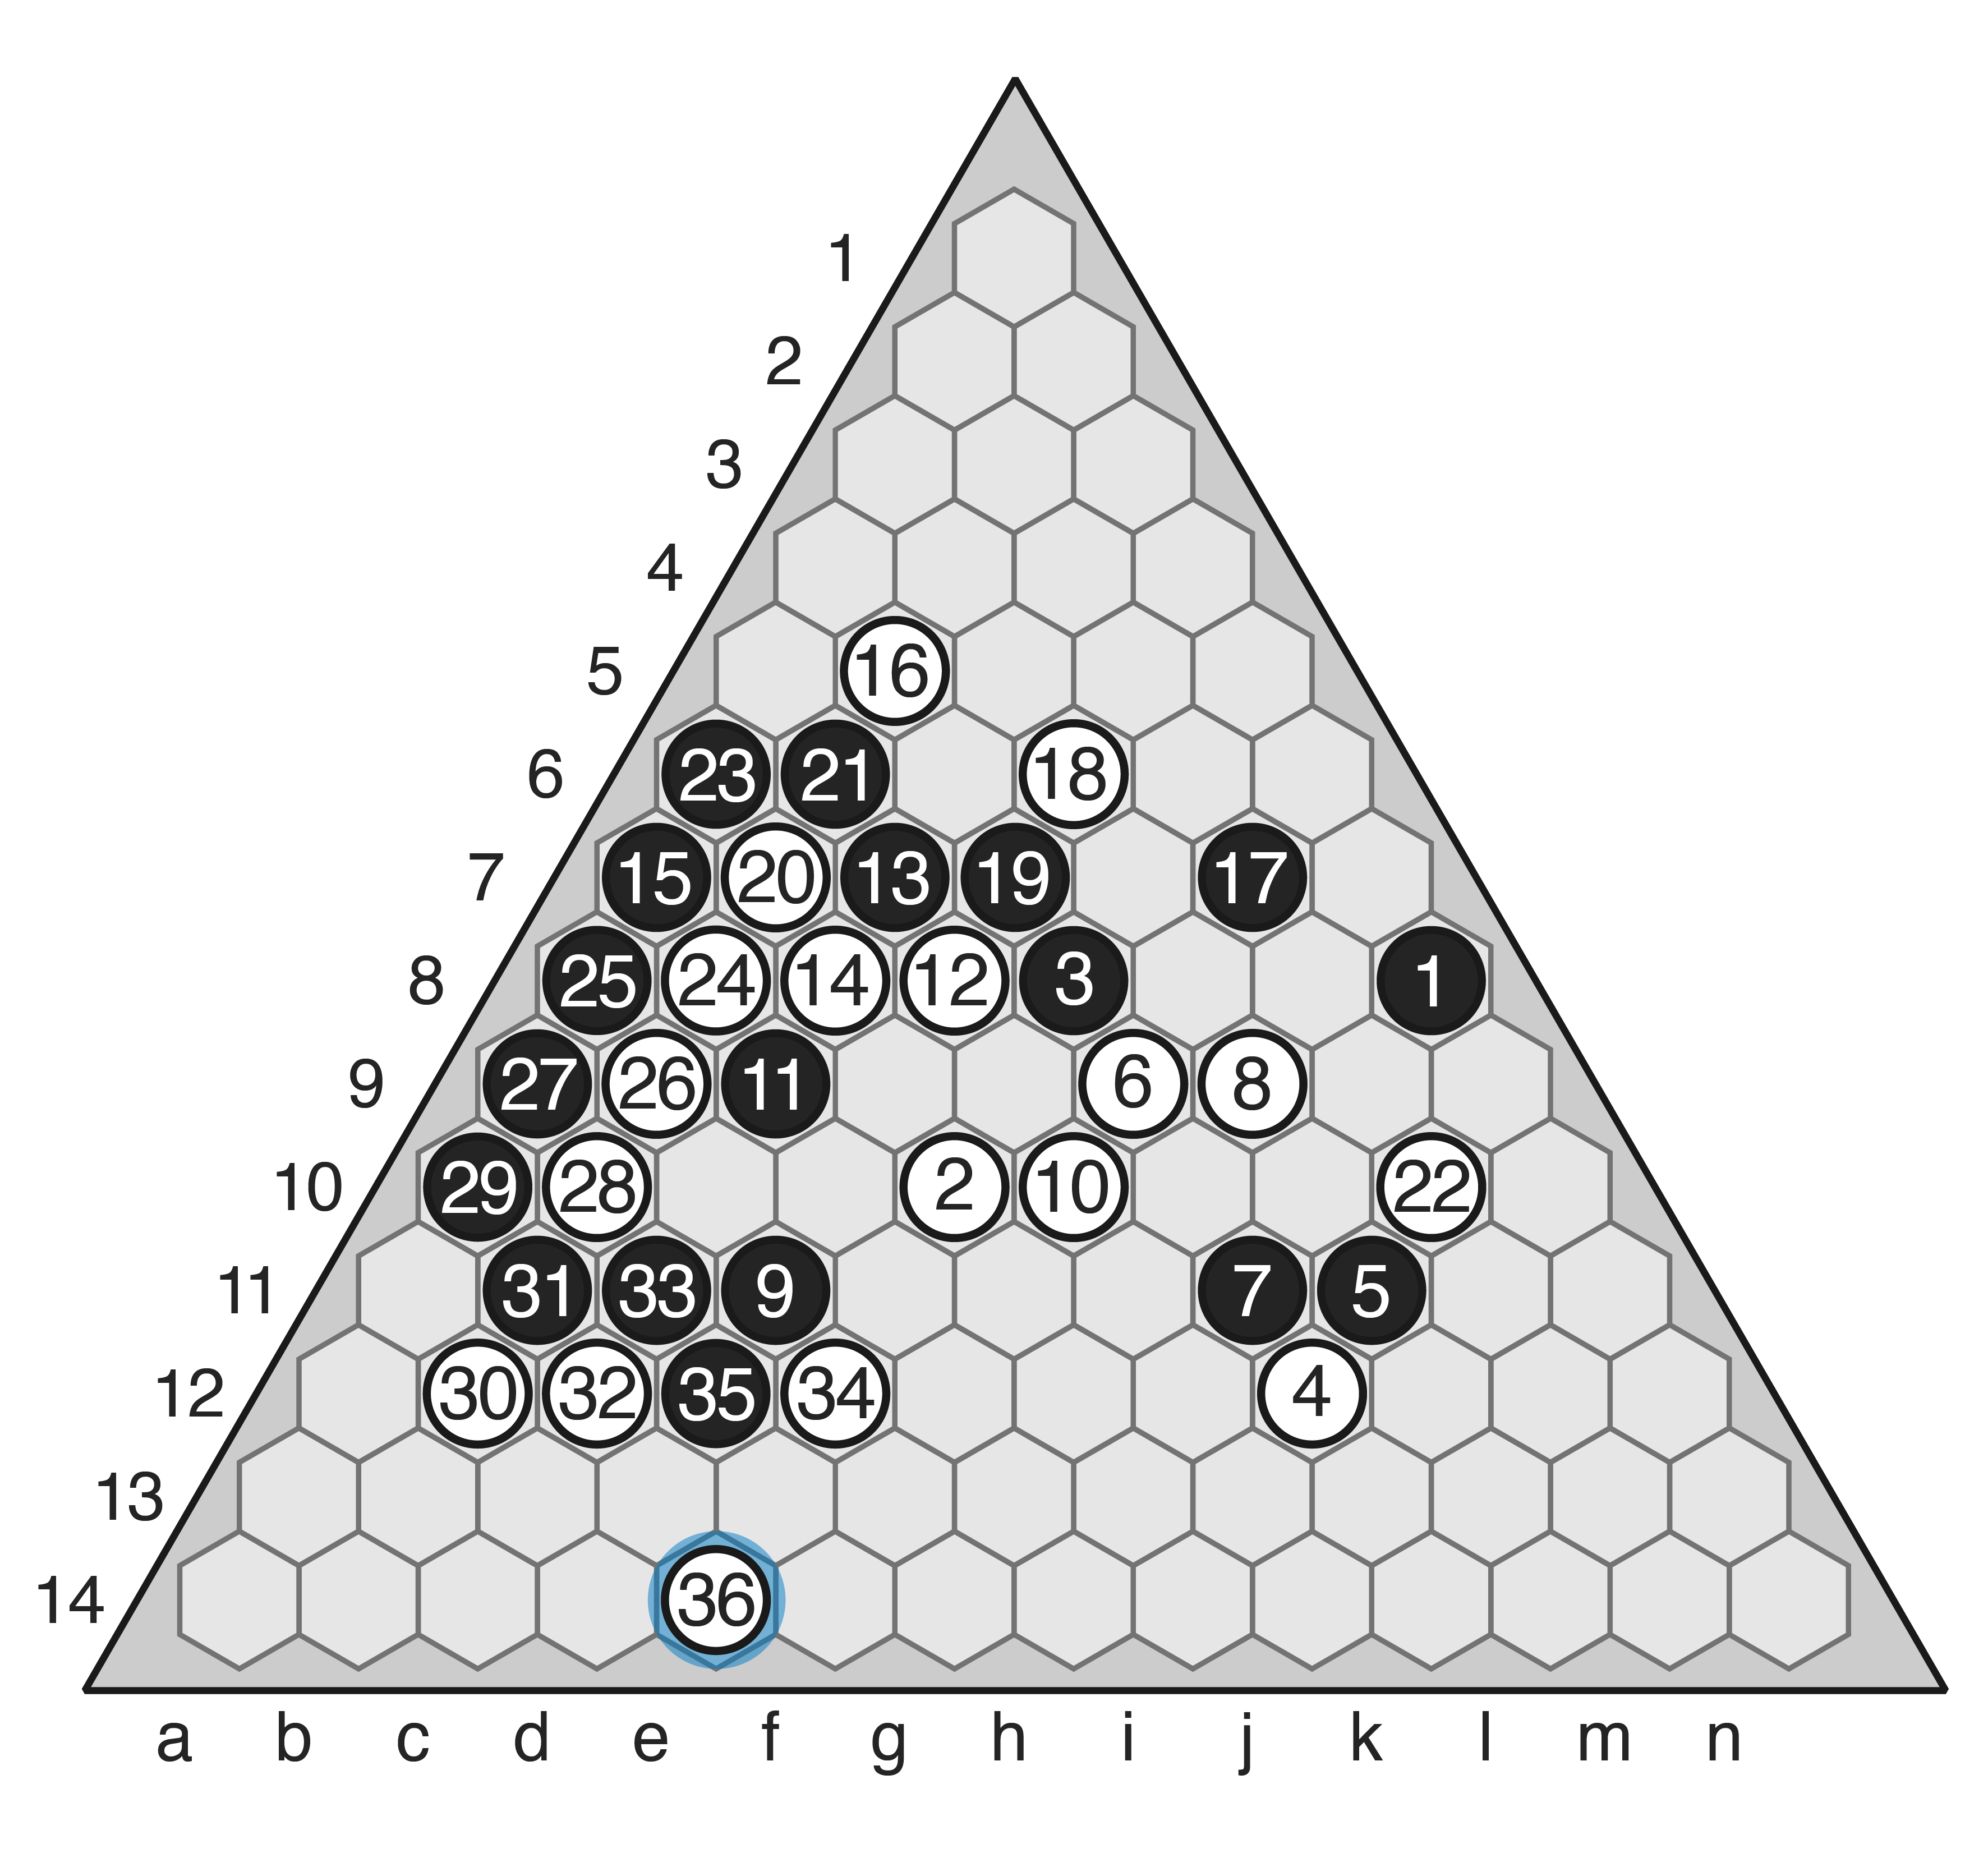
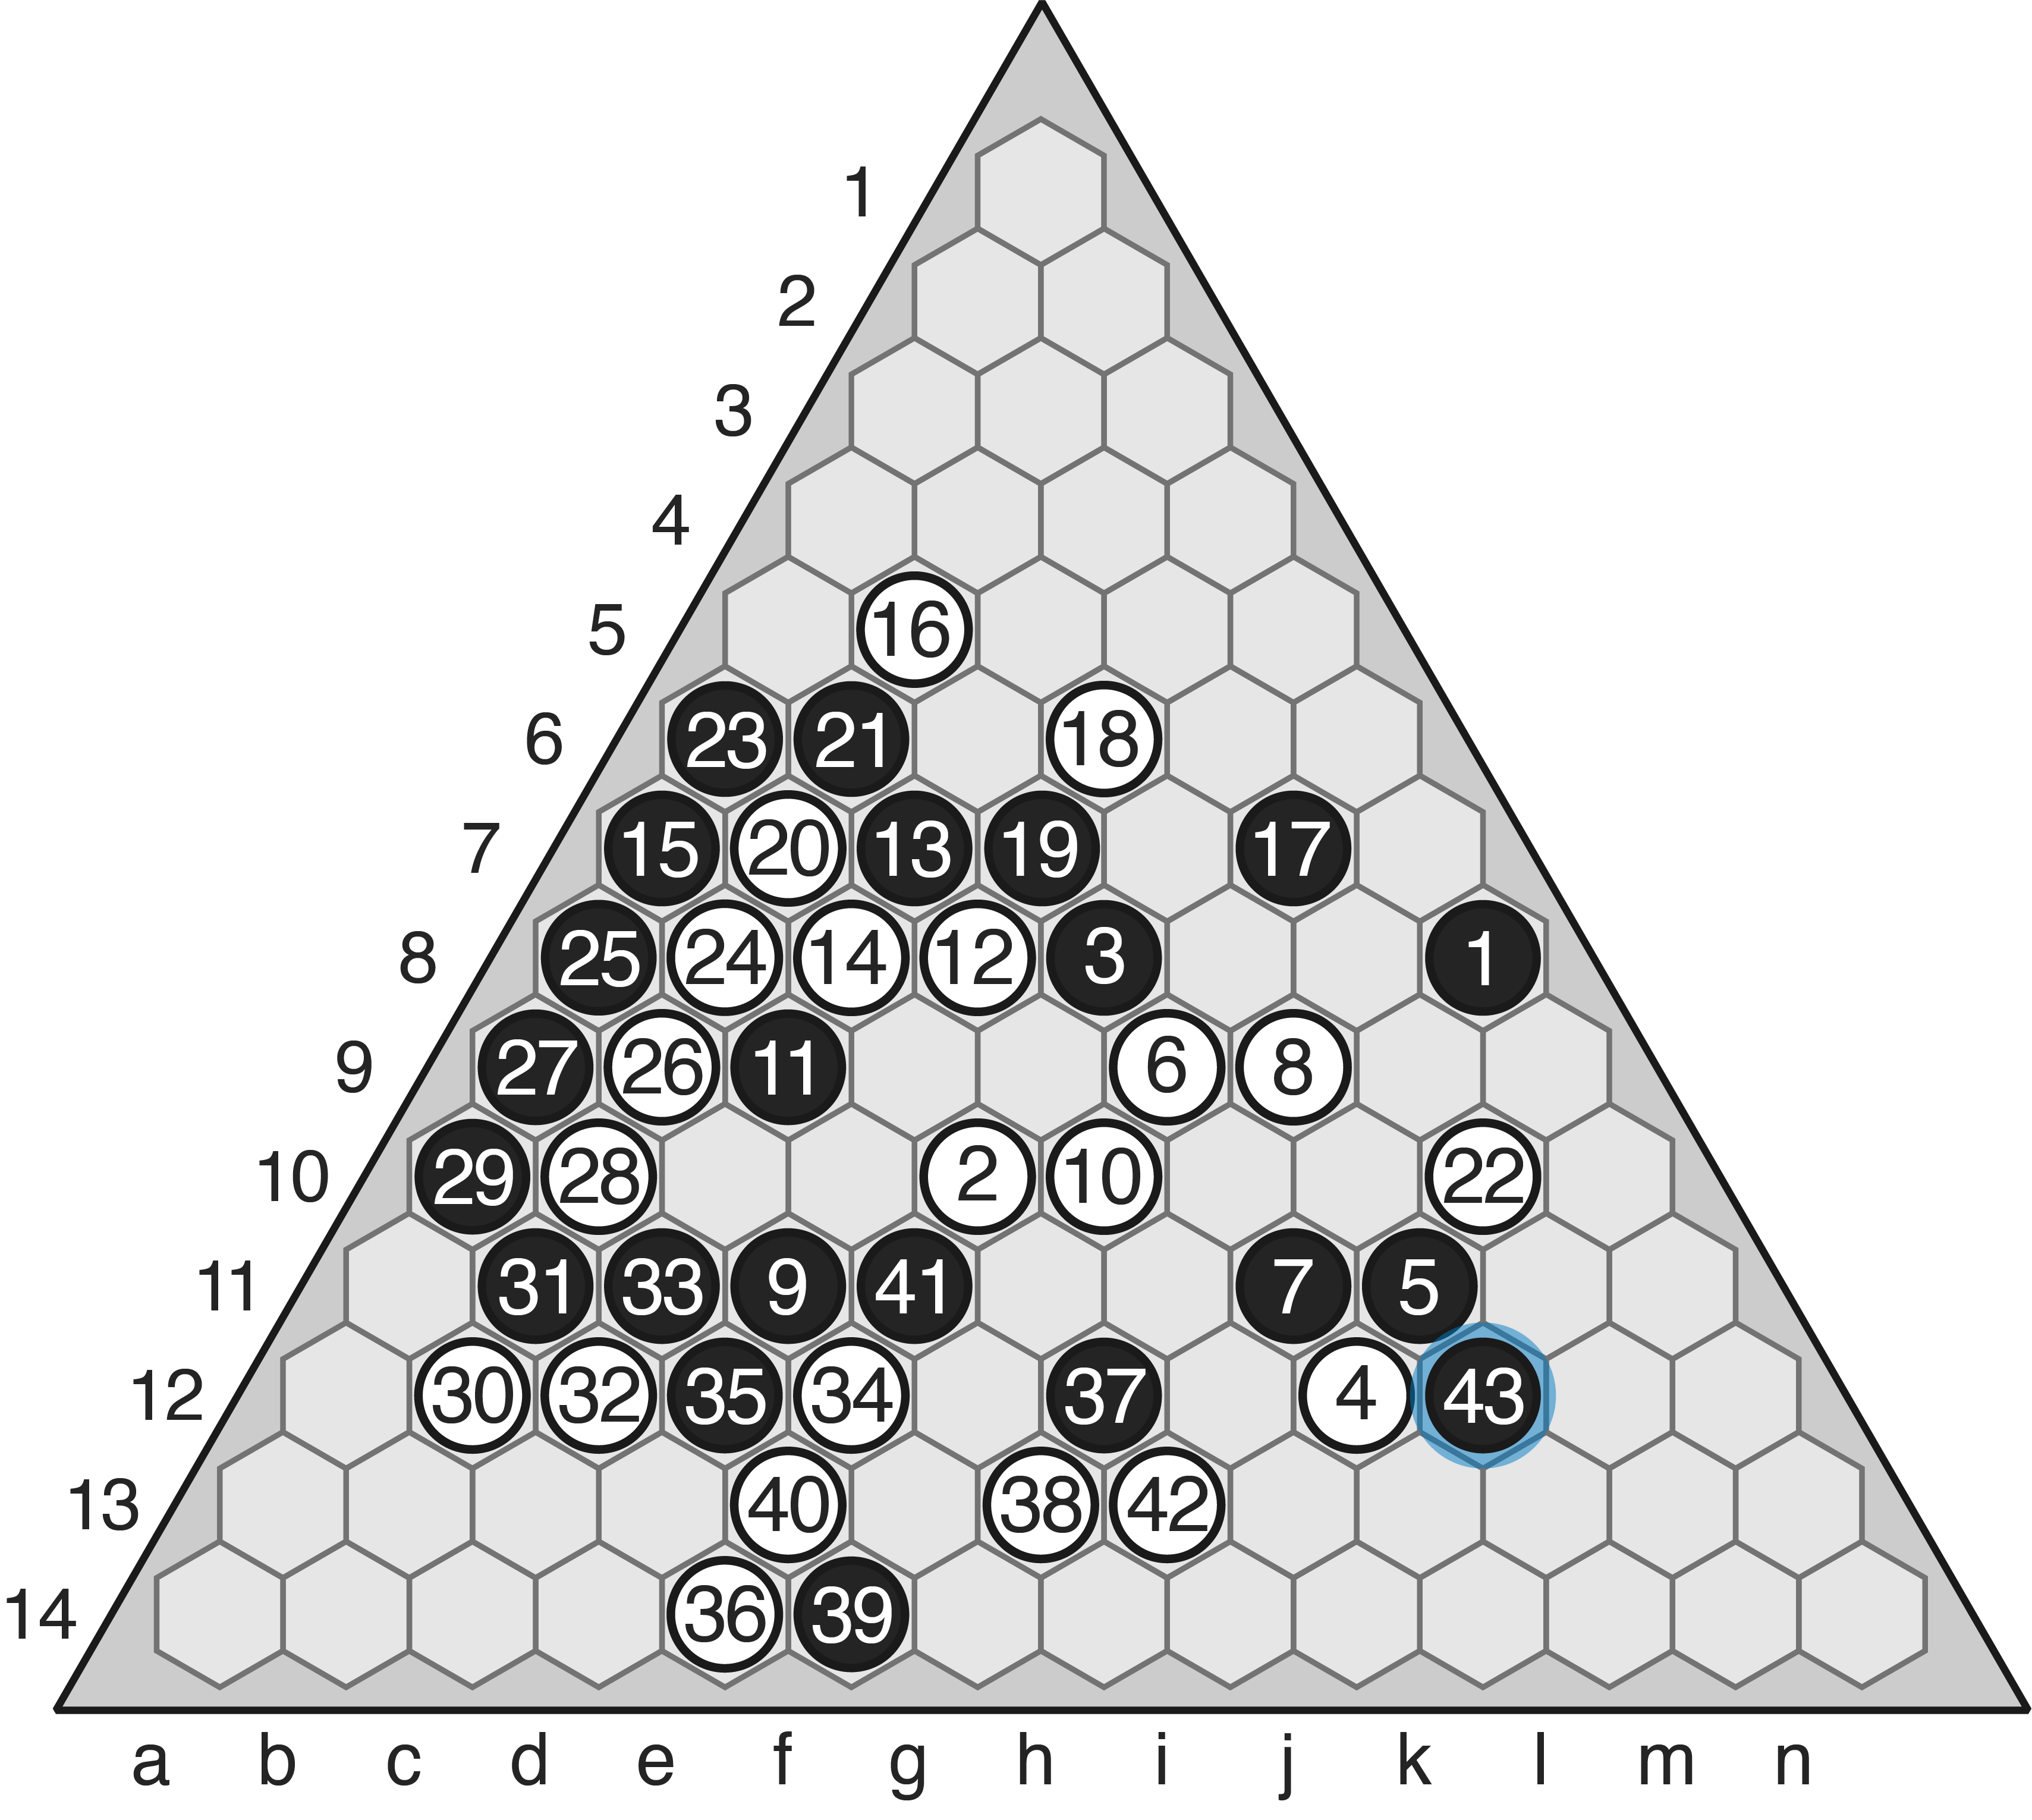
Hexade — Christian Freeling’s take on the n-in-a-row genre follows Havannah and grants the win under multiple conditions: victory comes after connecting six of one’s stones in a line, triangle or hexagon.  Capture occurs exactly as in Pente, but capture is not an alternate win condition as in that game.  The result is an appealing, varied game of interesting tactics.  Loses a couple points from me on the basis that Pente doesn’t feel much less rich despite the simpler win condition.  Must play more though to determine whether this is an accurate impression.  7/10.

pente1

Pente Once a popular game with a robust tournament community, Pente is a bit obscure nowadays but players still congregate and many games still take place at Pente.org.  Players compete to be the first to get five stones of their colour in a line, but in Pente players may also capture pairs of enemy stones if they place their stones at either end of that pair.  Captures also provide an alternate win condition for the game.  I like this game a lot, to the point that I programmed it for Ludii, alongside the excellent variant Keryo-Pente.  9/10.

Games With Various Other Goals

hexsymple-sz12-p10-sample-game1

HexSymple — Translating the Symple protocol to the hex grid works great, and produces a game with a strikingly different feel; the additional connectivity options present on the hexagonal grid shift the focus more toward strategy than tactics.  As a devoted fan of Symple I enjoy this game just as much, and sometimes I think it may even be better than the original, but that feeling fluctuates depending on my mood.  Like Symple, it’s deep, engaging, tense, and hugely flexible and scalable.  Just play it.  10/10. (read more here)

Multiplicity — Some of you will know of Omega, a clever game that uses multiplicative scoring, leading to interesting consequences when working out how to build groups that achieve the best score.  Multiplicity uses this same scoring mechanism, but unlike Omega, players place one stone per turn, may play stones only of their own colour, and the game opens using Christian’s one-bound, one-free opening protocol.  The resulting game is tense and fun, and shares with Omega the strange feeling of needing to avoid certain connections or one’s score can drop significantly.  One downside is that keeping accurate score is a bit annoying in OTB play, but on the other hand, just playing using basic concepts of trying to build groups of the optimum sizes can get you pretty far.  7/10.

Xodd/Yodd — This pair of games tasks players with building less groups of their colour on the board, but players may drop stones of either colour, and at the end of the turn the total number of groups on the board must always be odd.  The result is a very unique playing experience, with some highly unusual tactics and appealing whole-board strategies.  Xodd (on the square grid) is generally considered more tactical, and Yodd (on the hex grid) more strategic, but both are very worth playing.  For what it’s worth, I slightly prefer Yodd, not least because the use of the hex grid helps stop my brain from mistakenly applying Go concepts to this game!  Elsewhere I proposed Snodd, a variant played on the snub-square tiling which has five adjacencies on each point, precisely between Xodd’s four adjacencies and Yodd’s six.  Like most of my ideas it had no impact at all, but I still think it has potential.  9/10.

Games That Don’t Appear on MindSports (but should, IMO)

gomoku1

Gomoku — The quintessential n-in-a-row game (well, besides the trivial Tic-Tac-Toe), still played all around the world in various subtly different forms.  Gomoku is wonderfully simple to grasp — two players take turns placing a stone of their colour on the board, and the first to make a line of 5 stones orthogonally or diagonally wins the game.  Note the line must be exactly 5 stones long; six or more doesn’t count!  From those simple ingredients arise some complex tactics, with the taking and holding of initiative being perhaps the most important element.  In fact, initiative is so important that the first player holds a tremendous advantage (Black wins ~67% of games when opening placements are unrestricted).  However, if you play using the Swap2 opening protocol (which is the tournament standard), the first-player advantage drops to a completely reasonable 52% win rate.  All told, an accessible, deep, and balanced game (with Swap2), but definitely one for the tacticians.  I have fun with it, but I do prefer Pente, as the sandwich captures add significant dynamism to the basic 5-in-a-row framework. 8/10

Renju Renju is the Japanese take on the 5-in-a-row genre, which aims to reduce Black’s crushing advantage in Gomoku by restricting Black’s powers.  In Renju, Black cannot win with lines longer than 5 stones, nor can they place stones in such a way that two open lines of length 3 or 4 are created.  White, meanwhile, can win with ‘overlines’ (lines greater than length 5), and may win by forcing Black to make an illegal move.  Add to this a rather complicated opening protocol, which I won’t explain here, and you end up with a balanced game, albeit one with a steeper learning curve.  One major advantage of Renju is that the game is played at a very high level in Japan, and increasingly in Europe and elsewhere in Asia, so there are ample learning resources available and plenty of very strong opponents.  I quite enjoy the asymmetry in this game, which makes playing Black feel very different from playing White, and the dedicated playing community means it certainly has ample longevity.  8/10

checkers-snip-1

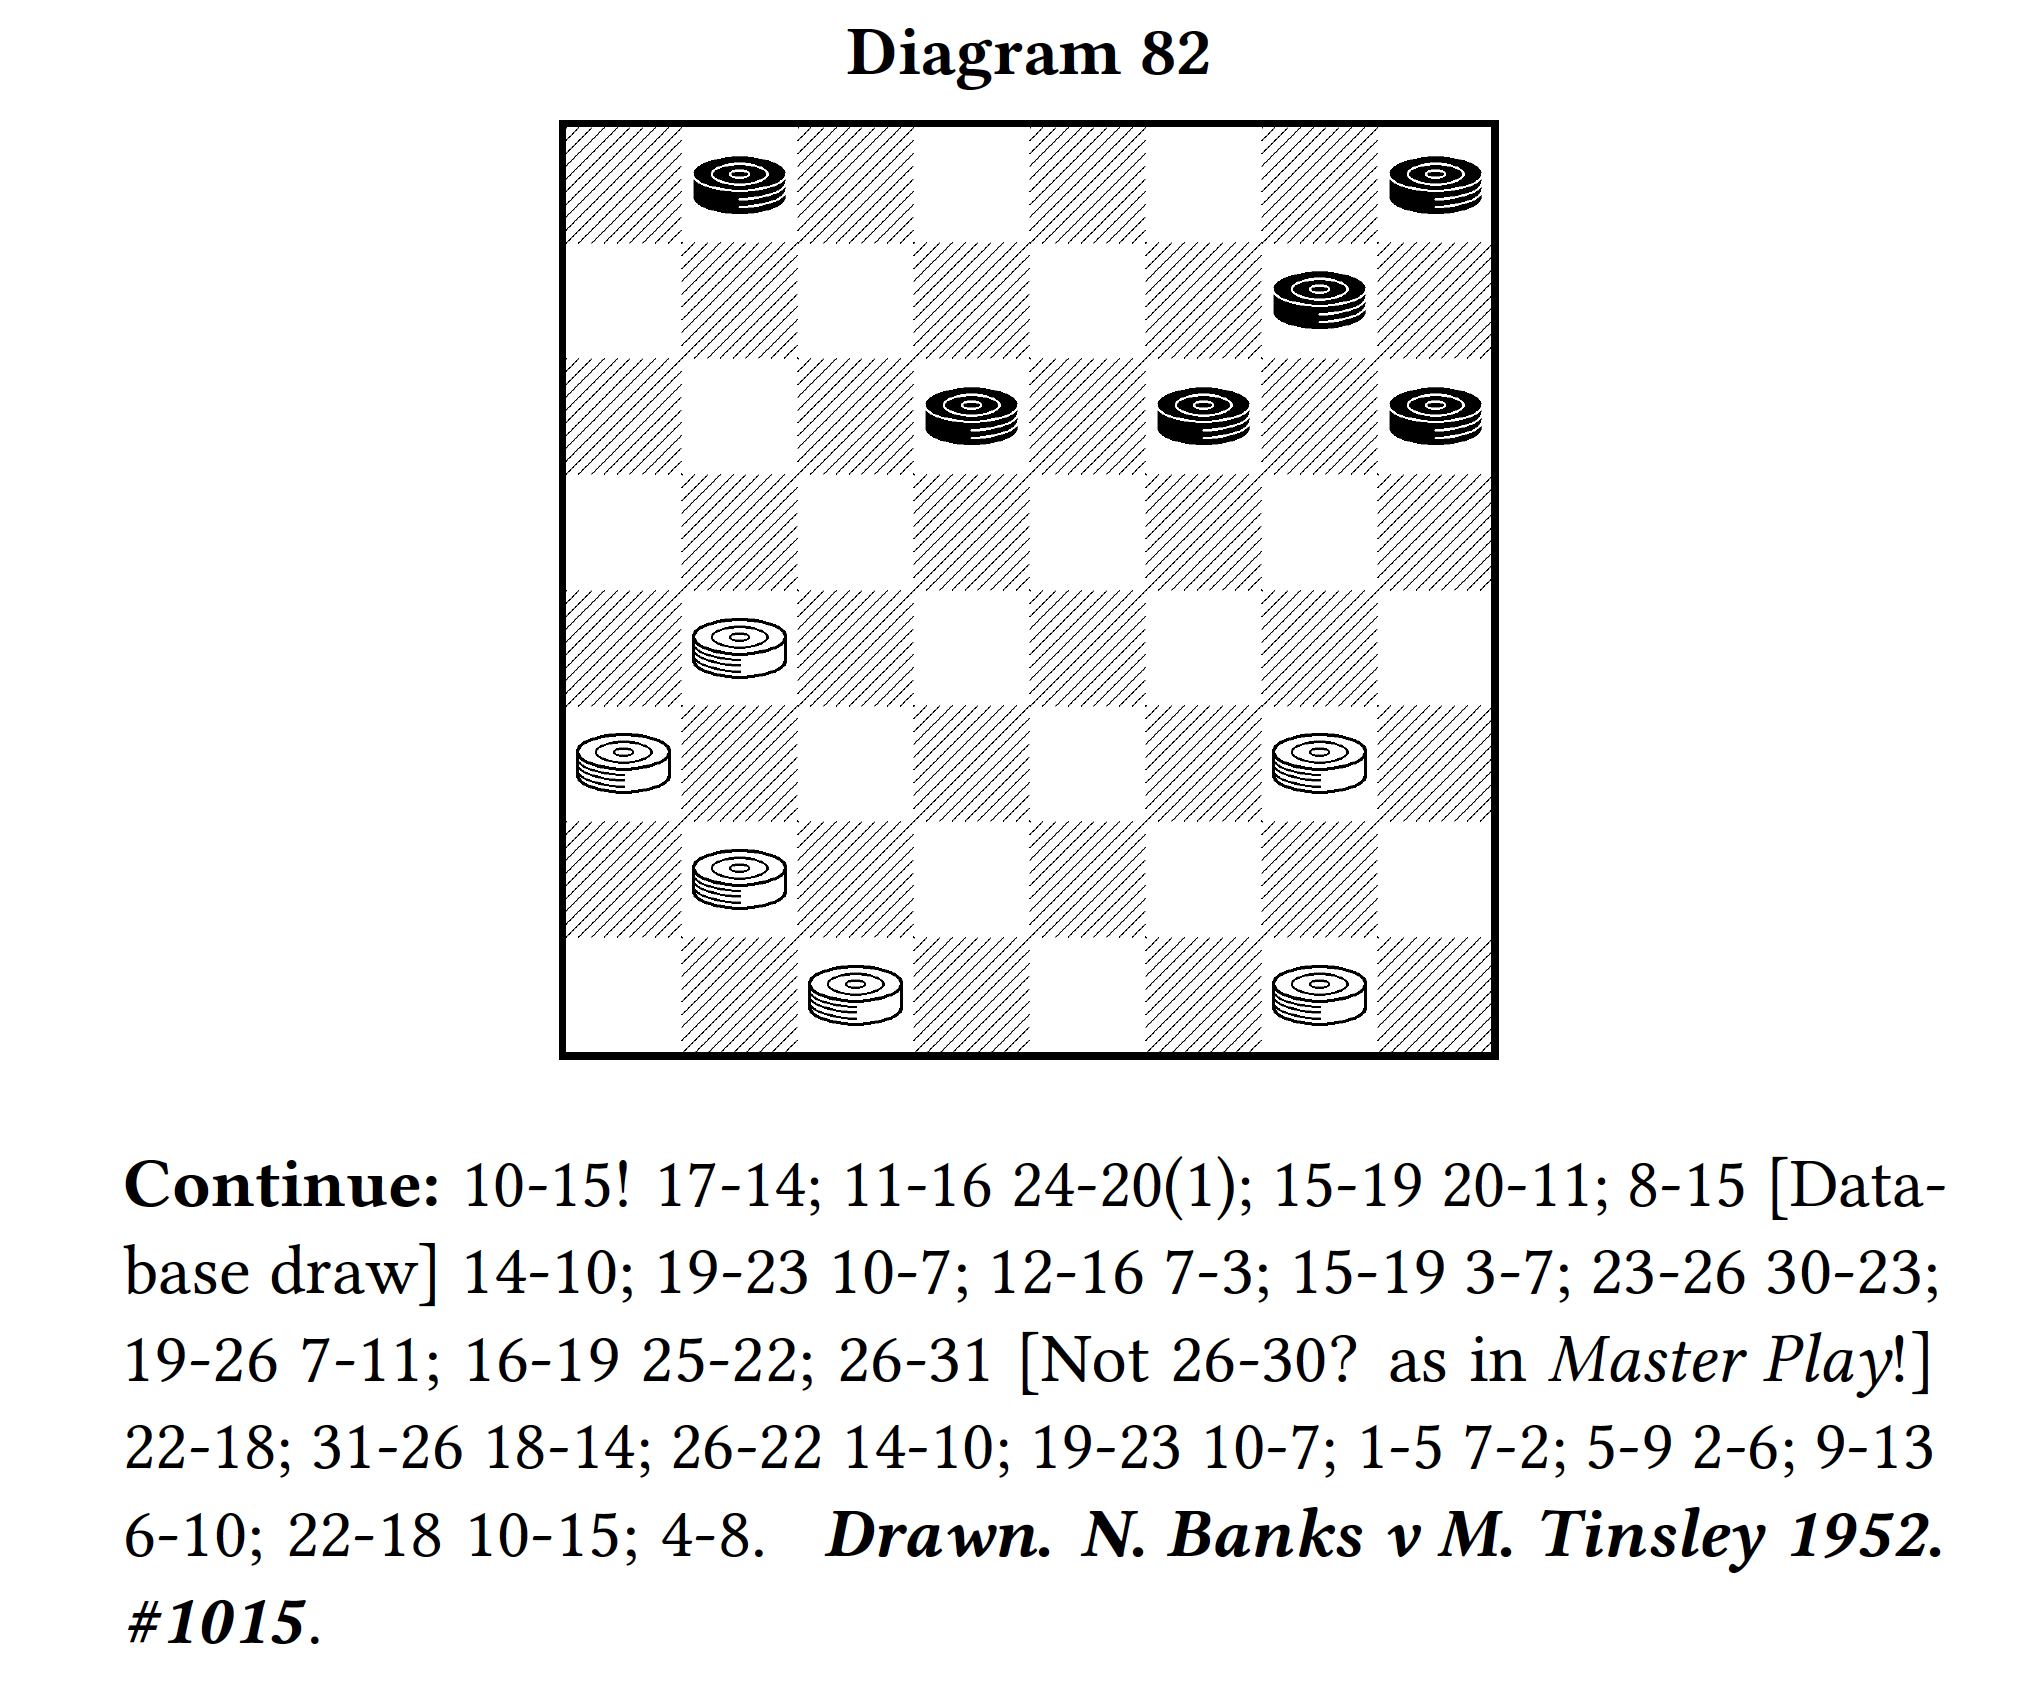
Excerpt from the monumental Checkers opening guide by GM Richard Pask, Complete Checkers (2020).

Checkers — Also known as Draughts, English Draughts, or Straight Checkers, this 8×8 classic suffered unjustly from Jonathan Schaeffer and his engine Chinook weakly solving the game in 2007 (it’s a draw).  This game-theoretic result has no real bearing on actual play between humans, and alternative opening options like 11-Man Ballot ensure the game has plenty of life left in it.  GM Richard Pask has written some excellent books on the game in recent years (like Complete Checkers above), and great YouTubers like AZCheckers continue to play, analyse and promote this venerable game.  The upcoming World Championship has a $32,000 prize fund, so previous reports  that competitive Checkers is ‘as dead as the dodo’ were a bit exaggerated.  I urge players out there to download Pask’s Checkers for the Novice and give the game a chance; Checkers remains a playable and enjoyable game to this day, and strong opponents are easy to find.  8/10.
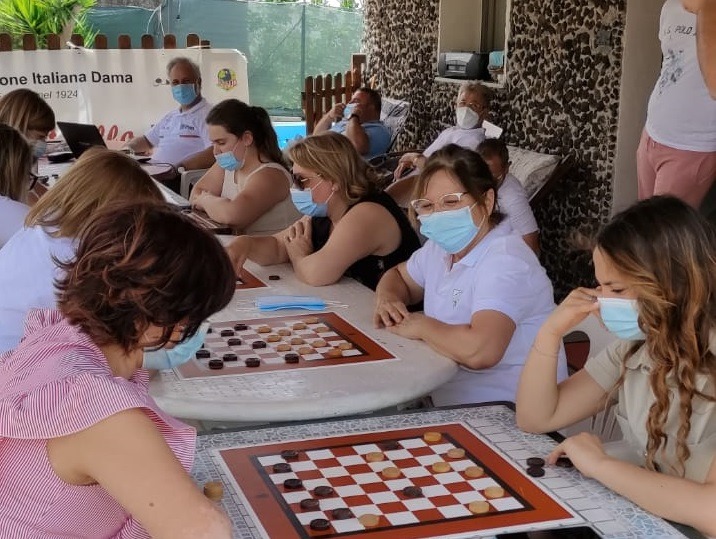
Italian DraughtsDama Italiana is a unique take on 8×8 English Draughts with one massive rules difference: kings cannot be captured by men.  This single change has a profound impact on endgame play especially, and for that reason alone is well worth checking out for fans of Draughts/Straight Checkers.  There are some additional wrinkles to the majority capturing rule, which take some getting used to.  The Italian Draughts Federation seems highly active, and supports OTB tournament play in both the Italian game and 10×10 International Draughts.  I’ve heard tales of 10×10 Dama Italiana being played in some parts of the country, which intrigues me, but I’ve yet to find confirmation.  8/10.

Unfortunately, Christian chose to describe this game in an oddly nasty way:

“It bears testimony to the idea that Italians either prefer ‘complicated’ to ‘simple’ or cannot distinguish between ‘complicated’ and ‘complex’, and in either case are obsessed with hierarchy.  Checkers is simple and complex. Italian Draughts is complicated and complex. There’s nothing gained except the loss of simplicity.” (here)

I don’t believe we can generalise about an entire nation on the basis of their Draughts preferences.  Besides, the Italian Draughts Federation runs more events for International Draughts than they do for Italian, so this claim doesn’t make any sense — clearly Italians can, and do, appreciate the ‘simpler’ side of the Draughts rules spectrum.  Also Dama Italiana does gain something unique from the powerful kings, and the more complex capturing rules work in service of that new dynamic.

Russian Checkers Known as Shashki in its native land, Russian Checkers has a distinguished history of high-level competition and sophisticated analysis.  Russian Draughts is nearly 8×8 International Draughts, but men can promote to king in mid-move (!), and players are not obligated to take the capture sequence of maximum length.  These two simple changes create a game with a distinct character, well worth playing.  I strongly encourage the skeptics to try it; you will see that the mid-move promotions and lack of majority capture work very well together, creating a unique positional feel compared to other variants.  Russian Checkers also has a large literature associated with it, which is helpful, but unsurprisingly nearly all of it is in the Russian language; a large archive of classic books on the game can be found here.  Tournament play occurs all over the world and is supported by the IDF64.  Online opponents are readily found on PlayOK.  9/10.

pool-checkers-1

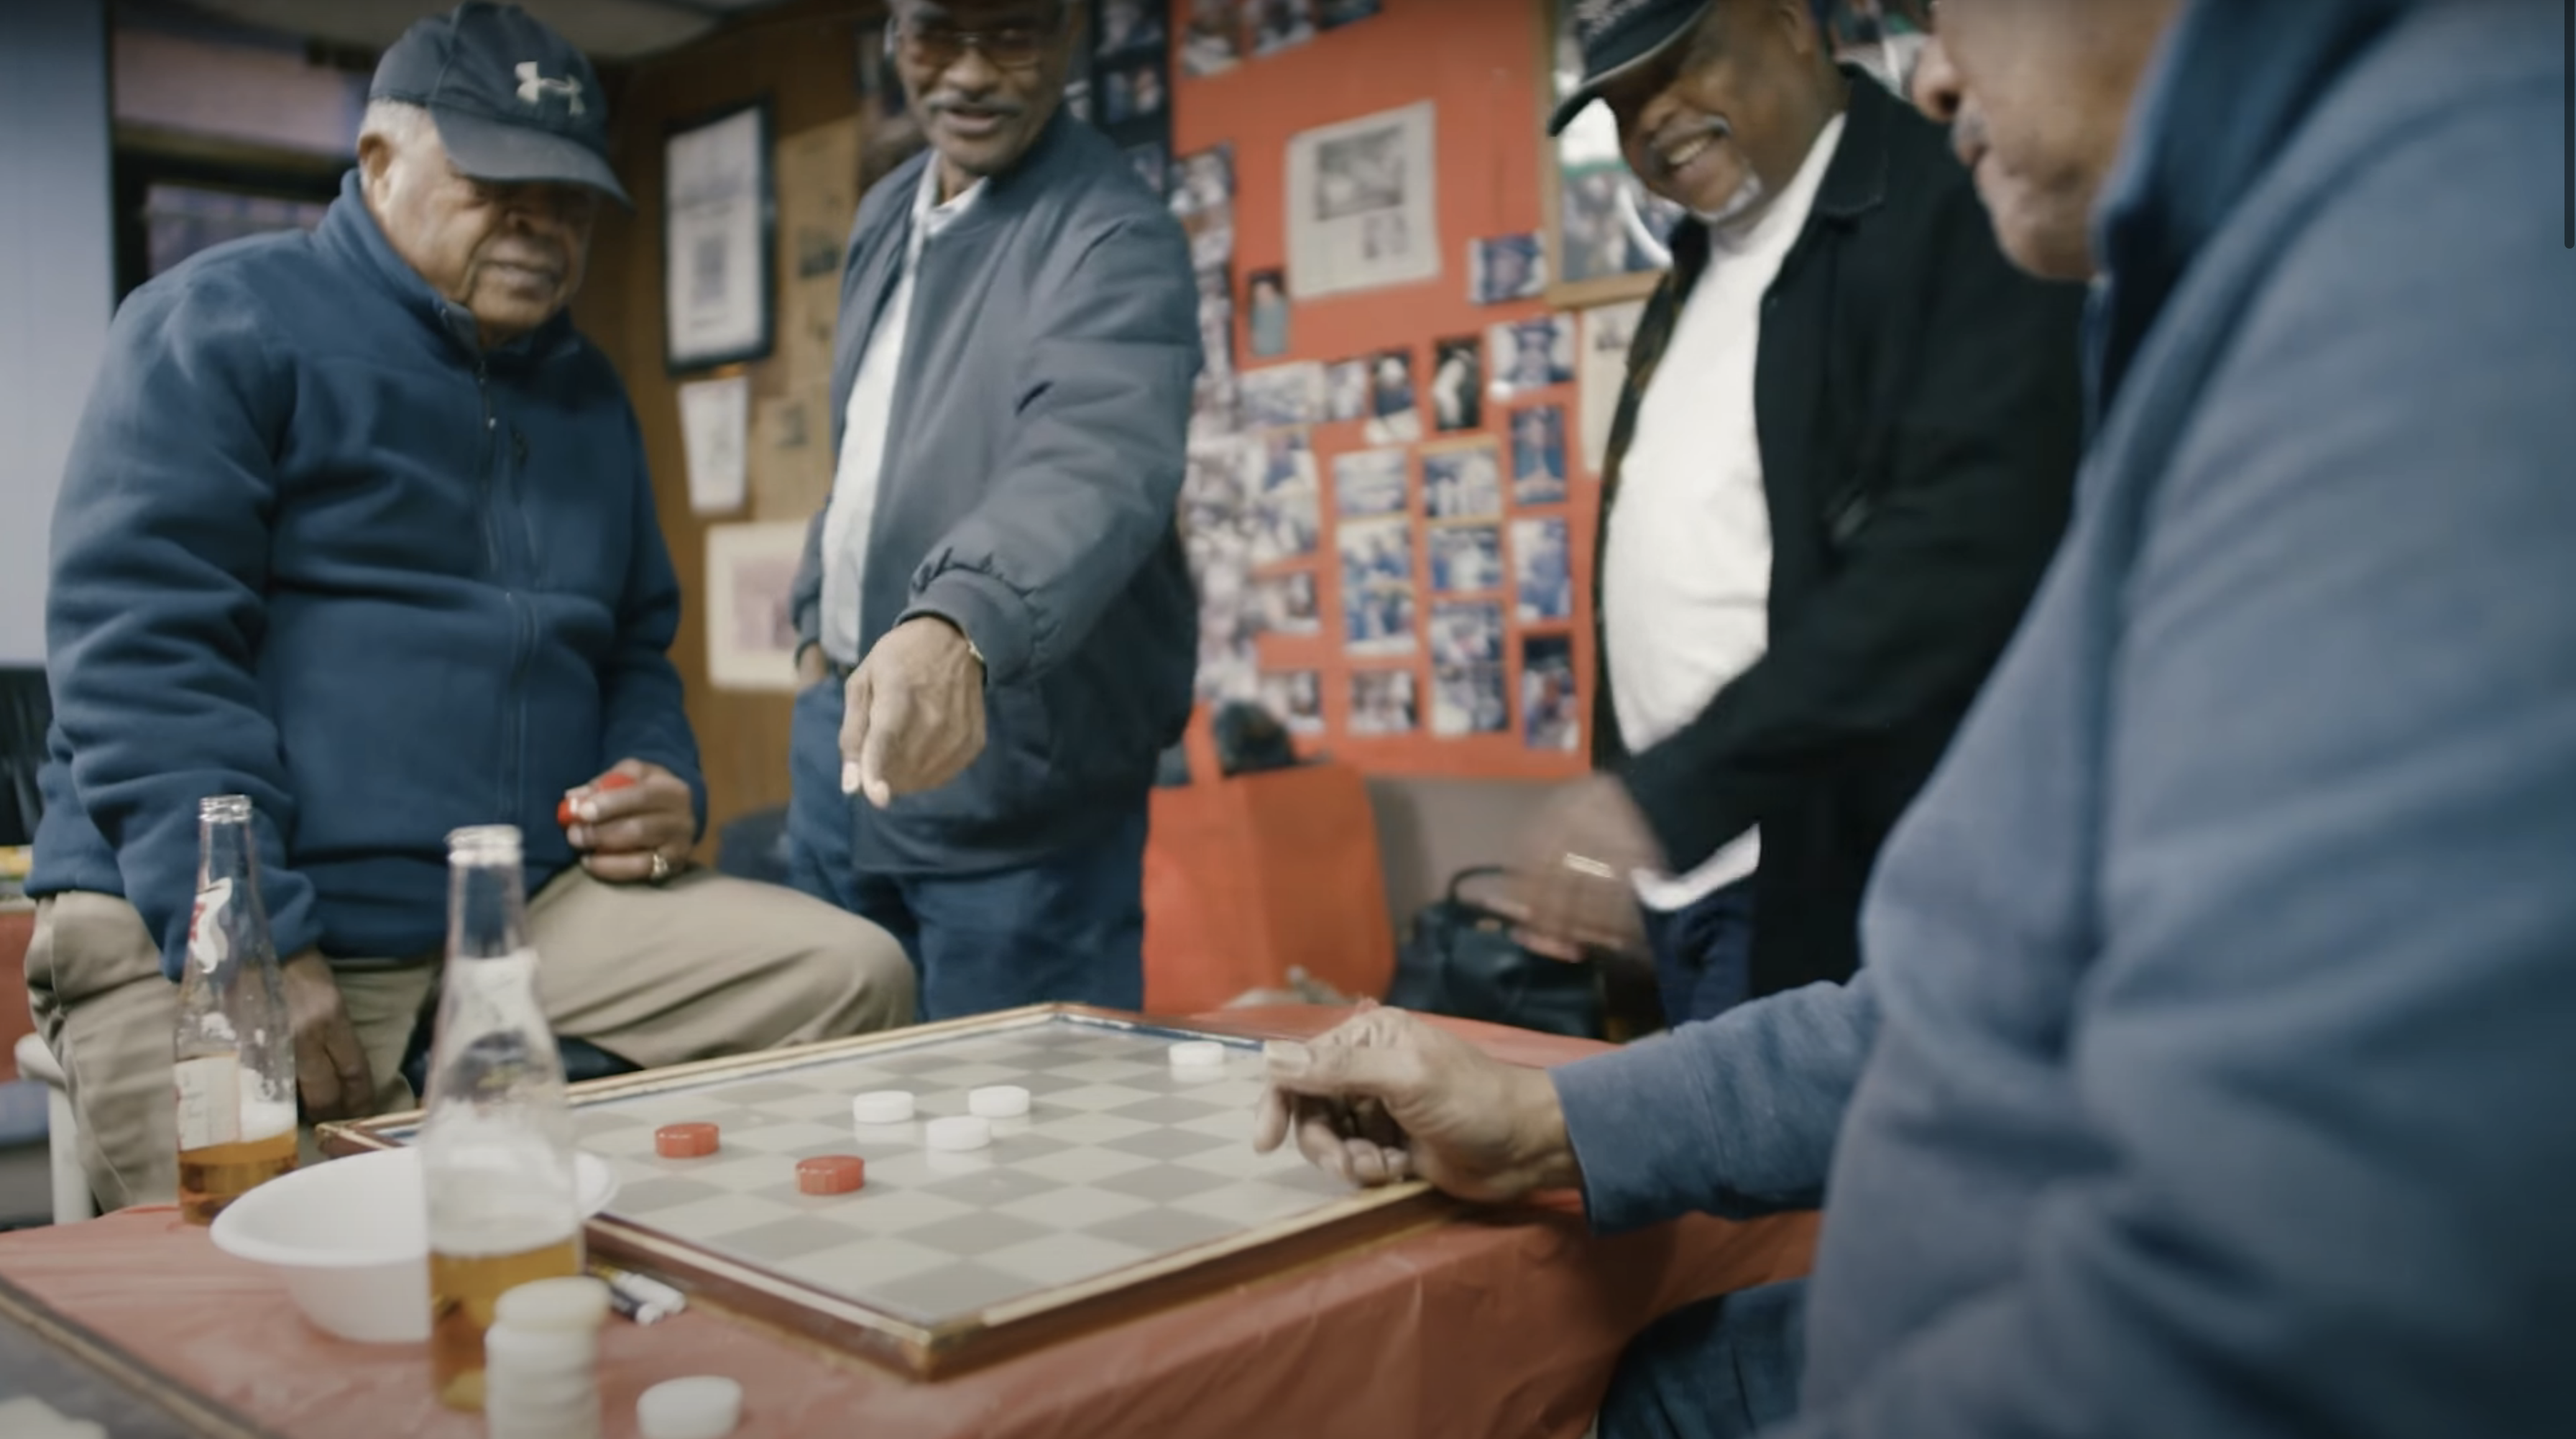
American Pool Checkers — A game criminally underrated in its home country, American Pool Checkers is a close relative of Russian Checkers, where men no longer promote in mid-move.  The game found some popularity for a time, particularly among black men in the American South.  I hope this game can maintain a foothold, particularly because it’s so rare that we recognise and support the contribution of minority communities to the world of abstract games.  Captivating articles like this feature in The Bitter Southerner certainly can’t hurt; how could we not love a game featuring top players with nicknames like ‘Iron Claw’ and ‘Big Willie’?  In the meantime, give it a try on Ludoteka9/10.

Brazilian Draughts — This is a straightforward reduction of 10×10 Draughts to the 8×8 board, all rules are otherwise the same.  The result is a quick and action-packed game, great as an introduction to the world of 10×10 Draughts, a quick blitz between longer games, or as a deep and rewarding pursuit in its own right.  Like Russian Draughts, Brazilian Draughts is played all over the world and high-level tournament play exists both online and offline.  9/10.

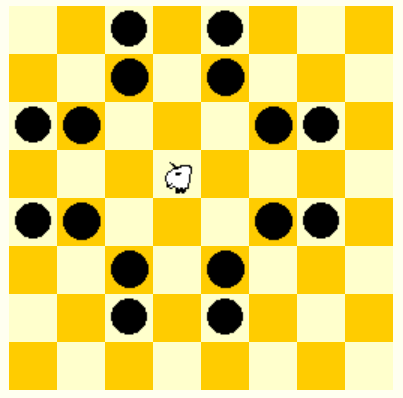
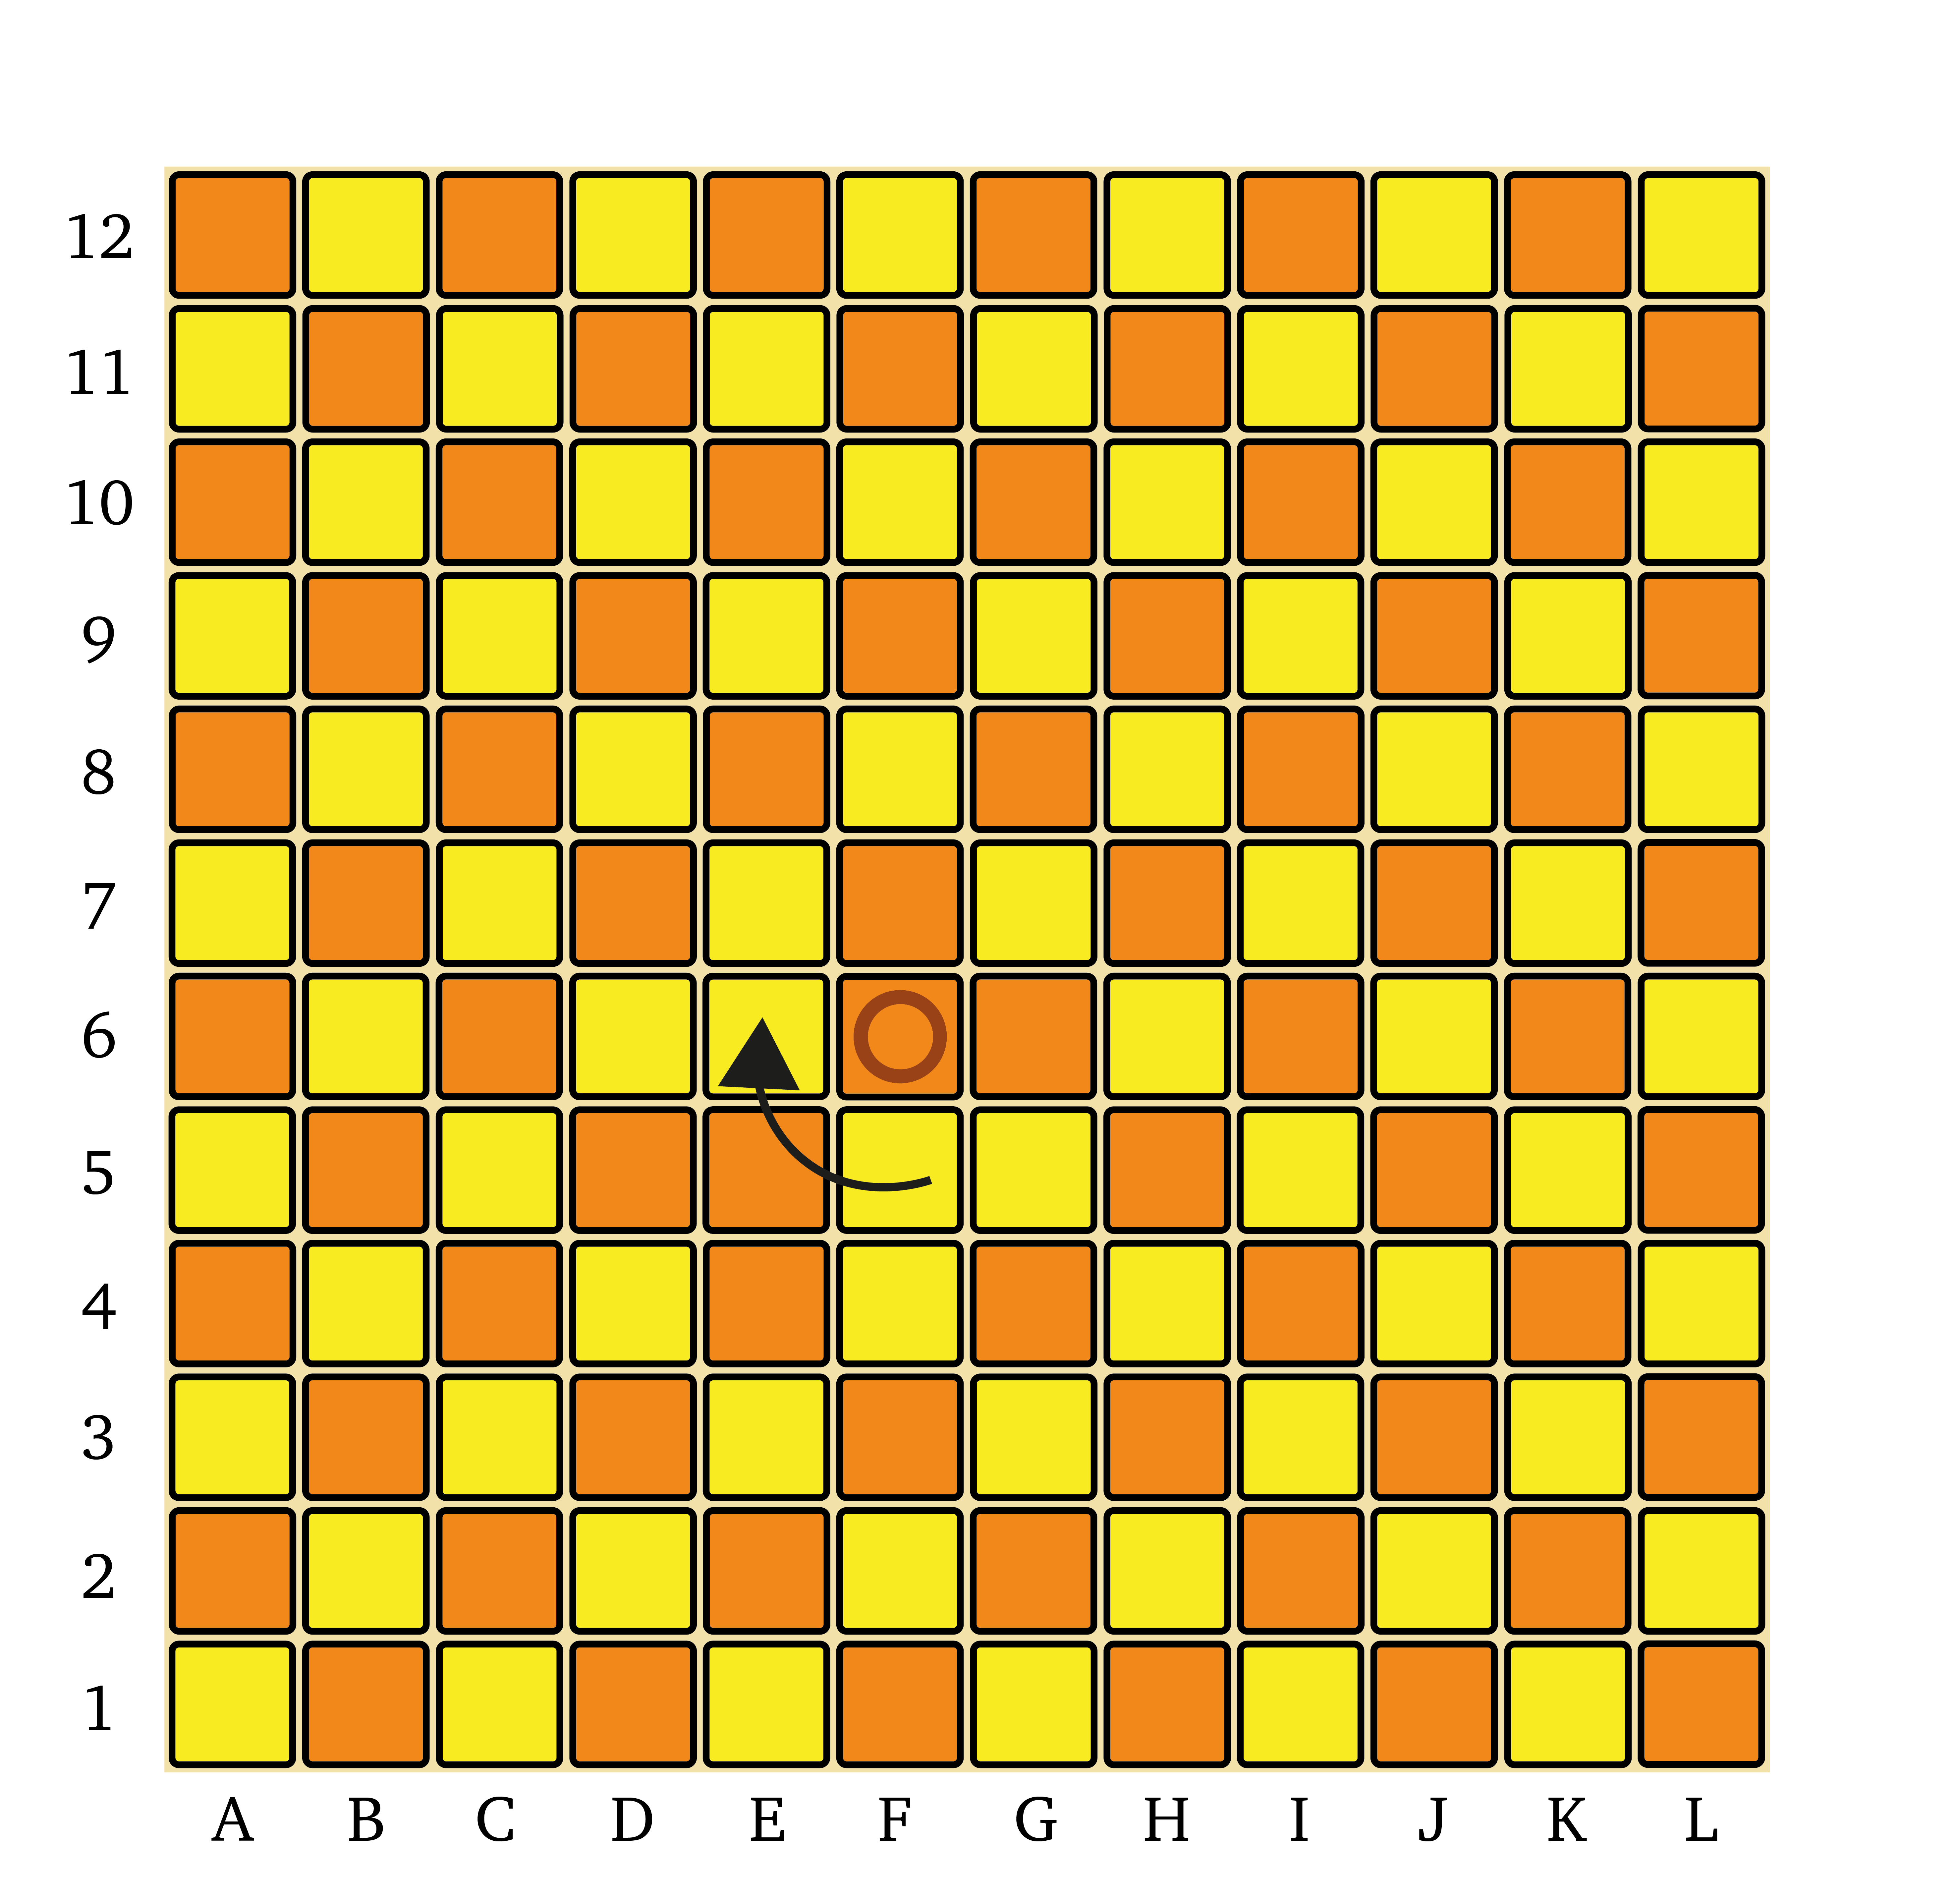
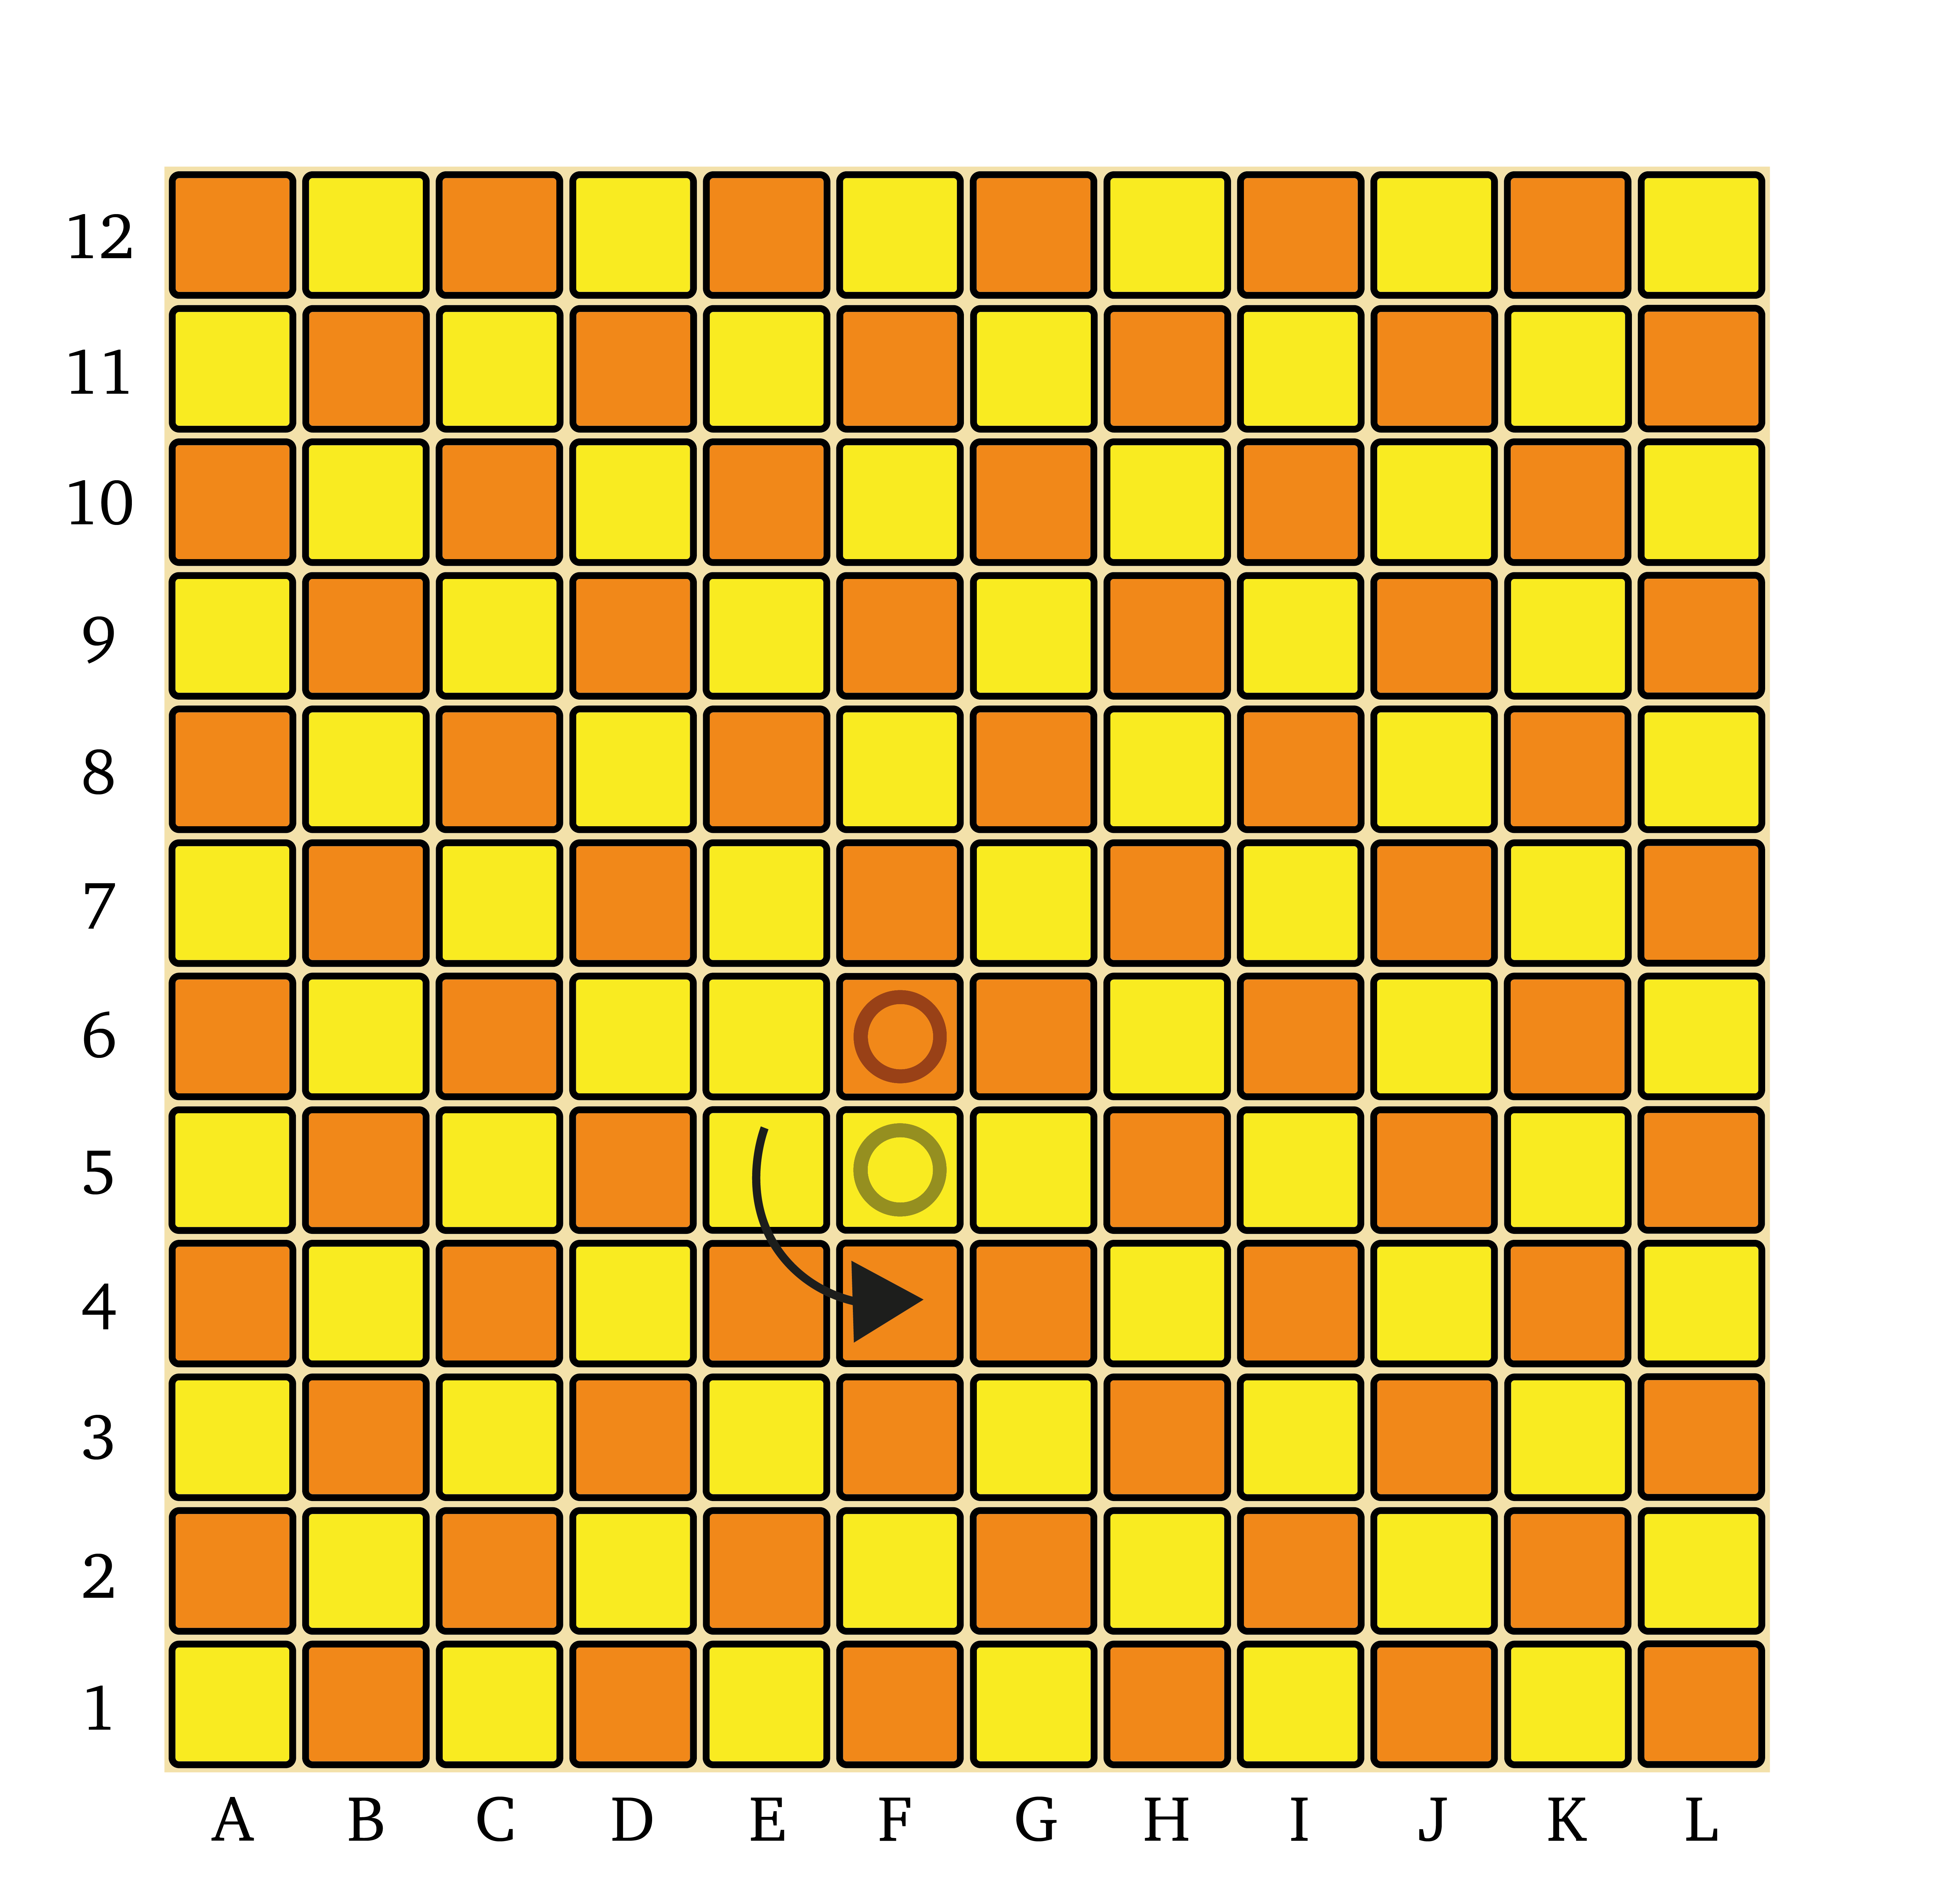
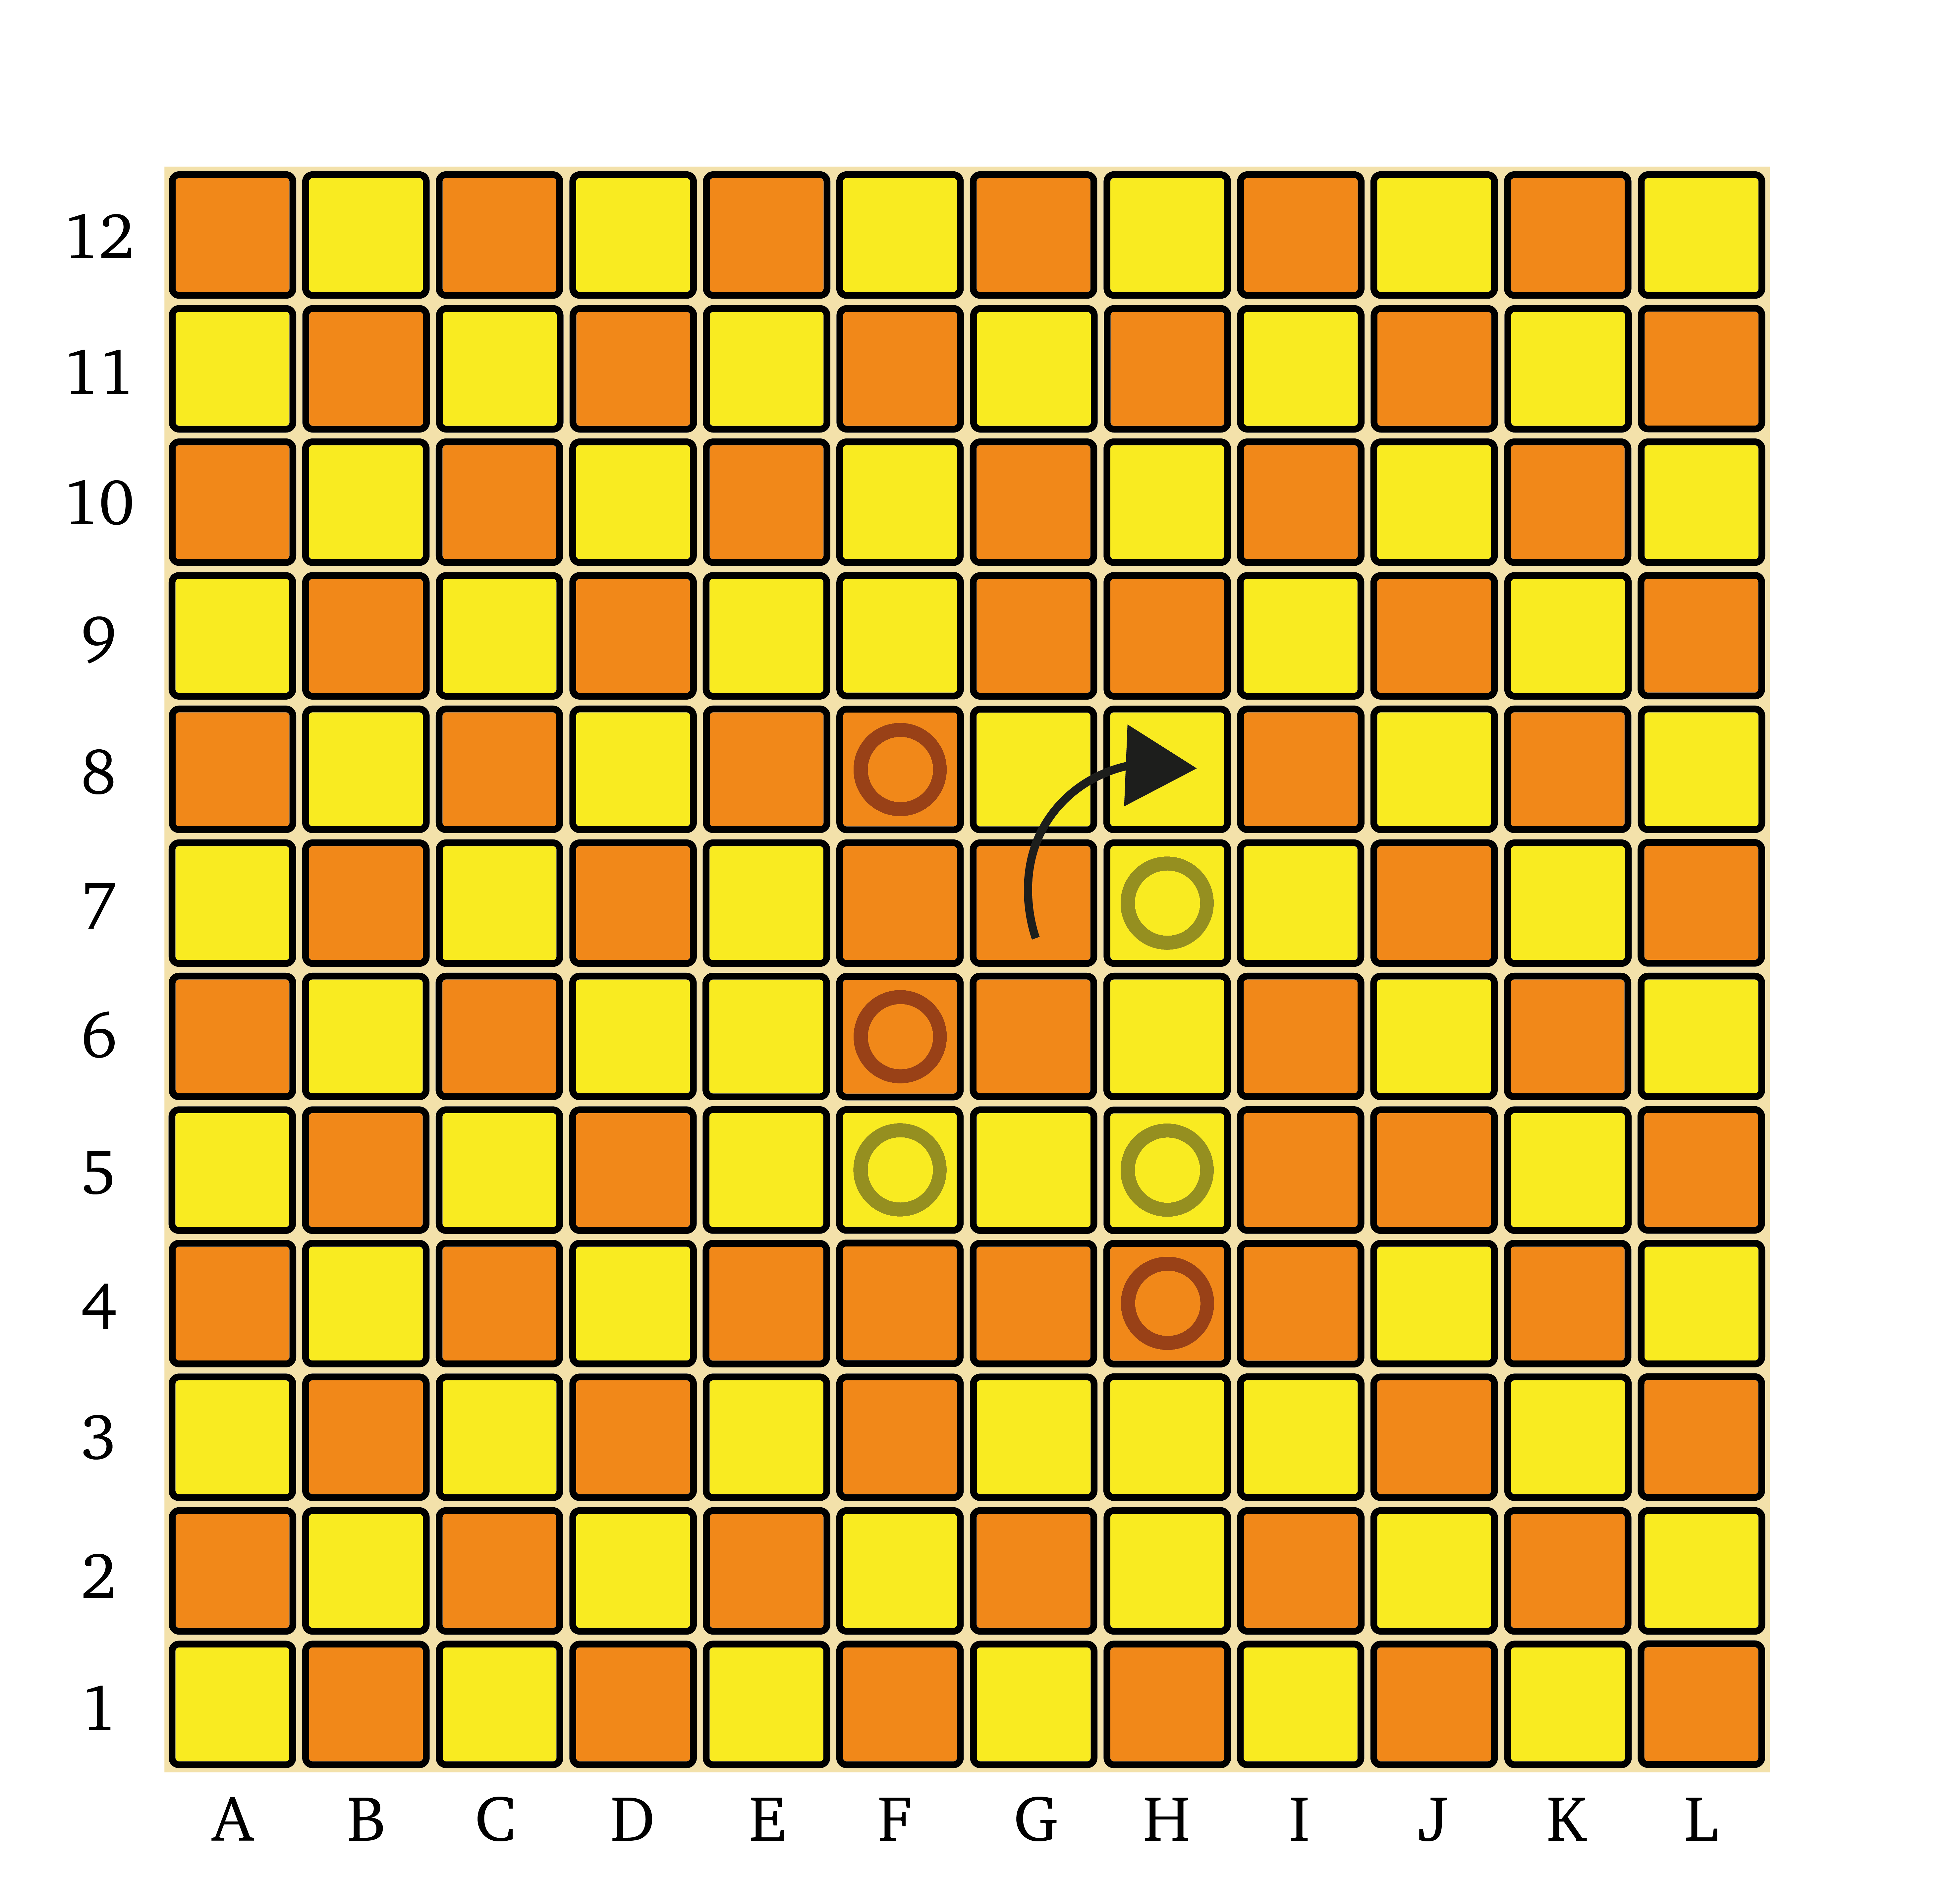
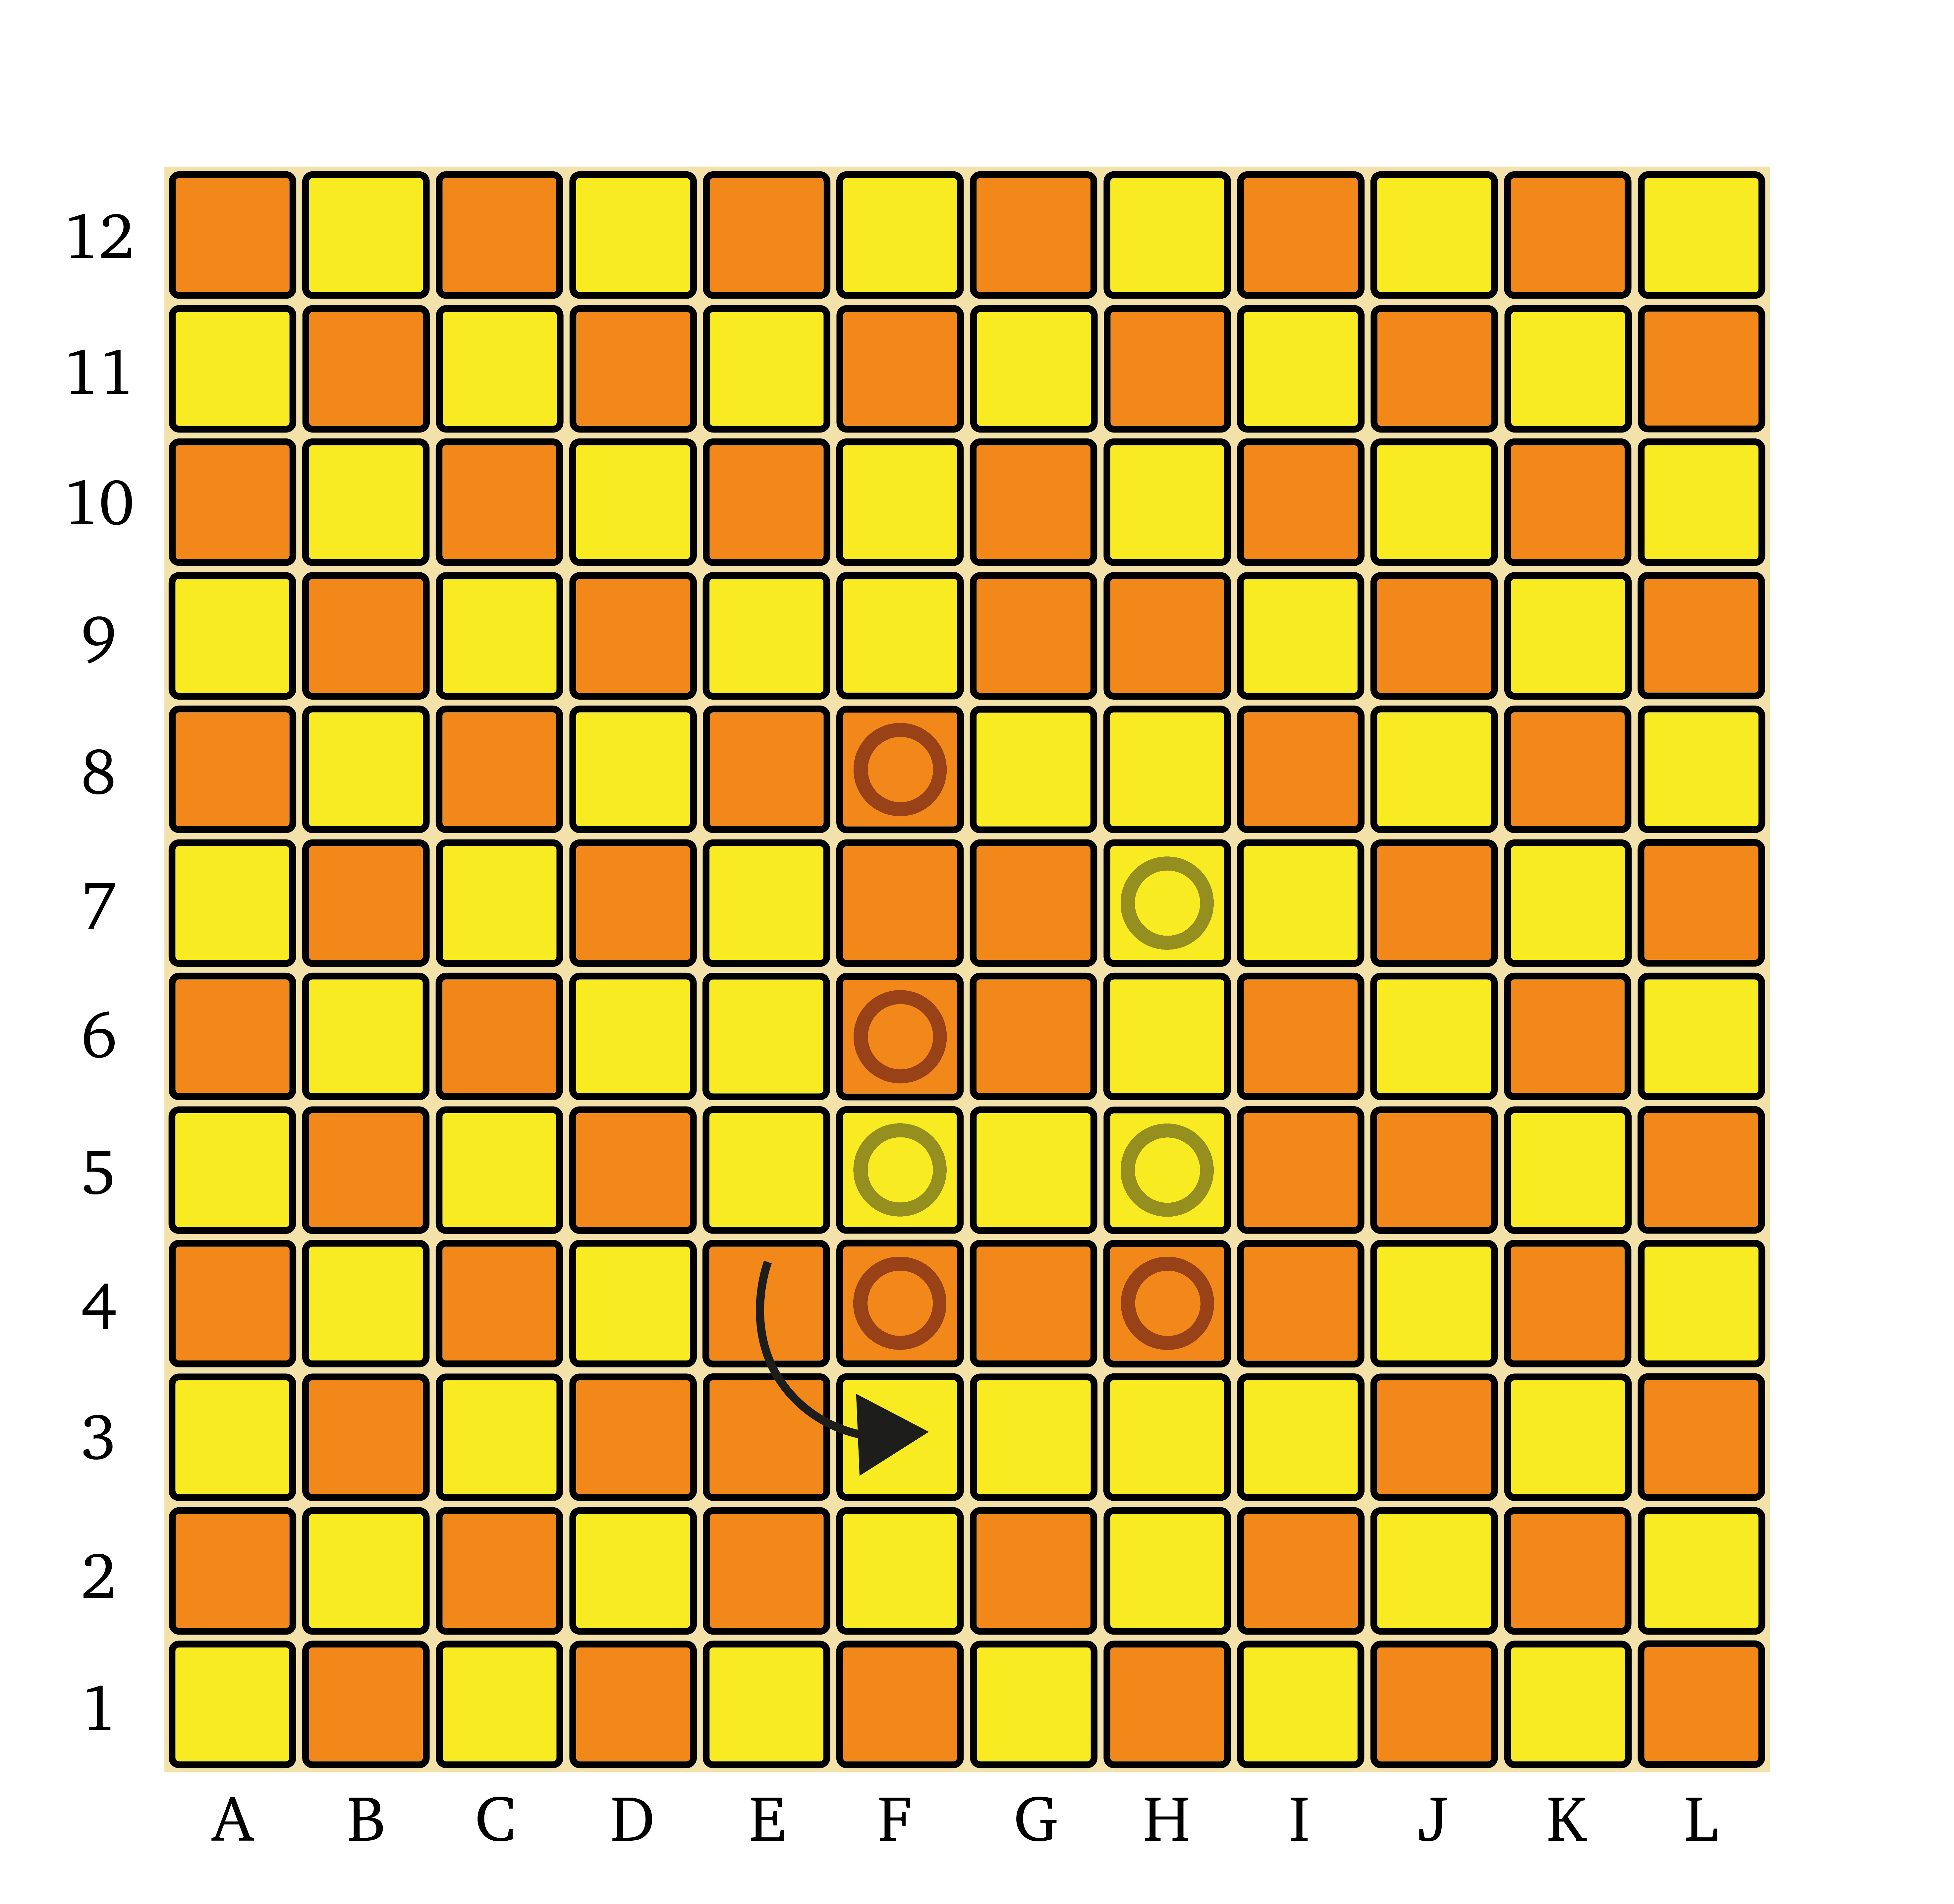
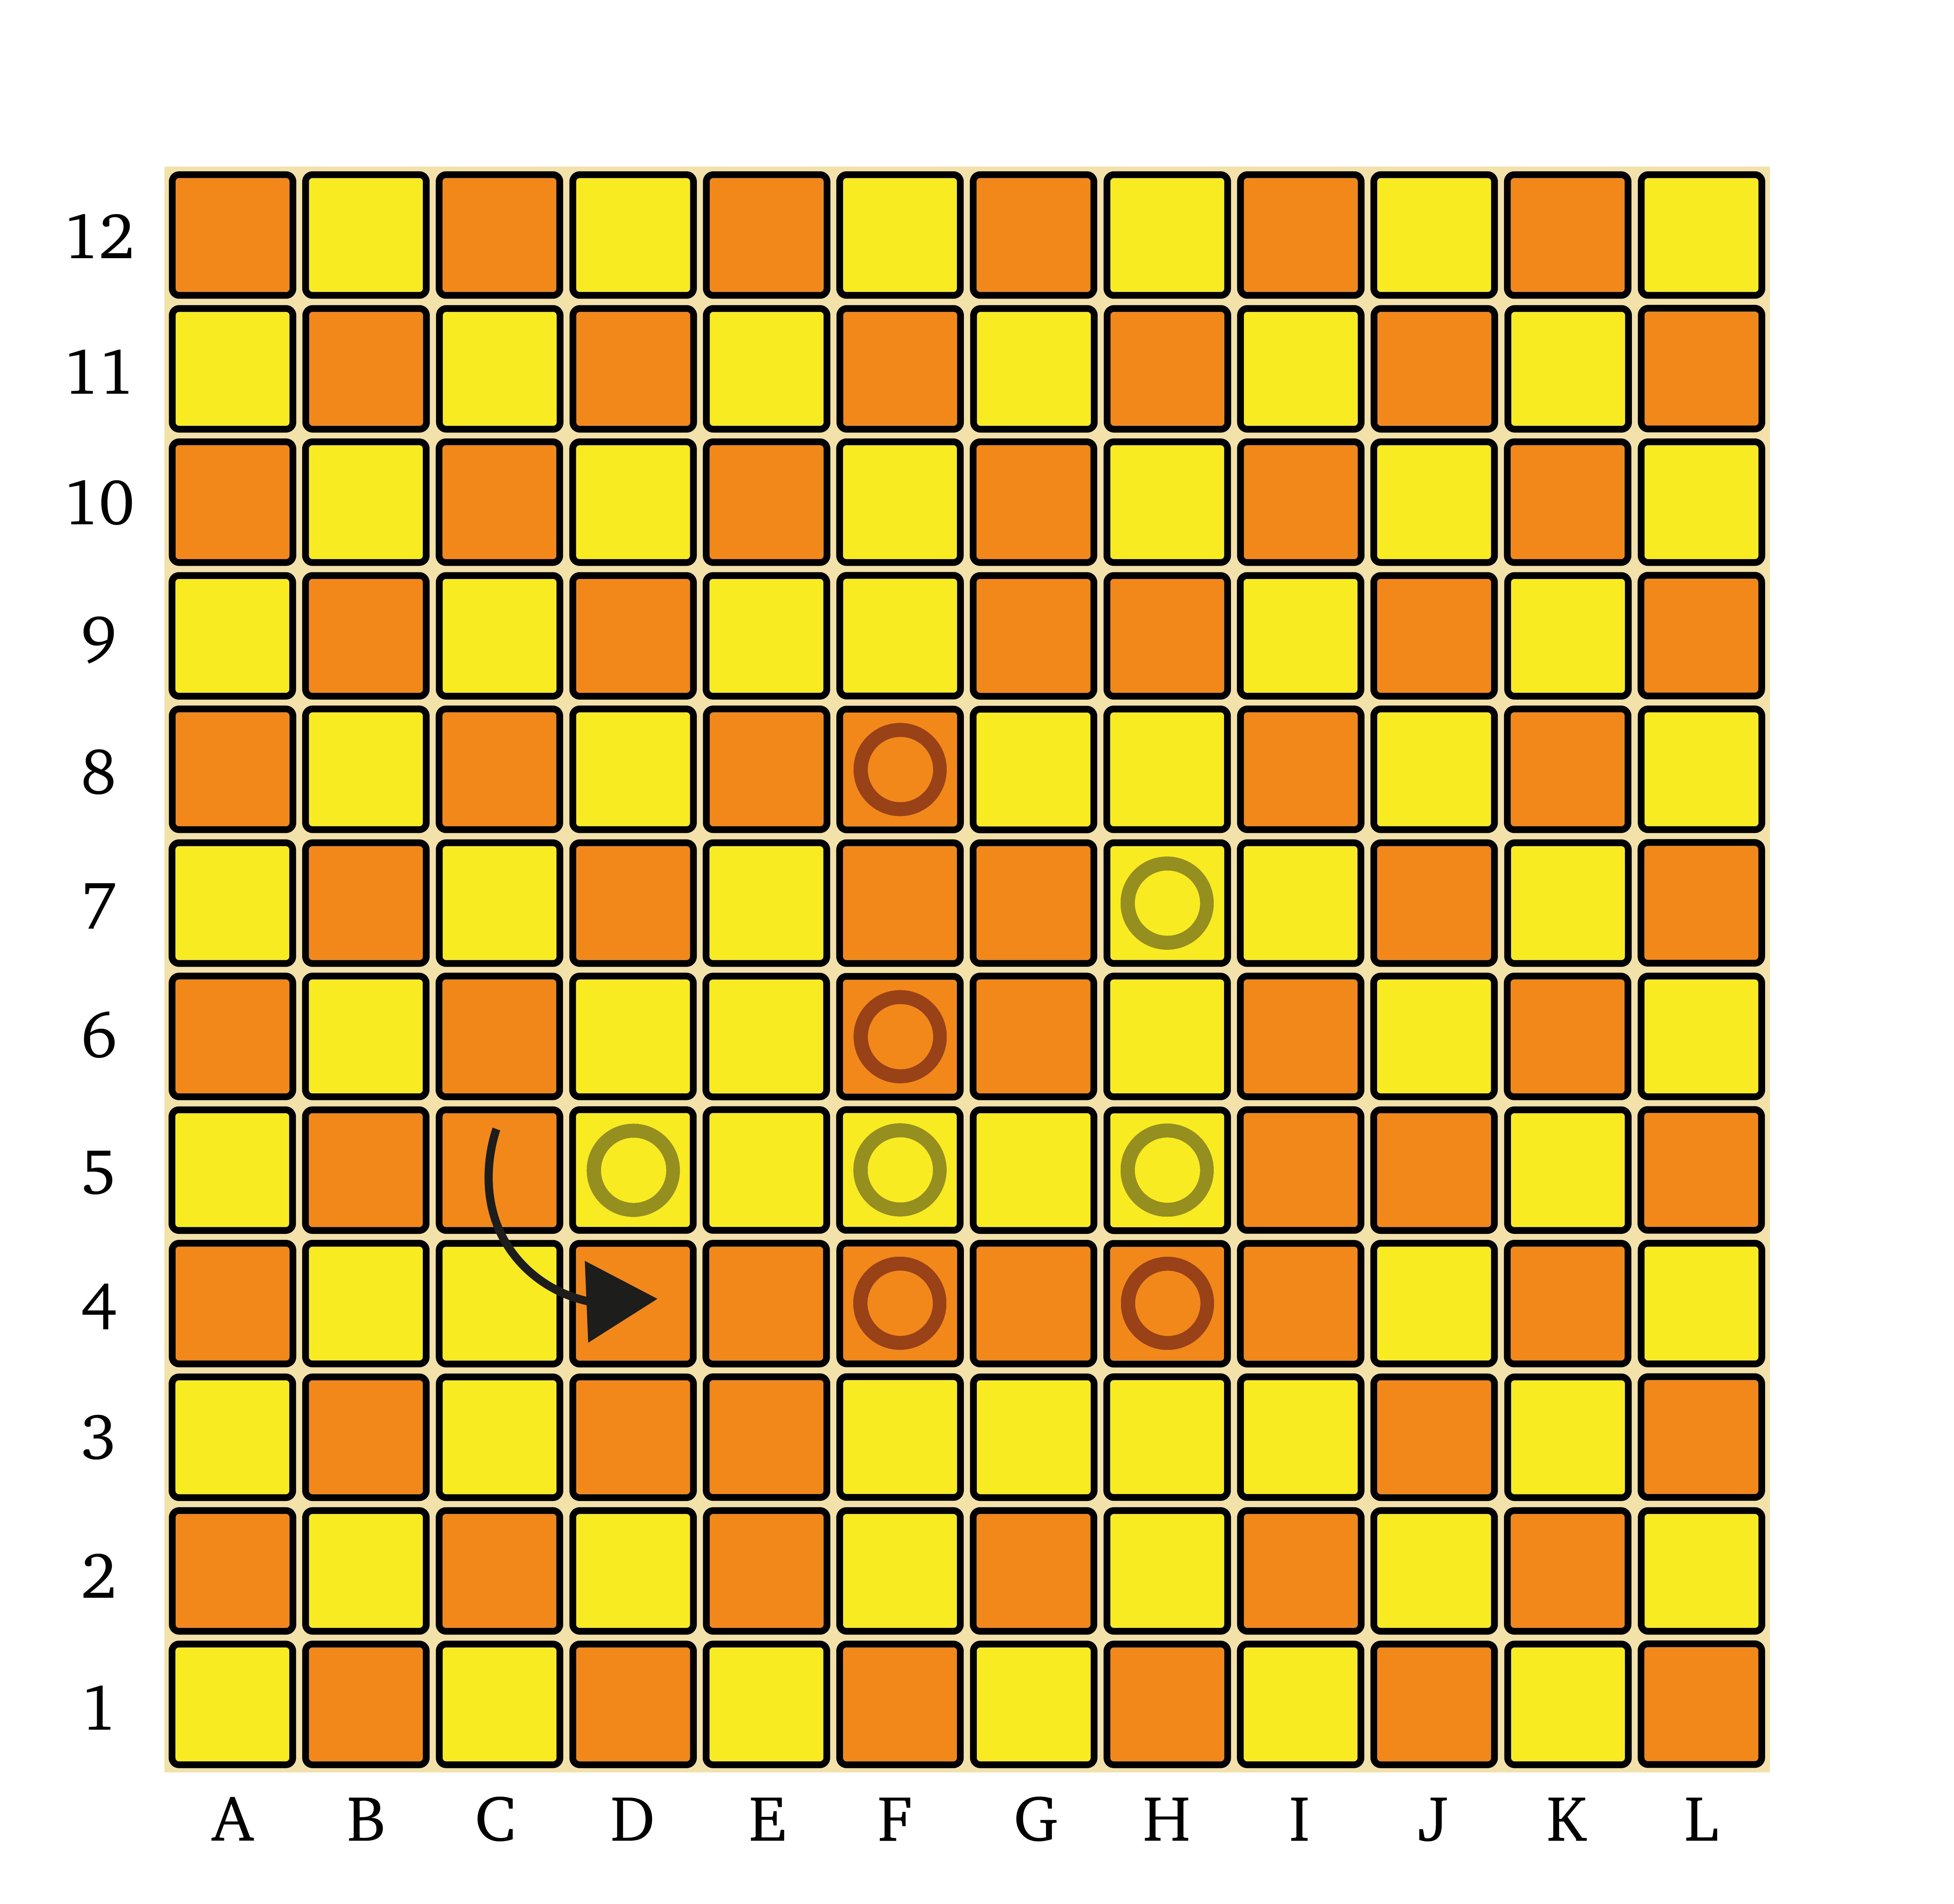
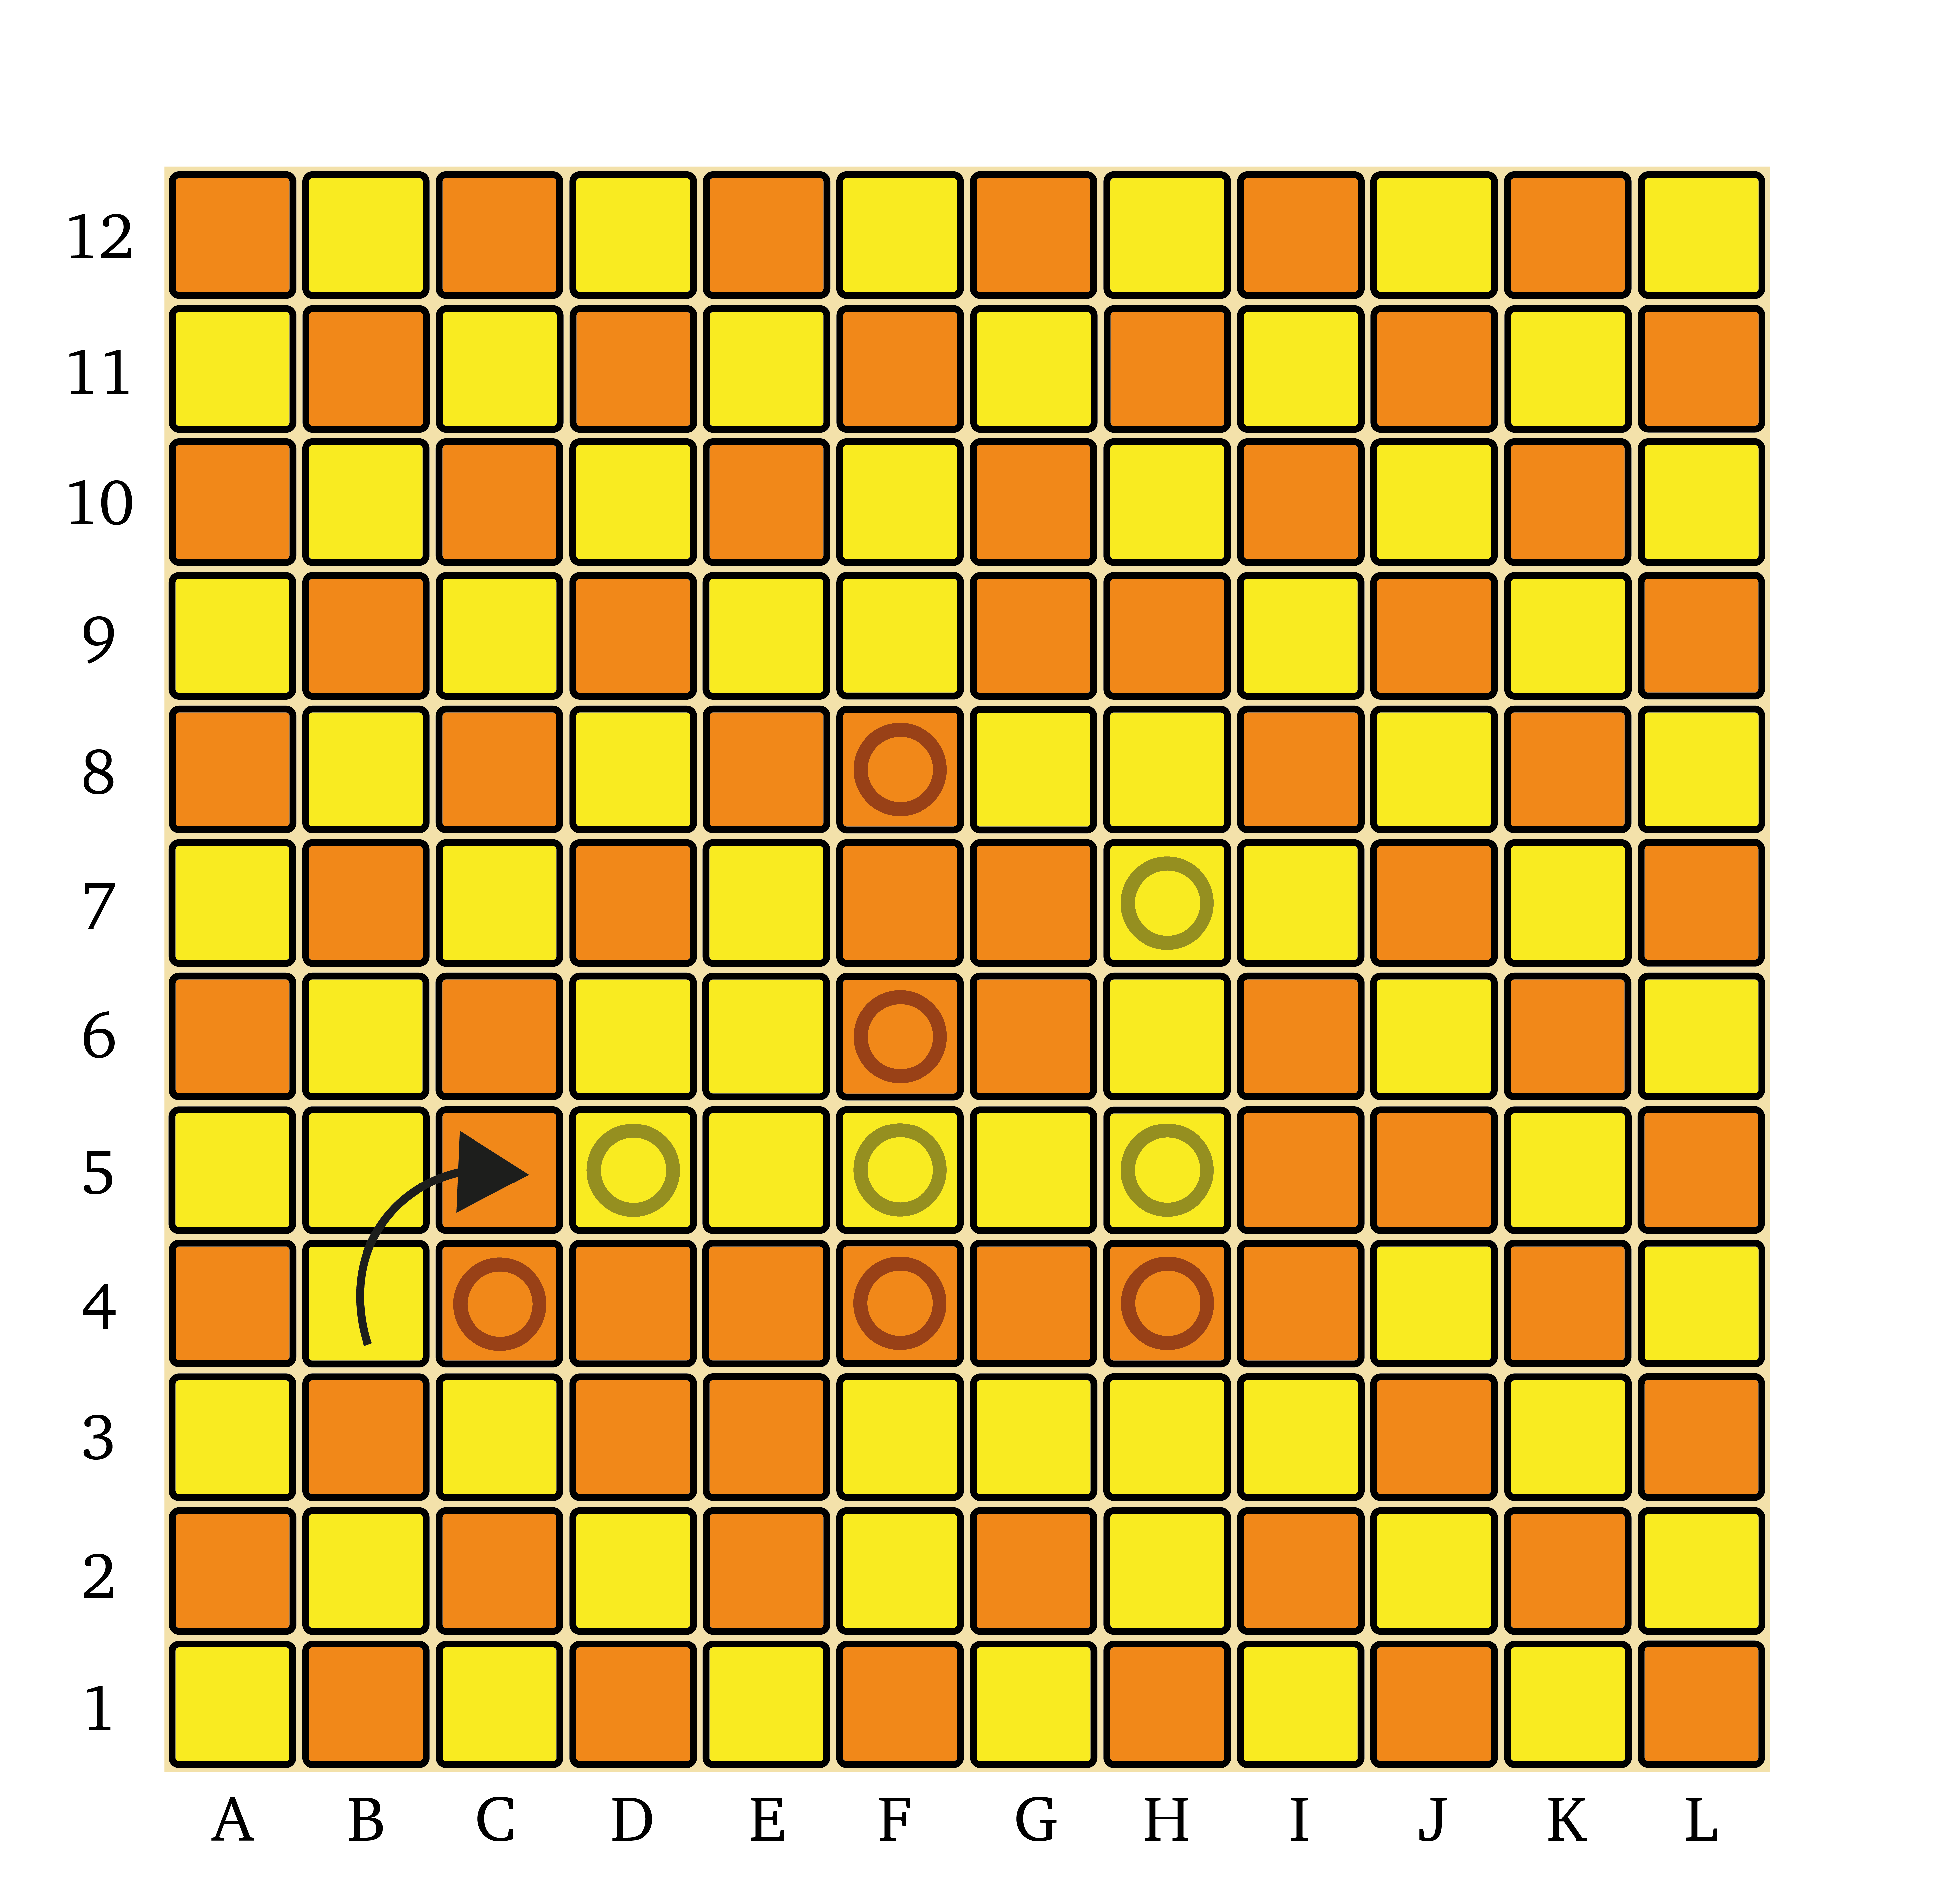
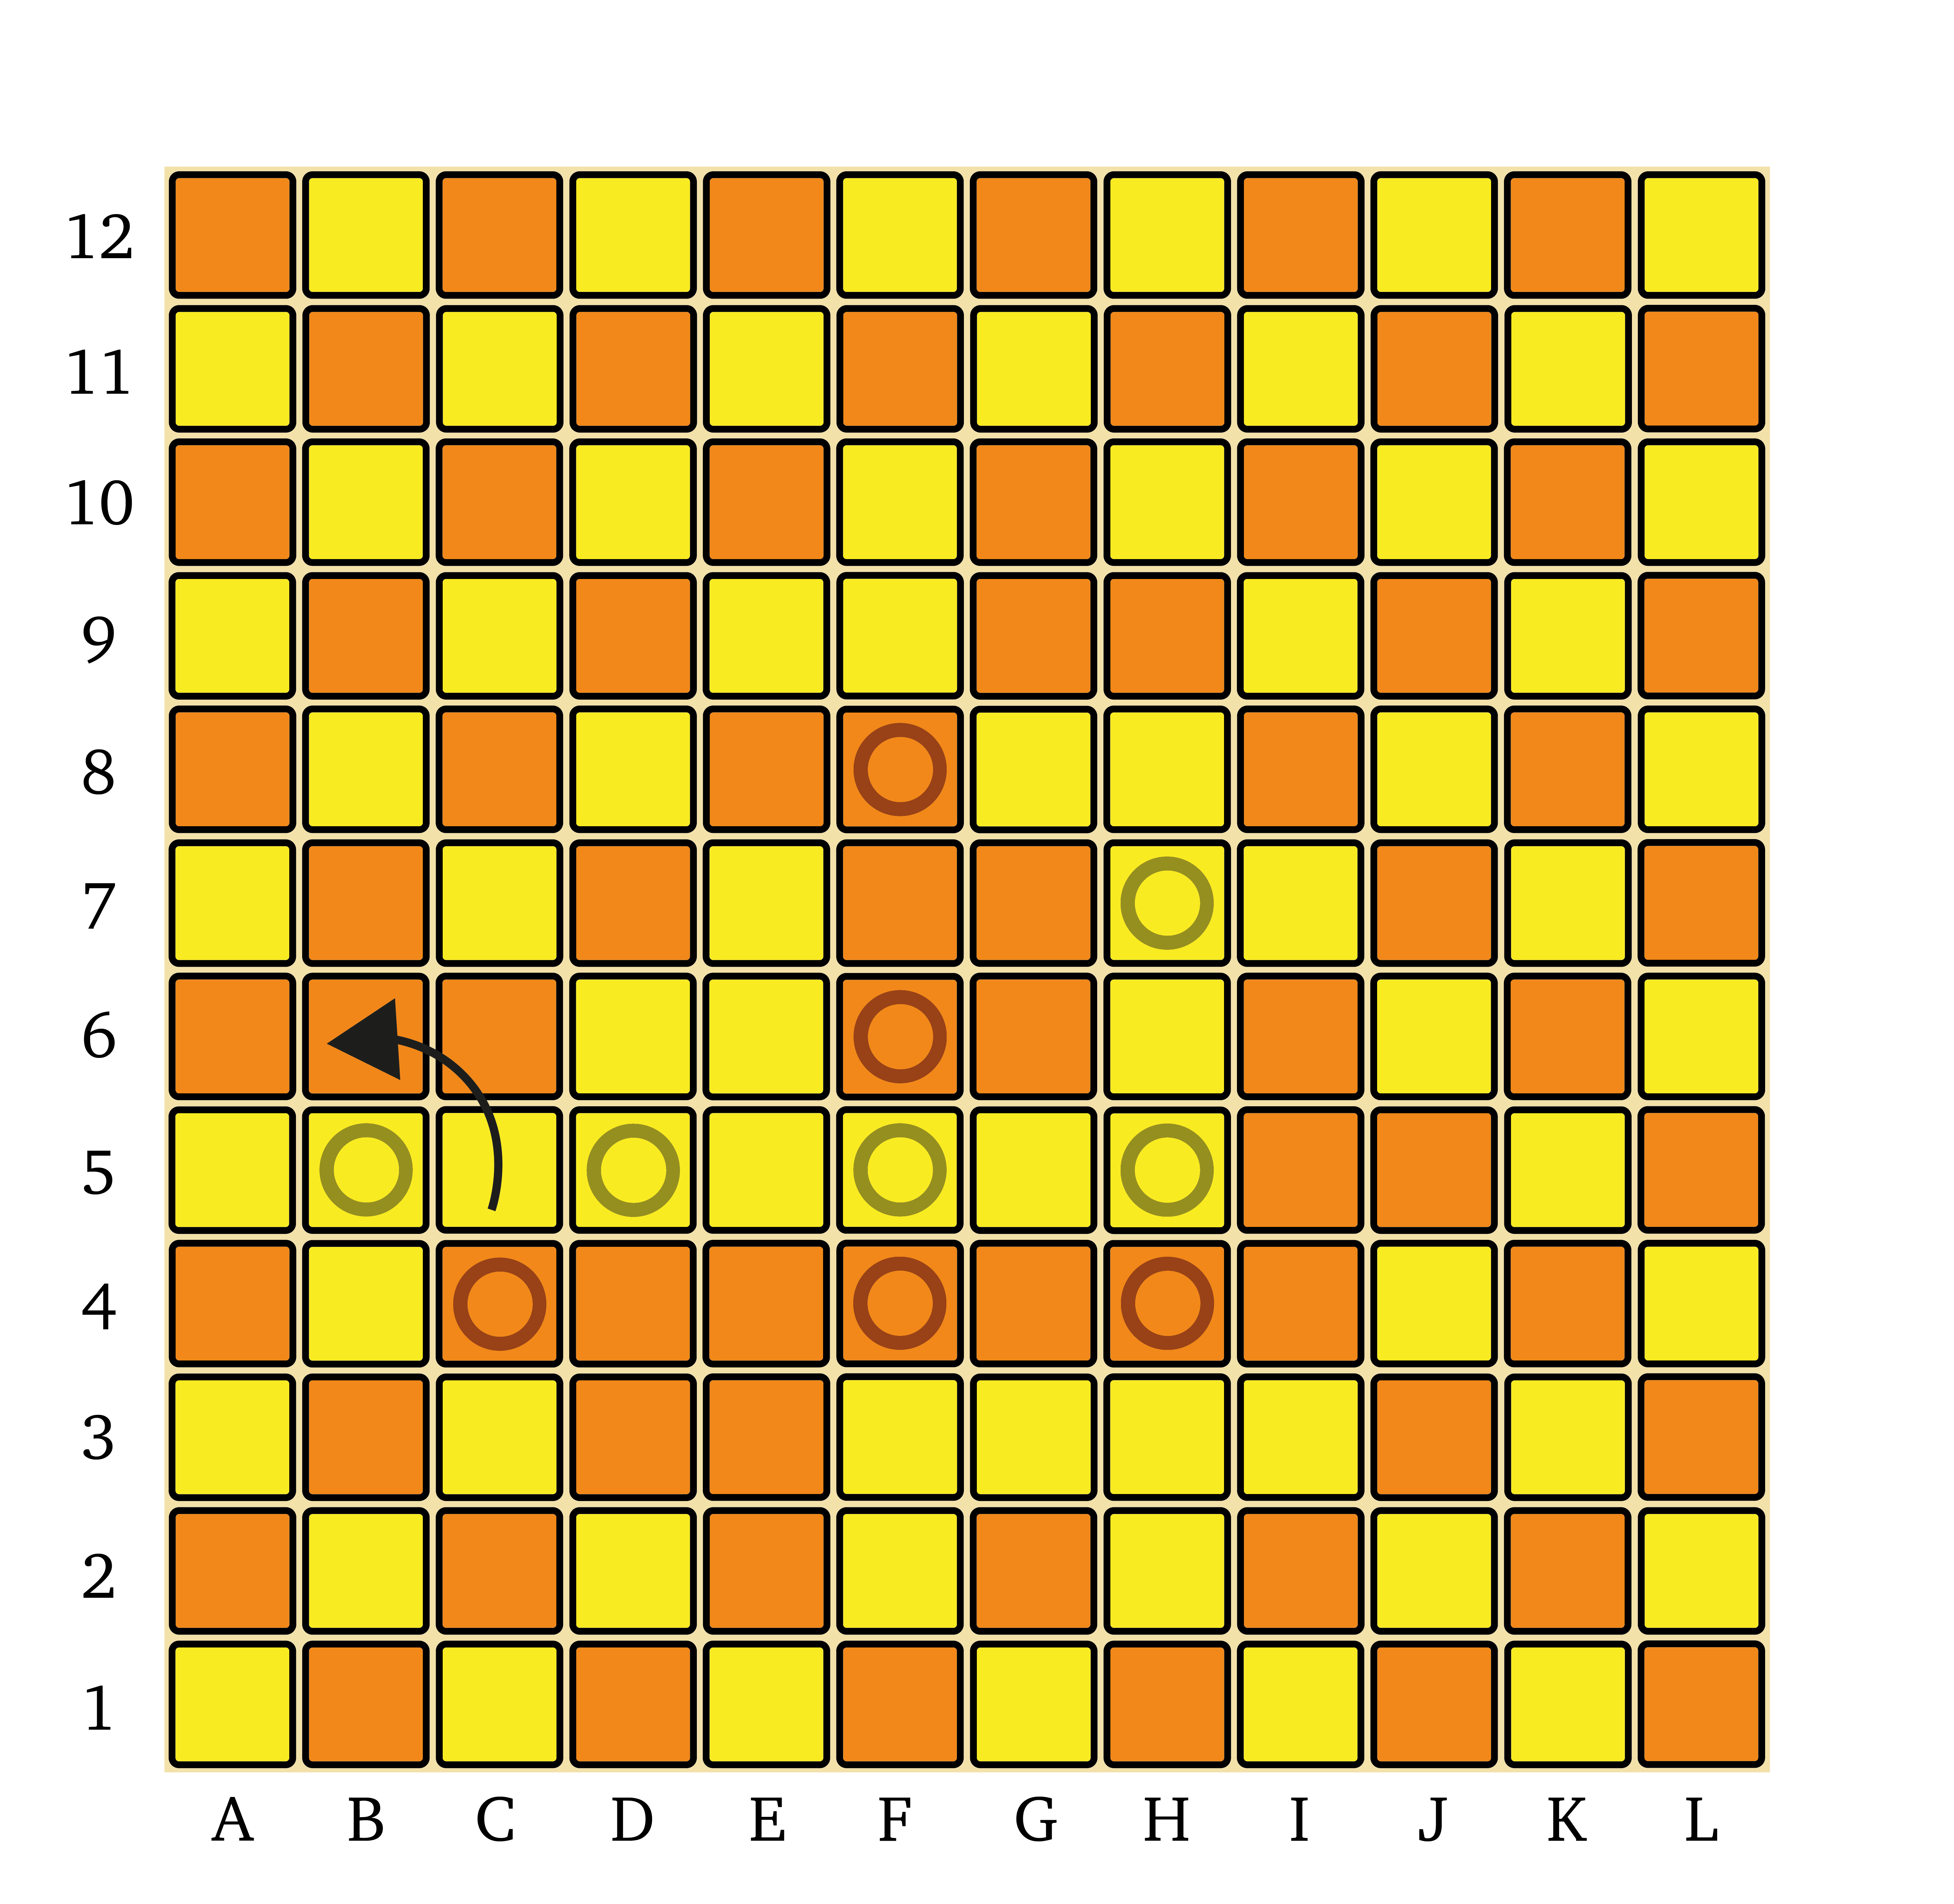
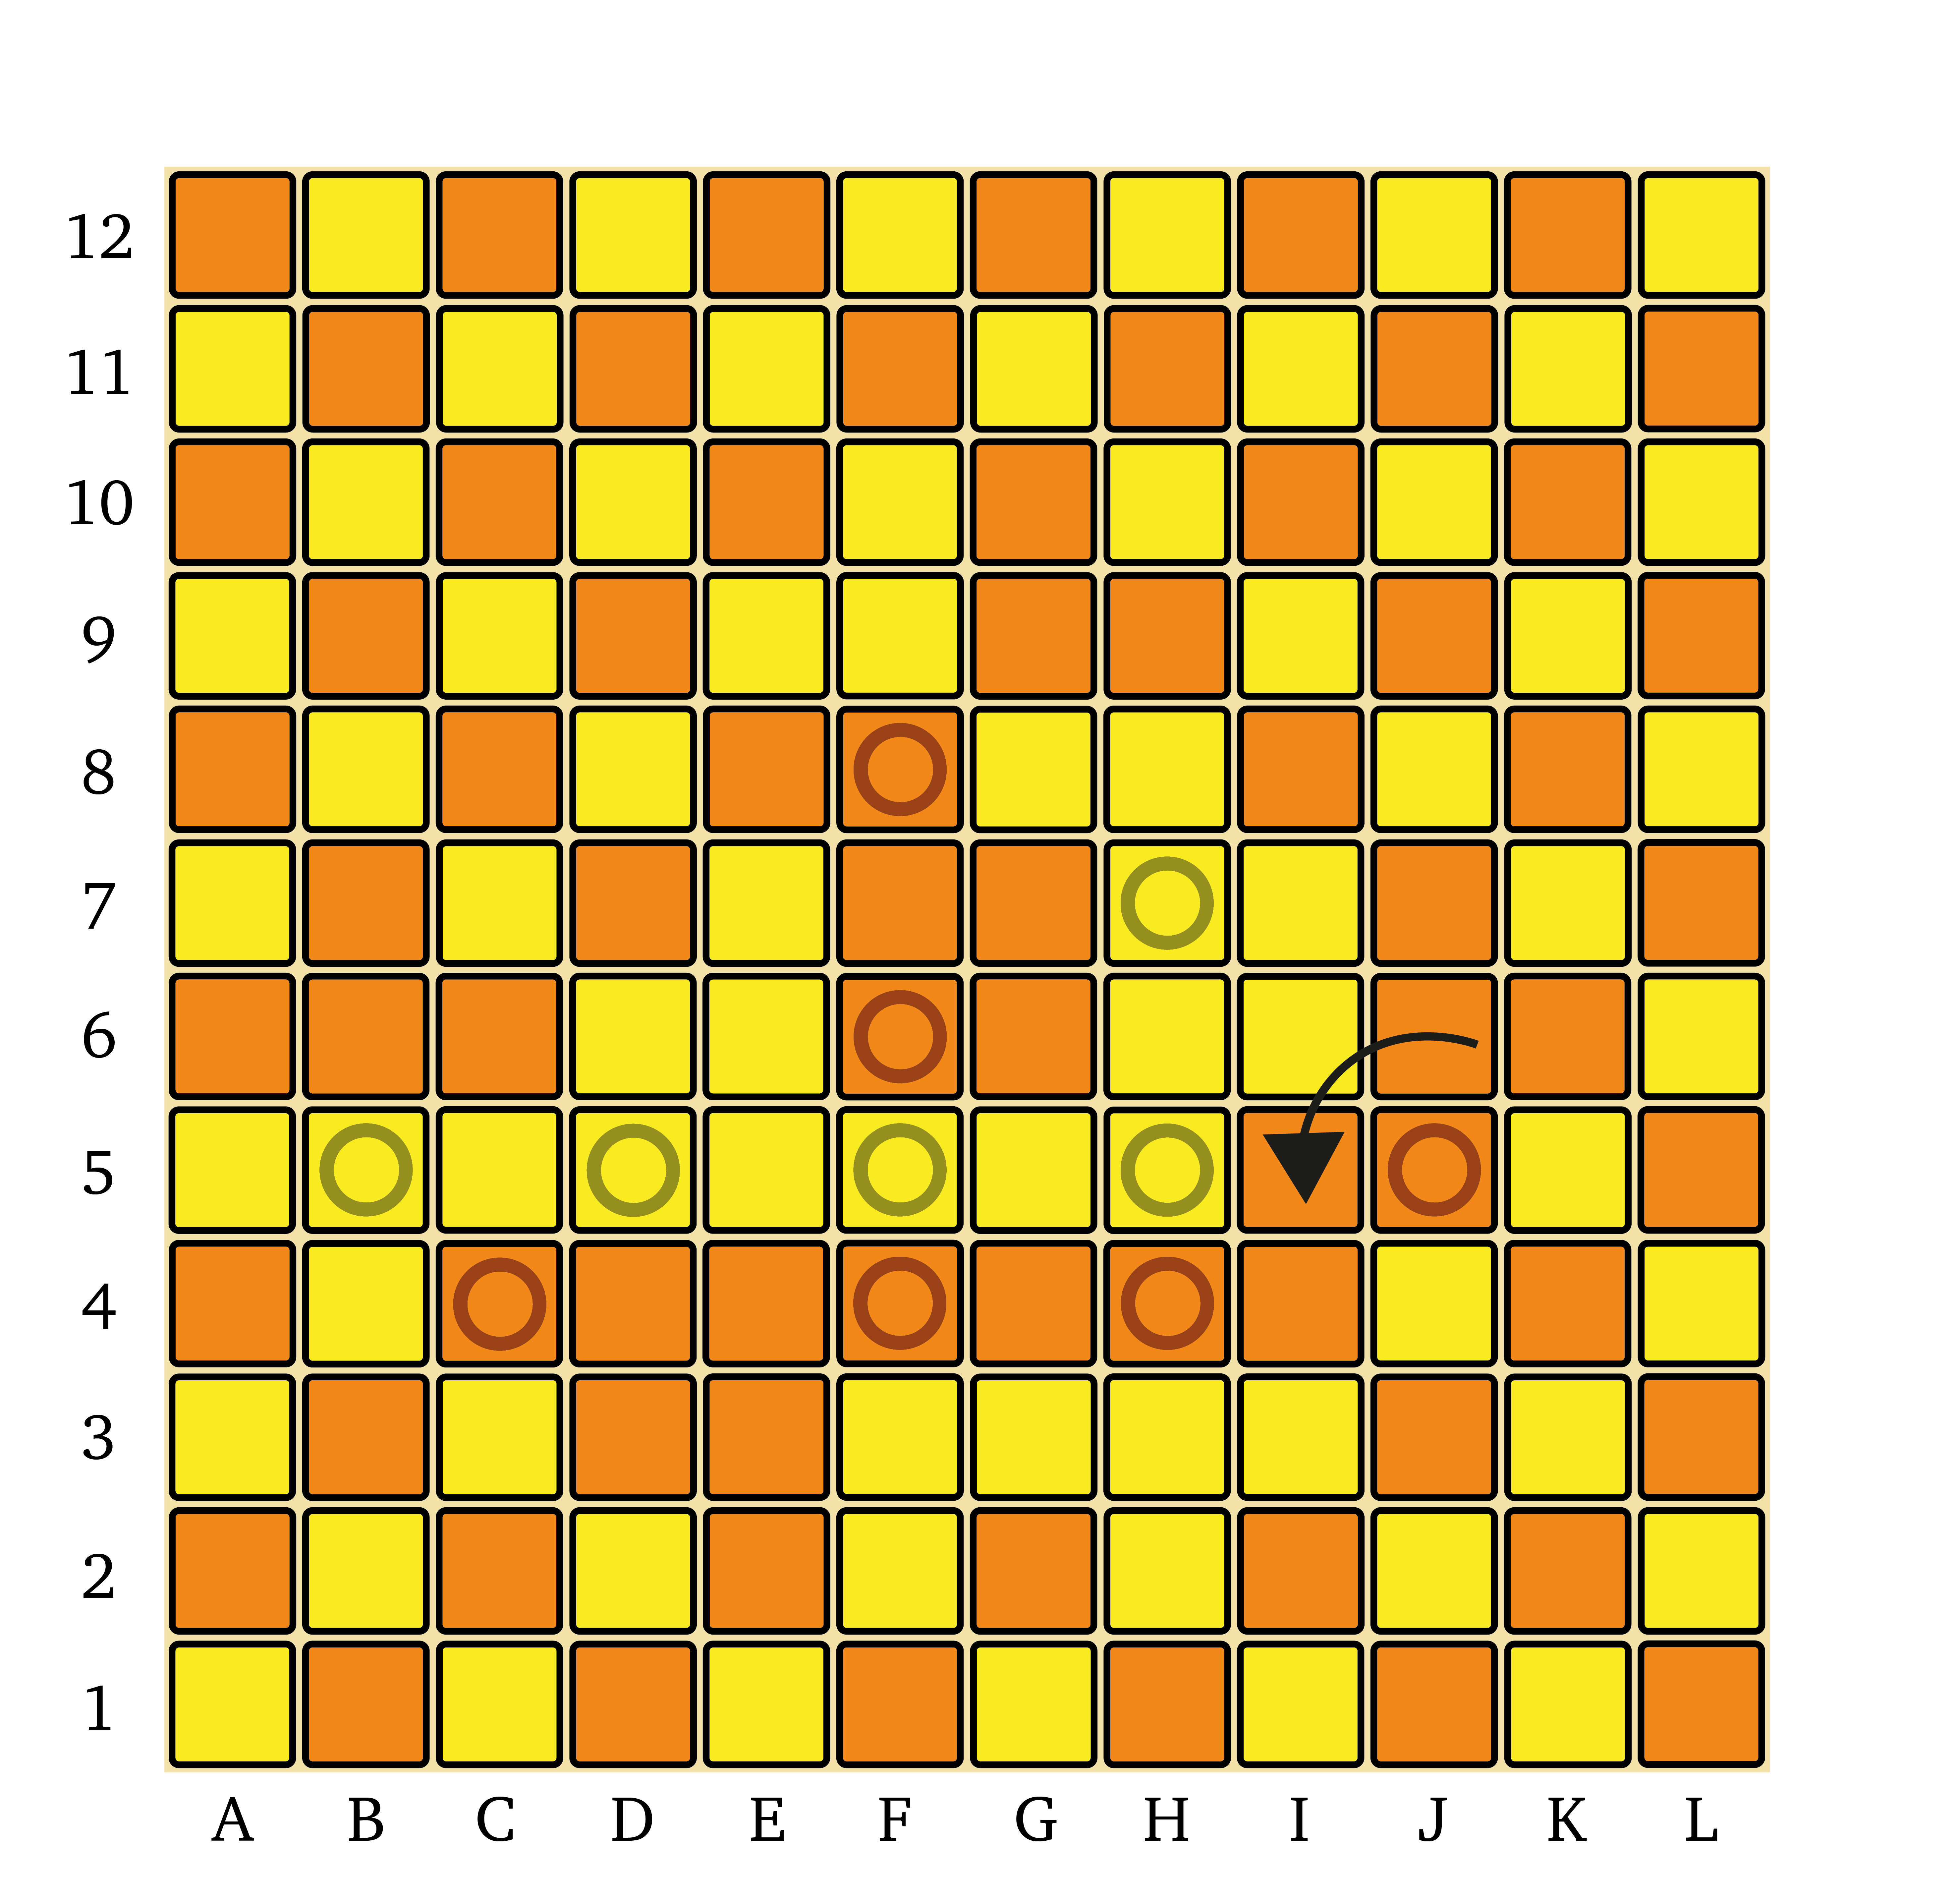
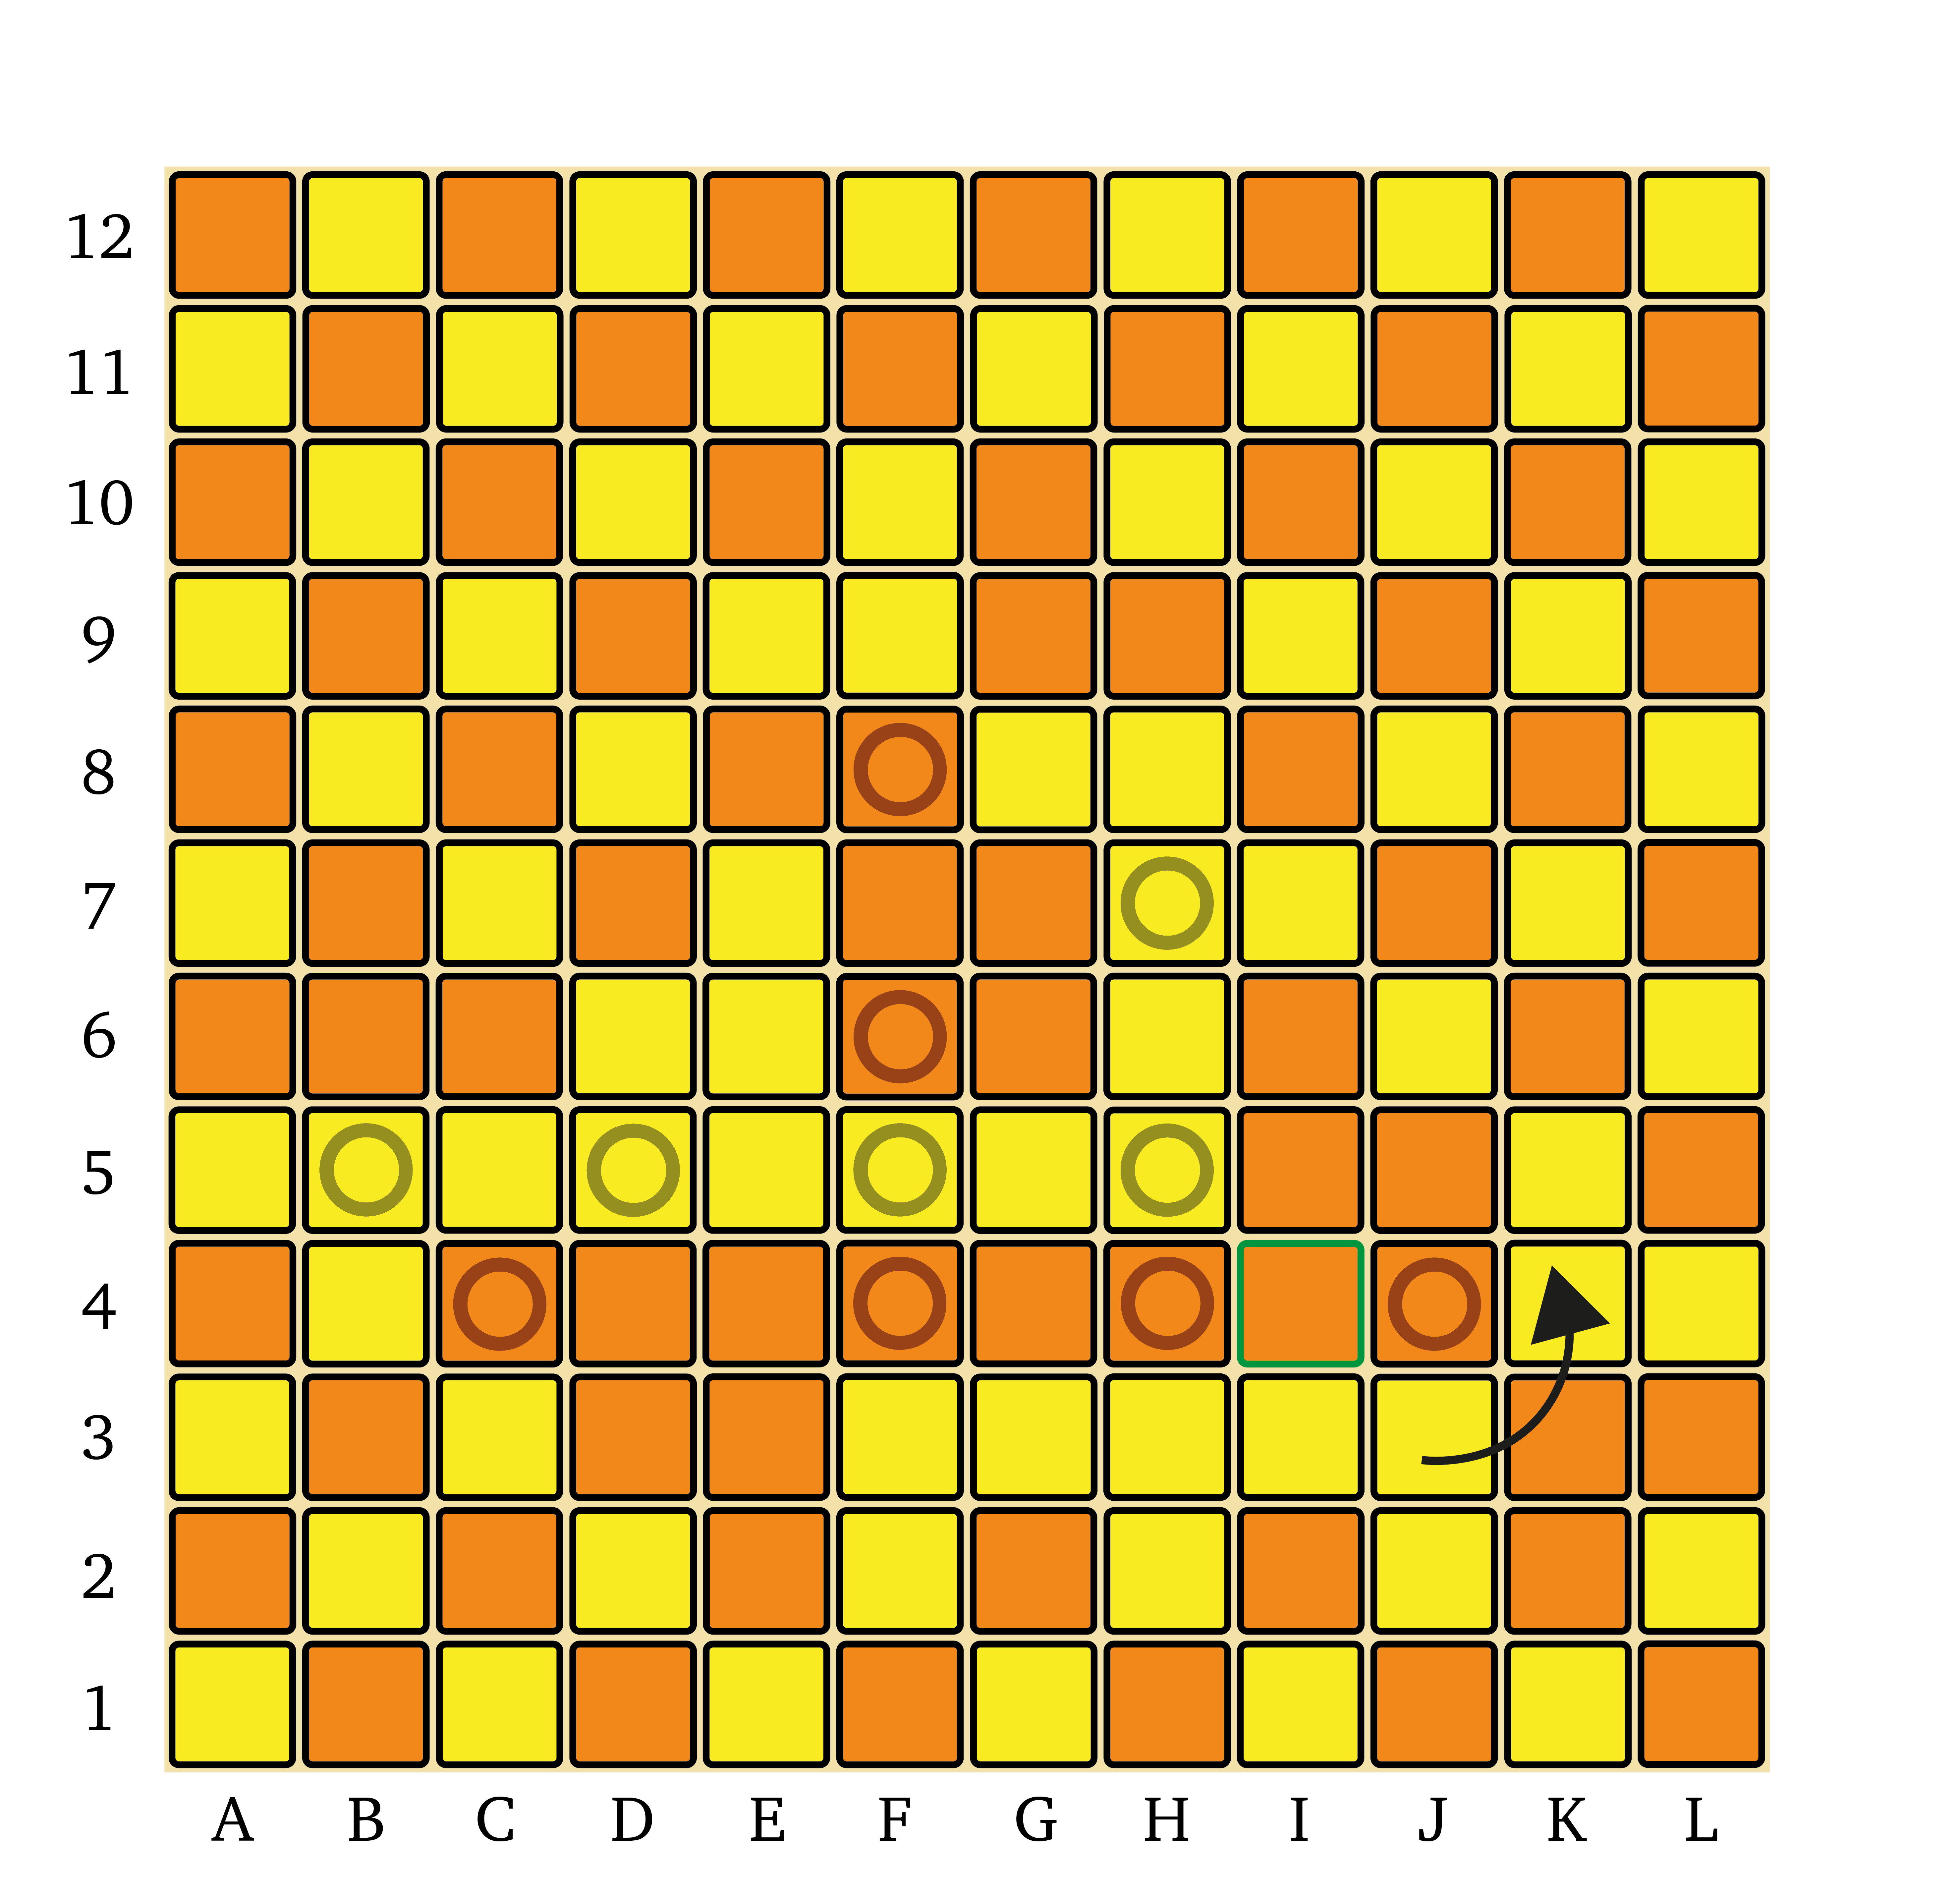
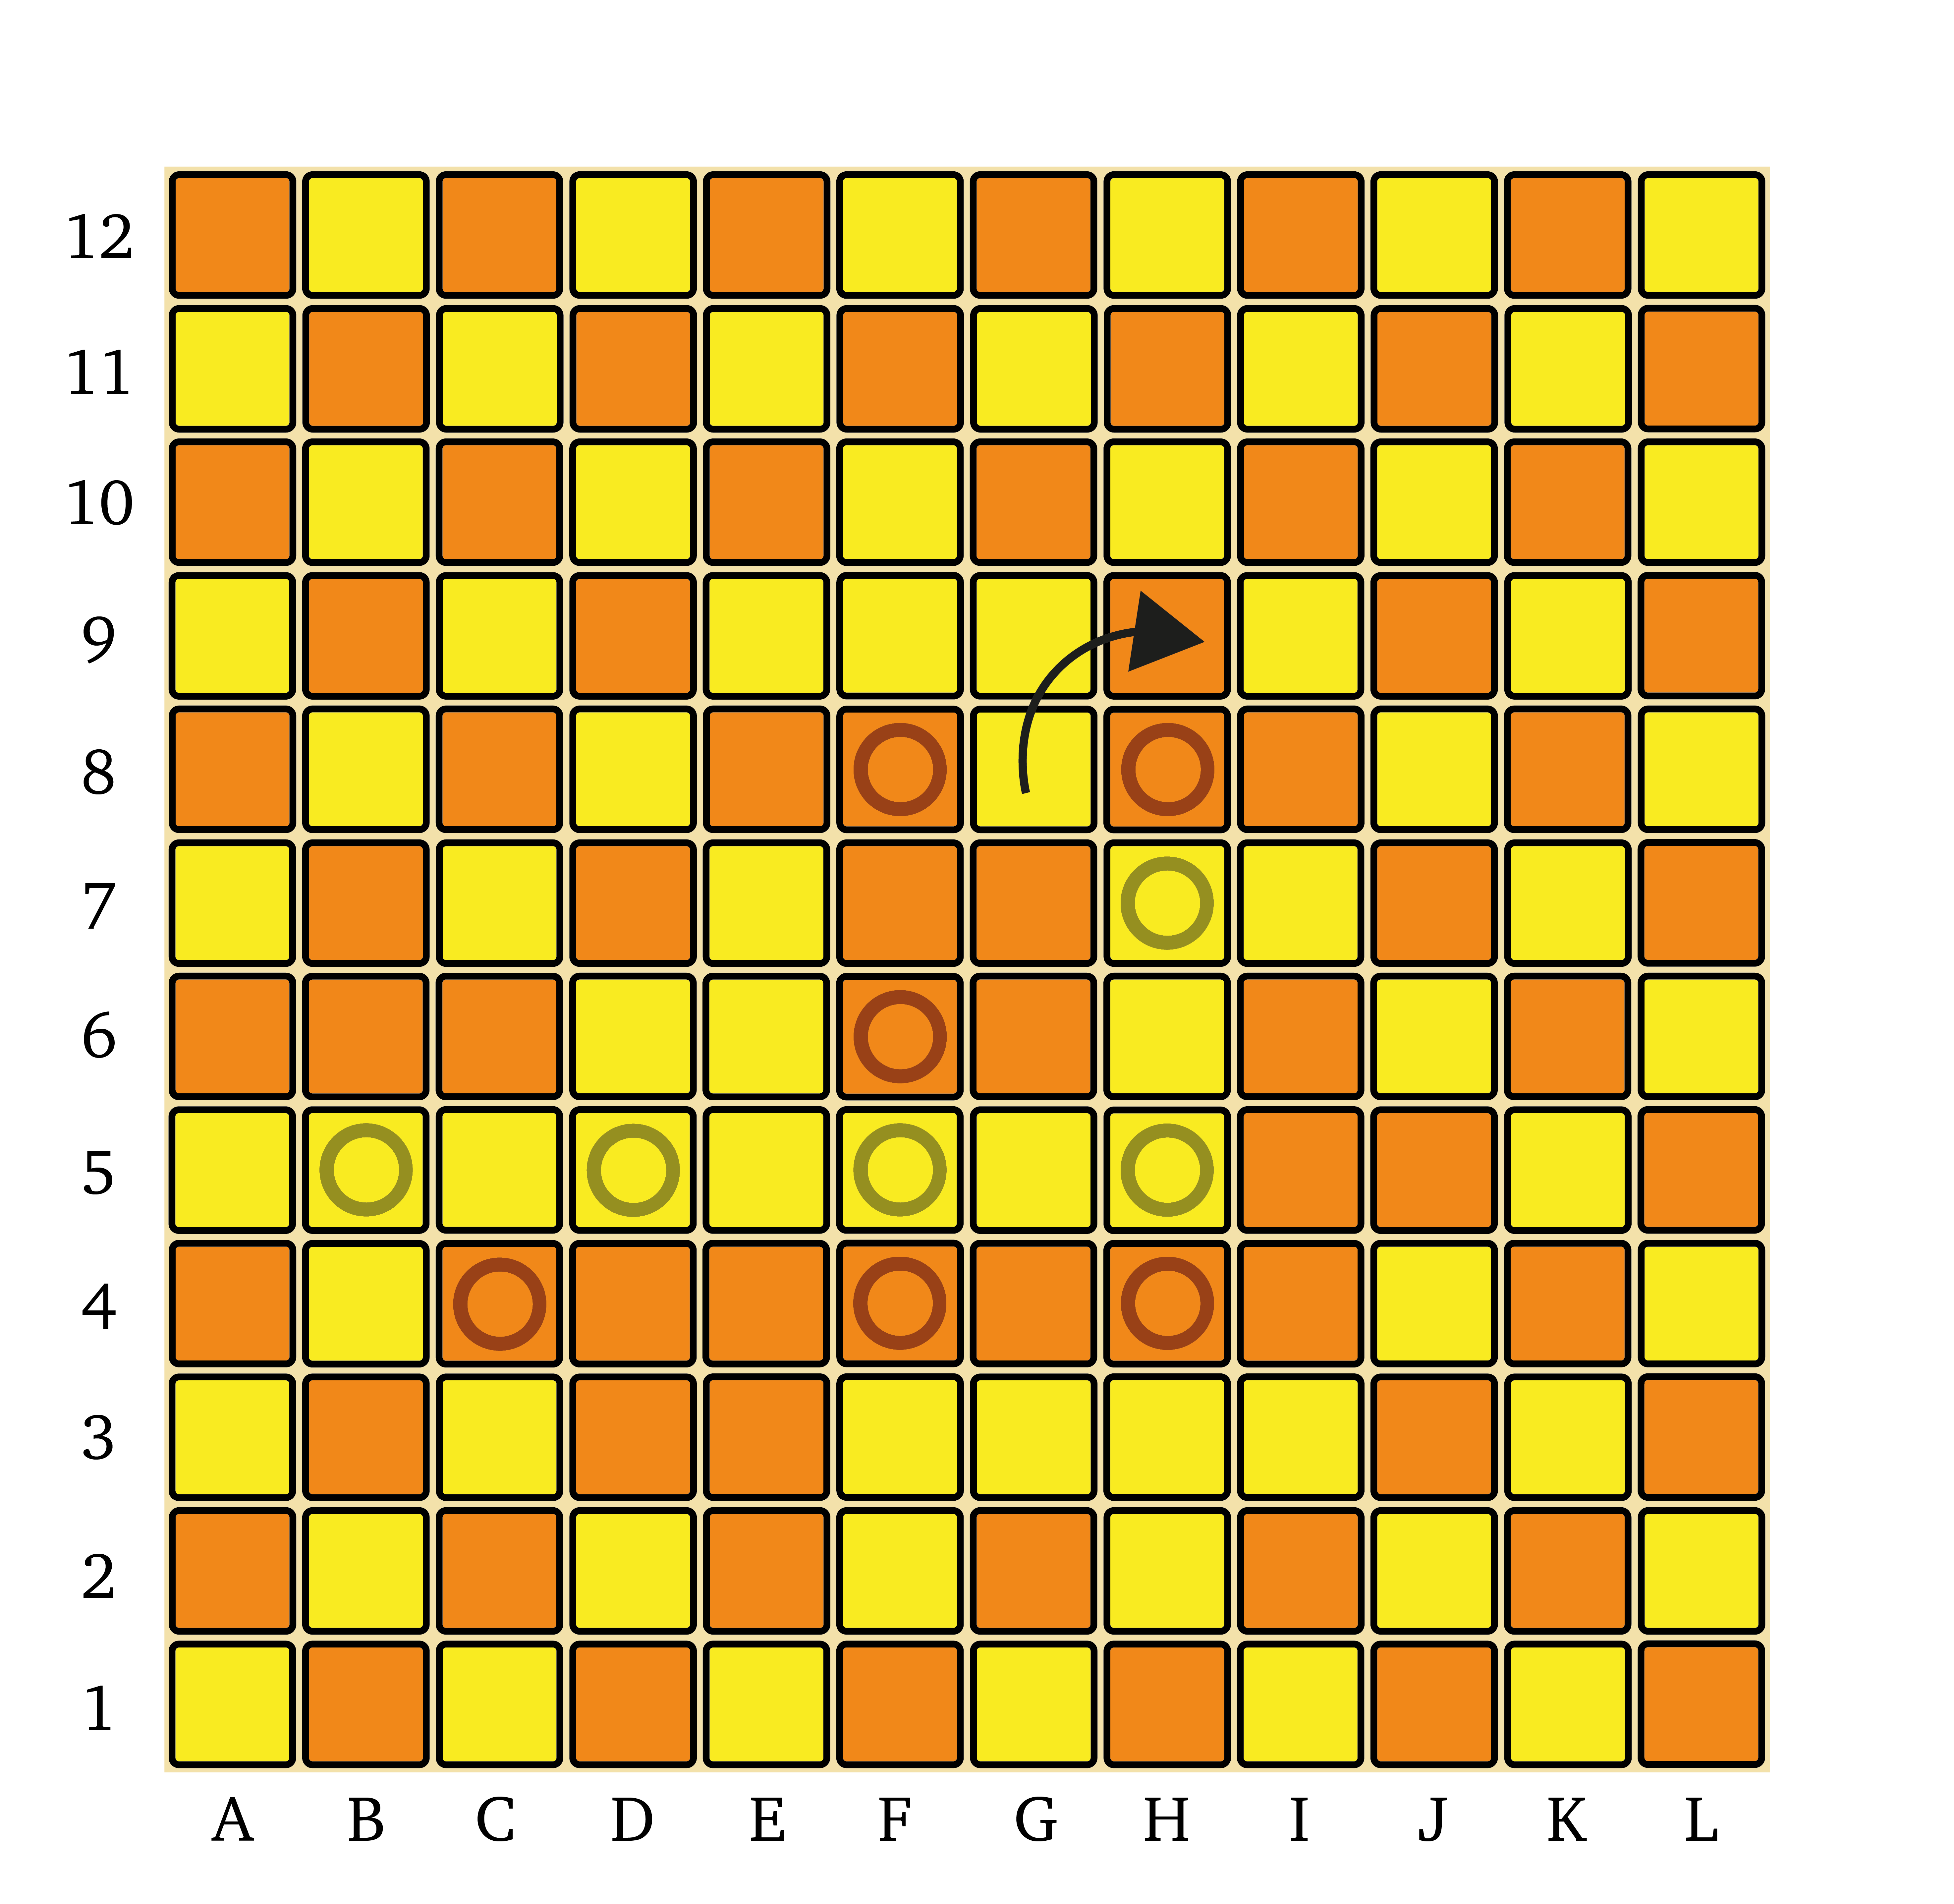
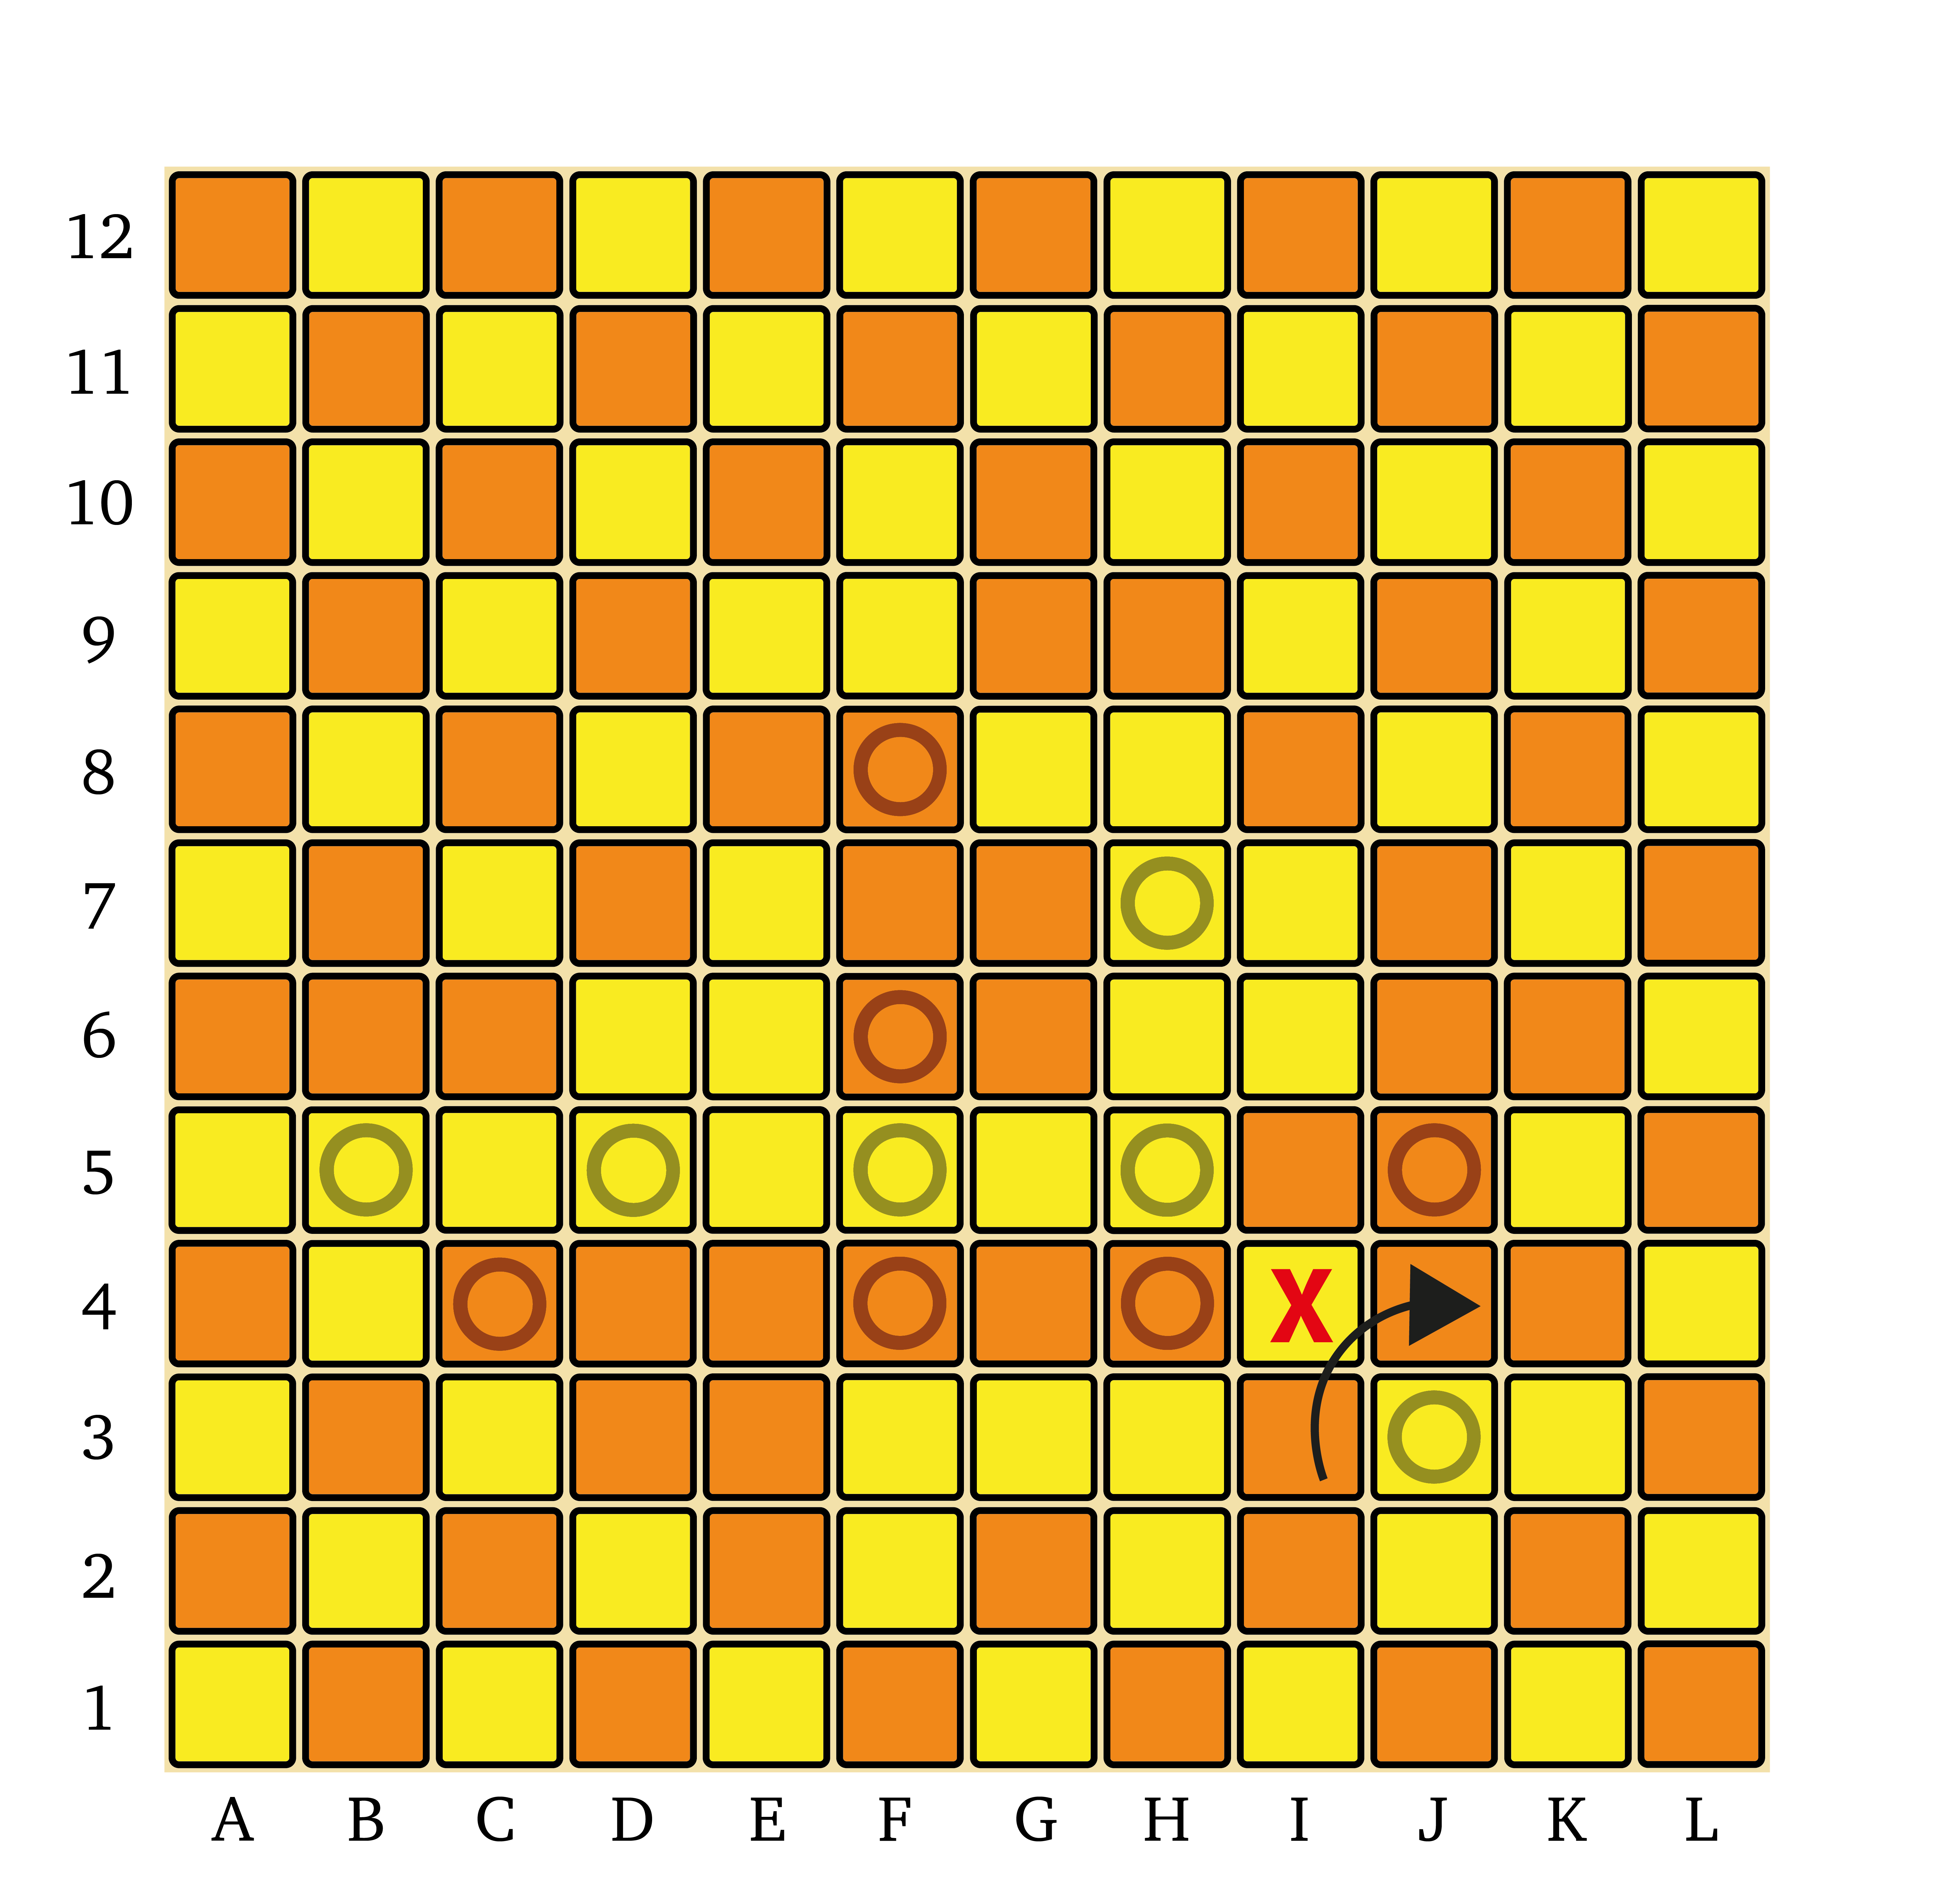
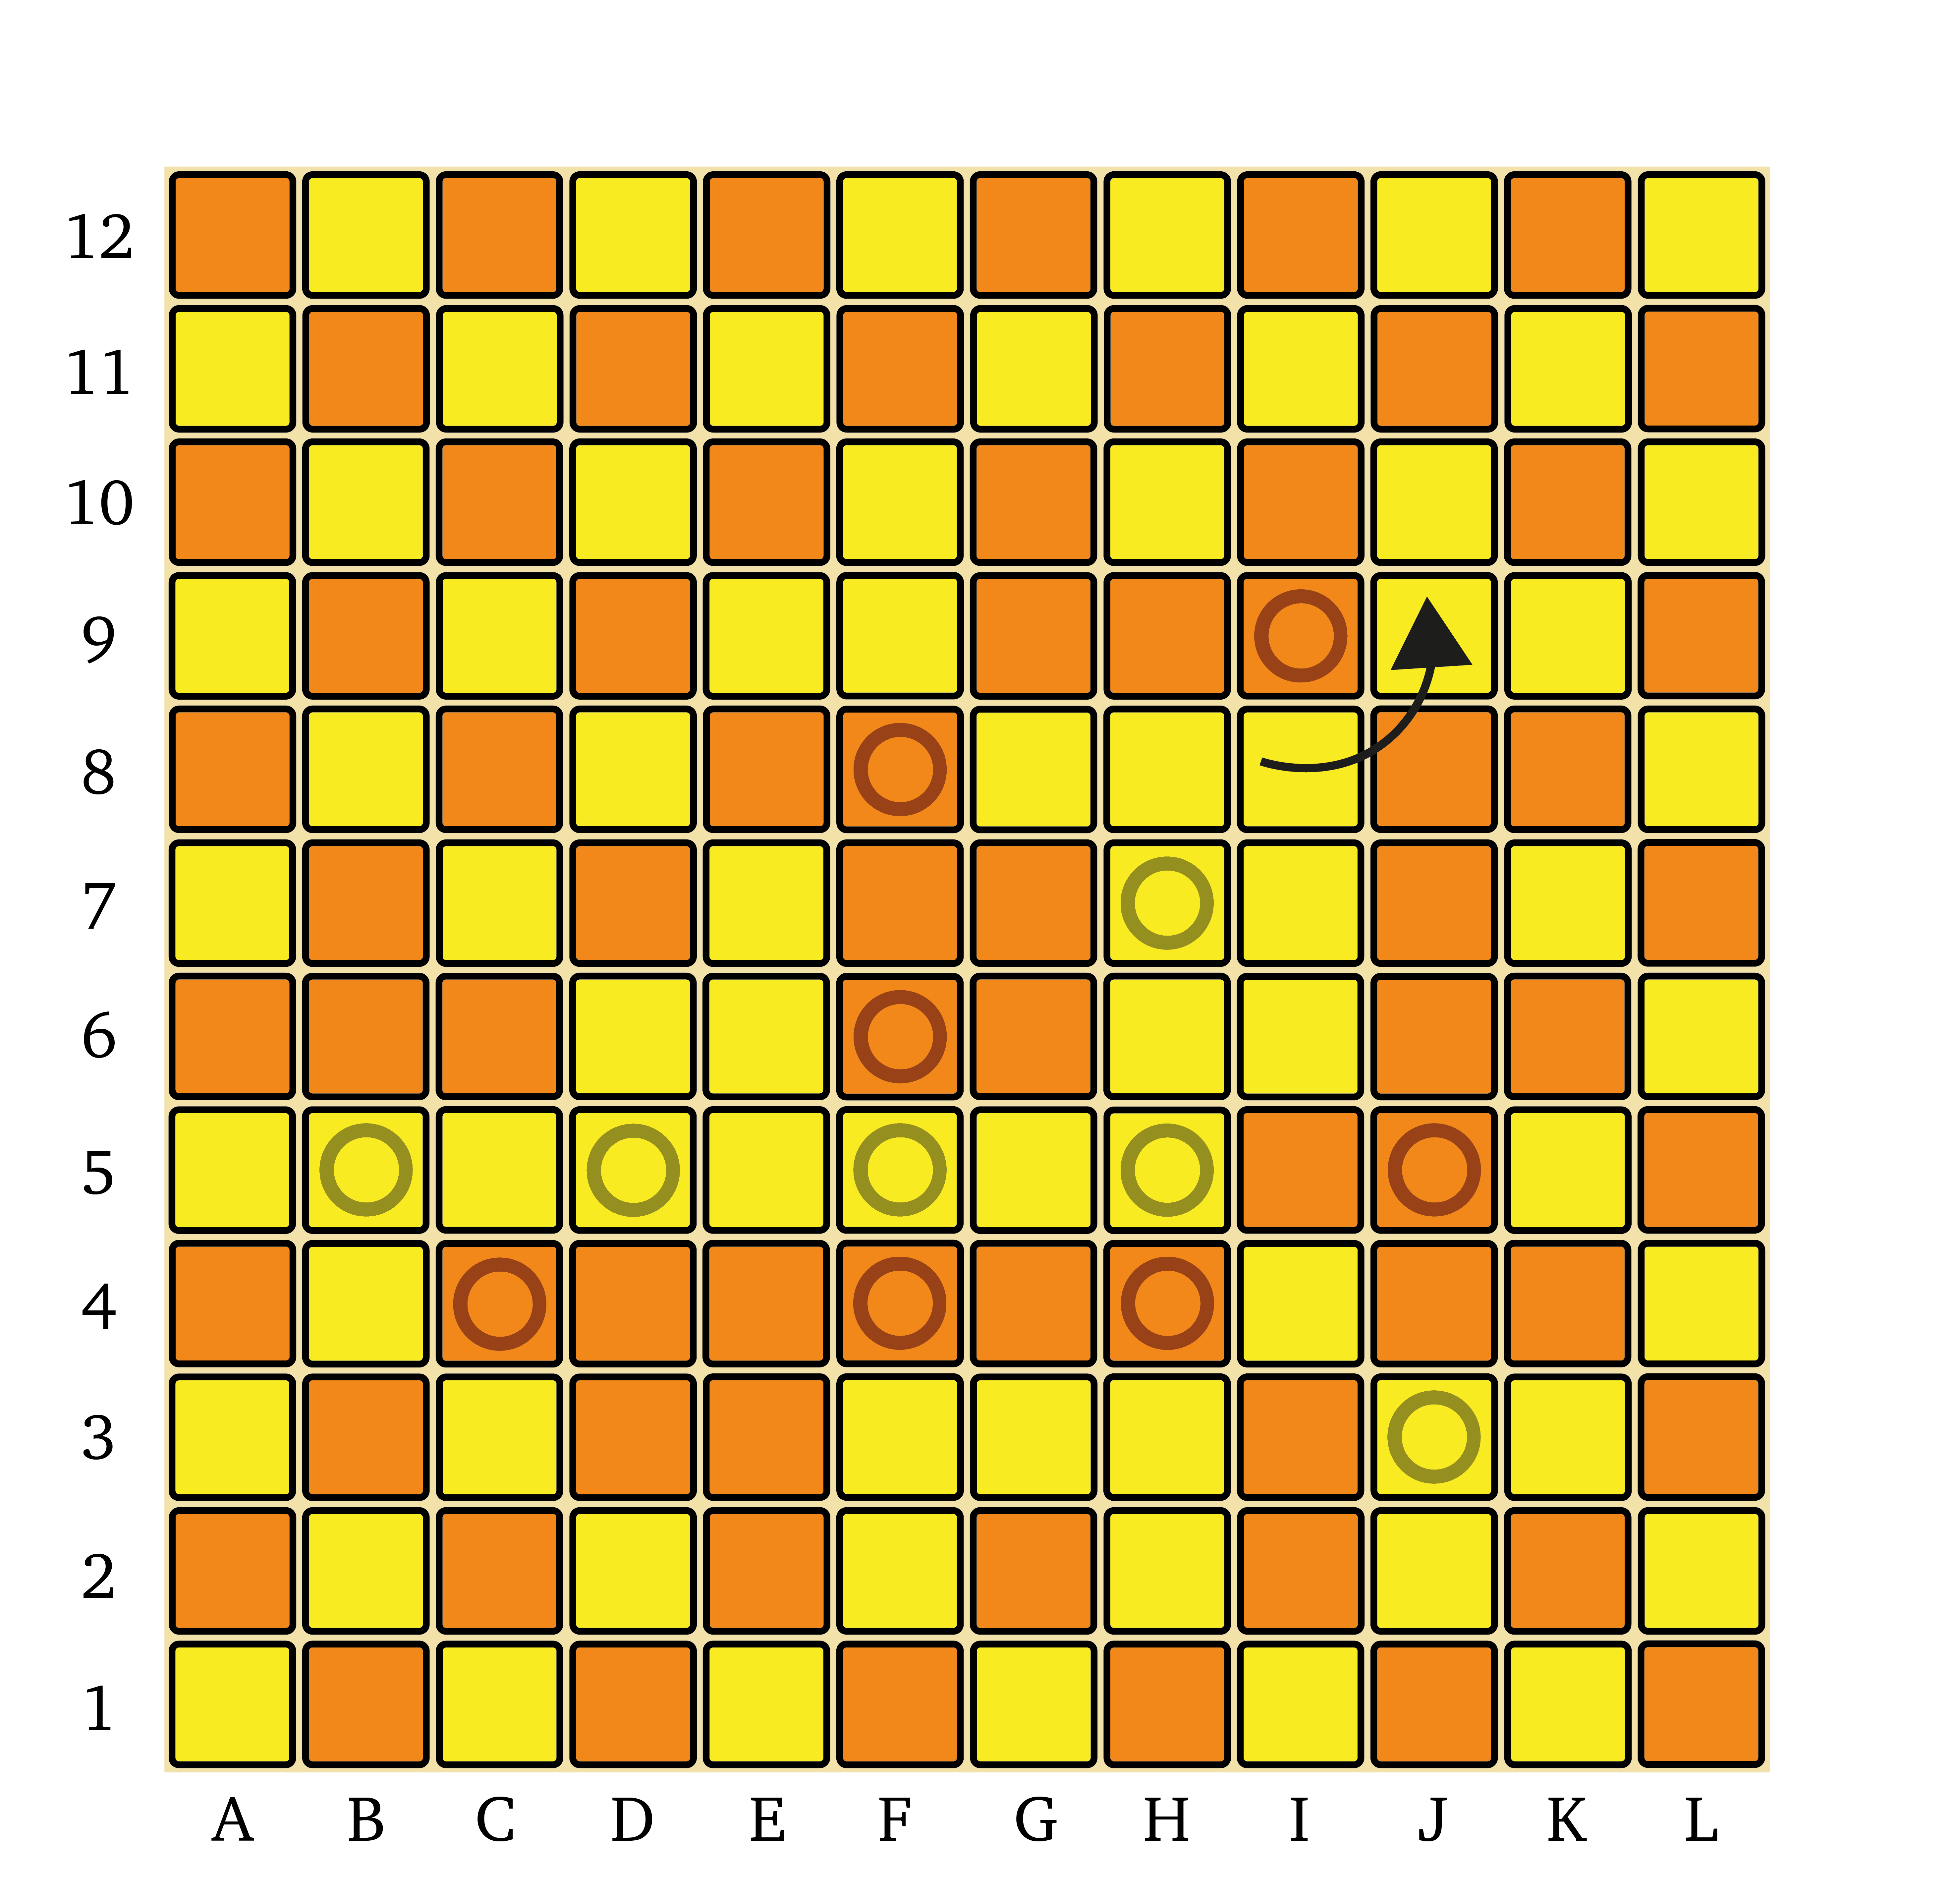
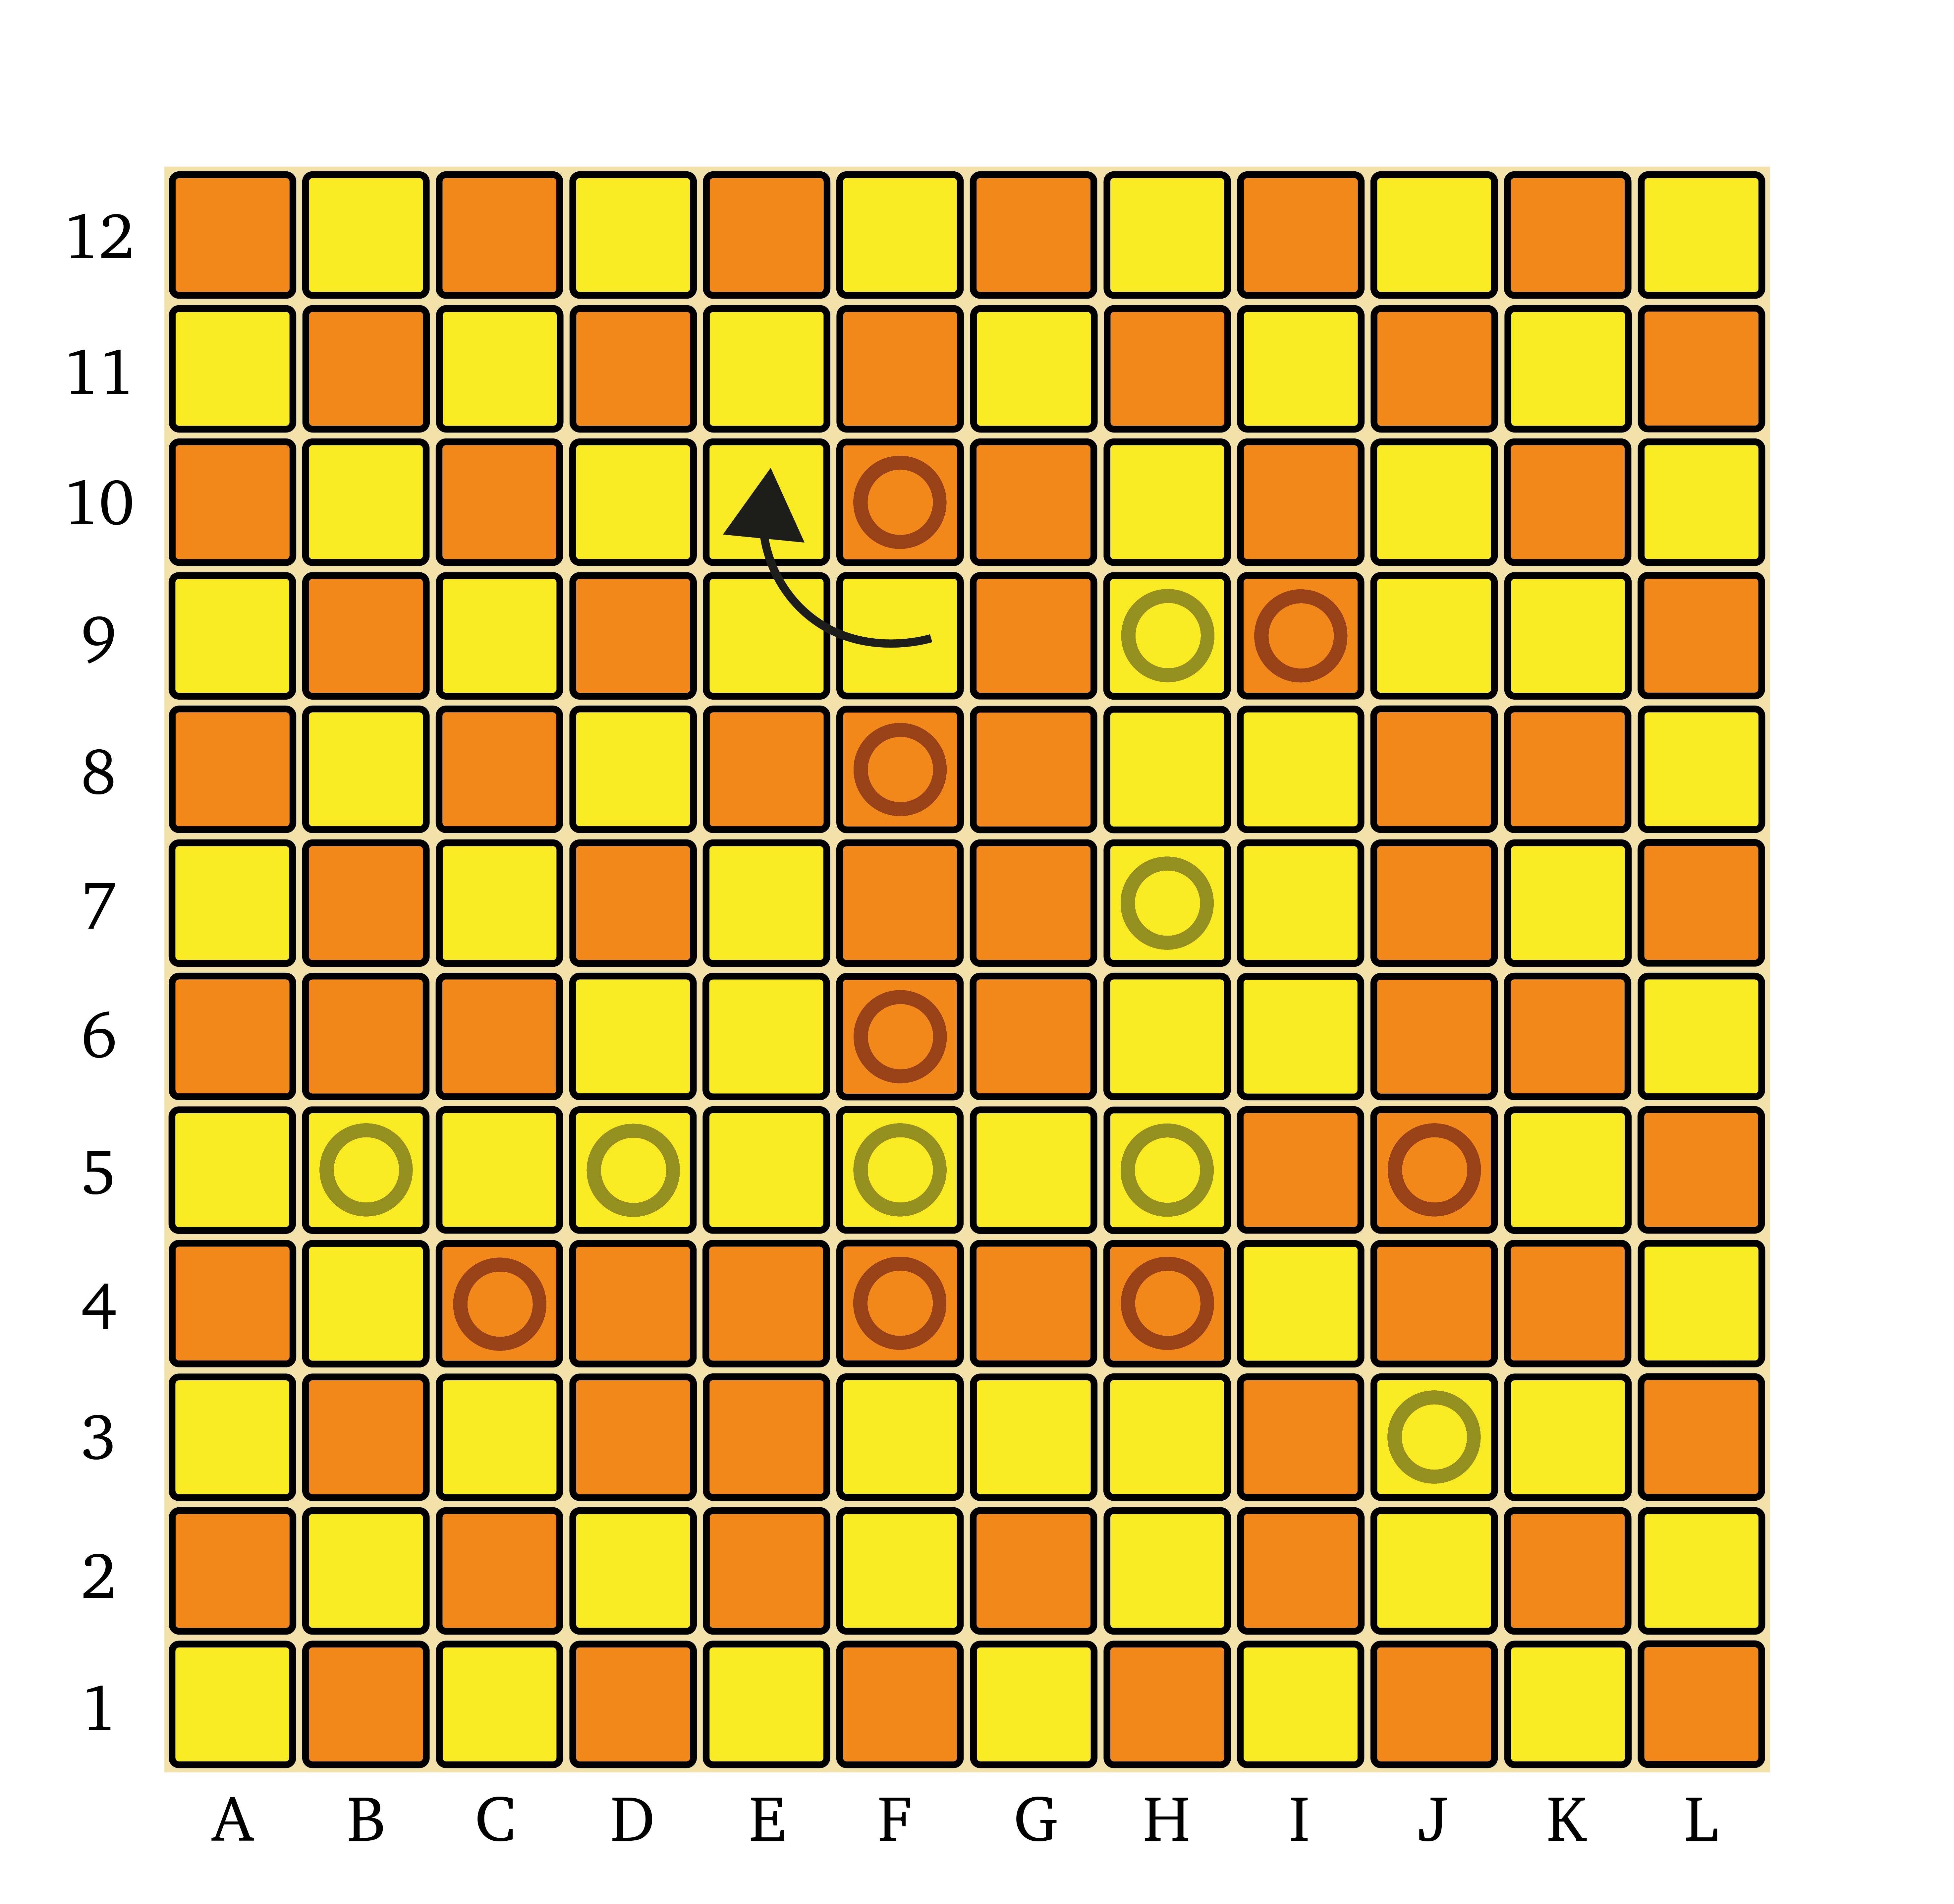
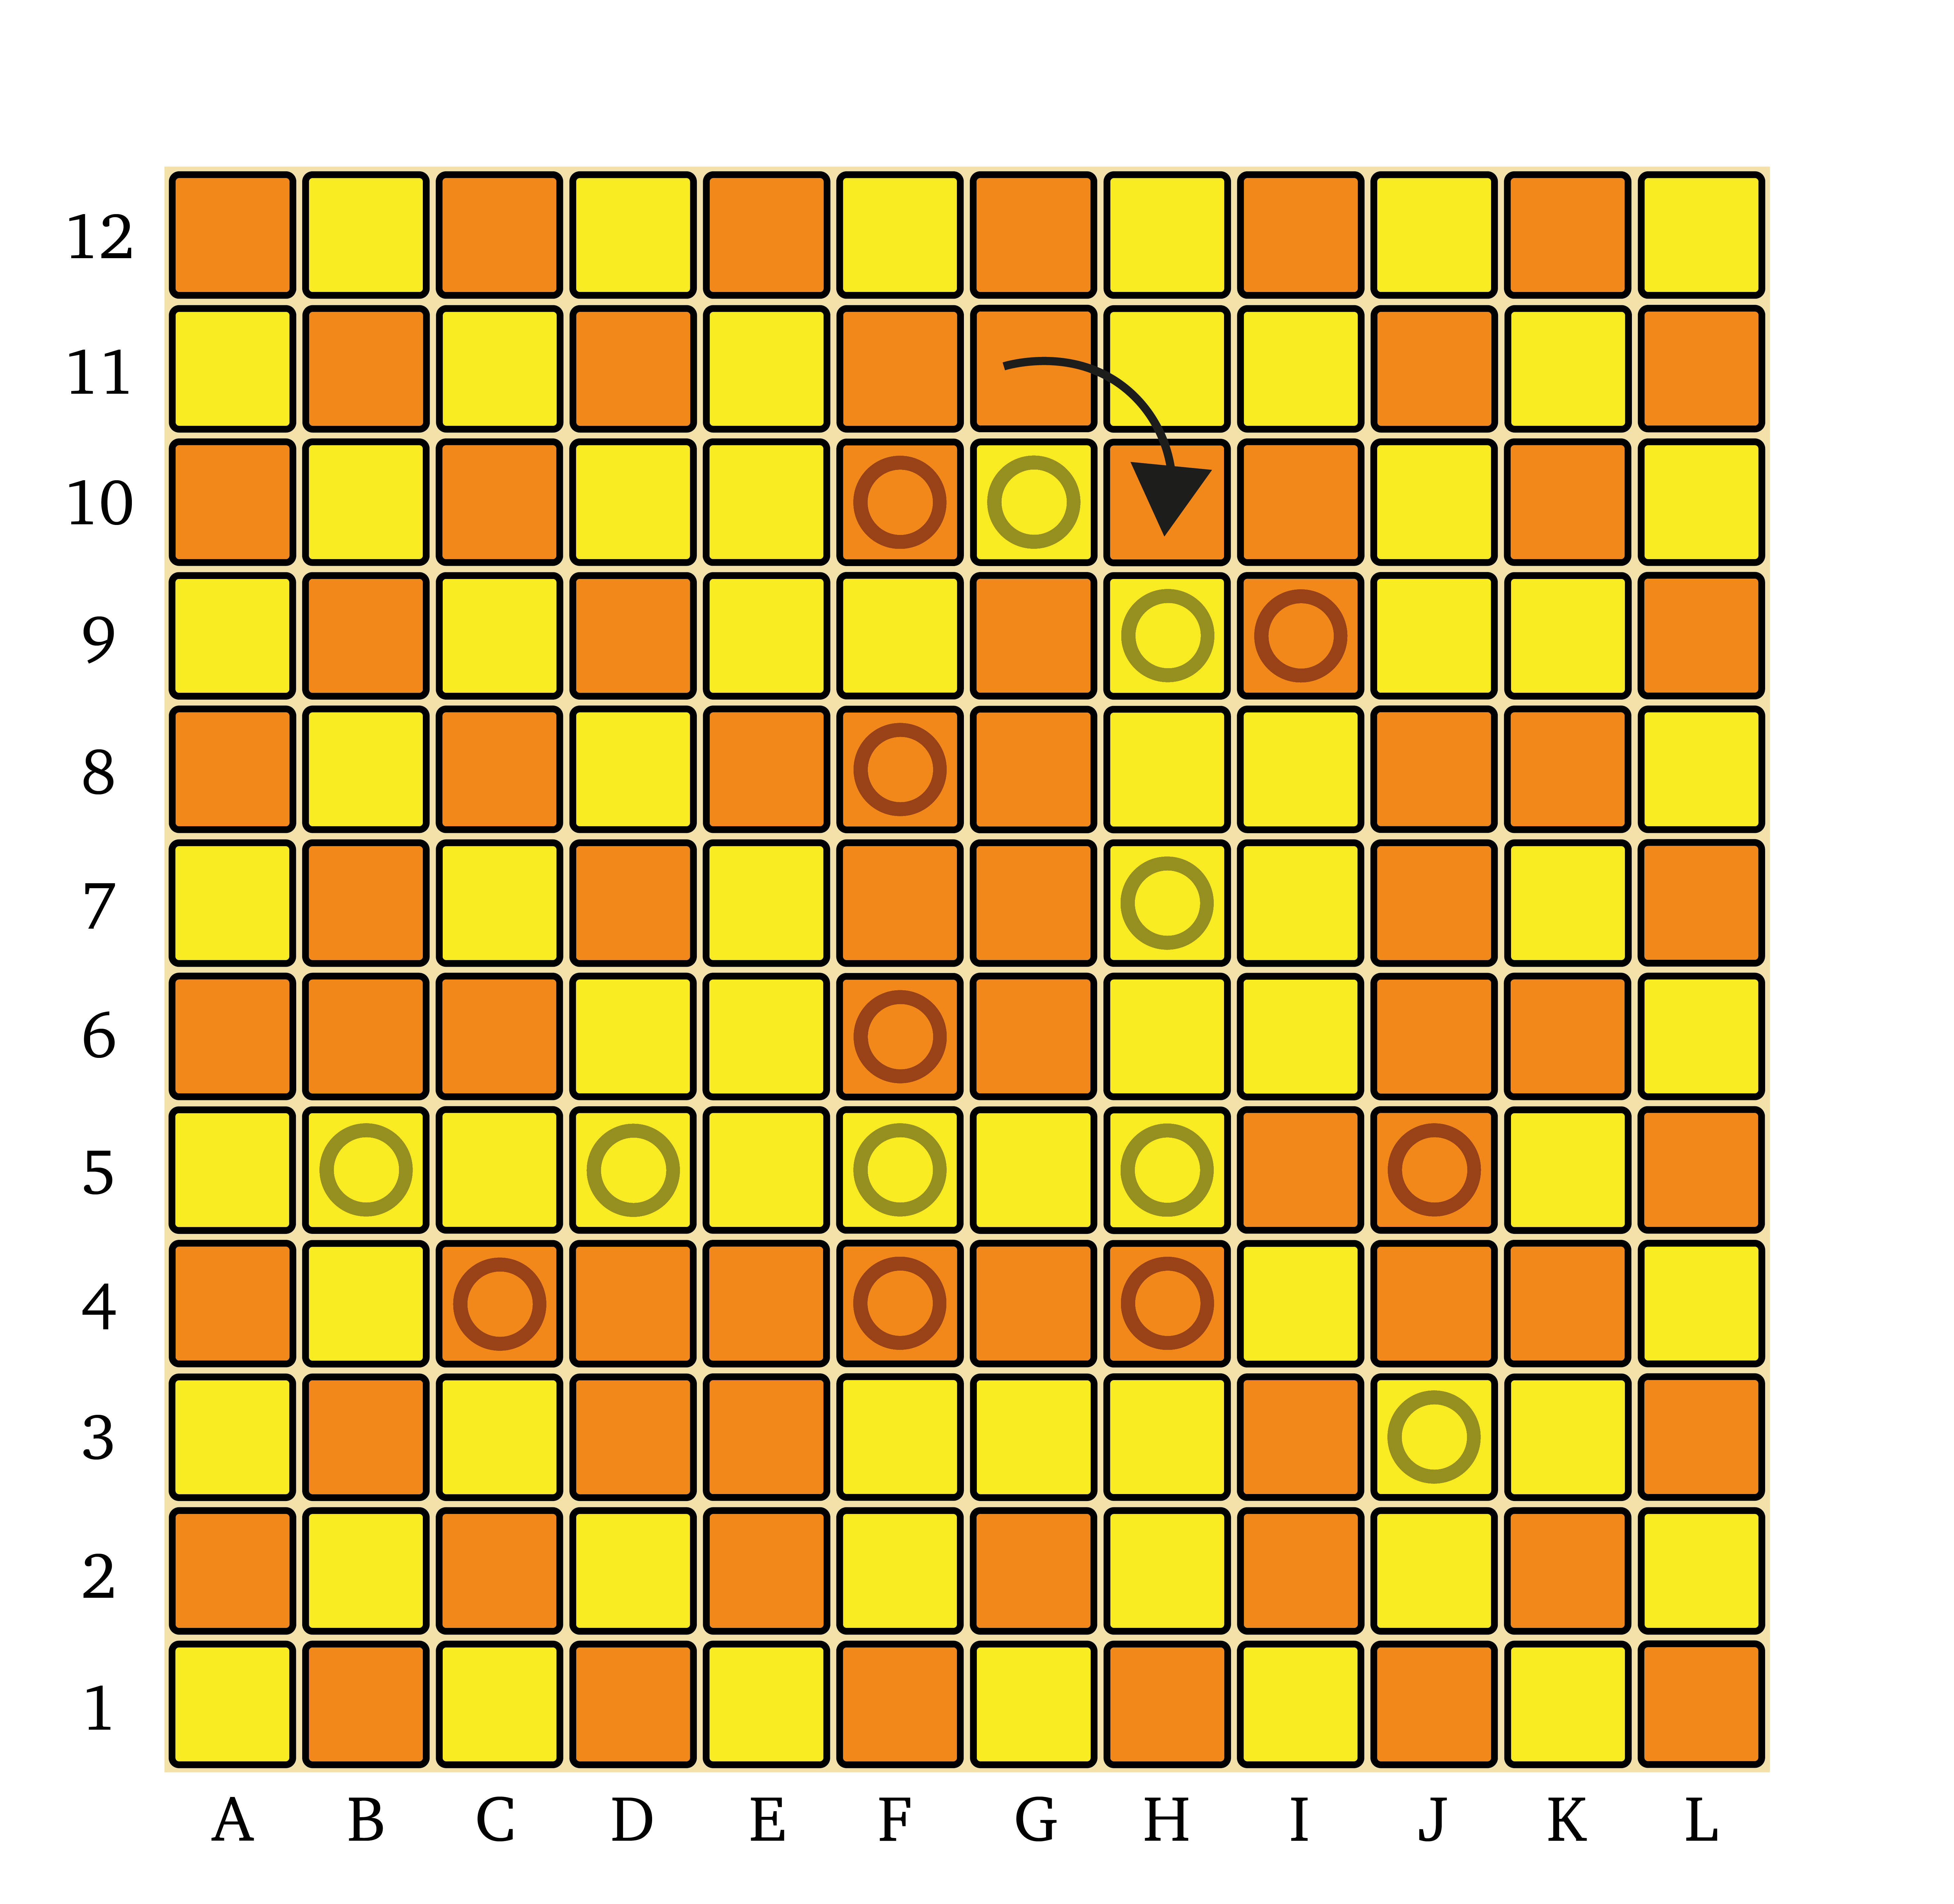
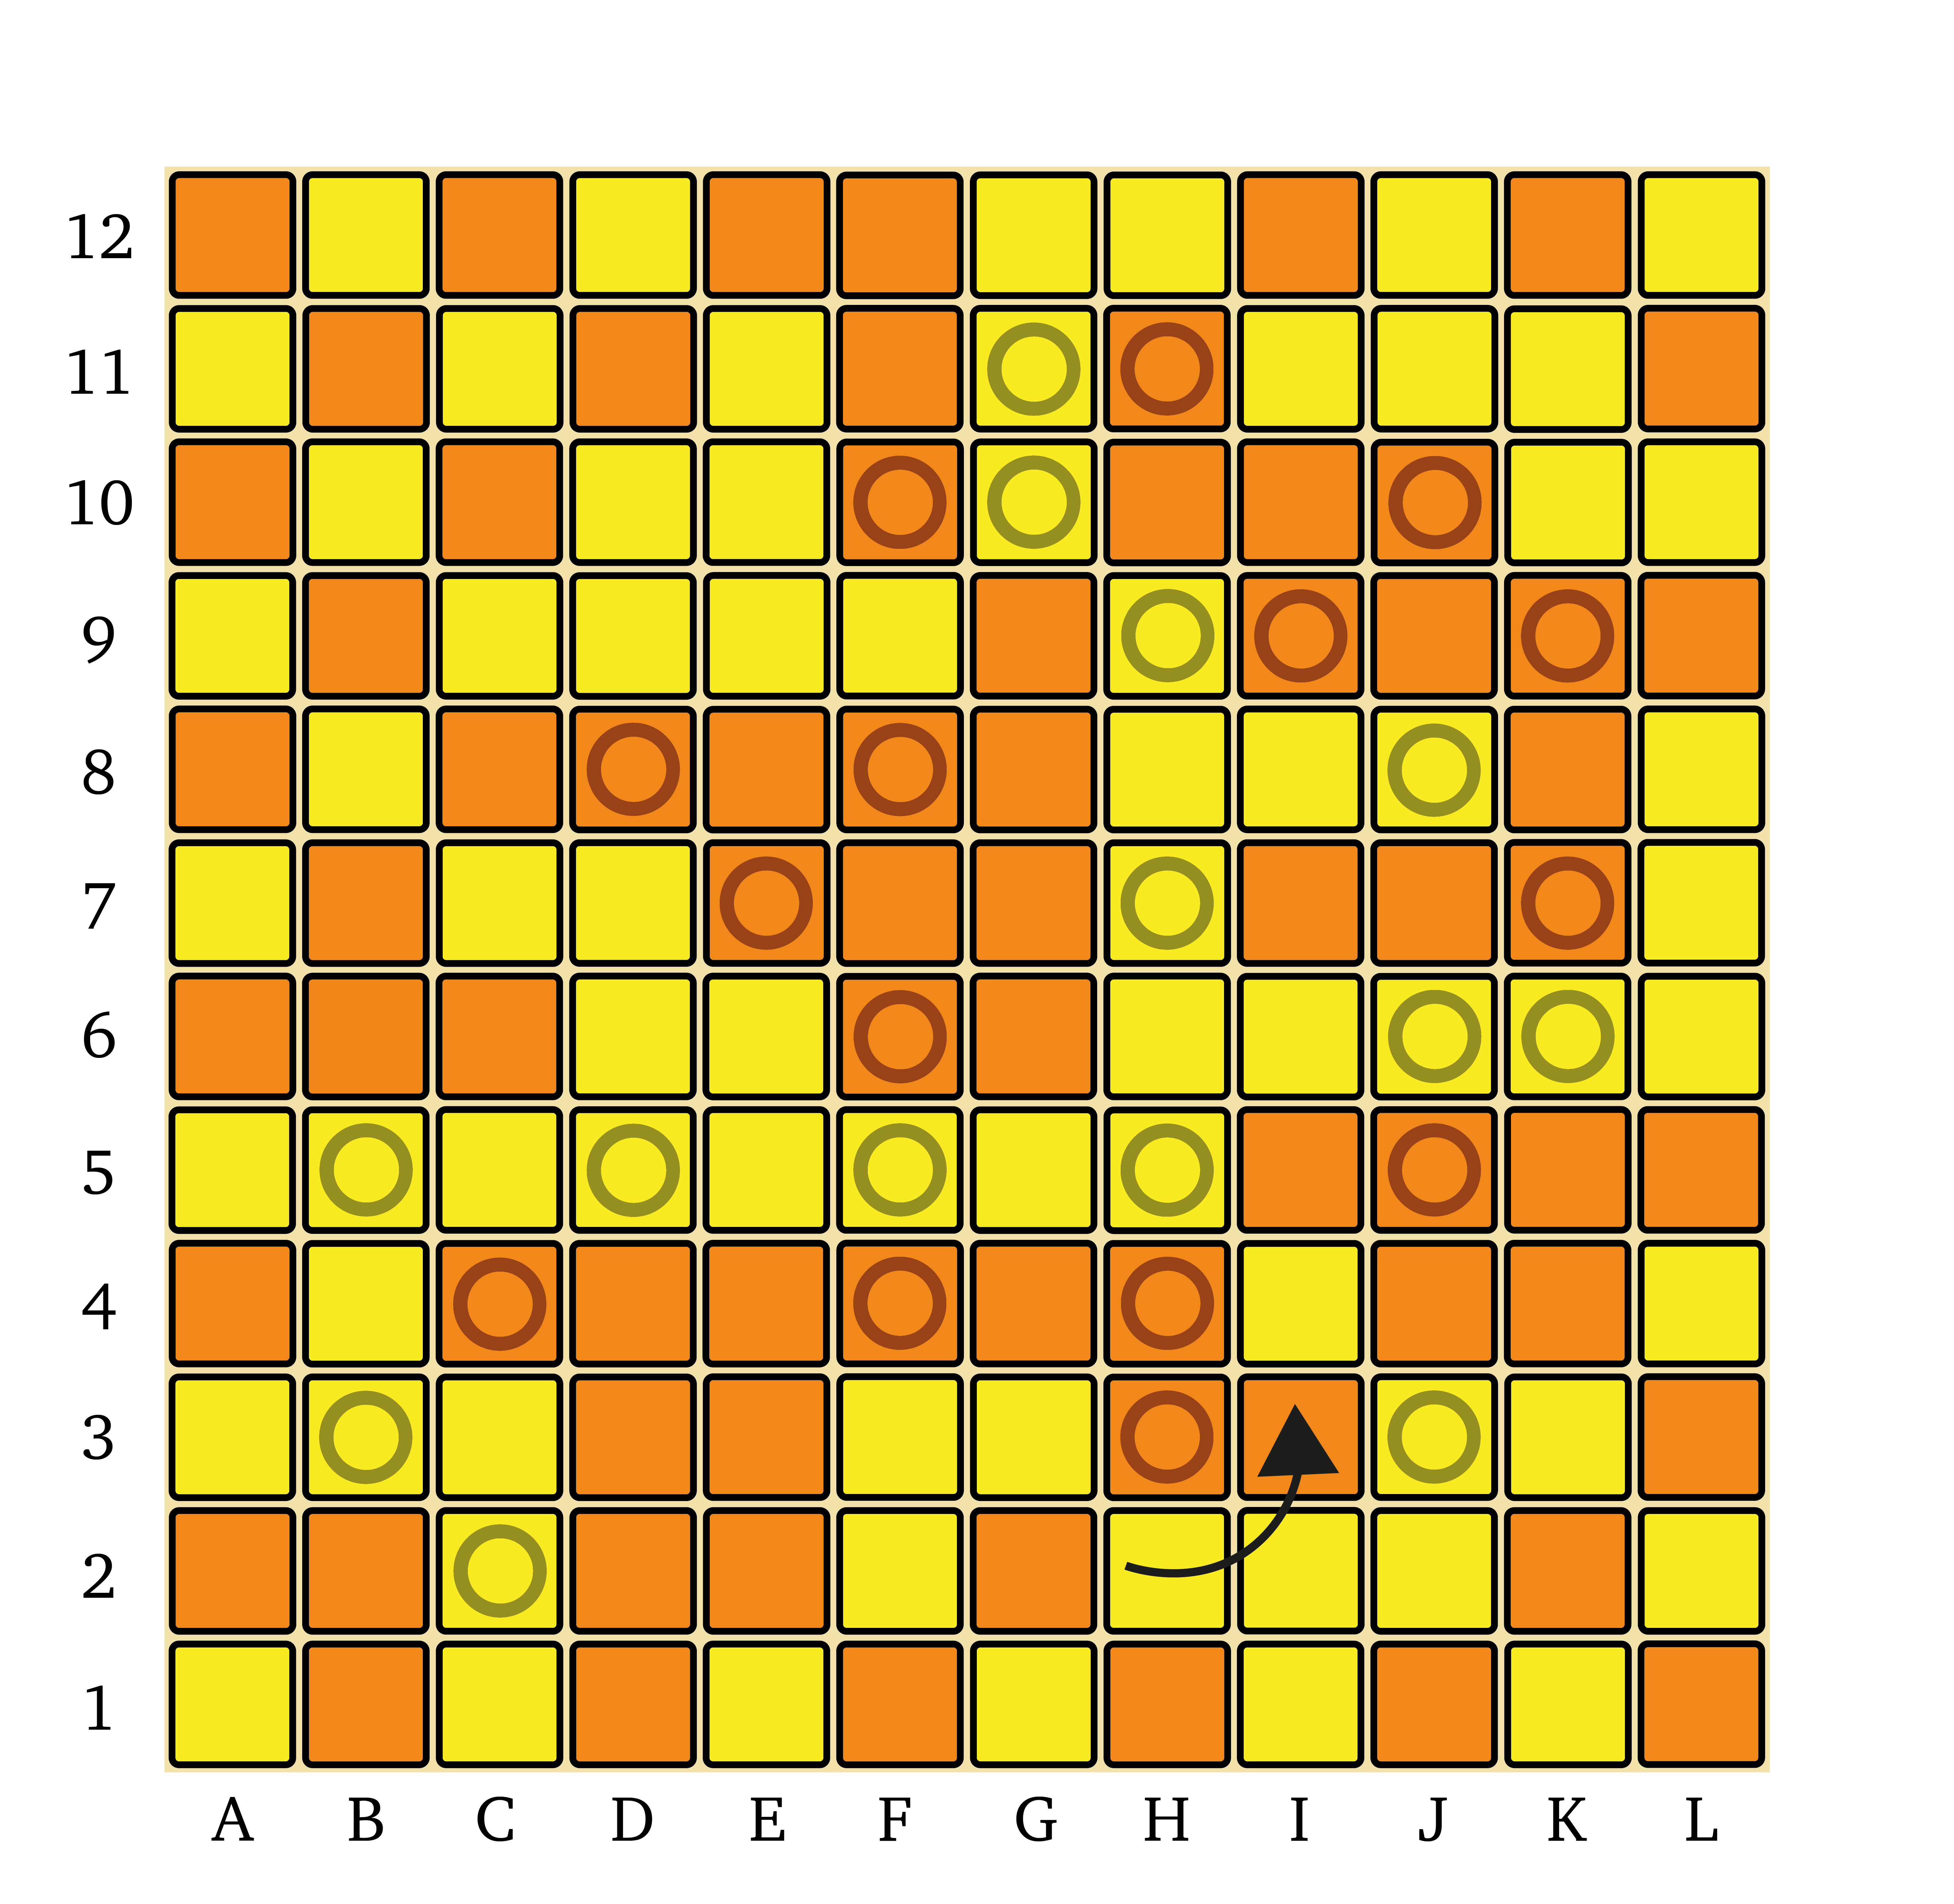
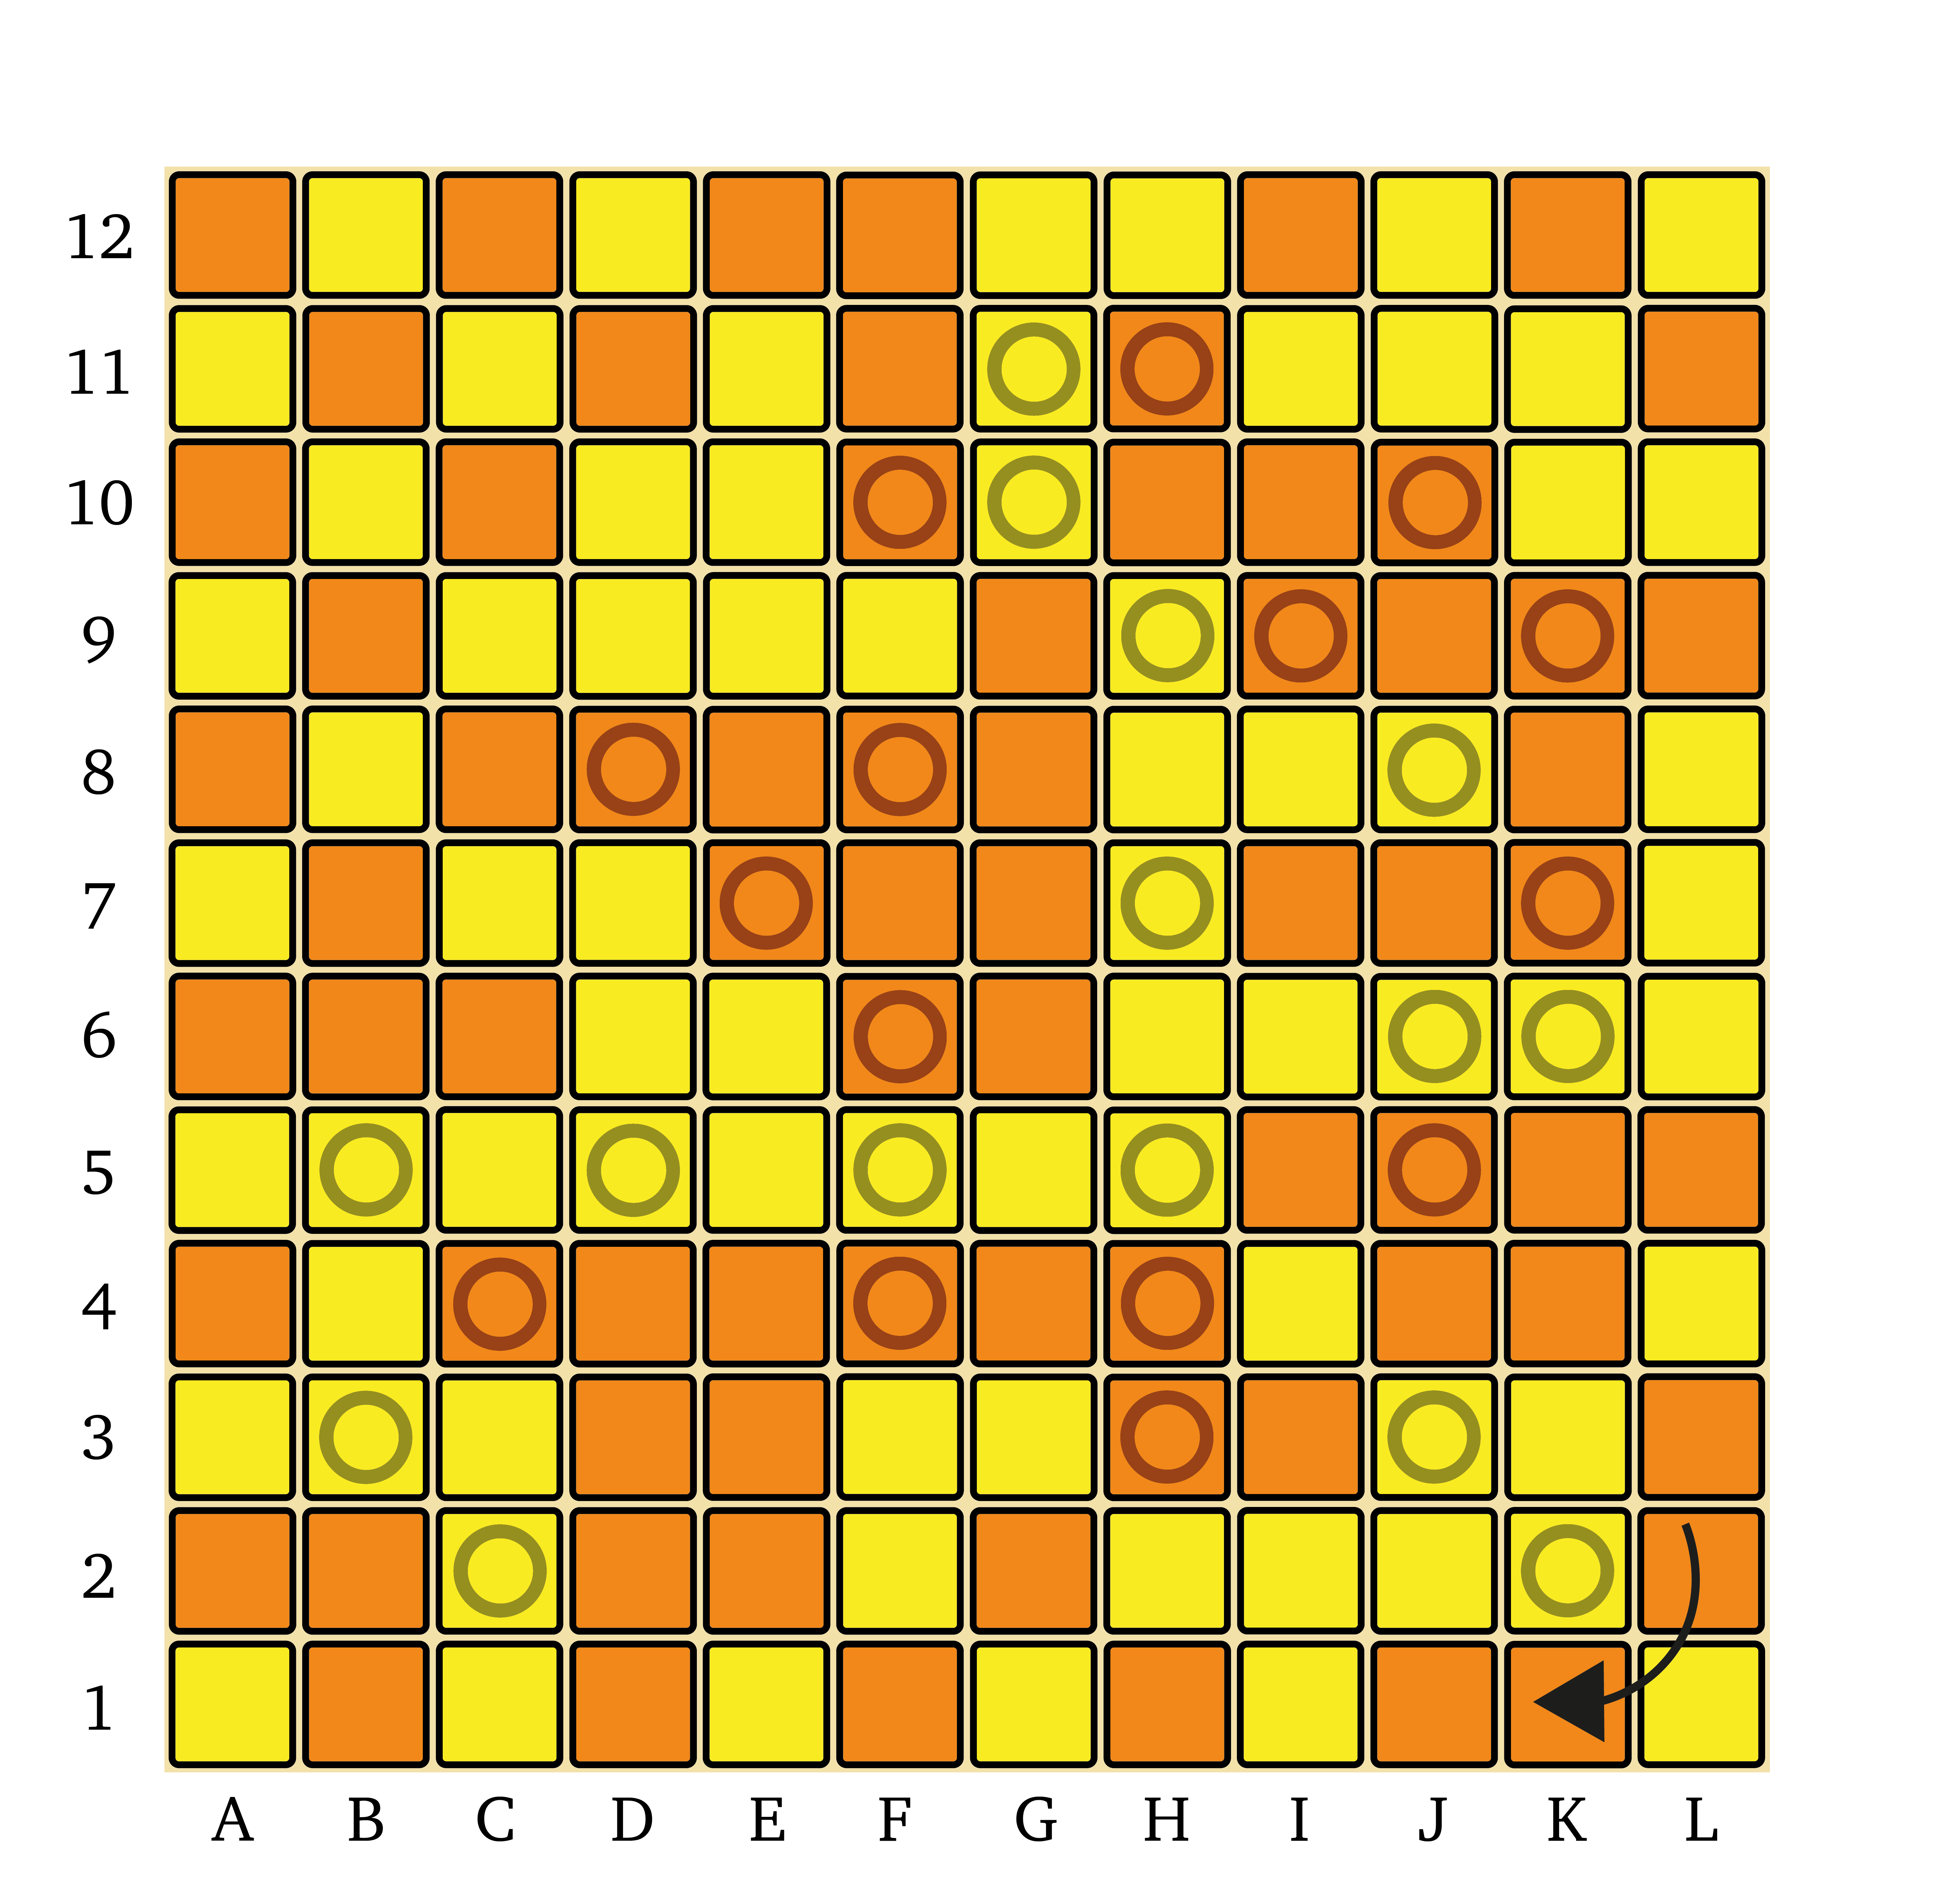
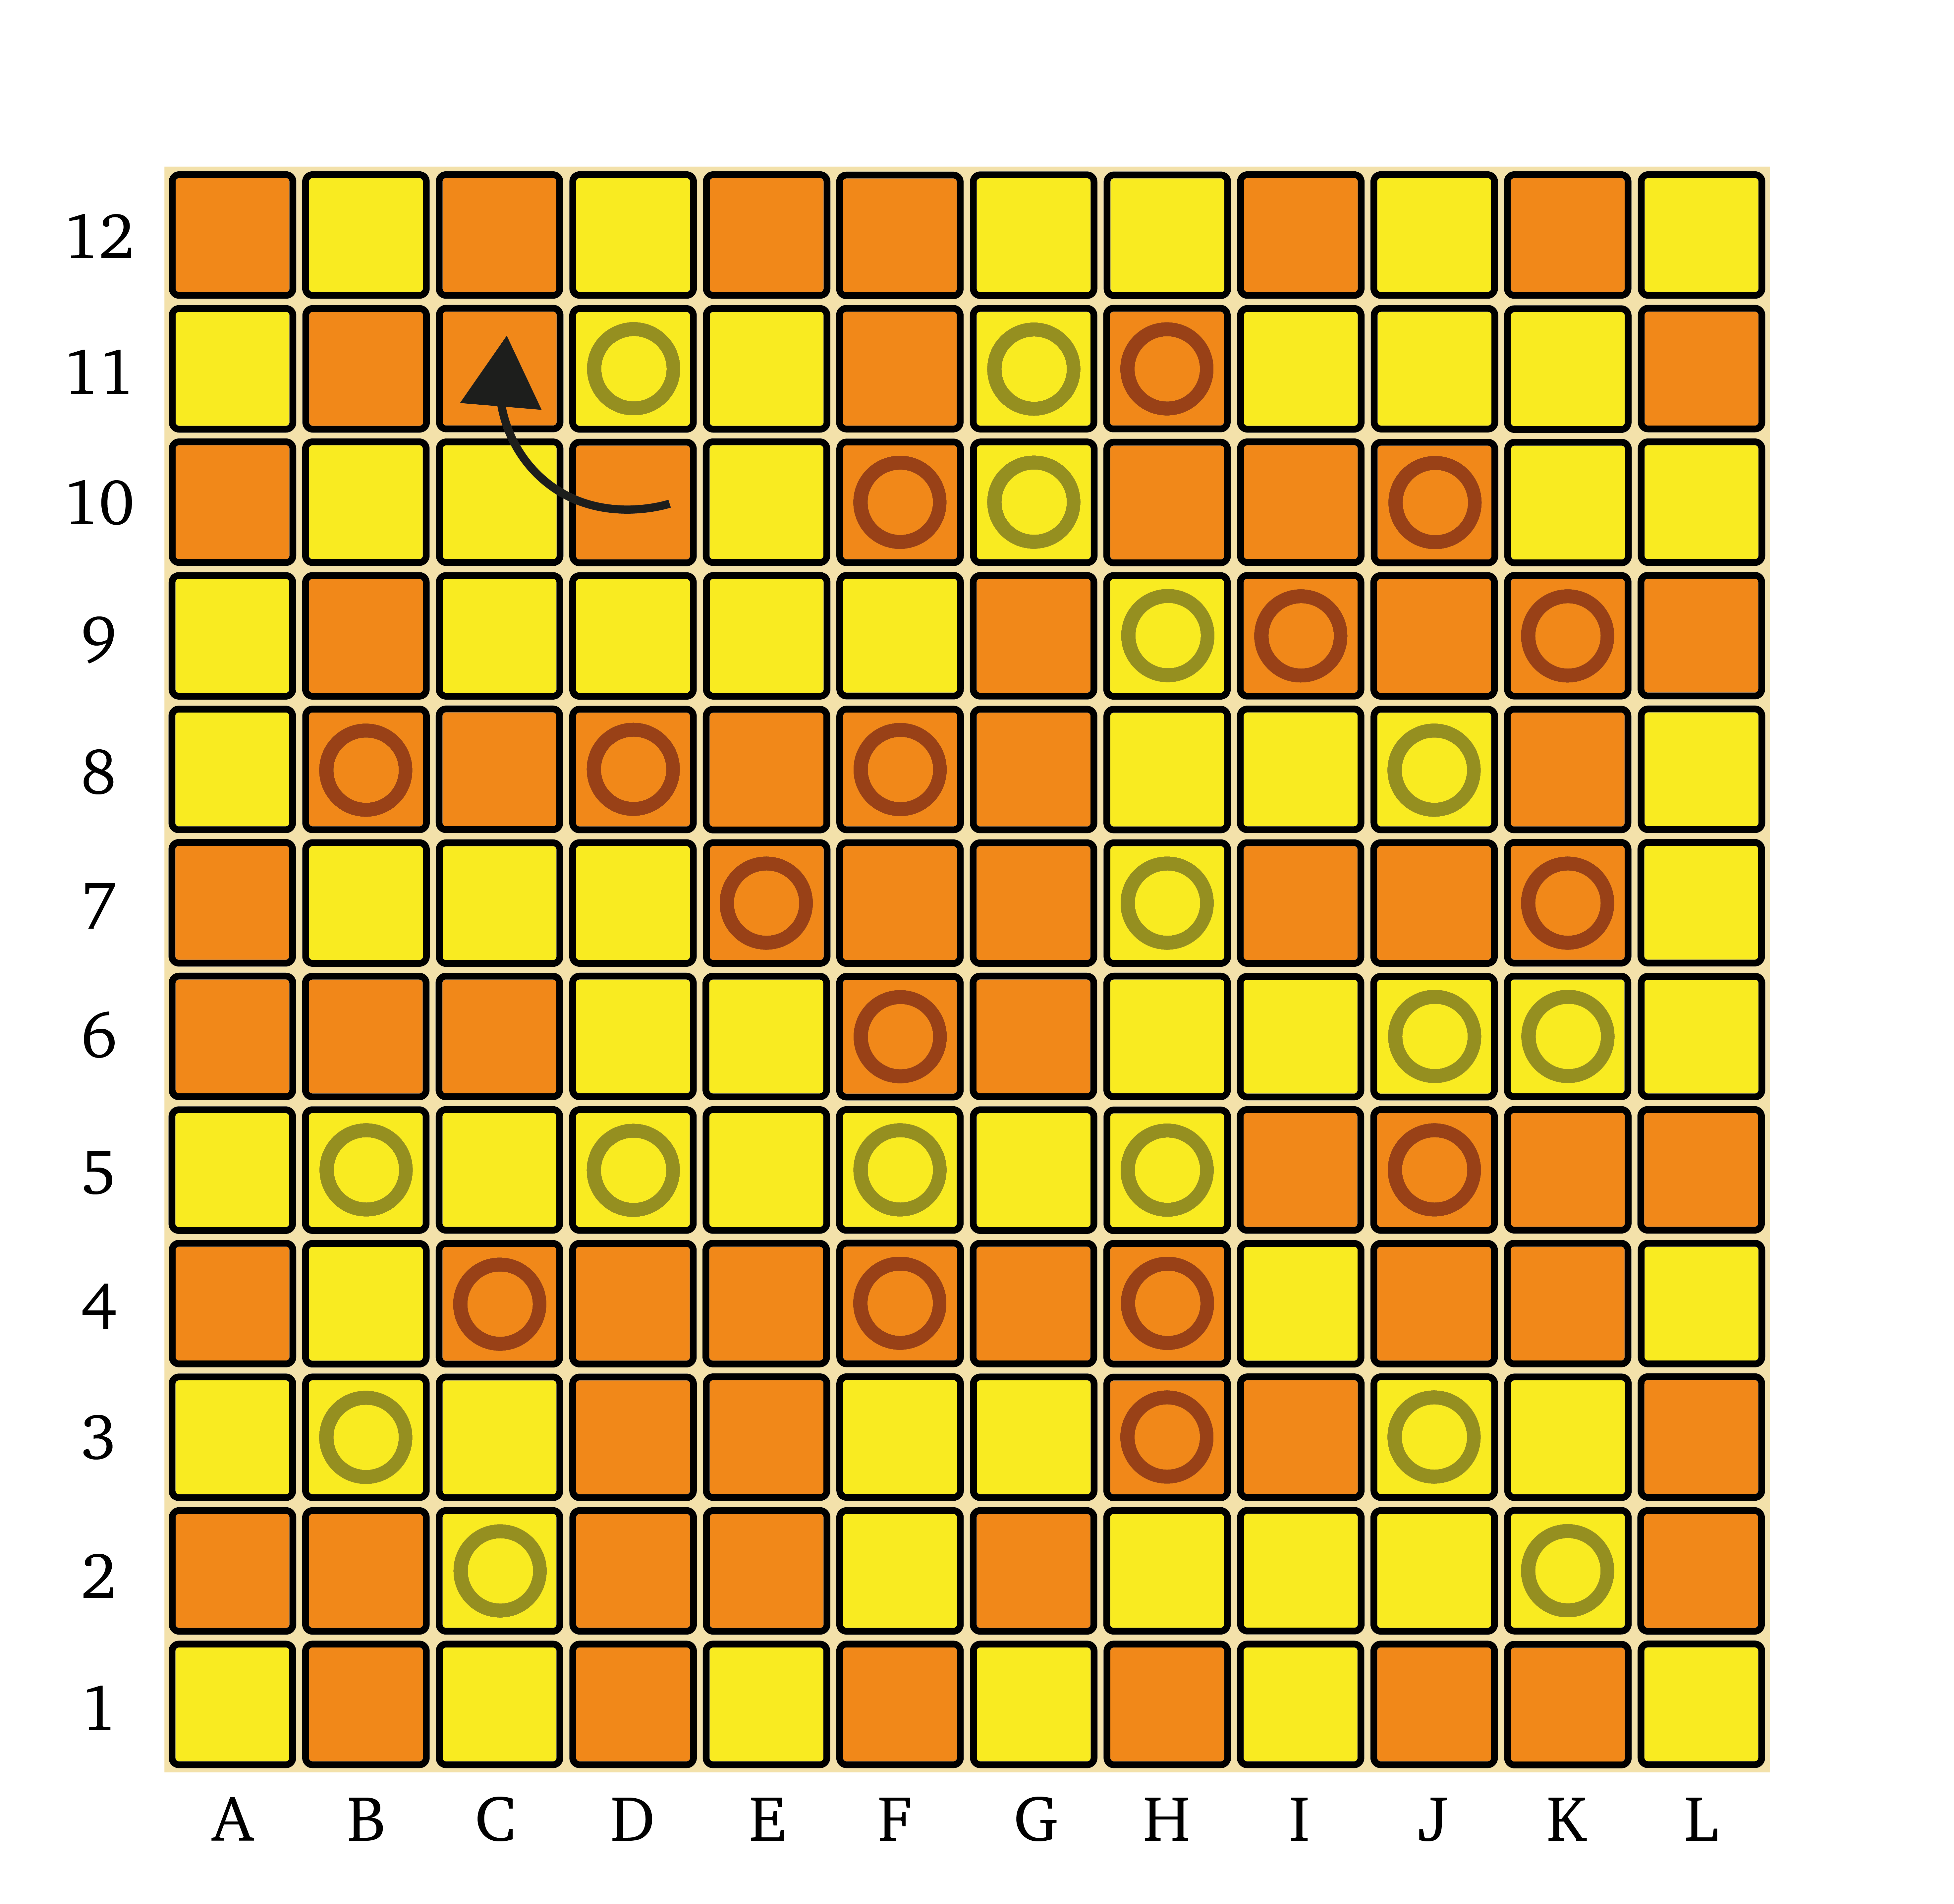
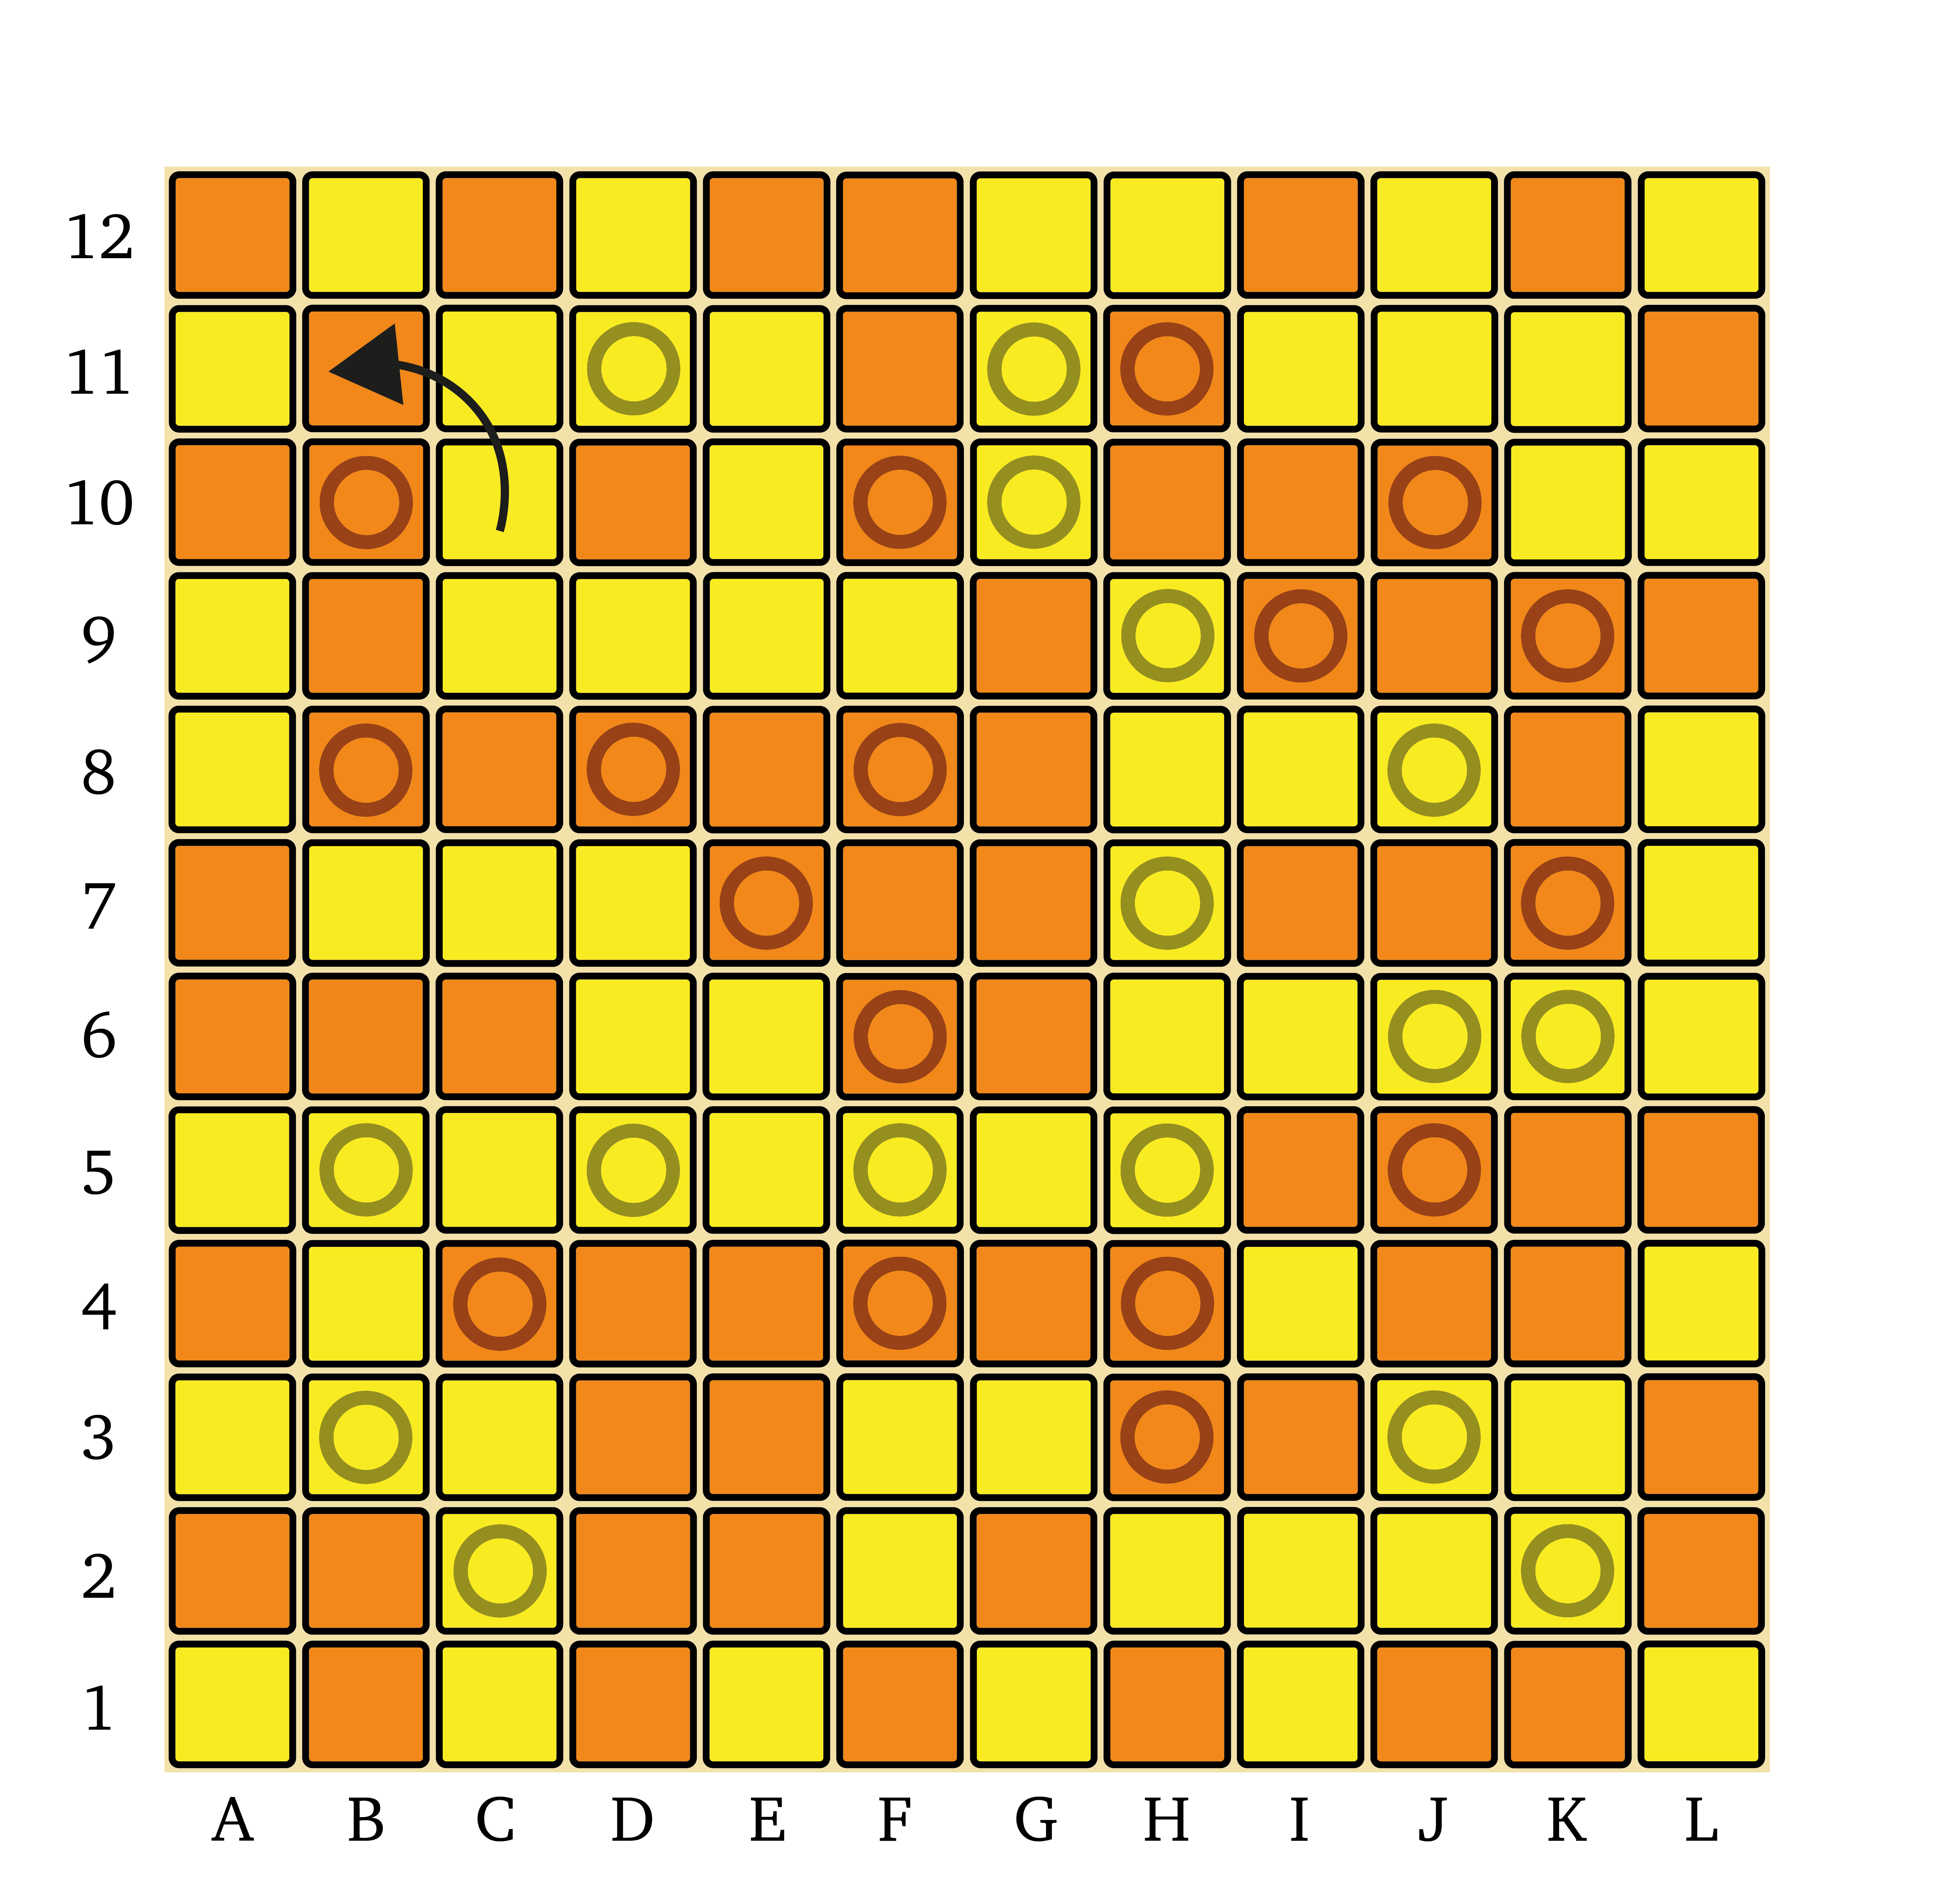
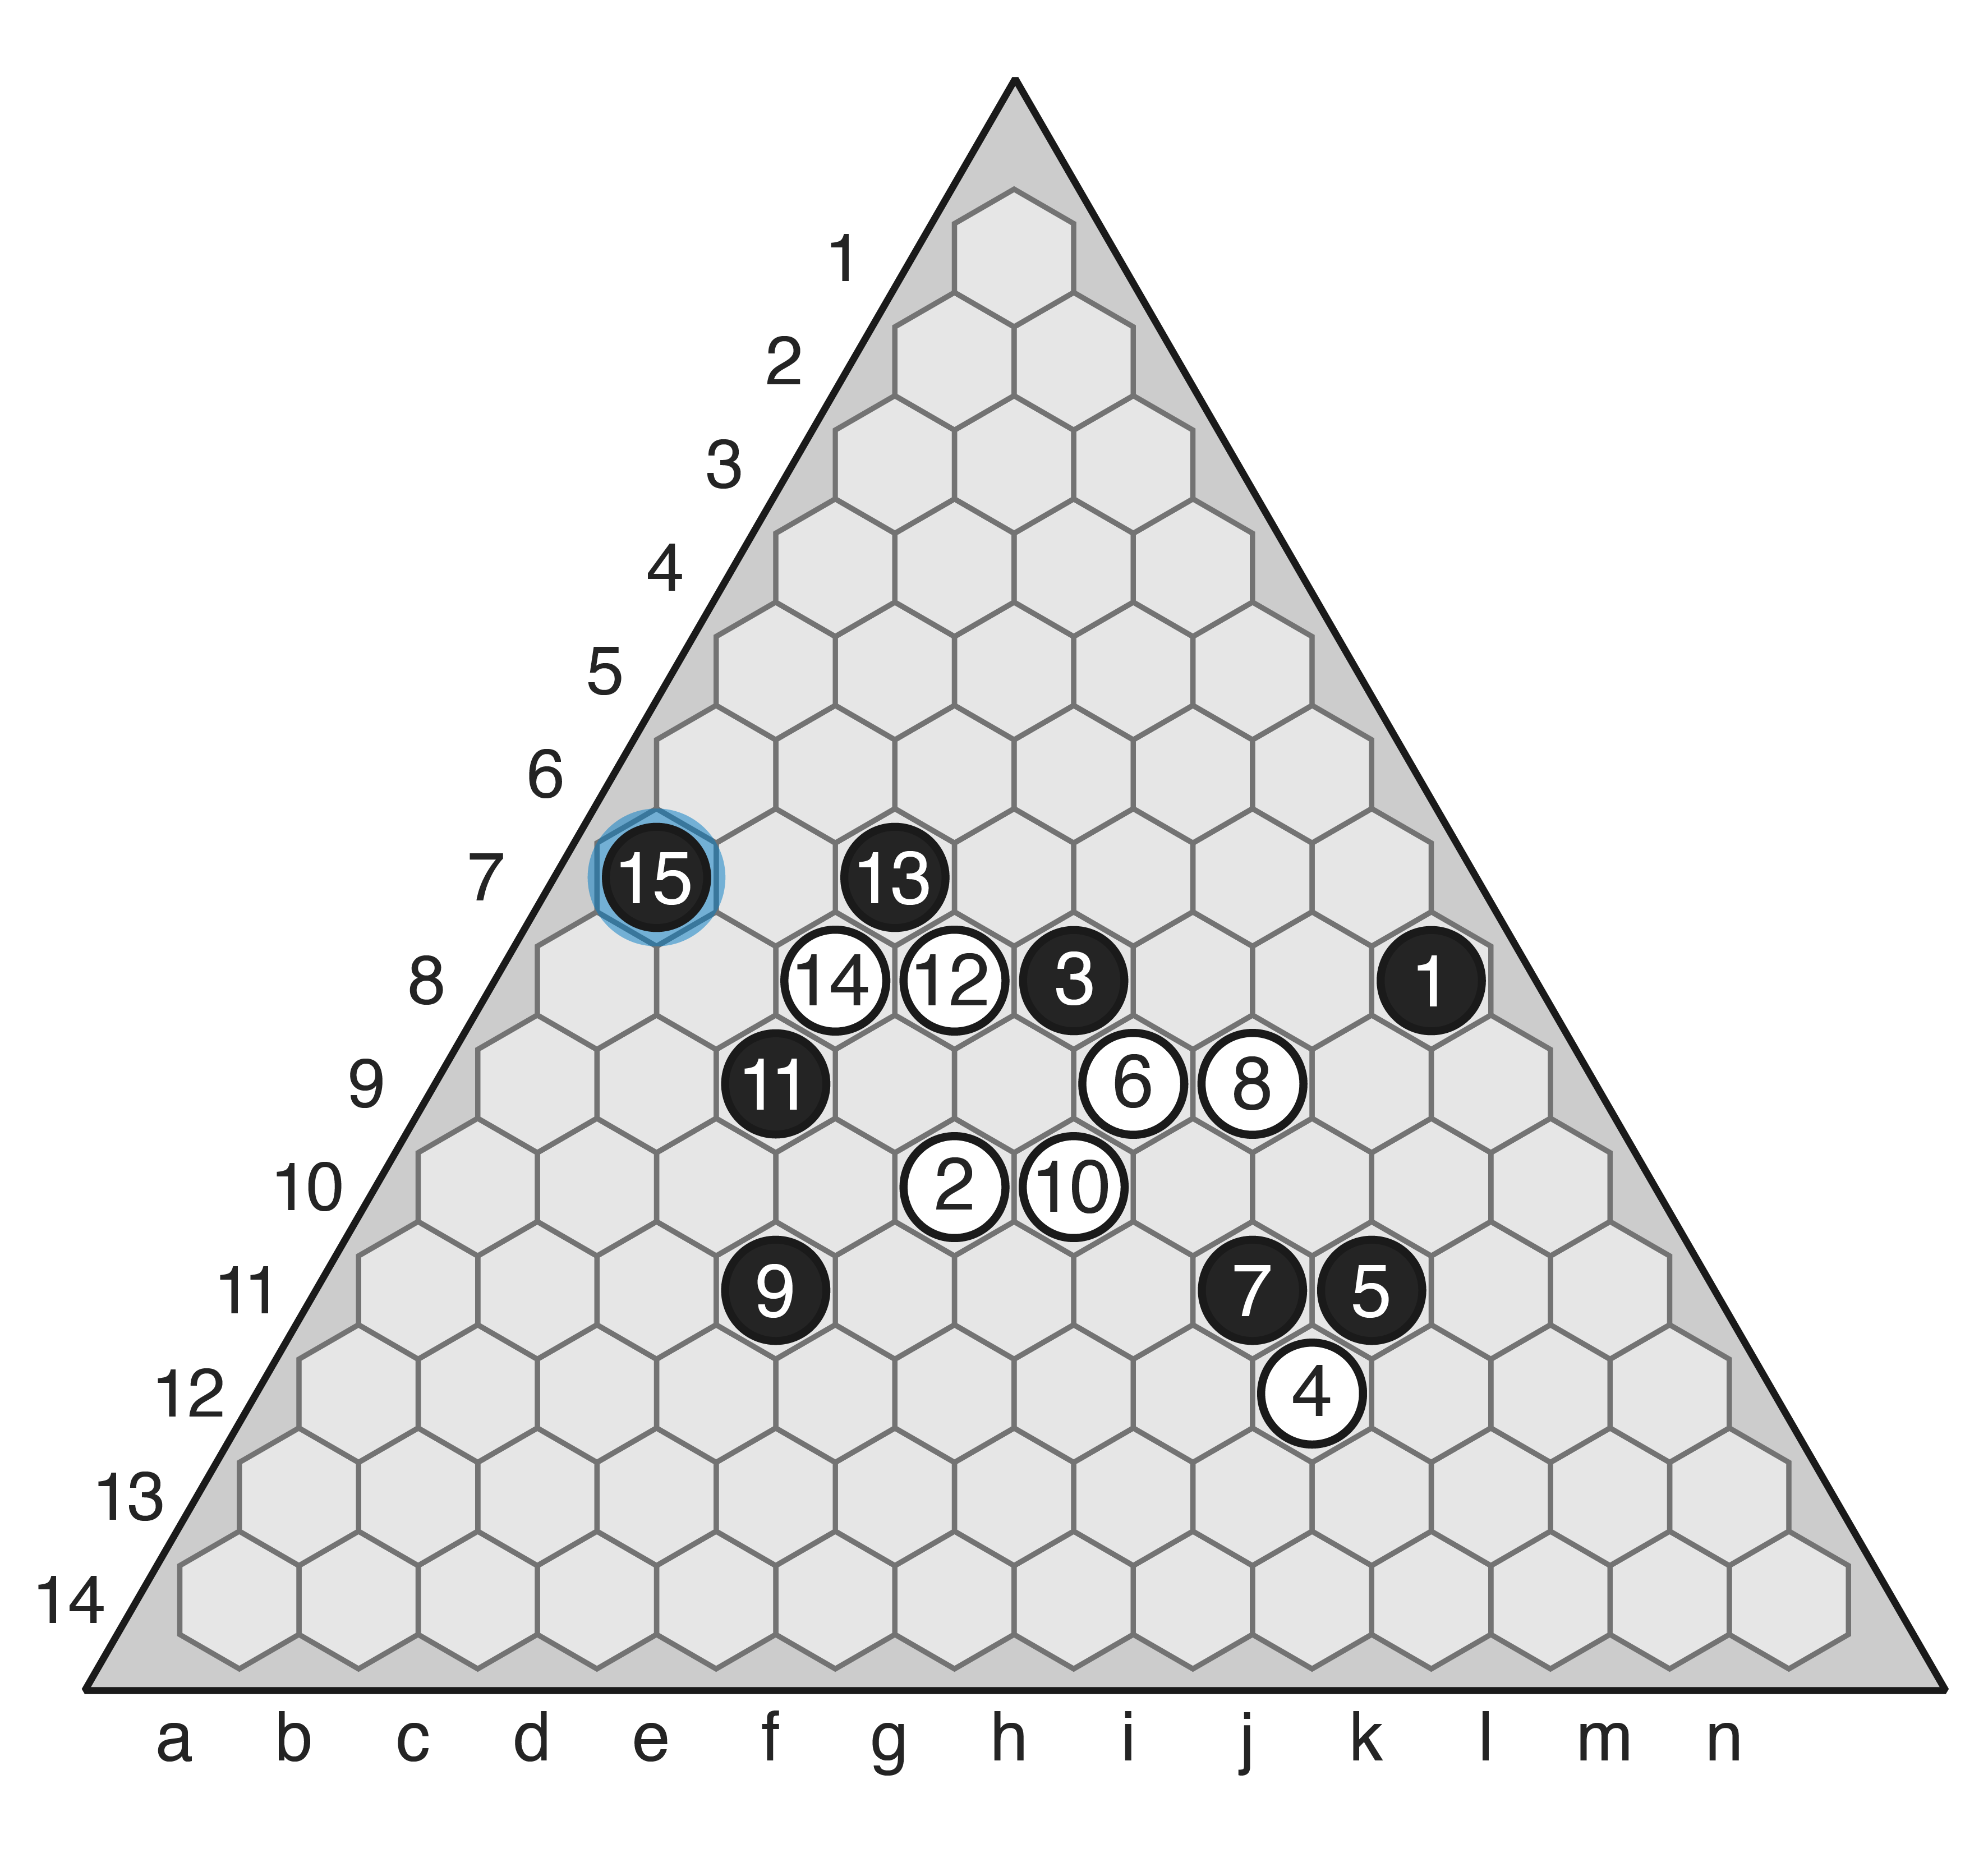
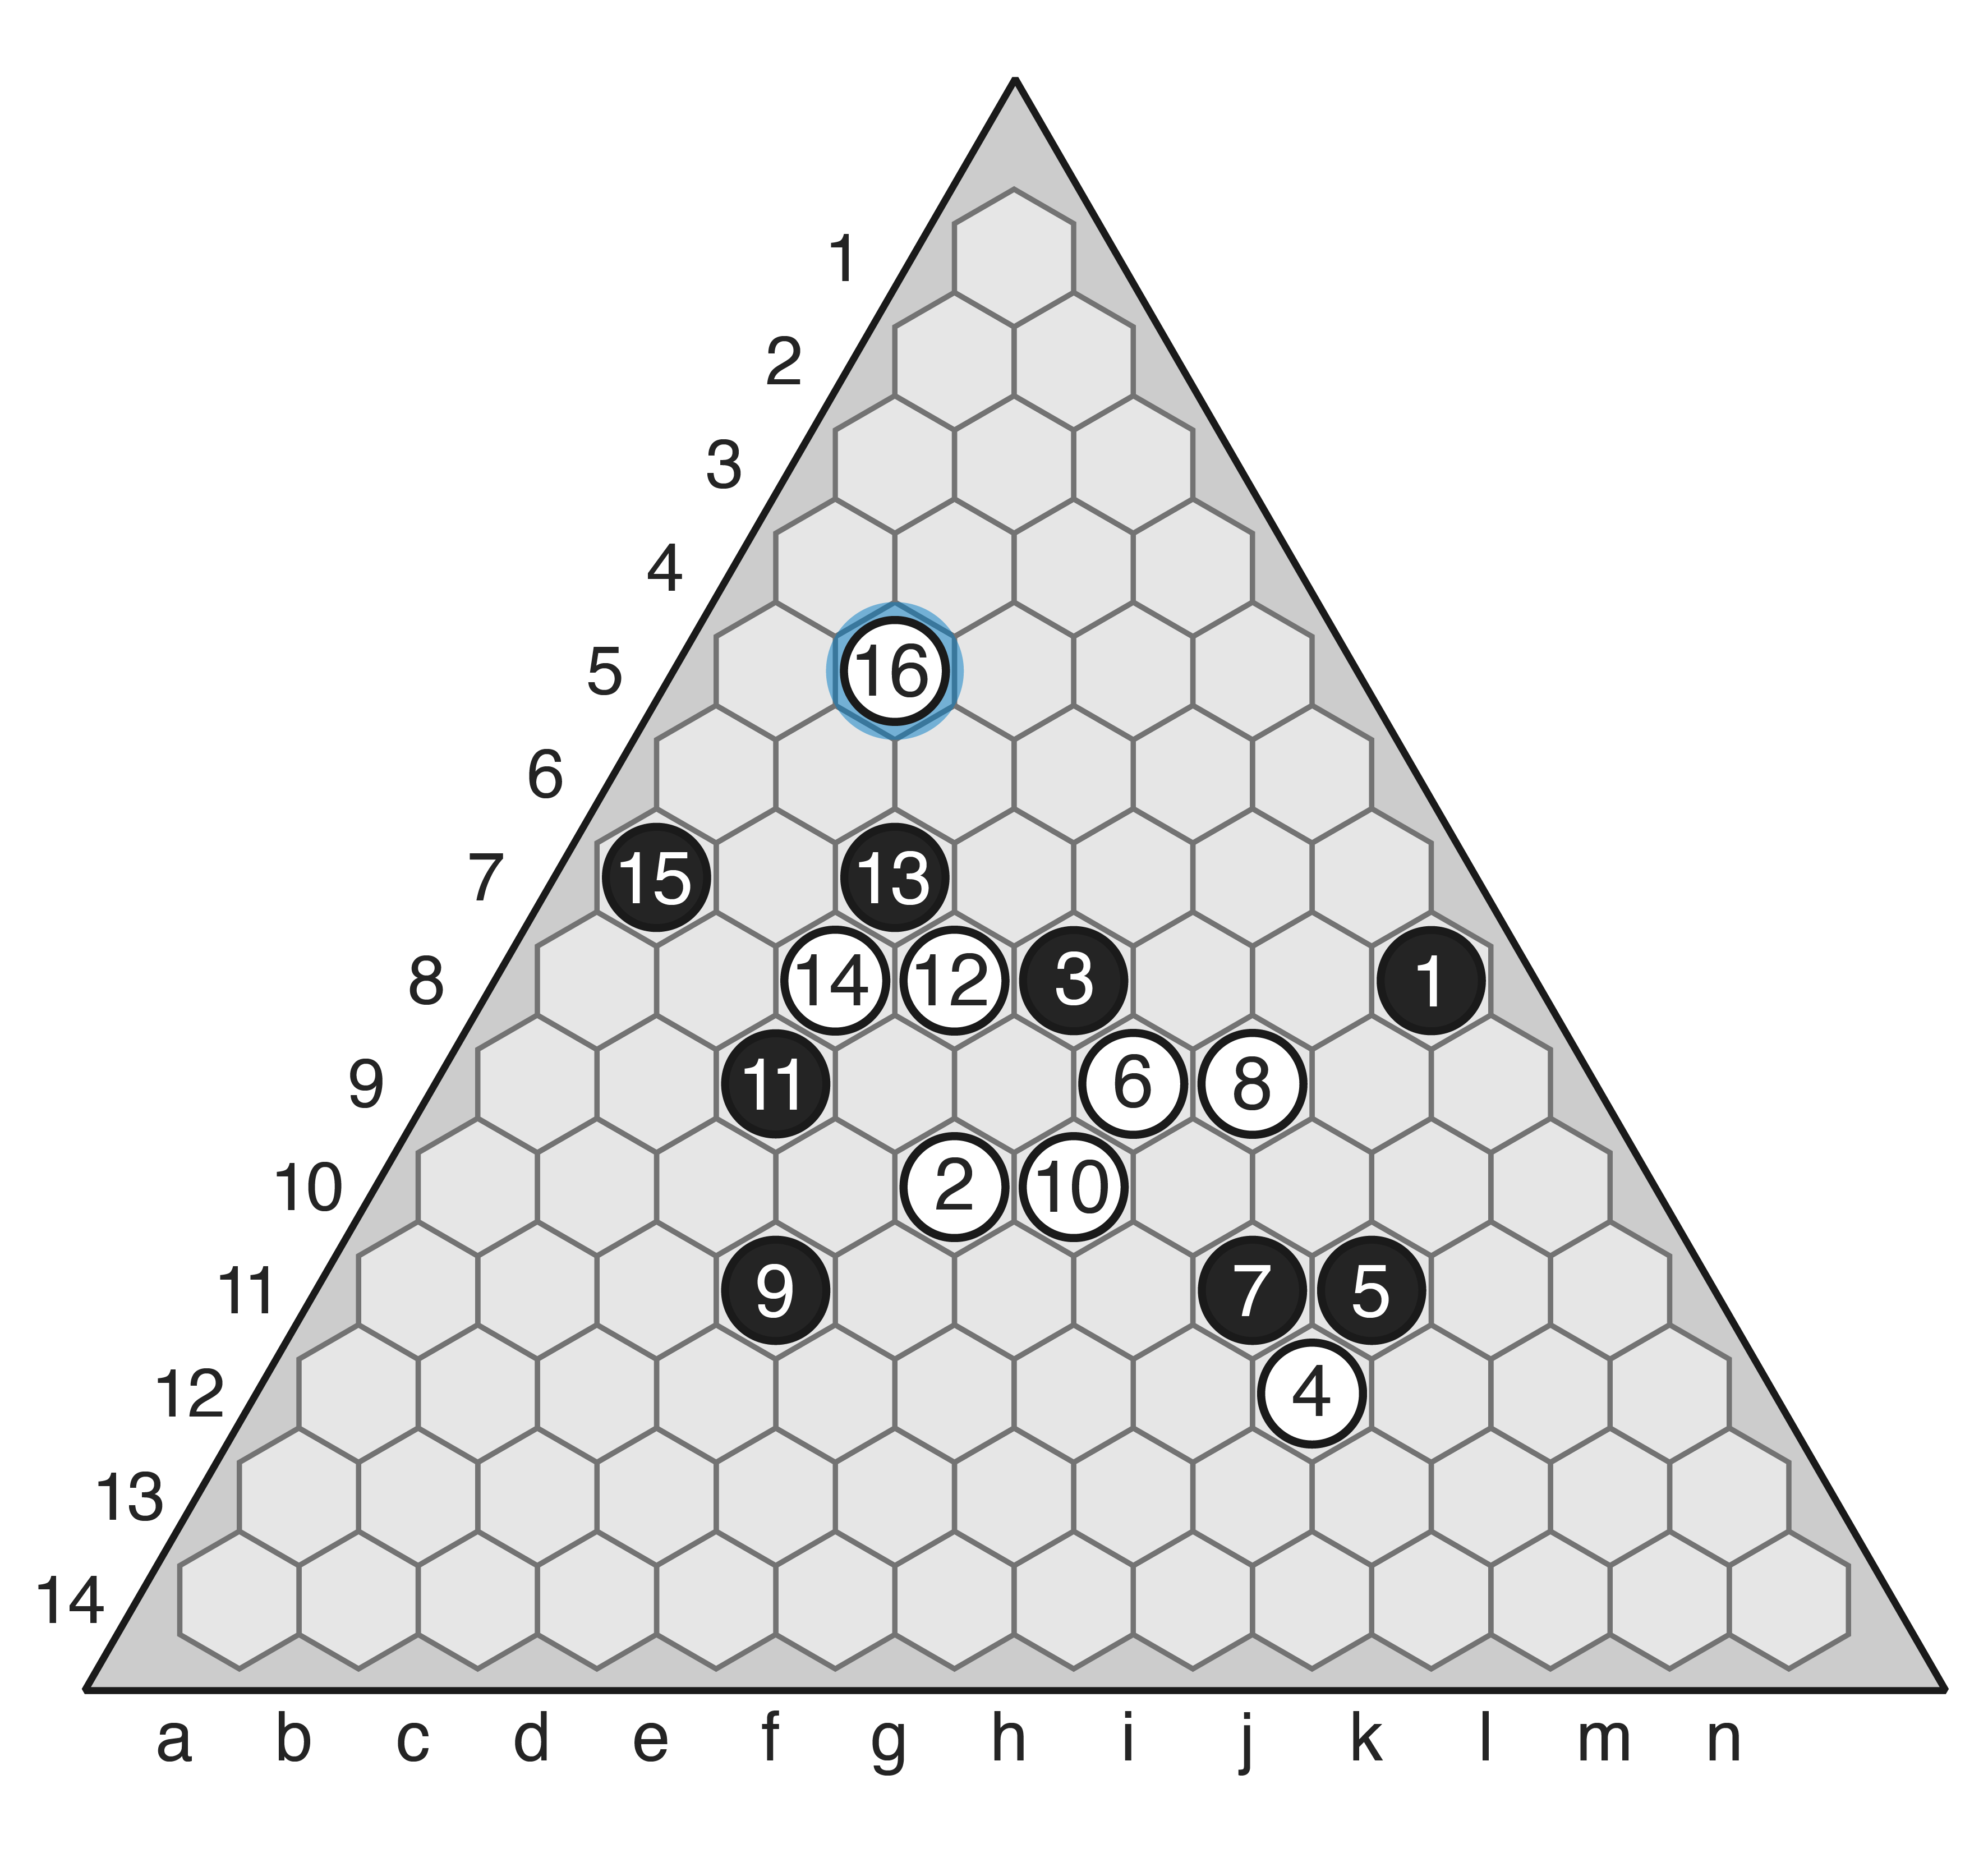
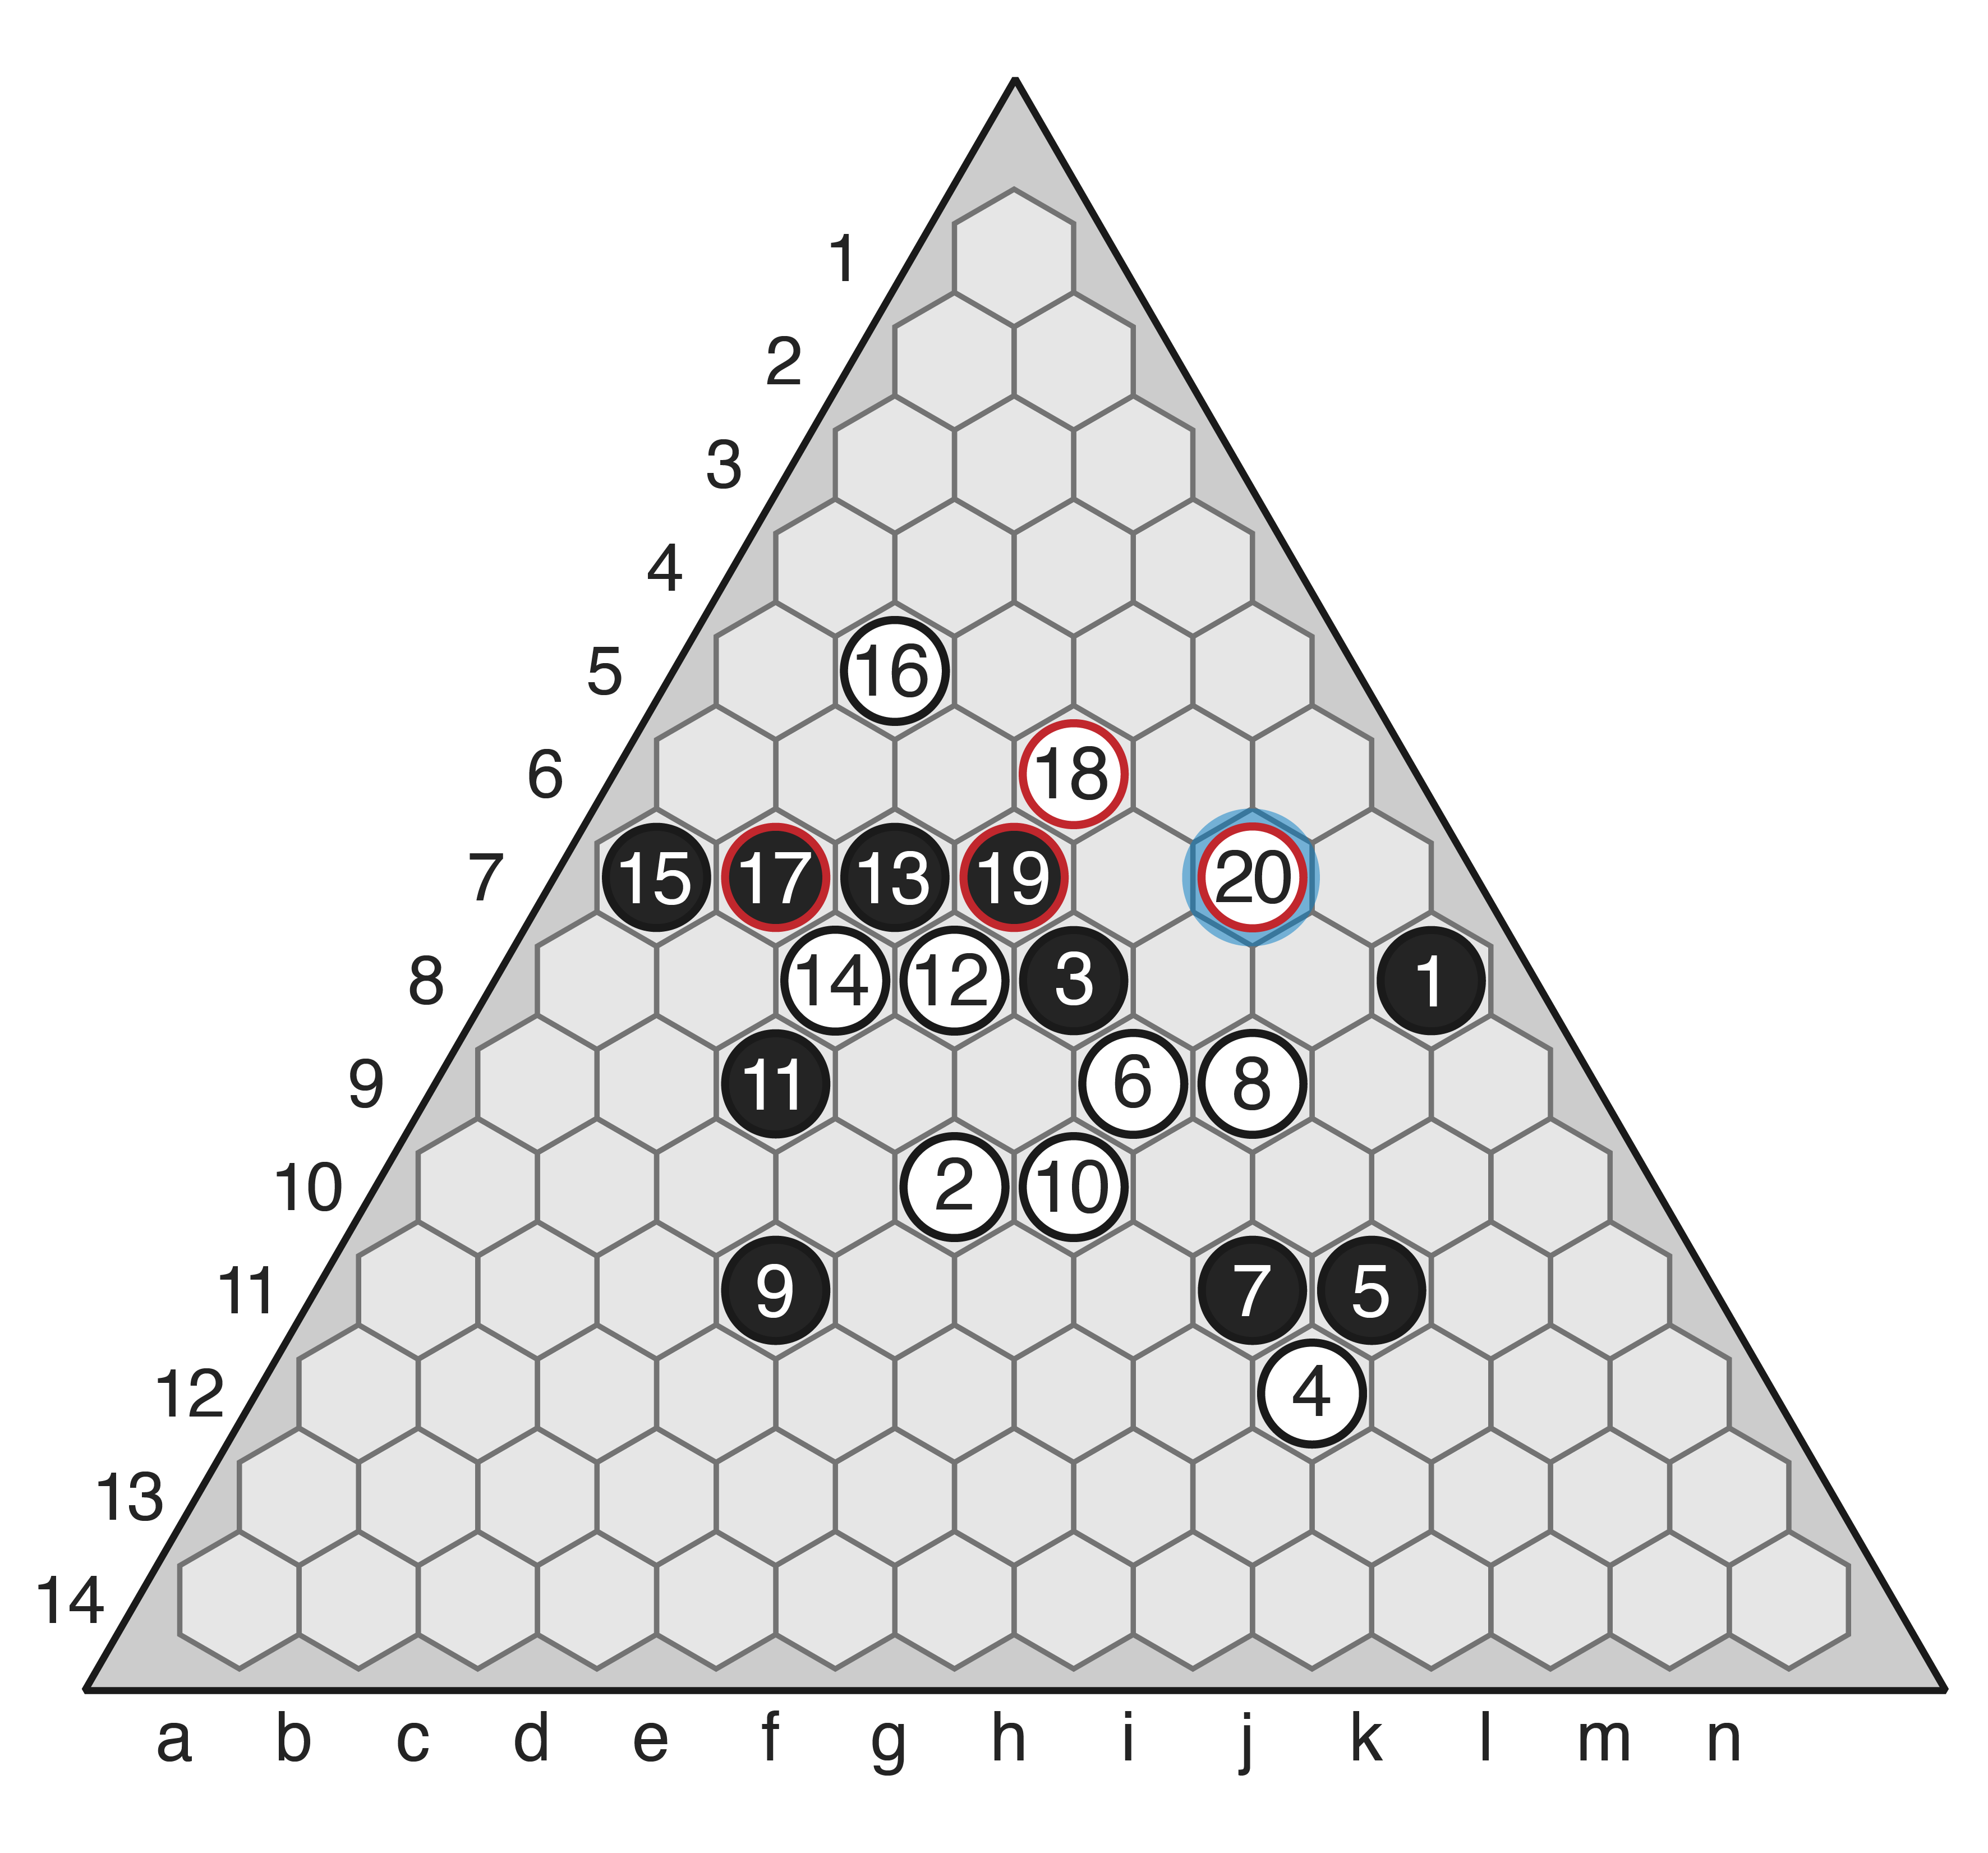
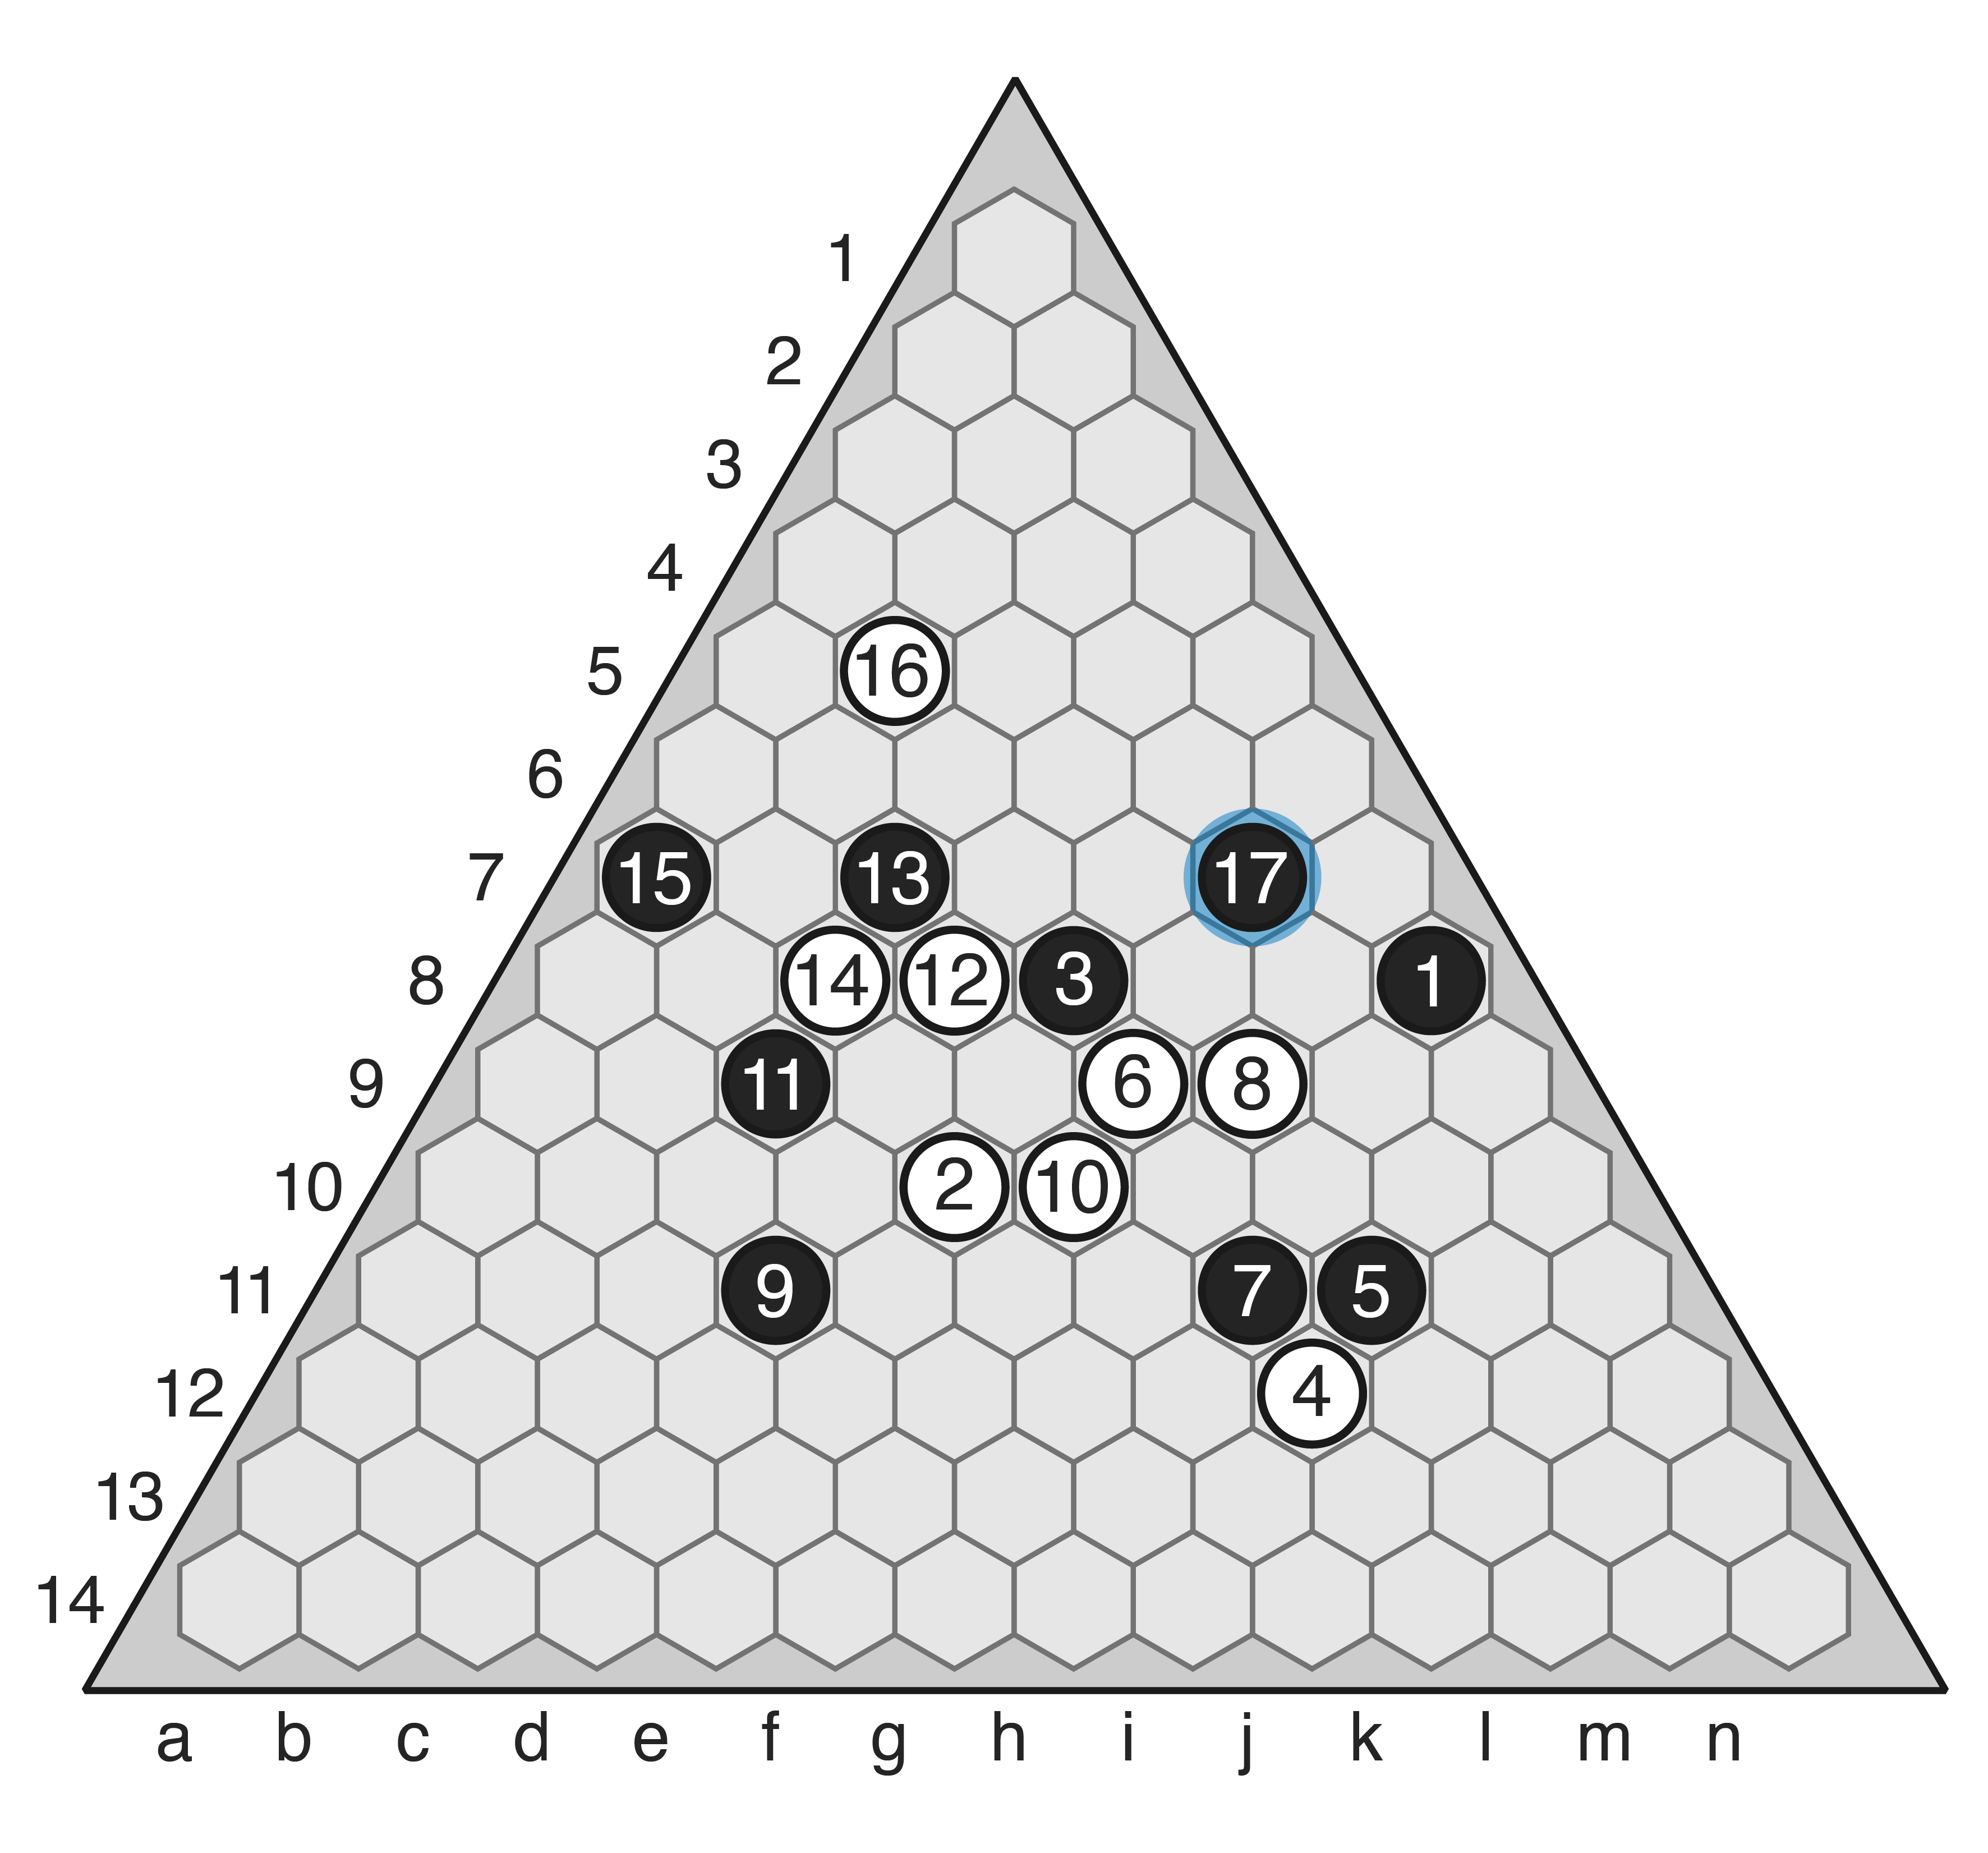
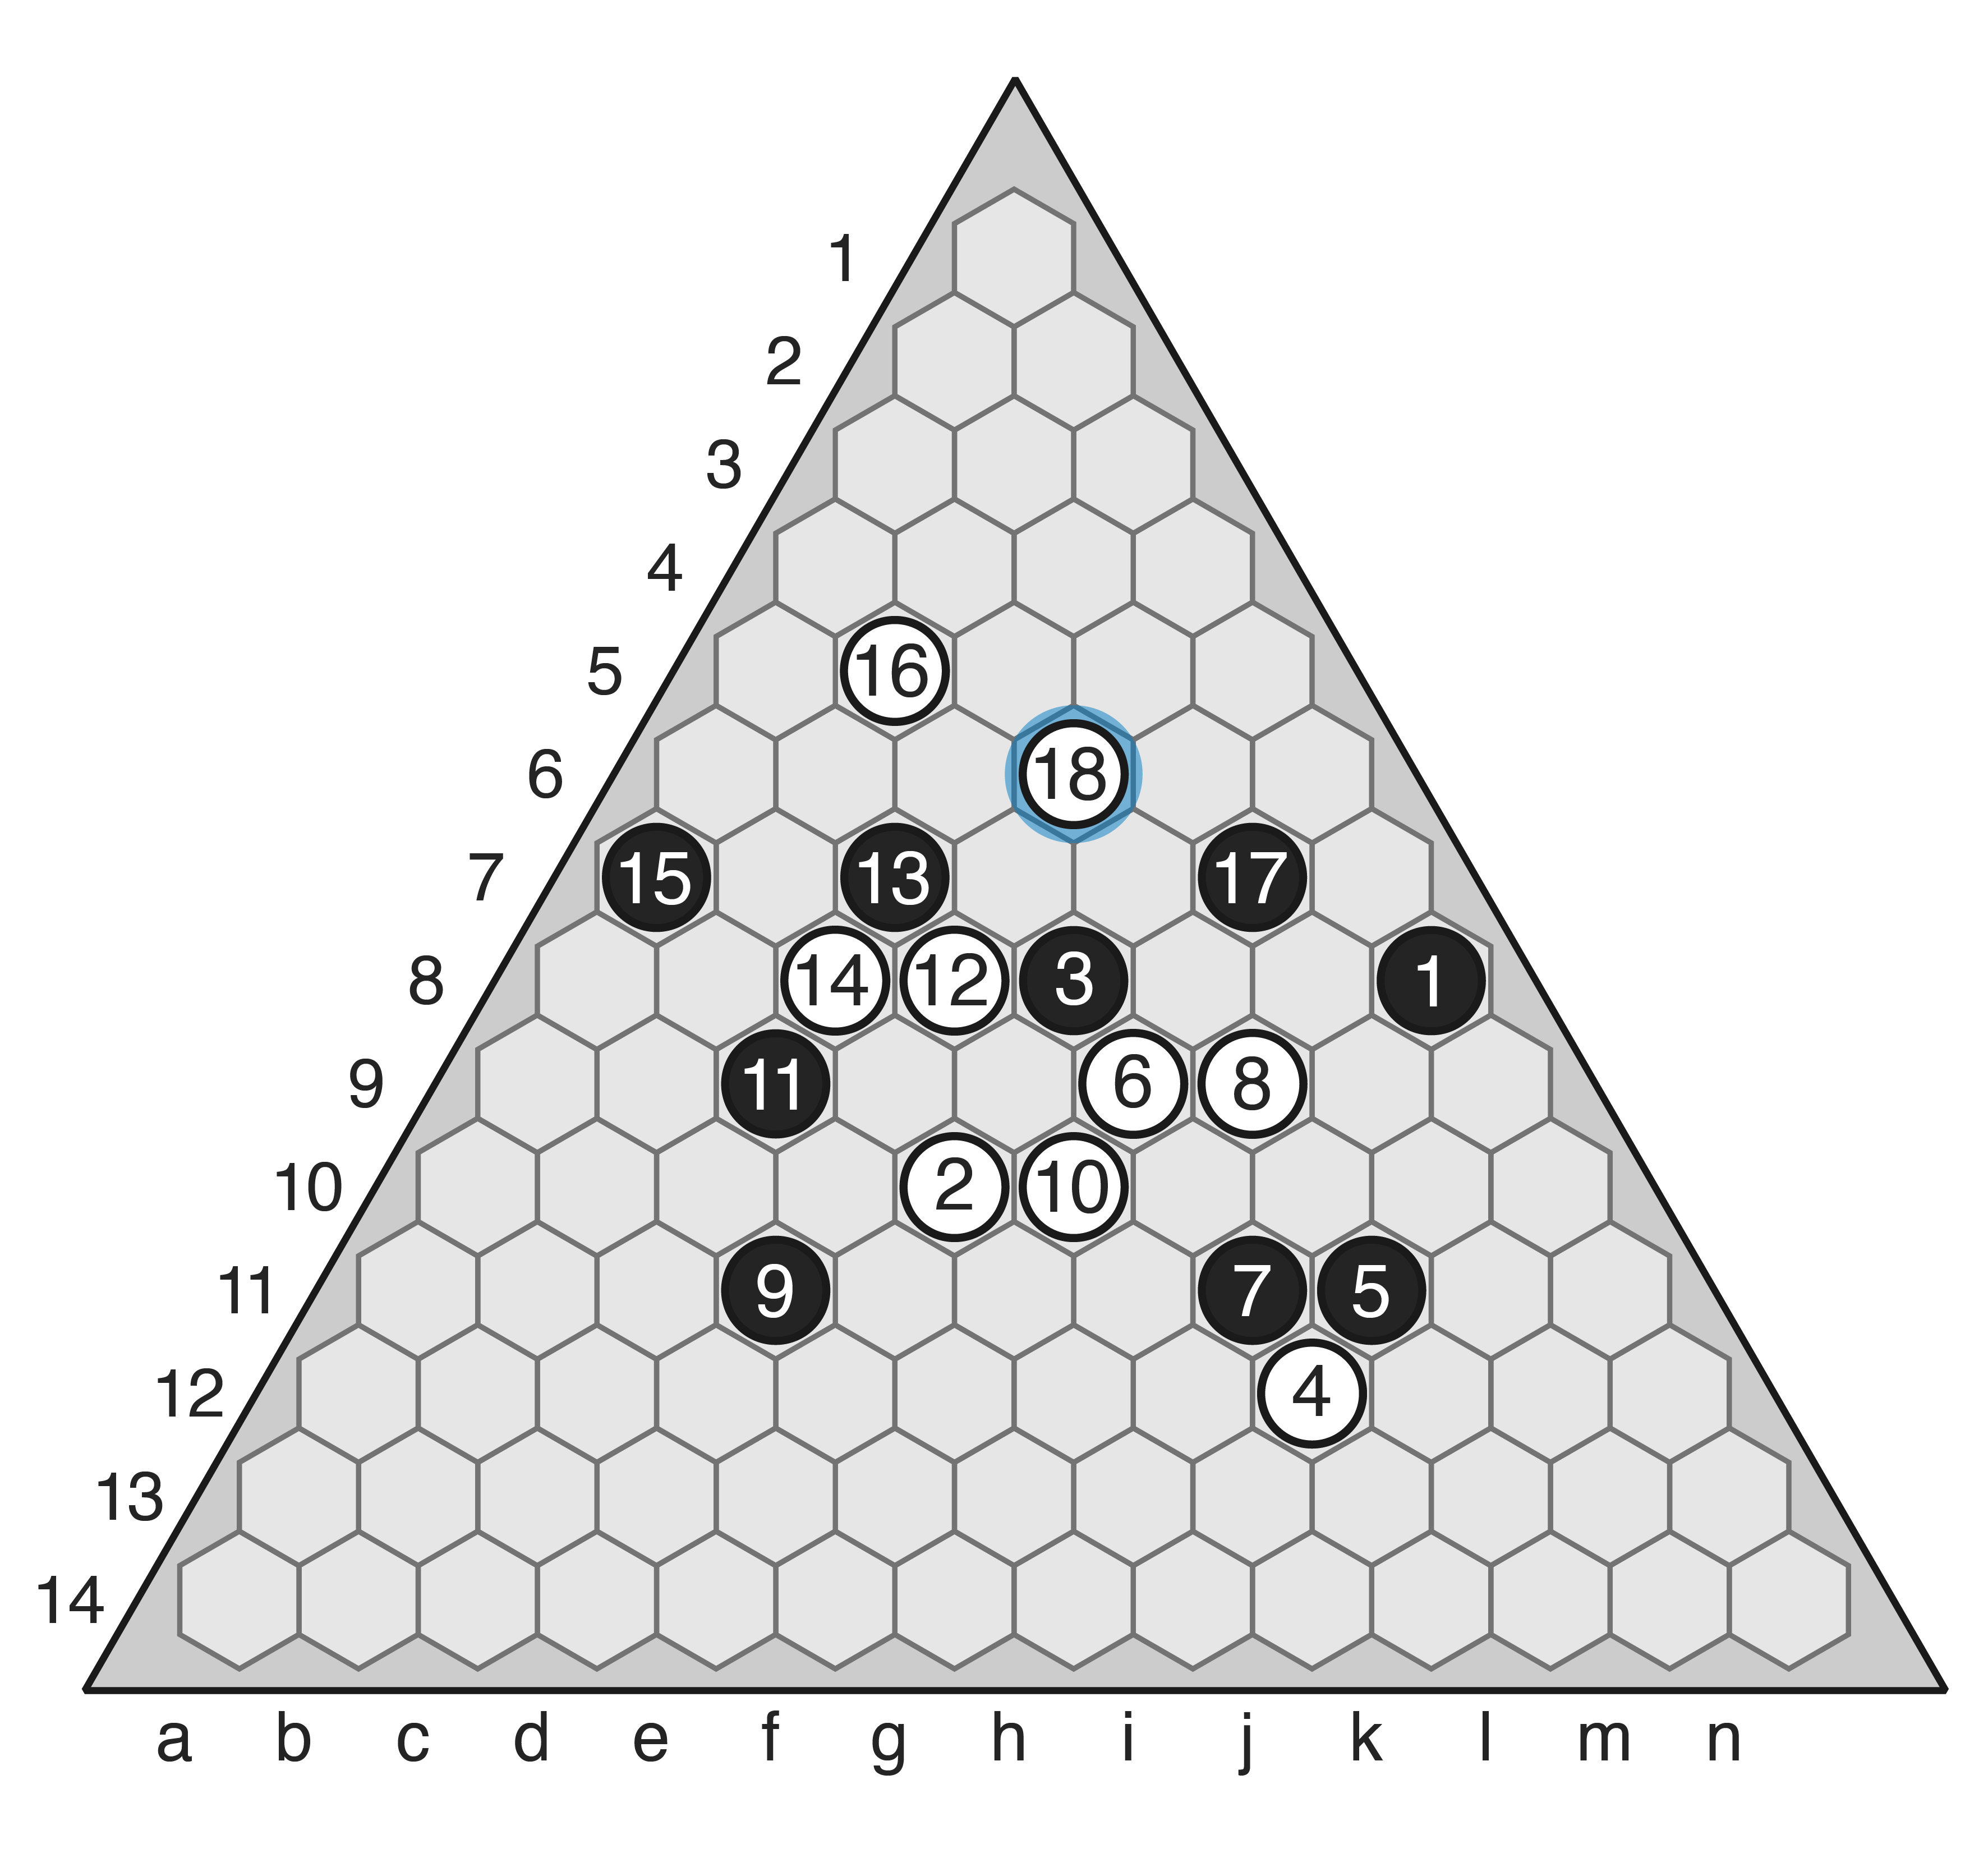
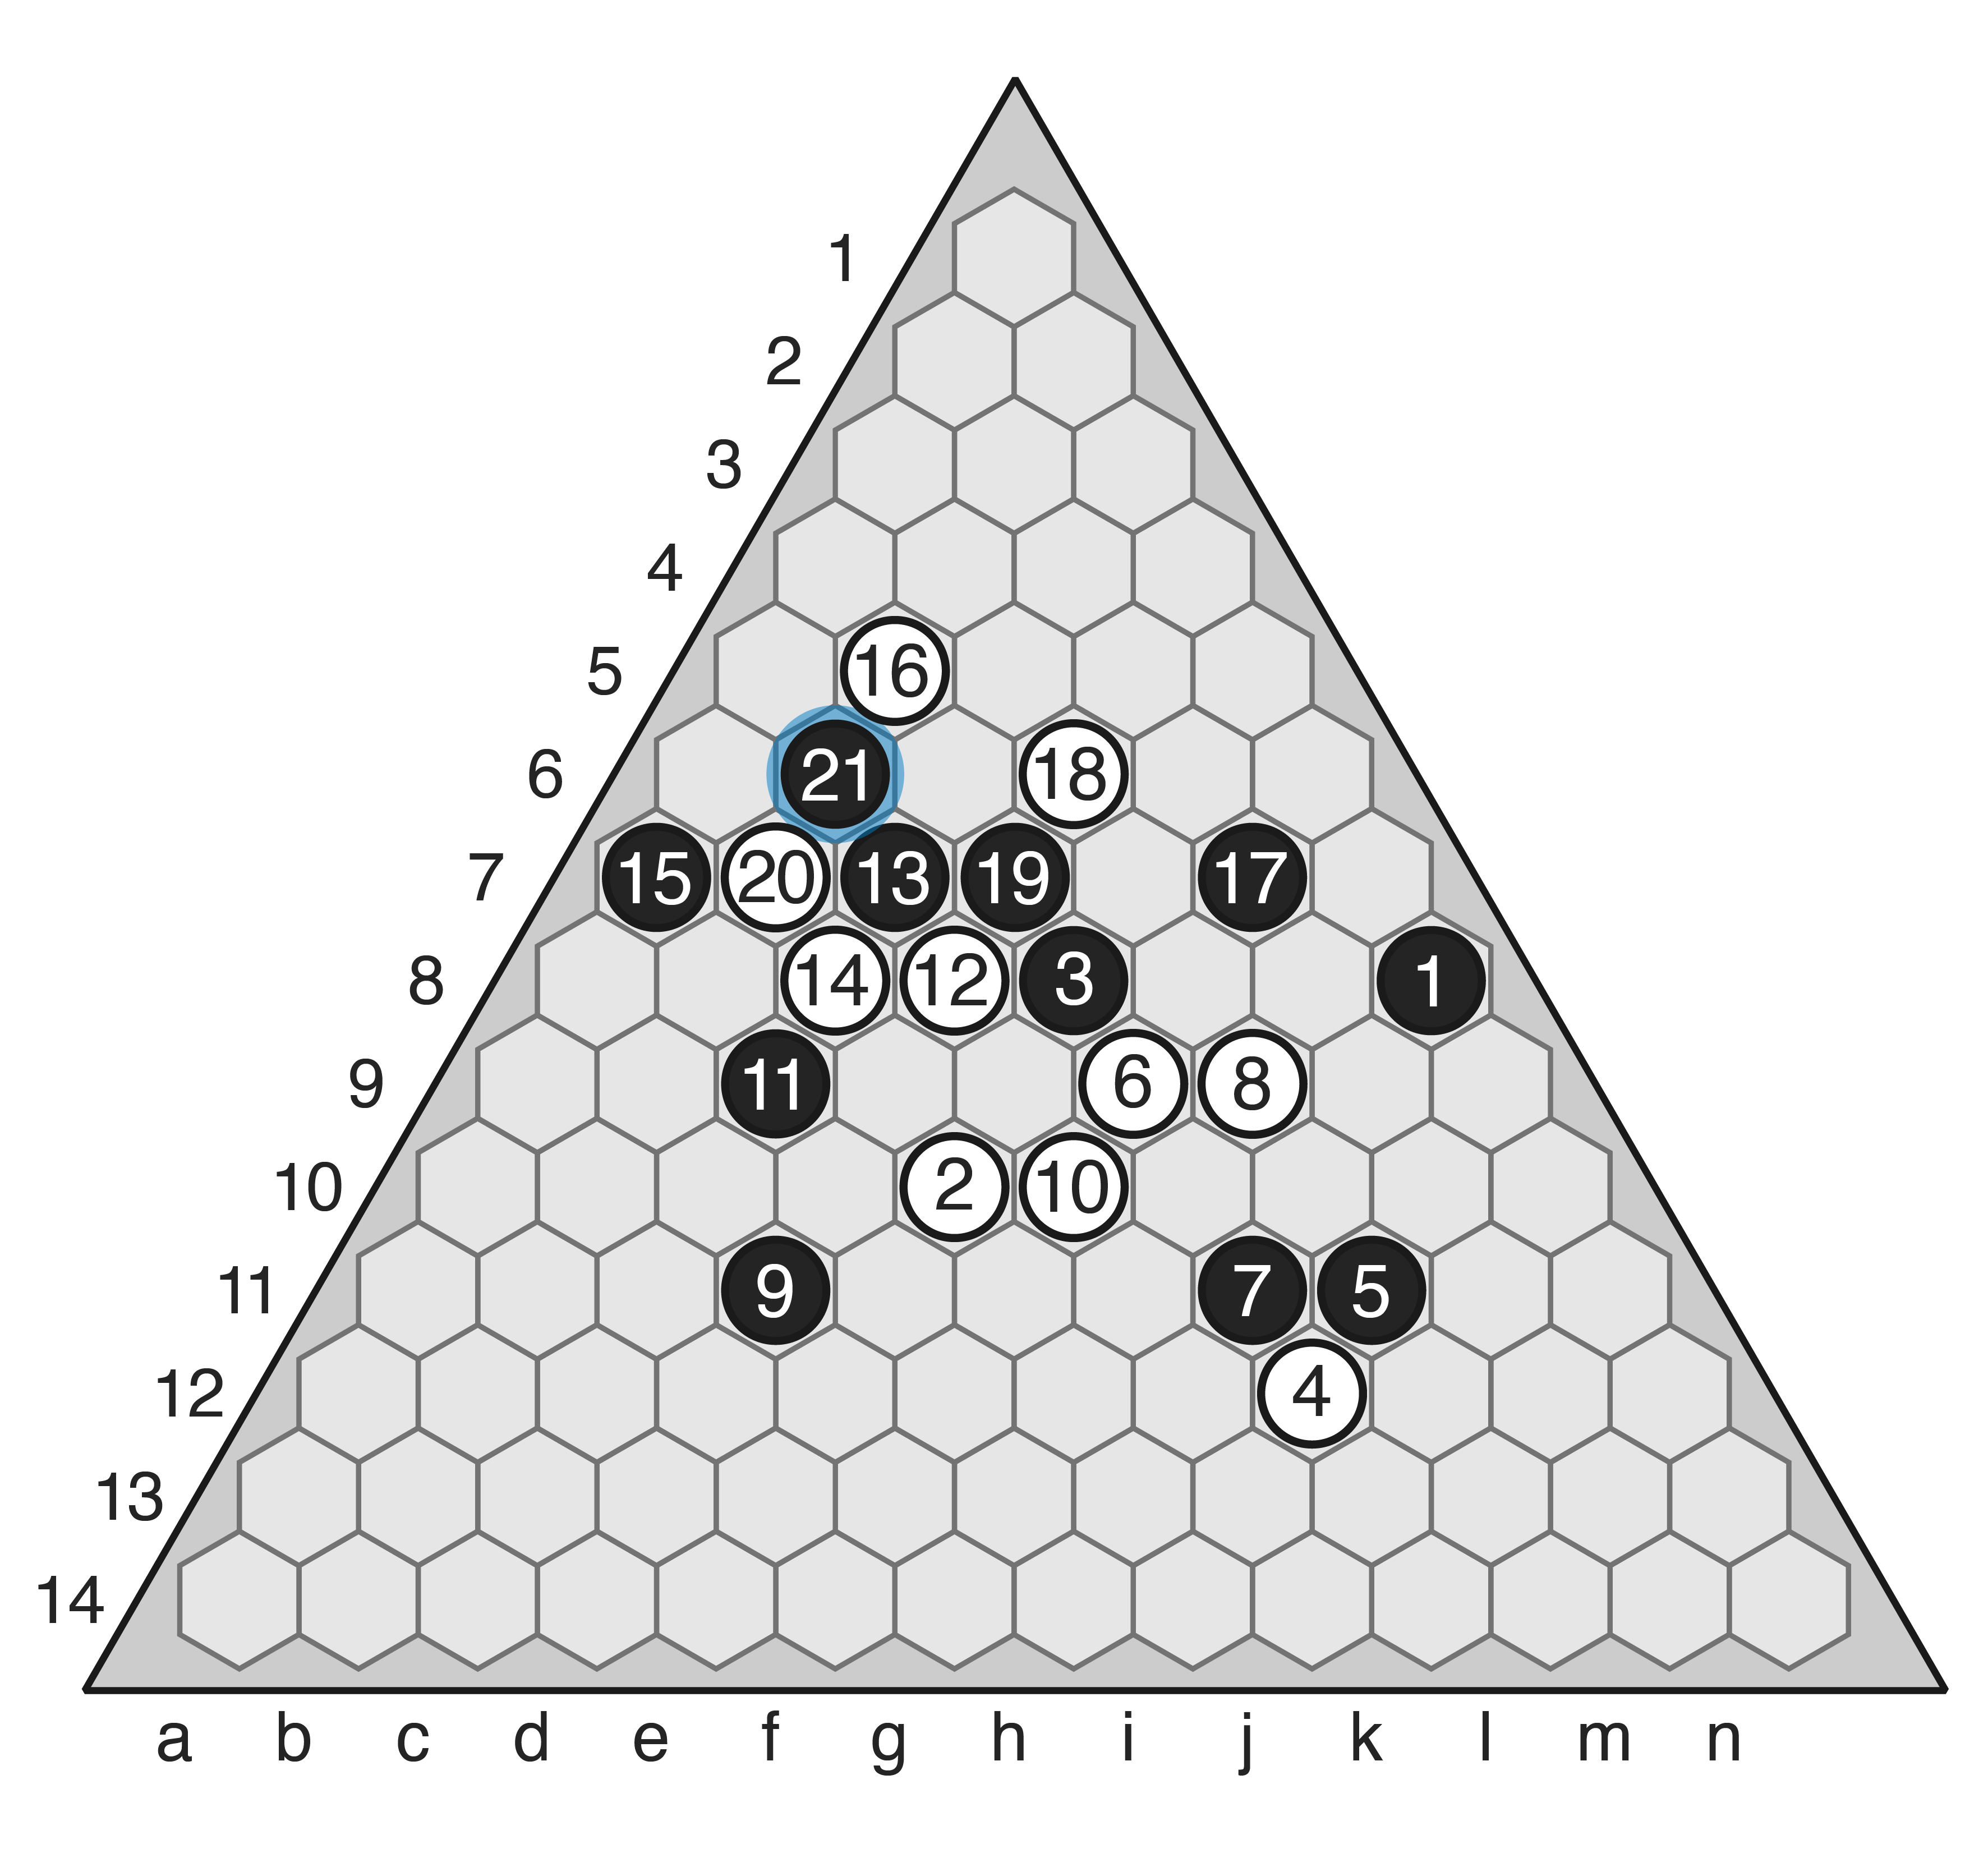
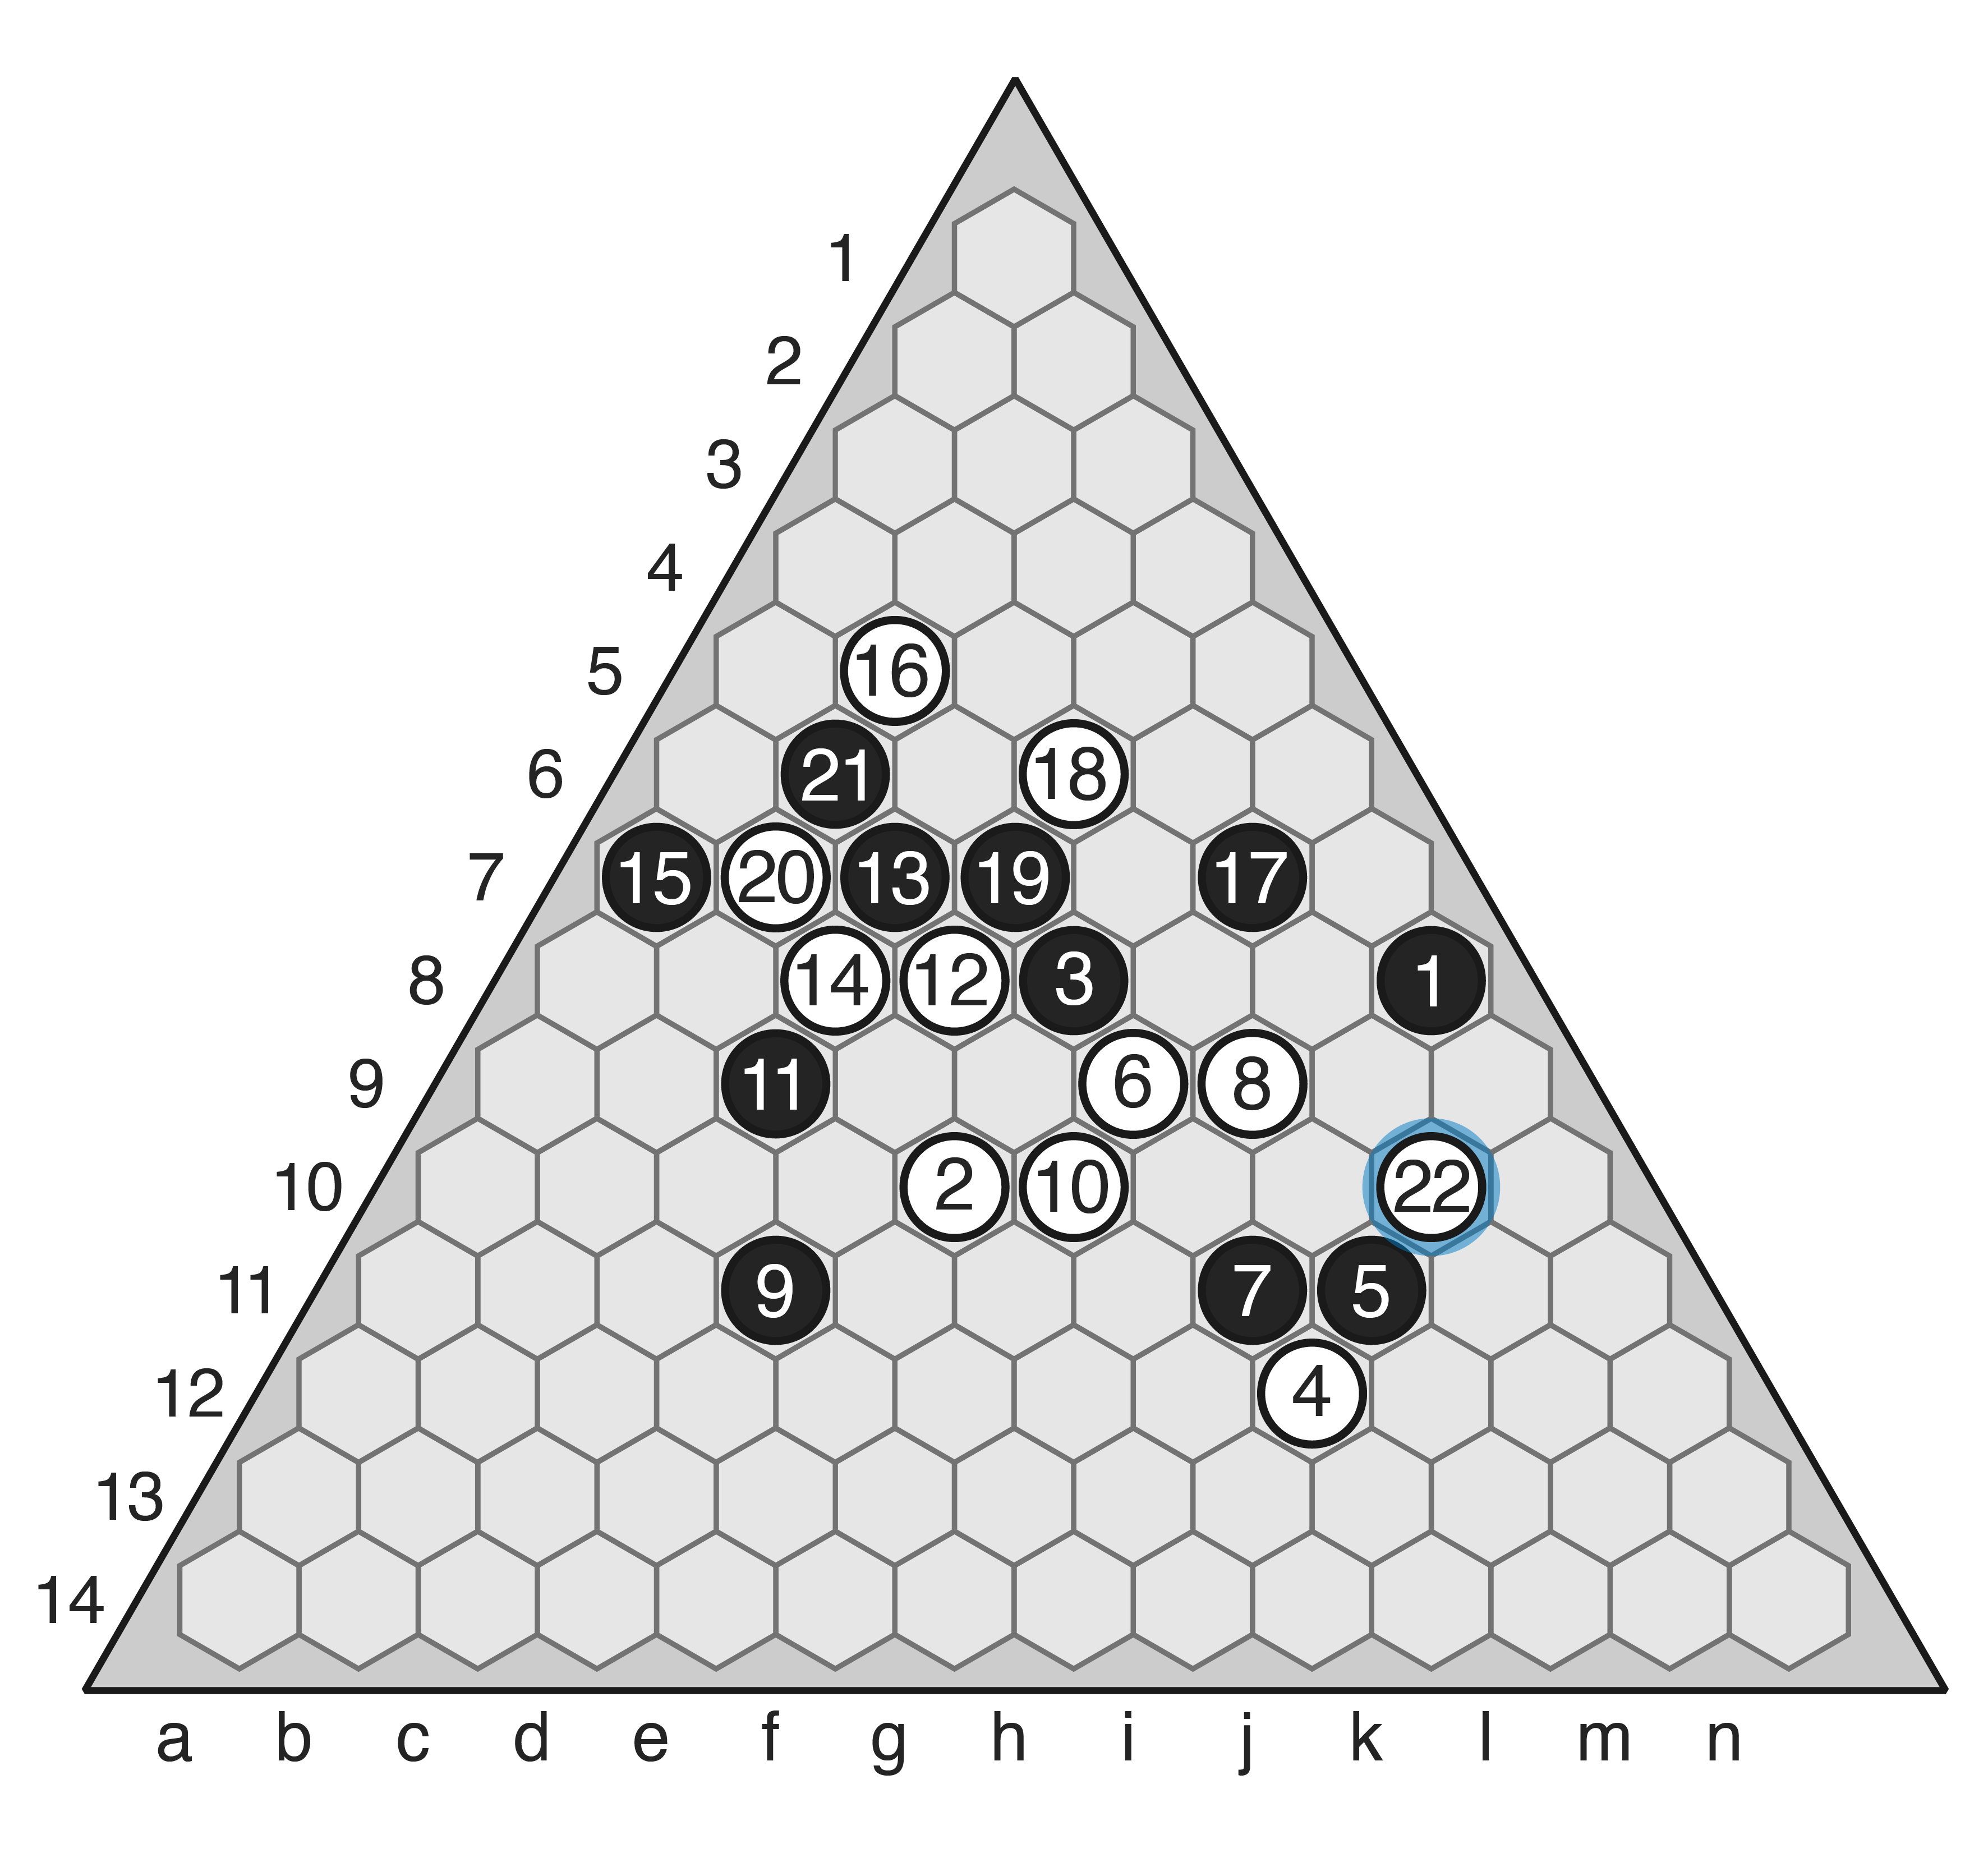
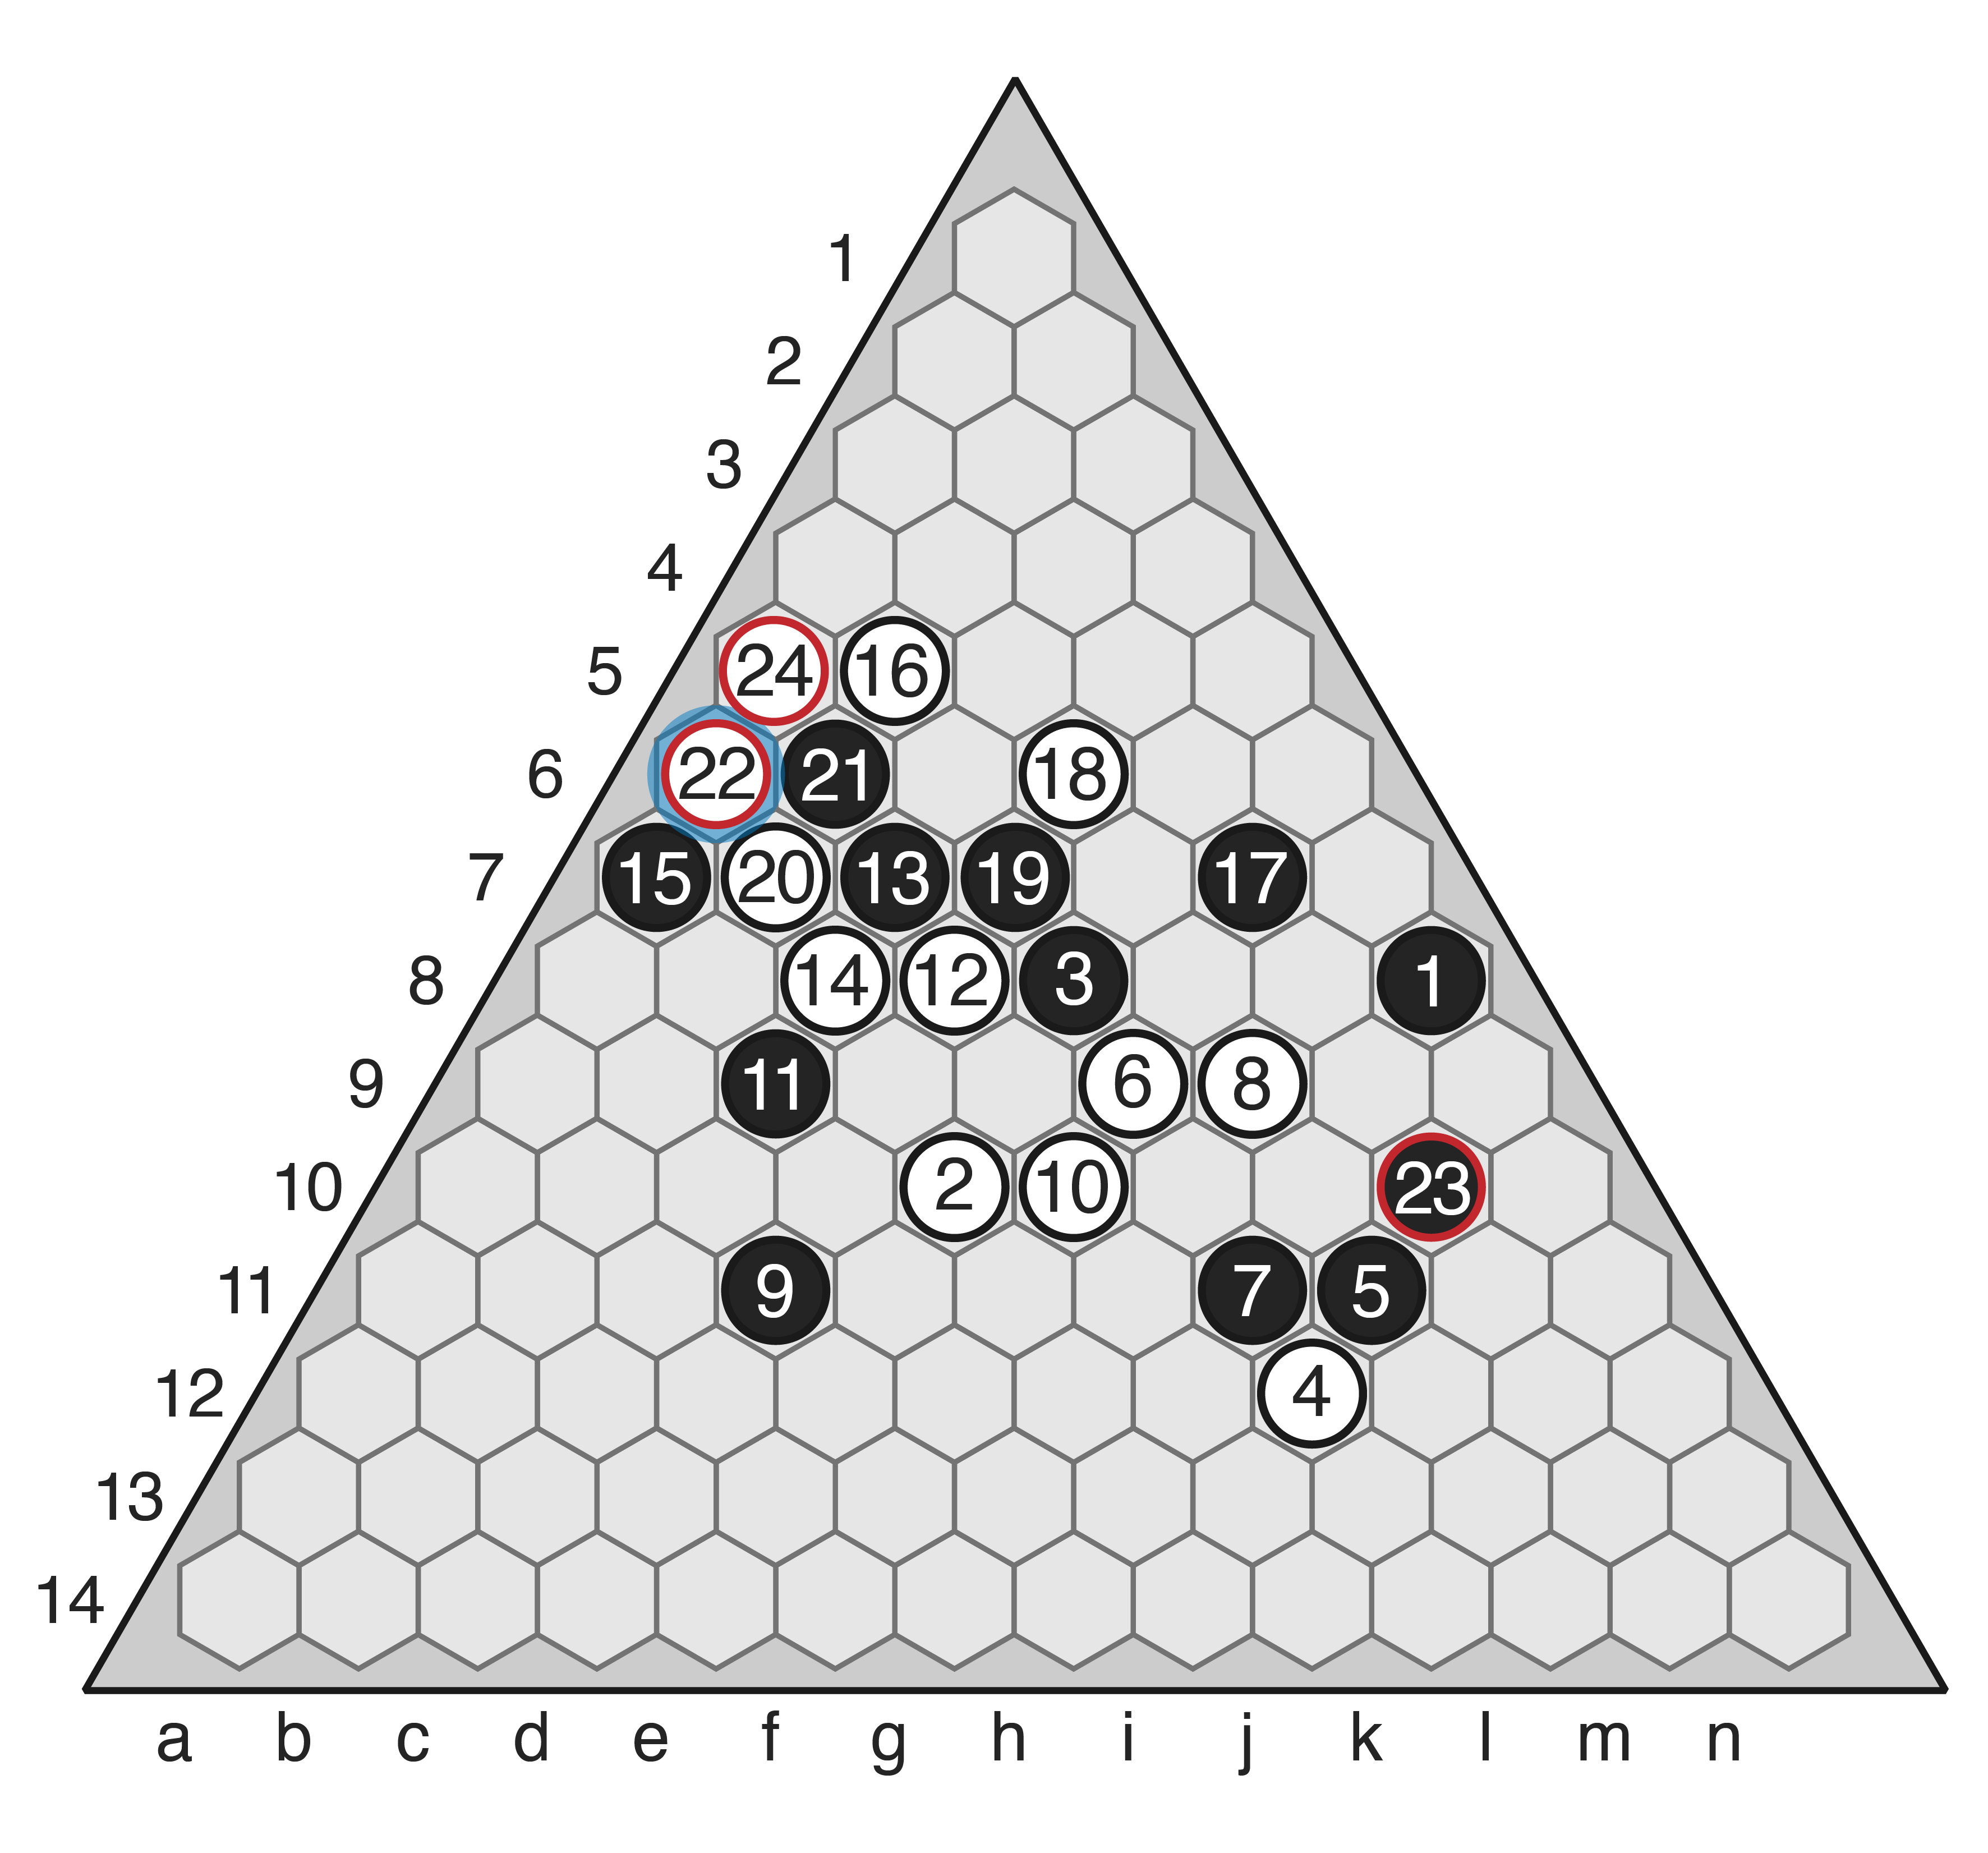
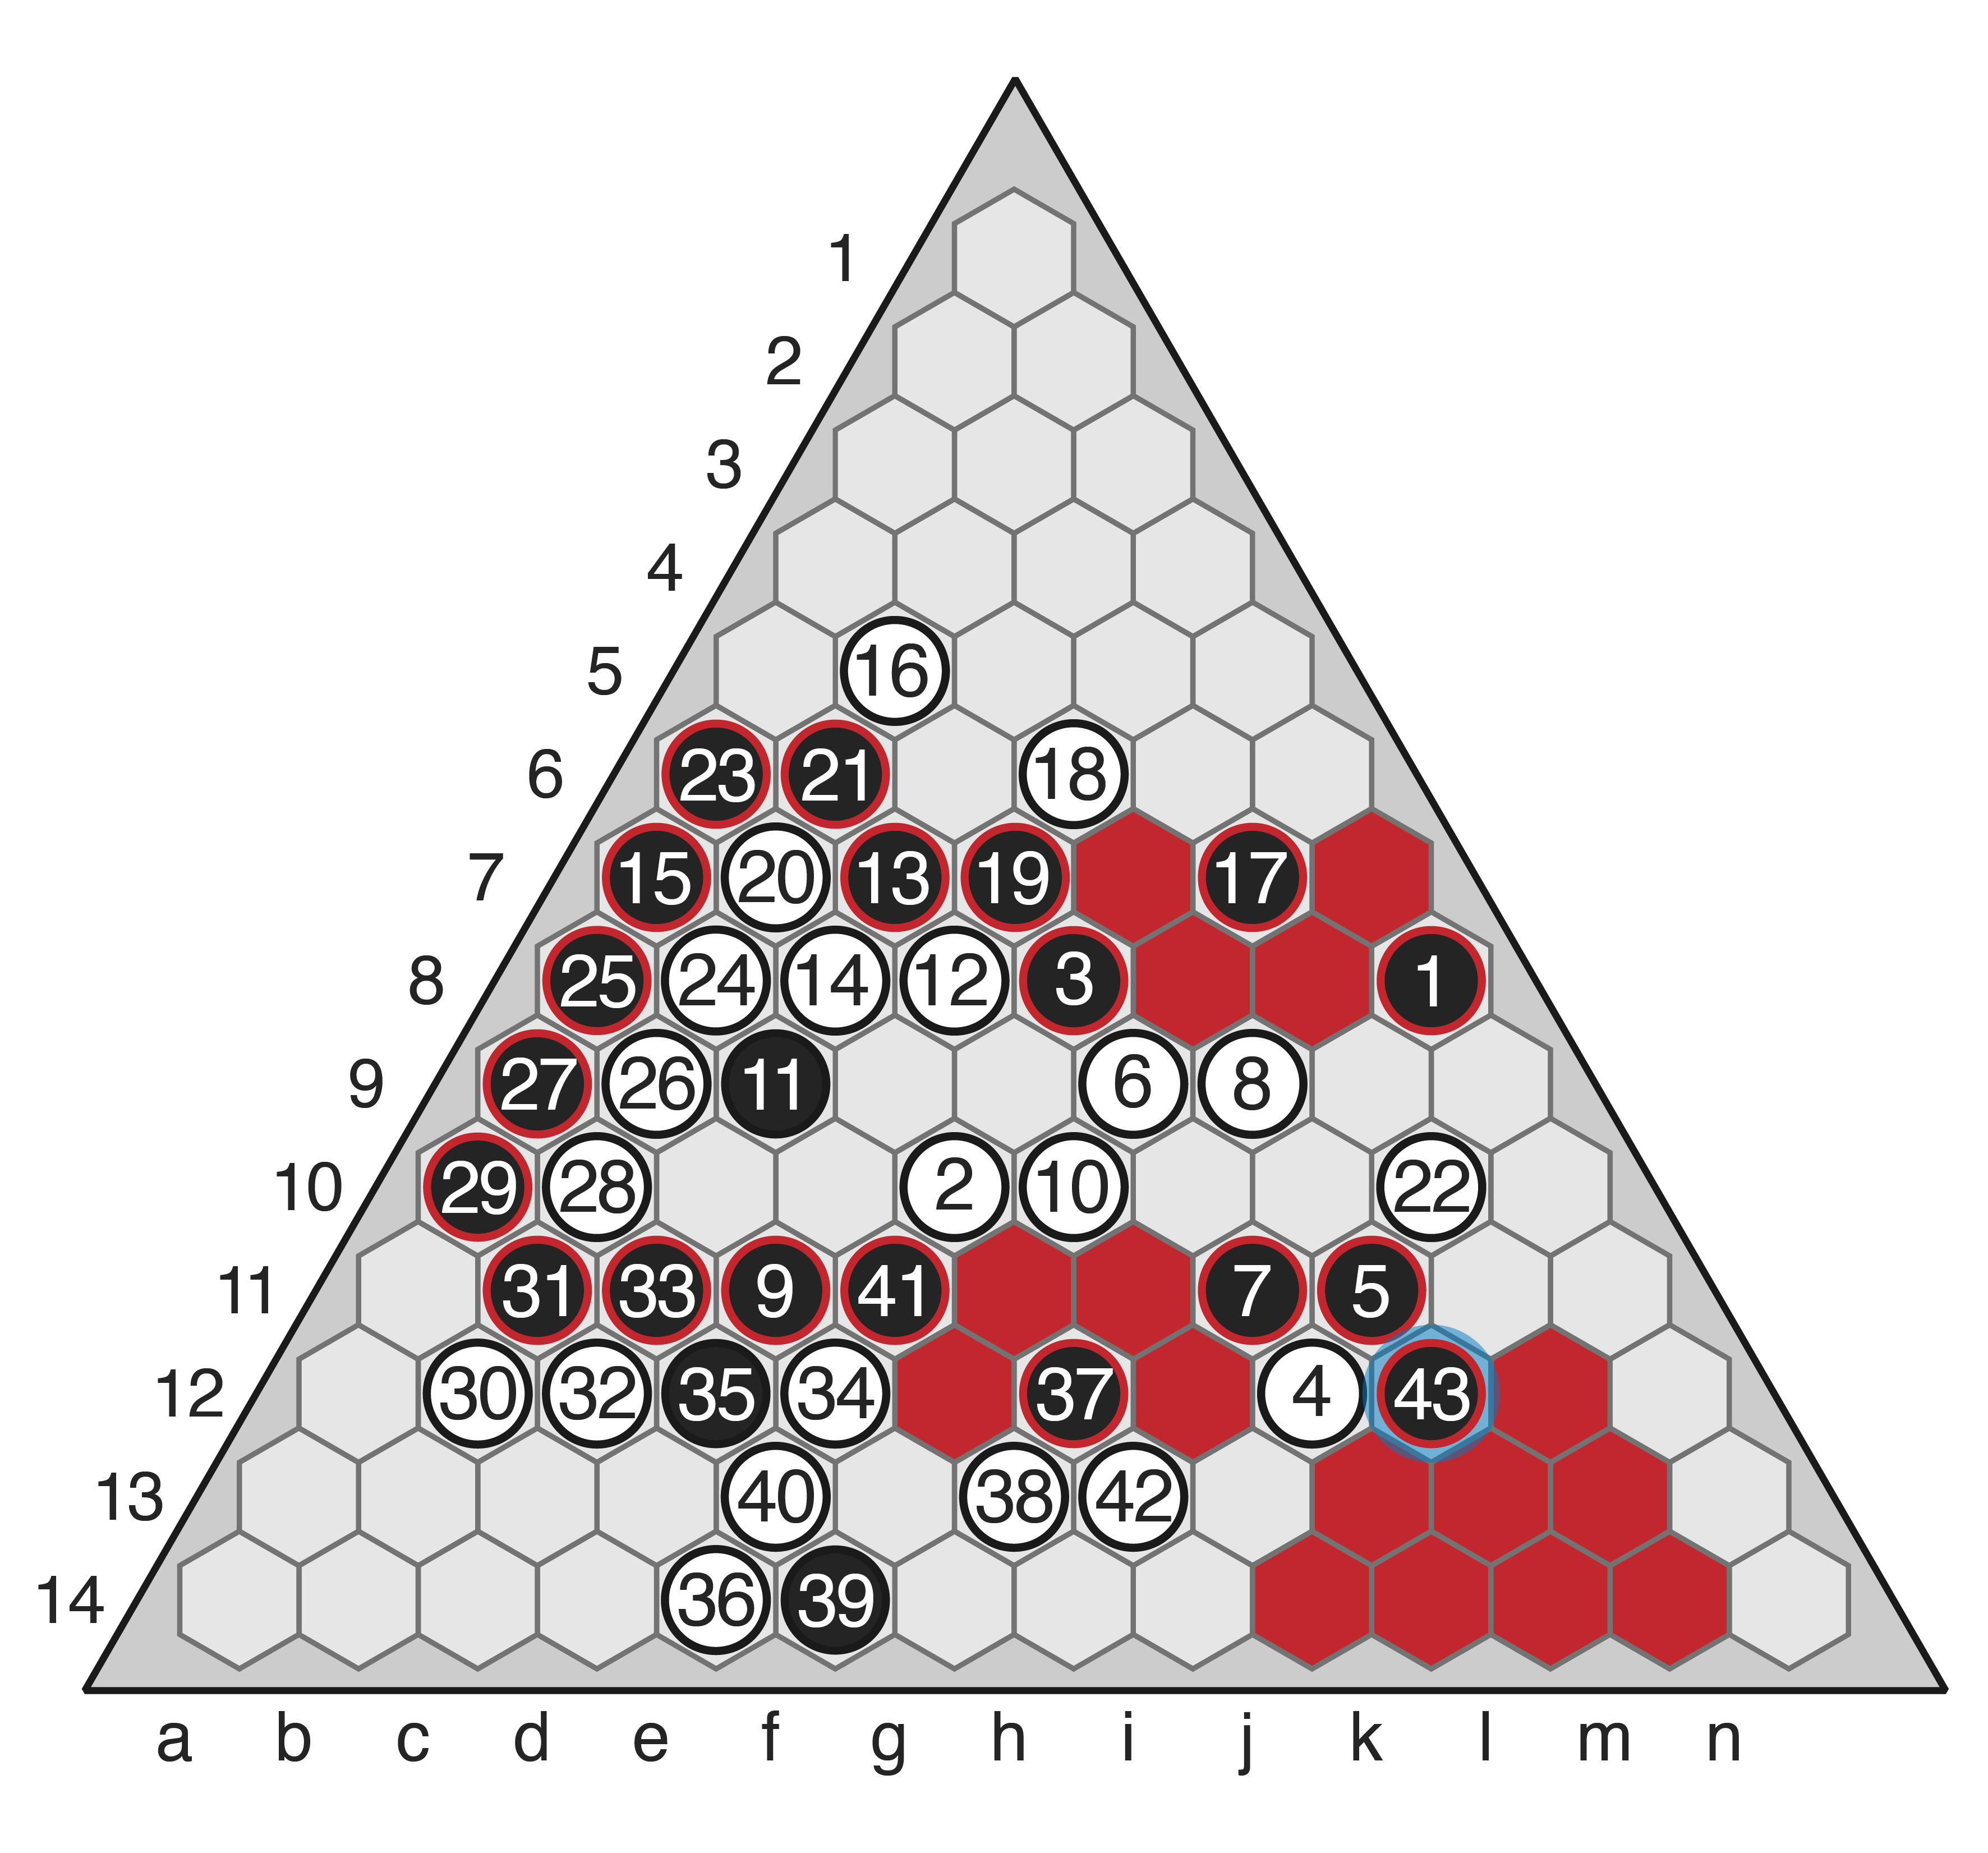
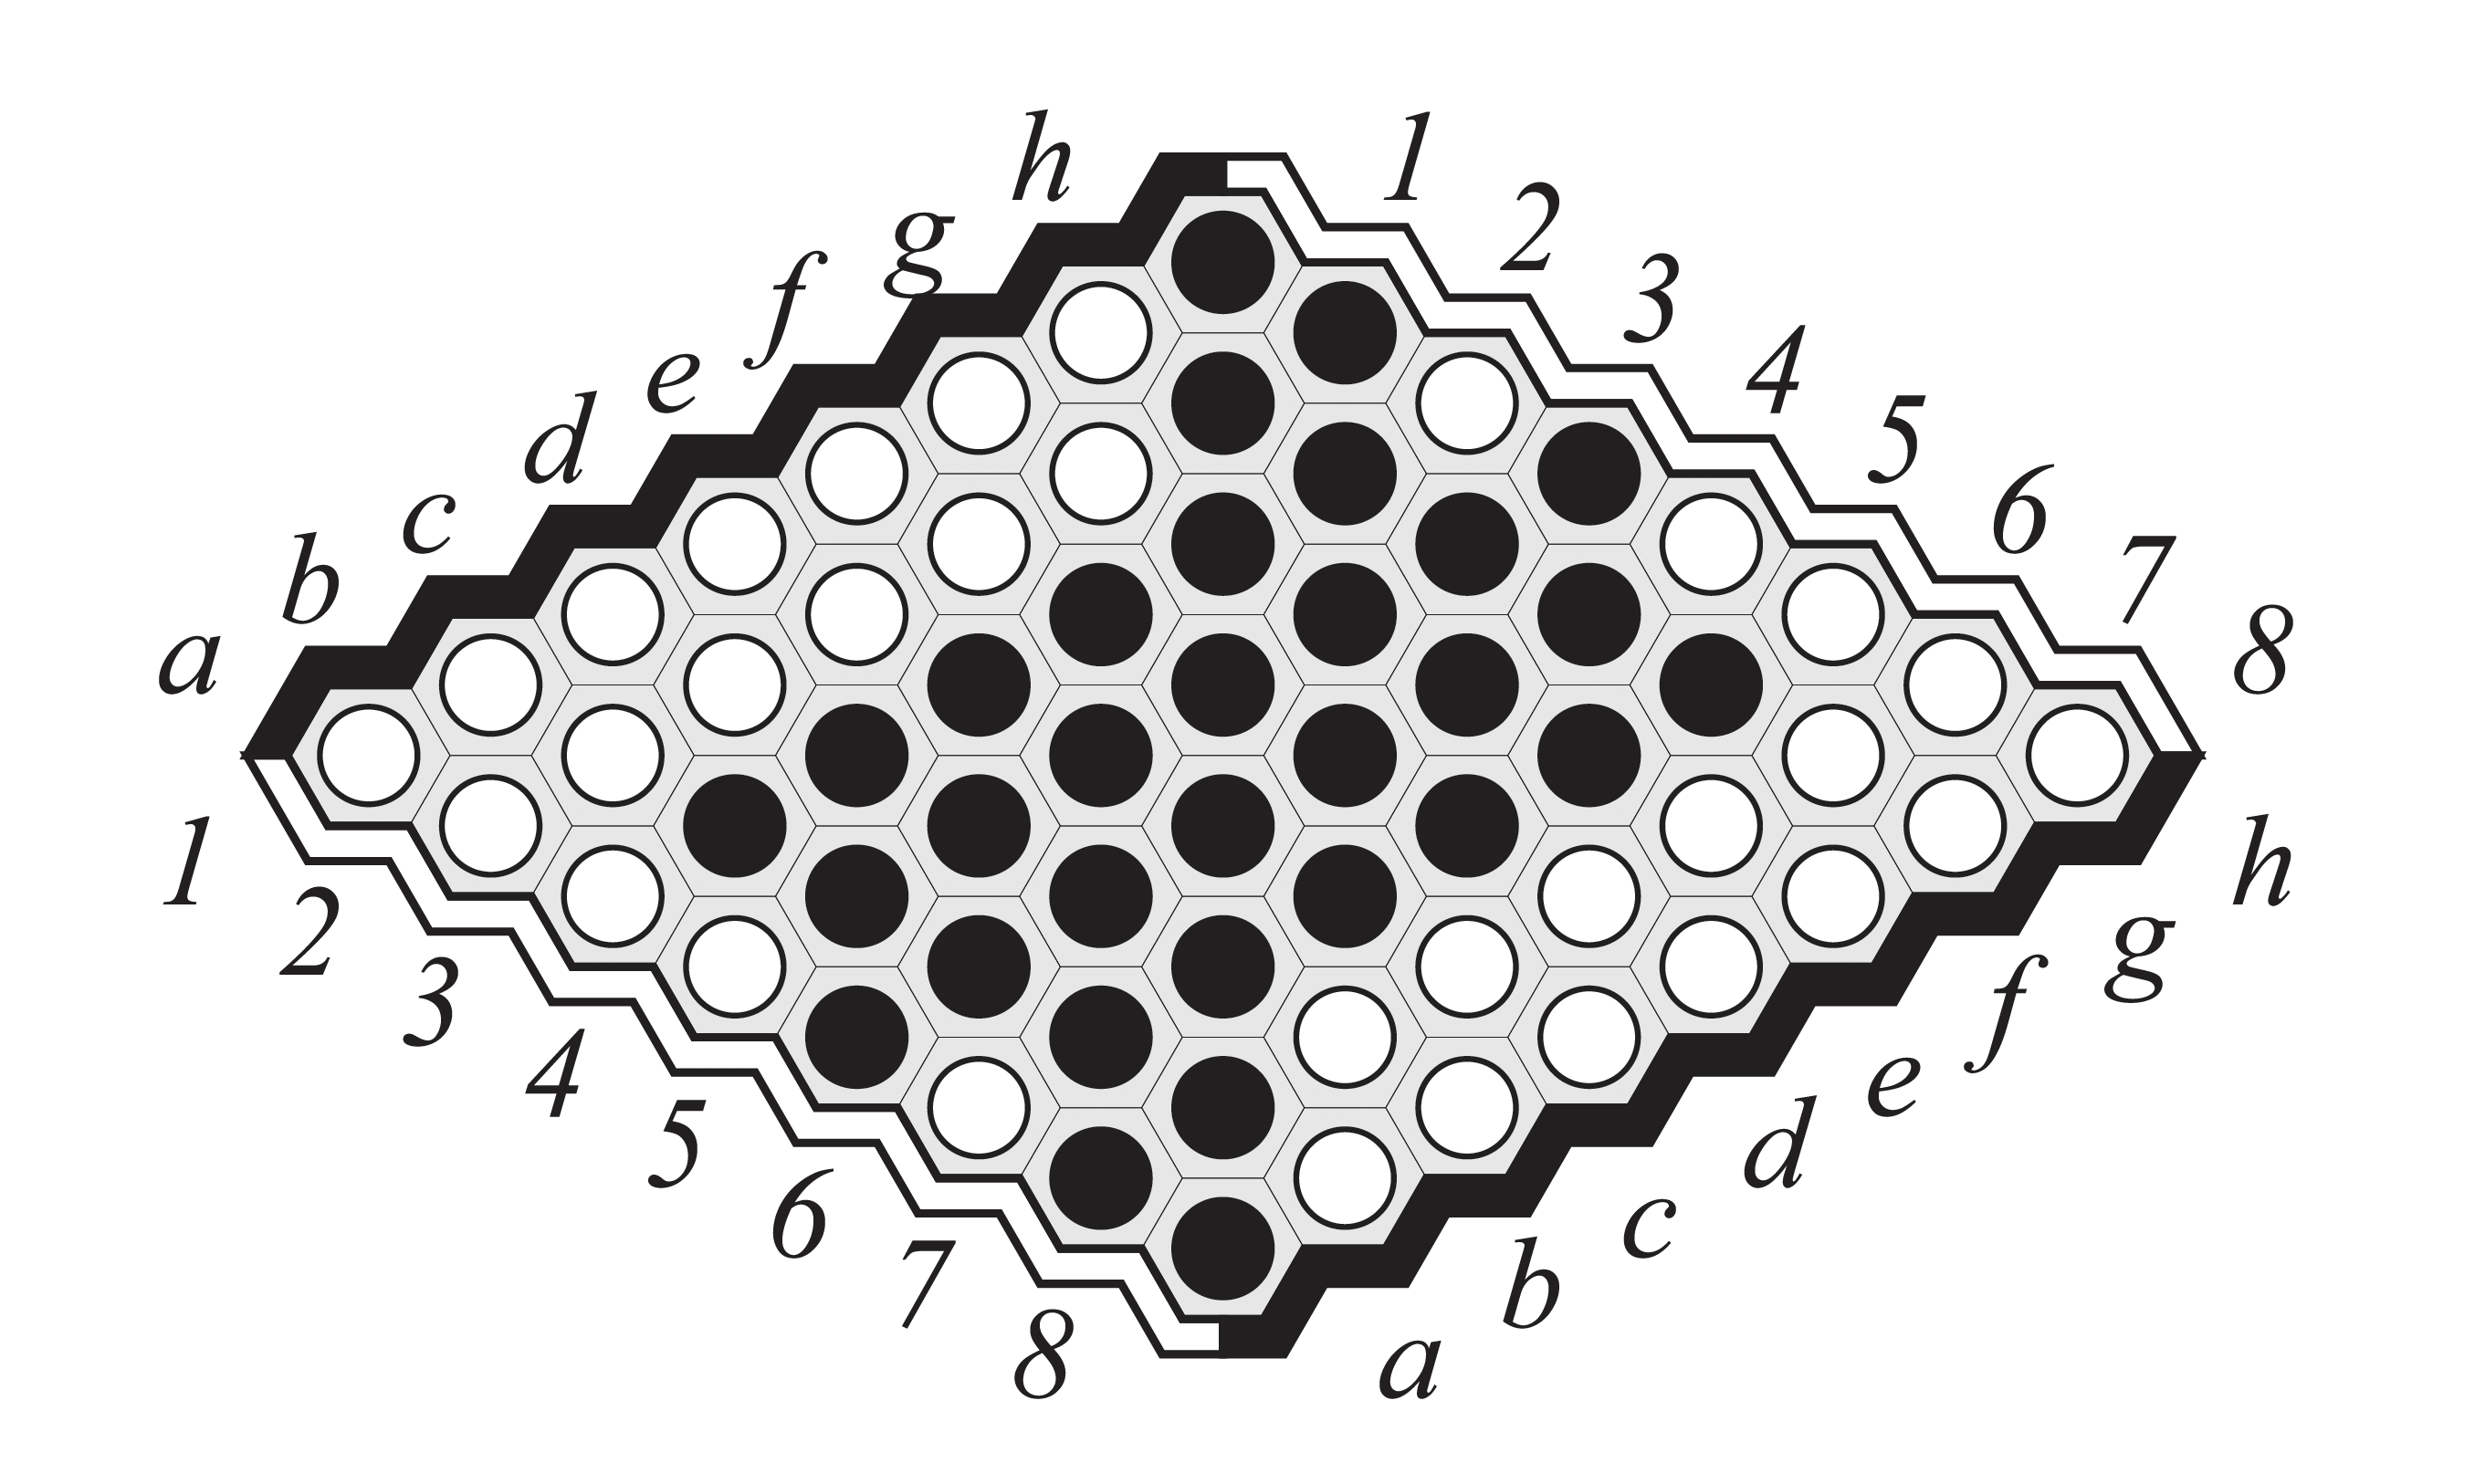
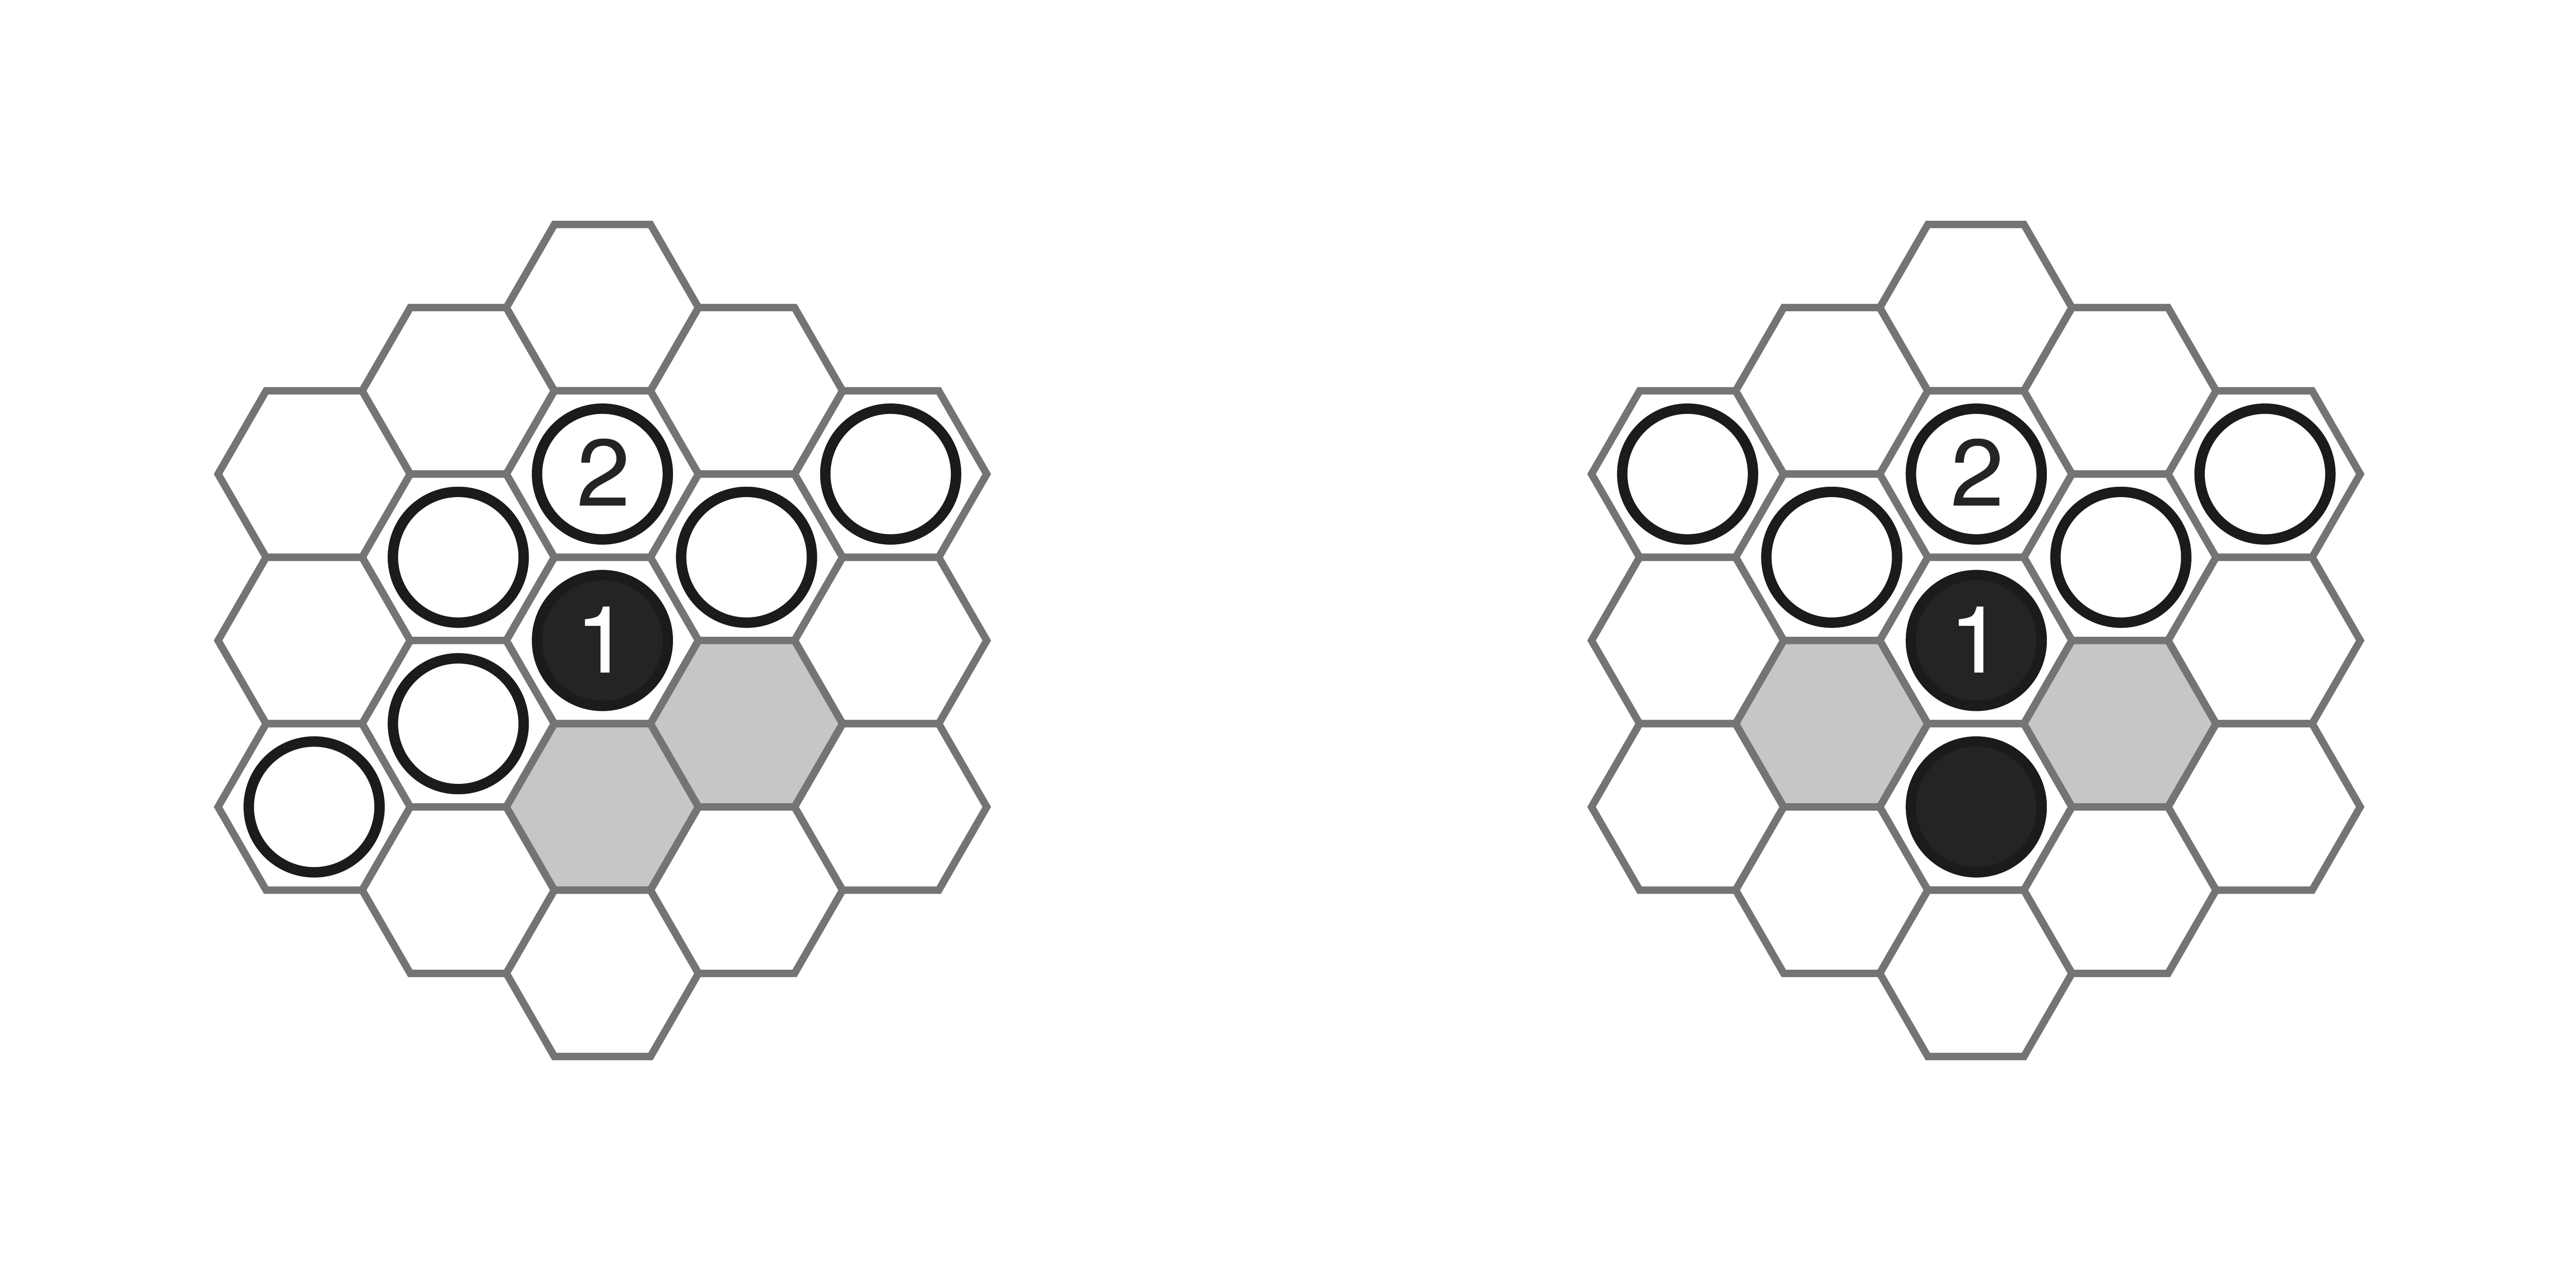
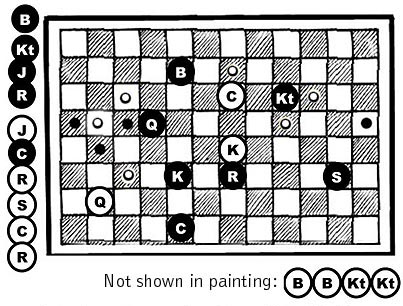
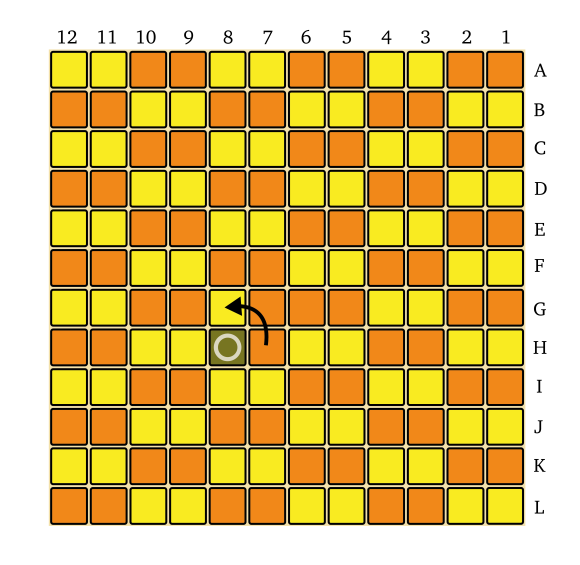
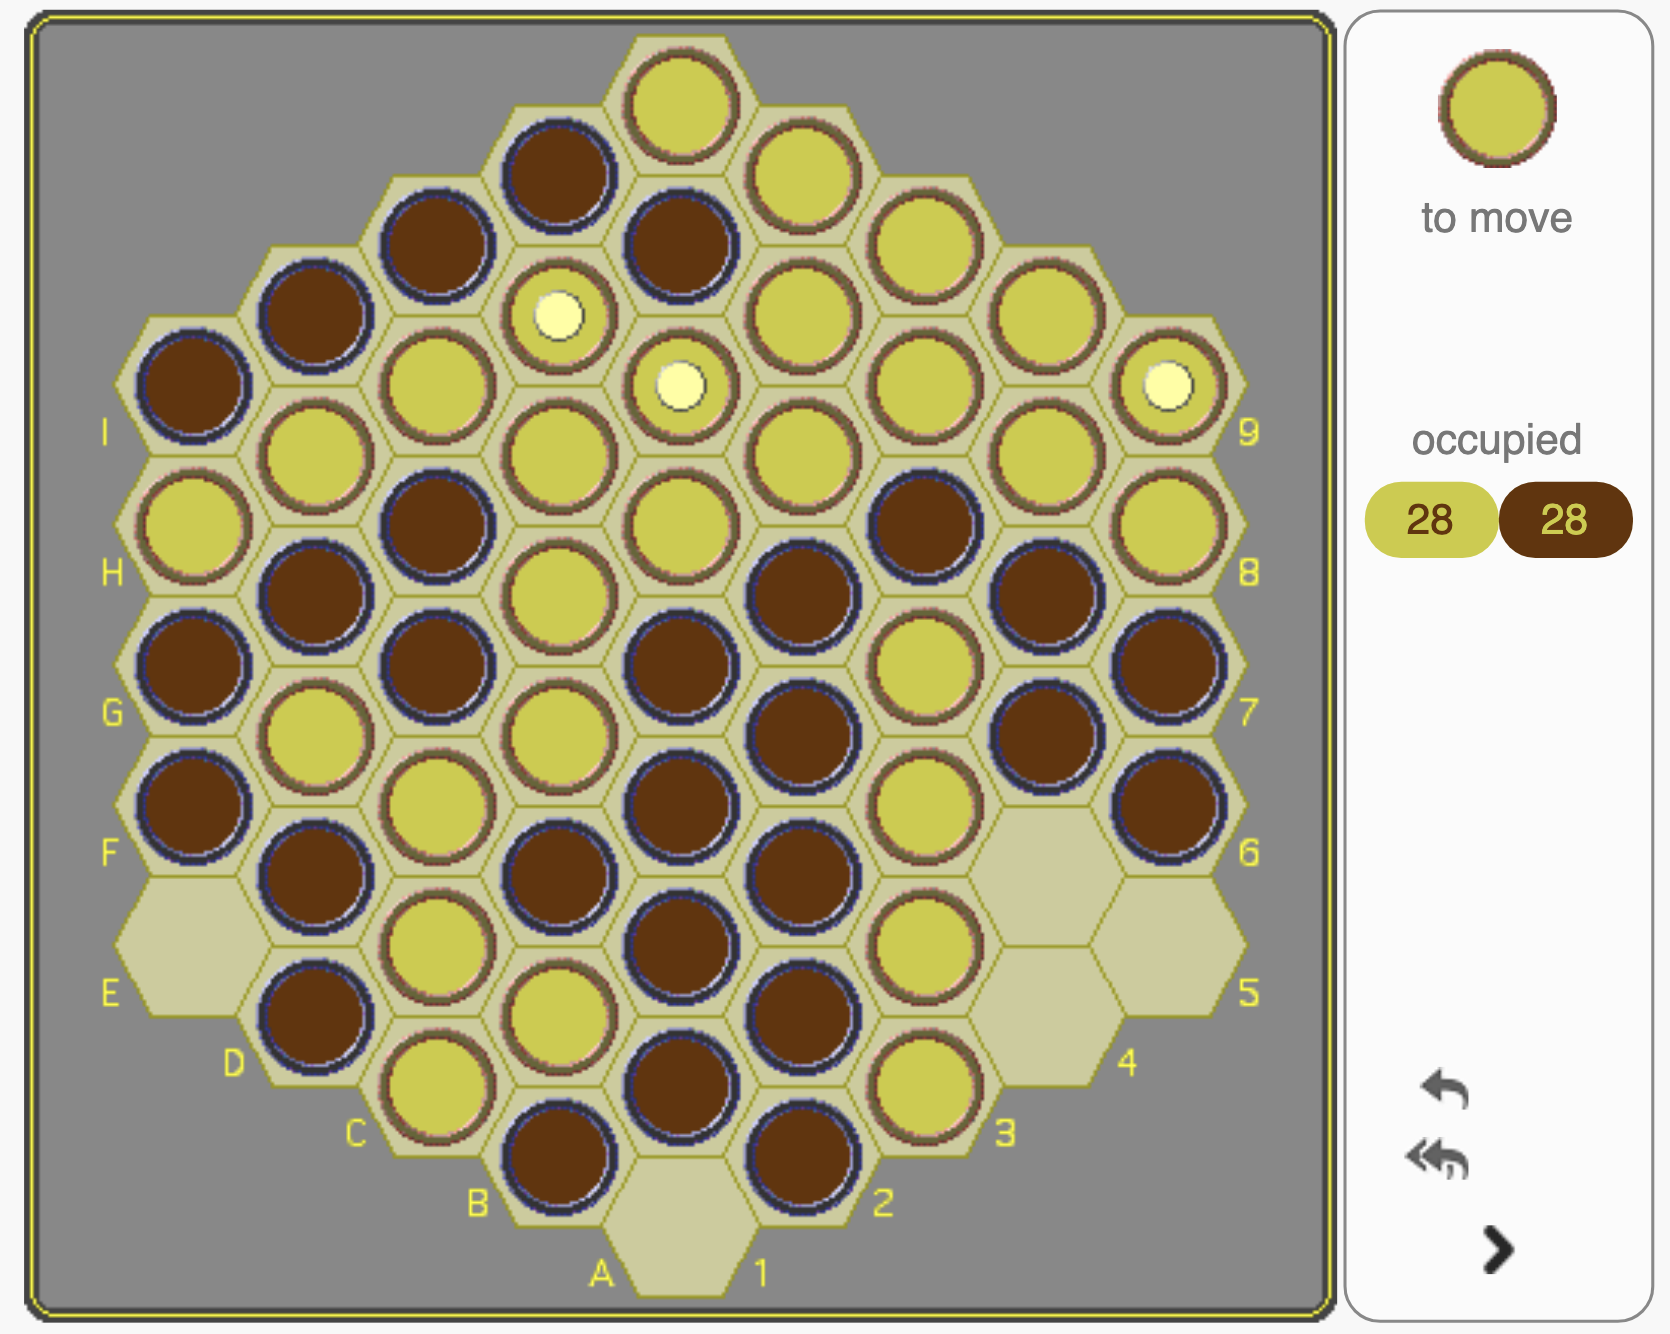
Russian and Brazilian Draughts have one noteworthy difference from 10×10 Draughts, besides the obvious: in 10×10, four kings are required to ensure victory against one, but in these 8×8 games, three kings can trap a lone king so long as they can occupy the long diagonal.  The key formation is known as Petrov’s Triangle:
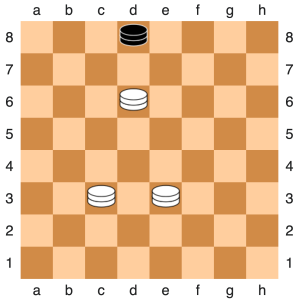

So there we go, a great big pile of reviews and impressions of many of the games on MindSports.  I hope someone out there finds this useful, at least fodder for discussion if nothing else; but if not, at least I’ve collected all these thoughts in one place for my own future reference.

As you can tell from this sizeable list, there are quite a lot of games on MindSports.  Ideally the Chess and Shogi sections would be more comprehensive — it’s a bit funny to me that MindSports has stuff like Armenian Draughts but not Shatranj, Makruk or Sittuyin — but there’s tremendous variety there nonetheless.  I highly recommend checking it out for yourself, and I’m happy to accept challenges on the site; just be aware I sometimes disappear for long periods due to being overworked.

I’ve resolved before to write future articles about certain things, and have often failed to follow through, partly due to a general lack of interest from others and partly from my own lack of time and energy.  About all I’m willing to promise anymore is that, assuming the next pandemic wave(s) leave society mostly intact, I’ll keep writing about games here and there, when I can.

Tagged , , , , ,

Permute: Move by Move

Some time ago I introduced you all to my game, Permute — an abstract strategy game inspired by the Rubik’s Cube.  Since then, the game was implemented on Christian Freeling’s MindSports — an essential site for any fan of the genre — and in Stephen Tavener’s wonderful Ai Ai software.  Hopefully some of you may have tried the game since then, and have discovered that the game has a unique feel in play and supports some unusual strategies and tactics.

Since developing the idea I’ve played a great deal of Permute, mostly against Ai Ai’s stiff opposition, but also some games against human opponents.   In this post I’ll walk you through a game I played against Simon R on MindSports, and explain some basic tactical and strategic considerations to keep in mind while playing Permute.  This sample game contains a few instructive moments that should be enlightening for any new player.

Here’s an animation of the full game, courtesy of Ai Ai:

permute12-game2-simonR-final

Full game — Simon was Orange, I was Yellow. Final score — Orange 16, Yellow 43.

The game is also viewable on MindSports, if you want to step through it move by move yourself.

Permute Move Notation

In order to record games of Permute and replicate them later, we need some form of notation to keep track of what moves have been played.  Ed van Zon of MindSports came up with a simple notation system that is very easy to learn:

Permute 12x12 -- notation sample-01

This small sample board illustrates how the notation works.  In this case, Yellow has made a move, rotating a 2×2 face clockwise.  We can translate this move into notation easily:

  1. We start by noting the direction of the twist, with a capital C for a clockwise twist, or A for anti-clockwise.
  2. Then we note the square on the board that is in the bottom-left corner of the 2×2 face we twisted, in this case d3 (indicated by the green square in the diagram).  So our move so far is Cd3
  3. Next we add in the square marking the top-right of the twisted face, in this case e4 (the red square in the diagram).  Our move is now Cd3e4
  4. Finally, we add a hyphen for readability, then add the square we chose to bandage, which is d4 in this case (the blue square in the diagram).  So our complete move can be written as Cd3e4-d4.

That’s it!  If we note down every move in this way, in proper sequence, we can easily reconstruct a game later for analysis.  In Ai Ai the notation works basically the same, except moves are written with the word Clockwise for clockwise twists and Widdershins for anti-clockwise twists.

Preliminaries

This post is very long, so I will not recap the rules here; if you are totally new to the game, please read my previous introductory post and follow-up about the Ai Ai implementation so that you can learn how the game plays, and get yourself set up to play it.

This particular game was played on a 12×12 board, which is the standard size available at MindSports.  A board that size contains 144 pieces, which seems like a large amount, but each move in Permute directly moves a set of four pieces and also locks down a portion of the board afterward, so games on 12×12 are surprisingly fast and brutal.  Typically a full game will last between 20-25 moves per player (note I’m counting a twist + bandage as a single ‘move’).

The board size has a strong impact on play in Permute, as it does in other territory games like Go.  Playing Permute on 12×12 is similar to playing Go on a 9×9 board — fighting starts immediately, and tactics are a major focus of the game.  Controlling the centre of the board early is very important, as this offers great opportunities both for expanding your own groups and blocking your opponent’s growth.

For a deeper, more strategic battle, I recommend playing on a 16×16 board.  At this size, games will last between 40-50 moves per player, about the same length as a typical game of Chess.  Opening play on this board size will tend to focus more around the corners and edges of the board, with the centre becoming more important once territories have been settled around the sides.  If you want the territorial aspect of the game to really dominate, then you can play on a 20×20 or even 24×24 board; on 24×24 a game will last about as long as a game of 19×19 Go (generally somewhat shorter).  Ai Ai supports Permute play on all these sizes.

The Ai Ai implementation also allows numerous variants of the game to be played.  The most notable of these is the option for a 1[1]2[2]* move protocol.  This means the first player on their first turn twists and bandages once, and from then on players alternate twisting two faces, then bandaging a stone of their colour in the second face they twisted.  I highly recommend trying this variant, which allows some very clever manoeuvring, and also lengthens the game on smaller boards.  For serious strategic play however I still advocate 16×16/20×20 single-twist rules as the best option; the two-twist variant makes useful tactics substantially harder to see, because two twists can cause so many changes to the board state in a single turn.

In any case, 12×12 with single twists is the ideal introduction to the game, and that will be our focus in this article.  In a future article, I will cover strategic tips and techniques for play on the larger boards, aimed at advanced players.

Permute 12×12 — Simon R vs Eric S

The opening begins!  Simon was playing Orange, meaning he gets to move first.  He strikes out for the centre immediately, which is a sensible play on the 12×12 board.  After just that single move, both of us now have two 3-groups each — each move in Permute substantially changes the local group composition, particularly in the early game, where few pieces have been bandaged.

I respond with an anti-clockwise twist at e4f5, aiming to contain any ideas of Orange extending to the western or southern edges.  In the process I connect my two 3-groups into a single 6-group.

Orange responds by growing their own 3-group by twisting f8g9.  Expansion is never a bad thing, but this move is a bit passive; the resulting group is still smaller than my largest, and this move does not really hamper my expansion.  In response, I twist h4i5, connecting two more pieces to the 6-group by rotating a piece into the connecting corner on h5.  From there, I can extend by adding to the piece attached to the north of h5 — I like to call these one-square extensions from bandaged friendly pieces anchors, as they are good bases for expansion — or I can connect two more pieces on the eastern edge of the group in two different ways, thanks to the 3-group covering i3-i4-j4.

Orange spots the threat of more pieces connecting to my group, so he instead connects his own pieces beneath and around my group by twisting h3i4.  This is a good move, in that it serves two purposes — it instantly gives him a nice-sized group, and it actively blocks my group from expanding to the south.  I was prepared for this, though, thanks to the anchor on h6, so I connect three more pieces with a twist at g7h8.  Note that my group is quite secure; each extension has bandaged pieces one space apart, which cannot be separated by any opposing twists.  When building your groups, one-space extensions are the safest way to connect new pieces.

We’re very early in the game, but the centre is already taking shape.  Here Orange decides to secure some more pieces for their southern group by twisting e3f4.  Again this move is a bit passive; Orange has the opportunity to sandwich my centre group between their upper and lower groups, and my hopes of extension rest on me being able to protect the corner of my group at e5, or the northern extension at g8-h8.  Better would have been Ae5d6-e5 — that would have severed my corner at e5, blocking expansion to the west, while further securing Orange’s biggest group.

Having been spared a squeeze on e5 from Orange, I twist c4d5 and bandage d5 to secure that vulnerable corner and gain space on the west side, with ambitions of connecting to the western edge and cutting off the bottom of the board, so that Orange cannot connect their upper and lower groups on that side.

Orange takes action to prevent my group heading west, but in actuality this move only delays me very briefly.  My group is also still expandable to the east and north, thanks to the anchors on h8 and i7.  This move does give Orange a large group in a commanding position over the southern reaches of the board, but at this stage of the game, exerting influence and securing areas for future growth is more important.  A nice move here would have been Cg8h9-h8, which would have blocked off any northern expansion for my group.

I respond by moving forward with my plan to connect to the western edge, which restricts Orange’s growth opportunities and gives me an anchor on b4.  At this point I also notice Orange’s vulnerable corner on i8, which is an important weakness now that Orange has invested several moves in growing this southern group.

We will take a close look at Orange’s next move, which is a crucial moment in the game.  Orange elected to twist i5j6, extending their group closer to the eastern edge while interfering with my group’s potential expansion on that side.  Unfortunately this move does not protect the vulnerable corner at i4, which gives me a huge attacking opportunity.

The middle diagram shows one potential alternative — securing the corner at i5 increases Orange’s hold on the bottom of the board, but it also further cramps their space for extension, confining their largest group mostly to the bottom.  A better alternative would have been the block at h8 I recommended previously — this move is still effective now, forcing a response from Yellow and adding some tactical complications.  However, at this point Ai Ai estimates Orange’s winning chances at just 36% even if they had chosen to block at h8.

Seeing that Orange has not protected the corner at i5, I launch my attack and twist out Orange’s piece on i5 (marked with an X in the diagram).  In one stroke this slices Orange’s largest group in half.  Bandaging at j5 ensures Orange cannot easily repair this damage, and claims further space toward the lower-right corner, making it very hard for Orange to even attempt to connect around this new blockage at i5.

At this point, Ai Ai estimates my winning chances at 88%.  Orange had invested a lot of moves in this group, and now the bottom portion has been entirely cut off from the section on the right, and is unlikely to form the basis of a winning group.  I have control over the centre and plenty of expansion options on the northern and eastern edges of my largest group.

Orange can see they are in trouble, so they respond with a twist at i8j9, in an attempt to constrict my expansion options to the north.  Orange now has to defend perfectly to have a hope of victory; when forced to play moves like this which do not extend one’s own groups, the opponent is often free to build up their advantage further.

This exchange gives us perhaps the most important message to take away from this game: protect your corners!  In Permute you will often need to bend your group around to connect pieces in various directions, and any corner piece in your group left unbandaged is a potential weakness.  One twist can potentially slice your group to ribbons and leave you struggling.

Now that Orange is on the defensive, I decide to aim for connection to the northern edge.  When ahead and in command of a large group, a useful strategic sub-goal is to try to split the board.  The group doing the splitting is then unassailable, assuming you have bandaged it well, and your opponent is heavily constricted in any attempts to connect large chunks of pieces.

Orange responds by constraining my group’s northern expansion, squeezing it from the west.  This does secure the northwestern section of the board for Orange, which could allow them to build a decent-sized group, and their current group stretching down to f6 is currently pretty secure.  However, this move still gives me the chance to connect to the north or east sides.  Ai Ai recommends moves that either disrupt the unbandaged, unsecured Yellow pieces at i6-i8, or blocking Yellow’s anchor at h10 and preventing the northern connection attempt.  In either case, though, Ai Ai pegs Orange’s winning chances now at only about 3.5%.

As it happens, I elected not to complete the northern connection, and instead disrupt Orange’s newest largest group.  My Yellow piece at f9 makes connection for Orange’s group quite awkward, so my hope is that further incursion into Orange’s northwestern territory will further decrease their chances to build a competitive group in that area.

Orange hits back by disrupting my 3-group around h11, ensuring that my bandaged piece at h9 remains isolated for the time being.  However, this leaves me with an opening to cut off three Orange pieces from potential connection via a later twist at f11g12.

At this point I can see that my central group is very strong, so I decide to continue my plan to disrupt Orange’s opportunities for expansion while securing my position.  By extending down from my anchor at b4, I further constrict Orange in the south, while adding a couple more pieces to my central group.

Orange elects to start enlarging their group in the northwest, establishing a bandaged piece at e7 that also prevents further extension of the Yellow group from e6.

I estimate at this stage that Orange’s northwestern group could not grow large enough to challenge my lead, but just in case I decide to extend my group and bandage at j8, in the process securing the vulnerable piece at i8.  Orange fights back by twisting my pieces at j9-j10 into the corner and firmly blocking them off from my group.  This also builds a nice group connecting through to the northwestern section, but those Orange pieces at f11-g11 remain vulnerable.

My first impulse here was to cut off Orange’s group on the top with Cf11g12-g12, but then I spot a move that looks bigger.  The clockwise twist at c2d3 grows my own largest group by three while simultaneously blocking out three Orange pieces permanently, which seems like a favourable exchange.

Orange responds sensibly, forgetting about the unfortunate southern group for now and further building on their central group.  Orange knows that at some point I will be forced to respond if I want to restrict Orange’s growth there.

Now that Orange’s southern group is well contained, I believe that their only chance to win is to connect their central and northern groups, then extend far down the eastern edge to pick up sufficient additional pieces.  I decide to try to connect to the east to completely cut off any ideas of expansion down that edge for Orange.

Orange sees an opportunity to place a secure bandaged corner at k7, extending their northern group a bit further.

Orange was able to extend that northern group a bit, but I could immediately follow up with Ck5l6-k6, completing my goal of connecting to the eastern edge.  Now Orange has no way to connect to the bottom groups, and the bottom groups themselves are cut off from each other thanks to the bandaged piece at j3.

Orange follows up with a prudent move, securing their vulnerable corner at i10 with a bandaged piece at j10.  Unfortunately, at this point the game is fully out of each; Ai Ai sees no future for Orange, giving them a winning percentage of a flat 0%.  There is no way for Orange to make a larger group at this stage.

My goal at this point is to firmly block off any remaining threats Orange has to increase their score substantially.  Having cut off the bottom with my last two moves, now I close the door along the top as well with Cf11g12-g11, splitting the top group and ensuring it cannot connect to Orange’s central group.

Orange has seen the writing on the wall by this time, but is valiantly fighting to the end.  He extends the southern group with two more pieces, and generates a possible threat of winding around the blockage at j3, though this would require several additional moves to achieve.

I can see that Orange may be hoping to connect around j3, so I close that door as well by placing another bandaged piece at k2.  Now there is no way through on the bottom.

Orange now pursues the last viable option for building a good-sized group, which is to extend their central group as much as possible.  I have almost no presence in the northwestern part of the board, so Orange has some chances to build up a score here potentially.

Finally I respond to the threats in the northwest, and place a bandaged piece at d11, which seems a suitably annoying placement.  The idea is to blockade the 4-group extending from f10 from the Orange pieces in the top-left corner, reducing Orange’s potential for growth.  Orange is still able to grow their central group by connecting two more pieces at b10, but those four pieces around f10 are now isolated.  At best Orange could attach the piece at d10, turning the 4-group into a 5-group, but there’s no way to connect those pieces to the larger group below.

Here I get greedy, and try to connect my central group across the 2nd row along the bottom.  The plan is to construct a pair of pieces that I can then bridge between the bandaged pieces at c2 and f2, but I actually made a mistake.  By choosing the twist at e2f3, I actually ensured that I would be unable to connect my newly-formed pair.

Orange makes precisely the right reply here, placing the Yellow pair where I want it, but unbandaged.  Now I have no chance to connect across the bottom, because in order to secure those pieces I would need to bandage one of them, which means a twist must be made.  But, given that the pair is already in the right position, any twist I make will only move them out of position!

This sort of problem comes up fairly often in Permute, and I was annoyed at myself for not seeing it.  When you have set up your pieces properly, you should have them placed so that they are ready to be twisted into place, but crucially, are not already in place and unbandaged.  That means you can make a move at that location, twist the pieces into place and secure a bandaged piece in the right spot.  If you try a setup for connecting a few pieces but misjudge your plan, as I did, then your pieces may be prematurely placed, and your opponent is then able to prevent your plan at any time by twisting your pieces out of position and locking them down with a bandage.

In truth, this move sequence was overly optimistic anyway; given the two-space gap between c2 and f2 and my lack of well-placed pieces nearby, the only way my attempt to connect would work is if my opponent chose to allow me to make that final twist of the free pair.  I had no way to force that connection in the first place, and Orange had no intention of allowing it, so effectively that was a wasted move.  In a tight endgame, throwing away a move like that could cost me the game!

I cannot secure the connected pair between c2 and f2, so instead I opt to insert another bandage at g2, trapping another Orange piece on the bottom edge at the same time.  Orange then extends that bottom edge group further, but this also connects my pieces to the bottom-right corner group.

I still cannot secure the extension in the south, so instead I opt to harass Orange’s central group some more by blocking two pieces in on the western edge.  This has no effect on the size of my Yellow group, so it is a safe move that still causes some trouble for my opponent.  Orange extends the bottom edge group once more, after which I lock out two more Orange pieces from their central group, and at this point Orange resigns.

If we remove the bandaged pieces we can get a clear picture of the final position:

Permute 12x12 -- move41 -- count-01

There we have it — a final score of Orange 16 to Yellow 43.  Had we played to the bitter end, my final score would have been significantly lower of course, as Orange could disrupt my connecting pair at d2-e2 at any time.  But even then the score would still be convincingly in Yellow’s favour.

Permutation Principles

As you can see, the 12×12 game is intense right from the start, and opening moves are very consequential.  AI testing shows though that between strong players, the outcome is usually decided about 60-70% through the game (during these tests I did not allow the AI to resign).  So, while the opening is very important, most games will be decided during the middlegame.  Our goal in the early stretches of a 12×12 game should be to come out of the opening with a stable central position, with some viable options for future extensions of our largest groups; during the middlegame we want to extend our groups effectively and safely, while denying opportunities for our opponent to attack our groups or build their own.

Of course, if we want to reach that point in our games, we need some guiding principles to help us along in our efforts to become stronger players.  Here I will outline some basic principles of Permute play that will help you play more effectively.

Make multipurpose moves

This general principle applies to many games, of course, but in Permute every move is inherently multifaceted and directly affects both players.  Every twist we make moves opposing pieces as well as ours, since faces consisting of only one colour cannot be twisted.  This means that every single move has the potential to grow or shrink our opponent’s groups as well as our own.

When I am choosing a move in Permute, I tend to evaluate it on a few dimensions to see how it measures up against other candidate moves, and I aim for the moves that can accomplish more than one of these general objectives at once:

  • How much does it add to my groups?  All else being equal, a move that grows my groups more is of course preferable to one that grows them less.
  • How much does it disrupt enemy groups?  If I have a choice of two moves, both of which grow my group by 3 pieces, but one shrinks an enemy group by two while the other doesn’t, then the first move is a better choice.
  • Does this move gain space?  Gaining useful space on the board and restricting the opponent’s growth options is really important, especially in the early game.  If a move grows my groups less than another move, but allows me to connect a group to an edge and block enemy expansion for the longer term, that move may well be the more sound strategic choice.
  • Does this move have follow-up options?  A useful beginner’s metric to judge this is whether a move leaves you anchors — single pieces extending from a bandaged piece that can serve as a launchpad for further expansion.  Again this is more of a strategic consideration; sometimes a move that adds fewer pieces can still be stronger, if it produces anchors that allow for a bigger extension later.  Anchors also create threats for your opponent, as they must keep an eye on those anchors and consider which may need to be blocked, which in turn may disrupt their own expansion plans.

Like any complex strategy game, all of these guidelines will have exceptions, and there are many other ways we might judge the effectiveness of a move as we get stronger.  However, I believe that keeping these principles in mind is very valuable as you are learning the game, because each of them focusses on the longer-term consequences of our moves.

In Permute we have to fight against the impulse to play reactively, and start twisting purely in response to local threats from your opponent; each move in Permute can be so destructive that we often will feel the need to react to every attack, leaving ourselves with no chances to attack in return or to build a coherent plan for expanding our groups.  If we instead train ourselves to evaluate each move in terms of its impact on both the groups local to that move and the wider strategic situation, by considering space gains and anchors, then we are more likely to choose moves that not only protect our groups in the short term but also create longer-term challenges for the opponent.

Protect Your Corners!

This is a straightforward tip, but definitely worth emphasising!  In this game we saw the consequences of leaving a vulnerable corner on your largest group — the opponent gets an opportunity to slice the group in two, and if the group is already contained and there is no alternate path to reconstruct the connection, then that one move is enough to ensure your group cannot be saved.  However, we may not want to develop a habit of taking time to protect every corner in every group; instead, we must judge when a group has enough prospects for future expansion that we need to secure its position.

Stronger players may experiment here and there with group sacrifices, where they lure the opponent to spend moves on disrupting a vulnerable corner when their actual growth ambitions lie elsewhere on the board.  However given the high price for getting this kind of sacrifice wrong, this is a tactic that should only be used very carefully!  Generally speaking, if you spot a weak corner in one of your important groups, you should act immediately to protect it.

Bandaging is just as important as twisting

Each move we make in Permute is, to some extent, irreversible.  In Chess, if we move a Knight to the wrong place, we can potentially reverse that move in the future to recover our position, but if we make a bad twist in Permute, the bandaging ensures that at least some of the damage is permanent.  Because of this, we need to be sure that when we bandage a piece as part of an effort to grow a group, we protect as many of our pieces as possible:

Permute 12x12 -- bandaging examples-01

Here we can see some basic examples of this principle.  In the leftmost diagram, Yellow has created a secure L-shaped group — the bandage on d4 protects the corner, and ensures the pieces on d2 and c4 are fully protected as well.  In the middle diagram, Yellow’s misplaced bandage on d5 has protected none of the pieces in the middle of this group!  On the right, this T-junction formation is also safe, giving Yellow three potential avenues of expansion with the bandages on b4, d3 and d5.  Our objective when setting up our groups should be to maximise our reach, while always being careful not to leave weak points that can be twisted out of position.  One-space extensions, T-junctions, and secure corners are important ingredients in any effort to build a large group.

Conversely, if we are attacking the opponent, we should place our bandages so as to create maximum disruption.  Let’s go back to that fateful 12th move in the game, where I was able to split Orange’s group via the vulnerable corner, and zoom in a bit:

Permute 12x12 -- attacking examples-01

On the left is the move I made.  When twisting at c2d3, I placed my bandage at d2, a diagonal step away from the diagonal corner I had just disrupted.  This ensures that not only is the vulnerable corner at c3 permanently cut, but also the Orange piece at d3 is blocked in, preventing Orange from twisting around the obstruction to continue building the group.  The Orange pair at c1-c2 is still twistable, but cannot get around the bandage at d2.

In the middle diagram, we see the position if I had bandaged at c3 instead — note that Orange now has two pairs at c1-c2 and d3-e3 that can potentially be brought to bear, expanding the group around my obstructing piece.  On the right we see a potential result of this mistake: Orange twists Ad2e3-d2, completely isolating my piece at c3 and building the group southwards with a secure connection.

The lesson here is to always observe the local patterns of bandaged pieces when attacking an enemy group, and think not just about the immediate damage you can do, but also whether you can potentially block off any more pieces by setting up your bandages differently.  Make sure your attack has as much lasting impact as possible, and then you can make advances elsewhere while your opponent scrambles to repair what damage they can!

Split the board when ahead

At several points in the game above, you saw me aim to split the board into sections by connecting my main group across the whole board.  When you have a decent-sized lead and the opportunity, connecting securely can be very beneficial; by cutting across the board, you prevent the opponent making board-spanning connections of their own, and restrict their options for catching up to your lead.

Let us go back to the game for a moment and look more closely at my middlegame connection to the eastern edge of the board:

On the left is the move I played in the game, which connected my largest group to the eastern edge.  Orange is now firmly cut off from connecting their upper group to the bottom half of the board, and their attempt to move south has been contained.

On the right, we see what could have happened if I had not attempted to reach the edge, but instead had played elsewhere (in this case, bolstering my group in the bottom-right with Ch2i3-h3).  Orange is then able to generate threats by connecting significantly more pieces down that right side.

In this particular position Orange cannot make massive gains this way; on the right we see that after a couple more moves, Yellow is able to contain the advance once again.  But Orange did manage to gain two more pieces even in this constrained position, and in a close game two pieces may make all the difference.

So, when the opportunity to cut off your opponent presents itself, taking advantage of that opportunity is often a good way to consolidate your advantage and deny your opponent chances to create more threats.

Twists are local, scores are global

Finally, an important reminder — Permute is a game full of complex tactics, but the ultimate goal of the game is inherently global in nature.  When fighting for your groups to stay live, never forget that all moves should be in service of the larger goal: building the biggest group of pieces on the board.  If you get deep into a tactical battle and realise you will not be able to make any more profitable exchanges, do not be afraid to abandon your group and seek a bigger move elsewhere!

Similarly, we can easily get tied down defending only our largest group, and forget that the group scores in Permute are cascading — this means that if the two players tie for the largest group, then we compare the second-largest, then the third-largest if those are tied, and so on.  So if a game is close, remember to nurture a secondary group in addition to your largest one.  Tight games between equally-skilled opponents will most certainly have games go to the second-largest group, and occasionally the third-largest (though this is rare).

Remember too that playing strategically and planning your group-building effectively will also help you tactically; the more secure your groups are, the better-placed you are to defend them, and the more you constrict your opponent’s growth options with well-planned extensions, the more vulnerable they are to attack.

Next moves

At this point, hopefully you have a clearer picture of how a game of Permute flows, and you have picked up some useful tools in your toolbox for your next twisty battle.  Permute feels quite odd at first if you are used to something like Go or Chess, given the fact that the board starts full and every move directly affects both players’ pieces.  But once we spend some time getting acquainted with the properties of the game, these unusual aspects will start to feel natural, and you can focus on increasing your playing strength.

From here, I recommend having a bunch of games on the 12×12 board, and focussing on developing plans for each of your groups as you play.  Always keep an eye on the score, and check that each move is advancing your own groups while hindering your opponent’s.  Once you become confident navigating the sharp openings of the 12×12 board, then you can try moving up to 16×16, where you have an even more dizzying array of opening options, and the game opens out to become even more strategically interesting.

I have a large backlog of posts to work on at the moment, but at some point down the line I will come back with some more Permute tips, shown off through a fully-analysed 16×16 game.  If any of you out there are interested in a game on the larger board, let me know in the comments; I am always happy to find new opponents!

Some of you may have noticed too that Ai Ai lets you play Permute with four colours, which makes the game feel even more like a twisty puzzle.  I am still in the process of getting acquainted with the nuances of the four-colour game — which works very well with the 1[1]2[2]* move protocol — but I will cover this at some point as well.

In the meantime, I hope you will give Permute a try — Permute is my game so I naturally will have some bias towards it, but at least I can say that after many, many games of Permute so far, I have yet to get bored with it.  I hope some of you out there will have as much fun with it as I have!

Until next time, here’s a little preview of what’s to come — a tense game of 16×16 Permute that came down to a single point:

permute16-5s-tight1

Tagged , ,

A Beginner’s Guide to Hex, Part II: Sample Games

In Part I of our Beginner’s Guide to Hex, we covered some critical tactical and strategic concepts that will help you get a flying start in your journey to become a strong Hex player.  This time, we’ll look at a full game played on the 15×15 board between two strong players, so you can get a sense of how those principles manifest during actual play.  After that, we’ll take a look at another game, this time from the Game of Y, to see how Hex principles can apply in other connection games as well.

Commented Hex Game: LG #2195354, kspttw vs Arek Kulczycki

This game was played on a 15×15 board on LittleGolem.net, the most popular place to play Hex in correspondence style.   15×15 Hex is a relatively recent addition to Little Golem, but is already proving popular.  Other board sizes are also available on LG: 11×11 for quicker, more tactical games; 13×13, which is the most popular size (and is the focus of Matthew’s brilliant Hex strategy guide); and 19×19 for deeply strategic contests.

If you’d like to follow along with the game and investigate the variations Matthew recommends, you can do so via the online Hex board on MinorTriad; this site allow you to go through the game step-by-step and experiment with different moves at any point.  

diagram1_5-01

Move 1: Black opens at c2. This is a popular opening on the 13×13 board, but here I would classify it as being likely on the losing side.  All Hex openings are either winning or losing, there are no neutral ones; the best openings are right on the border between clearly winning and clearly losing openings, in that they may give some advantage but likely won’t immediately provoke a swap. On 15×15 c2 is probably weaker than on 13×13, since on larger boards we expect that winning openings will be a bit more centralised than on smaller boards. As a consequence, White elects to not swap sides.

Move 2: The 5-4 point (five rows from your own edge, four rows from your opponent’s edge) is by far the most popular acute corner opening. This move is connected by Template A-5, and it escapes second- and third-row ladders.

Move 3-4: This is a common joseki. Black’s (3) is connected by Template A-4, and escapes second-row ladders while threatening White (2). White’s response connects back to the edge with Template A-4, while restoring their ladder escapes.

Move 5: The 5-5 point is a popular opening in the obtuse corner. Lately, 4-4 has become more popular on the 13×13 board, a development spurred by the play of very strong AlphaGo-style bots. On the larger 15×15 board, it’s an open question whether 4-4 or 5-5 is stronger.

Whether on the 4th or 5th row, having a stone in your obtuse corner is always a plus. These corners are almost always taken early in the game.

diagram6-01

Move 6: White needs something on his southwest edge. You may be wondering why this of all spots was chosen. One principle is that you want stones that are “attacking,” in the sense that they can reach the edge through bridge moves to the side (see the dots in the diagram). Stones like this are harder to block. This is the closest a stone on the sixth row can get to the acute corner and still be attacking. If not for the black stone on c2, White would likely have played this move at f5. You want your stone as close to the corner as possible because it does more to disrupt your opponent.

Note also that (2) was “attacking” in this sense in the east corner. This is part of why the 5-4 point is so popular.

diagram7_9-01

Move 7: This is a popular combination with c2. Together, these stones form Template I-5, and they can escape just about any ladder from the second to sixth row along this edge. This Template is rather difficult to attack. Note also that this move invades the “attacking zone” of White’s f7 stone. 

Move 8: White plays here at the center of the board. This move is somewhat of a distant response to (7). With (7) invading the attacking zone of the f7 stone, Black could potentially block that stone now. But White doesn’t want to overcommit to this area — it’s important to spread influence around the board, especially early in the game when the potential lines of play are so fluid. This stone can support the f7 stone while also increasing White’s influence over the centre of the board and towards the northeast edge.

Move 9: Counterintuitively, in Hex it’s often stronger to play on your opponent’s edge than on your own. Having stones separated by two empty hexes on the opponent’s second row can be quite strong. Notice how White is unable to fit Template A-3 in between (7) and (9) (nor in between (7) and c2). This stone (9) is basically connected to Black’s northwest edge now, because White’s only reasonable blocks (such as at b6 or b7) allow Black to go around to the north (at c6 or c7, respectively). Ultimately, White will need to connect to the southwest edge in the area between (9) and the obtuse corner.

diagram10_19-01

Moves 10-19: White can’t break the connection of b8 to the northwest edge. Instead, White allows Black to connect. But how does this help White? This is an attack I call “undermining.” Note first that the 10-12 group is connected to White’s edge (White can connect at either A or B; Black cannot block both). Because of this, the points D and C are vulnerable for Black. If White intrudes into these bridges, they threaten to connect to the edge through 10/12, so Black is forced to reply. White can therefore invade these points for valuable territory. Additionally, towards the end of the sequence, White obtained the stone (18), gaining more territory and forcing the reply (19). Lastly, the point E is also vulnerable for Black, if they want to keep b9 connected to the edge.

diagram20-26-01

Moves 20-26: Now White begins attacking the vulnerable points, starting at (20). After Black saves the connection, White moves to the other end to attack Black’s 5-5 stone in the obtuse corner, forcing a response there. White knows that after taking the territory at the vulnerable points, they will ultimately need to connect to their southwest edge somewhere in the lower half of it, so having 22 available strengthens this area to White’s advantage. With this secured, White returns to attacking Black in the west corner with moves 24 and 26.

diagram27_30-01

Moves 27-30: Clearly, White has been playing in sente for a while, dictating the direction of play ever since the attack that began on move 10. Black seems to have had enough, and rather than respond at b7 (and handing play back to White), Black tries here to take the initiative back with a block against the h8 stone. Here the play suddenly becomes a tactical affair. White first plays (28), because having these two stones parallel to the northeast edge will virtually guarantee their connection (thanks to the help of the white stones in the east acute corner). Next White plays (30). 

Here White begins to utilise that territory they gained through undermining. Since move 30 is connected to g4, White’s approaches have expanded considerably. (30) threatens to connect to f7, and g4 threatens to connect to e5. Before we look at Black’s response, it would be instructive to see what happens if Black tries to block the former with 31.g6. White might then respond at 32.f5. From here, a few lines to consider:

33. d6 e7 d8 d7 b7 (forced) c8 b9 and then c10 is a ladder escape fork for White, connected to the edge with Template A-3, and back to the main group by either c9 or e9.

33. b7 d8 (connected back by either f6 or d7) c9 d10 (d10 + d12 make for the edge template L-4, hence d10 is connected to the edge) d9 and now f9 is connected to the edge and threatens to connect to either h8 via g9, or to h5 via f8.

diagram31_42-01

Moves 31-42: Black attempted to block at (31) instead. The situation that follows is highly tactical. White first plays 32. d8. After Black blocks at 33. g6, White links up g4 to e5 with 33. f5. Black gains some free territory with a bridge intrusion (35-36). At this point, e5/f5 are connected to d8/f7 by either d7 or f6. If Black blocks at 37. f6, White’s connection is assured by 38. d7 (White can connect by either b7 with Template A-2 or c9 with Template A-3), so Black plays 37. d7. White connects up with f6 (although e7 would have been better, offering no intrusion points). Black takes a little more territory with move 39, but after move 41 White’s responds with 42. d10. As mentioned in the second variation above, this move (along with the stone on d12) is connected to the edge via edge Template L-4. If Black blocks at 43. d9, White plays 44. f9, which threatens either g9 or f8.

diagram43_46-01

Moves 43-45: With the southwest edge lost, Black must attempt to block the northeast edge. The odds aren’t good however. Presumably Black went all in on blocking White from the southwest because Black felt the chances were better there. Black didn’t gain much in the way of territory during that sequence that could help on this side of the board, with the possible exception of the stone on h4. 

The White stone on h5 isn’t yet connected to h7, but trying to block between them will just make things worse for Black (43. h6 i5 i6 and k4 can at best be held to a fifth-row ladder, heading towards the White stones in the east corner). So Black plays 43. j6. White connects up the smart way, at 44. i5. Unlike connecting via h6, this threatens the followup k4, which would start a fifth-row ladder, as well as the potential threats from the h7/h8 group. Black is forced to attempt to block both directions at once, with 45. k6. This cleanly blocks the potential of k4, but as we shall see, can’t hold off a White attack from h8.

Move 46: White bridges away from h8. This move is based on a simple concept: note that by placing the stone out so that there’s a clear line to the edge (shown by the arrows) it can’t be stopped with simple adjacent blocks (j9 j8 k8 k7 … ). This means Black will have to block this stone to a ladder, and that’s where those two white stones on l11 and k12 will come into play.

diagram47_50-01

Moves 47-50: All that remains is for White to finish off the connection. After 47. j9, White will ultimately play j8, after which a fifth-row ladder will begin (Black could hold White to either a fifth- or fourth-row ladder; generally you want to hold a player to the higher row). Before that, though, White sets up the ladder escape with move 48, which threatens to connect back via a bridge to the stone on i9. Black is forced to block (Black’s choice to play 49 at j10 as opposed to i10, is the stronger block since it leaves White with slightly less space underneath). Now White plays 50. j8, and the game is over. Although the final sequence wasn’t played, let’s quickly look at how it might have played out.

diagram_end1-01

The naive approach is just hold White to the fifth-row ladder. White easily connects with Template A-4.

diagram_end2-01

Black might instead jump ahead with move 55 and force a bottleneck, but after move 58 White connects to the bottom with Template A-3 and back to (50) via either A or B.

diagram_end3-01

Finally, Black might try to hold White to a fourth-row ladder instead, but after move 58 White’s stones are connected in the Trapezoid template, and Black has no means of blocking White from the edge. 


Y Sample Game: PCM vs Matthew Seymour

Next up we have a sample game of the Game of Y.  For those of you who don’t know Y, it’s actually even easier to learn than Hex:

  1. Two players, Black and White, compete to connect all three sides of a triangular board of hexagons.
  2. Players take it in turns to place one stone of their colour on any empty square on the board.  The first player to connect all three sides of the board with a single connected group of stones wins the game.

That’s it!  In Hex, players must connect two specific sides of the board that share their colour, while in Y all three sides are relevant to both players.  As we shall see, that fact can alter some of the tactics and strategies you may have learned from Hex, but broadly speaking your Hex knowledge is a great help in Y as well.

This game was played between PCM (Black) and Matthew Seymour (White) on iggamecenter.  The board is size-14, which is relatively small for Y but still big enough for a challenging game.  Matthew has annotated the game for us below:

Game of Y -- 14 -- mv4-01

Move 1: We’re playing with the swap rule, so Black (PCM) opens along the edge.

Move 2: White (Matthew) responds with a more central move.

Move 3: Connected left via the A-5 edge template, but the difficulty will be connecting to the bottom.

Move 4: Blocking Black’s stones from the bottom edge.

Game of Y -- 14 -- mv8-01

Move 8: Connected with the B-3 template.

Game of Y -- 14 -- mv10-01

Move 10: A blunder! e9 would have been better (winning I think) than f10, with template C-5 facing the left edge and move 4 helping guarantee the 8-2 group’s connection to the south. As it stands, 2-10 is connected south with C-5 and 2 isn’t fully connected to the left.

Game of Y -- 14 -- mv15-01

Moves 11-15: This block sets up a ladder with the bottleneck formation.

Move 16: Ladder escape. The plan here is that after b7, White plays d6 d7 f7, and now White is connected to all three edges.

Move 17: Counter-threat, threatening the connection between (8) and the edge.

Move 18: 16-18 is connected to the right edge through the M-4a template, and connected to the central group (14-8) via either d7 or the ladder on the left.

Game of Y -- 14 -- mv21-01

Moves 19-21: Black first blocks the d7 route, then blocks between the ladder and the escape on move 21.

Move 22: Here I blunder the game away! I was concerned the 20-8 group might lose its connection to the right that I had through either 8 or the 16-18 group. It looked like Black had blocked off the 16-18 group, so I had to save it via (8). I missed the winning move 22. a6.  Then, if 23. i10 I could simply play a5 and I would be connected to all three edges — in other words, it would have kept the double threat alive for connecting to the right, while also connected the group to the left.

Instead, I saved the connection to the right, but now Black can now cut me off from the left at a6. I missed this “obvious” move because (I think) I’m so used to playing Hex. 21 is connected to the left via A-2, and in Hex there’s no reason to ever invade A-2 because the two empty hexes are captured. But of course, in Y, the edge is shared by both players, so these hexes are NOT captured.

Game of Y -- 14 -- m23-01

Move 23: Forced. Black blocks White from the left edge.

Game of Y -- 14 -- m30-01

Moves 24-30: Ladder, followed by a break. The black group (1-29) is connected to the left and right edges. Black needs only to connect it to the bottom to win.

Game of Y -- 14 -- m36-01

Moves 31-36: 4th-row ladder, followed by a bottleneck. White has no hope however, as the 7-5 group will help escape the ladder.

Game of Y -- 14 -- m43

Moves 37-43: There are many ways to escape the ladder, but Black elects to go with this approach. More straightforward would have been e13 f14 f13 g14 g12 and then Black can play either h13 (with A-2) or j12 (with A-3). As played, (38) is the only reasonable reply to (37) (further left on this row, Black plays e11; further right on this row, Black plays g13; for plays on row 12, Black uses (37) as a second row ladder escape). (39) and (40) accomplish nothing but there’s no harm. After (41), Black can play either h13 (with A-2) or j12 (with A-3). White blocks the former, so Black plays the latter. White resigns.


So, there we have it — a quick but well-played game of 15×15 Hex, and a tricky game of Y that shows off some of the quirks of Hex’s cousins in the connection-game world.  We hope these give you some useful ideas about how to apply the core concepts of Hex strategy to your own play.

Let us know in the comments what you think, and if there are other subtleties to Hex (or Y, for that matter) that you’d like to hear more about, perhaps we may do some more posts in the future.

In the meantime, enjoy, and good luck with your journey toward becoming a strong Hex player!


Tagged , , , ,

A Beginner’s Guide to Hex

Some time ago I talked a bit about Hex on this blog, discussing its history and how it kickstarted the entire connection game genre. Since then, a few readers have asked for a bit more detail on how to actually play Hex. So, for this post I have teamed up with Matthew Seymour, author of the brilliant Hex: A Strategy Guide, and we have put together this beginner’s guide to Hex strategy and tactics.

Below we will introduce you to basic tactics, templates, openings, and strategic considerations. Each section is very brief but will give you enough to get you started on improving your Hex play; after you tackle each section, please continue your studies with Matthew’s guide, which has much more detail and numerous examples of each critical concept.

Basic Tactics

The edges

Edge play in Hex is obviously critical, since in order to win we must connect our two edges across the entire board. Initially, connecting a chain of stones successfully to the edge seems like a baffling enterprise — an adept opponent can bend and twist your attempted connections away from the goal, and it can be difficult to understand how to set yourself up for a strong connection.

Edge templates are extremely useful tools for understanding edge play. In our previous discussion of Hex, we met the bridge, a configuration of two stones that proves to be virtually connected even though the stones aren’t adjacent.  Similarly, edge templates show us configurations of stones that, with correct play, are guaranteed to result in connect to the edge. Templates indicate patterns where, even if your opponent has the first move, you will always be able to connect successfully. Your opponent may intrude on your template, but so long as you defend your template at every step, you will succeed.

This means however that templates are always just a move away from breaking. If you have two overlapping templates, and your opponent plays a move that intrudes on both, you can only potentially save one of them.

Here are some examples of basic edge templates:

Our first edge template is the very basic A-2 template, consisting of a stone on the second row. If White tries to block at A, Black can respond at B (second diagram), and vice versa. Either way, White has no means of stopping black. This template is very similar to the bridge template.

One of the most useful templates is template A-3, consisting of a single stone on the third row. This template comes up very frequently. We’ll analyse the situation by considering Black’s possible threats. On one hand, he could play at A and connect to the edge with template A-2. Or, he could play at B, and connect by a chain of a bridge and template A-2. The important part here is that these threats don’t overlap. If White plays at A, or one of the two hexes below it, Black simply plays at B and connects by that route. And if White plays in any of the 5 hexes on the right, Black plays at A and connects by that route.

We can succinctly convey this information in what’s called a pivot diagram. The two small dots indicate Black’s alternative moves. We can see that the rightmost dot connects back to the top stone with a bridge. Both dots are connected to the edge by one of two possible moves (template A-2).

Lastly, let’s look at Template A-4, on the fourth row:

diagram5-01

Similar to A-3, Black has two threats: to play adjacent at A, connecting to the edge with A-3 (left), or to bridge to the side at B, also connecting with A-3 (right).

These alternatives can get around most possible blocks by White. But there’s one issue, the point C. Both the threats above overlap at this point. So Black needs a response to a block at this point. The solution is shown below (note that if White played (3) on the left side, Black could bridge to the right instead).

diagram8-01

There are a large number of edge templates. You can find an excellent catalogue here or here.

Interior templates: connecting chains

We’ve already encountered one interior template — a template for connections in the centre of the board, away from the edges: the bridge. As you might expect, other templates exist for more complex configurations of interior stones. Knowing these templates is very helpful indeed, as once you achieve such a configuration on the board and recognise that template, you can play elsewhere, knowing that you’ll be able to successfully defend that template against later intrusion.

Some well-known interior templates are the Wheel, the Crescent, the Span, and the Trapezoid.

Defending at a distance

We’ve talked a lot so far about connecting — positive, attacking play. But what to do if our opponent has us on the back foot, and a deadly connection is looming? How can we stop them?

First, we should remember that as satisfying as that positive, attacking play may be, Hex is what is called in combinatorial game theory a hot game. This means that it is always beneficial to make a move in Hex, and no stone of ours on the board is ever a detriment to us. On top of that, one player must always win in Hex, so if we successfully block the opponent from any possible connection between their edges, we’ve in fact won the game. So don’t neglect defensive play — in Hex, it’s precisely as powerful as attacking play, and will win you the game just as effectively! Defensive moves in Hex are also offensive moves.

Having said that, defence in Hex can be a delicate affair. As we’ve seen in numerous examples, stones can be connected even if they aren’t adjacent, and skilled players can move across the board at high speed, staying connected the whole way. Therefore, if we attempt to block simply with adjacent blocks — playing right next to opposing stones — a skilled opponent can easily bend around us. Likewise, if we block at a distance but misjudge the situation, the opponent may still get round us by using bridges to cover enough ground to do an end-run around our defences.

In practice we may need to combine adjacent blocks with more distant blocks in many cases. The adjacent blocks restrict the opponent’s options for bridging forward, while the distant blocks contain those advances:

The classic block short-circuits the opponent from afar, allowing the defender to respond whether the opponent advances directly forward or takes a more oblique approach:

In either case, in order to defend we need to evaluate the opponent’s options for onward connection, and place our stones in anticipation of those options. If we defend reactively, and follow the opponent around right at their heels, then we’ve no hope of survival. If we instead constrict their choices and contain their subsequent advances, then we may just keep them at bay.

Ladders

Often, when approaching an edge of the board, you’ll end up in a situation like this:

ladder1-alt-01

White wants to connect and Black can’t allow it, so Black blocks at (3). White can’t connect right away but can force Black to carry on blocking all along the edge. This series of back-and-forth adjacent plays is called a ladder. White is completely in control here; Black has to respond to every ladder stone White plays, otherwise White’s connection is assured.

Go players will be familiar with sente — the concept of maintaining the initiative, by making moves that force an immediate response from the opponent. When you have sente you are in control of the game; you are making profitable moves, and all your opponent can do is match you, stone for stone, unable to direct play to their advantage. Sente is just as important in Hex as it is in Go, and ladders are one common manifestation of it.

However, you have probably noticed that if White continues playing the ladder here, it’s Black that ends up connecting across the board:

ladder1-01

To make the ladder profitable for them, White needs to incorporate some additional tactical plays. If White had an additional stone in place to form a ladder escape, then when the ladder reaches that stone, they can connect to the edge with ease.

ladder1-escape-01

Of course, when a ladder is already forming, taking a turn to place a ladder escape stone simply dooms the ladder. So players will often place ladder escape stones during the opening phase of the game, to allow for profitable ladder play later.

Another option is to place a stone that is both a ladder escape and a threat to connect by another route. Your opponent will be forced to block either the threat or the ladder, and then you can connect by the other means. In the diagram below, Black plays a stone at 1. This can escape the ladder, but it also threatens to connect via A (with two bridges). White can’t block both approaches, so Black will connect. This is called a ladder escape fork.

diagram14-01

If you have no ladder escapes or forks available, you’ll have no choice but to “break the ladder”, as Black does with move 7 in the diagram below (note that 7 is connected with Template A-3). In the acute corner, this tends to reverse the roles: notice how now it’s White who’s the attacking player with a ladder.

diagram13-01

Strategic Considerations

Openings

The opening in Hex is an interesting moment, as the first player needs to consider not just what is the best move to play, but what is the best move to play that won’t get swapped. In Go or Chess, you can play your opening move without fear of that move suddenly becoming your opponent’s opening, but not so with Hex!

As the second player, you need to do the opposite calculation: has my opponent played a move that, with perfect play, would give them a winning advantage? If so, I should swap; if not, I can safely play on.

On smaller boards, Hex has been solved, meaning that we know the precise outcome of any given opening move. That leads to diagrams like these:

Above are three diagrams showing the ultimate winner, with perfect play, of opening moves played at every cell on the board. There’s an important trend to notice here — the winning openings for any given board size are not straightforwardly extendable to larger boards! While we can see a general theme that opening moves in the centre are stronger than those on the edges, the specific outcomes of those edge cells change as we change the board. That means that on the boards we humans play Hex on — from 11×11 upward — not only do we not have these convenient maps of what moves win or lose, but we cannot use the opening maps from smaller boards as a definitive indication of the outcome of any opening on the bigger ones.

Matthew’s guide focusses on the 13×13 game, and for openings on that board, he’s produced a swap map that can help guide you in the opening. The cells with black dots are Matthew recommendations for good opening moves for Black. When you are the second player, if your opponent opens anywhere in the shaded area, you should swap — those moves have the potential to give a winning advantage, so you’re better off taking that stone for yourself. If your opponent plays outside that shaded zone, let them carry on — you can possibly do better by playing your own opening.

swap-map-13x13-01

For larger board sizes, like 15×15 and 19×19, we don’t yet have enough games played at a high level to put together a reasonable swap map. However, we can make some reasonable inferences about good opening moves; in particular, opening in the obtuse corners seems a good way to go on all board sizes.

These are very simple principles, but should be enough to get you started. One thing to bear in mind is that we humans are far from perfect play, even on 11×11, so both sides are likely to make mistakes, not just in the opening but throughout the game. So our goal at this stage should be simply to ensure that our opening doesn’t obviously disadvantage us; we don’t need to fret too much about whether a particular move is 100% winning or losing.

Playing in the corners

The Hex board has two types of corners — acute and obtuse — that have different properties. Corners are the only parts of the board where your stones can both strengthen your own position and weaken your opponent’s, and for that reason, players tend to play stones in the corners early in the game. Typically you will want to play stones in at least one corner on each of your edges during the opening.

The corners being so important often leads to pitched battles to establish control over them, and so strong players may study corner patterns (think joseki in Go) to navigate these tactical scuffles. If you don’t have a presence in a corner and your opponent does, invading is useful in order to reduce their influence there, and corner patterns will help you to reduce that influence. Conversely, if your opponent invades your corner, you can use these patterns to settle the fight and maintain as much of your initial influence as possible. The challenge in these situations is judging when there is no more profit to be gained, and thus when it’s time to move on from the corner battle and establish yourself elsewhere.

There is a lot to discover in these corner patterns, but don’t worry too much about these early in your Hex journey; as you start to face stronger opposition and find your corner play is letting you down, refer to Matthew’s guide for detailed examples of how to fight for the corners.

Influence

We’ve alluded to this concept in the previous section, so now let’s expand on what influence means in Hex strategy. Stones in Hex are not just localised points — they have impact on the board around them and on other nearby stones. Every stone has the potential to connect to something or to block something else, and when placing our stones we need to consider the influence of the stones around our planned placement.

In the early stages of a Hex game, gaining influence is important. We would do well to place our stones around the board, to spread them out; this maximises the potential influence of each stone. Conversely, if we don’t spread our stones out, we may have a strong influence in a particular area but will be weak elsewhere. If we are struggling to find an effective place to play, we can look at our relative influence on different areas of the board; if we find some areas where we have low influence, those might be good places to play our next moves.

As you might expect, stones in the corners have a high degree of influence — the proximity to two edges means those stones are better able to restrict your opponent’s activity in that area and force them to work around you in a limited space. Placements in the corners also are tougher to block, and provide you with ladder escape stones for later in the game.

The edges are somewhat less intuitive. We might feel secure playing near the centre of our own edges, as this seems a useful way to block the opponent, but in practice these kinds of placements do not provide strong influence. Instead, we should play near our opponent’s edges — this forces them to work around you and makes it harder for them to connect.

Beginning Go players often play in a style referred to as Puppy Go, where they continually play very close to every one of their opponent’s moves, following them around the board like an excitable puppy. We can easily be tempted to play Puppy Hex in a very similar way. Unfortunately this is an adorable, but poor strategy; in a Puppy Hex scenario your opponent is dictating play completely, and since you are always one stone behind they will have free choice of where to establish influence and you will always be playing catch-up. Always keep an eye on the broader board situation, and try to take the initiative when the situation allows it — don’t let your opponent drag you around by the nose!

As you become more comfortable playing in an influence-oriented style, you can start to focus on making moves that serve multiple purposes. Gaining influence is good, but gaining influence and blocking the opponent is even better! This is a challenging step, requiring you to have both tactical and strategic vision, but as you gain more experience and become able to recognise common tactical motifs, you’ll be better able to keep these in mind as you seek to expand your presence across the board as well.

As a final note, we should remember that Hex is fundamentally a scalable game — we can play Hex on any size board we like without changing the rules, but the feel of play will change. Hex on larger boards is a challenging and rewarding affair, but specific tips on those epic battles is beyond the scope of this article. However, we encourage you to try larger boards, as they by necessity will make you play in an influence-oriented style. With so much additional empty space on the board, you’ll need to learn to anticipate where battles for influence and territory will rage, long before they actually happen. That experience can help you on the smaller boards too, training you to think globally more consistently.

Territory

Territory is a critical concept to understand in Hex strategy. Think of territory as the potential your stones create for future connection; the more territory you control, the more tactical options you have for later attempts to form connections between your stones.

As a starting point, we might say that each stone creates territory in the area immediately around itself; in other words, the empty hexes immediately adjacent to it. However, as we see below, this definition falls apart fairly quickly:

useless-stones-01

These intrusions by Black gain no useful territory. In both cases, White simply blocks any onward connections, so the ‘territory’ gained (the shaded cells) offers nothing that Black didn’t already have!

If we believe that stones create territory regardless of their disposition, then we will run into situations like the above, where our stone is effectively a wasted move, as it will never actually be able to connect to anything. Instead we should restrict the definition a bit more: the territory around our stones consists of the adjacent hexes that could in theory participate in a connection. If we want to invade somewhere and gain influence from that play, we need to be certain that the placement provides useful territory; if the stone does not gain territory, then we have simply placed a stone for no real purpose. Without territory we cannot claim influence, as the enemy can simply work around us at no real cost.

Taking the initiative

As in many other abstract games, in Hex gaining the initiative is of huge importance. Recall the Puppy Hex discussion earlier — imagine if we could force the opponent to play Puppy Hex. If we can place stones with aplomb while our opponent can do nothing but respond, we can dictate the pace of play and dominate the board at our leisure.

Here we will go in-depth into some Go terms we mentioned earlier: sente and gote. In Go, when we play a stone that forces the opponent to respond — because a group is threatened with capture, for example — we say that is sente, meaning we are gaining the initiative. Our next move after the sente move is essentially free; the opponent’s response is mandatory, so our next placement can be anywhere we like, and we can use that to gain influence or territory. Conversely, the forced response the sente move creates is gote — we are forced to be the puppy for that move and play where the opponent demands.

In Hex we also have sente and gote moves. For example, we may recognise that our opponent has an edge template in play, so we may choose to intrude on that template and gain some influence. That move is sente because it demands a response; the opponent must play to save the template, otherwise that connection is lost. At that moment our opponent’s move is gote, lending us the initiative.

As we gain more experience of Hex strategy, we will be better able to identify opportunities to gain sente. At the same time, we must be mindful of our opponent’s threats, and remember that playing gote moves to save a critical connection is vital too! We should try to avoid being the Hex puppy whenever possible, but sometimes there’s no escaping it.

Tenuki

Let’s look at another situation:

tenuki1-01

Here Black is threatening to cut the stone A off from the top-right edge, and the straightforward response would be for us to save the connection and take gote, such as by responding at L3. After all, by not playing there we lose the connection.

However, in this situation we can see that White has an opportunity to make an intrusion of their own, on the other end of the board. Black’s threat depends on using the stone B to connect to the bottom-right edge of the board. White’s board situation will allow them to make other connections, even if they sacrifice the connection under attack by Black, but Black’s situation is just as fragile. In cases like this we may elect to tenuki — to play away from the threat and allow our opponent to break the connection. Instead of defending against the threat we attack elsewhere, and now they must make a choice: either save their own template, or finish ours off. If they finish ours off, they must make a second move, giving us influence elsewhere; if they take gote to save their own connection, then we have regained the initiative.

In this game, White elected to attack Black’s B stone with move (2), rather than save the connection of A to the edge. Black elected to save the connection, playing out a standard joseki sequence, leaving White with the initiative.

tenuki2-01

Tenuki is an advanced concept, and often difficult to judge. In general, you will have more opportunities for playing away from threats in the early- and middlegame, when the board is less full and there will be opportunities for other connections. In the late game, typically both players will have committed many stones to particular connections, and there is inherently less flexibility; if we ignore a threat, we are more likely to hand the win to the opponent.

The Joy of Hex

We’ve covered a lot of ground in this post — over the course of these few sections we’ve gone from the basics of the board geometry through to advanced strategic play. Yet for all that, we’ve barely scratched the surface. From here, you can move on to Matthew’s detailed guide to Hex, and dig deeper into all of these concepts. While you’re there, be sure to try out his fantastic collection of 500 Hex puzzles (also available in PDF, in Hex style and Go style) to sharpen your tactical vision.  If you need help with openings, he also used over 6,000 online games on 13×13 to generate a very useful opening database.

Having said that, resist the temptation to power through all this material. Take some time with these concepts, apply them to your games, and move on only when you feel comfortable and confident. Remember too that Hex is perhaps the most famous modern abstract strategy game, but it is still very new in the grand scheme of things. Traditional games like Go, Chess and Shogi have had centuries for strategies to be developed, whereas in Hex we are all still beginners in some sense! So there is always more to discover and more to learn.

If nothing else, we hope this brief introduction will give you an appreciation for Hex’s incredible depth and nuance. Hex is a disarmingly simple game, so much so that a brand-new player may be tempted to ask ‘…that’s it?!’ when told the rules for the first time. But within that sparse framework lies a world of intricate tactical and strategic variety. This simplicity means Hex also has amazing flexibility — we can play lightning-fast blitz games on 11×11 boards, strategic masterclasses on 19×19, or mind-bending, baffling escapades as long as a game of Go on 26×26. Each one of these configurations is rich with possibility. Learning Hex also benefits you in other connection games — the tactics you learn here can transfer to other games, like the Game of Y (more on that in our next post).

Above all, we hope you have fun with the game! Go spend some time testing out your strategies online, entering tournaments, analysing games and writing about them. But alongside that, teach your friends and family (when Covid restrictions allow!), help them learn some basic tactical and strategic concepts, and show them why you love it. Every new player we bring to the game makes Hex’s future ever brighter, so the more we help others to see what the game can offer, the more enjoyment we’ll all have in the years to come.

Next moves

In the second and final part of our Hex mini-series, we will analyse a complete game of Hex in detail, and show how the concepts we’ve introduced here play out in a game between strong players.

Then we will analyse a brief game of Y, as well, to demonstrate how Hex concepts transfer to other, related games — and we’ll point out how some concepts change when we move to a different game.

Extra nerd stuff

Check out these papers if you’d like to know more about how the small-board swap maps above were generated:

SOLVING 7×7 HEX: VIRTUAL CONNECTIONS. AND GAME-STATE REDUCTION. R. Hayward, Y. Bjomsson, M. Johanson, M. Kan, N. Po, J. van Rijswijck. Department of Computing Science, University of Alberta, Edmonton, Alberta, Canada.

Solving 8×8 Hex.  Henderson, Arneson and Hayward, IJCAI 2009.

9×9 Hex: Scalable Parallel Depth-First Proof Number Search.  Paulewicz and Hayward, Proc. Computers and Games CG2013, Springer LNCS 8427 (2014) 138-150.

Tagged , , , ,

Quick picks: interesting abstract games in brief

As some of you will be aware, as a way of keeping myself occupied during the pandemic I’ve learned how to use Adobe Illustrator to design stuff.  A particularly enjoyable, if slightly odd, area of design I’ve gotten into is designing game boards for abstract strategy board games.  I’ve had a good time getting to know the software and experimenting with many different designs, and now that nice neoprene game mats can be custom-printed for affordable prices, I’ve actually gone ahead and had some of my designs printed out as well.  Hopefully, in some theoretical future where the pandemic is over, I can use these boards to introduce friends and colleagues to some of my favourite games.

I’ve made a lot of boards over the last year, so rather than wait until I can find the time and energy to write detailed blog posts on all of the games that go with them, I thought I’d share a few abstract strategy gems with you with just a few sentences about why they’re interesting.  Each brief review includes links to full-size images of the boards I’ve made for each game, which you can print if you wish.  Some of these games will get covered in detail in the future; for now, hopefully these short descriptions will entice some of you to give these games a try.

As a side note, I can output these designs in a huge number of formats — PDF, PNG, JPG, SVG, whatever — so if any of these strike your fancy but you need a different format, just let me know in the comments and I’ll upload it for you.

Catchup

Catchup is a wonderful game by Nick Bentley that I’ve mentioned briefly before, because the scoring system inspired my choice of scoring system for Permute.  This is a game I’ll definitely cover in the future, as it’s incredibly easy to learn, yet within moments of starting to play you’ll realise the core strategic dilemmas at the heart of the game.  Catchup is a really dynamic and exciting game, and personally I think Catchup is Nick’s best design by far.

Why it’s great: Catchup’s unique feel stems from its unusual movement protocol: each turn, you place two stones anywhere on the board, unless your opponent equalled or exceeded your score after their last move, and then you can place three stones.  The winner is the player who forms the largest group of connected stones at the end of the game, so the result is a tense back-and-forth where you absolutely must connect your stones to win, but each time your biggest group becomes equal to or larger than your opponent’s, they get a much more powerful move with which to fight back.

About the boards: The board on the top left above is a standard hexhex board, seven hexes on a side, with a scoring track where players can place a stone on the number representing the size of their current largest group.  The other five are variant boards with uneven sides, which an experienced Catchup player has suggested may generate more interesting play.

Chess: Supersized

These are simply enlarged chessboards — 10×10 squares and 12×12 — that I plan to print on mats and use to play large variants of Chess.  Many Chess fans over the years have attempted to transport the magic of the Royal Game to larger boards, and thankfully a number of them succeeded in creating some very enjoyable variants that feel like Chess, but still have a unique personality.  I’m planning to write an article in the future that will cover a bunch of large Chess variants and give you some detailed recommendations; for now, here’s a few worth checking out on both board sizes, should you fancy giving them a go.

Some recommended 10×10 Chess variants: Caissa Brittania (checkmate the Queen instead of the King!), Decimaka (hybrid of Chess and Maka Dai Dai Shogi), Elven Chess (hybrid of Chess and Chu Shogi), Grand Chess (Christian Freeling’s most famous Chess variant), Grand Shatranj (ancient Persian Chess brought to 10×10), Omega Chess (commercial variant with Wizards and Champions), Opulent Chess (Grand Chess but more my style — higher piece density, less wild tactically), Shako (Chess with Cannons and Elephants).

Some recommended 12×12 Chess variants: Chu Shogi (the best 12×12 Chess-type game, period), Gross Chess (mix of Grand Chess, Omega and Asian variants, very playable), Metamachy (fast-paced Pawns and crazy historical pieces give it a unique and fun feel), Zanzibar-XL (dense and diverse piece selection with a variable setup).

Exo-Hex and Iris

I briefly covered both these games before, but since then I’ve made some enlarged boards for myself, so I thought I’d share these here and urge you again to give them a shot.  Both these games are from Craig Duncan, and they are unique connection games that are centred on scoring points rather than being the first to make a single connection.  Both are rich and highly strategic, and well worth your time.

Why they’re great: Exo-Hex is essentially a distillation of Side Stitch into a simpler form, playable with a standard hexhex board with some extra stones around the edges.  The more straightforward rules and minimalistic look are great for beginners who may not yet be ready to graduate to Side Stitch and its endless variety of possible playing surfaces.  Exo-Hex is also much easier to construct with components you may already have around, so it’s more straightforward to pick up and play.

Iris, meanwhile, is part of the surprisingly small family of connection games with two-move turns.  Simple restrictions on placement — you may either place two stones on same-coloured spaces on the edge of the board that are directly opposite each other, or two stones in the centre on non-adjacent spaces — means that the game moves quickly and has a huge number of possible moves per turn (a large branching factor), yet structures you will know from Hex and other one-move games still work.  I’ve played Iris a lot against Ai Ai and I highly recommend it for any fan of connection games.

Lotus and Medusa

Lotus and Medusa are two under-appreciated territory games by Christian Freeling that are closely related — in fact Christian calls Lotus the ‘support act’ for Medusa.  Both centre around the use of a mechanic from a game called Rosette.  Over the years, numerous designers have tried to transport the game of Go to the hexagonal grid, only to find that the reduced connectivity of each point (from 4 adjacencies to 3) made it too hard for players to build stable groups of stones.  Rosette addressed this by allowing groups of stones containing a rosette — a formation that occupies all six points of a single hexagon — to be immune from capture permanently.  Lotus and Medusa adopt this clever tweak, while adding some fascinating additional touches.

Why they’re great:  Lotus takes the cool-looking board from the rather disappointing game of Kensington, and turns it into the basis for a compelling territorial contest.  Capture doesn’t just eliminate enemy stones, it flips them to your side, like in Othello, and occupying all six points of a hexagon keeps your groups alive forever, as in Rosette.  Medusa takes this further by removing hexagons from the playable area of the board to further reduce its connectivity, and allowing players to either place or move a group of stones already on the board.  Medusa also has the ‘Othellonian’ capture and rosettes of Lotus.  Both games have the satisfying tension of a good Go-like game, but with very different play styles; Lotus is quick and deadly, while Medusa is a longer epic that allows groups to flow sinuously across the board.  Both deserve more attention than they’ve received.

Nutty Shogi (and friends)

Nutty Shogi is here as a representative of the class of 13×13 Shogi variants.  The only historic 13×13 Shogi variant is Heian Dai Shogi, which is a very early form of Dai Shogi that is unfortunately not very enjoyable to play.  However, some modern Shogi variant fans have created some 13×13 variants that are worth your time, and given that 13×13 Shogi boards are not available anywhere, I decided to create one to print on a mat.

Why 13×13 Shogi is great: Nutty Shogi, designed by HG Muller, is a reduced version of Tenjiku Shogi, a 16×16 historic Shogi variant famous for its outrageously powerful pieces and extremely fast-paced and destructive play.  Nutty Shogi condenses Tenjiku’s armies of 78 pieces per player, with 36 types of pieces, down to 50 pieces of 25 types — still much more than Chess or Shogi, but quite manageable.  The selection of pieces is basically a Tenjiku Greatest Hits album, so the game retains the feel of Tenjiku in a more compact size.  HG Muller also created two other worthwhile 13×13 variants:  Cashew Shogi, a reduced form of Dai Dai Shogi; and Macademia Shogi, a reduced form of Maka Dai Dai Shogi.  While you’re at it, do check out Mitsugumi Shogi, a condensed form of Suzumu Shogi, which is a modern variant of Tenjiku Shogi (still with me here?).  All of these games pack a lot of action into that 13×13 area, so despite the large boards and starting arrays they are far from slow.

Odd-Y and Pex

Here we have two fascinating variants of the seminal connection games Hex and the Game of Y.  Odd-Y extends the core concept of Y to boards with more than three sides, while Pex transports Hex to a grid of irregular pentagons.

Why they’re great: Odd-Y circumvents one of the shortcomings of Y, in my opinion, which is that the triangular Y board gives different areas of the board very different values, which means some parts of the playing area go largely unused.  Odd-Y extends the goal of forming a Y — connecting three sides of the board — to boards of more sides, creating a more expansive feel.  The new winning condition is a bit complicated to explain on larger boards, but Odd-Y with five sides — 5-Y — is beautifully simple: connect any three sides to win, so long as all three sides are not adjacent.  This can then be translated to a six-sided hexagonal board by colouring the edges with five colours in a pattern like you see above (Craig Duncan came up with this idea).   5-Y feels very freeing — there are more winning connections available than in Y, creating more strategic complexity, and the entire board surface feels useful.

Pex was invented by connection game maestro David J Bush, world champion of TwixT and co-author of my post on that game.  He transformed Hex by placing it on the irregular pentagonal grid you see above, keeping all the rules the same (not that there are many rules in Hex).  The new grid forces significant changes in tactics, as cells now have different adjacencies, so standard Hex techniques won’t work.  Pex is a challenging and interesting variant, definitely intriguing for experienced Hex players, but also simple enough for newcomers to pick up and enjoy within minutes.

Snodd (and Xodd/Yodd)

Snodd is a variant of a pair of games by Luis Bolaños Mures called Xodd and Yodd.  Xodd/Yodd are mind-bending games in which players are assigned a colour, yet may play stones of both colours; Xodd is played on a square grid, while Yodd is played on a hexagonal grid.  On your turn, you may place two stones on the board, each of which may be either colour, and at the end of the game the player with the smallest number of groups on the board in their colour wins the game.  There’s a catch, however: at the end of any player’s turn, the total number of groups of stones on the board must be odd!  This single restriction is what makes the game so challenging and unique.  When you start to play you’ll soon realise how this parity restriction allows you to catch your opponent out in all sorts of clever ways.

Why Snodd might be great:  Snodd is my attempt to bridge the gap between Xodd and Yodd.  Xodd is played on a square grid, where each square has four adjacencies (diagonal adjacencies don’t count), resulting in a tight, tactical game where groups are often split apart.  Yodd is played on a hexagonal grid, where cells have six adjacencies, meaning groups stay connected more easily and the game feels more deliberate and strategic.

In Snodd I took the exact same rules and ported them to a snub-square tiling.  When you play on the points of this pattern, each point has five adjacencies, placing it right between Xodd and Yodd’s geometries.  In theory, this should make a version of the game with a nice balance between tactical fights and global strategies.  Test games against myself have been promising, but more investigation is needed.  Give it a try and let me know how you find it!

*Star and Superstar

*Star is another game I’ve covered before, but at the time I was a bit confused about the rules and had yet to try it.  Boards are also hard to obtain, as they can only be ordered from America, and shipping from America now is ludicrously expensive, so I made two variations of the *Star board to print myself.  Superstar is a predecessor of Starweb, a fantastic connection game from Christian Freeling; Christian says Superstar is no good now and fully superseded by Starweb, but he thinks lots of things are no good, so I wouldn’t take that to heart.

Why they’re great:  *Star is the final iteration of Craige Schensted/Ea Ea’s set of connection games built around the goal of claiming edges and corner cells, then connecting groups of those cells together.  *Star is a bit hard to understand at first, but once you get going, you’ll find a dynamic game of territory and connection, where both players writhe hectically around each other trying to weave their scoring groups together.  The resulting play is complex and challenging, and games of *Star often exhibit subtle and sophisticated strategies.  The *Star board also supports two excellent variants: Double Star, where players may place two stones per turn instead of one; and Star-Y, a pure connection game where players must connect three sides which are not all adjacent (just like 5-Y above).

Superstar’s relationship to Starweb is about more than the shape of the board — there’s a clear lineage here, where Christian was moving from Star/*Star toward what would eventually become Starweb.  Despite Christian’s misgivings, I enjoy this game — it has a remarkable diversity, in that multiple types of formations are available for point-scoring: stars (a group touching at least 3 edge cells); superstars (groups connecting 3 or more sides, worth many points); and loops (worth more points for enclosing more cells, and many more points for enclosing enemy stones within).  The feel in play is like a heady mix of Star and Havannah, where each player has incredible flexibility and must keep their wits about them to spot the myriad ways their opponent may be seeking to score.  The mix of connection and surrounding elements gives it a bit of a territorial feel as well.  For me it is a worthy entry in the Freeling canon, distinct enough from both Starweb and Havannah to have its own identity.

About the boards:  The two *Star boards above are equivalent — on the blue one you will play your stones in the cells, and on the other you will play on the intersections.  I made both since different players may find one or the other easier to parse visually, so I wanted to have both options available.  The Superstar board is very similar to the Starweb board, with the notable difference that the light-shaded cells are not playable, but instead are there to indicate the point values of cells adjacent to them.  The game would definitely be extendable to larger boards, but uncharacteristically I haven’t yet made one; I plan to write a full post on this game at some point (along with some other connect-key-cells games), so I will be sure to make a bigger board when that day comes.

Tamerlane Chess

Tamerlane-start-pos-01

Tamerlane Chess is a historic Chess variant from the 14th century; the game was allegedly invented by the Persian ruler Timur Lenk, but that may well be a myth.  Tamerlane is a large-board variant of Shatranj, the Persian form of Chess and direct ancestor to the Royal Game we know today.  This game takes the core of Shatranj and adds a bunch of unusual elements to the game, giving it a confusing and beguiling personality.

Why it’s great:  Tamerlane’s board immediately stands out — not only is it large and oblong, forming a 10×11 grid, but there are two extra squares sticking off the sides.  These squares are called citadels, and they serve a special purpose: if your King can reach the citadel on your opponent’s side of the board, you can secure a draw.  These little boltholes of safety are just one of the quirks of Tamerlane:

  • Several unusual pieces are added to the base Shatranj army, including two pieces that leap like the Knight but in different patterns (the Camel and the Giraffe)
  • The Pawns — shown above as tiny versions of the other pieces — promote differently depending on what column they start from, and the ‘Pawn of Pawns’ (on A3 and K8) can promote three times to become an extra King
  • The Pawn of Kings promotes to a Prince, which also must be mated to win the game, so each player may have up to three Kings on the board

The result of all this craziness is a remarkably exciting game, with varied tactics thanks to the diverse pieces and unusual endgame strategies resulting from the promotion rules and citadels.  Shatranj pieces are generally shorter-range than modern-day Chess pieces, and Tamerlane extends Shatranj with more leapers rather than long-range sliding pieces, so the feel is very different from Chess.  Tamerlane may be 600 years old, but it feels modern and creative.  I enjoy it a great deal, so I plan to do an article on this game once I finish writing about Courier Chess.

Trike and Tumbleweed

Unlike much of the rest of this list, these two games are extremely new — both Trike (designed by Alek Erickson) and Tumbleweed (designed by Mike Zapawa) were invented in 2020, and in fact are currently slugging it out to take the win in the yearly Best Combinatorial Game competition at BoardGameGeek.  Both are very modern designs — they have extremely minimal rules, and are built to do one thing and do it well.

Why they’re great:  Trike is an intriguing game in which players place pieces in their colour by moving a neutral pawn piece, then placing their stone underneath it.  As the board fills up, the pawn has less freedom of movement, until eventually it can’t go anywhere; at that point, the player with the most stones of their colour adjacent to the neutral pawn wins the game.  Trike is very tactically sharp and full of twists and turns, so despite its simplicity the play is complex and exciting.  This game reminds me somewhat of Tintas, a brilliant game of moving a neutral pawn to claim a majority of pieces of seven colours.  Trike has a quite different feel though and is inherently more flexible and scalable.

Tumbleweed is a game of territory based on a line-of-sight mechanic — on each turn you may place a stack of pieces of your colour in one cell on the board, with the height of that stack determined by the number of your pieces within unobstructed line-of-sight of that cell.  You may capture and remove an enemy stack in that cell if your stack would be larger, or you can reinforce your own stack in the same way.  At the end of the game, the player who holds the majority of the board wins.  Tumbleweed is gaining a lot of attention since its creation, because the simple line-of-sight stack placement idea immediately creates interesting tactical situations and strategic dilemmas.  Apparently the community of players is settling on hexhex-8 boards, but I prefer to play on the original hexhex-11 board.  Playing in real life is a bit challenging, mainly because you need a huge number of counters to potentially stack them six deep on numerous cells, but playing online or via Ai Ai is straightforward and very enjoyable.  My board above plays on the intersections rather than in the cells, which just intuitively makes more sense to me given the line-of-sight mechanic.

Volo

Volo is an innovative game of unification by Dieter Stein.  The game was inspired by the flocking of birds, as illustrated in the famous Boids paper by Craig Reynolds (read more about the game and its influences in this paper).  The Boids simulation was also seriously influential on me when I was young and first discovered the scientific field called Artificial Life, so I feel a certain kinship with this game.  Volo’s rules are fairly simple, but the mechanics are evocative of the theme: the board starts empty, and as you gradually place birds you will need to fly whole flocks of them around the board at once in an attempt to join them together into one giant flock.  Being able to move an entire line of pieces at once is fairly unusual in abstract games, so it feels quite satisfying.  The first player to create one unified flock including all their birds is the winner.

Why it’s great:  Volo is a creative game, and its inspiration comes through beautifully in its clever rules.  You will feel like you’re navigating your flocks through treacherous skies, trying to bring your birds together to safety.  Volo is also a fine example of the unification genre, which is surprisingly small; the most famous examples are probably Lines of Action, which is a brilliant game with an oddball movement mechanic, and Ayu, a compelling game playable on a Go board where every move is an approach move.  The unification genre is small but mighty, and Volo may just be my favourite of the lot; the ability to move lots of pieces in a single turn gives it a sense of freedom and allows for some highly creative moves.

About the boards:  The standard Volo board is a hexhex-7 board with corners and the center point removed.  In the spirit of experimentation I’ve been playing with larger boards, so you can see above I’ve constructed  hexhex-9 and hexhex-11 boards for more epic Volo games.  On all the Volo boards you place your birds on the intersections, rather than within the triangular spaces.

YvY

YvY is another forgotten connect-the-key-cells game from Christian Freeling, developed as a vision of a simplified Superstar, then refined into its final form in collaboration with David J Bush.  In YvY, players take turns placing one stone of their colour onto the oddly-shaped hexagonal grid, and attempt to occupy and join together the green ‘sprouts’ sticking off the side of the board.  At the end of the game, each player scores points equal to the number of sprouts they occupy, minus twice their total number of ‘live’ groups (live groups being those occupying at least one sprout).  So, as with Star and *Star, the scoring system forces you to try to connect your occupied sprouts with as few groups as possible.  Intriguingly, YvY also offers a ‘sudden-death’ victory condition: if either player forms a contiguous loop of stones of any size, they win immediately!

Why it’s great:  I’m a sucker for a connection game with multiple objectives, and YvY fits squarely into that category.  The need to connect groups across the board to score well gives the game a territorial feel, while the loop-formation win condition adds some tactical sharpness on top.  In play the game bears a certain resemblance to Havannah, and the need to score points via multiple connections encourages board-spanning play with great subtlety.  Christian views this game as obsolete, but I see it as another intriguing take on the connect-the-key-cells genre, alongside Star, *Star, Superstar, Starweb and Side Stitch.  For my money this category of games offers a lot of depth and intrigue, so I recommend trying several of them and seeing which one best fits your style of play.

About the boards: As per usual, I made a few different sizes of boards for this game, to allow potential players to choose a game length that suits them.  The YvY board is oddly shaped, with three of the sides being two hexes longer than the other three; as a consequence of this shape and the need to place sprouts evenly around the outside edges, the boards all have even-length sides.  As is typical with games like this, the larger boards produce longer games of greater strategic complexity; the size-12 board above has 330 interior cells and 33 sprouts for a total of 363 cells, almost exactly the same as a Go board’s 361 points.  The size-12 board is thus suited for intense strategic contests; the size-8 board is great for beginners and more casual games, while size-10 offers a nice balance between depth and brevity.  If you’re feeling particularly adventurous, have a go on the size-14 board, with a whopping 468 interior cells and 39 sprouts.

New boards for old favourites

Side Stitch

I’ve talked about Side Stitch before, of course, but in the last few months I’ve gone back and tidied up the boards I made previously, and added two new ones — the hexhex-11 with 15 colour-sides, and the 14×14 Hex board with 13 colour-sides.  Side Stitch is a favourite of mine not just for the actual game, which is great, but also the aesthetic — making boards for this game is really fun.

Why it’s great:  Side Stitch is a member of a class of connection games that I really enjoy — connective scoring games, where different types of connections have different values.  These games spice up the connection-game formula by allowing for a wide variety of winning connections, and the need to stretch across the board to connect key areas and score points gives them a dynamic flavour.  Side Stitch is even more dynamic than most, since players connect colours along the edges of the board which need not match up with the actual board’s sides, so there are a tonne of interesting board setups you can try.  I just wish Side Stitch was playable on more game servers, so that more people would get acquainted with this excellent game.

About the boards:  All of the boards above were based on designs originally uploaded to BoardGameGeek by the inventor of the game, Craig Duncan; I have simply replicated them in Illustrator and made them as clean and sharp as I can.  The ‘standard’ Side Stitch board is the hexhex-8 with 7 colour-sides (top middle in the above array).  The hexhex-7/9-colour board is great for quick games.  My personal favourites are the hexhex-10 with 9 colour-sides and the hexhex-11 with 15 colour-sides; note that I have two variants of the 11/15 board available, one with some repeated colours and another with all unique colours.  To my shame I have not tried the 14×14 Hex board version yet!

Star

Star is a classic game of connecting edge cells by Craige Schensted/Ea Ea, which I’ve covered before on this blog, so I won’t spend too long explaining it.  These boards are slight updates of previous ones that I have made, with slightly cleaned-up cell placement and updated fonts.

Why it’s great:  Star is an unfortunately overlooked game, I think partially because the published version in Games Magazine years ago was on a too-small board that didn’t adequately showcase its marvellous depths, and also because it was followed by *Star, which seemed to overshadow it.  I think Star deserves more recognition than it gets, as it an accessible game only slightly more complex than something like Hex or Y, but the introduction of scoring and a group penalty takes it into a more territorial, strategic realm.  On larger boards like those you see above, Star becomes a deeply challenging contest, and often a game will see much of the board filled with complex, winding connections.  I highly recommend it both on its own merits as a beautiful game, and as a first foray into the connect-the-key-cells genre.

About the boards:  My boards adopt the standard uneven hexagonal grid used by the original game, and simply extend that to larger sizes.  I should note that the designer felt the corner cells, which on these boards would be worth three points due to being adjacent to three exterior edge cells, should be adjusted to only score two points; I don’t have particularly strong feelings about this, but in the future I do intend to make versions of these boards with corners altered in that way.  Of course you can use these boards and simply adjust the scores accordingly when you play, but certainly having the scores clearly visible from the board geometry would be better.  The largest board above, Star-12, contains 363 cells, similar to the Go board’s 361 points.  Given that Star games often use most of the board, Star-12 is probably the largest size most players would be willing to use, and above that size the game is perhaps a bit too much of a marathon.

Poly-Y

Poly-Y is the ancestor to Star and *Star, and marks the first attempt by designer Craig Schensted/Ea Ea to impart a connection game with a bit of territorial flavour.  In Poly-Y, players strive to control more corners of the board than their opponent; in order to claim a corner, a player must form a Y-shaped connection, connecting the two sides adjacent to the corner with another non-adjacent side.

Why it’s great: Poly-Y takes the connection goal of the Game of Y and adds a territorial element, using that connection as a way to claim parts of the board and score points.  The addition of the point-scoring element gives the game an appealing strategic flavour, while adding minimal rules complexity.  The importance of corners in this game means that oddly-shaped boards with larger numbers of corners are particularly well-suited for Poly-Y play, which adds a certain quirky visual appeal.  If you want the depth of something like Star or *Star with simpler score calculations, Poly-Y is a great option.

About the boards: Out of the three boards presented above, only the middle one is for playing stones within the cells; on the other two, you should place your stones on the intersections.  Making these boards was a bit of a challenge due to the odd geometry, but the final result is quite visually pleasing.  All three boards are nine-sided, which seems to be the most-recommended shape by the designer, so they will play similarly; just pick the one that most suits your aesthetics.

Game of Y (Kadon-shaped)

Y-17-Kadon-01

As I mentioned in the Game of Y/Poly-Y/Star/*Star article, the published version of the Game of Y uses a board of 91 points with a distorted triangular shape, designed to balance out the in-game value of the centre, edge and corner points.  However, the board published by Kadon is simply too small, meaning that every opening move by the first player should be swapped.  A better option is to use the same board geometry but substantially larger, and that is what I have attempted with this board.

Why it’s great:  Y is the most elemental connection game, even more fundamental than Hex — in Hex the two players have asymmetric goals, and are attempting to connect different sides of the board, while in Y both players have precisely the same goal.  The need to connect all three sides of the triangular board can produce some interesting tactics, and it has a bit of a different flavour from Hex as a result.  For people new to connection games, or to abstract strategy games in general, Y is right up there with Hex as an instantly accessible gateway to the genre.

About the board:  The board above is 17 points long on each side, meaning that games will be substantially longer and more balanced than on the 91-cell Kadon board.  Besides being visually appealing, this board geometry helps balance the values of board cells.  The downside is that I haven’t yet found a straightforward way to extend this board in Illustrator without reconstructing large portions of it, so for now this is the only large board of this type that I’ve made.

So, that was a whirlwind tour of some of the games I made boards for over the past 12 months or so.  Over the coming months I’ll try to cover a few of these gems in more detail, but at least for now I hope this will give you some ideas if you’re looking to try out a new game.

Next up: more Courier Chess!

Tagged , , , , , , , , , , , , , , , , , , , , , , ,

Courier Chess, Part I: It’s like Chess, but Wider

UPDATE 6 Nov 2021 — Added info and screenshots on playing Courier Chess and Courier-Spiel in Ai Ai.


As some of you may know, I’m a big fan of the large-board variants of Shogi, Japanese Chess.  These enormous games extend Shogi out from its normal 9×9 board with 20 pieces per player, up to Chu Shogi (12×12 with 46 pieces per player) and Dai Shogi (15×15 and 65 pieces per player), then through progressively more enormous boards and armies, all the way out to the ludicrous Taikyoku Shogi (36×36 with 402 pieces per player).  Not all of these games are particularly practical to play, at least not regularly, but the best among them use these large playing surfaces and diverse armies to create gargantuan strategic battles stay thrilling even over the course of hundreds of moves.

Large-Board Chess in History

Of course, Western Chess has a long history of variants.  A number of larger Chess games have been developed over the centuries as well, right from the earliest days of the game.  Shatranj, the ancient Arabic ancestor to Chess, was extended to the 10×10 board back in the 9th century to create Shatranj al-Tamma, or Complete Chess.  Inspired by Shatranj al-Tamma, Turkish Chess fanatics developed a family of enlarged ‘Turkish Great Chess‘ variants, ranging in size from 10×10 boards to 14×14.  Some other variants of Shatranj went off in some remarkably creative directions, such as Tamerlane Chess, where additional citadel squares hang off the 10×11 board and numerous new piece types appear.

At the time these games were invented, the pieces used in Chess were slower than today, with only the Rooks able to move unlimited distances.  That meant that on these larger boards the play tended to be rather slow, and while some may have appreciated the deliberate, strategic flavour this provides, some of these large-board games felt fairly ponderous.  Tamerlane was an exception, however; the piece density on the board was high and the board was shorter vertically as well, meaning that the opposing armies took less time to get into conflict.  The wide variety of pieces in Tamerlane also diversified play and provided some new tactical wrinkles compared to the smaller game.  Atranj and Indian Great Chess are also quite playable, largely because they include some powerful compound pieces (Bishop + Knight, Rook + Knight, Knight + Queen) that can range across the board very quickly and considerably speed up play.

Unfortunately, these more successful large variants still never quite established a significant foothold in the Chess-playing world, and most of these games have since disappeared and are now merely historical curiosities.  Tamerlane is still known to a degree, due to its unique character, but the others are long gone.  Generally speaking, historical large Chess variants came and went fairly quickly; clearly many players desired a larger game given the sheer number of attempts, but few games managed to maintain a following for very long.  Given that even the 10×10 variants had trouble finding players, none of the historical large Chess games were nearly as adventurous as the large Shogis, in terms of size, piece count or rules variation.  I suspect if these enlarged games had taken hold, we may well have seen Chess-based equivalents of the gargantuan Shogis.

Courier Chess

However, there is one large-board Chess variant that did have longevity — Courier Chess.   Courier Chess is believed to have originated around the 12th century, with its first known appearance being a tale written by Wirnt von Gravenburg in 1204 called the Wigalois.  Courier Chess is mentioned regularly in subsequent centuries, mostly in medieval German poetry, but its most famous appearance is in the painting The Chess Players by the Dutch master Lucas van Leyden in 1510:

Lucas_van_Leyden_-_The_Game_of_Chess_-_WGA12919

The gentleman on the left looks a bit chagrined, and he has every right to be — analysing the board position shows that the woman on the right will achieve checkmate in three moves!

Courier Chess -- painting game

As we can see in the painting, Courier Chess is immediately remarkable for its elongated board; the playing area is 12×8 (96 squares).  In order to fill in the 12 ranks in each player’s camp, some additional pieces are added to the lineup as well.  The Courier starting position looks like this:

Courier-Chess-start-pos-alt-01

The starting array for medieval Courier Chess.

Moving along the first rank from left to right, this is the piece lineup: Rook; Knight; Elephant; Courier (Bishop); Sage; King; Queen (Ferz); Fool; then we have the Courier, Elephant, Knight and Rook again.  In keeping with Chess convention, the second rank is filled with Pawns to protect our valuable pieces.

While there are clearly some pieces here that aren’t in the standard medieval Chess lineup, what is most remarkable about the Courier Chess piece assortment is that this game marks the first recorded appearance of the modern Bishop.  This piece actually gives the game its name — what we would call the Bishop is called the Courier here.  At the time, most Chess players would have been playing some medieval variant of Shatranj where Rooks were the only long-range pieces, so having these Couriers slicing diagonally all over this extended board must have been a thrilling change from the standard game.  Confusingly, what I have portrayed here as Elephants were actually called Bishops in the original Courier Chess, but given their moves match the Elephant of Shatranj, I am using that piece instead to prevent any mix-ups with the Courier.

In Courier Chess the most powerful pieces on the board are the long-range Rooks and Bishops, followed by the always-tricky Knight.  From there we have an array of short-range pieces of varying abilities.  This diagram shows the moves of every available piece type — yellow circles indicate a stepping move; red circles indicate spaces where a piece can only capture; solid arrows indicate a sliding move over any number of squares in that direction; and dashed arrows represent leaps directly to the square indicated:

Courier-Chess-moves-01

The pieces in Courier Chess generally follow the conventions of medieval Chess in place at the time:

  • The Pawn moves one square forward only, or may capture an enemy piece diagonally forward to the left or right.  Unlike modern Chess, Pawns only ever move one square — there is no initial double-move available, and therefore there is also no en passant capture rule.  When Pawns reach the opponent’s back rank, they promote to Queen (Ferz).
  • The Sage moves one step to any adjacent square, just like the King, but it’s just a normal piece — no worries about check or checkmate.
  • The Fool moves one step horizontally or vertically only; this move derives from the Shatranj piece called a wazir.
  • The Queen is far, far weaker than the ‘Mad Queen’ we are accustomed to in modern Chess — it moves only one square diagonally.  This move derives from a Shatranj piece called the ferz.
  • The Elephant (which again would have been called the Bishop in the original game) moves as an alfil in Shatranj, a diagonal leap of two squares, jumping over any pieces on the square in between.  The Elephant is thus colourbound — it will only ever be able to visit squares of the same colour it starts on.  In fact, the Elephants may only visit a quarter of the squares on the board!
  • The Knight moves just like in modern Chess — a leap of one square horizontally or vertically, followed by one square diagonally, jumping over any intervening pieces.
  • The Rook moves as in modern Chess as well, sliding any number of squares vertically or horizontally.  Note that there is no castling in Courier Chess.
  • The Courier moves as the modern Bishop, sliding any number of squares diagonally.  Like the Elephant, it is also colourbound, forever stuck on either the light squares or dark squares.

As in modern Chess, the goal is to checkmate the opposing King.  However, we do not know the precise rule for stalemate, where the King is not in check but has no legal moves; given the conventions of Shatranj and medieval Chess we might expect that stalemate in Courier is a loss for the opposing player, rather than a draw as in modern Chess.

Intriguingly, before starting the game both players would traditionally mvoe the A, G and L Pawns forward two squares, then move the Queen up just behind her Pawn.  These special Pawn moves were called ‘joy leaps’ and were not available during the rest of the game; these may well be the first known examples of a double Pawn move in Chess.  Presumably these initial moves were done so as to open up the position from the start and encourage the players to develop their slower-moving pieces.  So, before starting the game proper, the Courier board would look like this:

Courier-Chess-start-pos-medieval-01

Remarkably for a medieval Chess variant on a large board with many slower pieces, in actual play Courier is quite a lively game.  The pre-advanced Pawns mean the Rooks can be developed quickly, despite the lack of castling, and the forward Queen allows some cover for further Pawn advances to attack the centre.  The Knights and Elephants can leap into the action right away, while the Sage and Fool mostly hang back to protect the King from all these spiky Couriers swirling around the board.  A typical game of Courier will generally take longer than a game of Chess, but not as long as you might think; most of my games against the computer last about 60-70 moves per player, as opposed to around 40 for modern Chess.  However, two strong players of near-equal ability could easily end up locking horns for far longer.

Thanks to Courier’s interesting board shape, varied yet easy-to-remember set of pieces, and enjoyable play, the game was able to last for about 600 years in the parts of Germany where it was most popular.  The game did start to die off in the 19th century, however.  At that time, standard Chess had matured essentially into the form we know today, and the fast-paced action and compact game length of the 8×8 Royal Game certainly worked to its advantage.

Courier-Spiel

Despite the increasing dominance of standard Chess, some dedicated fans did want Courier to make a comeback.  In 1821, H.G. Albers of Lüneburg proposed an updated version of Courier Chess, which he dubbed Courier-Spiel (The Courier Game).  Albers cleverly updated the pieces and rules of the game to increase the pace and tactical richness, making it more competitive with standard Chess.

Courier-Spiel updates the classic Courier experience with some more modern rules and more powerful pieces:

Courier-Spiel-start-pos-01

Starting again from the bottom-left corner and moving to the right, this is our new starting lineup: Rook; Knight; Elephant; Bishop; Councillor; King; Queen; Sage; then completing the set with Bishop, Elephant, Knight and Rook once again.  Courier-Spiel thus has some new pieces and some changes to the old ones:

Courier-Spiel-moves-01

The moves of the pieces in Courier-Spiel.

  • Pawns move as in modern Chess — one square forward and capturing on the forward diagonal squares, but they may also take an initial two-step move from their starting square only.  En passant capture is now possible.  Pawns that reach the opponent’s back rank promote in an unusual way — they must sit on the back rank for another two moves, and then finally promote on the third move to any piece from the Pawn’s army that has been previously captured.  If no pieces have been captured from their army yet, then promotion is impossible, and the Pawn must sit on the back rank until a captured piece is available.  We are not entirely sure whether these Pawns are vulnerable while waiting for promotion, but modern players seem to have settled on making them immune to capture until promotion occurs.
  • The Sage moves the same as in Courier Chess — one step to any adjacent square.  The Sage is now next to the Queen rather than the King.
  • The Fool has had a significant upgrade, and now moves like a combination of the King and Knight.  This powerful new piece sits next to the King where the Sage used to be.
  • The Queen is no longer a ferz, but instead functions exactly like a modern powerhouse Chess Queen — moving any number of squares vertically, horizontally or diagonally.
  • The Elephant is stronger too, and now moves as a combination of alfil and ferz — it may move one step diagonally, or leap two squares diagonally.  They are still colourbound like the Elephants in Courier.
  • The King, Knights and Rooks move the same as in Courier Chess.
  • Rules-wise, of course the goal of the game as usual is to checkmate the enemy King.  I have not seen a definitive statement of the stalemate rule, but as far as I am aware modern players have stalemate as a draw in this game.  Courier-Spiel does not use the initial ‘joy leaps’ of the Pawns and Queen that were customary in Courier Chess.

Along with the modernised Pawns, players may now castle in Courier-Spiel.  As in modern Chess, in order to castle the path between the King and the Rook must be clear of any other pieces, and neither piece must have already moved.   Castling may not be done if either the King or the Rook is under attack by an opposing piece, or if any of the intervening squares are under attack.  To castle, the King will move to the C file (if castling with the A-file Rook) or the J file (if castling with the L-file Rook), then the Rook leaps over to the space adjacent to the King on the opposite side:

Courier-Spiel-castling-01

Castling example.

Taking all these adjustments together, Albers did a good job updating Courier for a more modern era.  The increased power of the Elephants, Sage, Fool and particularly the Queen significantly increase the pace of the game.  Tactical exchanges are more frequent than in the original as well.  The addition of castling prevents too many early wins by allowing the King a quick path to safety.  The removal of the initial ‘joy leaps’ of the A, G and L Pawns also allows the King further protection, and avoids a prematurely-developed Queen.  Cleverly, the newfound single-square diagonal move of the Elephant also serves to protect the B and K Pawns, which previously were unprotected and thus vulnerable to early attack in Courier.  Finally, the increased powers of the Sage and Fool provide some strong checkmating powers in the late game, and are also strong defensively, preventing the deadly Queen from completely dominating play.

The glaring flaw in Courier-Spiel is of course the promotion rule, which adds some serious rules complications while also significantly slowing down the process of Pawn promotion.  This leads to some weird pacing in the endgame, where the typical race to promote Pawns becomes a strange, cagey stand-off instead.

However, there is historical precedent here that likely encouraged Albers to adopt this strange promotion method.  In the version of Courier played in Ströbeck, Germany’s famous ‘Chess Village’, the Pawns must go through an odd ritual in order to promote.  Upon reaching the opponent’s back rank, the Pawn would have to make a series of three double-step jumps backward, each one taken on a separate turn (the Pawn’s controlling player did not have to do these jumps immediately or consecutively, but could do them whenever the board situation was convenient).  Pawns making these leaps cannot capture this way, but they can be captured.  After the third backward leap, the Pawn would have returned to its starting square and could then promote immediately into another piece (any piece, not just the Queen).

Given this odd promotion rule was in use in the past, perhaps Albers adopted a version of it to avoid altering the feel of the Courier Chess endgame beyond what Courier fans may have been willing to tolerate?  In any case, I suspect most modern players would prefer to replace these three-turn promotion rules with the simpler method of the original Courier Chess, and just allow Pawns to promote immediately upon reaching the enemy’s back rank.

Playing Courier Chess and Courier-Spiel

While neither of these variants are played widely today, thanks to the internet and powerful Chess-playing engines we need not be short of opponents.  Perhaps the most promising way to find human opponents would be to sign up for an account at the Chess Variant Pages, and then use their Game Courier (how appropriate) Play-By-Email system to invite someone to a game.  Courier Chess has a setup available on Game Courier, and a fair few games have been played, so probably someone will take you up on the offer.  Courier-Spiel has some fans as well.

Since I wrote the first version of this article, I began working with Stephen Tavener on his wonderful Ai Ai general game-playing software.  I work primarily on the Chess/Shogi side of things, and have added many dozens of variants in recent months.  We of course added implementations of Courier Chess and Courier-Spiel, so you may play both these games against AI or human opposition:

As you can see, the piece graphics are slightly different — the Queen and Fool have been replaced with the generic Ferz and Wazir, respectively, but the piece images are schematic and easy to remember.  Subsequently I have added a number of Courier-inspired modern variants to Ai Ai; more on these in a future article!

Alternatively, if you want to play against a tougher AI, you can download WinBoard and play Courier Chess against the FairyMax computer engine.  This is quite an enjoyable way to get to know the game, and FairyMax is a decent opponent.  WinBoard does not appear to have a Courier-Spiel setup available by default, but it is possible to define your own variants.  Winboard supports variants all the way up to Tai Shogi and its 25×25 boards, so feel free to experiment with your own wild expansions of Courier Chess.

If you are looking for a real challenge, download the Fairy-Stockfish engine, which also supports Courier (and you can define Courier-Spiel very easily, check the file ‘variants.ini’ under the ‘src’ folder in the GitHub repository at the link).  Fairy-Stockfish is based on Stockfish, one of the strongest Chess engines on the planet, so it is an absolutely brutal opponent!  Conveniently, Fairy-Stockfish also supports a tonne of other good Chess variants, although due to engine limitations it cannot play any game with a board larger than 12×10 (although this may change further down the line).

For playing Courier Chess on the go, you can grab the Chess Remix app for your Android phone or tablet.  This great little app contains over 100 Chess variants, including many of the major regional and historical ones.  Alongside Courier, Tamerlane Chess, Chu Shog and Dai Shogi are in there, too.  The piece graphics are little pixel-art representations of the moves of each piece, which is probably helpful for some but I personally am not a huge fan of that approach.  As a Shogi purist who loves Japanese calligraphy, playing the Shogi family without the kanji characters feels particularly wrong and gross, but I do enjoy having the ability to play all of these games on the go.  Chess Remix, true to its name, also lets you create your own variants or modify the included ones in all sorts of different ways, so it is a must-have if you enjoy mucking around with Chess.

Screenshot_20210207-113848

Playing Courier Chess against the AI in Chess Remix.

Over-the-board Courier play is a bit more challenging to arrange due to the lack of any 12×8 boards on the market, although some chessboard specialists may be able to make one to order.   There are some occasional reproductions available based on the Courier Chess set depicted in van Leyden’s painting, but these are handmade and the pieces are brass, so they are quite expensive!  A better option may be to buy a couple of inexpensive vinyl or neoprene chess boards, slice one in half and attach it to the other.  For pieces, a couple of regular Chess sets plus some variant pieces would be sufficient.

However, if you are willing to be a bit patient, the Chess Club of Ströbeck is planning to produce a run of Courier Chess boards and pieces sometime in 2021.  The boards will be handmade, and without a doubt these sets will be a fine collector’s item as well as being great for play.

Next moves

The second part of this series will examine some modern extensions of the Courier Chess concept, all of which are available to play in Ai Ai.  I had previously planned to present some analysed games of Courier and Courier-Spiel, but due to a backup mishap I lost the substantial work I’d already done on these.  At some point I’ll do that work again, but for my own sanity I need some time before I dive back into that analysis a second time!

In the meantime, please give Courier Chess and Courier-Spiel a try — in my opinion they are easily among the most interesting historical Chess variants, offering a unique feel and entertaining strategic dilemmas.  Courier’s distinct medieval feel and pacing is surprisingly absorbing, and while the modernised takes on it are probably more polished games, I still find myself returning more often to the 800-year-old original.  Certainly Courier will not appeal to everyone, but I feel every Chess fanatic owes it to themselves to experience this unique offshoot of the medieval game.

Tagged , , , , , ,

Permute Update: Now available in Ai Ai!

Since my first post on my game Permute, there’s been a very exciting development.  Thanks to the efforts of Stephen Tavener — thank you, Stephen! — Permute is now playable in his wonderful abstract-gaming mega-package Ai Ai!

Ai Ai is a fantastic, and free, collection of many dozens of excellent abstract games, all playable online or against various strong AI opponents.  I’ve talked about it in my Connection Games series a few times, but I can’t emphasise enough how essential it is if you have any interest in this category of games at all.  Ai Ai includes everything from classics like Go, Chess and Draughts, to modern legends like Amazons, Havannah, Symple, and Catchup.

Ai Ai is particularly great if you like to experiment with games.  The platform is incredibly robust, and with some simple modifications to the MGL files that define the parameters of each included game, you can try out ludicrous variants of your favourite games and Ai Ai takes it all in stride.  As you can see in my post on Symple, you can play games on ludicrously large boards if you like, or modify starting positions, and so on.

Even better, Ai Ai is festooned with super-interesting analysis functions that you can use to investigate all the included games.  You can generate opening books and endgame puzzles, produce detailed statistics on game complexity, create detailed reports on branching factors throughout a typical game, and much, much more.  I used Ai Ai to generate a full report on Permute, which Stephen has uploaded to the Ai Ai website here.

A big part of the reason I was so excited to have Permute in Ai Ai is because of these analysis functions.  While my initial testing of Permute showed that the game is fun and allows interesting strategies to develop, there were a couple of lingering questions:

  1. Draws are theoretically possible on the recommended even-length board sizes (12×12 and 16×16).  How likely are draws in typical play?  Is it possible that high-level Permute play could become infested with draws?
  2. Permute does not use a balancing protocol like the swap rule we use in many other games like Hex or Havannah.  Is the game balanced enough as-is, or does the first or second player have an advantage?  Should I add a balancing protocol?
  3. Is it possible that symmetric playing strategies might break the game?

The Ai Ai report helped alleviate my concerns on these three aspects.  While of course these results shouldn’t be taken as gospel, I’m comforted by the fact that in 88,891 games played by the AI, not a single one was drawn!  On top of that, the winning chances for each side across all those games was 49.99% for Orange and 50.01% for Yellow — nearly perfectly balanced.  Finally, Ai Ai attempted to win with various mirroring strategies, but lost every game in those instances.  Permute might still prove to have issues on these fronts when attacked with superhuman neural-net AI, or super-strong humans, but at least I can rest assured that the game doesn’t break too easily.

Playing Permute in Ai Ai

When you load up Ai Ai, you can find Permute in the ‘Combinatorial 2020’ category, which you can find in a folder if you go to the File menu and click ‘Choose Game…’.  Once it loads up you’ll be presented with a dialog box to choose a few options:

  • Resign when hopeless?  This means that the AI will determine when it has no chance to win, and will resign at that point rather than playing on.  This is a very convenient feature, though for new players it might be worth playing a few games without it on, so that you see games all the way through to the finish.
  • Alternate setup?  This allows you to choose the alternate starting position with a 2×1 chequerboard pattern rather than the standard chequerboard.
  • Board size:  Here you can choose the size of the board, ranging from 8×8 to 24×24.  The default is 12×12, which is a good size to start playing on.  When you want a deeper, longer game, I’d go for 16×16.

After choosing your options, you’ll see something like this:

permute-screenshot1

Here I’ve loaded up a 16×16 game with the standard chequerboard setup.  If this is your first time starting Ai Ai, you may find the default will be for you, the human player, to play as Orange and the AI to play as Yellow, but you can change this to Human vs Human or AI vs Human or AI vs AI using the AI menu.

Stephen has implemented a very handy system for making moves in Ai Ai that uses mouse-dragging to determine which direction your twists will go.  To make a clockwise twist, locate the 2×2 face you want to twist, and click and drag from the top-left of that face to the bottom-right; to make a counterclockwise twist, drag from the bottom-right to the top-left.  After that, just click on one of your just-twisted pieces to bandage it, and there you go — your first Permute move!  If at any time you need a reminder of how the moves work, just click the Rules tab on the right side of your Ai Ai window.

Once you get used to the input method you’ll find Ai Ai is an incredibly convenient and flexible way to play the game.  By changing the AI thinking time in the AI menu, you can tailor your opponent to your skill level.  Beware, Ai Ai can be very strong if you give it lots of time!  To give you an idea of what Ai Ai plays like on higher thinking times, here’s a sample AI vs AI game played with ten seconds of thinking time per move:

This game was quite a good one, a close back-and-forth battle.  As is typical from the AI, the game was fought initially in the corners, and once territories took shape there, both sides extended into the centre to battle for dominance there.  This seems a good way to open a game of Permute in general — territory is easier to secure along the corners and edges with fewer bandaged pieces required, and once some gains have been made in those areas the protected groups can be used as a base to stake a claim on the centre of the board.

Just for kicks, here’s another sample game played on a 24×24 board, this time with 5 seconds of thinking time per move:

As readers of this blog will know, I generally love playing abstract games on larger boards anyway, but I particularly love playing Permute on big boards.  There’s something extremely satisfying about seeing these huge chequerboard patterns gradually coalescing into interestingly-shaped blocks of colour.  On the larger boards there are tantalising hints of fascinating strategies lurking in the distance; as you’ll see in the game above, the AI battled itself across the whole board, and intriguing local battles eventually linked together into larger contests as the game evolved.  Playing on a physical board this size might be a bit challenging, not just in terms of space but also in terms of keeping track of group sizes, but since Ai Ai takes care of both those problems, I highly recommend trying some bigger boards when you have time!  In truth 16×16 will stay my recommendation for tournament play, but I can say for sure that 20×20 and 24×24 have real potential, and the resulting games still take less turns than a game of 19×19 Go to play out, given that each move affects a decent-sized chunk of the board.

What’s next?

I hope the info above might convince you to give Permute a try using Ai Ai.  This program is essential for any fan of strategic games regardless, and the implementation of Permute is just perfect.  The AI plays a tough game, and you can easily experiment with larger board sizes and the alternate start position.  As you can probably tell, I’m hugely excited to have Permute available on Ai Ai, and I’m enormously thankful to Stephen Tavener for taking the time to implement it!

Hopefully this won’t be the end of exciting news for Permute.  I’ve been speaking with some very talented designers about the game, and earlier today I received a beautiful concept for a purpose-built physical game set for Permute that just blew me away.  Abstract games are a bit of a risk for publishers compared to more accessible, flashier board games with fancy bits, but nonetheless I do intend to keep investigating if this game could be realisable physically.  In the worst-case scenario, perhaps we could offer 3D-printed game sets for fans to purchase, if publishers don’t want to take a chance on it.

In any case, I hope you’ll download Ai Ai and give Permute a shot!  Let me know how you get on with it.  Keep an eye on these pages for more updates on the game, and hopefully some strategic tips and tricks as I gradually become less awful at it 🙂

Tagged , , , , ,

Permute: A Game About Twisting Things

As some of you are aware, one of my hobbies besides games is solving twisty puzzles, also known as 3D rotational puzzles.  The most famous example is the legendary 3x3x3 Rubik’s Cube, but since that set the world alight some decades ago a fascinating community of twisty-puzzle designers has emerged, producing some truly outrageous puzzles.  Here’s a few examples from my collection: 

So, as challenging as the Rubik’s Cube is, these days you can get puzzles that quite simply put it to shame.  I love the challenges presented by these amazing puzzles, and in recent months I’ve been trying to develop a way to bring the joy of twisty-puzzling into the world of abstract strategy gaming.

A new core behaviour: the twist

The key properties of twisty puzzles that makes them so challenging is the way in which the twistable faces of the puzzle interact with one another.  Any time you twist a face on the Rubik’s Cube, or any of the monstrosities above, you are forced to disrupt some of the work you’ve already done.  This creates a feeling of tension and danger when you’re first learning to solve a new puzzle; you’re acutely aware that at any moment, a wrong move or two could re-scramble the puzzle and essentially send you back to the beginning of the solve.

I wanted to capture this feel in the form of a two-player abstract game, so I began to cast about for examples of games that used twisting mechanics to shuffle pieces around.  Probably the most famous example in abstract games is Pentago:

Pentago Game from Mindtwister USA, Black-Natural/Solid Birch: Amazon.co.uk:  Toys & Games

In Pentago, players place marbles on the board and rotate the clever 3×3 sub-boards in an attempt to build a line of five of their pieces before the opponent.  The board rotation does create an enjoyable feeling of chaos in the game, but I had to immediately dismiss this idea for my game.  In a Pentago-type game with rotatable sub-boards, the sub-boards don’t actually disrupt one another; the relationships between stones can shift as they rotate around, but the sub-boards can’t actually scramble each other, as the faces do on a Rubik’s Cube.

I soon realised that the best way to replicate the behaviour I wanted would be to allow the players themselves to define the axes of rotation.  This wouldn’t really be possible with a physical board, though — how could you build a board where any sub-board of a certain size on it could twist?  

Instead, players would select an area on the board — a 2×2 or 3×3 subsection — and rotate the pieces within it, as if the board section below them had rotated like the face of a Rubik’s Cube.  This would capture exactly what I wanted: rotations could overlap with one another, allowing pieces to get twisted around and then re-twisted and scrambled up in other newly-created ‘faces’!

Then I embarked on a series of experiments to work out how best to implement these face-twists.  My first impulse was to allow players to rotate 3×3 sections of pieces, since the 3×3 Rubik’s Cube is so iconic.  However, I soon found that, while it was definitely fun, for a serious game 3×3 twists were simply too confusing.  The board state changed so much on each turn that trying to build strategic plans felt a bit fruitless.

I finally decided on 2×2 faces as the sweet spot — four pieces were still moving every turn, creating interesting situations on the board, but there wasn’t so much disruption that calculating future moves became impossible.  The core twisting behaviour of Permute was born:

Permute-twist-demo

Here Yellow selects a 2×2 ‘face’ of pieces and twists them 90 degrees clockwise.  At the start of the move, neither player had orthogonally-connected groups on the board; at the end of the twist, both players have two groups of three.

This behaviour would allow for the possibility of disrupting groups with further twists, which was another key concept of the game for me:

Permute-twist-demo response-01

After the move above, Orange strikes back by twisting a face just to the south of Yellow’s last move.  By twisting that face clockwise, Orange wrecks Yellow’s bottom-right group and boosts his own upper-right group from three connected pieces to six!

From here the overall shape of the game fell into place in my head almost automatically:

  • I wanted the players to focus on permuting pieces around the board, without additives like placing additional pieces or removing them through capture.  That meant the board should start already full of pieces.
  • The most interesting task to do with 2×2 twists would be to connect groups, and this would also mirror the act of ‘solving’ coloured pieces on a Rubik’s Cube.  I could keep the game tactically spicy by restricting connectivity to only horizontal or vertical; this would ensure that players could slice groups in two with twists that changed connectivity to diagonal only.
  • If the goal of the game is to build the largest orthogonally-connected group of pieces, then the fairest start position would be one where not a single piece of either side is connected orthogonally — a chequerboard pattern.
  • To ensure that players had to keep the whole board in mind and not just fight over the biggest chunk of pieces, the Catchup scoring mechanism — where if the largest groups are tied, then the player with the biggest second-largest group would win; and if those are tied, then check the third-largest, etc. — would be perfect.  That would ensure players would also need to build and preserve secondary groups, in case scoring went to the wire, and would prevent the game descending into a non-stop back-and-forth slap-fight over the largest group without opportunities to play distant strategic moves.

The game already felt nearly done!  I tested out the chequerboard starting position and twisting mechanics on my Go board with some colourful plastic pieces, and I found it was easy enough to play even with physical components.  Everything felt right so far, but I still had a problem:  how to get players to stop twisting?

Bandaging

A clear issue with the game at this point was a lack of termination.  Players could endlessly twist pieces back out of position, preventing their opponents from making any serious headway.  I needed a way for moves to have some finality, and create permanent changes in board state.  That’s when I decided to take a break and play some Slyde:

slyde16-10s-1

In Slyde, players take it in turns to swap one of their pieces with a horizontally or vertically adjacent neighbour of their opponent’s colour.  After the swap, the active player’s piece becomes pinned in place and can’t move for the rest of the game (and the opponent can’t swap with it). 

This was exactly the kind of thing I need for Permute!  Since a twist moves four pieces, and up to three of them could be of the active player’s colour (twisting four would be meaningless so I excluded that as a possibility), then a player’s move could consist of two parts: a twist in either direction, followed by fixing one of their pieces in place permanently.

That would accomplish what I needed — each move would have some finality, but since only one piece would be fixed in place, groups would still be in constant danger of disruption without further moves to shore them up.  Giving players a choice of which pieces to fix in place added an additional strategic element to the game, enabling players to try to optimise their twist/fix combo to achieve the best result in terms of securing territory and/or denying territory to their opponent.

With this final element now in place, I had a complete game — the initial position, goal, end condition and moves were all set.  I decided to call the piece-fixing ‘bandaging’, a term derived from twisty puzzles.  Bandaged puzzles have certain pieces glued together so that in some positions certain moves would be blocked; the term also refers to states in some puzzles where twists in certain directions are blocked.  The term comes from the fact that bandaged puzzles were made in the early days by using Band-Aids to stick pieces together on the Rubik’s Cube.

Playtesting

Now that the rules were set, I started playtesting the game, first with trial matches against myself.  The game seemed roughly balanced in my tests on 9×9, 10×10 and 12×12 board setups.  The core twist/bandage dynamic was enjoyable and gave each player’s turn a couple of interesting decisions to make, and each move felt like a tradeoff between securing territory and sacrificing future mobility, which was just the kind of feel I wanted.

The final test was a playtest match against Phil, which we did via a convoluted setup involving sharing my Adobe Illustrator screen over Google Meets.  Phil is quite good at most games he tries, so I felt confident he’d be able to tell if the game was obviously broken pretty quickly.  We had an enjoyable match, and true to form, Phil took a convincing win:

Phil told me that while it took a bit to get used to the twisting aspect, he could see that there was room for interesting strategies to develop, and he felt engaged by the action throughout the game.  At that point I felt it was an appropriate time to share the game with the wider world and get some more feedback, so I typed up the final rules and put together a thread on the BoardGameGeek Abstract Strategy forum.

The Rules

Here are the final rules, as presented on BoardGameGeek (well, tided up a bit):

The basics: Permute is a game about twisting things, inspired by twisty puzzles like the Rubik’s Cube. The name comes from one of the two main things we can do with pieces in a twisty puzzle: permute them (shuffle their positions); or orient them (change their facing). In this game players take it in turns to rotate 2×2 sets of pieces (‘faces’) on the board, in an attempt to bring pieces of their colour together in larger groups. Once a face has been twisted, part of it is locked in place (‘bandaged’) and can’t be twisted again. When no more twists are possible, the game is over and the players’ largest groups of pieces are scored. To win the game, you must permute your pieces so that they form the largest connected group, and deny your opponent the chance to do the same!

The rules: Play proceeds on a square board with a 9×9 grid (or larger). At the start of the game, all squares are filled with alternating Yellow and Orange stones in a chequerboard pattern.

Definitions:

Face: a 2×2 subset of the board surface. A face may not extend off the board.

Bandaged Stone: a stone with a token, sticker, or other marker on it that indicates it may not be twisted again.

Bandaged Face: a face containing one or more bandaged stones. A bandaged face cannot be twisted.

Twist: a move in which all the pieces in a face are translated around that face simultaneously 90 degrees in either a clockwise or counterclockwise direction, as if rotating the face of a 2×2 Rubik’s Cube.

Group: a group is a set of same-coloured stones connected orthogonally. The value of a group is the number of same-coloured stones it contains.

Orange plays first. The swap rule can be used – after Orange’s first move, Yellow may choose either to play their first move or change their colour to Orange.

Players then take it in turns to twist one non-bandaged 2×2 face containing at least one of their colour stones 90 degrees clockwise or anticlockwise. Once a face has been twisted, the player who twisted it must select one of their stones in that face and place a token on it, thereby bandaging it.  Faces containing a bandaged stone cannot be twisted.  Faces consisting entirely of one colour cannot be twisted either, so this is not a way to pass a turn (but mono-colour faces can be disrupted by twists of neighbouring faces, of course).

The game ends when no more twists can be made. At this point scores are compared. The player with the highest-valued group wins; if both players’ largest groups are equal in size, then compare the second-largest, then the third-largest, and so on until a winner is determined.  If the board is even-sided and the scores are somehow equal all the way down, then the game is a draw, but this should be very unlikely (and outright impossible on odd-length boards).

Translation for non-gamers

That looks like a lot of rules, but really it’s a pretty simple game!  There are two players, Orange and Yellow; Orange plays first.  Each turn, the active player must select a 2×2 sub-section of the board (a ‘face’) and rotate the pieces in it 90 degrees clockwise or counterclockwise, just as if they were rotating the face of a 2×2 Rubik’s Cube.  Once the twist is done, they must choose one piece of their colour in that face and bandage it; once a piece is bandaged, it can’t ever be twisted again.  

As the players make more and more twists and bandaging moves, gradually the board will get more and more constricted.  Since faces with bandaged pieces in them can’t be twisted, moves will be blocked and players will start to have secure territories built up.  Once no more moves are possible at all, players count up their largest groups of pieces of their colour; a group is a set of pieces that are connected horizontally or vertically, diagonal connections don’t count!  See the pictures from the game between Phil and myself for a scoring example.

The player who built up the largest group of their colour wins the game.  If both players’ largest groups are the same size, then compare the second-largest groups of each player, and the largest of those two groups wins.  If those are still tied, then check the third-largest, and so on.  

So, winning a game of Permute means you have to bring your pieces together into connected groups, but because twists can disrupt so much of the board, you have to work hard to protect them!  That means bandaging pieces strategically, to hopefully prevent your opponent from tearing apart everything you’ve worked so hard to build.  Once you play for a bit, you’ll start to see ways to build your groups while simultaneously blocking or disrupting your opponent, and that’s when you’ll start to really enjoy what Permute has to offer.

Alternate starting positions

The default chequerboard starting position works well, which is why I chose that as the ‘official’ starting position in the rules.  However, during testing, Phil had suggested the possibility of an alternate starting position that might be easier on the eyes.  We worked out that a chequerboard pattern of 2×1 blocks could work well, and had another advantage in that early-game twists would immediately create some bigger connections, which could be helpful for new players who may have more trouble seeing groups right away:

In the discussion on BGG, Steven Metzger pointed out that playing on a 13×13 board would forbid the possibility of draws, and would also mitigate a possible first-mover advantage by giving the second player a stone advantage:

F2L-13x13 -- NEW start position --Orange-Yellow-01

Ultimately I’m not sure that draws will be much of a problem anyway, as maintaining precise parity across every group down the size order would be pretty unlikely, but it’s good to have the option.  Plus in a matchup between two players of uneven strength, giving the weaker player the side with extra stones on the board in this setup could help them be competitive.

However, it’s not immediately clear how to replicate the alternative 2×1-chequered start position on an odd-length board; Phil had some ideas about this which could work, but the setup would be more awkward on a physical board.  We’ll keep trying though, eventually we’ll find a good alternative.

Permute on MindSports

I was generally pleased by the reaction on the BGG forums; most posters seem interested in the game, and had some good suggestions about the visuals.

Most exciting for me was that Christian Freeling, a designer I’ve spoken about quite a bit in these pages, was immediately positive about the game.  This meant a lot to me, not just because I’m a fan of several of his games, but also because he’s got a very strong intuitive sense about whether a game will work or not; for him to say that he felt “it is immediately obvious that it works (without endless modifications)” gave me a big boost in confidence.  

Christian is also the proprietor of MindSports, a website that hosts all of his games for online and AI play, as well as some games from outside contributors.  Lucky for me, Christian and Ed van Zon decided to implement Permute on MindSports, so now anyone can play Permute against the AI or against other people (via the MindSports Players Section)!

This was tremendously exciting for me — not only is Permute now playable easily in a digital format, but it’s sat in the MindSports website right below Catchup and Slyde!  As I described above, these two games gave me inspiration I needed to get Permute to its final form, and both are really excellent games, so I feel privileged to be sharing a page with them.

I’ve spent the weekend making some YouTube videos about Permute and writing this post, so I haven’t yet dived into online play, but I did have a couple of matches against the AI.  The AI isn’t super strong but it’s still a fun time and a great way to learn the game:

Now that my first promotional push for the game is completed, I’m happy to accept challenges for games on MindSports, so please let me know if you fancy a game 🙂

Where next?

I’m really happy with how Permute turned out, and as people are playing it here and there I’ve had some great feedback on it.  That being the case I’m not planning to make any further changes to it, beyond perhaps adjusting the starting position if computer analysis finds a strong advantage for either player or something.

However, the core twisting mechanism does have lots of potential for future development.  I have two new twisty experiments I’m working on right now: a four-colour twisty game on a hexagonal grid; and a square-grid game where players only twist, and no bandaging happens.  The latter is a difficult design challenge, so if you have thoughts about it feel free to air them in the BGG discussion thread on the topic!

Twisty experiment -- game 1-01

The initial test of the idea in that thread (shown above) has some potential, but definitely needs some work.  In this game, players only twist 2×2 faces, and pieces become fixed in place (‘solved’) when they join a group of pieces connected to three or more neutral edge pieces.  There are some other ideas in the thread that I think are worth investigating too, and ultimately I think some synthesis of these concepts will produce a good game.  However I’m going to let all this simmer in the back of my head for awhile, and keep most of my attention on enjoying Permute for now.

In the meantime, I hope some of you out there will give Permute a try!  Go check out MindSports, have some games against the AI, and get in touch if you want to have a game with me.  I hope that some more strong players will have a go at the game, and that soon we may see some interesting tactical and strategic concepts develop.

I’ll do some follow-up posts on Permute in the future and show off some sample games with interesting play, so please look forward to that.  At some point too I’ll reveal Permute’s other twisty siblings once they’re in good shape 🙂 

If you’re dying for more Permute content, please do check out my YouTube videos: I have a short intro to Permute with some sample moves; a longer intro with a full sample game against the AI; and finally a video introducing Catchup and Slyde alongside the wonderful Ai Ai game-playing platform.

So, give the game a shot and let me know what you think!  Perhaps I’ll see you on MindSports.  Before I go, I wanted to say another heartfelt thanks to Christian and Ed for putting Permute up on MindSports, and to Nick Bentley and Mike Zapawa for creating Catchup and Slyde respectively, without which Permute might have just stayed as a weird twisty concept in my head and never become a playable game.  

Tagged , , , , , ,

Symple: a game that matters

UPDATE 1 MAY 2020: Added ‘Playing Symple over the board’ section, and downloads for the Ai Ai .mgl files for large/oblong Symple boards and HexSymple.

Way back in Connection Games III: Havannah and Starweb, I praised designer Christian Freeling’s games but expressed a bit of skepticism regarding his list of six ‘games that matter’:

Christian has invented a tonne of well-regarded games over the years, and he has his own opinions on the most essential ones — namely Grand Chess, Dameo, Emergo, Sygo, Symple and Storisende.  Although I’m not sure I can agree with most of them, personally speaking — that list is mostly games I certainly admire, design-wise, but don’t particularly enjoy playing.

I still stand by most of that — I do admire all of those games, and still I’m not a super-fan of several of them.  But I’m here today to tell you that I was wrong, in fact very wrong, about two of them:  Symple and Sygo.  Today I’ll tell you about Symple, designed by Christian Freeling and Benedikt Rosenau, and in a future post I’ll introduce its descendant Sygo as well.

Full credit for this change of heart must go to David Ploog, who sent me a draft of an excellent article he’s writing for Abstract Games Magazine about games featuring many moves per player turn, with Symple being the star of the piece.  His explanation of the game massively piqued my interest, so I started exploring it via Stephen Tavener’s Ai Ai software — which I’ve recommended many times already, you really should download it!

What I discovered is that Symple is not just an ingenious piece of invention, it is that most elusive kind of ingenious invention — one that you see in action and think ‘how did no one think of this before?’  The core of it is easy to grasp, yet in play it surrounds you with staggering complexity while still remaining manageable.  Having been obsessed with it now for a little while, playing many games, and analysing many others with the AI, I’m convinced that this game is something truly special.  Had it been invented hundreds of years ago, I think today it’d be sat alongside Chess, Go and Shogi as one of the great traditional games.

Enough gushing — from here I’ll explain the game, show off a few example games, and maybe gush a bit more here and there.  In deference to David’s article, which will explain strategic concepts to you far more clearly and expertly than I could, I’ll shy away from detailed playing tips and simply direct you to play it on Mindsports or via Ai Ai and explore it until David’s article is out.

How to play Symple

Symple is best played on a Go board, using standard black and white Go stones.  I’d recommend the full 19×19 Go board (or even larger — more on that later), although for the first few games a 13×13 board or even 9×9 would be a good idea, to get used to the core concepts.  Here are the rules:

  1. Each player chooses a colour, Black or White — White always goes first.  Before starting, players should agree on an integer value P, which will affect the scoring at the end of the game.
  2. Key definition: a group is a set of horizontally and/or vertically adjacent stones (orthogonally adjacent, in other words) of the same colour.  A single stone is also a group.
  3. Making moves: on their turn, a player must do one of the following (players may not pass their turn):
    1. Plant: place one stone anywhere on the board that is not adjacent to any stones of the same colour, which creates a new group
    2. Grow: add one stone to every possible group of their colour on the board, by placing a stone on a vacant point horizontally or vertically adjacent to that group.  If a group has no vacant horizontally or vertically adjacent points, then that group may not be grown.
  4. Balancing mechanism: once per game, if neither player has yet made a growth move, Black may grow all of their groups and then plant one new group in the same turn.
  5. Move restrictions: if a group grows and the added stone touches another group, then both groups are considered to have grown (meaning the group the new stone touched now can’t grow this turn).  However, two groups may grow in such a way that only the two new stones are now adjacent.
  6. Scoring: the game ends once the board is completely full.  At that point, both players count up the total number of their stones on the board, and the number of separate groups they have.  Their final score is the total number of their stones, minus points for every group they have on the board.

To summarise, in Symple players seek to claim territory on the board for their groups of stones to grow in by first playing planting moves, then growing those groups all at once with subsequent growth moves.  Creating groups early in the game is important in order to claim territory and secure space for future growth, but creating a new group takes an entire turn for just one stone placement; conversely, during a growth turn, a player may place a huge number of stones in one turn, sometimes 10 stones or more during a 19×19 game.  The scoring system gives players a penalty of P points for each group of their stones at the end of the game, meaning that connecting one’s groups is paramount.

Growth turns give players an enormous array of choices.  A typical early-game growth turn might look something like this:

symple19-growth-example2

Here White is taking a growth turn, as depicted in the Ai Ai software.  In Ai Ai, groups that have a growth move already chosen are faded out, as in the top left of the image, and new stones are indicated with a ‘+’.  In this instance White has taken advantage of the two-stone separation between the two groups on the upper left to grow both groups in such a way that they are now connected.  Around the other groups, the green asterisks indicate where legal growth moves can be played.  At the end of this turn, White will have played up to a total of eight stones, one for each group.  Note that White could end up only playing seven, if they elect to grow one of the two top-right groups into connection with the other; that would then block the second group from growing that turn, and from then on they would be a single group.

Playing a fistful of stones in one turn is initially intimidating, but these massive multi-moves naturally keep one’s mind focussed on strategy over tactics.  You will find yourself considering the optimal directions of growth to restrict your opponent, facilitate your expansion, and develop opportunities for later connections between groups.  The growth mechanism makes the game feel organic and flowing; more than single stones, you’re manipulating amorphous, amoebic groups that ooze and coalesce across the board.  The feel of this game in play is unlike any other abstract strategy game I’ve played before.

Examples of play

Let’s look at some examples of completed games, to get a better idea of how the scoring system works.  A finished game of Symple looks something like this:

symple19-p10-10s-sample1

A finished game of Symple on a 19×19 board (P = 10).  Black wins, 128 points to 83.

In this game, the players agreed to play with P set to 10 points.  Black finished with 5 groups totalling 178 stones, for a final score of 178 – (5 * 10) = 128; White finished with 10 groups totalling 183 stones, for a final score of 183 – (10 * 10) = 83.  Black solidly outmanoeuvred White here, connecting more groups together to significantly reduce their point penalty and take the win.  Note White’s unfortunate 1- and 2-stone groups on the bottom right — these alone took 20 points from White’s score!

This GIF shows off the whole game:

symple19-p10-10s-sample-game1

The endgame in Symple can be quite challenging and subtle, as in this close game:

symple19-15s-sample1

A finished game of Symple on a 19×19 board (with P = 10).  White wins, 79 points to 62.

Here both players finished with 10 groups, but White managed a win.  By restricting Black’s ability to grow certain groups earlier in the game, White eventually forced Black to play stones into isolated squares in the late stages of the game, causing significant extra scoring penalties that secured the game for White.  Here’s the complete game in GIF form:

symple19-15s-sample-game1

In Symple, managing your growth carefully and strategically is very important, as the final score difference may end up coming down to ensuring that one’s final stone placements aren’t forced to be new, point-draining groups.

The balancing mechanism provides some great tension in the early game, as well.  Black has one opportunity to grow and plant in the same turn, but White knows this, of course, and can short-circuit that chance by playing a growth move earlier than expected.  But growing too early can be too committal, losing an important opportunity to plant a new group in key territory.  This dynamic provokes a pleasing little game of chicken, as both players try to suss out their opponent’s rhythms and strike at the right time — “should I do my double move now, or will White wait another turn to do their first growth turn?”

On the whole, Symple has a great flow to it, and every phase of the game feels consequential.  In the opening, players plant all over the board, attempting to claim space for future growth while impeding the opponent’s opportunities for later connection.  All the while the will-they-won’t-they tension of the balancing mechanism lurks in the background.  In the middlegame, players switch over to growth moves and their groups extend their tendrils across the board, competing with opposing groups for territory.   In the endgame, Symple turns ‘cold’, as players turn from aggressive expansion to cautious growth to avoid getting hemmed in, while trying to force their opponent into positions where they’re forced to plant a stone somewhere unfortunate.  The final result is shaped by key moments in each of those phases, making the whole experience feel cohesive and dynamic.

Playing Symple over the board

Playing Symple is very easy when using a computer program or web-based implementation, since the software will track group sizes and scores for you.  When playing on a real board, however, a bit more effort is required to keep track of things.

A single turn in Symple can require a lot of individual moves for each player, and one can easily get confused as to which group has already been grown.  Most players recommend using a second, easily distinguishable type of token or stone to mark your intended growth moves, and replacing them with normal stones once you’ve decided on all your moves for that turn.  That allows you to think about each growth move without getting confused about which group can still grow.  If you’re using a Go set and want to maintain the austere aesthetic of black and white stones, then consider using Chinese-style Go stones with one flat side as your markers, and Japanese-style double-convex stones for regular plays.

The other aspect is scoring, which in Symple involves a lot of counting.  However, the game continues until the board is completely full, so as David Ploog pointed out in a BGG discussion, scoring can be done quite efficiently: simply count the number of groups for each player, then remove all stones of one of the colours from the board, and count the stones for the other colour.  Since you’ve recorded the numbers of groups, you can freely rearrange the remaining stones into an easily-countable shape, too.  That’s all the info you need to then calculate the scores for both players.  Using this method, scoring a game of Symple shouldn’t take any longer than scoring a Go game.

An eminently flexible game

Alongside the straightforward rules, unique gameplay and immense strategic depth, Symple has some practical advantages that add even more interest.  An important element of the design is that the value of the group penalty is not fixed, and players can experiment with different values.  Smaller values reduce the emphasis on connecting groups, while larger values make it even more essential.  David Ploog recommends P = 10 for 19×19 games, and in my experiments so far I agree; I’ve also played some 19×19 games at 12, 14 and 16 and have enjoyed those too.  When experimenting with different values, bear in mind that on boards with odd numbers of squares, you should use an even value for P to ensure that draws are not possible.

The enormous multi-move turns of Symple also mean that the game is incredibly scalable.  Symple plays remarkably quickly even on 19×19, since each turn can easily provide 10 or more stone placements — and these mechanics tend to emphasise strategic concerns over tactical ones, which helps to keep the game from bogging down with excessive calculation for every stone placement.  As a consequence of these unique properties the game plays well even on ludicrously large boards.  Here’s a game I played against the AI on a 37×37 board:

symple37-p18-2s-close1

A game played against the AI on a 37×37 board (P = 18).  I won as Black by only 3 points, with a final score of 434 to White’s 431.

This game was huge, but still surprisingly playable; in the middlegame we were often placing well over 20 stones per turn, so even with 1,369 squares to fill the game moved at a good pace.  The result came right down to the wire — I won by only 3 points.  If you’re bored you can watch the whole game in animated GIF form here.

I’ve definitely never played an abstract game before Symple that could take place on a board that large and remain playable and fun.  Go is one of my all-time favourite games, but play on the standard 19×19 is already very challenging; I’d never go near 37×37 Go.  Symple’s mechanics mean that the board fills quickly, and strategy reigns supreme over tactics, and so even on boards this large one doesn’t feel too hopelessly confused.

I’ve also found that Symple presents some interesting challenges on rectangular boards.  Here’s a game played on a 19×29 board:

symple-rect-19x29-p12-2s-close1

A game of Symple on a 19×29 board (P = 12).  Black wins, 117 points to 110.

This was a test game between two AIs, played when I first modified the Symple file in Ai Ai to permit rectangular boards.  Note that both players took advantage of the strange board geometry, growing huge groups horizontally across the board.  You can view the whole game in GIF form here.

Note that Ai Ai by default only supports square boards up to 19×19; I have modified the Symple.mgl file in Ai Ai to permit rectangular boards with sizes up to 37 in either dimension.  You can download the .mgl file needed in this Google Drive folder; simply add it to the ‘mgl’ subfolder within your Ai Ai folder, and it will appear in your games list.  The file you need is called Symple-rect.mgl.

All my tests of weird board dimensions have confirmed that the core mechanics of Symple are not just clever and elegant, they’re also extremely robust.  The game remains interesting even with bizarre values of P, or when played on extremely large boards or weirdly-shaped boards.

HexSymple

Speaking of weird boards, it turns out that Symple is also incredibly good on hexagonal boards, too.  Christian Freeling calls it HexSymple, and in this variant the game is played on a hexhex board (a hexagon-shaped board composed of hexagonal spaces).  The rules are identical to regular Symple.  Here’s a game played on a hexhex board with 12 hexes to a side (that’s 397 hexes in total):

hexsymple-sz12-p10-sample1

A completed game of HexSymple on a hexhex-12 board (=10).  White wins with 153 points to Black’s 124.

In this game White managed to constrain Black’s growth along the left edge and take the win.  HexSymple has a very interesting character — the board geometry means that cutting off groups is more difficult than on the square board, since all hexes have six neighbours instead of four and there are no diagonal cuts possible.  The game feels very expansive as a result, with ambitious connections snaking across the board in every direction.  Here’s the full game in GIF form:

hexsymple-sz12-p10-sample-game1

Just as in regular Symple, HexSymple is incredibly scalable, and I’ve played a few games on very large boards because I am a bit crazy for large boards.  Here’s one on a hexhex-25 board (that’s 1,801 hexes):

hexsymple-sz25-p30-2s-sample1

A completed game of HexSymple on hexhex-25 (P = 30).  White wins, 643 points to 588.

You can see here how the expanded connectivity of hexes makes truly enormous groups possible; check out White’s gigantic group stretching from the top right all the way around the board to the top left!  You can see the whole game in GIF form by clicking here.

On the whole I highly recommend HexSymple.  The board topology creates some interesting wrinkles in play, but the overall strategy remains broadly similar to regular Symple.  The result is a fascinating variant that works as a great change of pace, and stands up as a great game in its own right, too.  I haven’t yet seen a consensus on what good values of might be for different sizes of boards, but in my experience you can safely use significantly larger values than on similarly-sized rectangular boards and get a similar experience, due to the increased connectivity between hexes.

Note that HexSymple is not implemented in Ai Ai by default, but a simple modification of the regular Symple.mgl file makes it possible to play.  You can download the file you need, helpfully titled HexSymple.mgl, from this Google Drive folder.  HexSymple of course has its own dedicated page on Mindsports, and you can play the game online there too.


A modern classic

In the very crowded field of modern abstract strategy games, Symple (and HexSymple) are rare specimens that feel like classics.  In some alternate universe, I imagine Symple having frequent high-level tournaments, with a professional player scene, ample literature on high-level play, and an online community with millions of players.  Perhaps in the not-too-distant future this may come to pass in this reality, too.  In the end I agree with Christian — this is certainly a ‘game that matters’.

Sometime in the (relatively) near future, I’ll post a follow-up to this and introduce Sygo, a combination of Symple and Go and Othello-style piece-flipping captures that seems like it shouldn’t work, but totally does.  Like most fans of Go I’m not very keen on most Go variants, because they normally just disturb the elegant balance of simplicity and depth that makes Go so seminal.  But Sygo feels different enough to have its own character, and HexSygo even more so.

Before that, I owe you all a couple of Shogi posts which are still in the works.  I’m pleased to say that the Japanese Chu Shogi Players Association — Chu Shogi Renmei — has sent me a treasure trove of historical information on the game.  It’s all in Japanese, of course, so it will take me some time to read, but with any luck I’ll have some interesting information to report further down the line.

In the meantime, please do yourself a favour and whip out your Go set, get yourself on Mindsports, download Ai Ai, or preferably all of the above, and give Symple a try.


Tagged , , , ,